
SQL Server 2016 introduced officially on the 1st of June 2016. It comes with many new features such as Query Store that maintains the execution plans history for the queries with its performance data in order to detect any slowness in the query caused by the new plans, so that the administrator can force the use of the better old plan.
Another new feature in SQL Server 2016 is Polybase; a SQL Server connector to Hadoop. Microsoft SQL 2016 allows you to store parts of your tables in SQL Azure databases in the cloud, this feature is called the Stretch Database. Java Script Object Notation (JSON) language is supported now in SQL Server 2016. Row Level Security is introduced in SQL Server 2016, where you can limit the data access based on a specific column. A new functionality that allows the data to be encrypted in transit, at rest and while it is live in the database called the Always Encrypted.
Many features that are introduced in older SQL Server versions improved in SQL Server 2016, such as the In Memory tables feature foreign keys, check and unique constraints and parallelism limitations. And Always On Availability Groups which supports the DTC transactions now.
In this article, we are interested in the new enhancements in the SQL Server 2016 installation wizard, which we will discuss during the installation process.
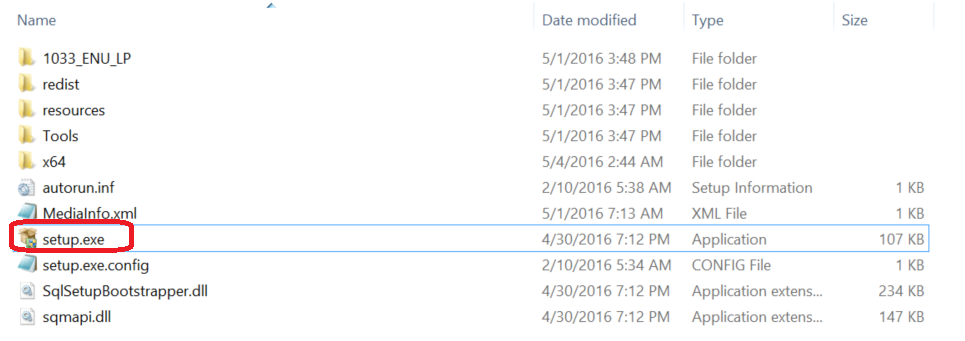
From the SQL Server 2016 installation media, click on the setup.exe file in order to start the installation wizard.
Choose the Installation tab at the left side of the SQL Server Installation Center window to view the installation options. What is new in this window is that you can find a separate line for Install SQL Server Management Tools and Install SQL Server Data Tools. These tools were part of the Shared Features selection window in the previous SQL Server versions.
To start the starndard SQL Server installation, click on the New SQL Server stand-alone installation or add features to an existing installation first option.

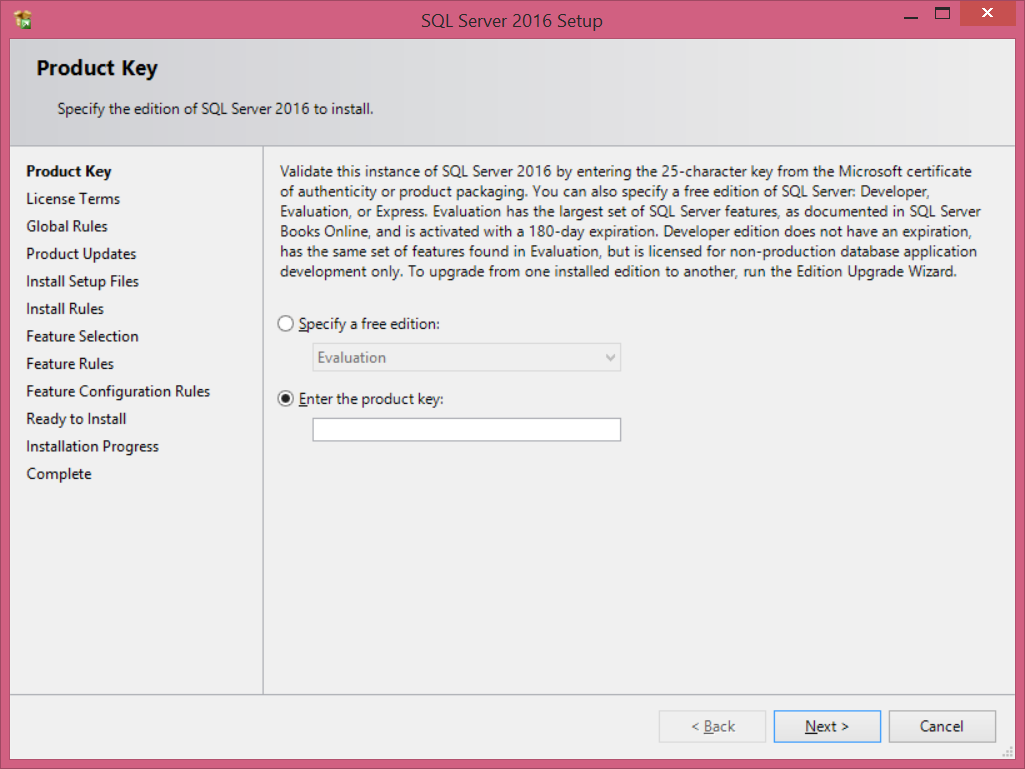
Nothing new in the Product Key window, where you need to specify the edition of the SQL Server to be installed, by providing the product key for that edition or choosing the Evaluation free edition. For the licensed editions, the product key will be included within the installation media itself. Click Next when you finish.
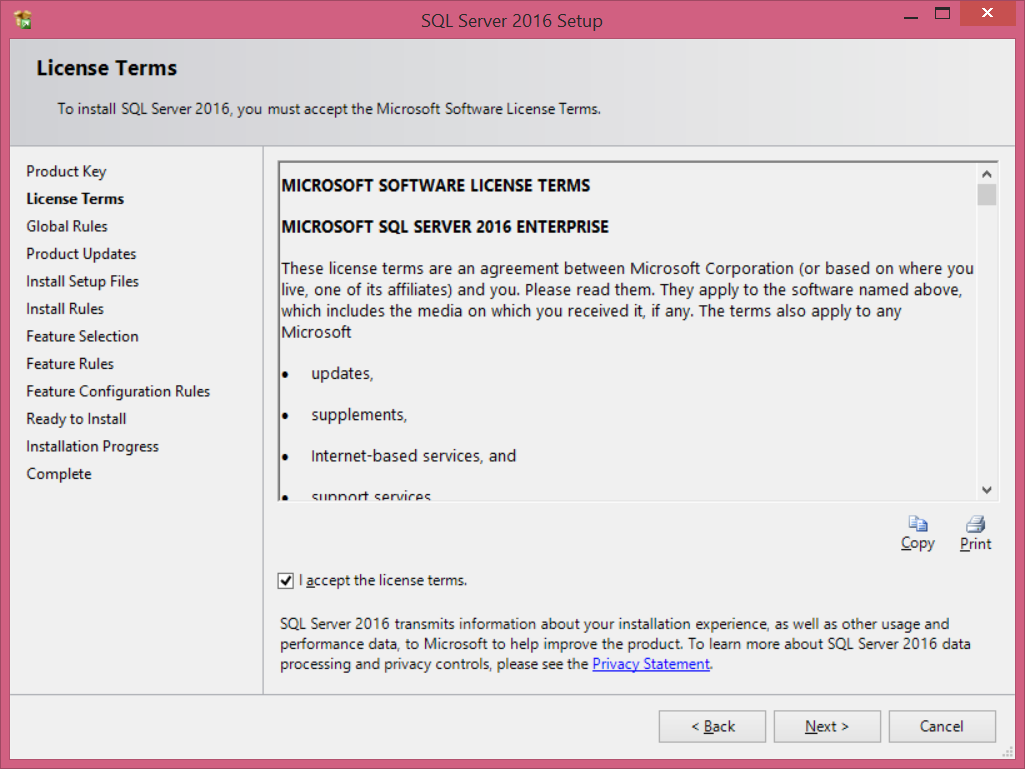
In the License Terms window, read the Microsoft product license terms as usual then check the confirmation check box if you agree and click Next.
If there are no errors or warnings, the Global Rules window will be skipped automatically to the next Product Updates window, in which you can check for updates to be installed, making sure that the server has internet access. If there is no updates, SQL Server Setup will not show you this page and will be directed to the next Install Setup Files window.
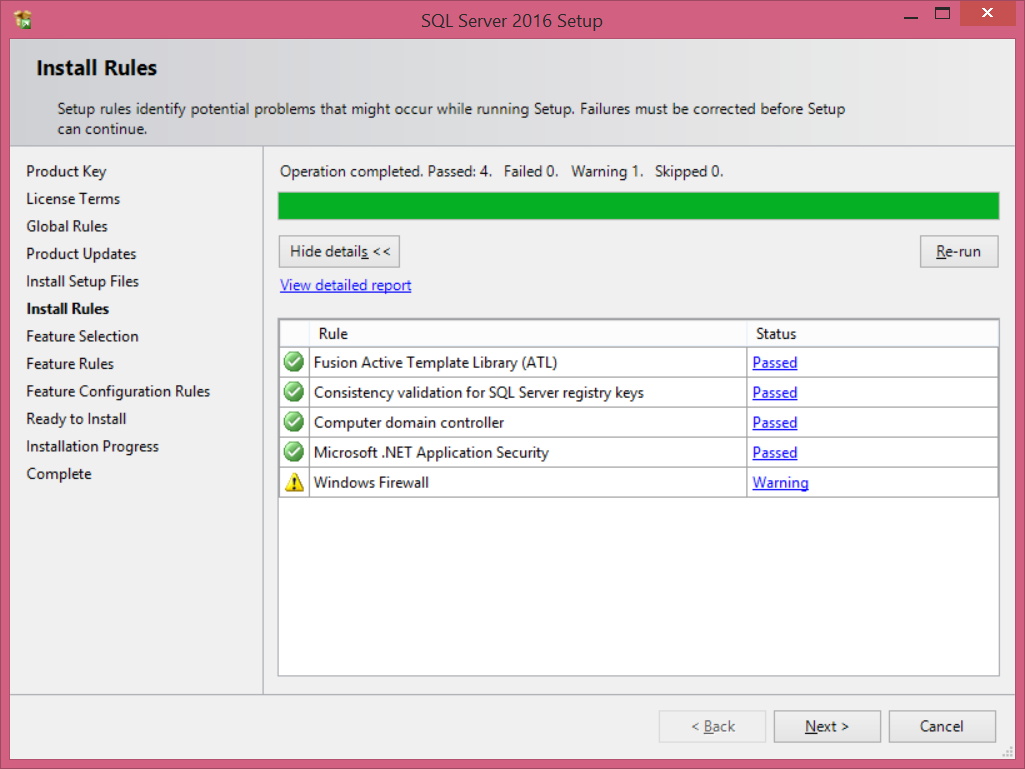
The Install Setup Files window will be displayed, searching for the available updates in addition to installing the required setup files. Once completed without any issue, the Install Rules window will validate some installation parameters. For the firewall warning appeared, you can proceed with the SQL Server installation for now and configure the windows firewall to allow the used SQL Server ports later. If there is no error, click Next.
From the Features Selection window, you can select the SQL Server components and features that you need to install, with each feature description displayed in the Feature Description area at the right upper side of the window.
A new component is introduced in SQL Server 2016 that can be selected and installed from the Feature Selection window which is the PolyBase Query Service for External Data shown below:
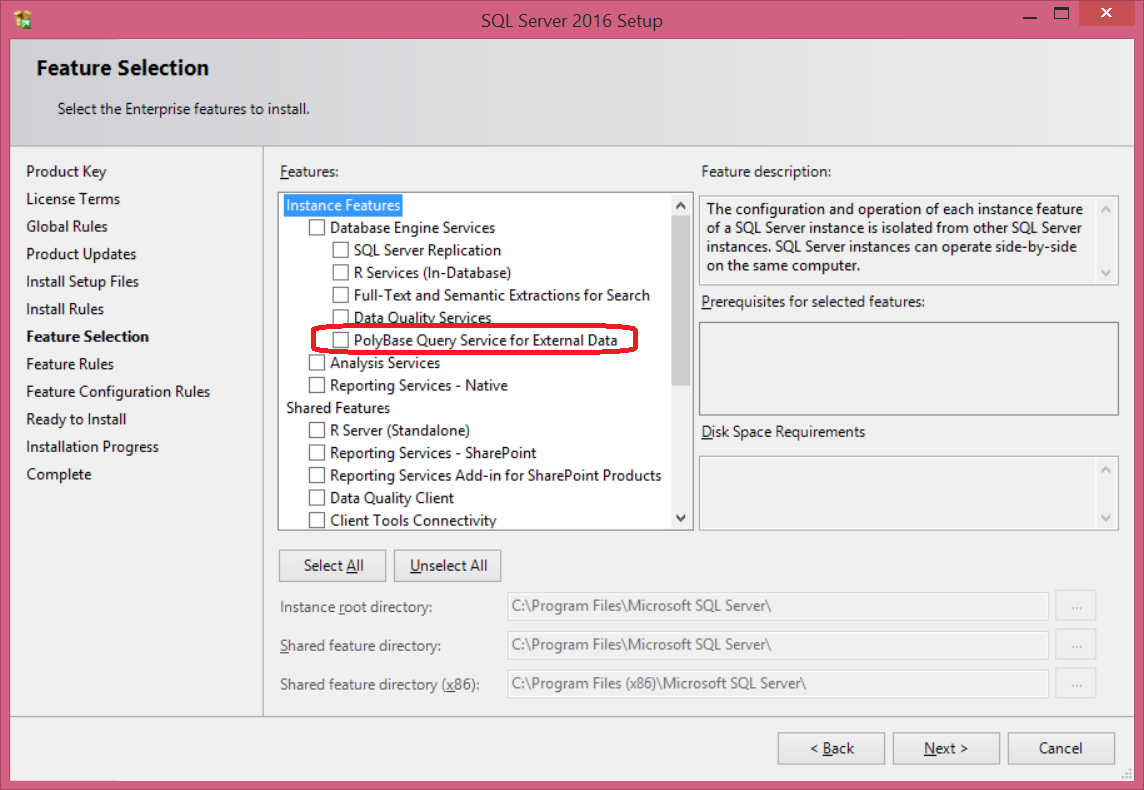
This feature acts as connector between Hadoop and SQL Server and allows querying data using standard T-SQL statements.
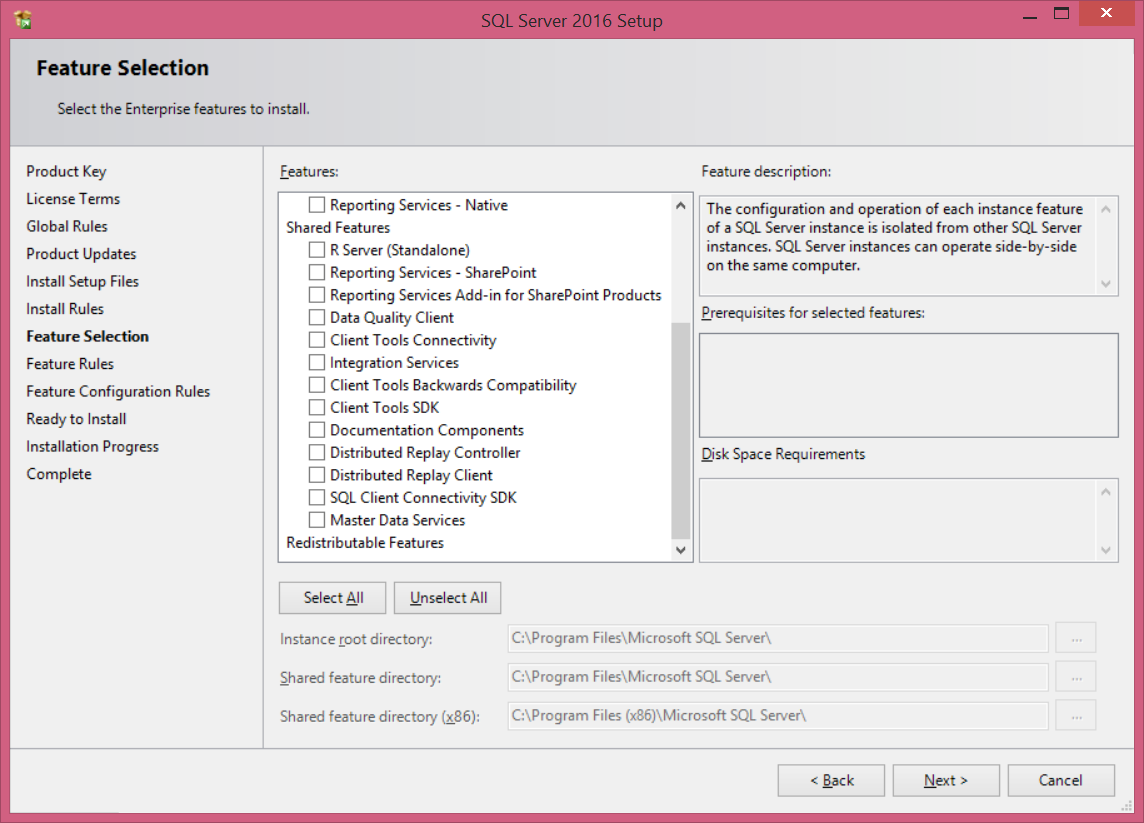
As you can see, SQL Server Management Tools and SQL Server Data Tools are not part of the Shared Features below, it has a separate installation link as introduced previously. To continue click Next.
The Feature Rules check will be automatically skipped if there is no error. One thing that still not enhanced here is that you still have to install the .NET Framework 3.5 manually as it is not installed automatically within the setup and pre-installation files.
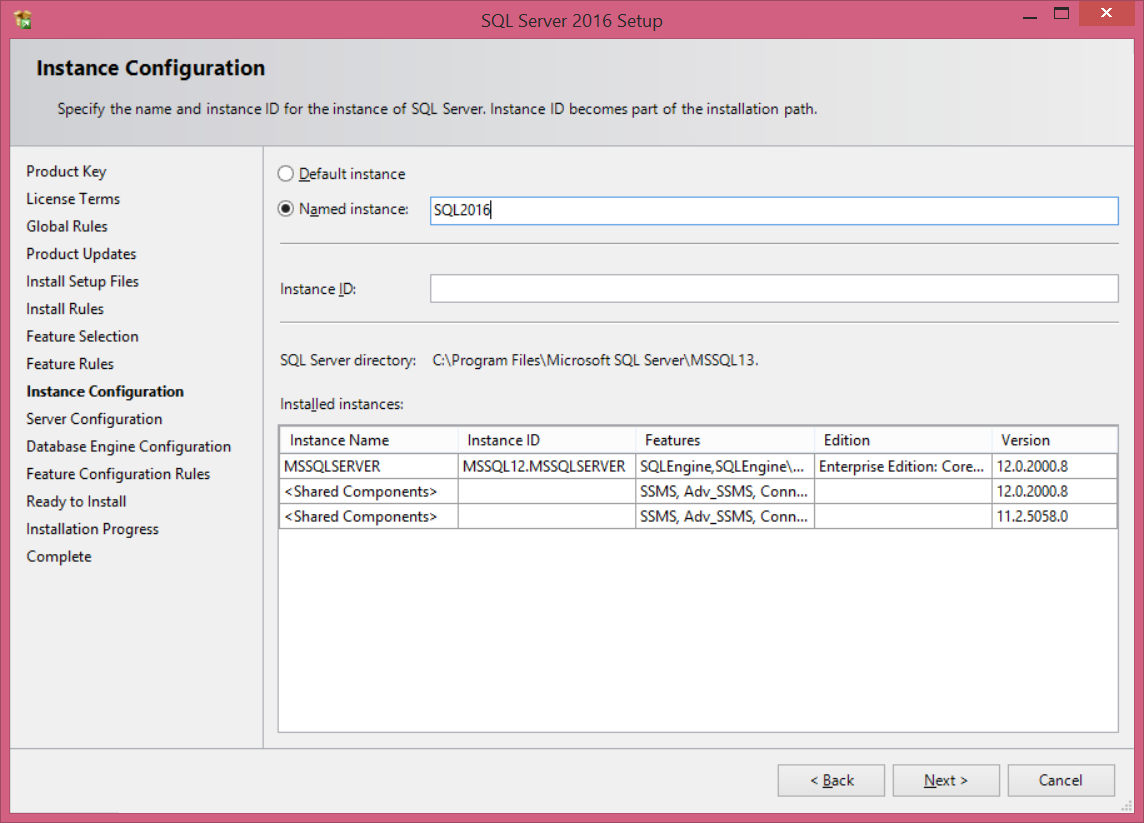
In the Instance Configuration window, you have the choice to install a default SQL Server instance or install a named instance if there is a default instance installed previously. If you choose to install a named instance, specify a name for that instance. You can see also a list of installed SQL Server instances on the current machine as follows:
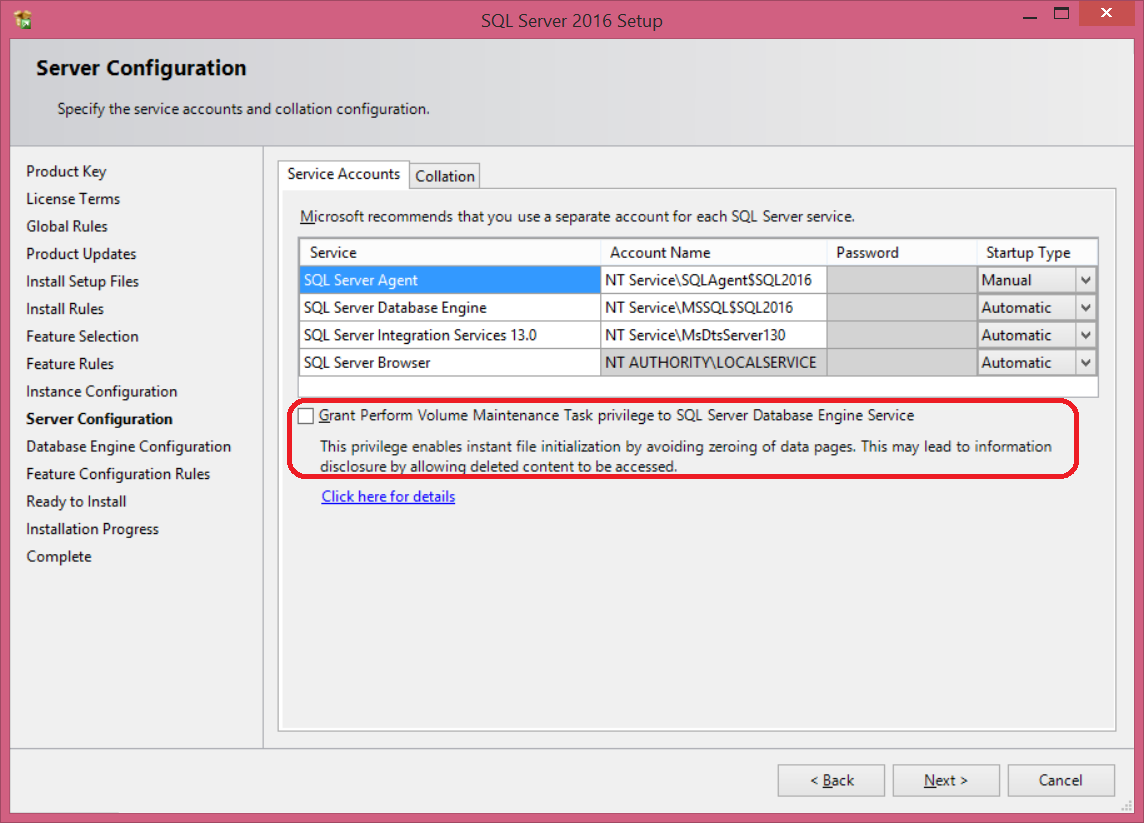
The Server Configuration page is used to provide the SQL Server services login accounts. The start mode for these services can be specified also to be automatic, manual, or disabled. The list of services shown in this window depends on the services you choose to install.
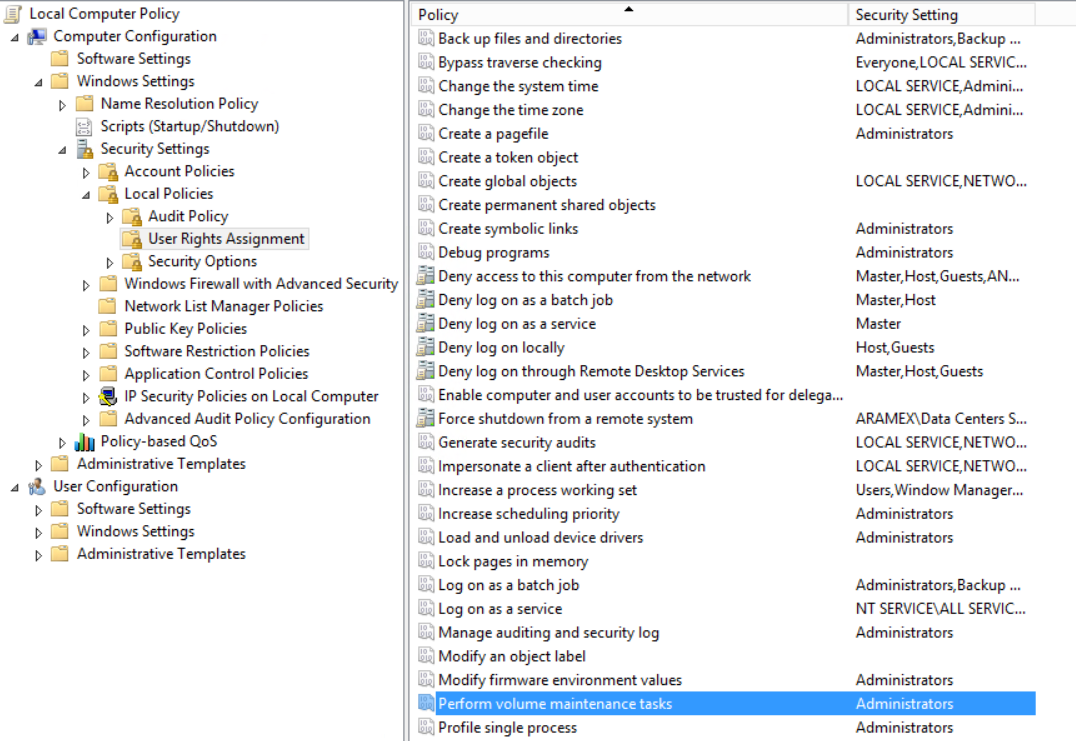
What is different here from the previous SQL Server versions is the ability to enable the Instance File Initialization, which is used to reclaim the used disk space without filling that space with zeros. Previously, this feature is enabled by adding the SQL Server Service account to the Perform Volume Maintenance Tasks policy from the User Rights Assignments of the Security Setting as follows:
Now this can be handled directly from the SQL Server installation wizard by checking the Grant Perform Volume Maintenance Tasks Privilege to SQL Server Database Engine Service as below:
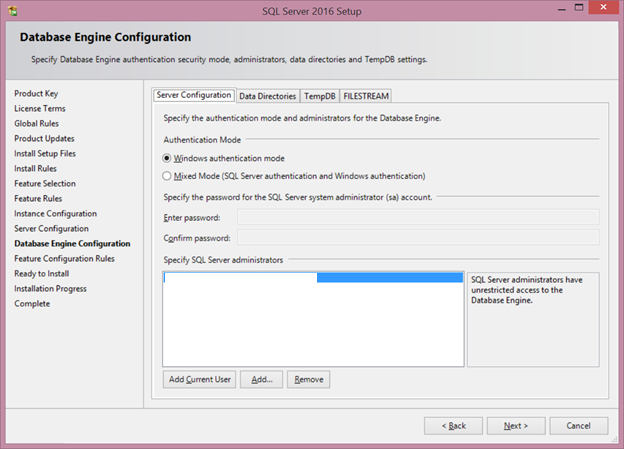
In the Database Engine Configuration window, specify the authentication mode and the SQL Server administrators in the Server Configuration page.
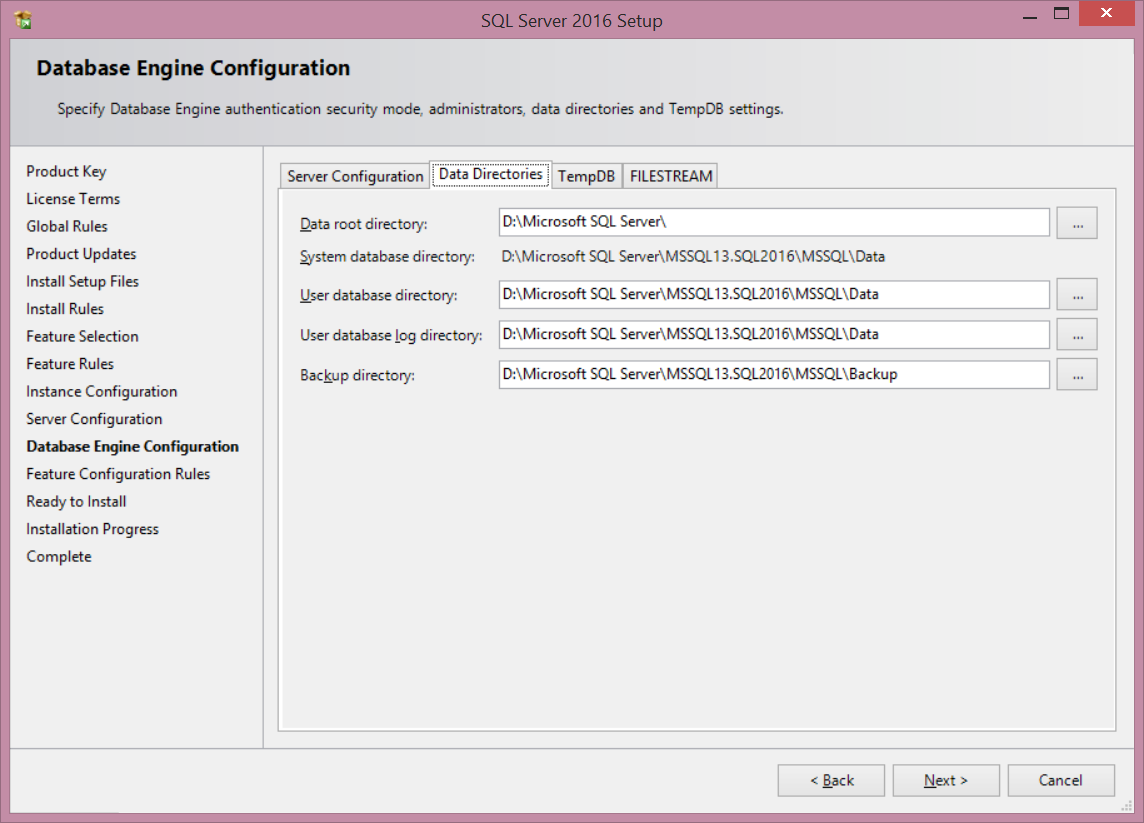
You can also change the default path for the system and user databases files in addition to the backup folder.
The new addition here is the TempDB page, where you can specify the size and growth parameters for the TempDB data and log files.
In the previous SQL Server versions, it was one of the database administrator’s tasks to configure the TempDB with multiple data files based on the number of server cores after the SQL Server installation. In SQL Server 2016, a new tab is added to the Database Engine Configuration window that enables you to specify the number of TempDB data files, the initial size, growth and directory for the data and log files.
As a best practice, the number of TempDB data files should be same as the number of the server cores up to 8 data files. My current test machine has 4 cores only, so that the installation wizard set the default data files number to 4 with 8MB initial size and 64MB auto-growth by default as in the example below.
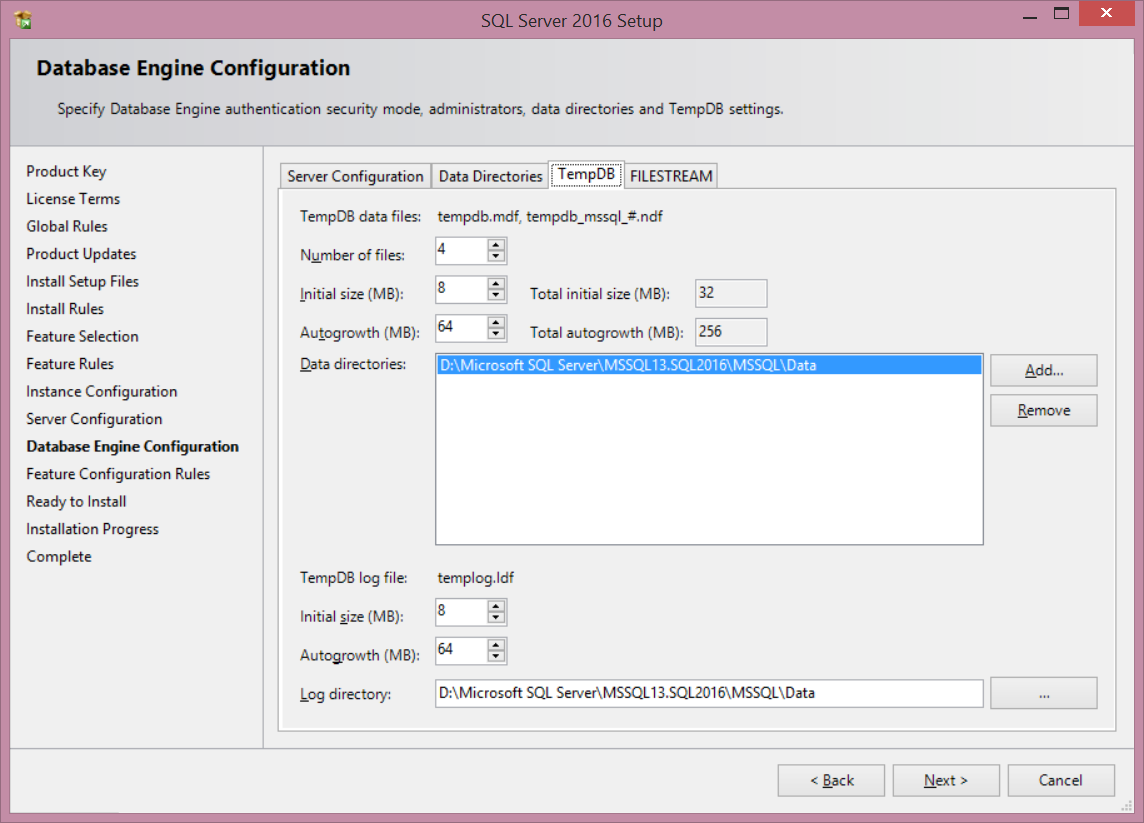
You need to take into consideration that the maximum size that you can set here for the TempDB data or log file is 1024 MB (1GB). If you try to put any value higher than 1GB, the GUI will reverse the number back to 1GB automatically. To continue click Next.
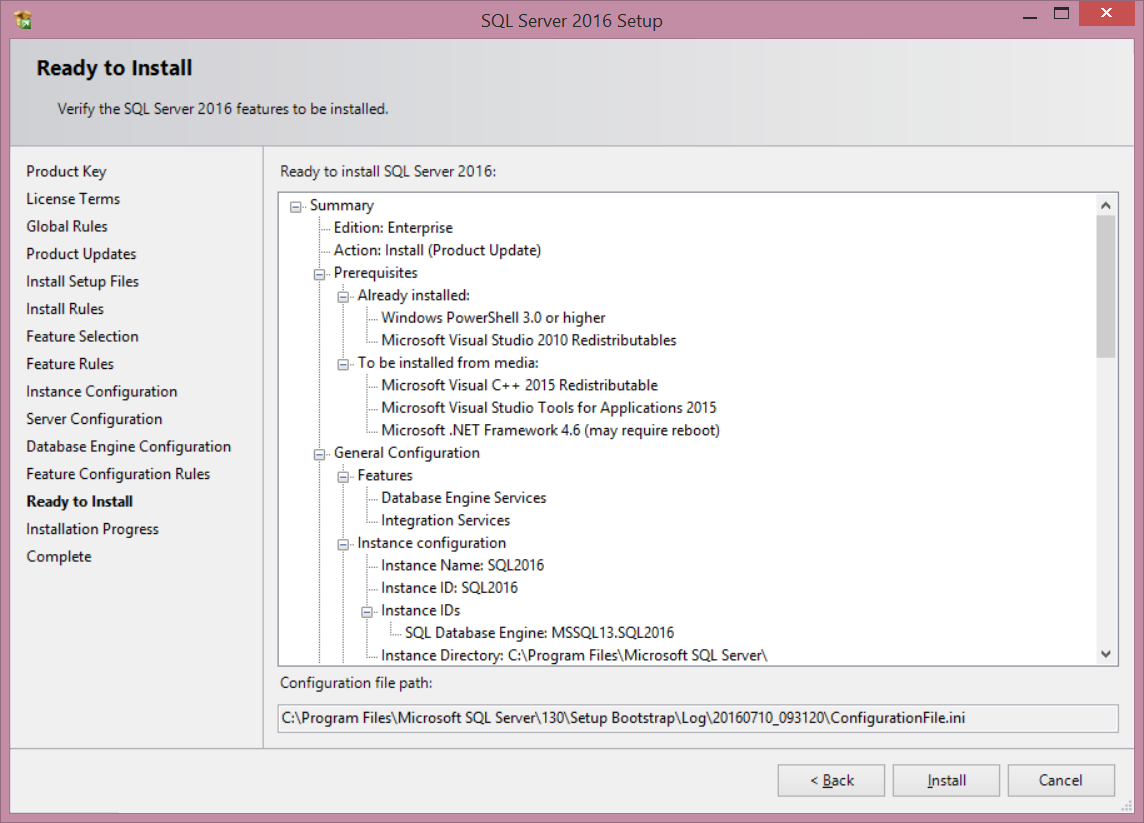
If there is no issue, the Feature Configuration Rules page will be skipped to show the Ready to Install window. Review the installation options that were specified during the setup process and click Install to start the installation process.
You can monitor the installation status from the Installation Progress page during the installation. Once the installation completed successfully, the Complete page will provide you with a link to the installation summary log file. You may be requested to restart the current machine and it is better to do so now.
As we mentioned previously, the SQL Server Management Tools installation is not available within the SQL Server 2016 shared features installation, as it has its own installation link in the SQL Server Installation Center window as below:

As described in the previous image, the installation link will open a download page from where you can download the SQL Server Management Tools installation files. The installation file will install all SQL Server management tools including the SQL Server Management Studio, SQL Server command-line utilities, SQL Server PowerShell provider, SQL Server Profiler and the Database Tuning Advisor.
If you click on the Install SQL Server management Tools link in the SQL Server Installation Center window, it will open the (https://msdn.microsoft.com/en-us/library/mt238290.aspx ) download page automatically. Once the exe file downloaded completely, double-click on it, the below window will be displayed:
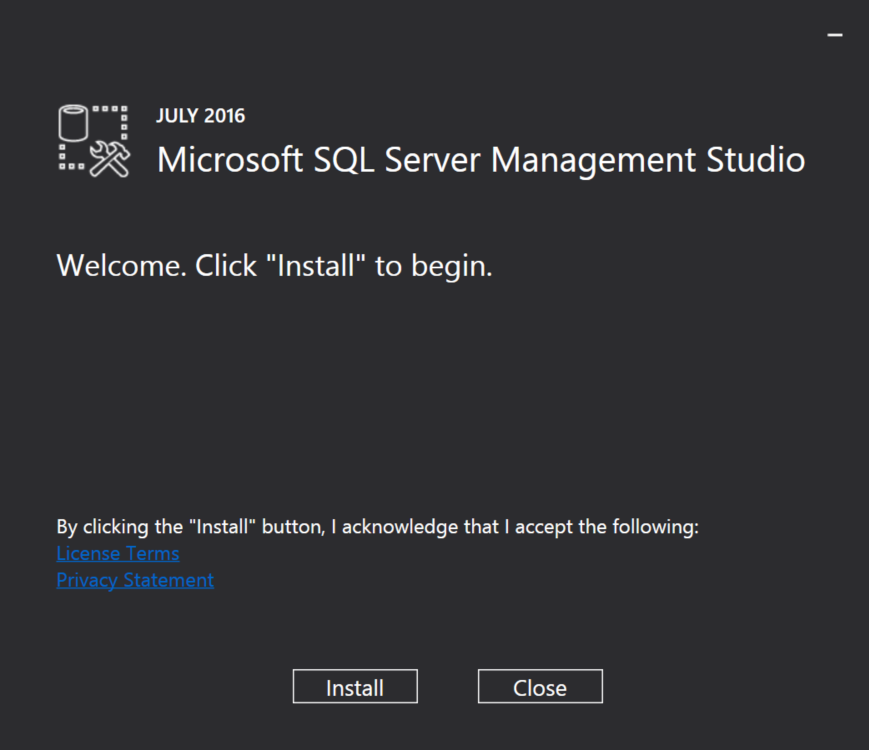
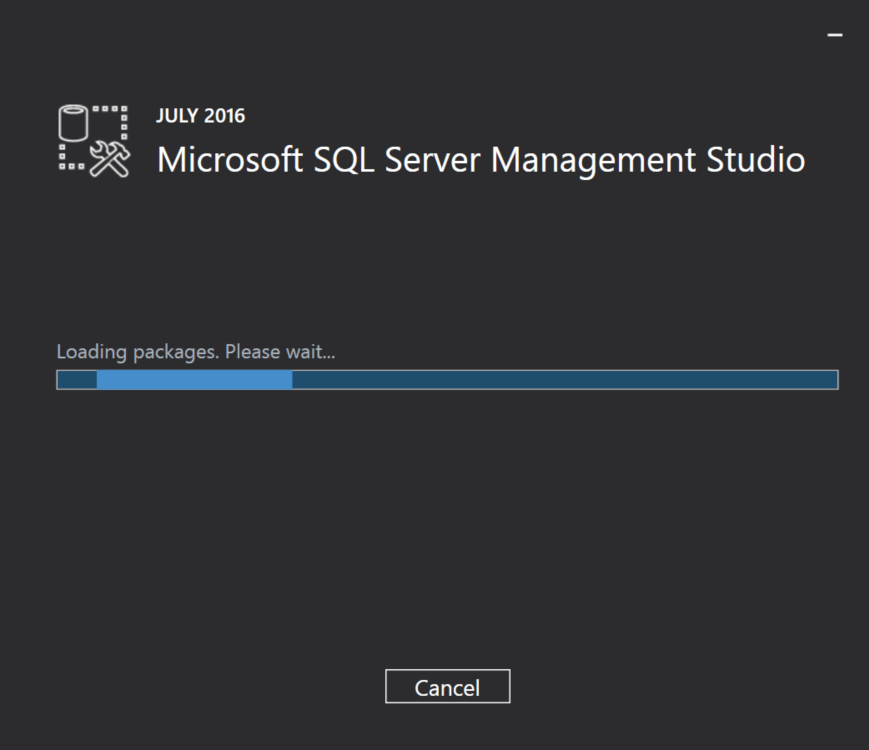
This window summarizes many steps of the SQL Server Management Tools installation. Just click on the Install button to acknowledge the license and privacy terms and start the installation process. It will start loading the installation packages as in the following window:
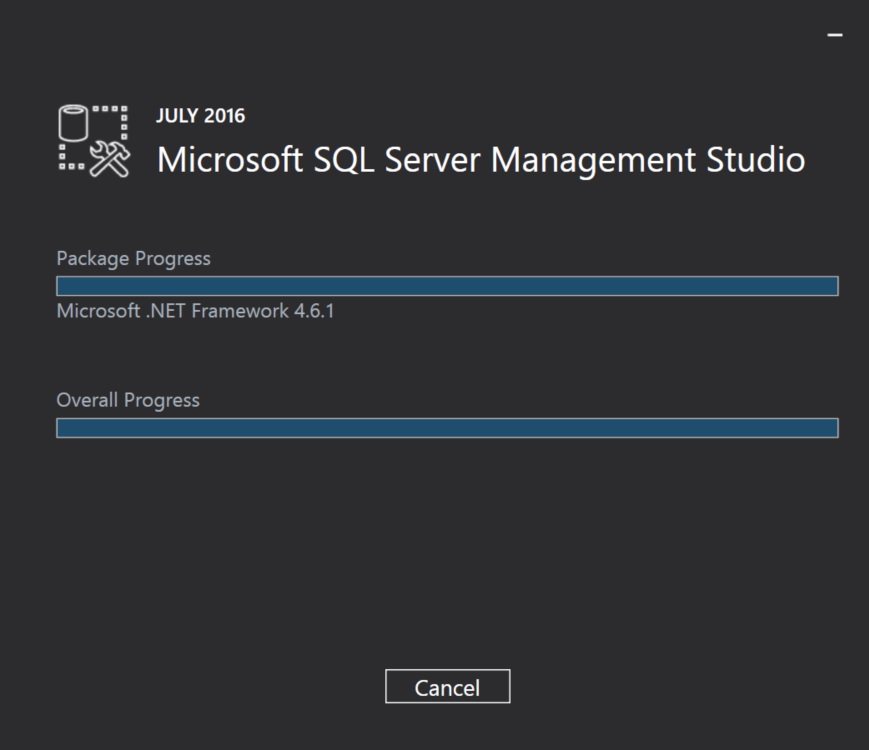
Once the packages loaded completely, the Management Tools installation will proceed automatically, showing the installation progress of each component and the overall installation progress:
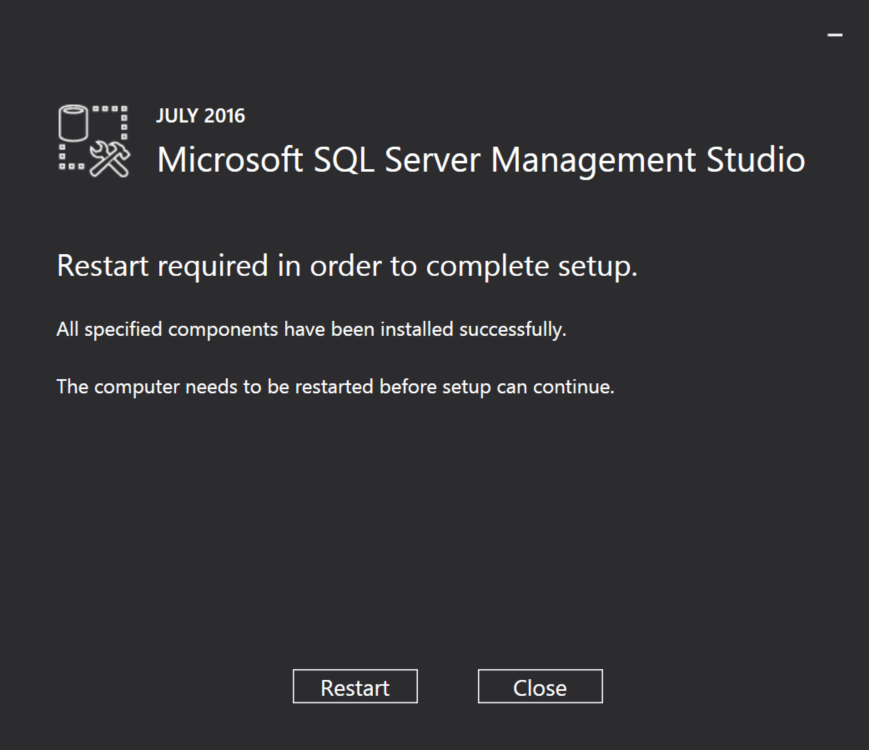
After completing the management tools installation, the wizard will ask you to restart the current machine now to continue the installation or restart it later. Click Restart to reboot the machine and complete the installation process and enjoy the new SQL Server 2016 with all Management Tools.

He is a Microsoft Certified Solution Expert in Data Management and Analytics, Microsoft Certified Solution Associate in SQL Database Administration and Development, Azure Developer Associate and Microsoft Certified Trainer.
Also, he is contributing with his SQL tips in many blogs.
View all posts by Ahmad Yaseen
- Azure Data Factory Interview Questions and Answers - February 11, 2021
- How to monitor Azure Data Factory - January 15, 2021
- Using Source Control in Azure Data Factory - January 12, 2021