
In this article, we will learn to upload the excel file to Azure blob storage using SQL Server Integration Service Package. The excel file contains the output of a T-SQL query. This article is a small demonstration that gives some idea about the Azure Blob Upload task and how it can be used to upload files using SSIS.
To upload the file on the Azure blob storage container, we will use the Azure Blob Upload Task of SSIS. To demonstrate the process, I have prepared a setup on my workstation and azure account. The details are the following:
- I have restored a backup of the AdverntureWorks2017 database on the SQL Server instance
- I have created an excel file named employees.xls. The output of the query will be exported to the employee.xls file
- I have created an Azure Blob storage account and a container on Azure. We are going to use the Azure Blob Upload Task
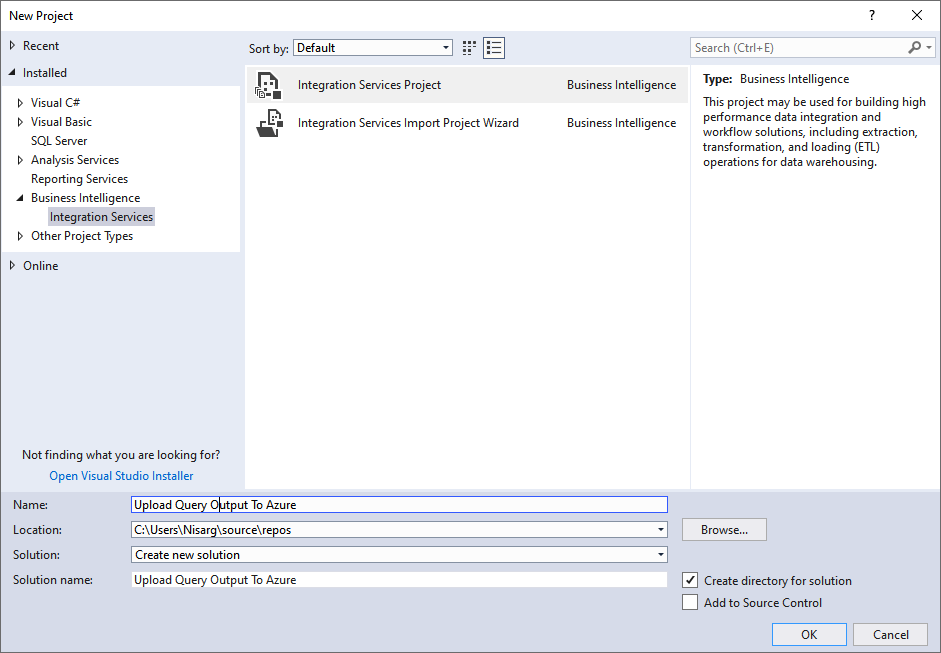
Let us create an SSIS package to copy the data of the On-premise SQL Server to the excel file. We will create a new SSIS project. To do that, Open SQL Server data tools -> Click on File -> Hover on New -> click on Project. In the new project dialog box, select the Integration Services Project. Provide the desired name and click OK. See the following:
First, let us configure the data flow task.
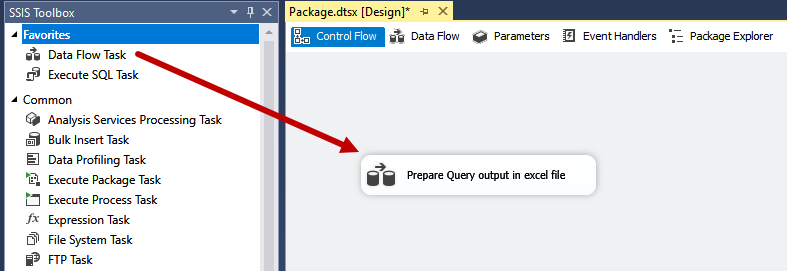
Create a data flow task to copy output of the T-SQL query to excel file
Drag and drop the data flow task on the control flow tab and provide the appropriate name. Double-click on the dataflow task to configure it. See the following image:
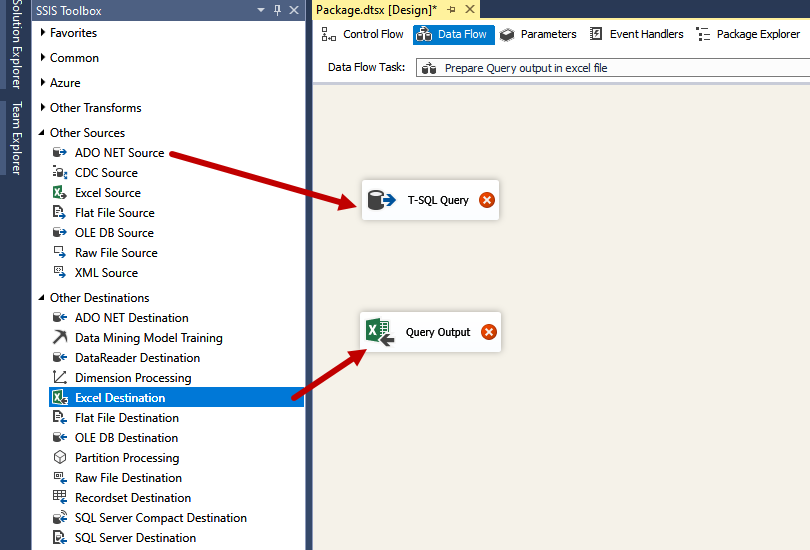
On data flow task window, drag and drop ADO.Net Source and Excel destination from SSIS toolbox. See the following image:
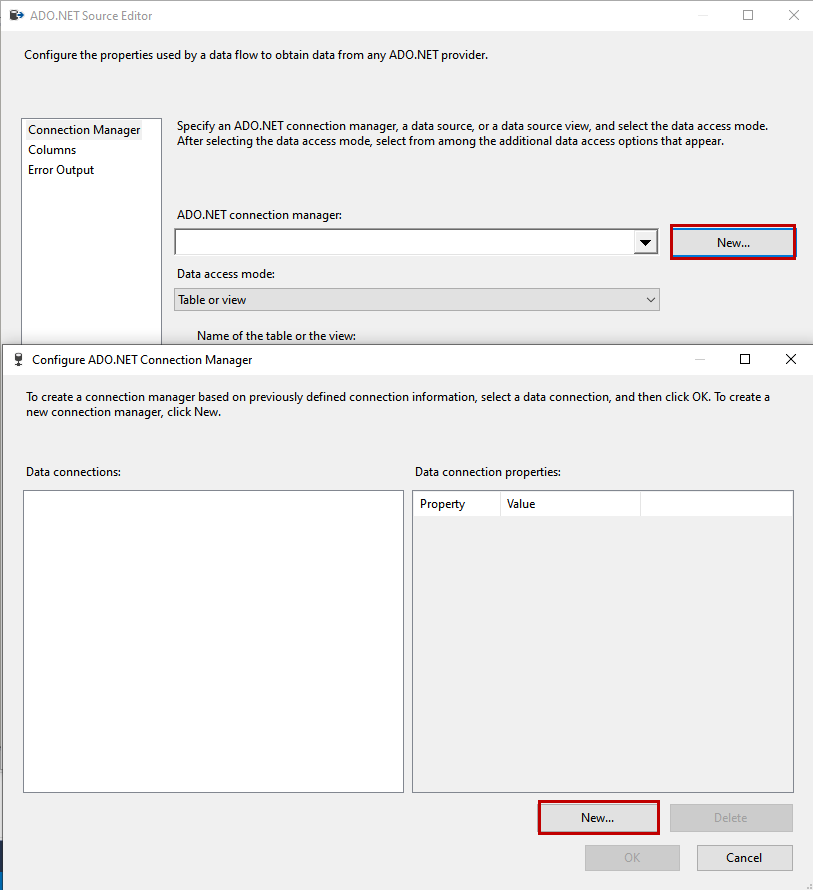
First, let us configure the ADO.NET connection—double-click on it. ADO.NET Source editor (Image:1) opens. Click on New. Dialog box Configure ADO.NET Connection Manager (Image 2) opens. Click on New. See the following image:
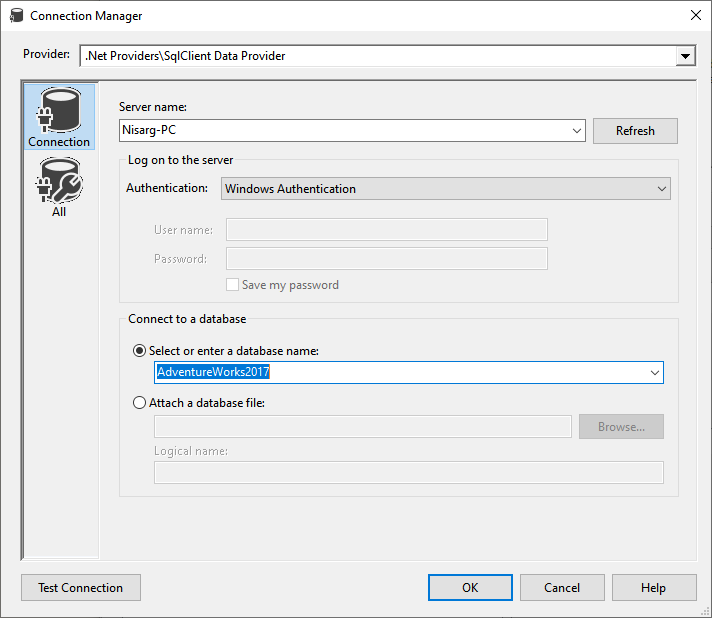
A dialog box Connection Manager opens. Provide the following information:
- Server name: Select the name of the server on which SQL Server is hosted
- Authentication: Provide authentication methods. If you are using SQL Server authentication, then provide Username and Password
- Database Name: Select database name from Select or enter database name drop-down box
Click OK to save the ADO.NET connection and close the dialog box. See the following image:
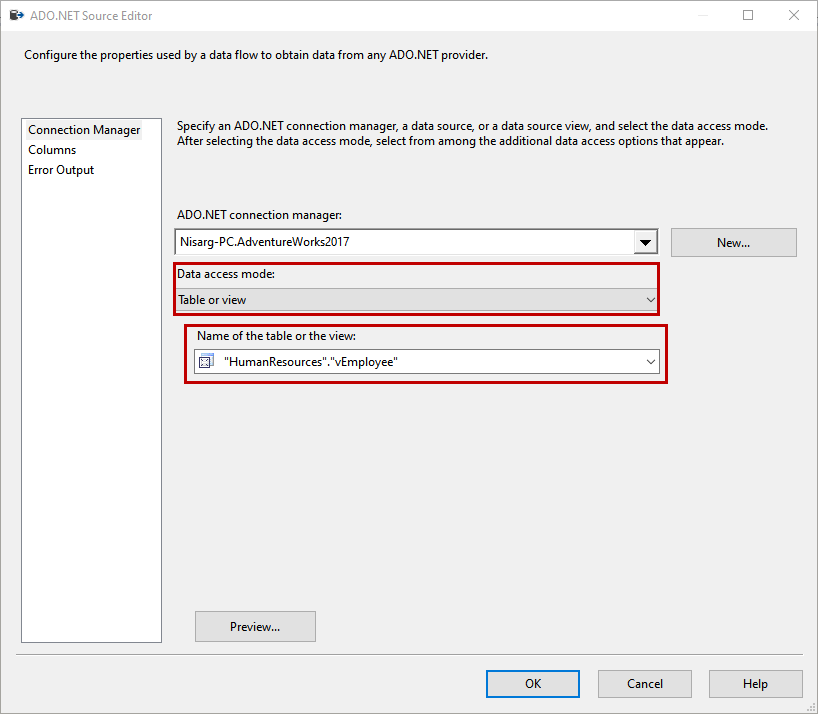
On the ADO.NET source editor screen, select Table or view from the Data access mode drop-down box. Choose the desired Table or view name. Click OK to save the connection properties and close the window. See the following image:
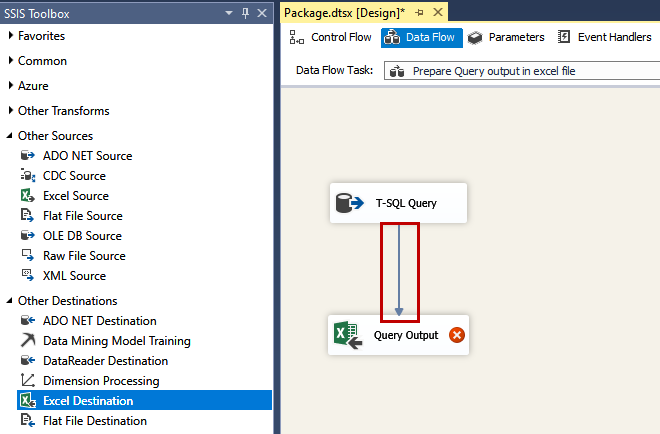
To configure the excel destination, first, connect source and Destination. To do that, drag and drop the blue arrow on an Excel destination. See the following snapshot:
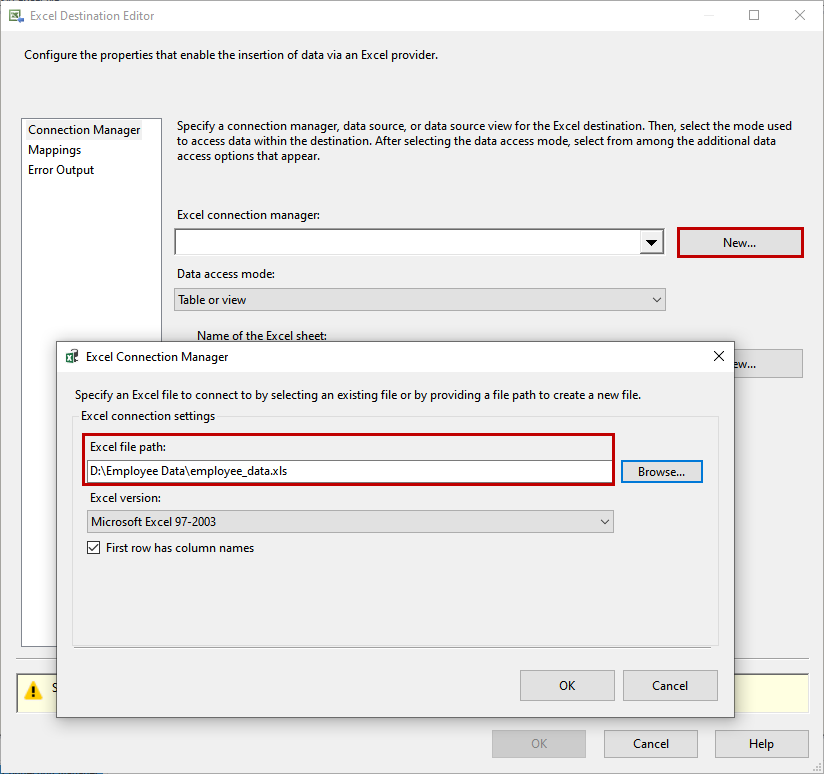
Double-click on excel destination to configure it. On the Excel Destination Editor dialog box, click on New. A dialog box Excel Connection Manager opens. In the dialog box, provide the path of the excel file. Click OK to close the dialog box.
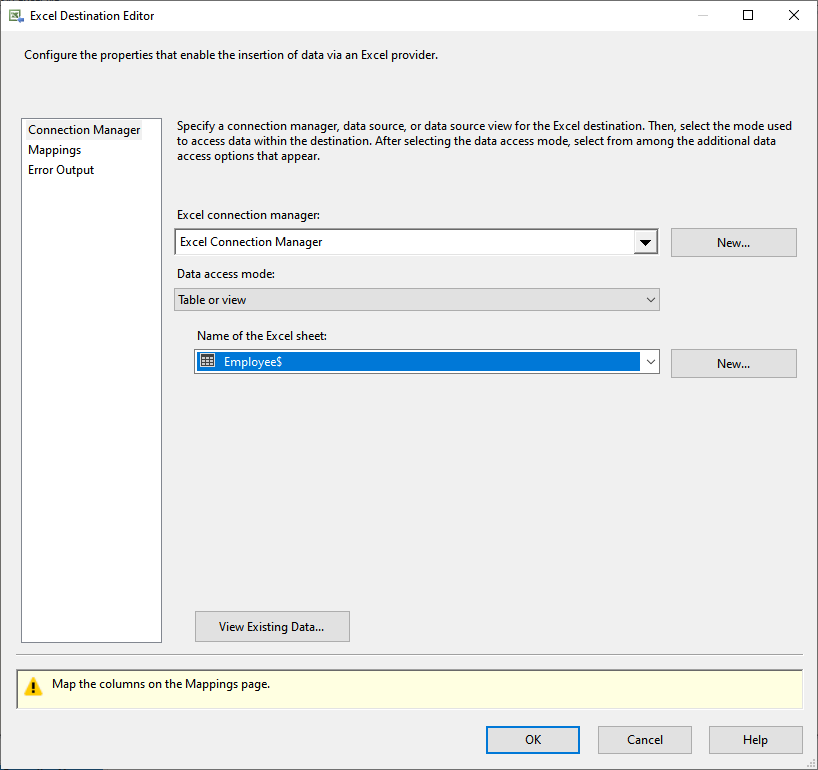
On Excel Destination Editor, choose Table or view from Data access mode drop-down box. Select the name of the excel workbook from the Name of the Excel sheet drop-down box. See the following image:
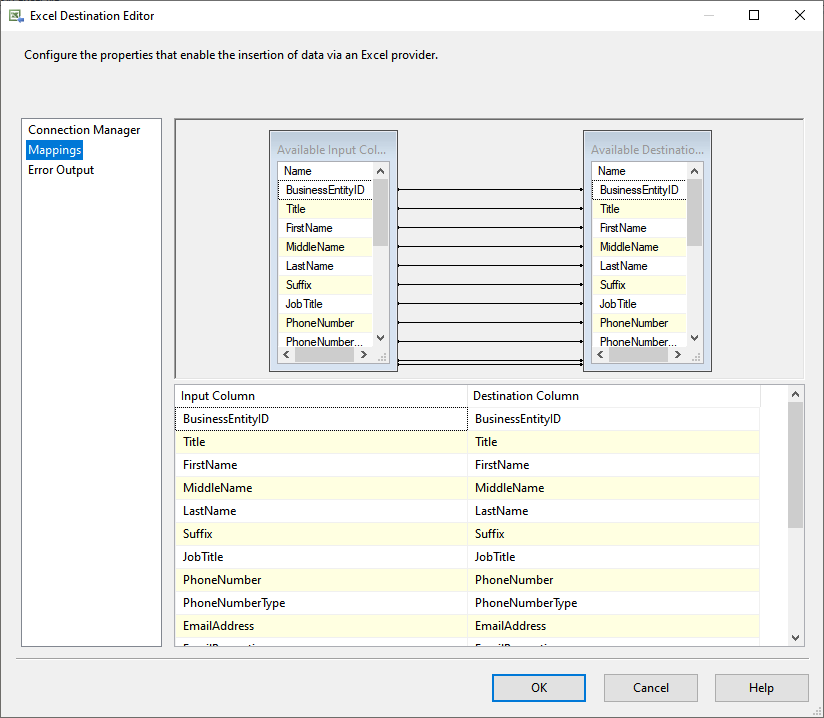
To map the columns of the ADO.Net source and Excel destination. Click on Mappings. The column name of SQL View and Excel file is the same so that mapping will be performed automatically.
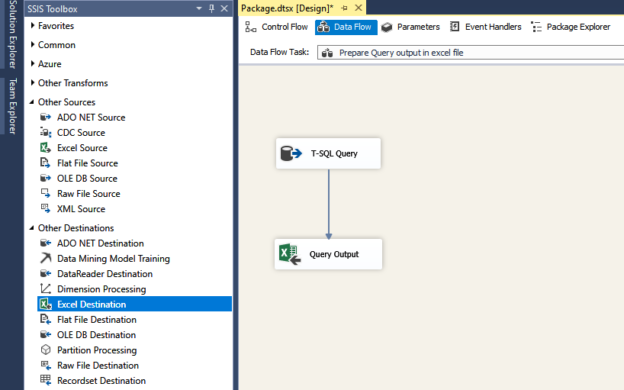
Click OK to close the Excel Destination Editor. The data flow task looks like the following image:

To test the data flow task, click on Execute. The SSIS package has been executed successfully, and data have been written to the excel file. Now, let us configure the Azure Blob Upload task.
Configuring the Azure Blob Upload Task
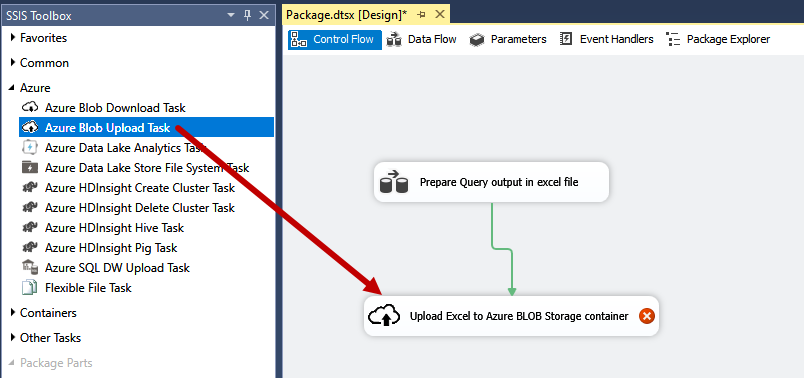
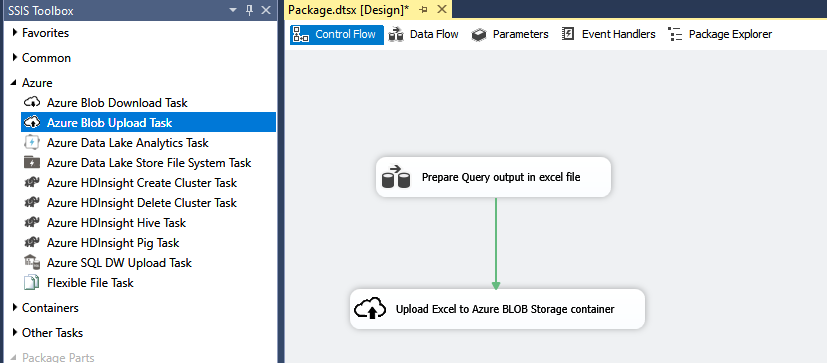
To configure the Azure Blob Upload task, drag and drop it from the SSIS toolbox to the Control Flow window. We want to upload the excel file to the blob storage container, hence first, connect the Data flow task and Azure Blob Upload task. See the following image:
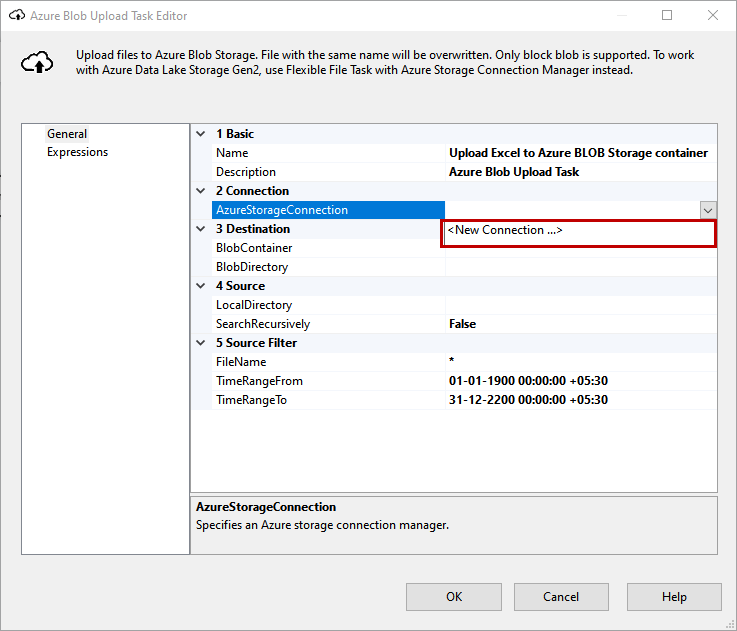
Double-click on the Azure Blob Upload task. Azure Blob Upload Task Editor opens. In the dialog box, we will create an Azure Storage connection and Local Directory. First, let us configure the Azure Storage connection. Click on AzureStorageConnection drop-down box and select New Connection. See the following image:
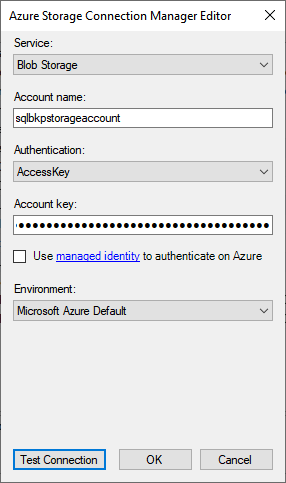
A dialog box Azure Storage Connection Manager Editor opens. Configure the following image:
Service: Select the Azure storage service which you want to use. The options are the following:
- Blob Storage
- Blob Storage (Emulated)
- Data Lake Storage Gen 2
We will use Blob Storage, so select Blob Storage.
- Account Name: Enter the Azure storage account name.
Authentication: The authentication method that you want to use to connect to the storage account. Options are the following:
- Access Key
- Service Principal
We are going to use an Access key, so choose Access Key.
Once Parameters configured, click OK to close the dialog box.
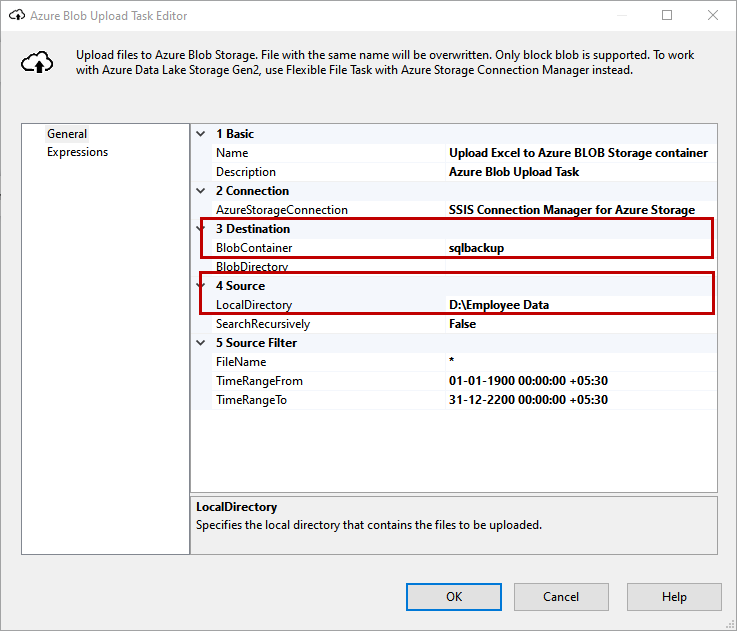
In Destination, provide the Name of the BlobContainer. In LocalDirectory, provide the name of the directory where the excel file is created. Click OK to close the Azure Blob Upload Task Editor dialog box. See the following image:
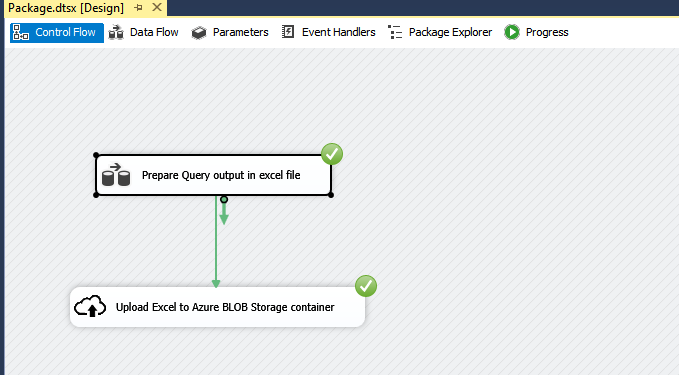
Once an SSIS package is configured, it looks like the following image:
To test the SSIS package, click on Execute.
As you can see, the package has been executed successfully. Now, to verify that file has been uploaded on Blob container. Log in to the Azure Portal Navigate to the Storage account Open container. See the following image:
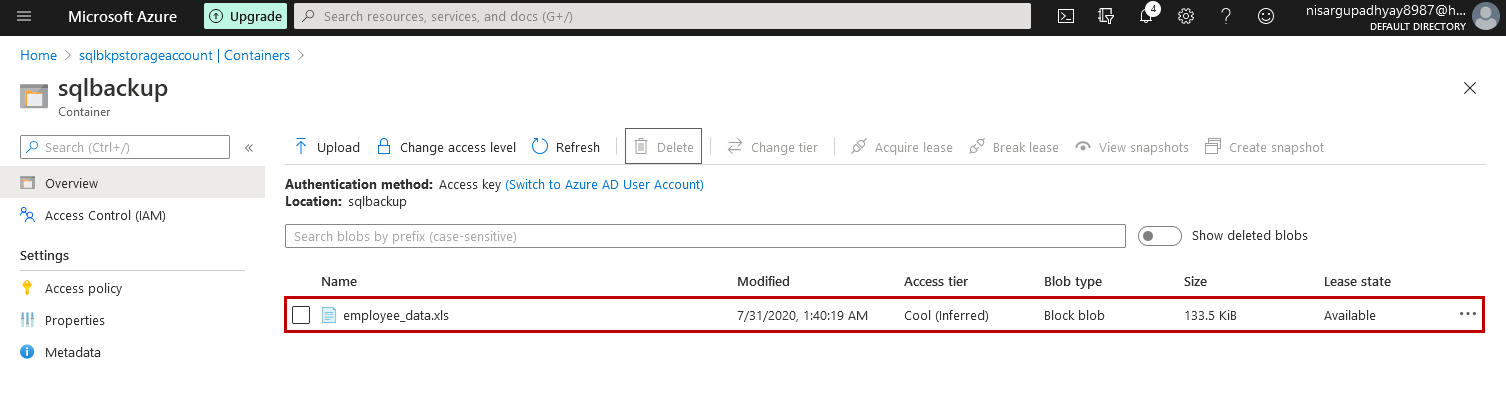
As you can see, the excel file employee_data.xls has been uploaded on the Blob container.
Summary
In this article, we have learned how we can configure the Azure Blob Upload task in SQL Server Integration Services to upload the output of a SQL Query that is stored in an excel file on an Azure Blob Storage container.

He has expertise in database design, performance tuning, backup and recovery, HA and DR setup, database migrations and upgrades. He has completed the B.Tech from Ganpat University. He can be reached on nisargupadhyay87@outlook.com
- Different ways to identify and change compatibility levels in SQL Server - July 22, 2024
- Copy SQL Databases between Windows 10 and CentOS using SQL Server data tools - October 19, 2022
- Changing the location of FILESTREAM data files in SQL Database - October 14, 2022