

This article talks about the two standard ways of building SQL Database Projects in Azure Data Studio along with the simple steps of implementation.
This article is also an in-time call for all those database or business intelligence developers or enthusiasts interested to use Azure Data Studio using declarative database development.
Getting ready for Database Projects
As with any other tool we need to first ensure that it is capable of serving the purpose and in our case, the purpose is to successfully build database projects.
The first thing in this regard is to equip Azure Data Studio (after it is installed) with the capability of creating Database Projects and this is done by adding the required add-ons.
The two must-have extensions to build database projects are as follows:
- SQL Database Project Extension
- SQL Server Schema Compare Extension
Let us now go through the steps to add these extensions.
Adding SQL Database Project Extension
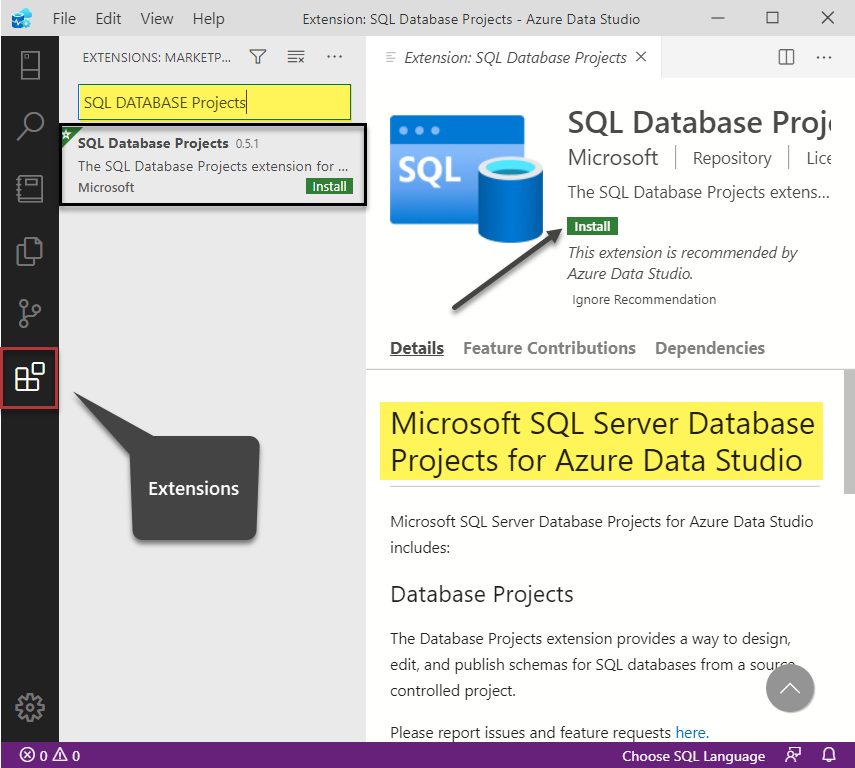
Please open Azure Data Studio and click on Extensions from the left navigation bar (or use the shortcut key CTRL+SHIFT+X) and look for “SQL Database Projects”.
Click Install once you have selected the desired option:
After a couple of minutes or a little less than that the extension is going to be installed and ready to be used. Once you get the add-on (extension) the job of creating database projects is going to be a piece of cake except if you end up doing something silly which can happen with anyone even the most talented developers do silly mistakes.
Another way to understand this add-on is to visualize that you have just turned your Azure Data Studio into a SQL Database Project development machine (tool). There is just one more extension to go which is highly recommended if not mandatory.
Adding SQL Server Schema Compare Extension
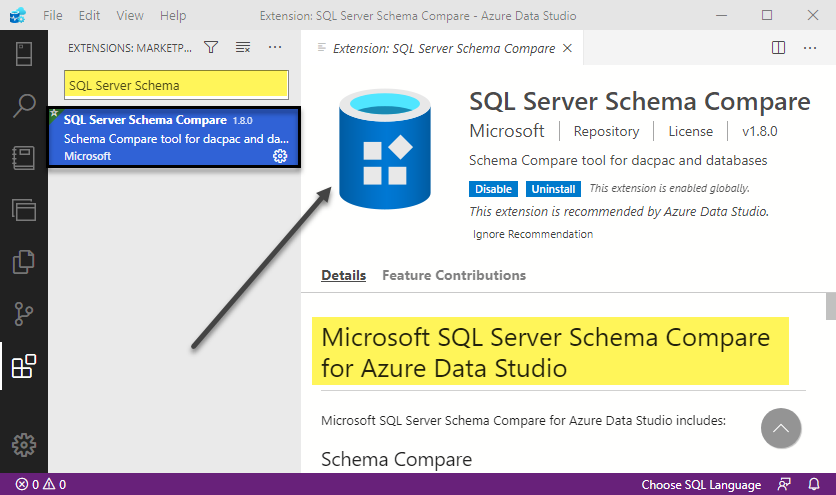
If the Extensions page is still open then please look for “SQL Server Schema” this time and install it just like the way you installed the previous add-on (extension).
A successful installation of the extension is shown as follows:
This add-on (extension) helps you to compare schemas (structures) between your database project and the target database although it can compare schema between the two databases as well.
For those who are less familiar with it, I suggest to please consider this extension as a check and balance method of comparing your current work (database code) against the previously done work when developing or refactoring (modifying) database projects.
Another way of understanding this extension is to understand the need to know the difference between the database project in hand and the database in use (as a result of deploying that database project) so that you can make some better decisions to what to do further and what not to do further in terms of new database changes to be deployed across different environments including dev and production.
Method 1: Creating Project from Database
The first method is to create a database project from a database. Now this database can be a production database or development database.
When we should create a database project from a Production database
This is highly advisable when (after getting approval) you (or your development team) decide to manage and control all your database changes (up until Production) via SQL Database Project(s) serving as the single source of truth.
When we should create a database project from a dev/test database
If there is already an existing database development strategy (other than database projects) but you are interested in testing the database projects approach then it is good to create your project from a dev/test database until you are ready for the big change which is mentioned earlier.
In this case, your database project scope is limited to you and actual database changes are deployed by the existing method.
Steps to create Project from the database
Whether you are creating a project from the database for real-time implementation (when it is officially decided) or not you have to go through the following steps if they are not already been taken:
- Create a database
- Create an object (table) in the database
- Create SQL Database Project from the database
- Compile (Build) the Project
- Add another object (table) to the database and recompile (Build) the Project
- Publish your changes to the database
- View your changes
Let us implement the above steps.
Create a database
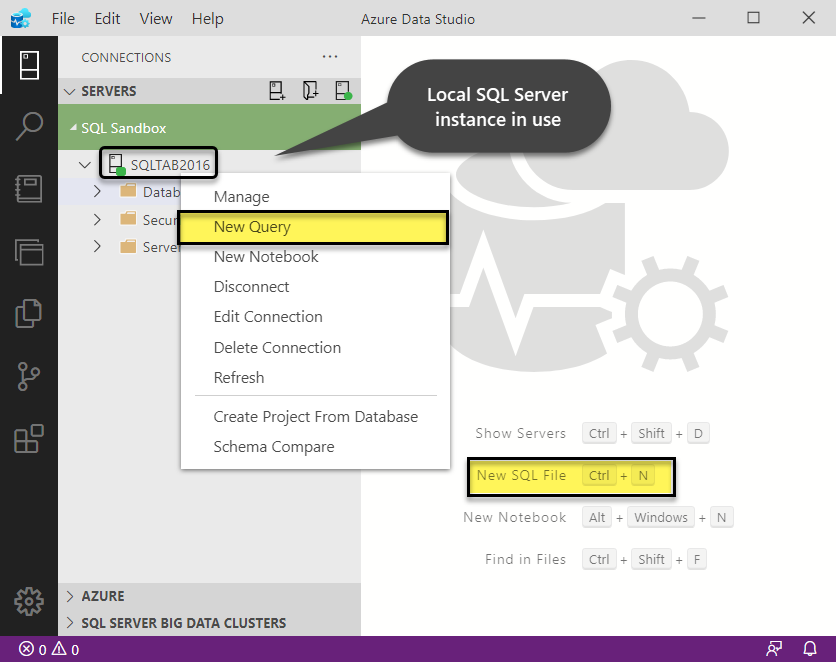
Please Select the CONNECTIONS icon from the left bar and connect to your locally or remotely installed SQL Server instance (or to an Azure SQL database). Create a new query by right-clicking on the server and clicking on “New Query” or simply pressing the shortcut key CTRL+N:
Please write the following T-SQL script to create a new database called “ProgrammingSchool”:
|
1 2 3 4 5 6 7 8 9 10 11 12 |
-- Create a new database called 'ProgrammingSchool' -- Connect to the 'master' database to run this snippet USE master GO -- Create the new database if it does not exist already IF NOT EXISTS ( SELECT [name] FROM sys.databases WHERE [name] = N'ProgrammingSchool' ) CREATE DATABASE ProgrammingSchool GO |
Press F5 to execute the script and expand the Databases node (on the left) to locate your newly created database:

Create database object Student Table
Now right click on the “ProgrammingSchool” database and click on “New Query”.
We are creating a new database object called Student table in the sample database by running the following script:
|
1 2 3 4 5 6 7 8 9 10 11 12 13 14 |
-- Create a new table called '[Student]' in schema '[dbo]' -- Drop the table if it already exists IF OBJECT_ID('[dbo].[Student]', 'U') IS NOT NULL DROP TABLE [dbo].[Student] GO -- Create the table in the specified schema CREATE TABLE [dbo].[Student] ( [StudentId] INT NOT NULL PRIMARY KEY, -- Primary Key column [Name] NVARCHAR(50) NOT NULL, [Detail] NVARCHAR(150) NOT NULL -- Specify more columns here ); GO |
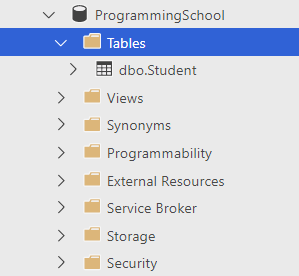
Now expand the database to view the newly created table object:
Create SQL Database Project from the database
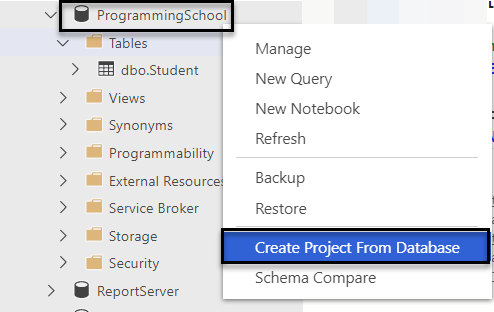
Now we need to create a SQL Database Project from this database. Right-click on the ProgrammingSchool database and click on “Create Project From Database”:
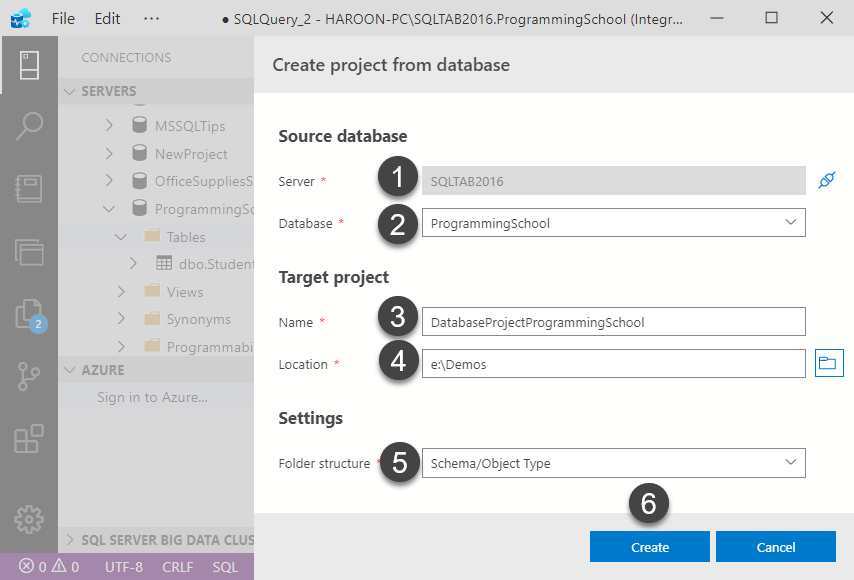
Please select a location on your drive where the database project is going to be stored and click the Create button:
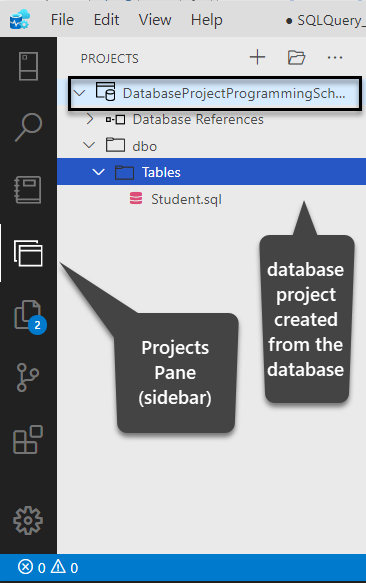
Successful project creation is shown as follows:

Compile (Build) the Project
Now go to the Projects sidebar by clicking the Projects icon on the left to see the project which you have just created from your database:
Right-click on the project and click on Build:

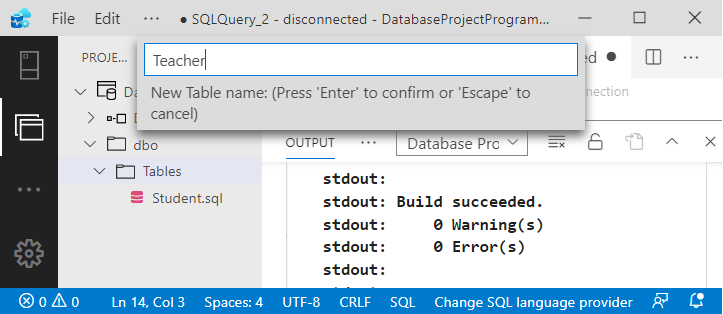
On a successful build, you should be seeing 0 Error(s) as shown above.
Add another object (table) and recompile (Build) the Project
Let us add a new table to the project called Teacher. Right-click on the Tables and click on Add Table following by typing the name of the table as Teacher:
Next type the following script to create the table:
|
1 2 3 4 5 6 7 |
CREATE TABLE [dbo].[Teacher] ( [TeacherId] INT NOT NULL PRIMARY KEY, [Name] NVARCHAR(50) NOT NULL, [Detail] NVARCHAR(200) NULL ); GO |
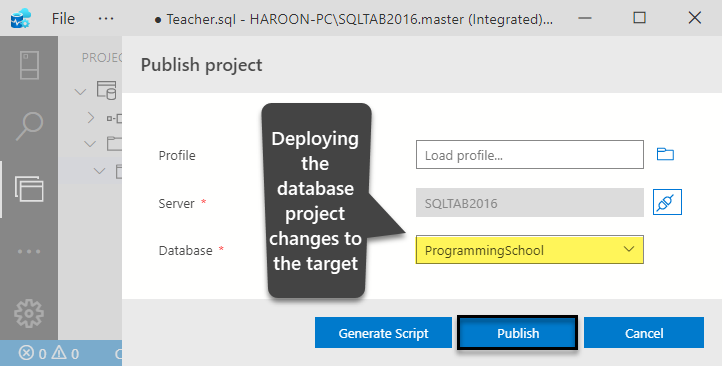
Please remember that you must not run this script against the database because this is to be managed by the database project (through publishing). Build the project the same way we ran a build earlier. After the project is successfully built right click on the project and click Publish.
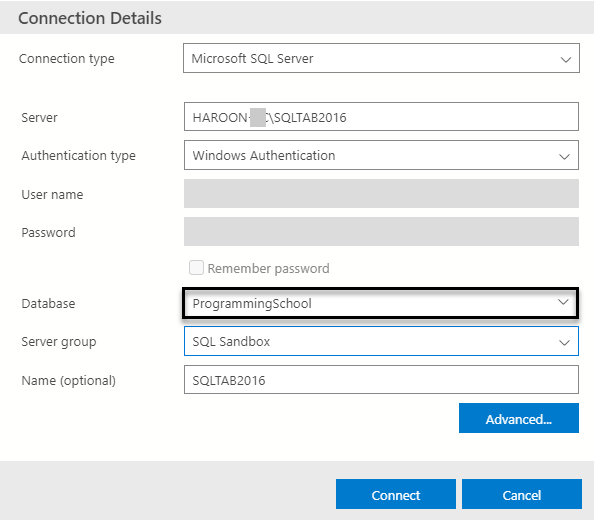
You have to first provide a connection to the desired database where your database project changes are going to be deployed:
Then click on the Publish button:
The successful publishing is shown as follows:

The database project (changes) has been successfully published to the target database.
View your changes
Now go back to the Connections and expand the ProgrammingSchool database to see whether the new table is there or not:
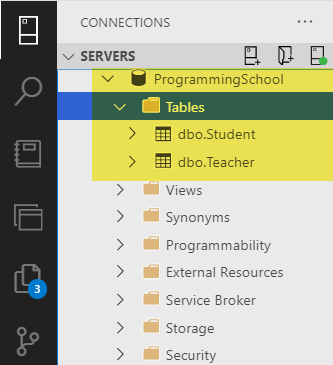
We have successfully created a database project from the database and then deployed our changes to the database through it.
Method 2: Creating Database Project as a starter
The next method is to start your database development right from the database project and this is desirable if you have no solid reason not to do this.
We can think of the steps as follows:
- Create a blank database project
- Build the project
- Publish the project to a target database
- View the changes
Please note that you can also add an object (table) after creating the project just like we did in the first method.
Create a blank database project
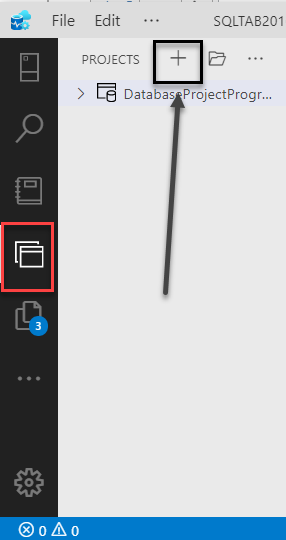
Go to the Projects section and click plus sign to add a new project:
Add Name and Location of the project followed by clicking the OK button:
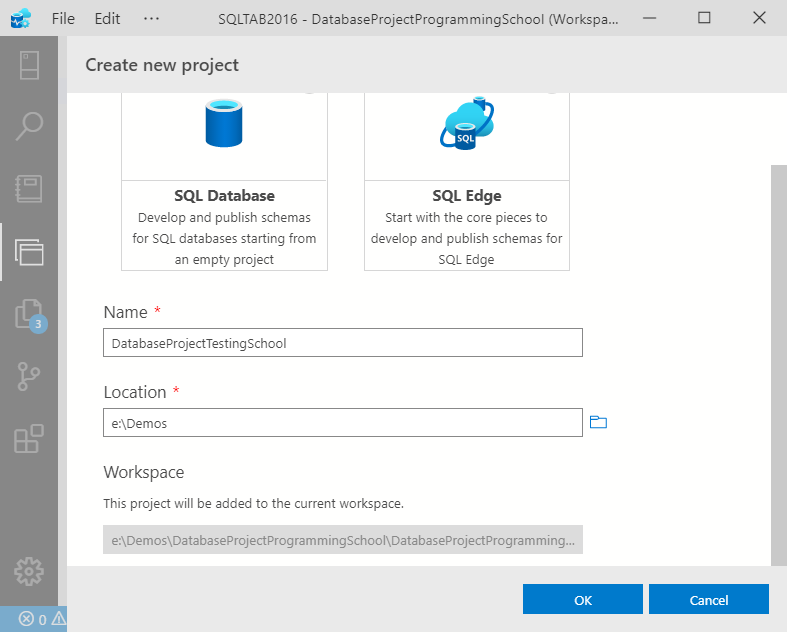
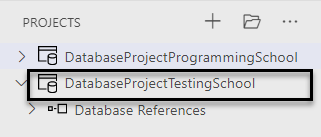
Your new database project is created in an instant:
Build and Publish the Project
Please build the project to see if all is well regarding the database project. Finally right-click on the project and click on Publish to deploy your changes to the database:

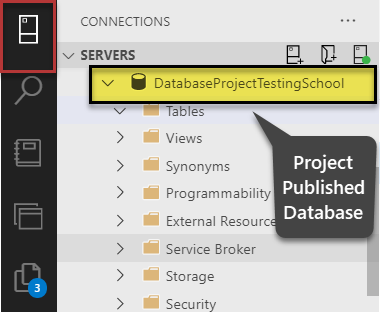
View the changes
Now please locate DataseProjectTestingSchool under the Databases node to see the database created and managed by the database project:
Congratulations, you have just learned two standard ways to build SQL Database Projects in Azure Data Studio.
A Word of Advice
There is one other more common and dominant toolset in the form of SQL Server Data Tools (SSDT) available to achieve a similar objective and Azure Data Studio despite being extremely efficient and fast by design is still not mature enough to overthrow SQL Server Data Tools (SSDT)’s dominance does not mean they cannot be used in a complementary fashion.
In simple words, Azure Data Studio is more like a programmer’s playground even when it comes to database development while SSDT offers a dual design and coding-based approach for the data professionals especially when creating and modifying objects such as tables.
Now it is absolutely fine for a development team to mix and match these two tooling options in such a way that some members can still use Visual Studio to build the projects and others can use Azure Data Studio to do the same and as long as they are well aware of their scope of work and objectives this is equally workable and productive.
Table of contents
| Two ways to build SQL Database Projects in Azure Data Studio |
| How to use SQL Server DACPAC extensions in Azure Data Studio |
| Declarative Database Development in Azure Data Studio |
| Using the DB Snapshot Creator Extension in Azure Data Studio |
| Migrating on-premises databases to Azure SQL Database in Azure Data Studio |

He holds BSc and MSc Degrees in Computer Science and also received the OPF merit award.
He began his professional life as a computer programmer more than a decade ago, working on his first data venture to migrate and rewrite a public sector database driven examination system from IBM AS400 (DB2) to SQL Server 2000 using VB 6.0 and Classic ASP along with developing reports and archiving many years of data.
His work and interest revolves around Database-Centric Architectures and his expertise include database and reports design, development, testing, implementation and migration along with Database Life Cycle Management (DLM).
He has also received passing grade to earn DevOps for Databases verified certificate, an area in which he finds particular interest and potential.
View all posts by Haroon Ashraf
- How to create and query the Python PostgreSQL database - August 15, 2024
- SQL Machine Learning in simple words - May 15, 2023
- MySQL Cluster in simple words - February 23, 2023