
In the articles, Deploying Azure Container Instances for SQL Server 2019 and Create Azure Container Instances for SQL Server 2019 using Azure CLI, we explored Azure Container Instances for SQL Server on Linux. These containers are stateless. Therefore, if you stop or restart container instances, you lost your data. Suppose, being a developer, you created a new container database, deployed a few tables, and stored procedures for testing purposes. You do not want to lose these objects or databases even if you destroy your container. Similarly, you also want to reuse those databases if you create a new container instance.
By default, the containers do not allow you to persist data beyond the container lifecycle. However, you can use an external volume for data storage. The Azure container instances can access the Azure file share for persistent data storage simplifies the lift and shift of databases to another cloud container by remapping the file share. This file share can be accessed from the container instances.
This article configures a persisted storage using Azure files in the Azure Container Instance.
- Note: You require a basic understanding of Azure Container instances, Azure CLIs. If you are not familiar, refer to earlier articles(refer to TOC at the bottom) on SQLShack
Steps to persist storage in Azure container Instance
Step 1: Authenticate to Azure using CLI
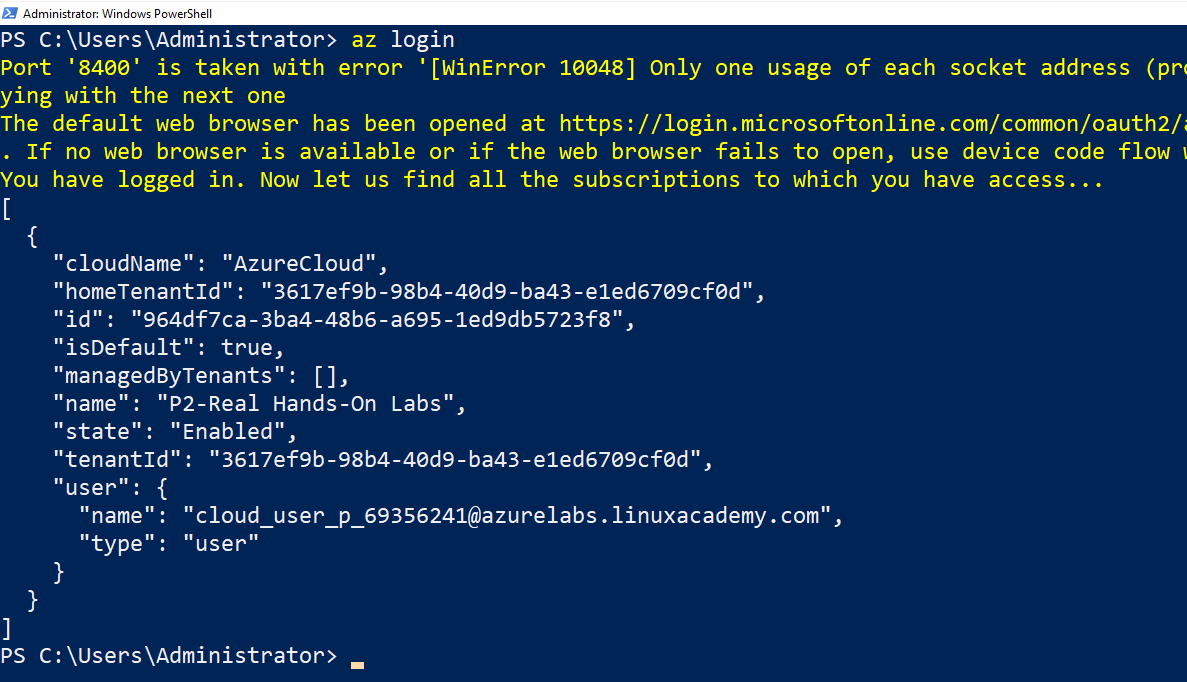
Launch the Windows PowerShell and run command – az login. It opens our default browser for entering credentials interactively.
Step 2: Create an Azure Storage Account
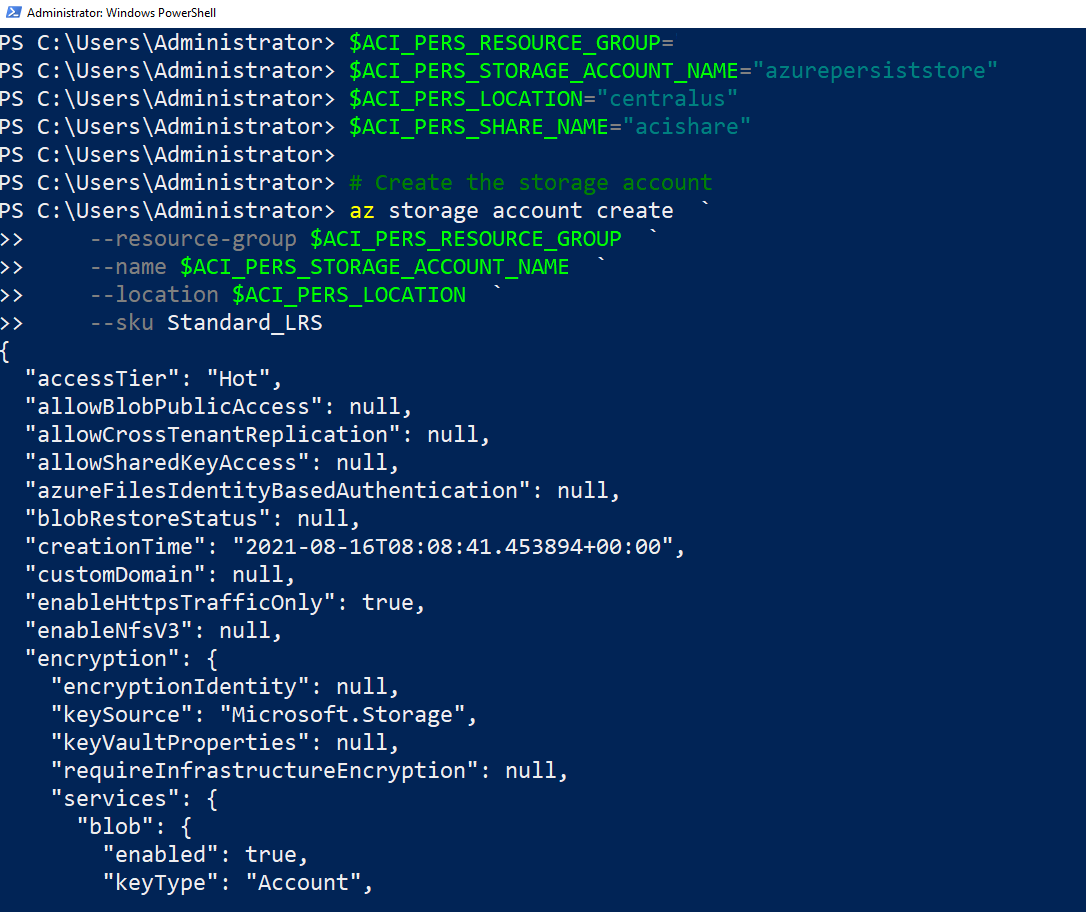
In this step, we create a new storage account for hosting the file share. The CLI command az storage account creates uses the following parameters.
- Resource group: Enter the resource group name in which you want to deploy your storage account
- Name: It is the globally unique storage account name
- Location: In this parameter, we specify the location where we want to deploy the storage account
-
SKU: Here, we specify the storage type. The supported values are
- Premium_LRS: Provisioned IO Locally Redundant Storage
- Premium_ZRS: Provisioned IO Locally Redundant Storage
- Standard_GRS: Standard Geo Replicated Storage
- Standard_GZRS: Provisioned IO Locally Redundant Storage
- Standard_LRS: Standard Locally Redundant Storage
- Standard_RAGRS: Standard Read-Access Geo Replicated Storage
- Standard_RAGZRS: Provisioned IO Locally Redundant Storage
- Standard_ZRS: Standard Zone Redundant Storage
The script uses variables for assigning values for these parameters. We will use these parameters for the remaining steps of this article.
|
1 2 3 4 5 6 7 8 9 10 11 |
$ACI_PERS_RESOURCE_GROUP="1-3bf91c96-playground-sandbox" $ACI_PERS_STORAGE_ACCOUNT_NAME="azurepersiststore" $ACI_PERS_LOCATION="centralus" $ACI_PERS_SHARE_NAME="acishare" # Create the storage account az storage account create ` --resource-group $ACI_PERS_RESOURCE_GROUP ` --name $ACI_PERS_STORAGE_ACCOUNT_NAME ` --location $ACI_PERS_LOCATION ` --sku Standard_LRS |
The script creates the storage account [azurepersiststore] and returns the JSON metadata in the CLI console, as shown below.
Step 3: Create Azure file share
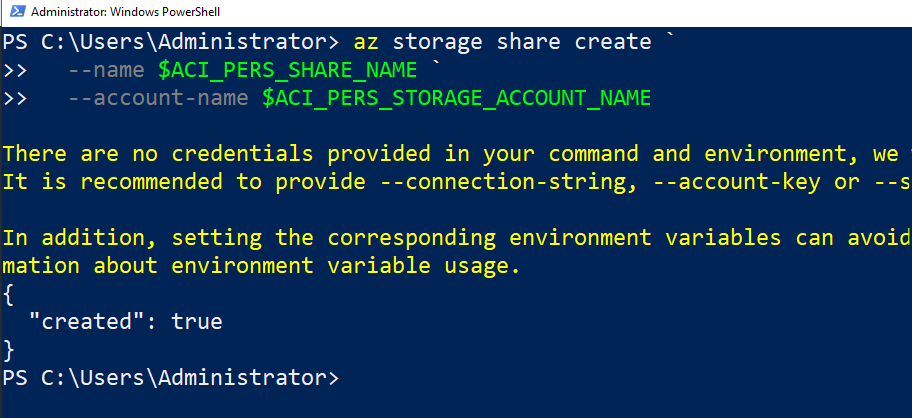
The Azure file share uses the CLI command – az storage share create and requires parameters share name and azure storage account name.
|
1 2 3 |
az storage share create ` --name $ACI_PERS_SHARE_NAME ` --account-name $ACI_PERS_STORAGE_ACCOUNT_NAME |
The script returns output – “Created: true” as shown below.
Step 4: Get key for Azure Storage account
Azure automatically generates an access key for authentication. You require the access key while using the file share. The Azure CLI command az storage account keys list returns all access keys for the specified storage account name.
|
1 2 |
$STORAGE_KEY=$(az storage account keys list --resource-group $ACI_PERS_RESOURCE_GROUP --account-name $ACI_PERS_STORAGE_ACCOUNT_NAME --query "[0].value" --output tsv) echo $storage_KEY |

Step 5: Deploy container with Azure file share as persisted mount volume
In the article,Create Azure Container Instances for SQL Server 2019 using Azure CLI, we explored the Azure CLI script to deploy Azure Container Instance with SQL Server 2019 Linux image.
The script uses the az container create command with the following parameters.
- Resource group: It is the resource group for Azure Container Instance
- Name Azure container instance name
- Image: Specify the image for SQL Server that we want to use with this container. Here, we use SQL Server 2019 CU12 on Ubuntu 20.04 image
- Environment variable: The environment variables specifies accepting license terms and SA password
- IP address: We choose public to get a public IP address for connecting it over the internet
- DNS name label: The DNS name is the FQDN of the container SQL instance for connecting without the IP address
- CPU, Memory: SQL Server on Linux requires a minimum of 2 GB CPU and memory
The above parameters are required to create the non-persisted container instance in Azure. The persisted Azure container instance maps the Azure file share with the following parameters:
- azure file volume account name: Specify the Azure storage account name in this parameter
- azure file volume account key: Enter the key that we retrieved in step 4
- azure file volume share name: Specify the Azuree file share name
- Azure file volume mount path: Here, specify a mount volume path in the Azure Linux container
|
1 2 3 4 5 6 7 8 9 10 11 12 13 14 |
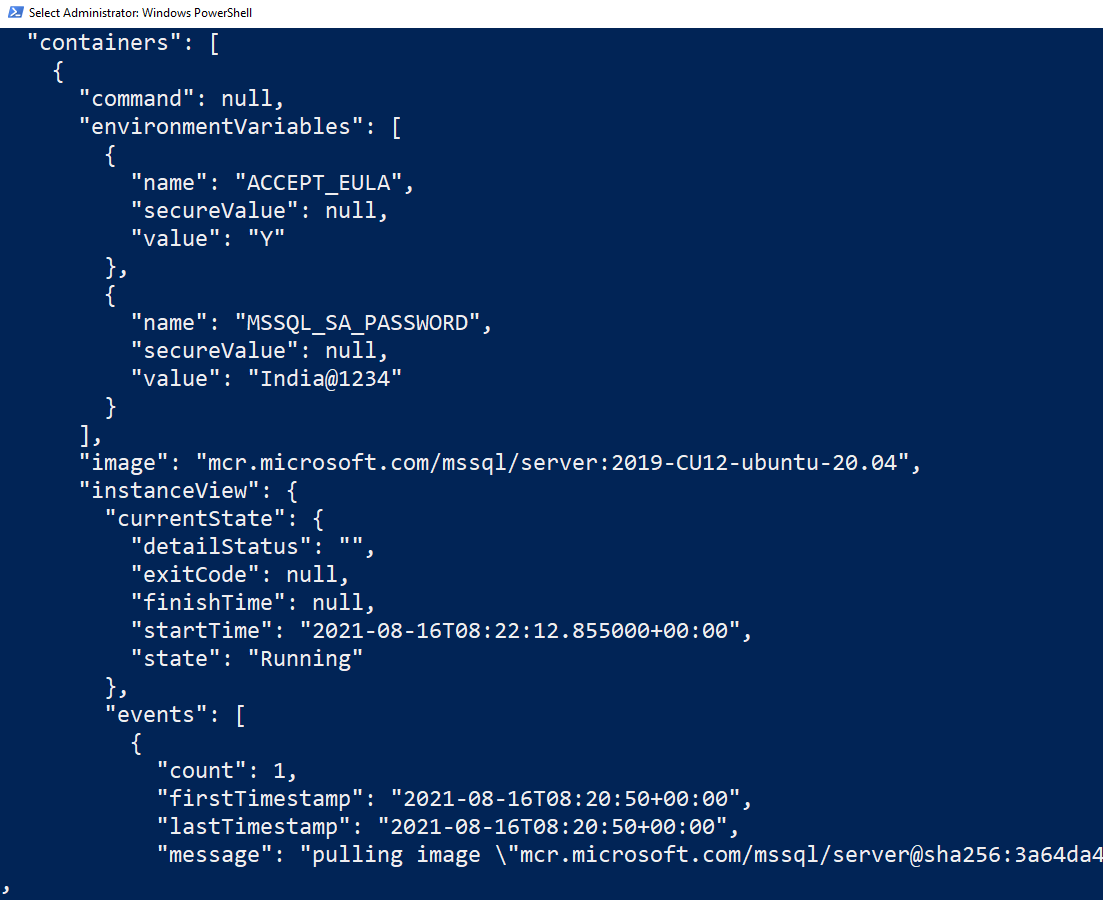
az container create ` --resource-group "1-3bf91c96-playground-sandbox" ` --name mysqlserverlinuxcontainer ` --image mcr.microsoft.com/mssql/server:2019-CU12-ubuntu-20.04 ` --environment-variables ACCEPT_EULA=Y MSSQL_SA_PASSWORD=India@1234 ` --ip-address public ` --dns-name-label mysqlserverlinuxcontainer ` --cpu 2 ` --memory 2 ` --port 1433 ` --azure-file-volume-account-name $ACI_PERS_STORAGE_ACCOUNT_NAME ` --azure-file-volume-account-key "94vaV+jE0PXDNhIULkkH5awlLu76jsZ1+Yj4cY103hzJTtWU8vhN3nEk44uw8gKifMtnK6F0Kt2y0X871FolsA==" ` --azure-file-volume-share-name $ACI_PERS_SHARE_NAME ` --azure-file-volume-mount-path "/aci/logs/" |
Once you execute this command, it creates an Azure Container instance and maps the Azure file share as a volume mount point. It takes 1-2 minutes for resource deployment.

It returns the Azure container configuration, and its metadata in the JSON format as the command az container create output.
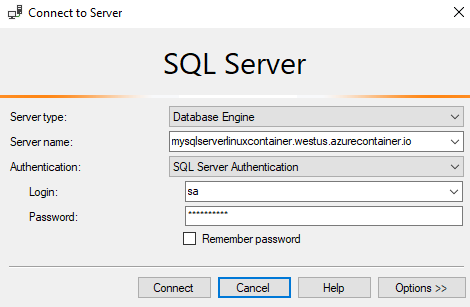
Step 6: Get container FQDN and connect using SSMS
To connect with Azure Container SQL Server instance, use a fully qualified domain name (FQDN) or public IP address in SQL Server Management Studio(SSMS).
The following CLI command az container show returns FQDN as shown below.
|
1 2 |
azcontainershow--resource-group$ACI_PERS_RESOURCE_GROUP` --namemysqlserverlinuxcontainer--queryipAddress.fqdn--outputtsv |

Use the FQDN and SA credentials in SSMS for connecting to databases.
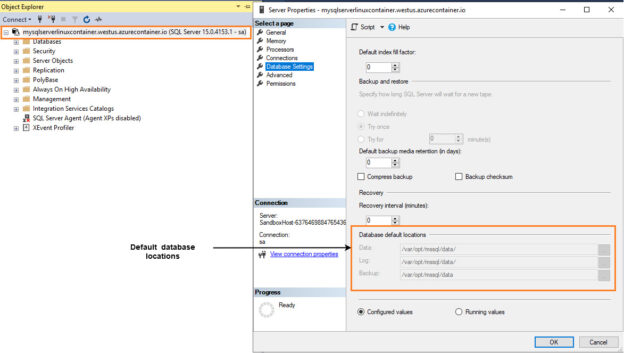
Right-click on the container instance and verify the default database location. As shown below, the default location is in /var/opt/mssql/data. It means SQL Server is not using the persisted storage as of now.

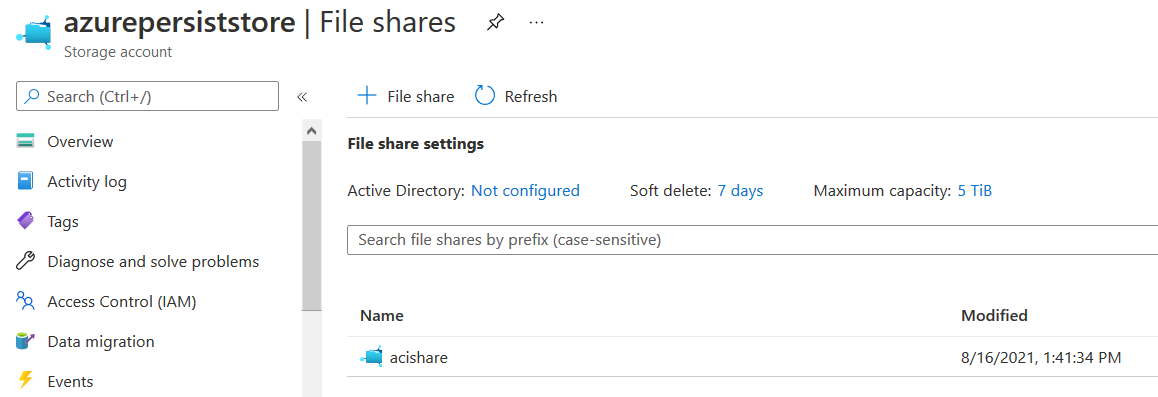
You can also browse to the Azure storage account and file share to verify any database files created in it. As shown below, the file share is empty.

Step 7: Create a SQL Database on the persistent storage
In step 5, we mounted the azure file share as /aci/logs in Linux. Therefore, we can use the mount point for storing the database files.
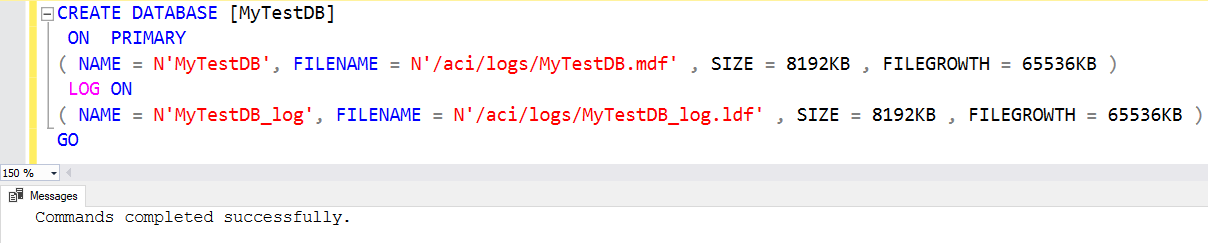
The following create database script specifies the primary data file (MDF) and the transaction log file (LDF) in the mount file /aci/logs. It is an external persisted storage that does not end with the container lifecycle.
|
1 2 3 4 5 6 |
CREATE DATABASE [MyTestDB] ON PRIMARY ( NAME = N'MyTestDB', FILENAME = N'/aci/logs/MyTestDB.mdf' , SIZE = 8192KB , FILEGROWTH = 65536KB ) LOG ON ( NAME = N'MyTestDB_log', FILENAME = N'/aci/logs/MyTestDB_log.ldf' , SIZE = 8192KB , FILEGROWTH = 65536KB ) GO |
You can verify the database files using the sp_helpfile system procedure.
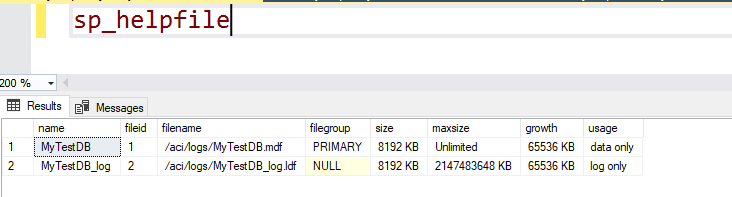
Earlier the azure file share was empty. Now, we can see database MDF and LDF files stored in it.

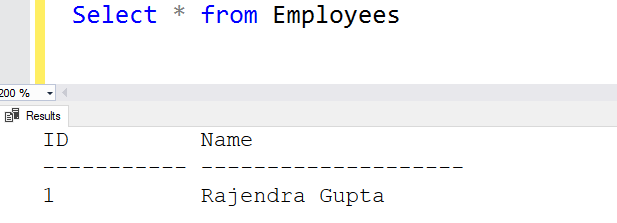
Let’s create a sample table [Employees] and insert a record in it.
|
1 2 3 4 5 6 7 8 |
Create Table Employees ( ID int, [Name] varchar(20) ) Go Insert into Employees values (1, 'Rajendra Gupta') Go |
Step 8: Destroy the container
Until this point, we have deployed an Azure Container Instance with SQL Server 2019 Linux image. Further, we created a database [MyTestDB] and table in it.
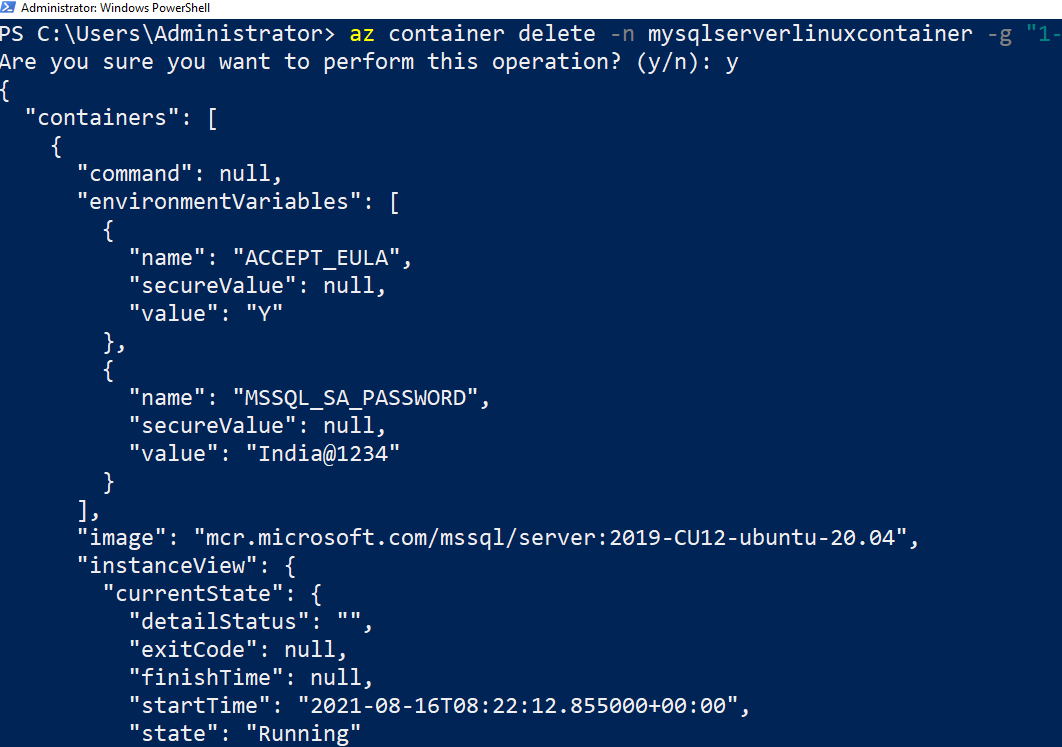
Now, we want to test the persistence storage in the container. Therefore, let’s destroy the container using CLI command az container delete.
|
1 |
azcontainerdelete-nmysqlserverlinuxcontainer-g"resourcegroup" |
Once you dropped the container, verify the database files stored in the file share. The file still exists because it was not part of the container lifecycle.

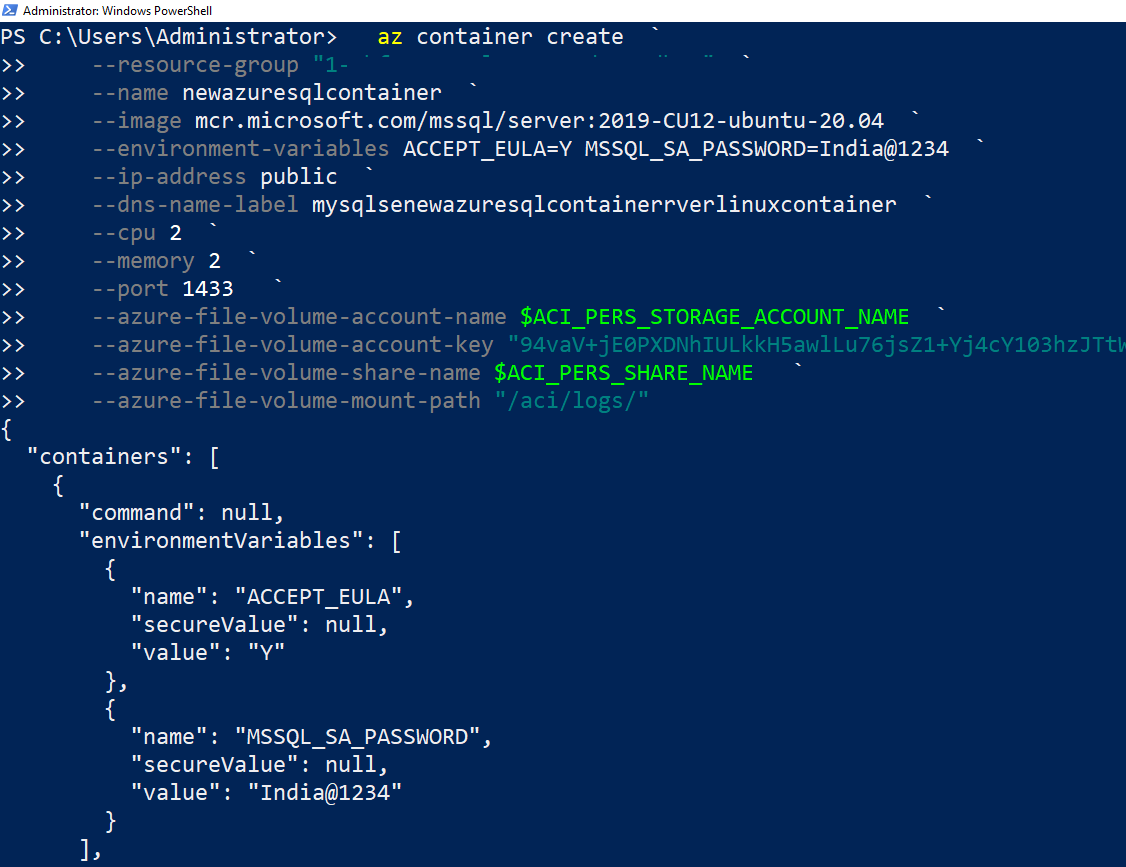
Step 9: Create a new Azure container Instance
This step creates a new Azure container instance and use the earlier created persisted azure file share. The new container name is [newazuresqlcontainer].
|
1 2 3 4 5 6 7 8 9 10 11 12 13 14 |
az container create ` --resource-group "1-3bf91c96-playground-sandbox" ` --name mysqlserverlinuxcontainer ` --image mcr.microsoft.com/mssql/server:2019-CU12-ubuntu-20.04 ` --environment-variables ACCEPT_EULA=Y MSSQL_SA_PASSWORD=India@1234 ` --ip-address public ` --dns-name-label mysqlserverlinuxcontainer ` --cpu 2 ` --memory 2 ` --port 1433 ` --azure-file-volume-account-name $ACI_PERS_STORAGE_ACCOUNT_NAME ` --azure-file-volume-account-key "94vaV+jE0PXDNhIULkkH5awlLu76jsZ1+Yj4cY103hzJTtWU8vhN3nEk44uw8gKifMtnK6F0Kt2y0X871FolsA==" ` --azure-file-volume-share-name $ACI_PERS_SHARE_NAME ` --azure-file-volume-mount-path "/aci/logs/" |
Step 10: Verify database connection to new Azure container
Retrieve the public IP address of the new container and connect to SQL Server instance using SSMS.

The sp_helpdb returns the existing databases. We used the old azure persistent storage, but it does not show [MyTestDB] in the list.
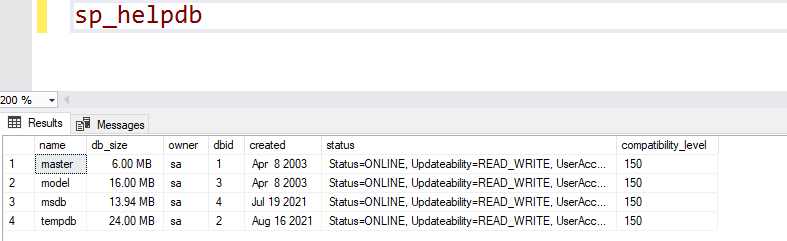
Oh! did I lose my database even after persistence storage?
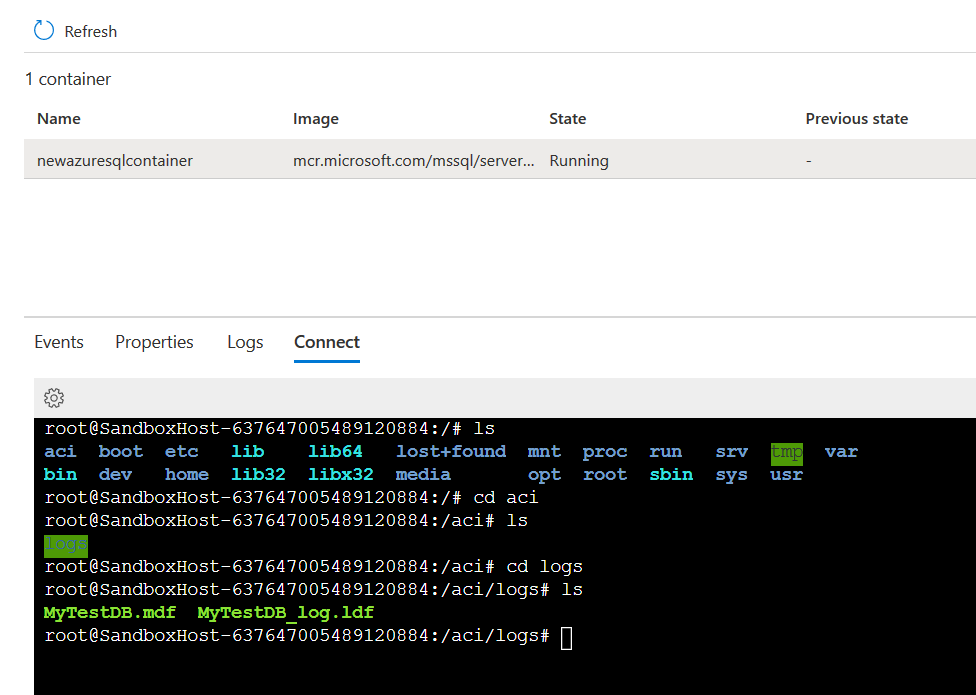
To verify the files, click on connect in the container dashboard. The mount point shows both data and logs files in the /aci/logs.
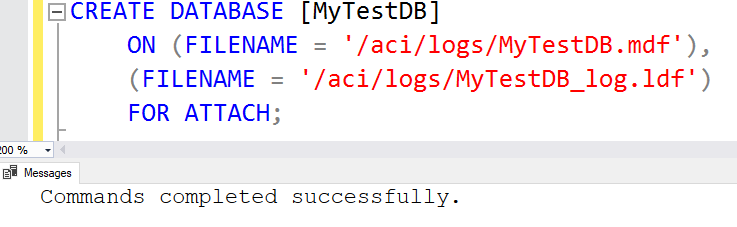
The database does not come up automatically because the new instance master database does not have a record in the system tables. Therefore, we need to attach the database using the below CREATE DATABASE ..FOR ATTACH script.
|
1 2 3 4 |
CREATE DATABASE [MyTestDB] ON (FILENAME = '/aci/logs/MyTestDB.mdf'), (FILENAME = '/aci/logs/MyTestDB_log.ldf') FOR ATTACH; |
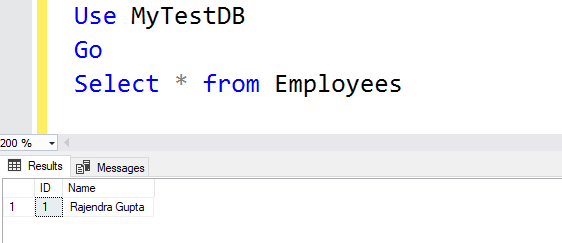
Now, query the [Employees] table. Hurrey, we have data from the table created in the previous container using the Azure file share container instance.
Conclusion
This article explored using persistent Azure file share for storing your database files or backups. The persistent storage helps you to retain databases, backups, or files whether the container is stopped, restarted, or crashed.
Table of contents
| Deploying Azure Container Instances for SQL Server 2019 |
| Create Azure Container Instances for SQL Server 2019 using Azure CLI |
| Store SQL Server files in Persistent Storage for Azure Container Instances |

I am the author of the book "DP-300 Administering Relational Database on Microsoft Azure". I published more than 650 technical articles on MSSQLTips, SQLShack, Quest, CodingSight, and SeveralNines.
I am the creator of one of the biggest free online collections of articles on a single topic, with his 50-part series on SQL Server Always On Availability Groups.
Based on my contribution to the SQL Server community, I have been recognized as the prestigious Best Author of the Year continuously in 2019, 2020, and 2021 (2nd Rank) at SQLShack and the MSSQLTIPS champions award in 2020.
Personal Blog: https://www.dbblogger.com
I am always interested in new challenges so if you need consulting help, reach me at rajendra.gupta16@gmail.com
View all posts by Rajendra Gupta
- Understanding PostgreSQL SUBSTRING function - September 21, 2024
- How to install PostgreSQL on Ubuntu - July 13, 2023
- How to use the CROSSTAB function in PostgreSQL - February 17, 2023