
In my previous article, Getting started with Azure CLI 2.0, I have explained how to get started with the Azure CLI 2.0. I have also explained how to install it on a local machine and demonstrated a few commands. In this article, I’m going to explain how to create a SQL Database using Azure CLI 2.0. Further, in the later part of the article, I’ll also show how to create a backup of the SQL Database using Azure CLI. Creating a SQL Database using the Azure CLI helps us to get things automated and removes the error-prone manual creation of the databases and backups.
This article doesn’t contain any information regarding the Azure SQL Database, instead, it is just a reference on how to create the SQL Database using Azure CLI. We can also create the database using the Azure portal or the cloud shell. The result of all these will be the same. Once the database is created, we can connect the database using the SQL Server Management Studio from a local machine.
Creating the SQL Database using Azure CLI
Creating an SQL Database in the Azure involves two steps. In the first step, we need to create the SQL Server instance and in the second step, we need to create the database in the instance. Both these steps can be performed by using the Azure CLI 2.0.
Let us first go ahead and create the SQL Server Instance using the Azure CLI. The command to create an SQL Server instance is “az sql server create“. In order to create a SQL Server instance using the CLI, we need to provide a name for the instance, a username and a password for the administrator to login to the instance. Another requirement that needs to be fulfilled prior to creating the SQL instance is we need to know under which Resource Group are we going to create the SQL Server instance and the location in which the instance is to be created.
Let us assume that we will be using the following information to create the SQL Server Instance.
- SQL Server Instance Name: sqlshackdemo-server
- SQL Username: sqlshackuser
- SQL Password: !SecuredPassword@123
- Resource Group: rg-sqlshack-demo
- Location: West Europe
The CLI command to create the server will be as follows:
az sql server create –name sqlshackdemo-server –resource-group rg-sqlshack-demo –location westeurope –admin-user “sqlshackuser” –admin-password “!SecuredPassword@123”
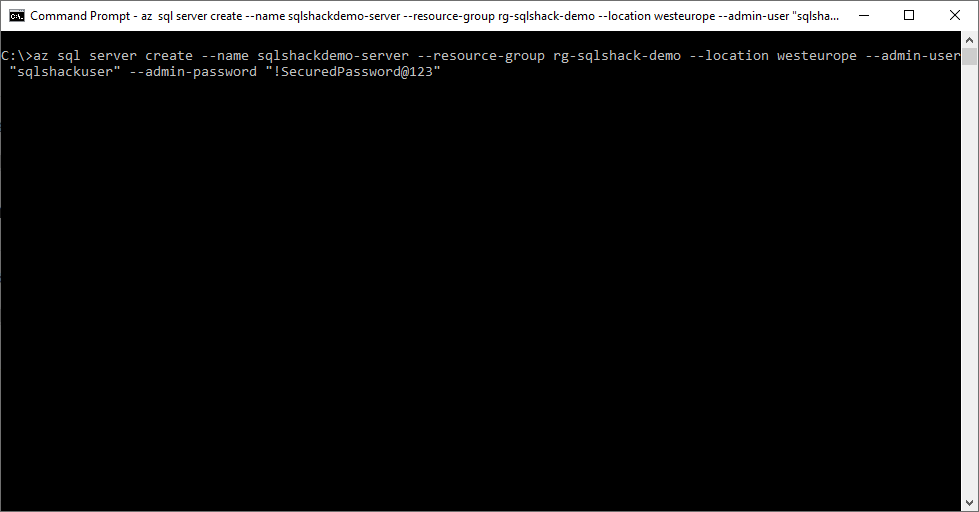
Figure 1 – Azure CLI Command for SQL Server Instance
Once this command is executed, it might take some time to run and create the instance in the Azure Portal. As soon as the SQL Server instance is created in the portal, the details will be displayed in the console and can be verified easily as follows.
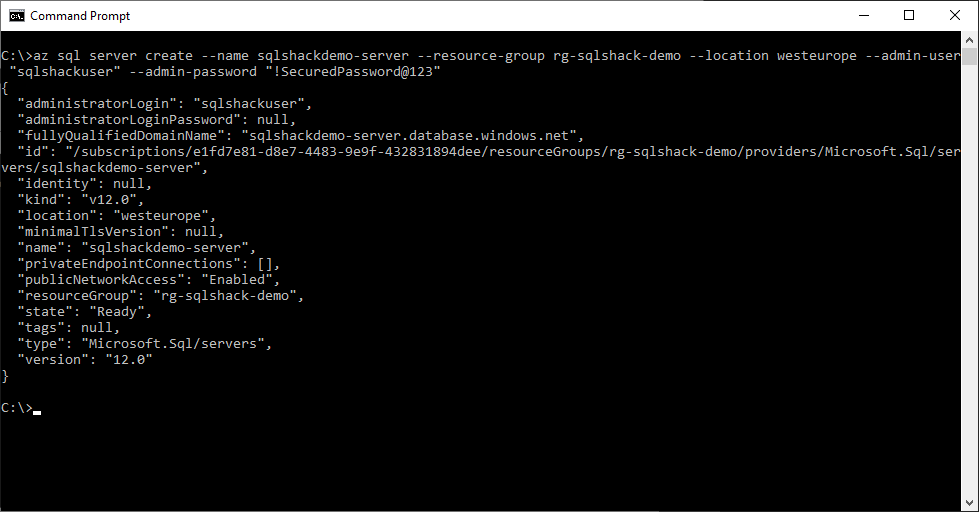
Figure 2 – SQL Server Instance Created Using Azure CLI
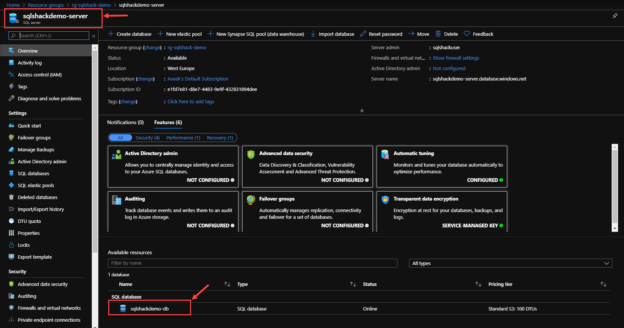
You can also verify the same by navigating to https://portal.azure.com and browse the resources created under the resource group that was specified while creating the SQL Server instance. As you can see in the figure below, the new instance “sqlshackdemo-server” has been created under the resource group.
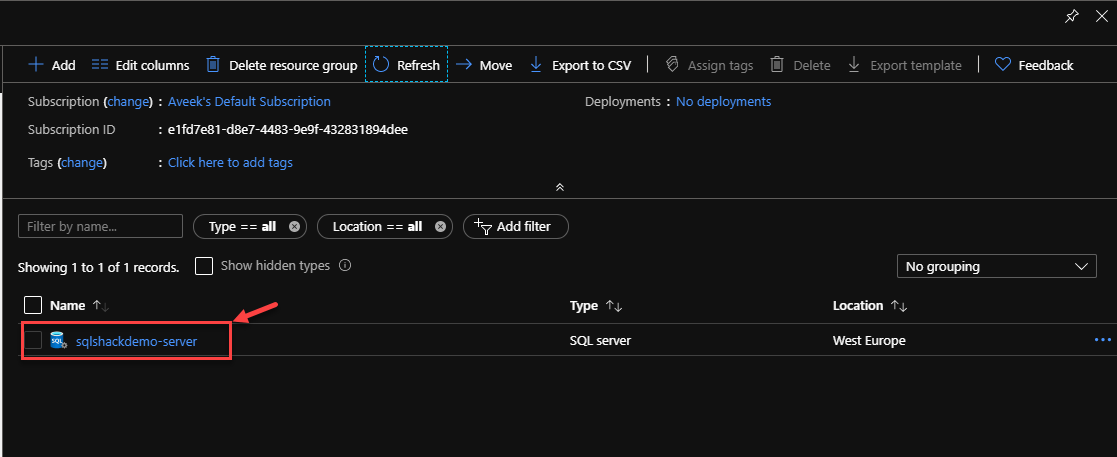
Figure 3 – Resource Added under Resource Group
Once the SQL Server Instance is created, the next step is to create the SQL Database using Azure CLI. The command to create an SQL Database is “az sql db create“. In order to create the SQL Database, we need to provide the following details.
- Resource Group: rg-sqlshack-demo
- SQL Server Instance Name: sqlshackdemo-server
- Database Name: sqlshackdemo-db
- Service Objective: s3
- Collation: SQL_Latin1_General_CP1_CI_AS
The CLI command to create the database will be:
az sql db create –resource-group rg-sqlshack-demo –server sqlshackdemo-server –name sqlshackdemo-db –service-objective S3 –collation SQL_Latin1_General_CP1_CI_AS
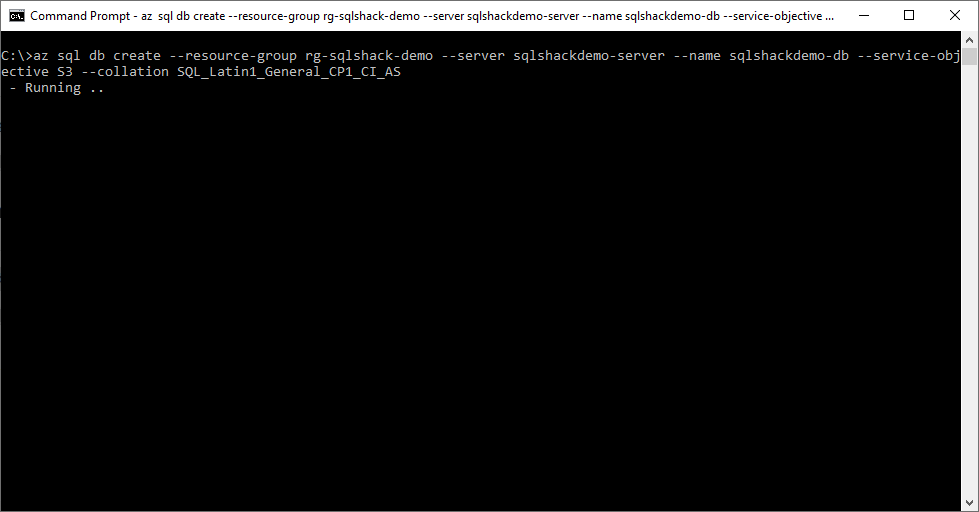
Figure 4 – Creating SQL Database using Azure CLI
Once the database has been created successfully, the CLI will return the details of the database being created as below.
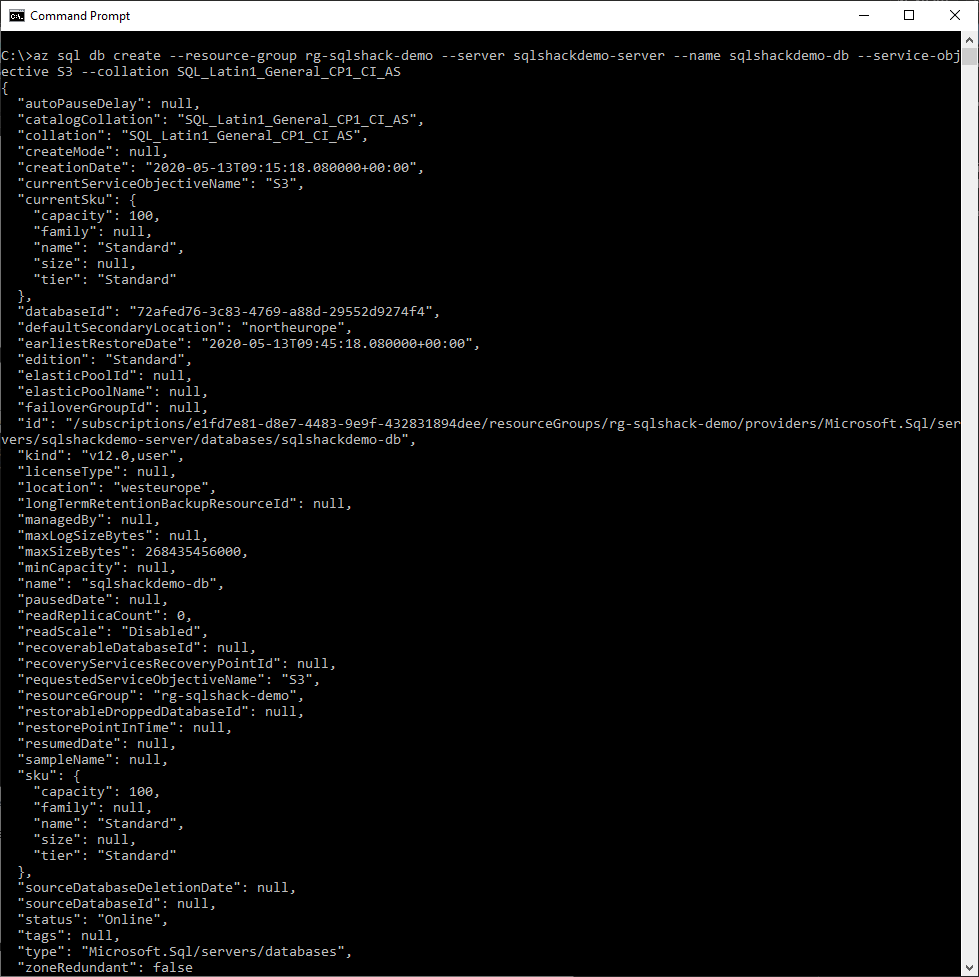
Figure 5 – SQL Database Created
You can also verify the database is successfully created by navigating to the Azure portal and drill down to the server resource.
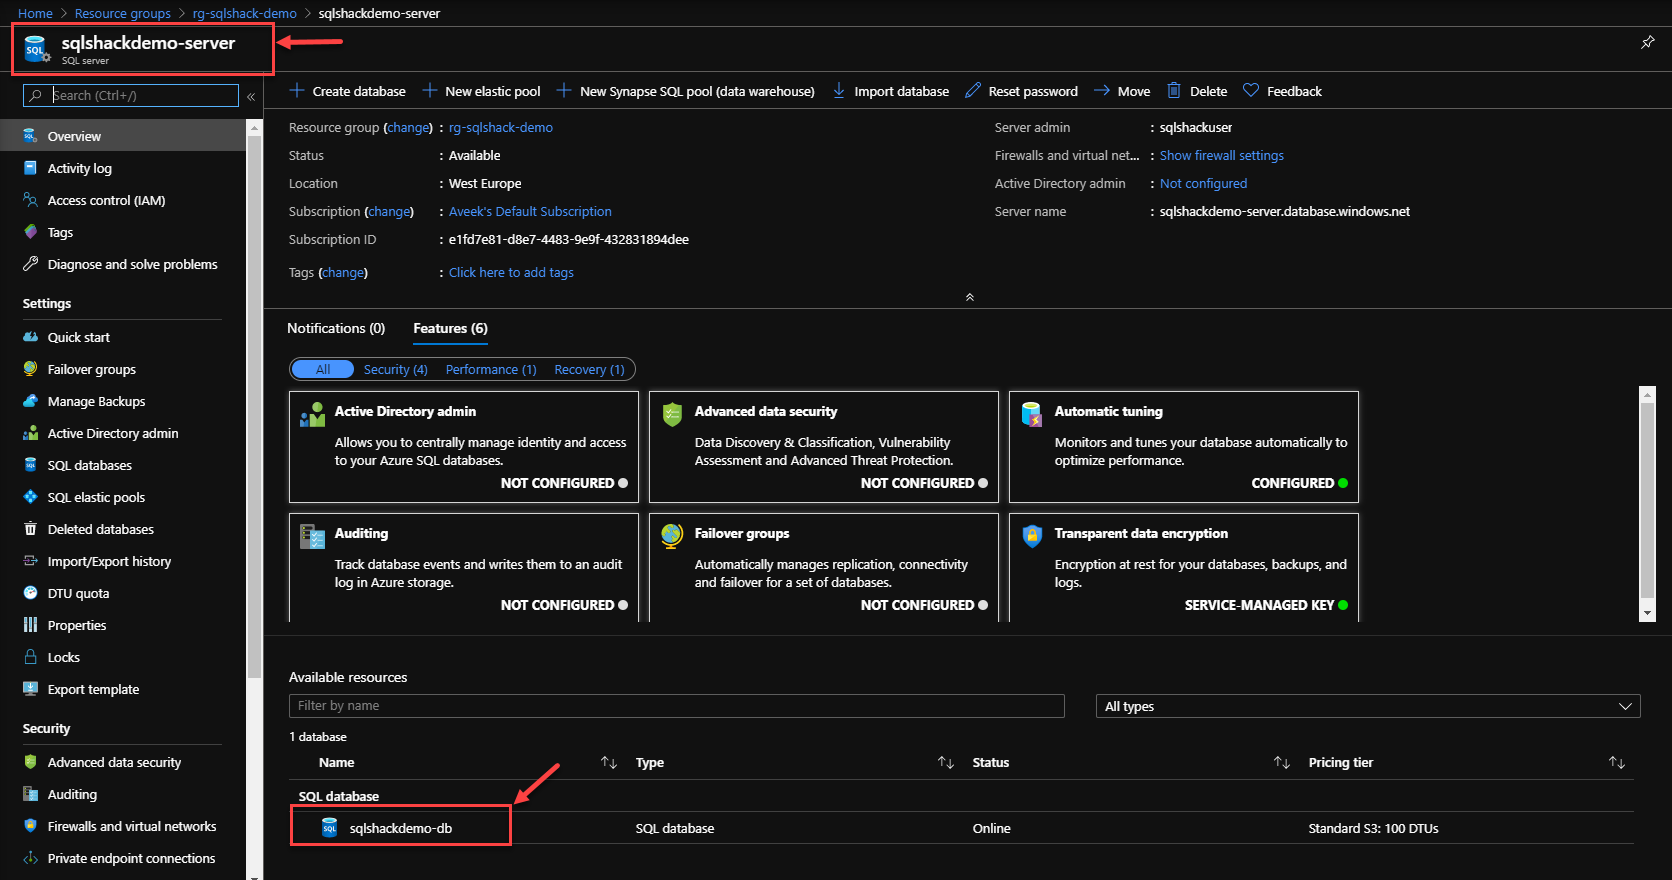
Figure 6 – SQL Database created
Now that the database is created, let us go ahead and try to connect to the instance using SQL Server Management Studio. Open SQL Server Management Studio and provide the following information.
- Server Name: sqlshackdemo-server.database.windows.net
- Authentication Type: SQL Server Authentication
- Username: sqlshackuser
- Password: !SecuredPassword@123
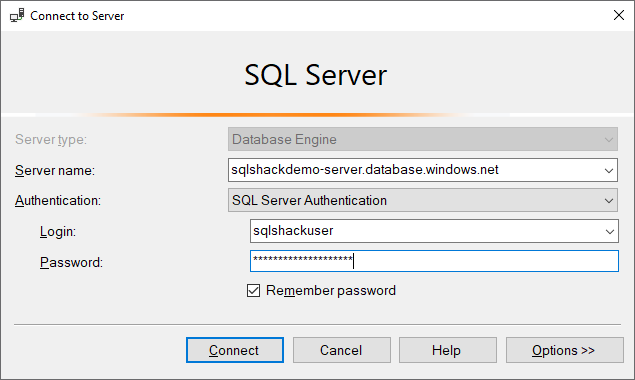
Figure 7 – Connecting to SQL Database using SSMS
Once the login is successful, you can see the list of databases that are available in the instance. In this case, since we have created only one database, it is visible. You can use this database like any other database and execute queries against it.

Figure 8 – SQL Database Connected
Backup and Restore an Existing SQL Database using Azure CLI
In the first part of the article, we have seen how to create a SQL Database using the Azure CLI and how to connect to the same using SQL Server Management Studio. Now we will see how to create a backup from the SQL Database using the CLI and how to restore the same using Azure CLI. The backup will create a BACPAC file and we can restore from the BACPAC file. The basic command to back up an SQL Database is “az sql db export” and to restore the database we can use “az sql db import“.
In order to create the backup, we would also need to store the backup file in Azure. For this, we would need to create a storage account which can be used to store the backup file and restore from it when necessary. The storage account can be created in the same resource group as the SQL Server or in a different resource group.
Let us go ahead and create the Storage account first with the command:
az storage account create –name sqlshack-storage –resource-group rg-sqlshack-demo –location westeurope –sku Standard_ZRS –encryption-services blob
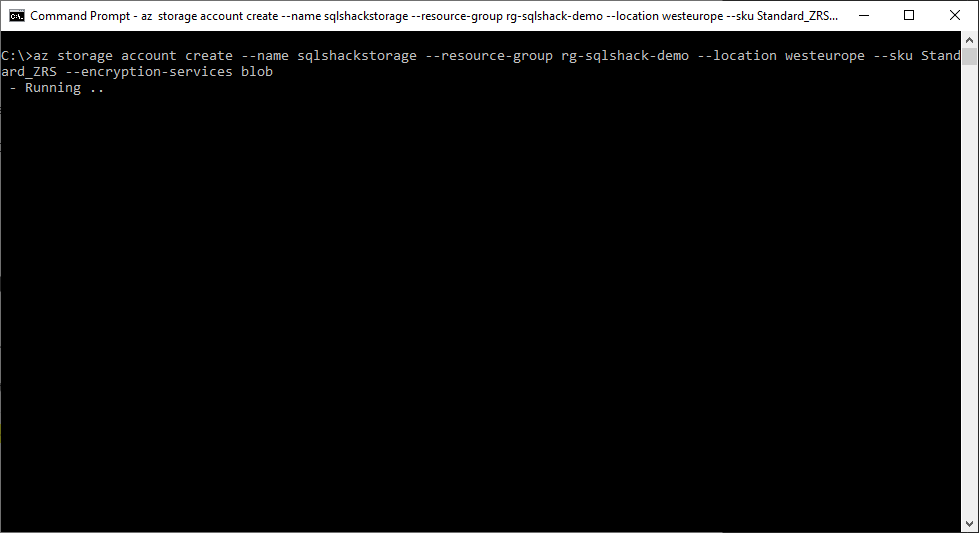
Figure 9 – Creating the Storage Account
Once the storage account has been created the CLI will populate the results of the new Storage Account.
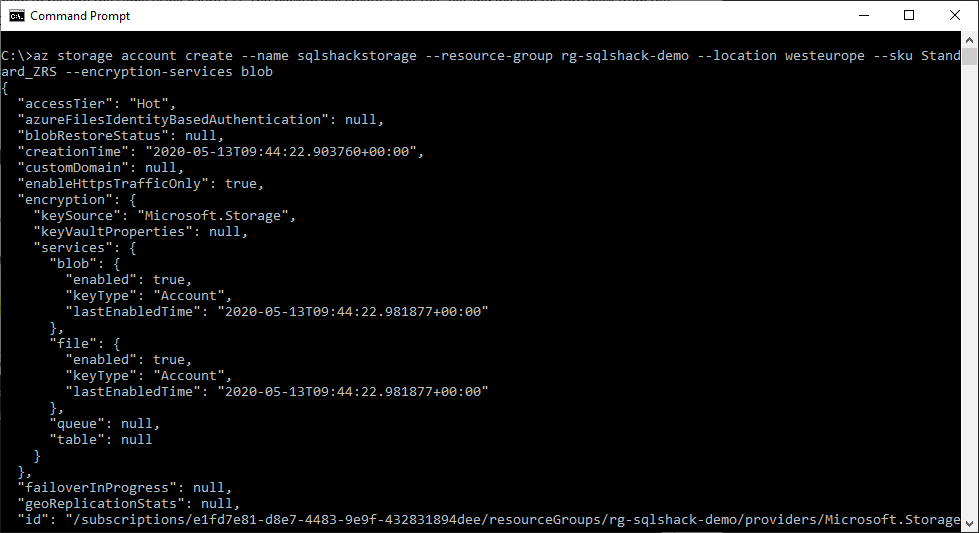
Figure 10 – Storage Account Created
You can also verify the same storage account by navigating to the Azure portal under the Resource Groups.
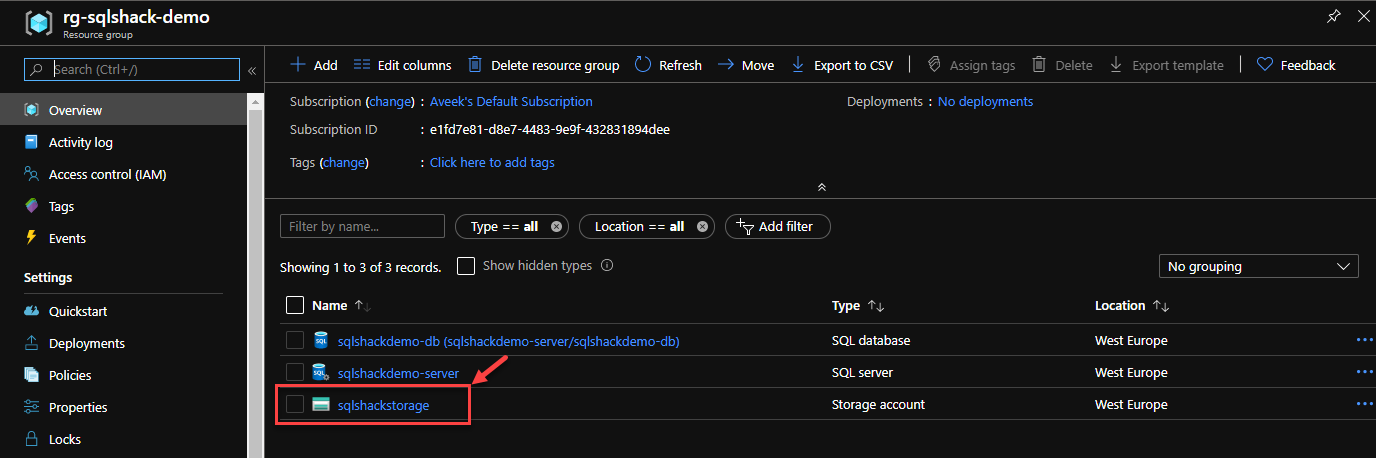
Figure 11 – Storage Account in Azure
Once the storage account has been created successfully, we need to fetch the Connection String of the storage account to be used while storing the BACPAC file. You can run the command – “az storage account show-connection-string –name sqlshackstorage –resource-group rg-sqlshack-demo” to retrieve the storage account connection string. The important part is the AccountKey information which we will need in the next steps to create the backup.
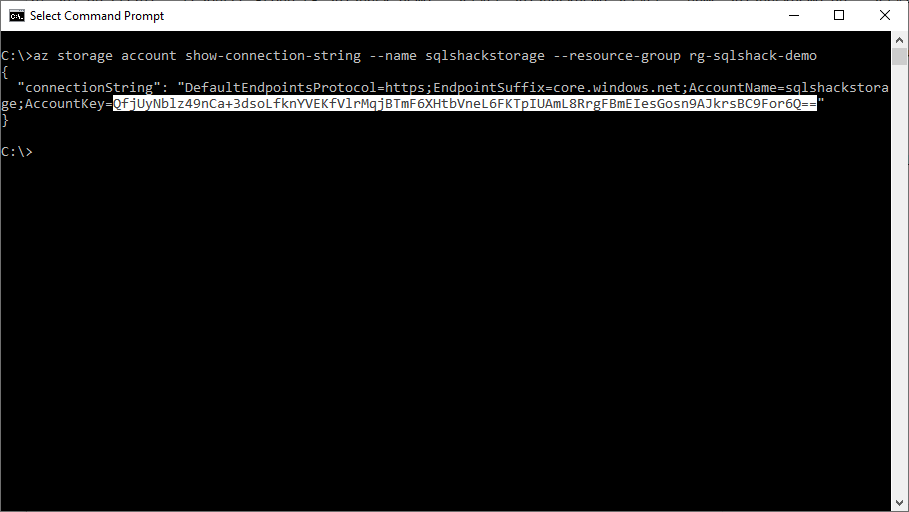
Figure 12 – Storage Account Connection String
Now that most of the pre-requisites are fulfilled, let’s go ahead and run the command to create the backup file. This is a bit complex as we need to provide the details of both the SQL Server Database and the Storage Account. The command for the CLI is as follows:
az sql db export –server sqlshackdemo-server –name sqlshackdemo-db –resource-group rg-sqlshack-demo –admin-user “sqlshackuser” –admin-password “!SecuredPassword@123” –storage-key-type StorageAccessKey –storage-key QfjUyNblz49nCa+3dsoLfknYVEKfVlrMqjBTmF6XHtbVneL6FKTpIUAmL8RrgFBmEIesGosn9AJkrsBC9For6Q== –storage-uri “https://sqlshackstorage.blob.core.windows.net/SqlShackDemo_Backup.bacpac”
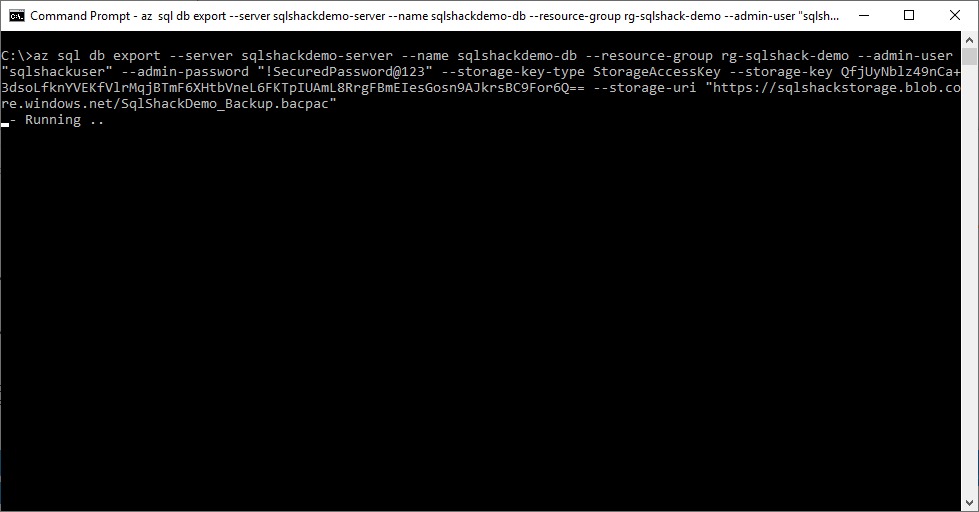
Figure 13 – Creating BACPAC in Storage Account
Once the command has been executed successfully, you can see the backup file is created in the Storage Account.
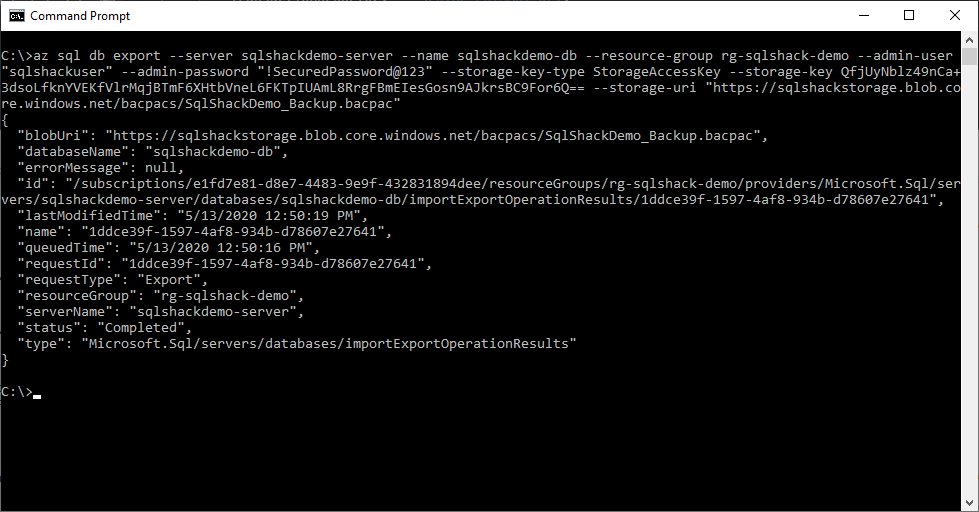
Figure 14 – Bacpac File Created
You can also verify the same by logging in to the Azure Portal and browsing the Blob Storage manually.
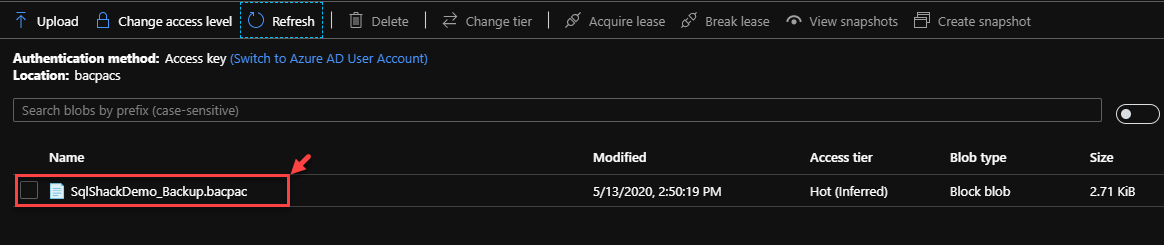
Figure 15 – BACPAC File Verified
Conclusion
In this article, I have explained how to create a SQL Database using Azure CLI 2.0. We have understood the first step in creating the SQL Server instance and then we have created the database in it. We have also learned how to create a backup of an existing SQL Database using Azure CLI and finally creating a BACPAC file with the same. Using Azure CLI is helpful as it can automate a lot of manual functions. Using Azure CLI in the portal, also known as the Cloud Shell, provides the users or admins the ability to store and save the scripts on the cloud and execute them whenever required.

He is a prolific author, with over 100 articles published on various technical blogs, including his own blog, and a frequent contributor to different technical forums.
In his leisure time, he enjoys amateur photography mostly street imagery and still life. Some glimpses of his work can be found on Instagram. You can also find him on LinkedIn
View all posts by Aveek Das
- Getting started with PostgreSQL on Docker - August 12, 2022
- Getting started with Spatial Data in PostgreSQL - January 13, 2022
- An overview of Power BI Incremental Refresh - December 6, 2021