
SQL Server Policy-Based Management was introduced in SQL Server 2008, to make it easy for database administrators to define and enforce SQL Server best practices and company standards in the form of policies. This feature is available in both Enterprise and Standard SQL Server Editions.
Policy-Based Management helps DBAs to be proactive, by providing them with a way to define the standards that control the SQL Server and database objects configuration. These configurations can be enforced on the database objects, database, SQL instance or multiple instances levels. The defined policies’ evaluation can be automated with no effort from the database administrator. If the DBA decides to fix the objects that don’t meet the configured policy, he can enforce this policy easily on all out-of-policy objects with a single button click, without going through all objects manually.
Policy-Based Management consists of five main components; the pre-defined properties that describe the SQL object functionality, which will be used to evaluate and manage that object, such as the Database Options, called Facets. There are more than 74 facets in SQL Server, and each facet has one or more properties. Conditions are the facet’s property state that will be used to evaluate the managed objects, such as the Full value for the database Recovery Model property of the Database Options facet. The Targets are the type of objects that will be managed and evaluated. The set of conditions that will be used to evaluate the facets of the target objects called Policies. Evaluation Mode specifies how the policy will be evaluated by comparing the actual setting value with the value defined in the condition. If the actual value of the target meets the condition value, the policy evaluates to true. If the actual value of the target breaks the condition, the policy evaluates to false.
The evaluation mode can be On Demand, where the evaluation will be upon your request. Using On Schedule evaluation mode, you need to define a schedule that will control the evaluation process. The policy can be evaluated when a change that breaks the policy’s condition and make the policy to evaluate to false is occurred. In this case, the change can be prevented if you use On Change – Prevent evaluation mode, or just log that action without preventing it when using the On Change -Log Only evaluation mode.
SQL Server Policy-Based Management is configured using SQL Server Management Studio. To go through it, expand the Management node from the Object Explorer to view the Policy Management. Expand the Policy Management node to find the Policy-Based Management main components as follows:
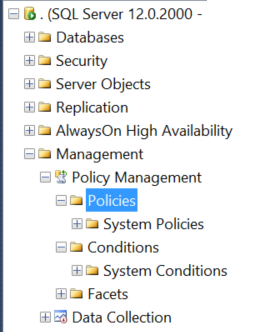
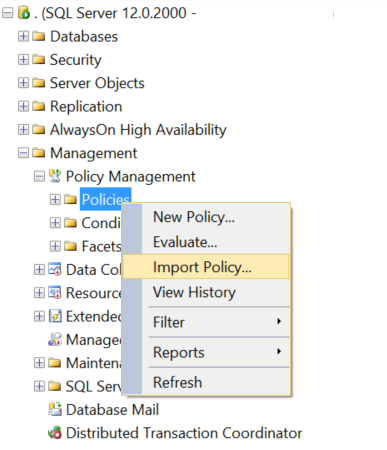
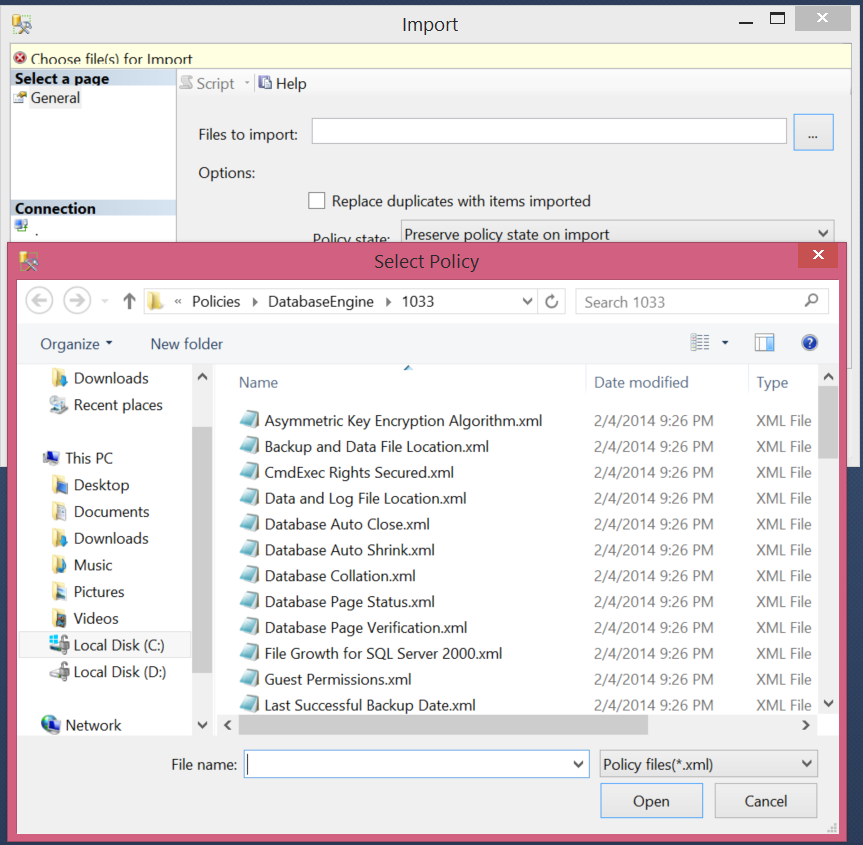
As you can see from the previous image, there are no user pre-defined conditions or policies. It is the DBA’s job to check which policies should be defined and evaluated upon the company’s need. There are sample policies that are installed with the SQL Server installation and stored as XML files. You can check these sample policies and import the ones you are interested in into your SQL Server instance to be ready for the evaluation. If you installed the SQL Server in the C drive, the XML files can be found under the below path:
C:\Program Files (x86)\Microsoft SQL Server\120\Tools\Policies\DatabaseEngine\1033
To import these polices to your SQL Instance, right-click on the Policies node under the Policy Management and choose Import Policy as follows:
In the Import window, click on the dots beside the File to import field to brows the policies XML files. Choose all policies you need to import and click OK. Now the imported polices are ready to be evaluated using the suitable evaluation mode.
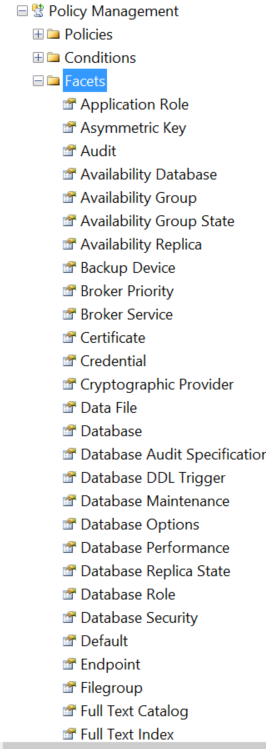
The first step in creating and configuring the policies is deciding which facet property you will evaluate and enforce. There are many facets defined in SQL Server, which can be displayed by expanding the Facets node from the Policy Management as below:
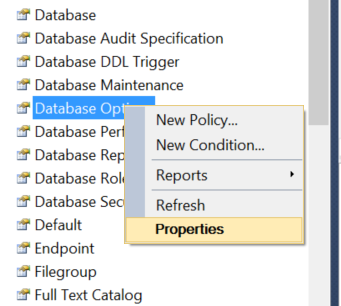
To check any facet, right-click on the selected facet and choose Properties as below:
In the Facet Properties window, you can find all properties for the chosen facet with description for each property. This helps you in deciding the facet and its property that will be used in the policy and the condition value that will be used to compare with the actual value.
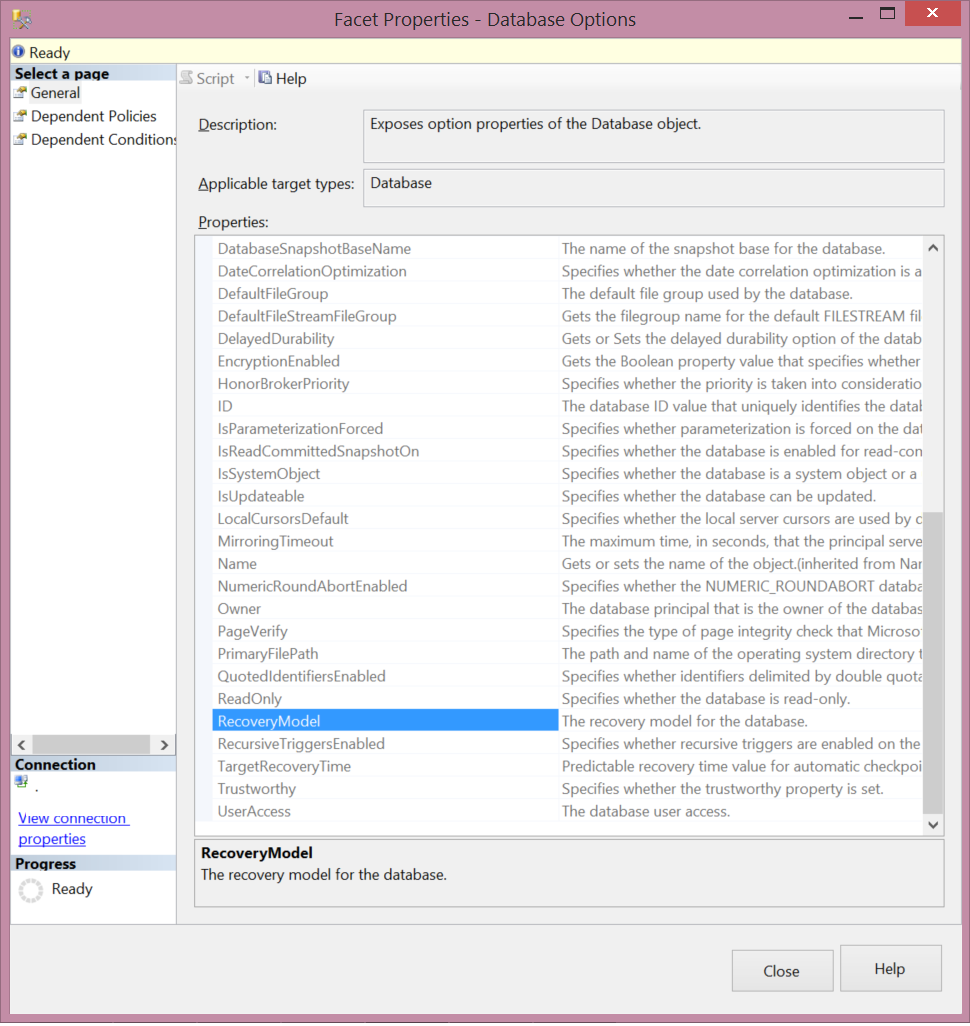
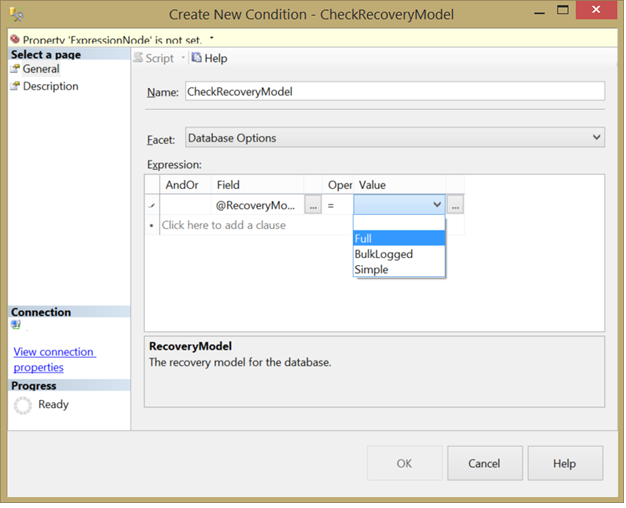
Let’s say that the RecoveryModel property of the Database Options facet is selected. The next step now is to create the condition that specifies the facet property value that will be compared with the actual evaluated value. To create a condition, right-click on Conditions node from the Policy Management and choose New Condition:

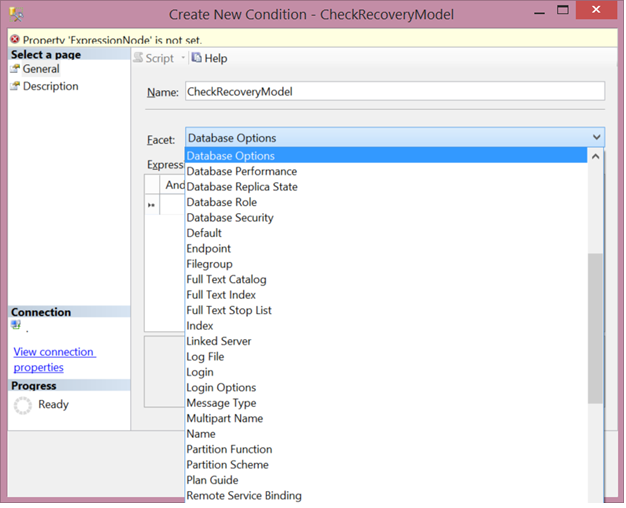
In the General page of the Create New Condition window, write a meaningful name for the created condition in order to distinguish it when creating the policy. Choose the facet that your condition depends on from the drop down list, which is the Database Options facet in our case as follows:
To build the condition, choose the facet’s properties that you will include in the Expression area of the Create new Condition window below:
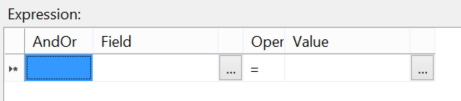
Click on the dots beside the Field box to view the Advanced Edit window below to choose the facet property that you will use in your condition. Choose the property and click OK.
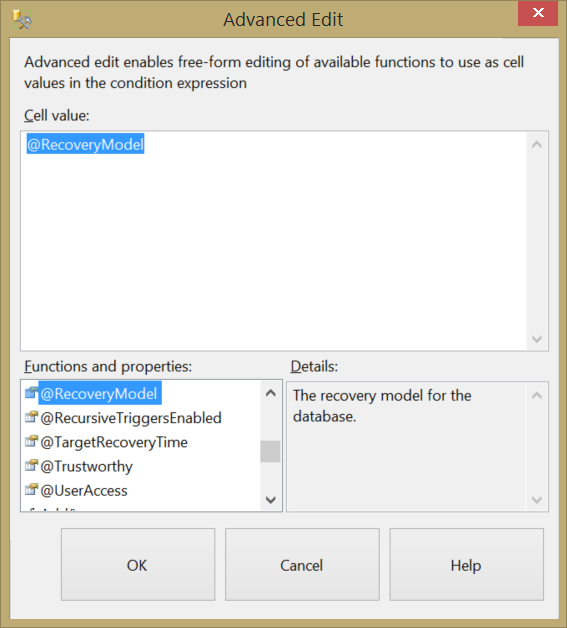
Once you choose the facet property that will be evaluated, you need to choose the property value that will be compared with the actual value in the evaluation process. This value can be selected from the Value drop down list in the Expression area, which is Full recovery model in our example, as follows:
You can choose more than one property and value when creating the condition with the ability to perform And / Or operations between these values. After you finish the condition creation, click OK.
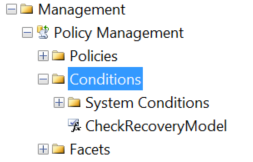
To make sure that the condition is created successfully, expand the Conditions node from the Policy Management where you should find the created condition:
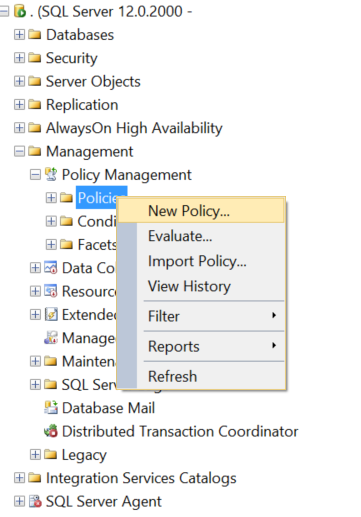
Now we are ready to combine the policy management components together to create the policy. Right-click on the Policies node of the Policy Management and select New Policy:
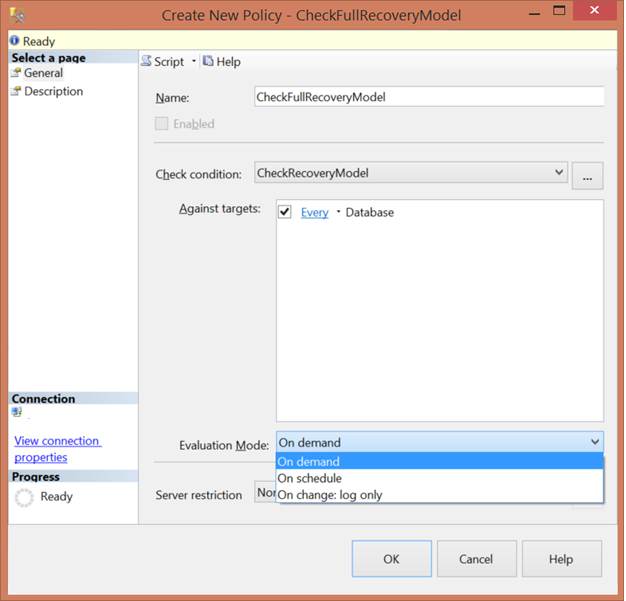
In the General page of Create New Policy window, write the name for your policy in the Name field. Browse the previously created condition in the Check Condition field as follows:
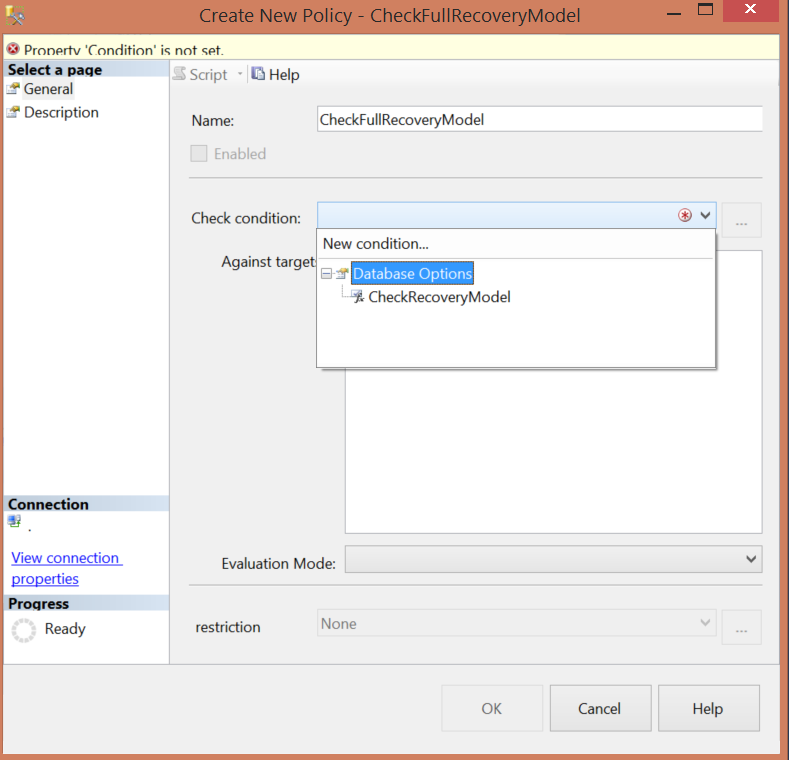
Now we need to specify the target that the condition will be checked against, which are all databases in our example here. You are requested also to specify the Evaluation Mode for the policy. As you can see, the On Change: Prevent option is not available in our example here, as it is used to prevent only the operations that can be rolled back. Choose the suitable evaluation mode and click OK.
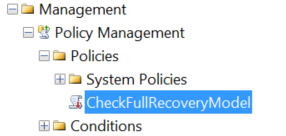
Expand the Policy node of the Policy Management to ensure that the policy is created:
To summarize what is done till now, we have created a policy that check if the recovery model of all databases hosted in the current SQL instance is FULL or not. And this policy will be evaluated on demand.
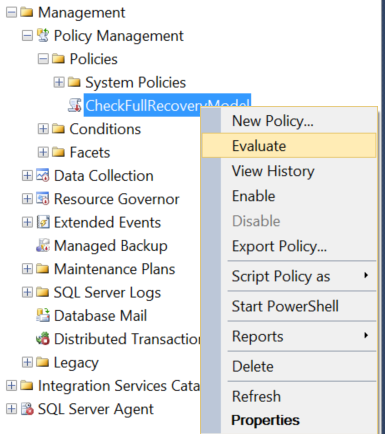
Let’s evaluate the created policy against the defined target manually, ass the selected evaluation mode for our policy is On Demand. To evaluate the policy, right-click on the created policy and select Evaluate as below:
The Evaluate Policies dialog box will be displayed, showing the result of the policy check per each database as follows:
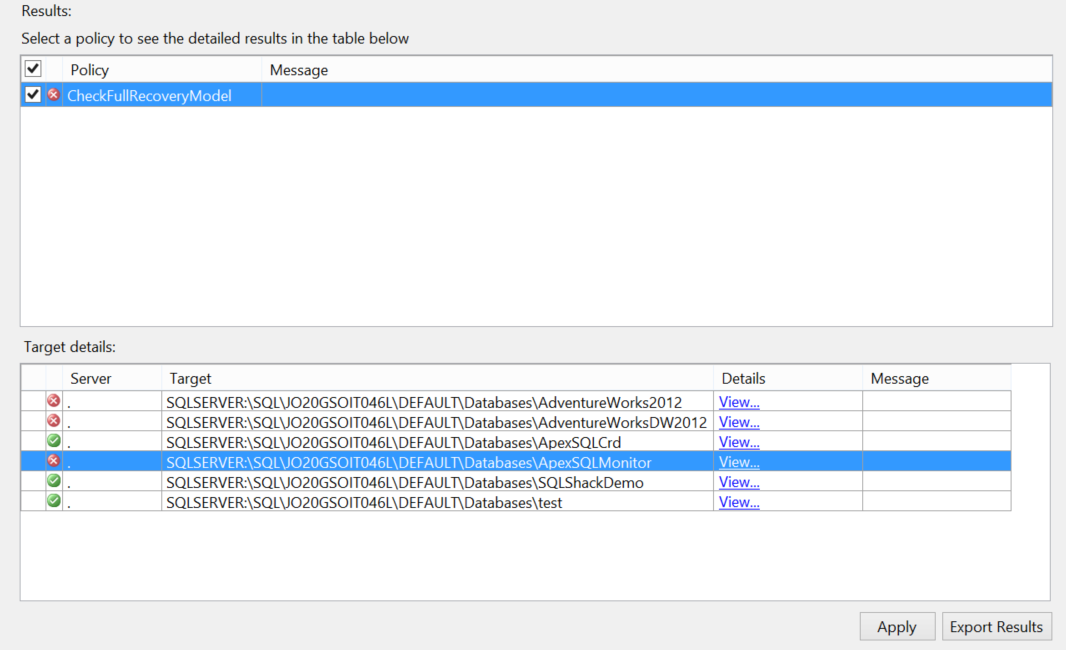
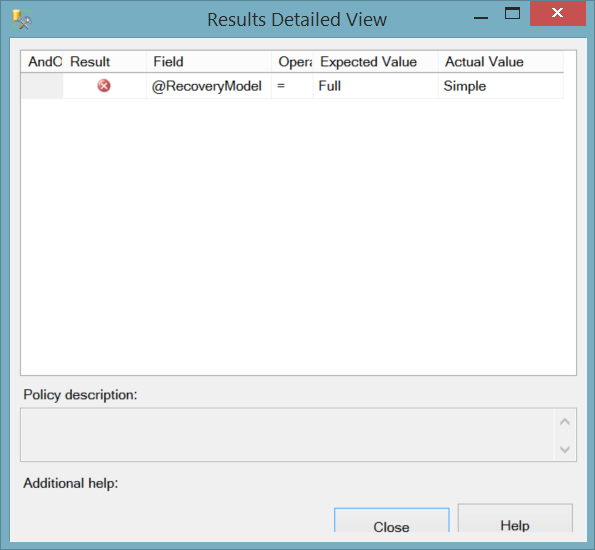
As you can see from the previous result, three databases matched the policy condition and three databases didn’t match the condition. If you click on the details View link beside each database, the result details view window will be displayed showing the difference between the actual value and the expected value by the policy as below:
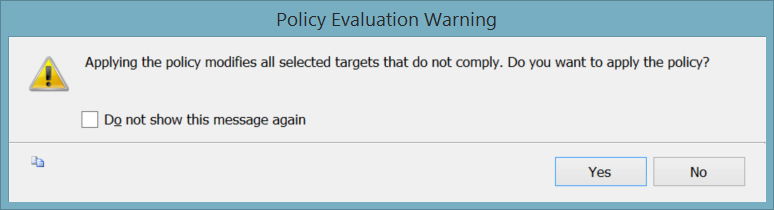
A nice feature that you can take benefits from, in the policy evaluation dialog box, clicking on the Apply button will change the target’s facet property value that doesn’t match the policy’s expected value to match the policy condition. In our example, if we click Apply button in the previous result window, the recovery model of the three databases that didn’t match the policy condition will be changed to FULL. If you click Apply, the below warning message will be displayed to make sure that you are OK with that changes:
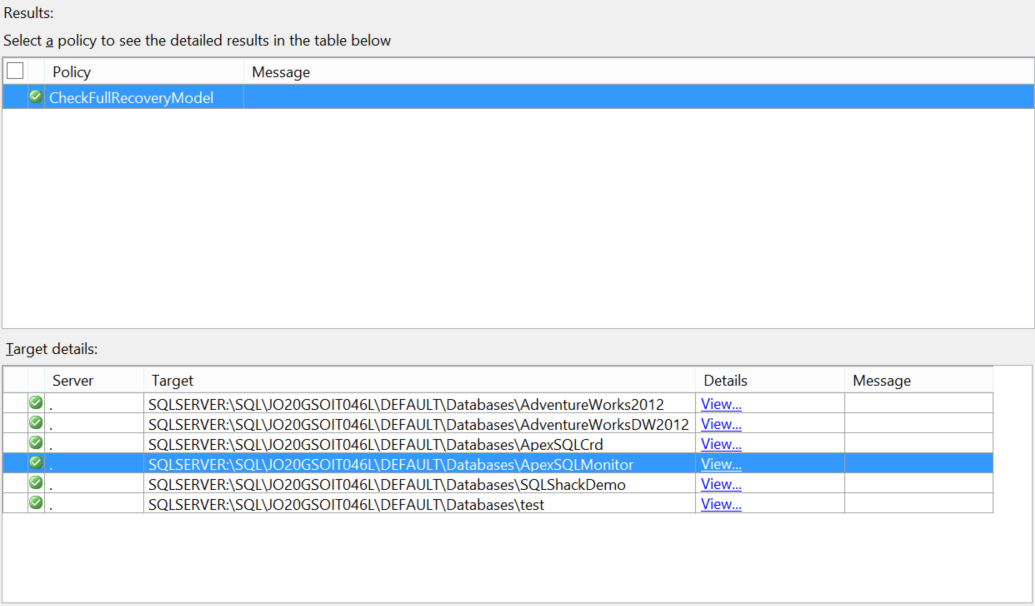
If you confirm applying the change, the policy will be evaluated again after changing the databases recovery model to FULL, evaluating the policy to true for all targeted databases as follows:
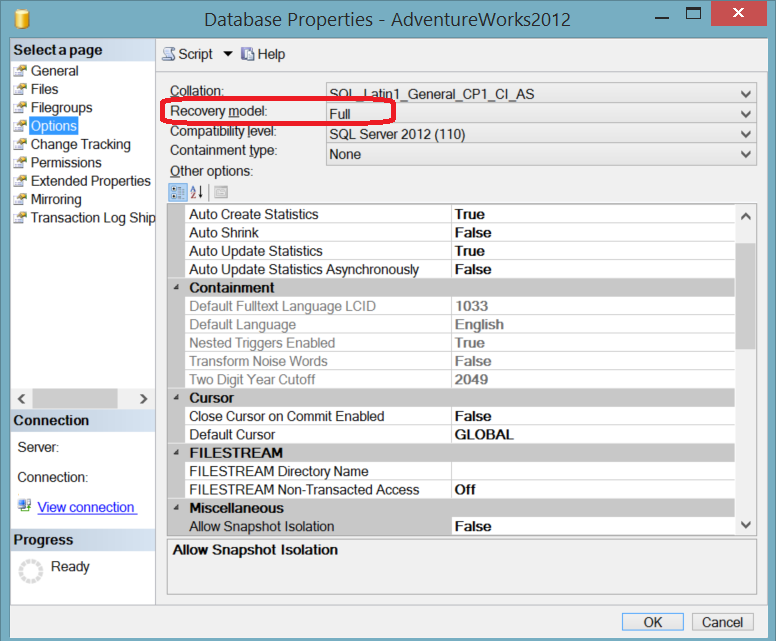
Let’s take one of the databases that didn’t match the policy’s condition at the beginning due to Simple recovery model and check if its recovery model is changed to FULL. From the AdventureWorks2012 database’s Options tab of the Database Properties window, it is clear that the database Recovery model is changed to FULL as follows:
Conclusion
SQL Server Policy-Based Management helps database administrators to be proactive, by automating policies that will save time and effort in checking and applying SQL Server baselines and standards. Policy-Based Management can be also applied on a group of servers if you have Central Management Servers group that you use to administrate a group of servers together in single action.
As a best practice, add the msdb system database to your backup job as it stores all the policies information. Also, using the On Change – prevent evaluation mode, you need to test it on a test environment first to make sure that it will not harm the server’s performance. You can also create alerts for the policies result, as it is logged to the SQL Server error logs with the 34050, 34051, 34052 and 34055 error codes.

He is a Microsoft Certified Solution Expert in Data Management and Analytics, Microsoft Certified Solution Associate in SQL Database Administration and Development, Azure Developer Associate and Microsoft Certified Trainer.
Also, he is contributing with his SQL tips in many blogs.
View all posts by Ahmad Yaseen
- Azure Data Factory Interview Questions and Answers - February 11, 2021
- How to monitor Azure Data Factory - January 15, 2021
- Using Source Control in Azure Data Factory - January 12, 2021