

In this article, we are going to learn about the windows internal database. Microsoft windows server and their components use the Microsoft WID database to store their data. It is used to store the relational data of the following services:
- Active Directory Right management service
- Windows server update services (WSUS)
- Windows system resource manager
When you configure any of the services mentioned above, the WID Database will be installed automatically. To access the database, we can use SQL Server Management Studio (SSMS).
Administrating the windows internal database is important but except for backing up the database, shrinking, and moving the database, we must not play with it. If we made any changes in the schema, the data will break the entire application.
In this article, we will learn the following:
- Install windows internal database using Server manager
- Connect to the WID using SQL Server Management Studio
- Connect to the WID using PowerShell
For demonstration, I have created a virtual machine and installed Windows server 2016. To connect to the WID, I have installed SQL Server Management Studio on the VM.
Install WID using Server Manager
If you do not want to install WSUS or other services, you can install the WID using Add remove server roles. Let me show you how we can install it.
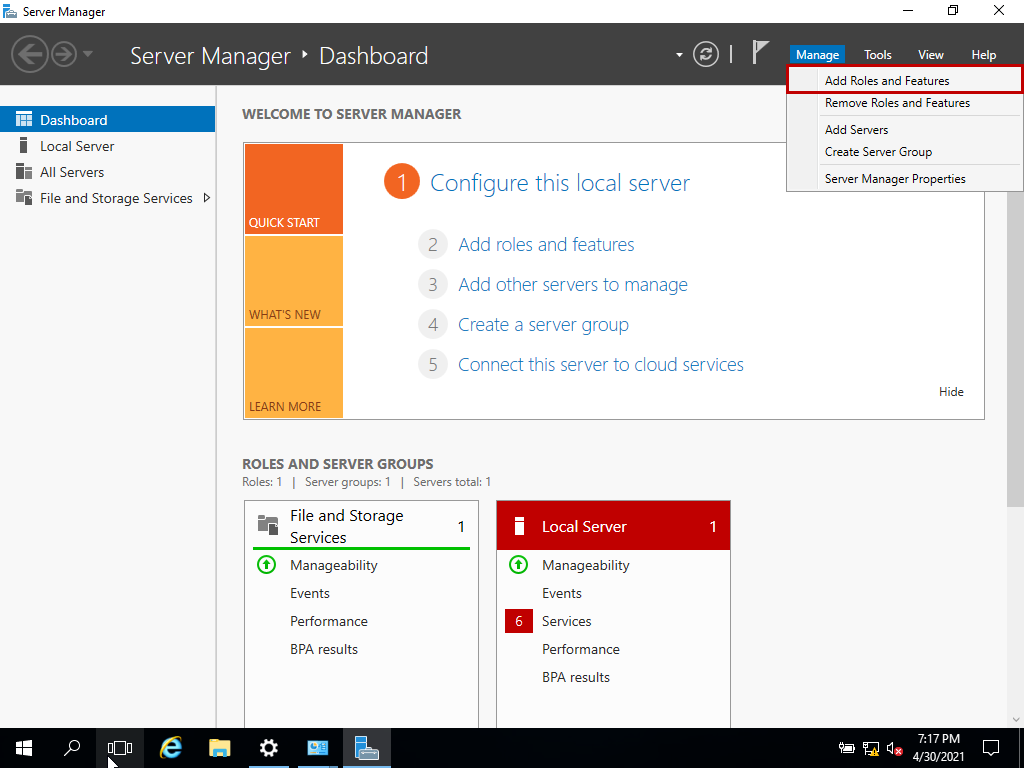
On windows server 2016, open Server Manager 🡪 Click on Manage 🡪Select Add Roles and Features.
The” Add Roles and Features” Wizard begins. The first screen shows the details of the task that are going to be performed by the wizard. You can skip the first screen.
The next screen is Select installation type. We are installing an internal database on a single server so choose Role-based or feature-based installation.

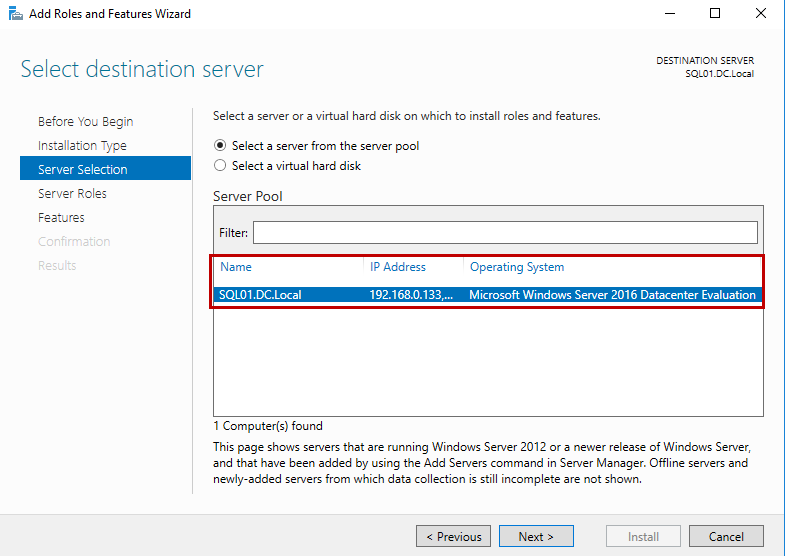
On the Select destination server screen, select the server on which you want to install the internal database. I am installing an internal database on my workstation, so I have selected SQL01.Dc.Local.
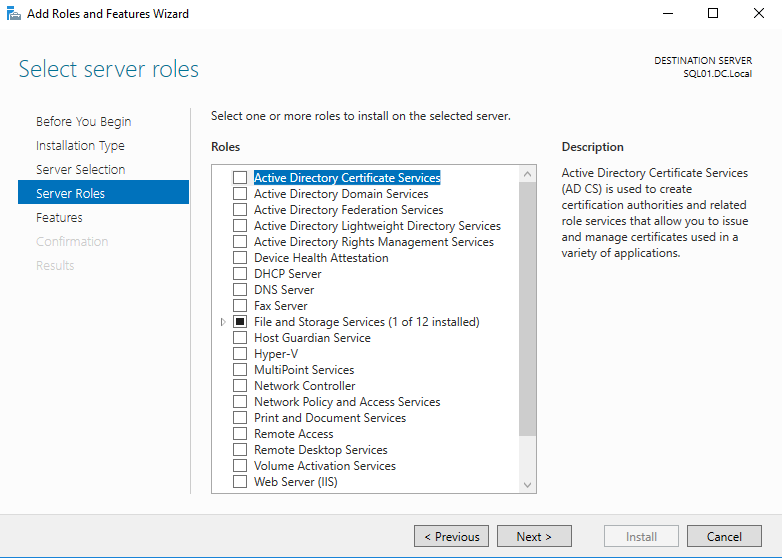
On the Select server role screen, you can view the list of the server roles that we can install on the server. WID Database is a feature so click Next.
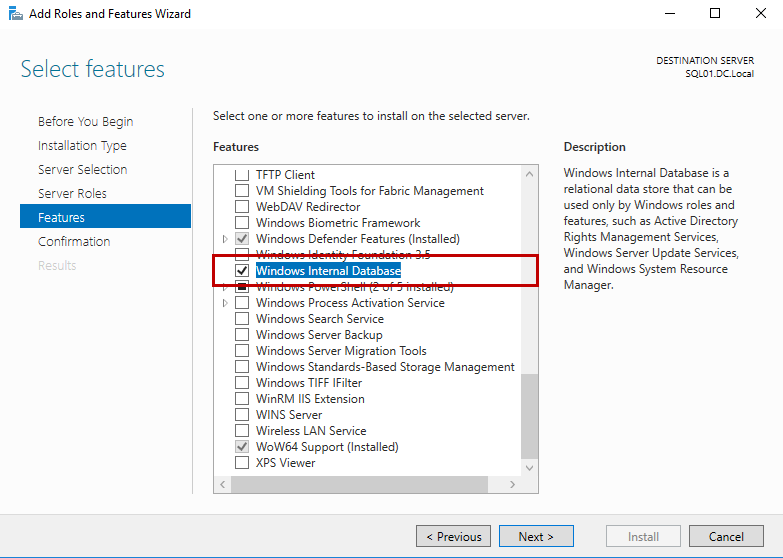
On the Select features screen, you can view the list of the features that can be installed on the server. We want to install windows internal server, so select Windows Internal Database and click on Next.
On the Confirm installation select screen, you can view the list of the features or server roles that are going to be installed on the server. Click on Install.

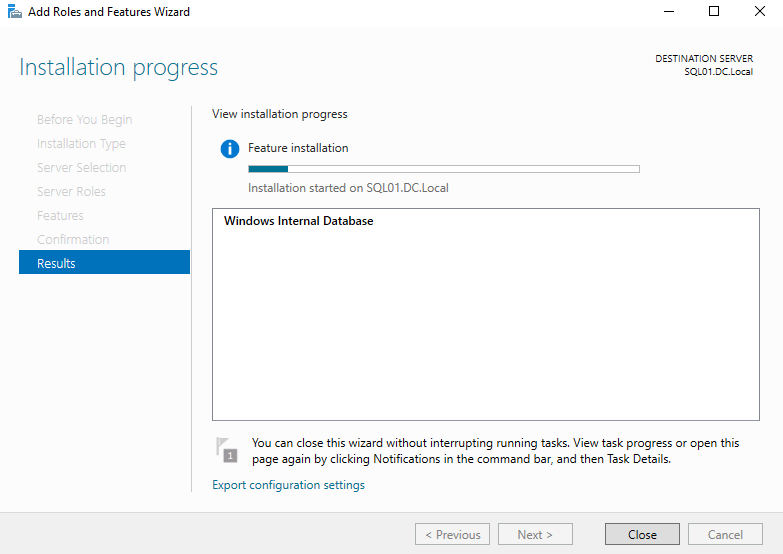
The installation process begins.
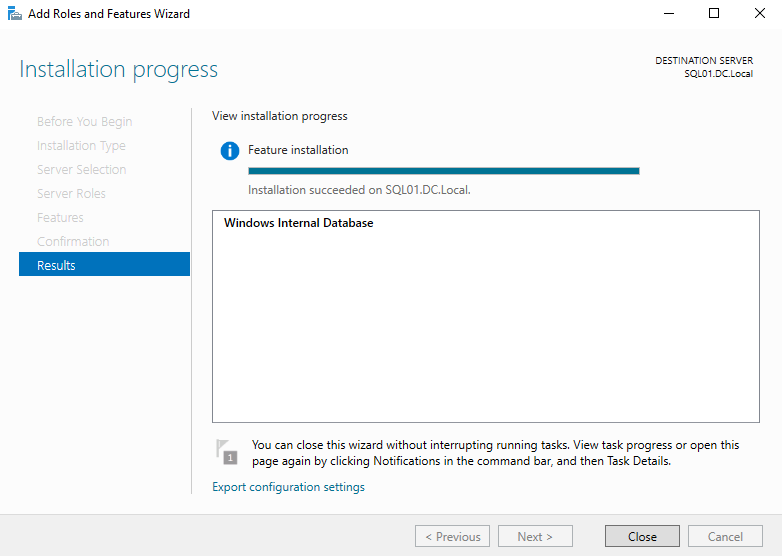
Once feature installation completes, click on Close to end the wizard.
When the internal database is installed, the data files and log files of the internal database are created on C:\WID location. In our case, the data files and log files of WID are created on C:\WID\data directory.

The internal database is created while configuring the WSUS server. In our demo, I have also configured the WSUS server on my workstation.
Now, let us try to connect it. We are using SQL Server Management Studio to connect to the WID database.
Connect to Windows Internal Database
We can connect to the WID using the Named Piped connection. To read more about named pipe connections, you can read the SQL Server Network configuration article.
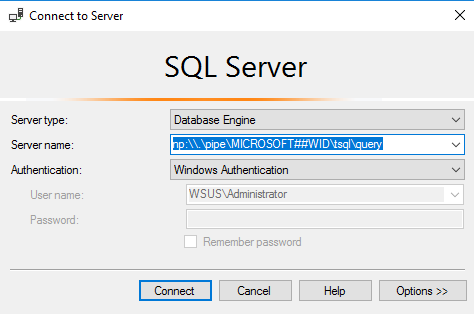
Open SQL Server Management Studio 🡪 On Connect to Server screen, specify the following named pipe connection string in the Server name textbox and click on Connect.
np:\\.\pipe\MICROSOFT##WID\tsql\query
Below is the screenshot of the Connect to Server screen.
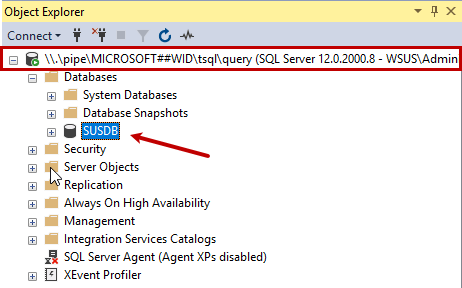
You can view the databases in the object explorer window. We have configured the WSUS; therefore, you can see the SUSDB in the object explorer.
Once connected, run the following query to view the version of the SQL Server.
|
1 |
Select @@version |

Let us view the location of the data and log files of the SUSDB.
|
1 2 3 |
Use SUSDB Go Select file_id,type_desc,name,physical_name,state_desc,max_size from sys.database_files |

Note: As I explained, we must not change the schema of the internal database because it will break the application. To demonstrate, let us change the schema by creating a table in a SUSDB. Create a table named Test in the SUSDB by executing the following query
123Use SUSDBgoCreate table Test(id int)
The table will be created successfully. After adding the table, restart the services using the following command.
|
1 |
Restart-Service "Windows Internal Database" |
Once services are restarted, connect to the SQL Server instance and open object explorer.
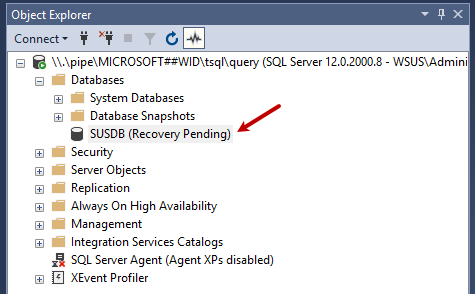
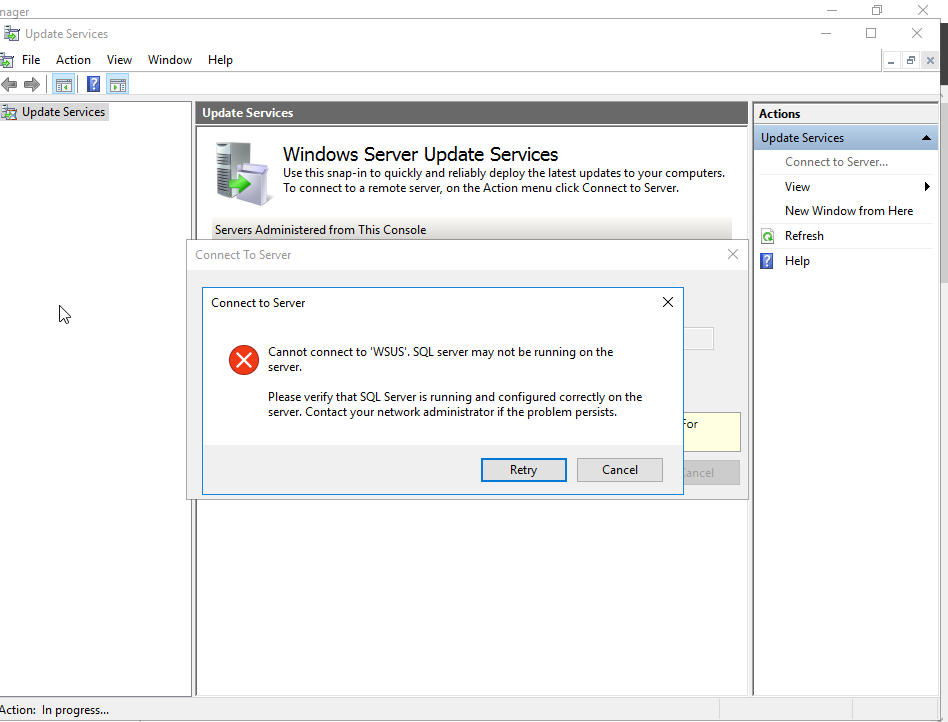
As you can see, the database is in Recovery Pending that indicates the SUSDB database is not operational. When we open the Windows Server update services, it will throw the following error.
To resolve this issue, we must re-install the WSUS services on the server.
Connect to WID using PowerShell
Now, let us understand how we can connect to the Windows Internal Database using PowerShell. We are using Invoke-SQLCmd command to connect and populate the list of the databases.
|
1 |
Invoke-Sqlcmd -ServerInstance np:\\.\pipe\MICROSOFT##WID\tsql\query -Database master -Query "select name from sys.databases" |

Summary
In this article, we learned about the windows internal database and its purpose. I have covered the following topics:
- Install windows internal database using Server manager
- Connect to the WID using SQL Server Management Studio
- Connect to the WID using PowerShell

He has expertise in database design, performance tuning, backup and recovery, HA and DR setup, database migrations and upgrades. He has completed the B.Tech from Ganpat University. He can be reached on nisargupadhyay87@outlook.com
- Different ways to identify and change compatibility levels in SQL Server - July 22, 2024
- Copy SQL Databases between Windows 10 and CentOS using SQL Server data tools - October 19, 2022
- Changing the location of FILESTREAM data files in SQL Database - October 14, 2022