
I will explore how to manage Azure blob storage using storage explorer. Azure blob storage is a storage solution to store various types of data at a massive scale in the cloud environment. If you have a large number of storage accounts in Azure storage, then it will be difficult to manage them. Microsoft has developed a desktop application to manage Azure storage accounts easily. This desktop application is known as Azure storage explorer which is used to manage Azure storage accounts. Read the attached article to learn how to download and install Azure storage explorer, “Getting started with Azure storage explorer”.
Azure storage explorer can be used to manage the below types of storage services.
- Azure blob storage
- Azure Files
- Azure Queue
- Azure Tables
- Azure CosmosDB
- Azure data lake storage
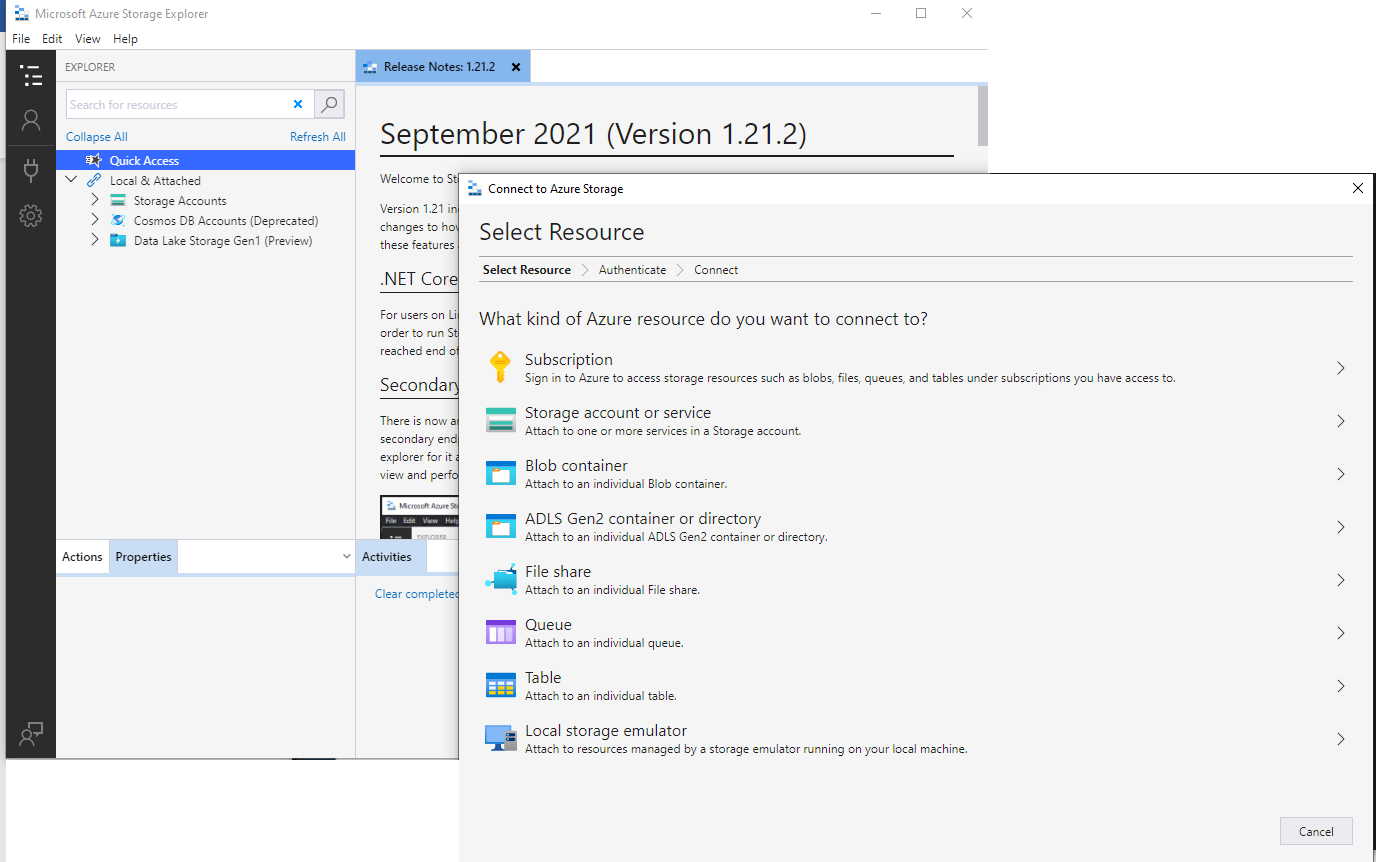
I assume you have already installed Azure storage explorer. Go ahead and launch it by clicking on its shortcut or icon from your desktop. Once this application will be launched, you will get the below screen to connect to Azure blob storage accounts or the Azure subscriptions. You can choose the desired option and follow the instructions to establish the connection to a storage account or to a subscription to display all storage accounts of that subscription.
Connect to Azure subscriptions
I want to list all my storage accounts and services in storage explorer so I will connect to my Azure account using the first option Subscription shown in the below image.
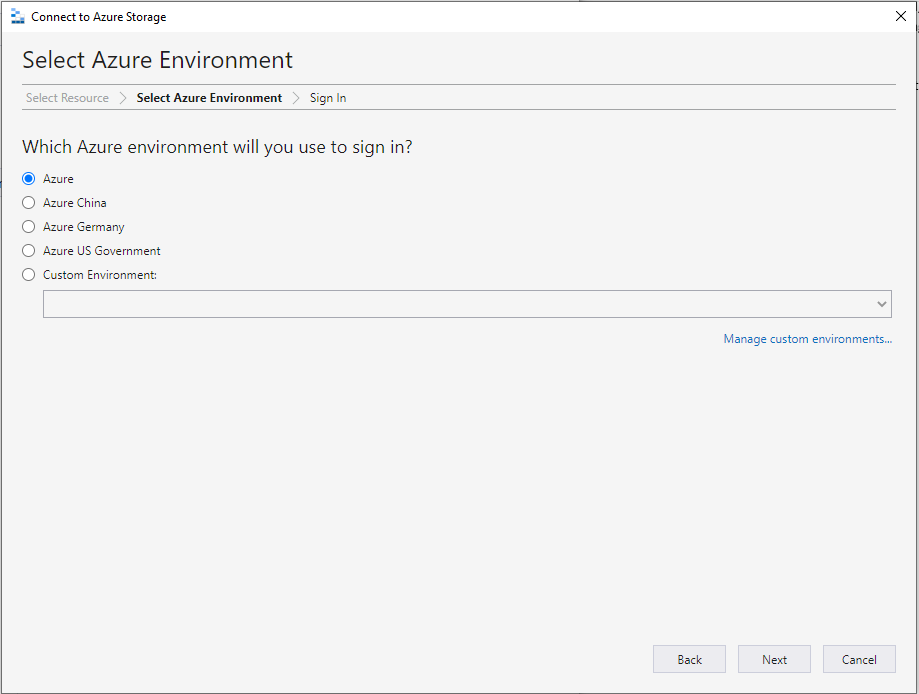
Once you will click on Subscription of the above image, it will display below the page to choose your Azure environment. I will choose Azure and click on the Next button to proceed.
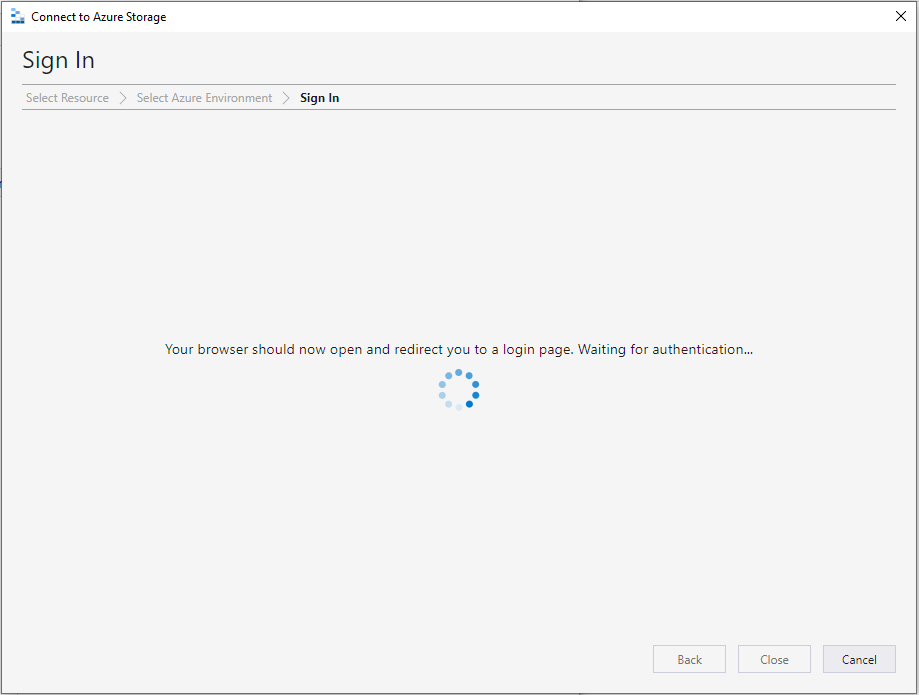
The below screen will come post hitting the Next button of the above image. The below screen will redirect you to the Azure login portal to enter your Azure login credentials through which all storage accounts will be accessed in Azure storage explorer.
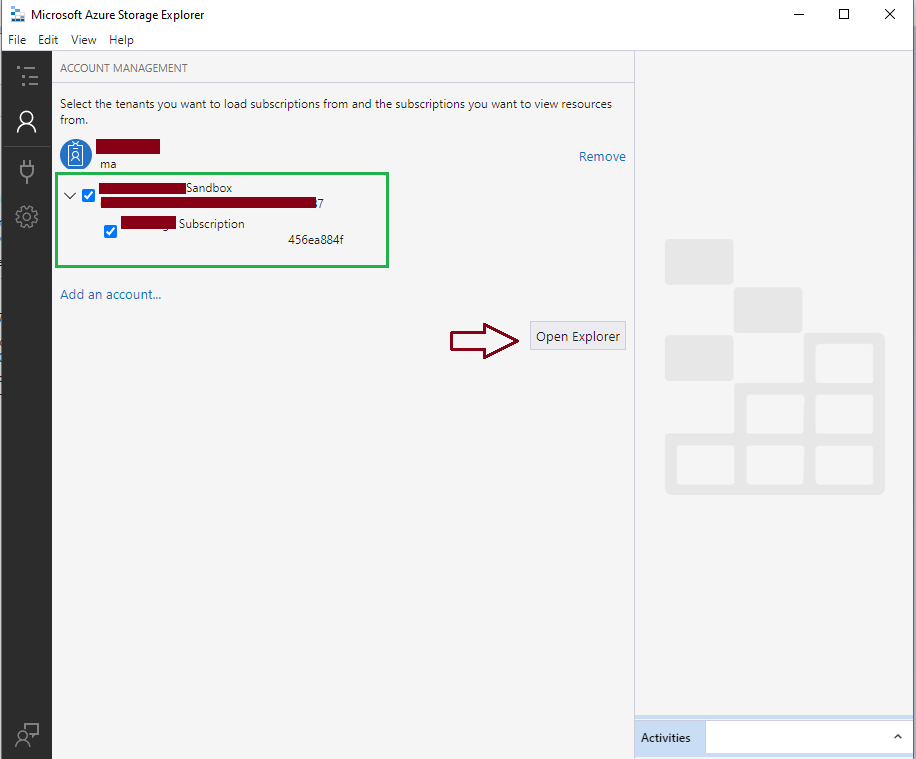
Once you enter the Azure login credentials, you can see your Azure account details along with its subscription details in the below image. Click at the checkbox of this subscription and hit the Open Explorer button showing near the dark red arrow.
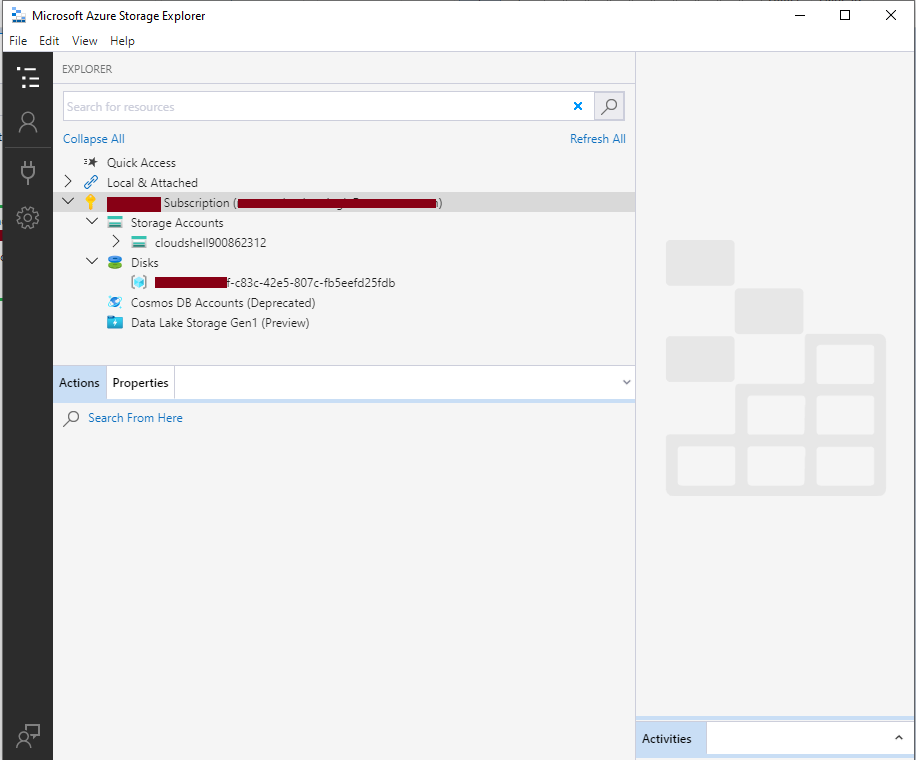
You will see the below details in object explorer. Here you can see almost all types of storage solutions available in the Azure cloud. We can see storage accounts, disks, Cosmos DB accounts, and Data Lake Storage Gen1 (preview) options. You can get Azure blob storage, Azure files, Azure queue, and Azure tables by expanding the storage account names.
We can see a storage account showing in the above object explorer. Let me create another storage account under which I will show you various activities which we can do using Azure storage explorer. I will create this storage account on the Azure portal and validate it by accessing it in Azure storage explorer.
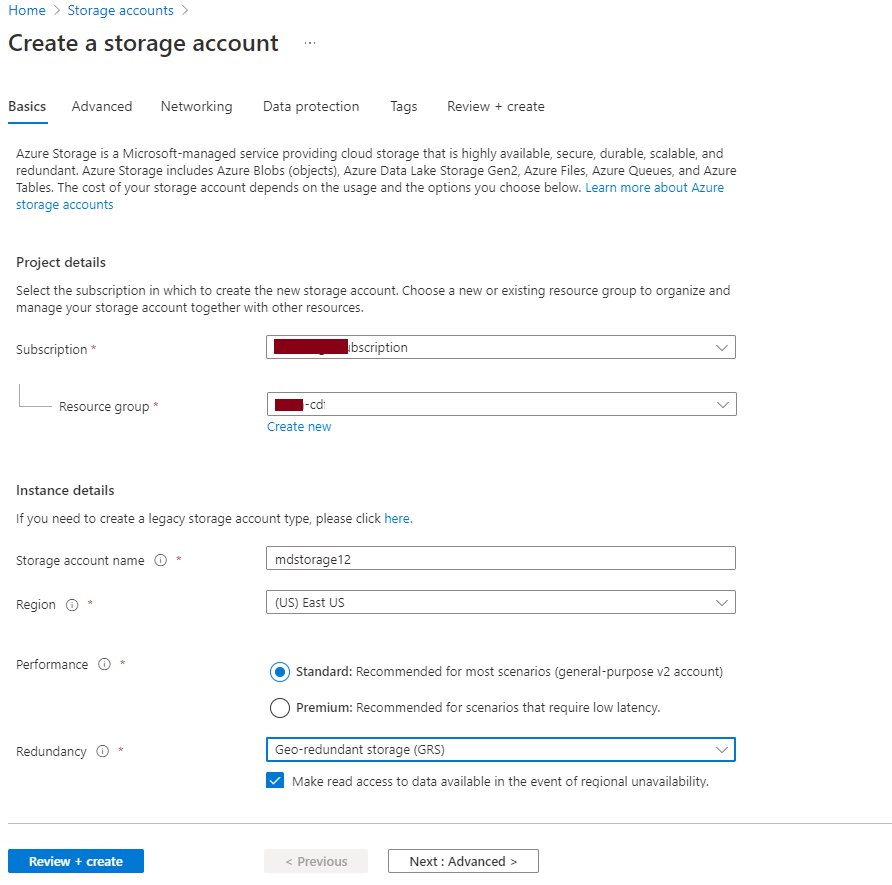
Log in to the Azure portal. Search Storage accounts. Click on the create button on the storage accounts page. You will get the below screen to fill in the details of storage accounts. I will not explain much about these options as I have already explored them in another article which I would recommend you read “Getting started with Azure blob storage”. Once you fill in all details, hit the Review + create button to initiate this deployment.
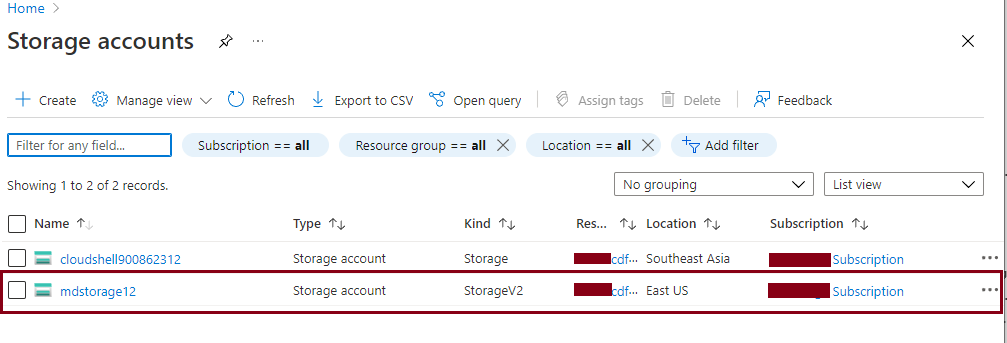
Now, you can see new storage account mdstorage12 is created in the below screen. Let’s access this storage account in Azure storage explorer.
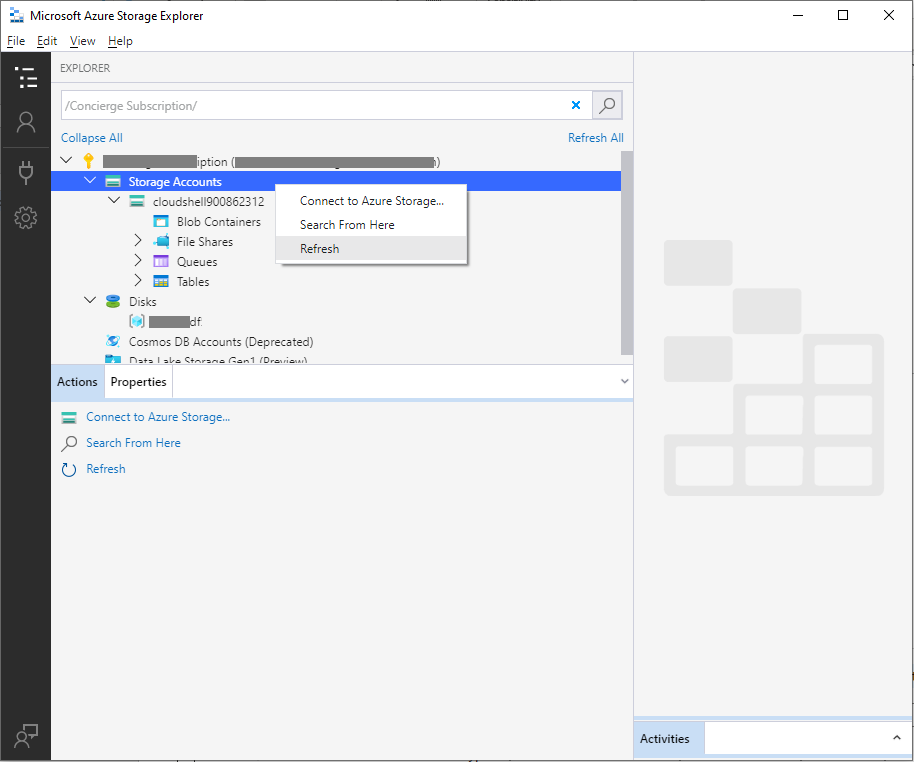
Open Azure storage explorer which you had connected in the above steps. Right-click on Storage Accounts option and click on the Refresh button as shown in the below image.
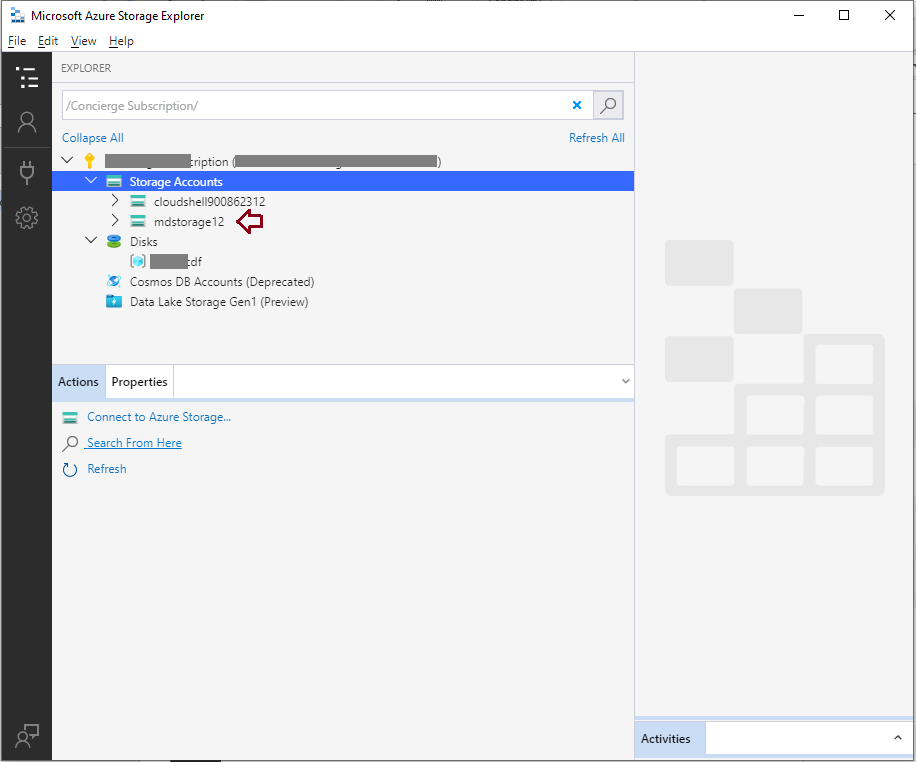
You can see mdstorage12 storage account is showing under the Storage Accounts tree now. Now I will go ahead and perform various activities on this storage account using this application to demonstrate to you how useful Azure storage explorer is to manage Azure blob storage from your desktop.
Perform storage account level changes
We have created a new storage account named mdstorage12 in the above section and connected it to this Azure storage account using storage explorer. Now let’s explore what all activities we can perform for storage accounts using this desktop application storage explorer.
There are 2 ways to get all activities which we can perform for a storage account using storage explorer.
- One is by right-clicking at the storage account as shown in the below image where the list of activities is displayed
- Another way is by looking at the Actions tab after selecting storage account as given at the bottom of the object explorer window which is also highlighted with a dark red arrow
There are a lot of activities we can perform directly from storage explorer on any storage account. We can open selected storage account on the Azure portal, get Shared Access Signature, copy keys, set access tiers, etc.
Let me show you performing a specific activity for this Azure blob storage account mdstorage12. Suppose you want to get the shared access signature of this storage account then right-click on storage account in object explorer and choose Get Shared Access Signature… as shown in the below image. You can choose any other option in case you want to perform that activity.

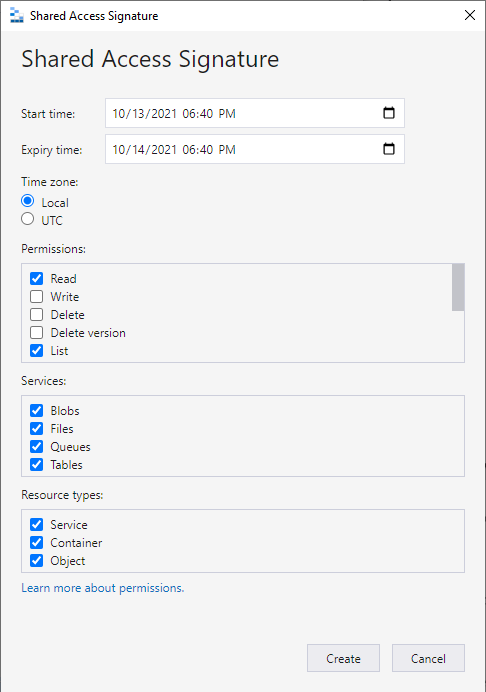
The below screen will appear once you click on the above option. You can review the details, make changes as per your desired need and hit the Create button given bottom of this window.
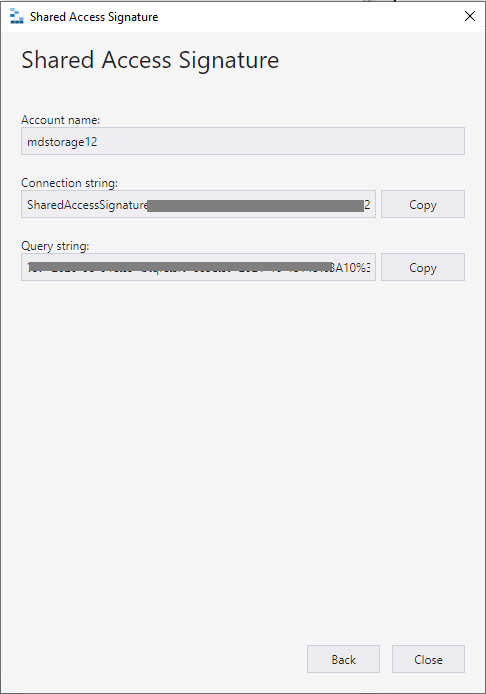
The shared access signature will be displayed on the next page as shown in the below image. You can click on the Copy button to copy these signatures for your requirement.
 ,
,
Similarly, you can perform other activities on Azure blob storage accounts using storage explorer. Go ahead and practice other options to make you familiar working with Azure storage explorer.
Create an Azure blob container
Now, I will show you how to create an Azure blob container under the new storage account mdstorage12 using storage explorer. Expand storage account name in object explorer, you can see all storage options blob container, file shares, queues, and tables as shown in the below image. You can right-click these options to get a list of activities that we can perform for each Azure storage option.
As we have to create Azure blob storage so right-click on Blob Containers and choose Create Blob Container options.

You will get the below text box to enter the name of the blob container. Type the name of your blob container in the text box and press enter to create the blob container.
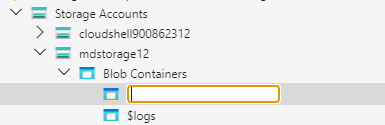
Once you named your blob container, an additional explorer window will appear in the right-side pane of the object explorer window. You can see various options under this blob container in right-side pane. Let’s go ahead and upload a document to this blob container.
Upload a document to Azure blob storage
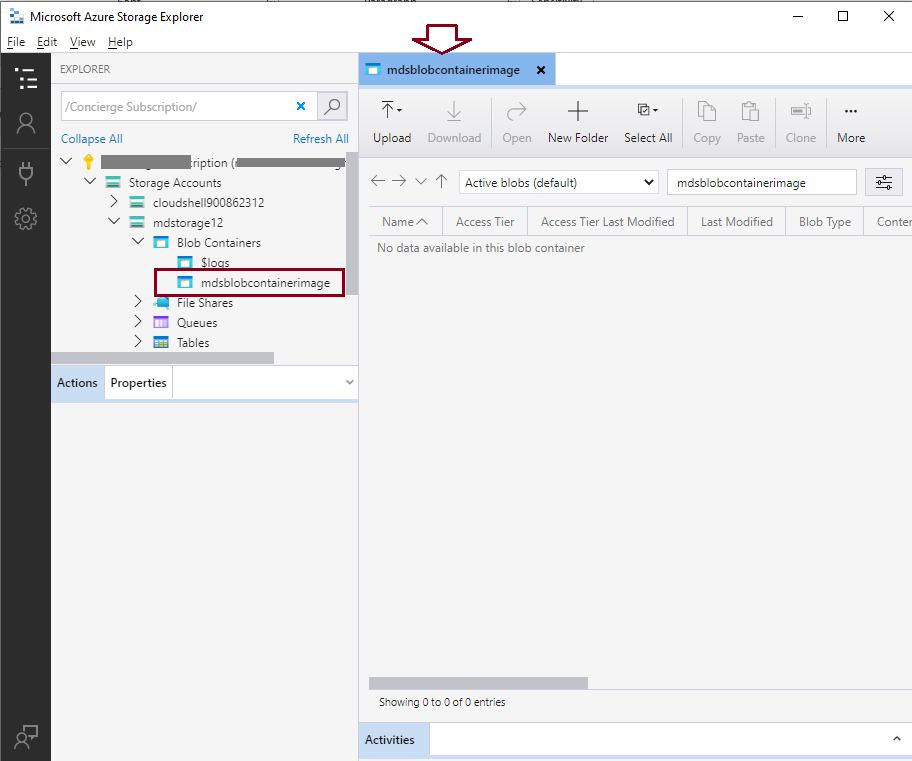
We have created a storage account mdstorage12 and a blob container named mdsblobcontainerimage inside that storage account. Now we will upload a file to showcase how to upload blob data in Azure blob storage using storage explorer.
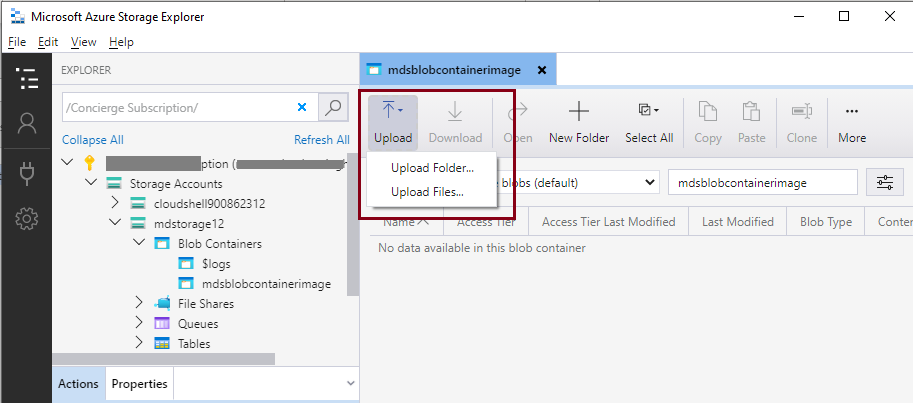
Click on the Upload button shown in the right-side pane of the newly created blob container. You will get 2 options; one is the upload folder and another one is upload files. Choose your option according to your data to be uploaded. As I have to upload a blob document so I have chosen Upload Files… from the below screen.
The below screen will appear once you click on the upload files option. You can choose your file by accessing your desired location by clicking at three dots showing near the red arrow. Next, you can choose the blob type, Access tier, destination directories, and tags if any from the below image.
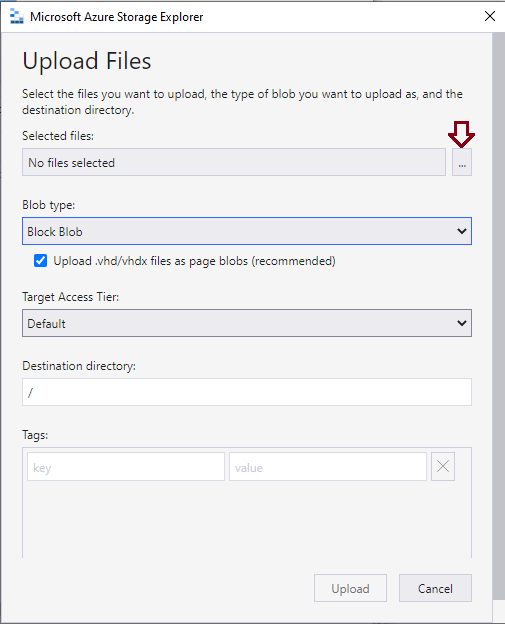
I have clicked at 3 dots and uploaded a document, chooses block blob as blob type, kept the default setting for access tier, and added a tag type during this file upload. Once you choose all options, hit the Upload button to upload this file to Azure blob storage.

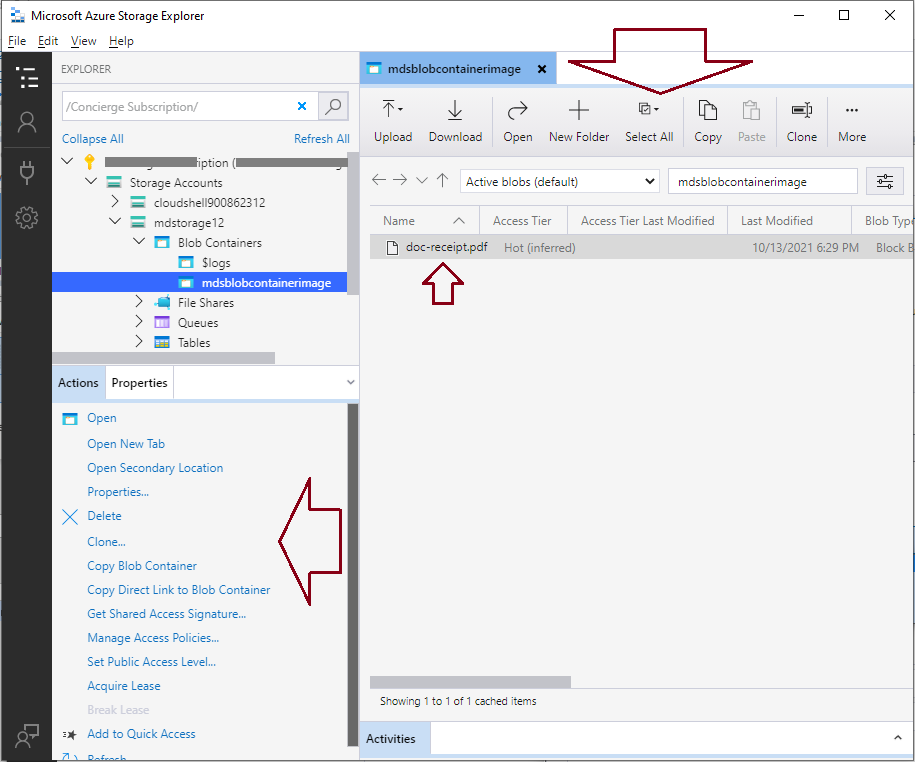
Once the file will be uploaded, you can see it in the newly created blob container. You can see the uploaded file in the details pane of the blob container. You can also see multiple activities which are highlighted in dark red arrows that can be performed on this uploaded file and blob container.
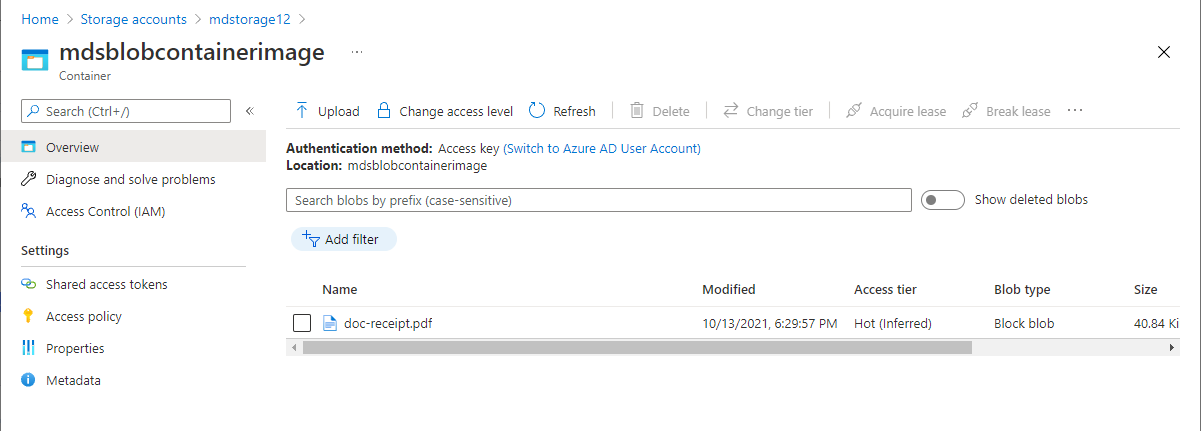
As the file has been uploaded to Azure blob storage using storage explorer so let’s validate it in the Azure portal. Here, we can see the same file is shown in the blob container in the below image.
Perform various activities at blob container level
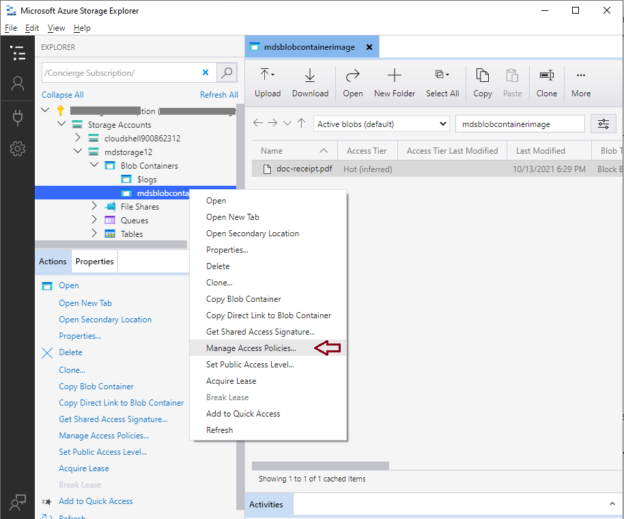
There are various activities we do for blob containers; you can get that list of activities by doing a right-click on the blob container as shown in the below image. You can also get that list in the Actions tab when you click on the blob container.
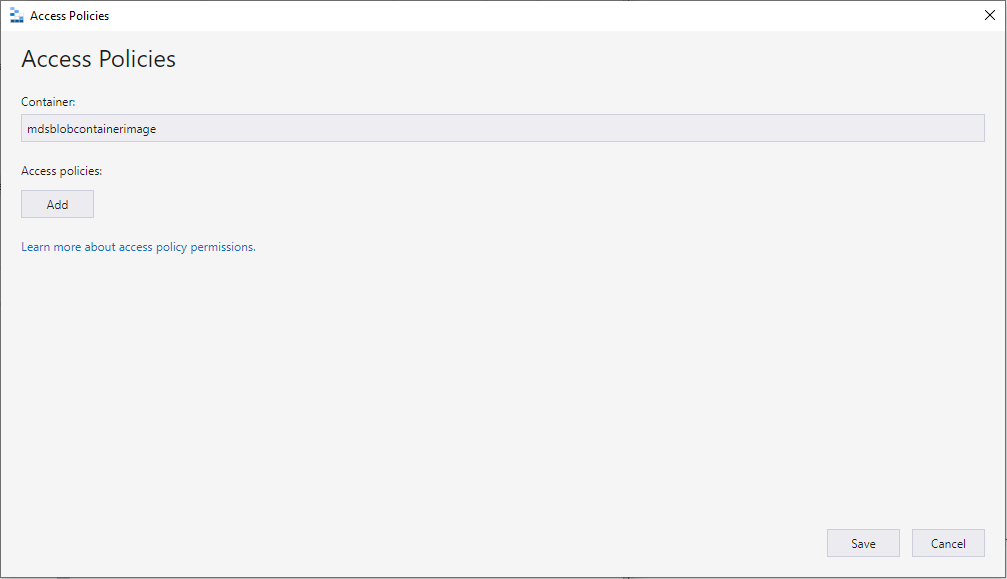
Let me show you an example by performing an activity named Manage Access Policies…

Once you will click on this option, you will get the below window to add the access policies for this container. Click on the Add button shown in the below image.
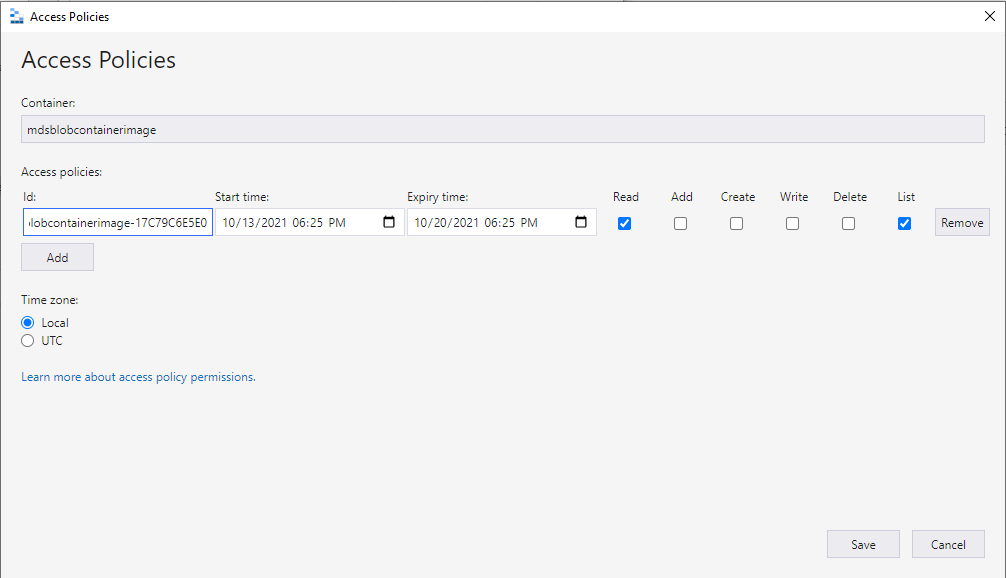
You will get a row under Access policies as shown in the below image. Here you can apply your desired access policy for this blob container and click on the Save button to store and apply this access policy.
Similarly, you can perform any activity that is shown in the list of the first image of this section.
Delete an Azure blob container
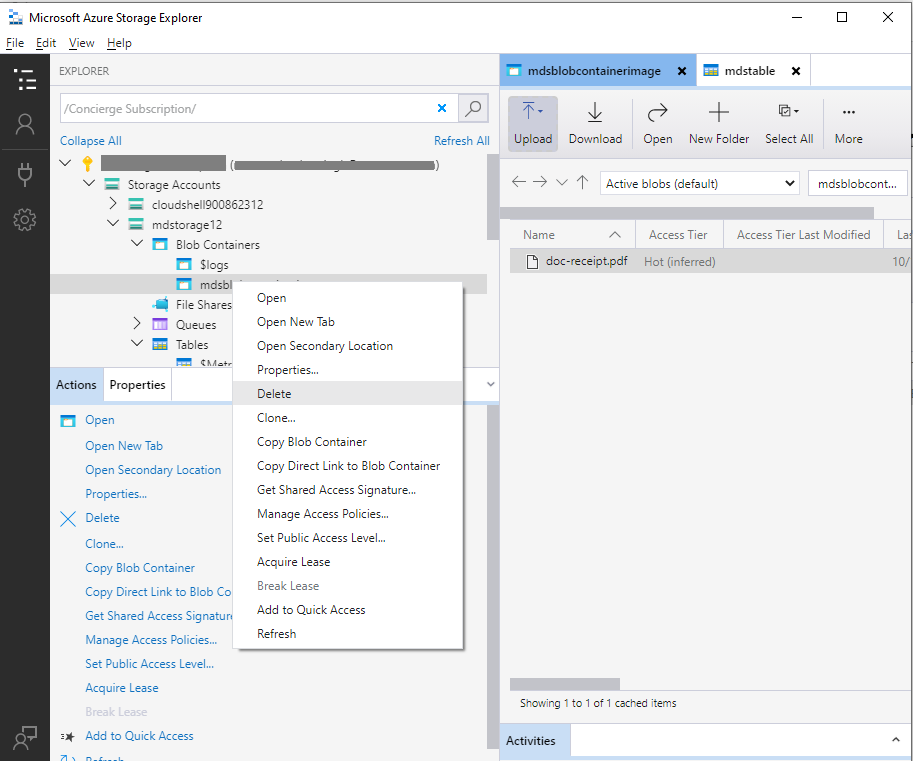
This section will explore the steps to delete a blob container of an Azure blob storage account. Right click at your identified blob container and choose the Delete… option.
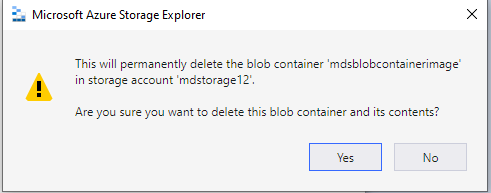
Once you click on the Delete option, it will display below the pop-up window stating that this will permanently delete the blob container in the storage account given Azure blob storage account. Make sure to back up the data if it will be needed in the future.
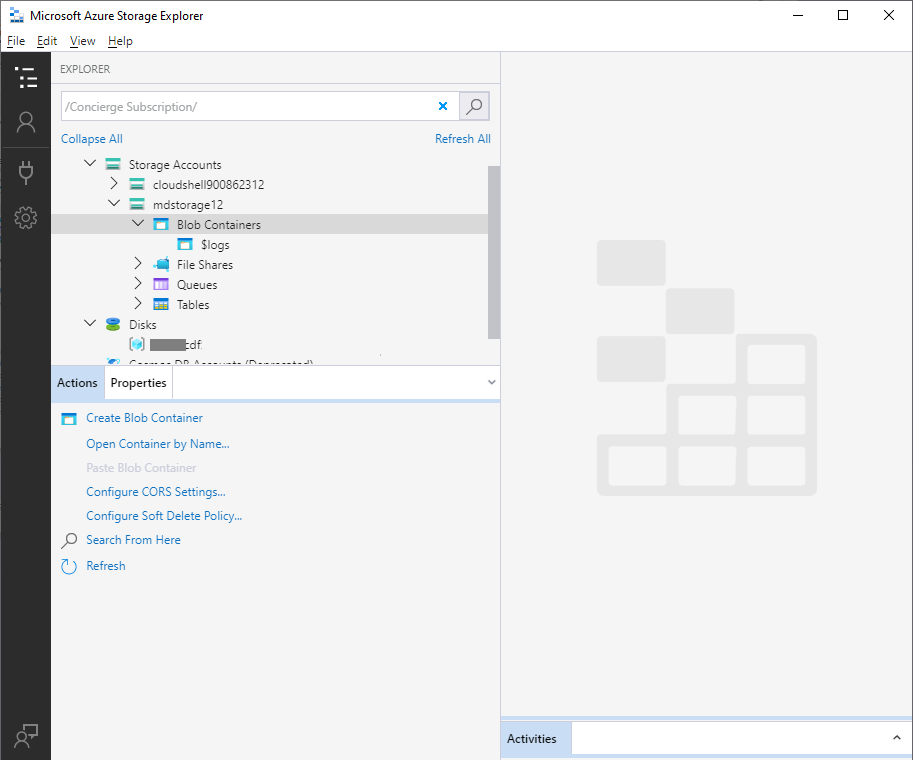
You can see deleted blob container is not showing in the storage account mdstorage12 in the below image.
Manage other Azure storage options
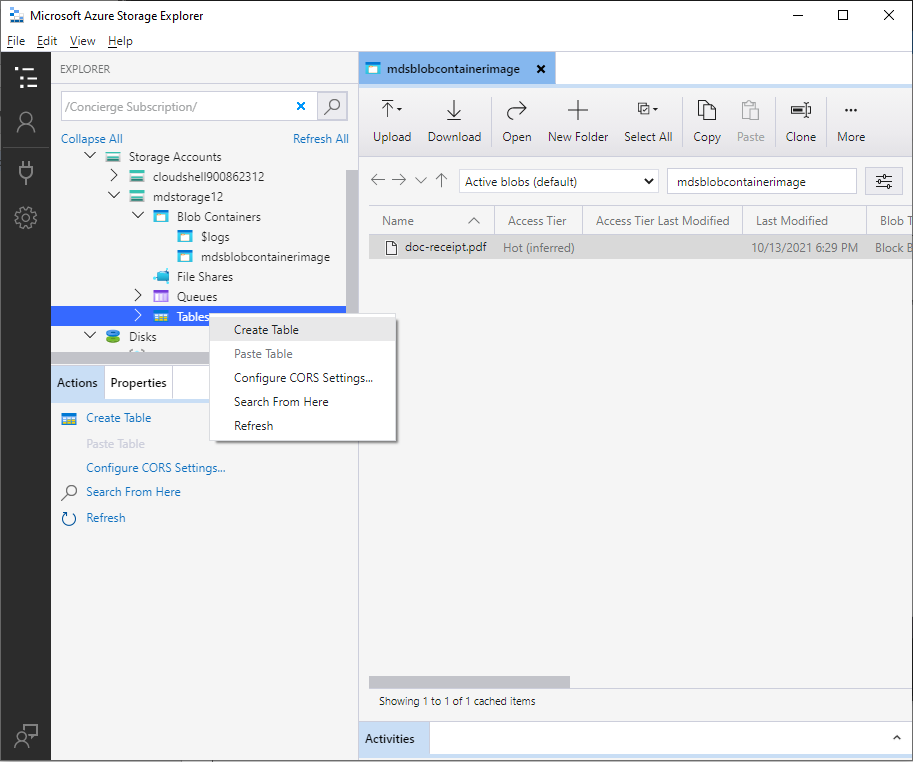
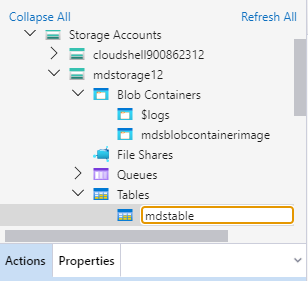
We can also perform various activities for other Azure storage options like file shares, queues, and tables. Let me show you how to create an Azure table in storage account mdstorage12. Right-click on any option like I did for Tables and choose Create Table
You will get the below text window to enter its name. Press enter after naming your Azure table storage.
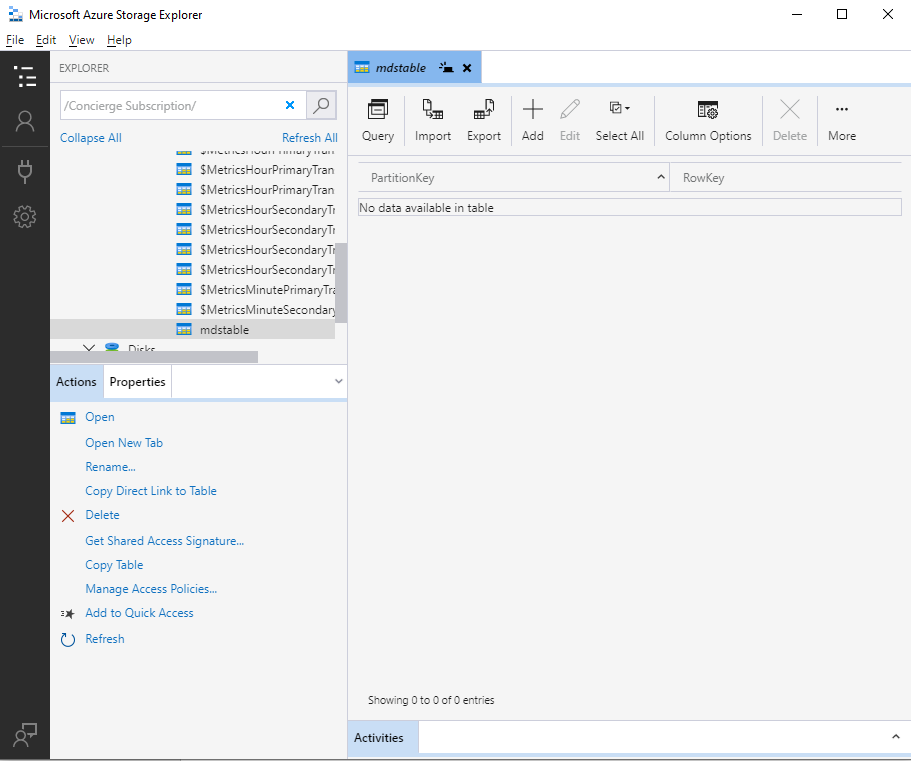
You can see Azure table has been created along with multiple internal objects. If you look in the right side pane, you can see various options like Import, Export, Add and column options. You can go ahead and design your table as per your desired requirement.
Conclusion
Azure storage explorer is a very useful desktop tool to manage Azure storage. I have explored managing various activities for Azure blob storage. I have also shown how to create, delete and access its properties using Azure storage explorer. Try using this tool to manage your Azure storage accounts without accessing the Azure portal.

He loves to talk and write about database technologies. He has lead and delivered many projects from designing to deployments on Migrations to the cloud, heterogeneous migrations, Database consolidations, upgrades, heterogeneous replication, HA / DR solutions, automation, and major performance tuning projects.
You can also find him on LinkedIn
View all posts by Manvendra Singh
- Configure backup storage redundancy for Azure Cosmos DB account - May 15, 2024
- Difference between SQL SELECT UNIQUE and SELECT DISTINCT - January 16, 2024
- How to do a group by clause - April 12, 2023