
In this article, we will learn how to configure the Azure Search instance to import data from Azure Cosmos DB.
Introduction
Azure Cosmos DB is a multi-model type database that supports different types of APIs like Core SQL, Mongo DB, Gremlin, and others. This makes it a versatile data repository for hosting various types of data. Data consumption using a search-based mechanism is one of the most popular forms of consuming data. Azure Search is one of the key services for addressing search use-cases on the Azure cloud platform. In the last article, we learned how to create an Azure Search instance that can be used with Cosmos DB. Once an instance exists, the next step is configuring the Azure Search instance such that it can integrate with the data source and import records into its index which will serve the search queries. This article will show you the way to configure the Azure Search instance to import data from Cosmos DB.
Pre-requisites
To follow this exercise, we need to have an Azure cloud account with administrative privileges to operate Azure Search as well as Cosmos DB service. It is assumed that this setup is already in place. Also, we need to have at least one database with one container in it that would have some items added to it. This was explained in my last article on Cosmos DB and Azure Search, Creating Azure Search service instance for Azure Cosmos DB. It is assumed that this pre-requisite is already in place, before following the rest of the steps explained below.
Configuring Azure Cognitive Search
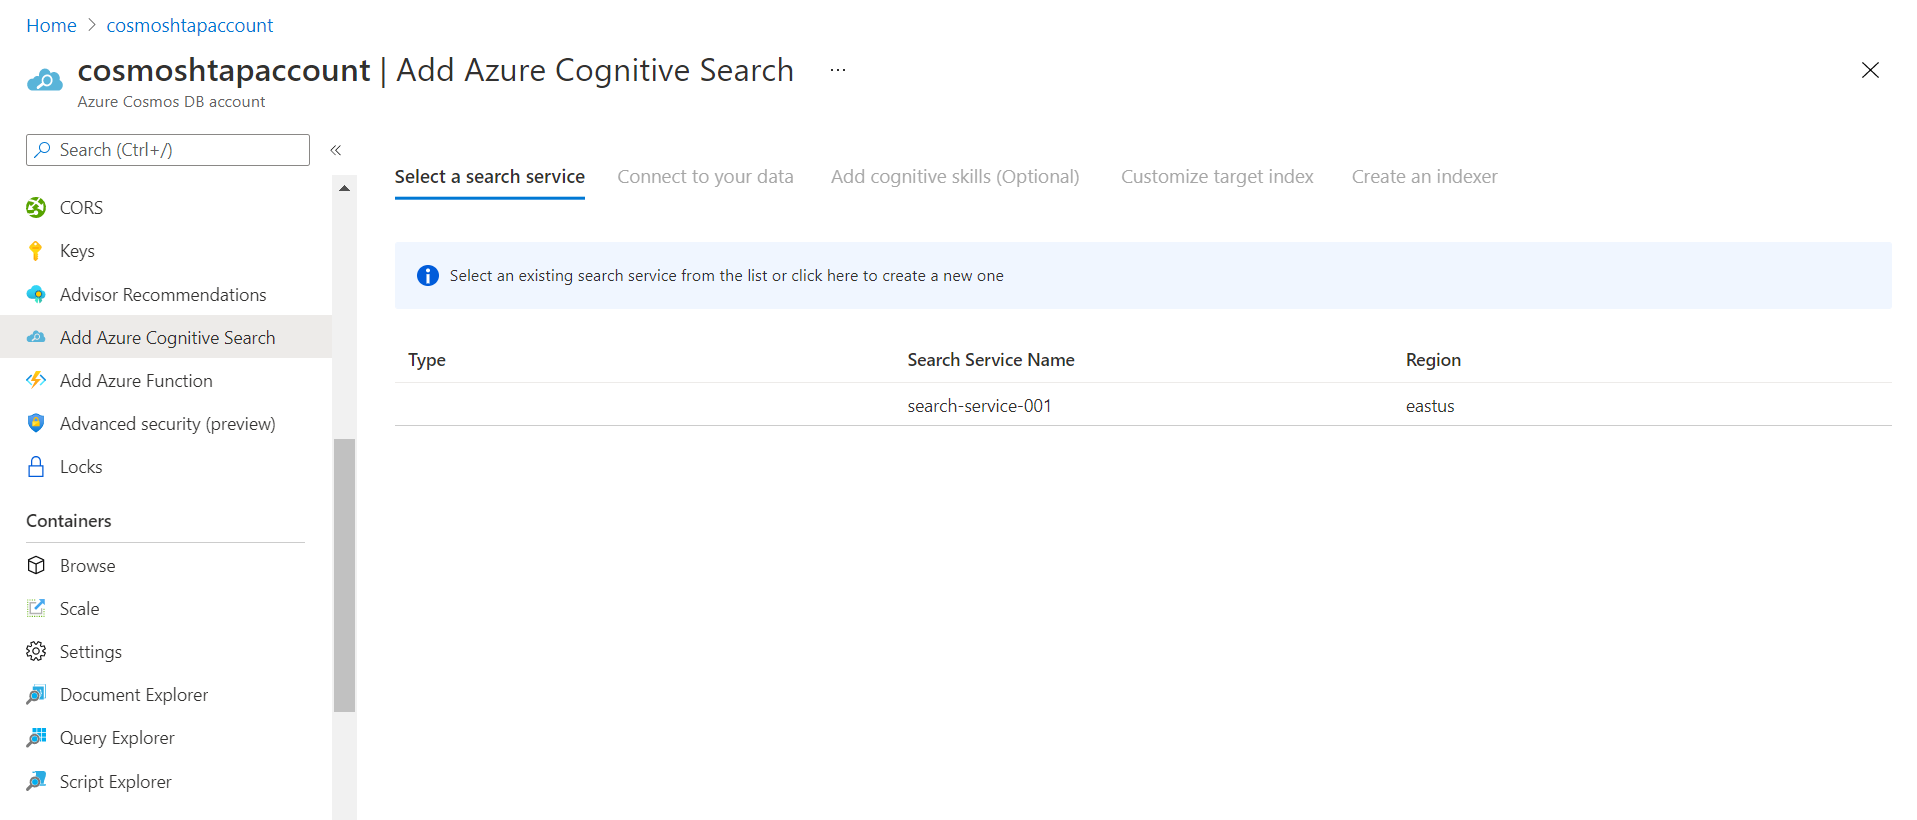
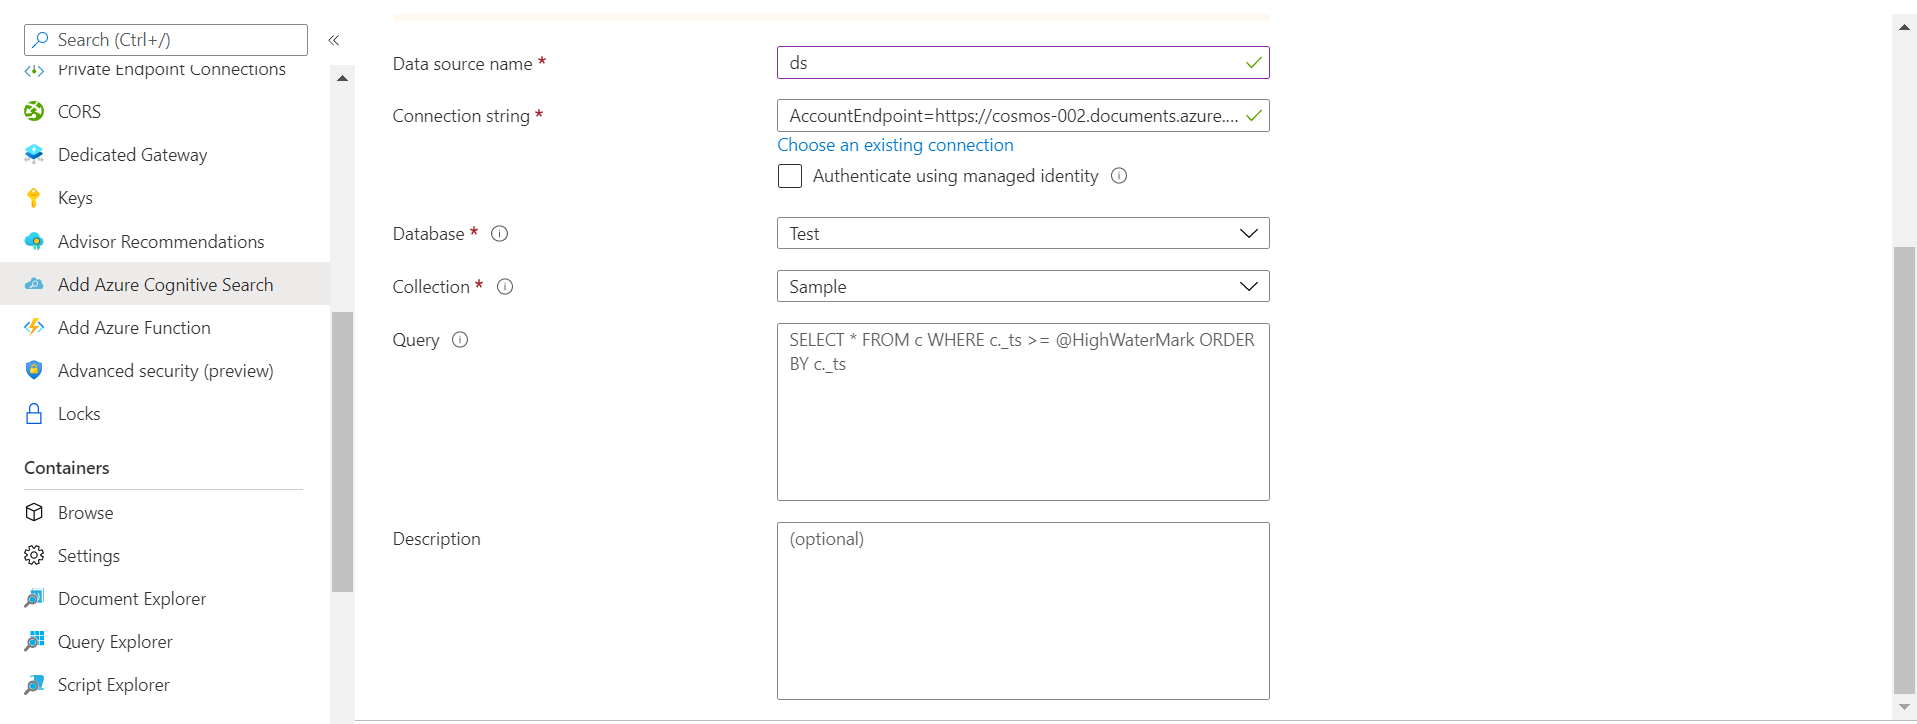
As we already have the search instance created and listed under the Cognitive Search section in Azure Cosmos DB, we can move to the next step, which is Connecting to data. The data source would be obviously Cosmos DB as shown below.

We need to provide a data source name for the source being created in the Azure Search instance. The next step is to form the required connection string. We can click on choose an existing connection to find the list of Cosmos DB instances in the same configuration i.e., subscription, location, and resource group in with the search instance exists. Once we select the instance, the connection string will be automatically formed and populated in the relevant field.
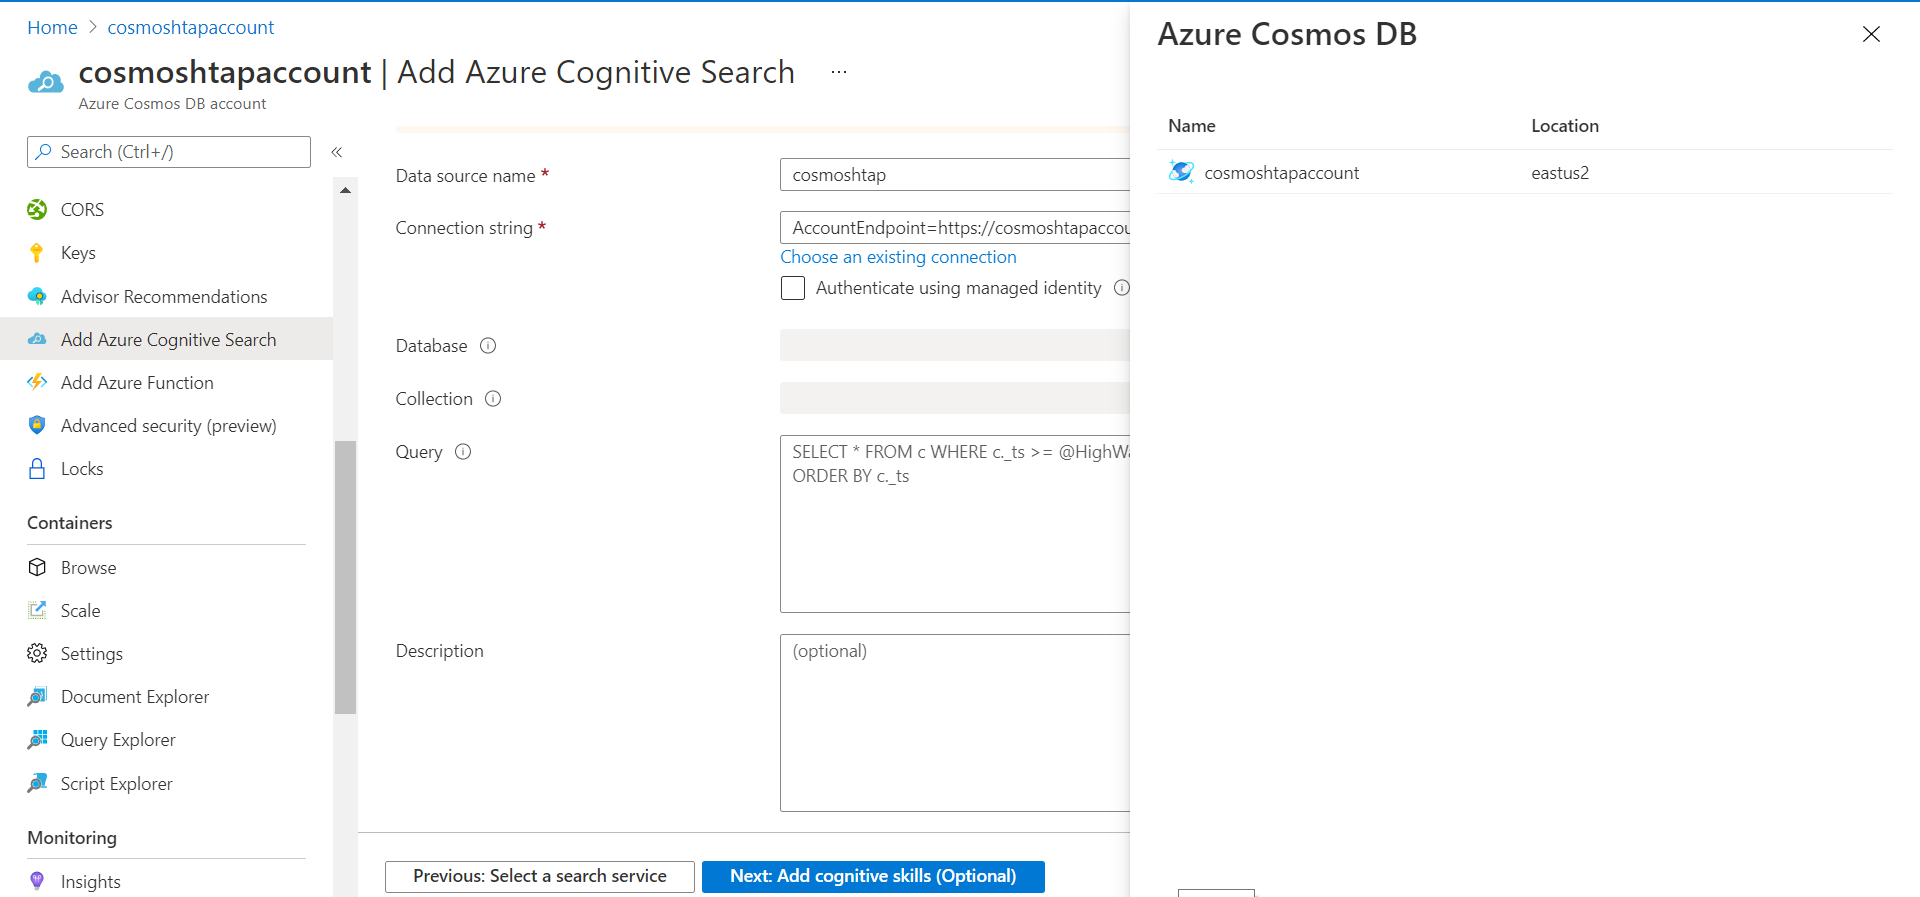
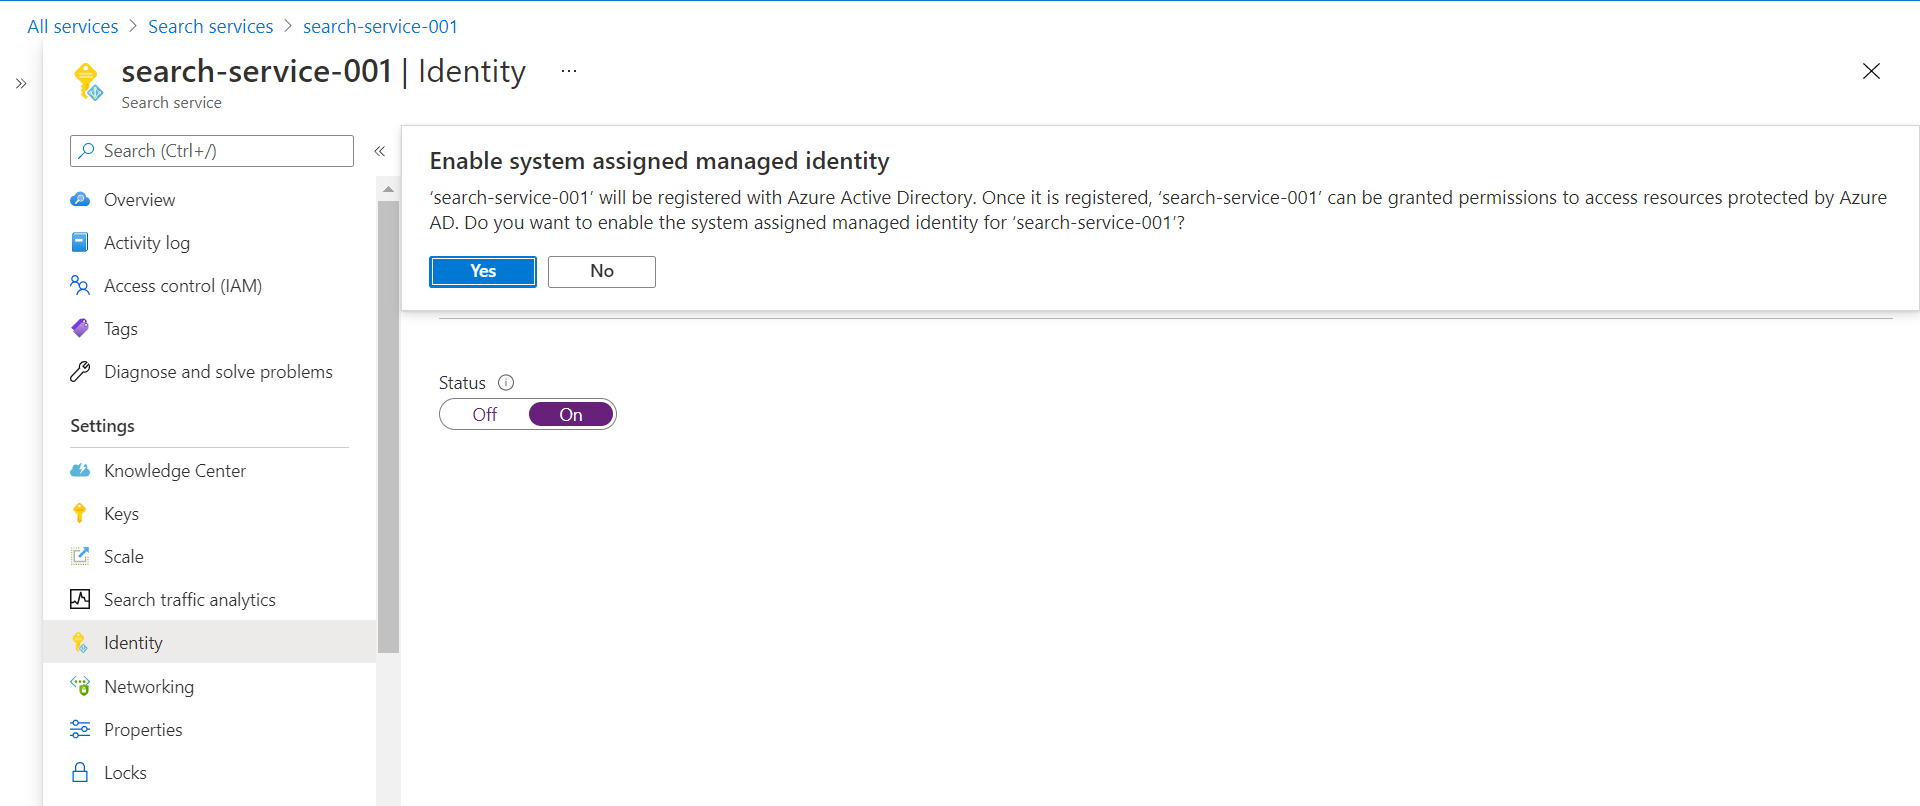
The next step is configuring the authentication mechanism that would be used by the search instance to connect to the Cosmos DB instance. One option is to use Managed Identity, which means identity is created for the Azure Search instance, and that identity would be provisioned required privileges to access Azure Cosmos DB instance. To create a managed identity for Azure Search, navigate to the instance and click on the Identity menu item from the left pane as shown below. Ensure that the status is set to On as shown below. Save the status change to enable system-assigned managed identity as shown below.
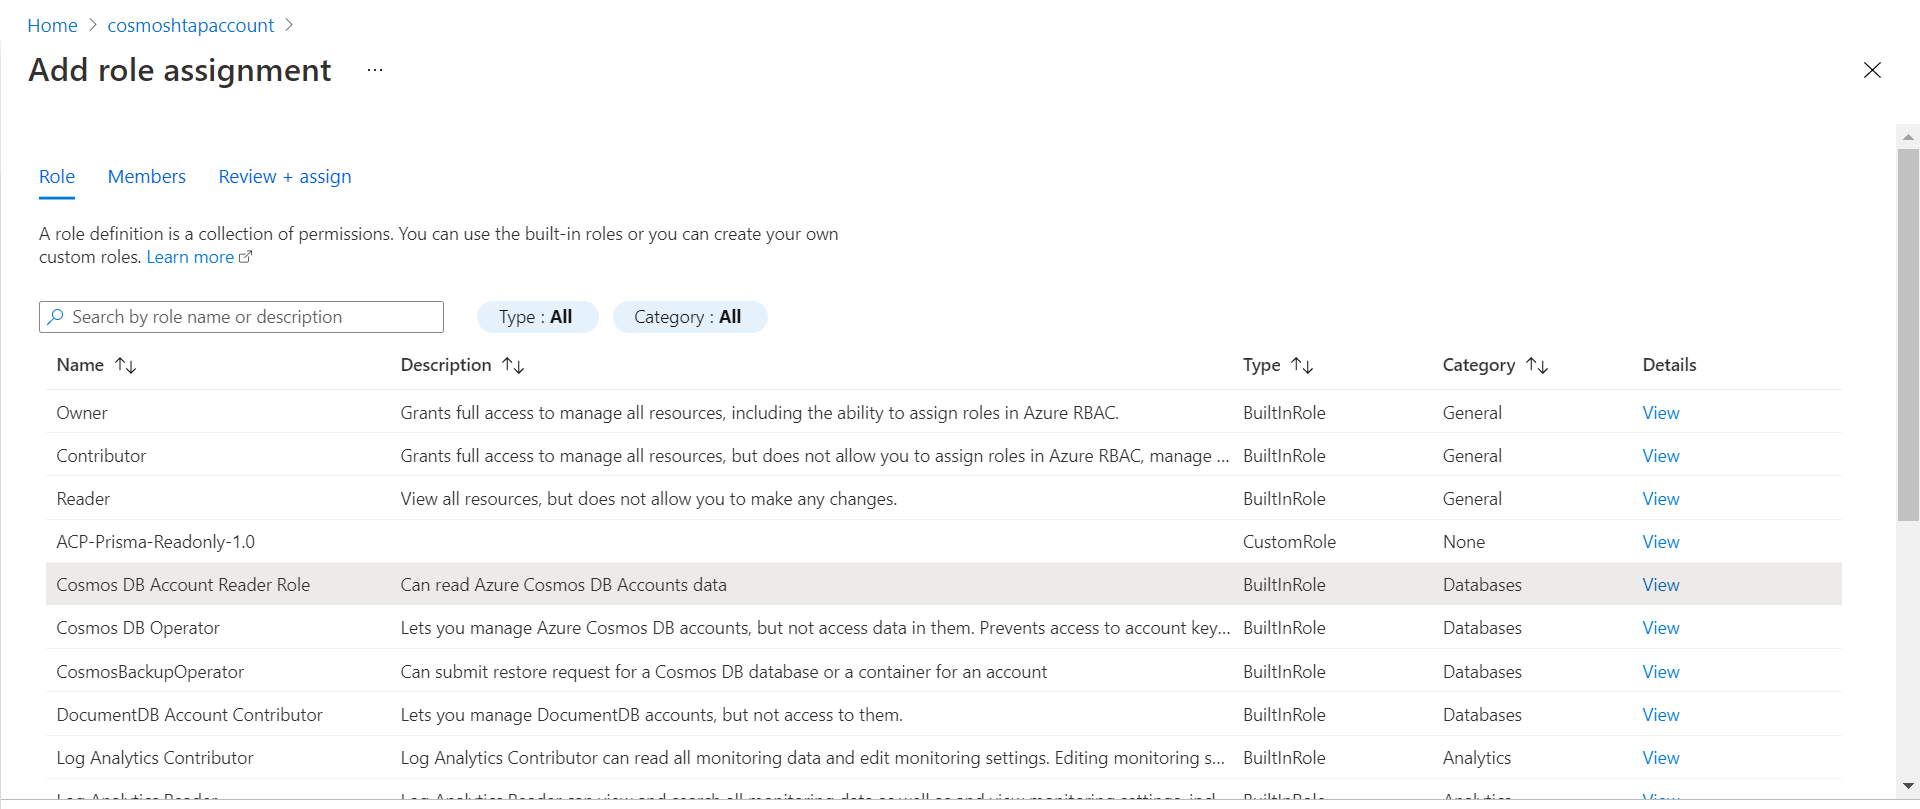
After the managed identity is created, it needs to be assigned the required privileges so that the search instance can read data from the Azure Cosmos DB instance. Click on the IAM menu item from the left pane, click on Role privileges and assign the Cosmos DB Account Reader role to the managed identity.
If the search instance, as well as cosmos db instance, is in the same configuration setting, the search instance can access the data without the managed identity as well. If this is the case, you should be able to find the database name listed in the dropdown. Once we select the database, the collections hosted in the database would get listed. Once this happens, it can be assumed that the search instance can successfully connect to the Azure Cosmos DB instance. We can optionally specify the query template to limit the scope of the data being fetched. We can move to the next step. Before we can proceed to the next step, it will validate the query and connectivity and only then we would be presented with options to configure the next step.
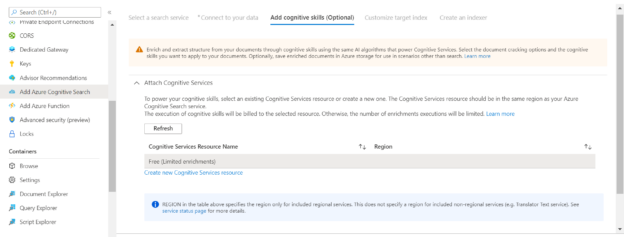
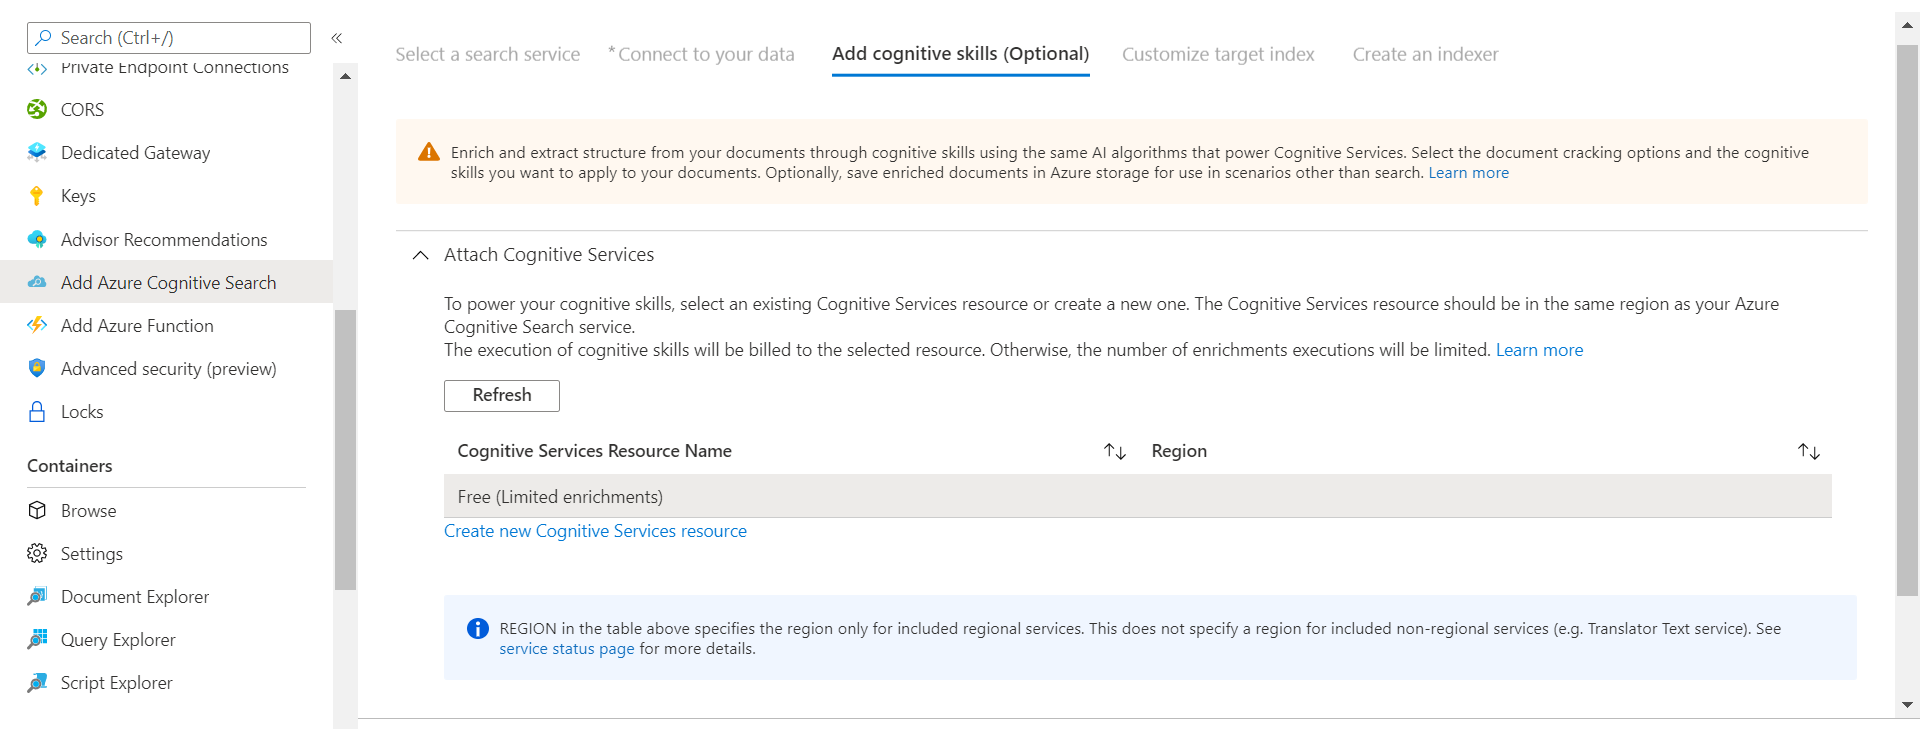
In this step, we have the option to add any cognitive resources that we may want to use with the data being fetched from cosmos DB as shown below.
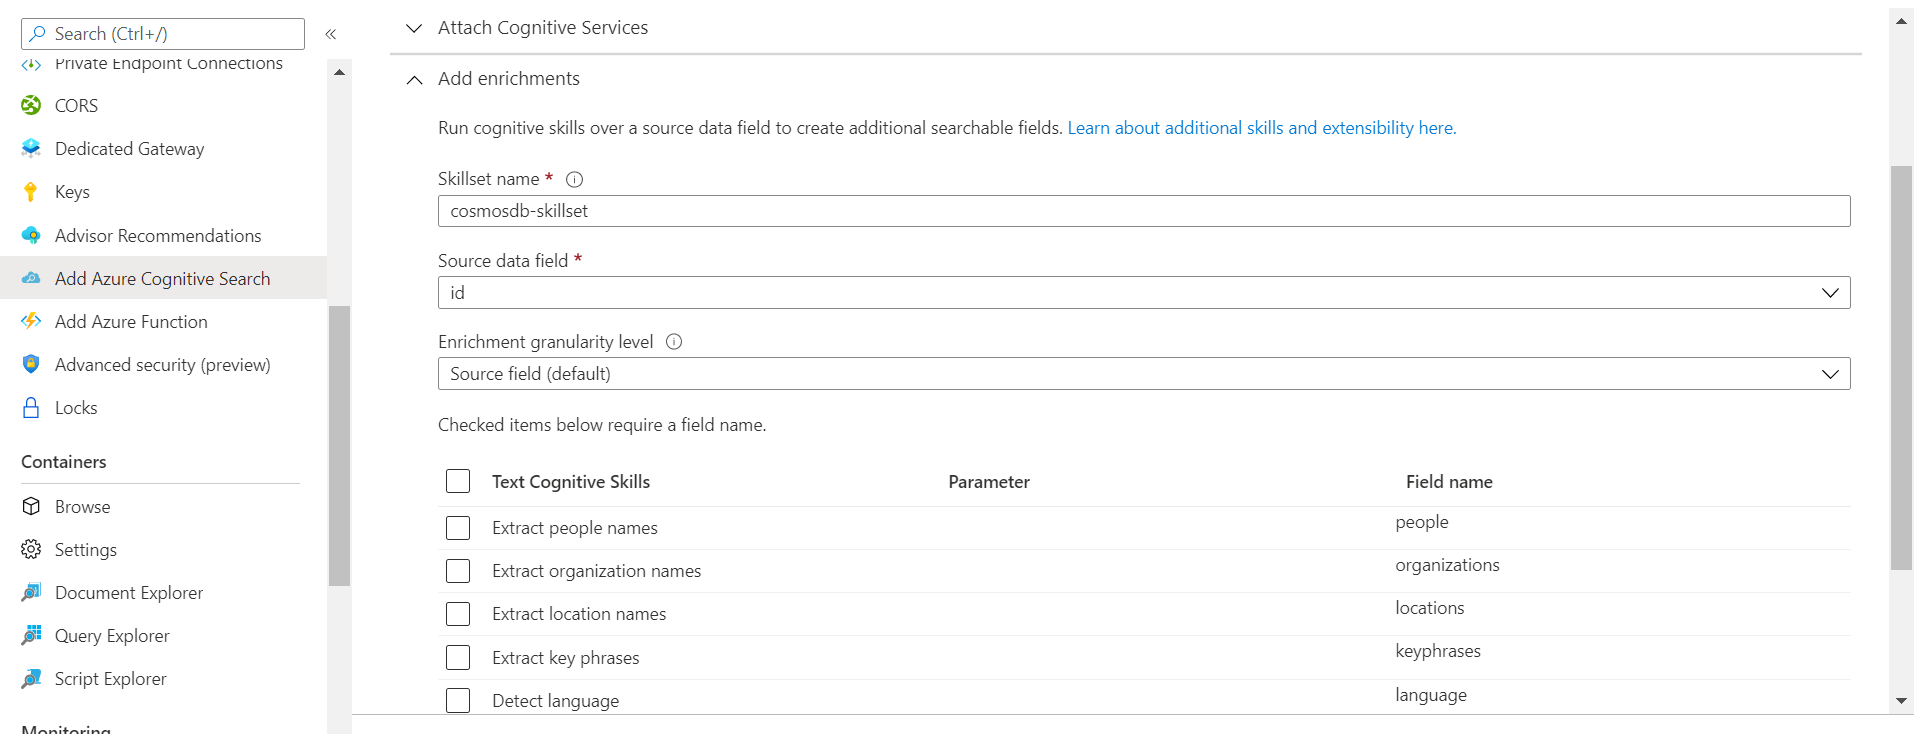
We can also add enrichments to the data being fetched, using this section as shown below. Some of the examples of these are extracting names, locations, key phrases etc. We do not intend to add these enrichments upfront while we are creating the index for the first time. So, we would skip this for now.
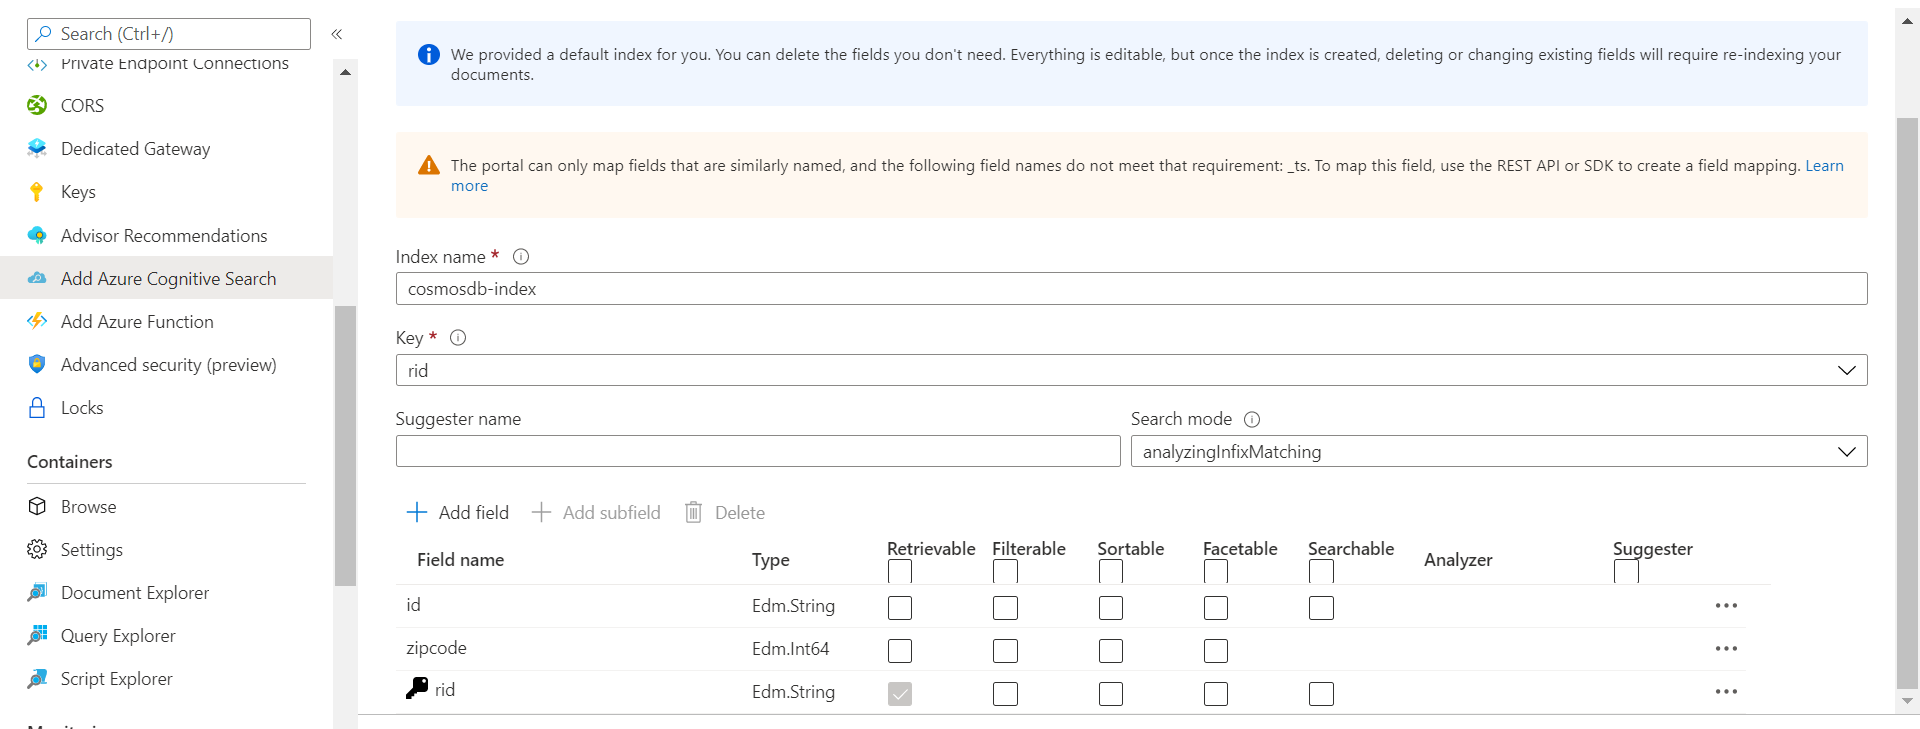
In this step, we must specify the name of the index that will hold the data that would be fetched from the Azure Cosmos DB instance. The key would be select by default, which is rid that is typically the identifier field of an item in the collection. We can specify the name of the suggester if we intend to create one and configure the search mode with it as well. For now, we can skip this configuration as it’s not mandatory. We can add or remove fields as required, and select which fields we want to retrieve as part of the search result, which fields can be used for specifying search criteria or filters etc. Tick the checkboxes for the relevant fields as required.
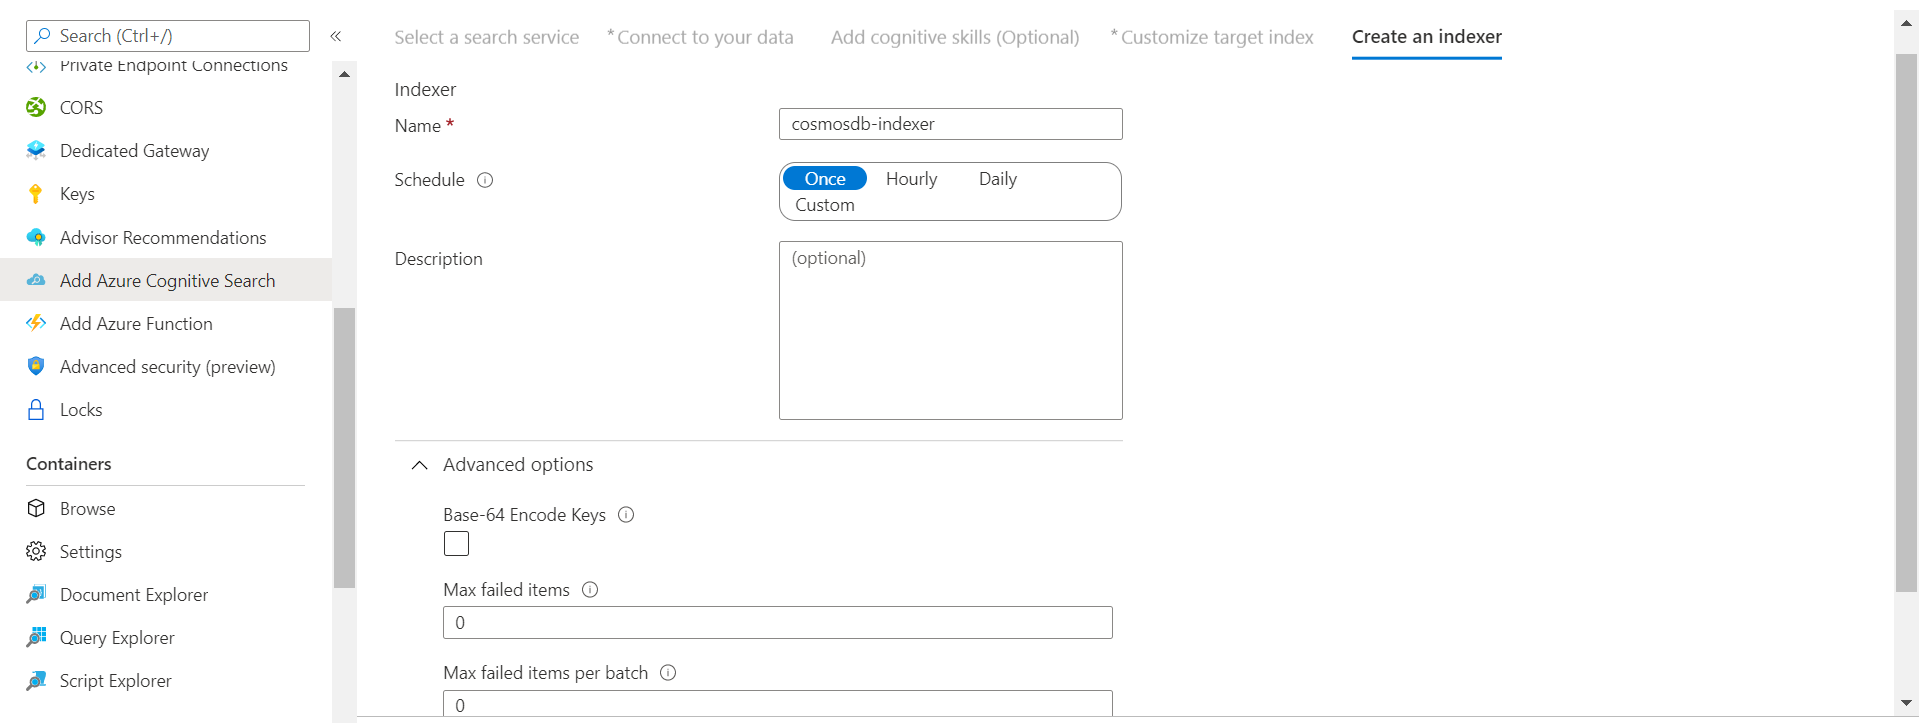
In this last step, we need to specify the name of the indexer, the frequency of the schedule and any advance options like encryption, maximum limit of failed items etc.
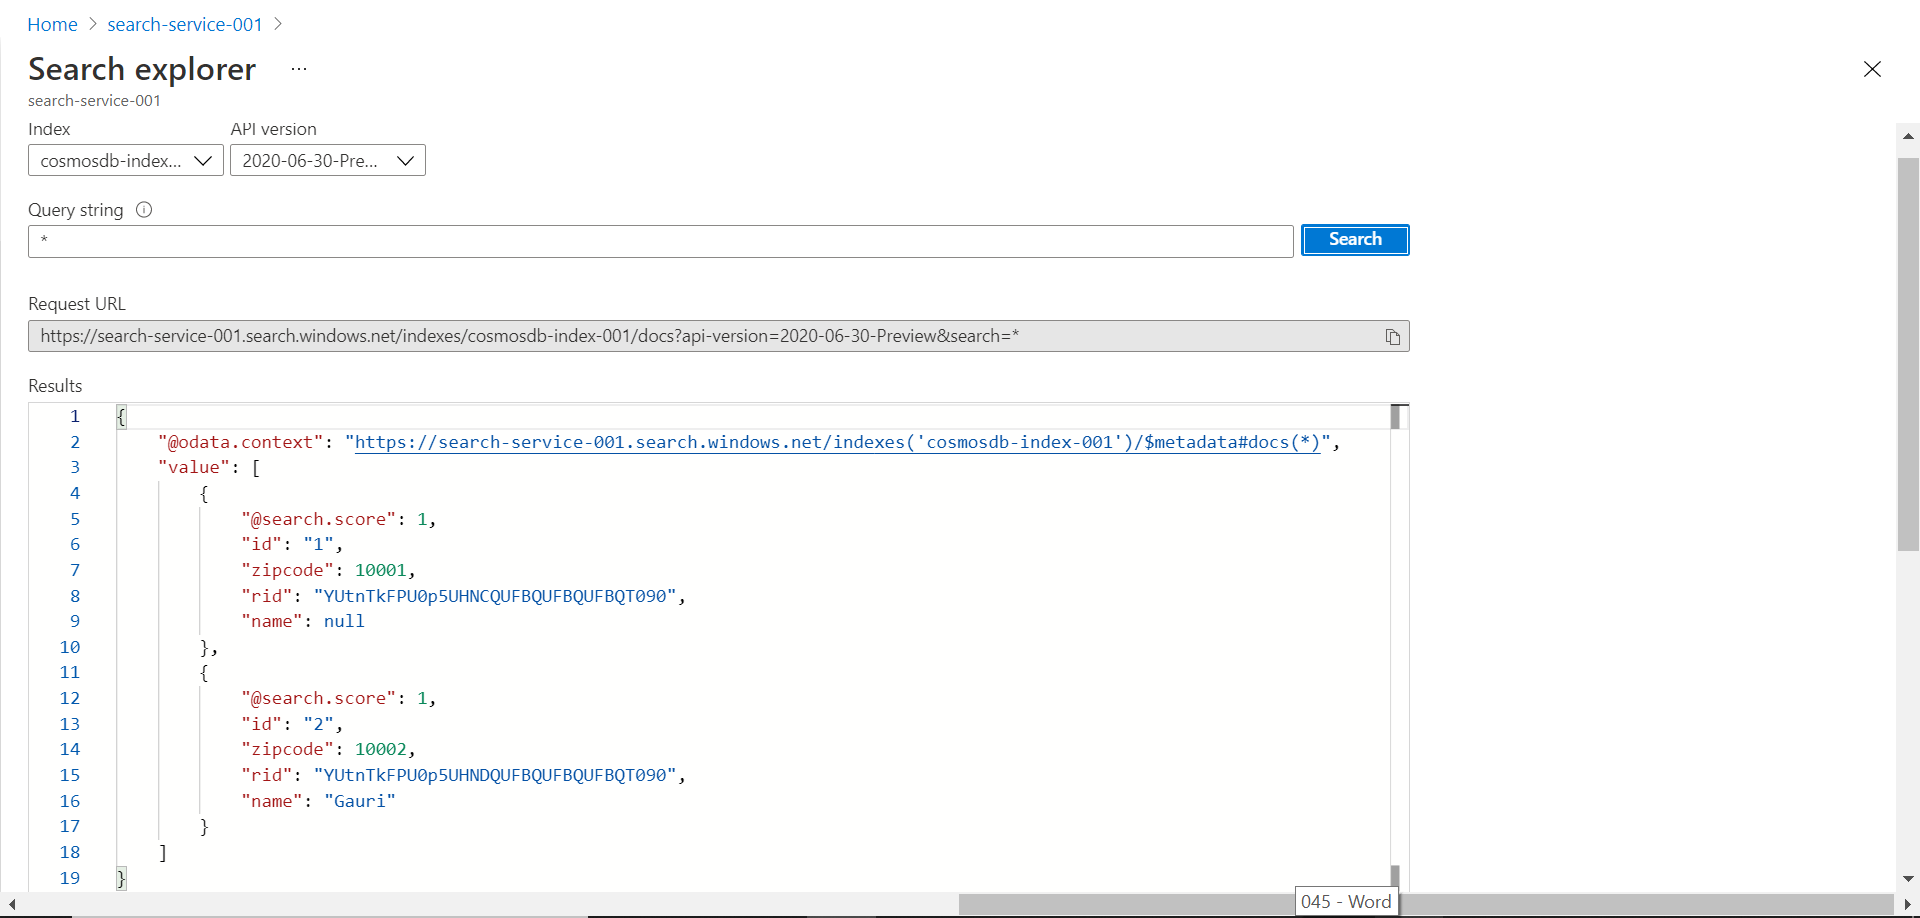
This completes the configuration part, and then we can confirm to create a new search indexer. Once the indexer would get created, it will start the indexing process where it would fetch data from the Azure Cosmos DB database instance and index it as well. Once indexing is complete, we can use the search explorer interface of the Azure Search service, simply specify * as the search criteria and click on the Search button. This will result in all the records being returned from the index as shown below.
In this way, we can import data from the Azure Cosmos DB into the Azure Search instance and enable search functionality on the data.
Conclusion
In this article, we learned the different options to configure Azure Search instance such that it can import data from Azure Cosmos DB to enable the search functionality. We also learned about the Azure Search authentication configuration which can be utilized across different data sources.

She has a deep experience in designing data and analytics solutions and ensuring its stability, reliability, and performance. She is also certified in SQL Server and have passed certifications like 70-463: Implementing Data Warehouses with Microsoft SQL Server.
View all posts by Gauri Mahajan
- Oracle Substring function overview with examples - June 19, 2024
- Introduction to the SQL Standard Deviation function - April 21, 2023
- A quick overview of MySQL foreign key with examples - February 7, 2023