
Introduction
In SQL Server 2000, the sample databases were pubs and northwind. They contained sample information to learn SQL Server.
Starting in SQL Server 2005, the Adventureworks was the new Sample Database. Each SQL version (2005, 2008, 2012, 2014 and now 2016) included new samples included to show new features. In Adventureworks there were different adventurework versions:
- OLTP version (Adventureworks for transactional databases)
- Datawarehouse (AdventureworksDW for business intelligence including SSAS)
- Lite version (AdventureworksLT, a light transactional database)
In SQL Server 2016, a new sample database came:
- WideWorldImporters, we created an article about this new database.
WideWorldImporters contains a real life database following design recommendations.
This time we will talk about WideWorldImporters for Azure. This Database is a new database to work with Azure. By default, you can install the AdventureLT Database, however, it is now possible to import the WideWorldImporters to Azure.
We will explain how to import WideWorldImporters, but the instructions are valid for any bacpac file.
A bacpac file is the extension to deploy Data Tier Application packages.
Requirements
- SSMS in a local machine or Virtual machine.
- An Azure Account to the Azure Portal.
- MASE (Microsoft Azure Storage Explorer)
Getting started
To import the WideWorldImporters database, we will explain two methods:
- Importing using the Portal and MASE
- In Azure Portal, create a storage account.
- Using MASE, create container and add the WideWorldImporters.pac file.
- In Azure Portal, import the file.
- Another method is using SQL Server Management Studio (SSMS). This option is great if you have SSMS already installed.
Method 1. Importing a database using Azure Portal and MASE
This option is recommended if you do not have a local machine with SSMS. You only need MASE (which can be installed in a MAC, Windows and Linux machine).
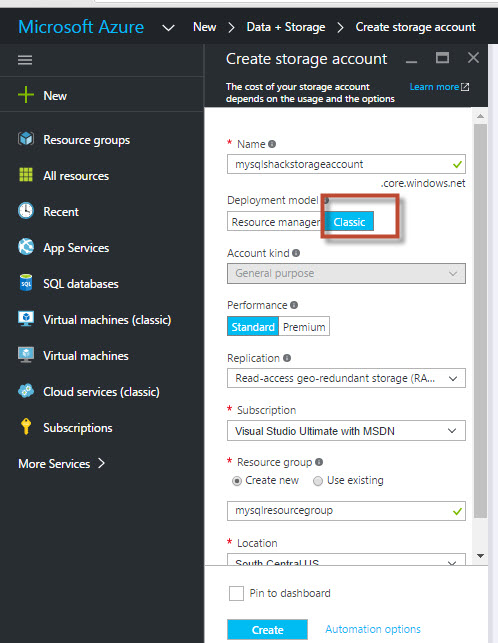
First, in Azure Portal, go to New>Data+Storage>Storage Account and create a storage account. Storage account is used to store files, messages, etc. For more information about storage account, please refer to our article about MASE.
In MASE, connect to the storage account in figure 1 and create a container named mybackups or any name of your preference:

Download the Azure WideWorldImporters-Standard.bacpac file.
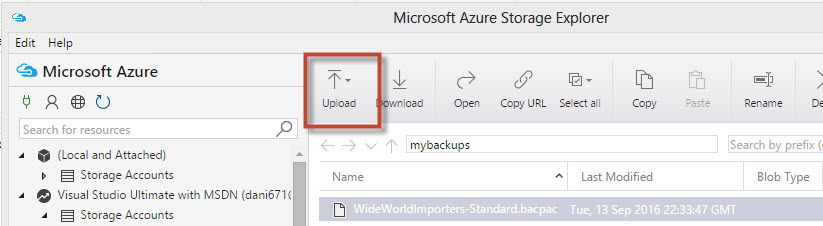
In MASE, Upload the WideWorldImporters-Standard.bacpac just downloaded in the container created in figure 2:
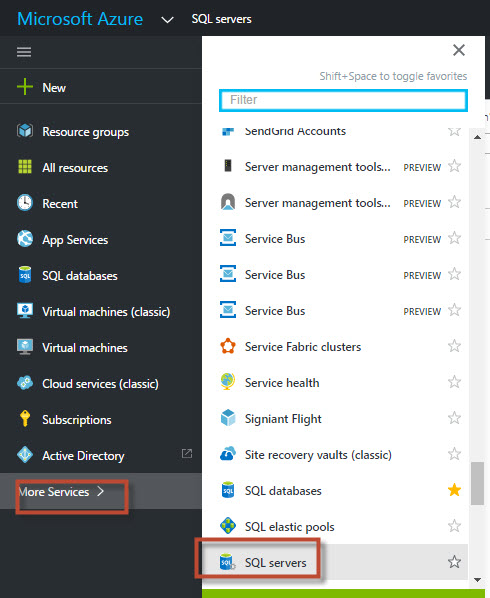
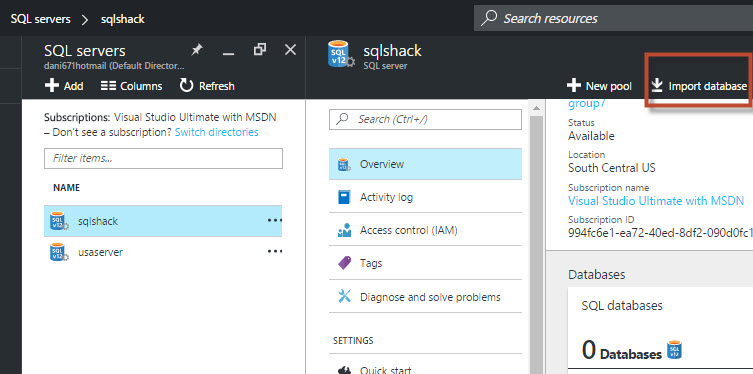
In Azure Portal, go to more Services ➜ SQL Servers
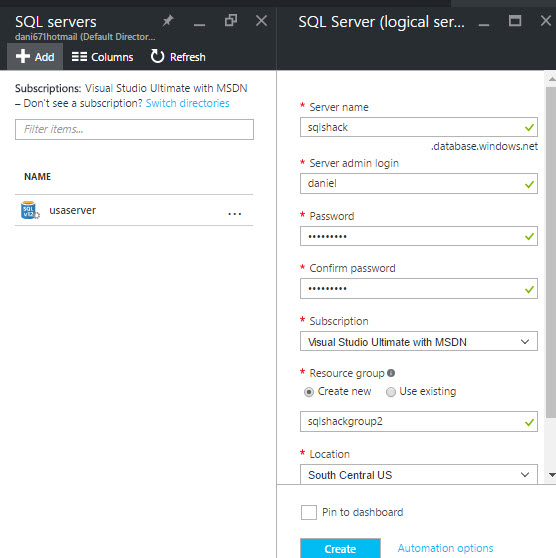
Press Add to create a new SQL Server. Add a name, password and a group in Azure to create a new SQL Server:
Select the database created and click Import Databases:
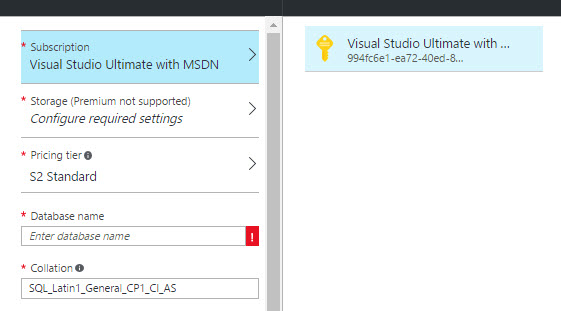
Select your subscription (this is important when you have multiple subscriptions):
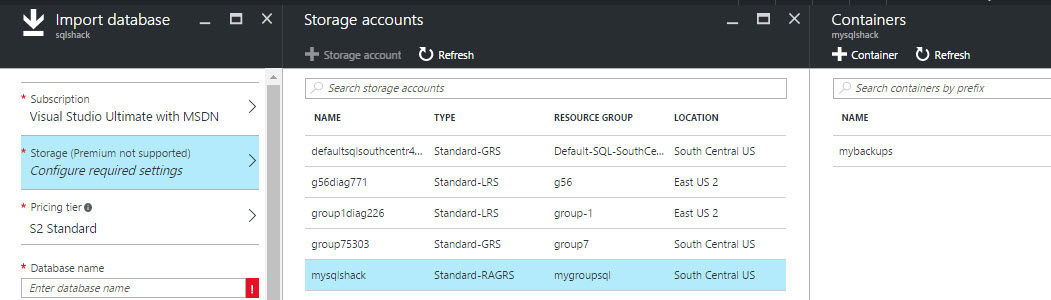
Select the storage account created in Figure 1 and the container created in figure 2:
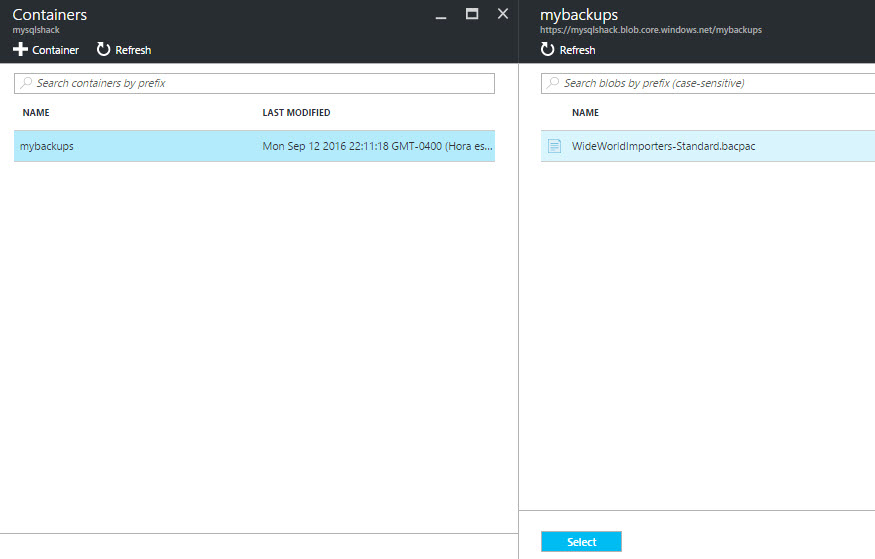
Select the file WideWorldImporters-Standard.bacpac uploaded on step 3:
Specify a database name, login and password for the database and press OK:

To verify in your local SSMS, in Azure Portal, select the SQL Server and go to properties. Add the current client IP and Save:

In your local machine, you can connect to the Azure database already created:
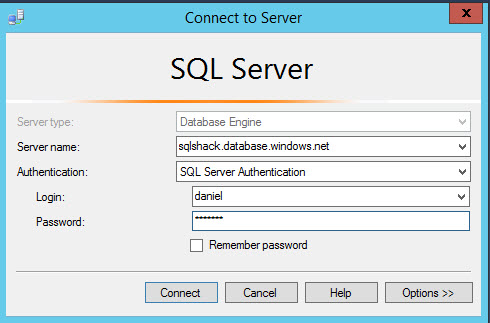
If everything is fine, you will be able to access to the WideWorldImporters-Standard database:

Method 2. Importing using SSMS
This method is recommended if you have SSMS installed in a local machine. You do not need MASE if you import from a local file.
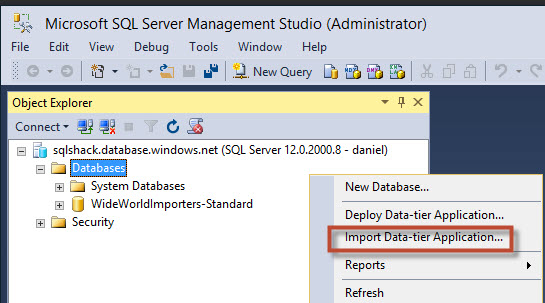
Another way to do import the file in Azure is in SSMS using the Import Data-tier Application. In you Azure Machine, right click and select this option:
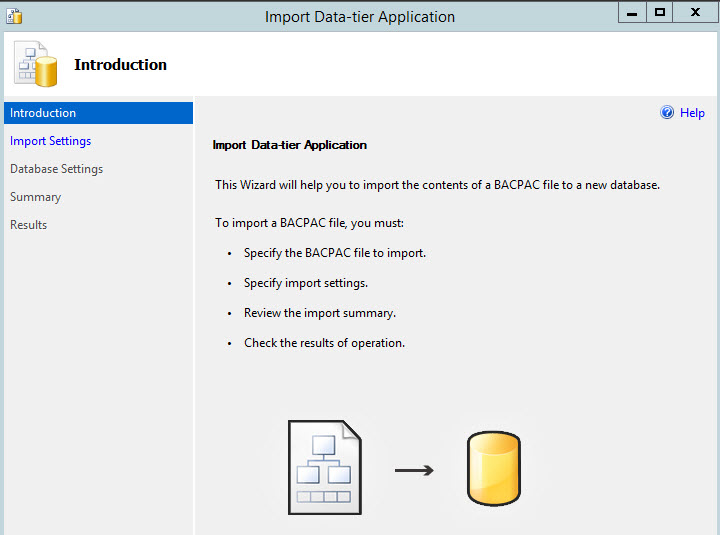
A wizard will be displayed:
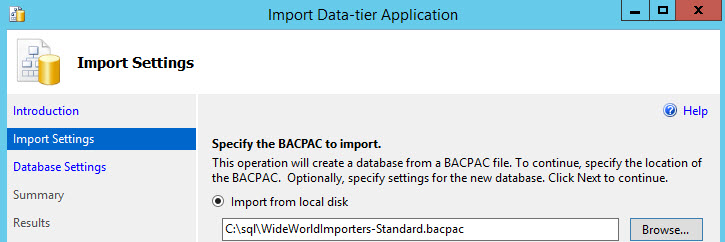
You can download the bacpac file to your machine with SSMS and import from the local file:
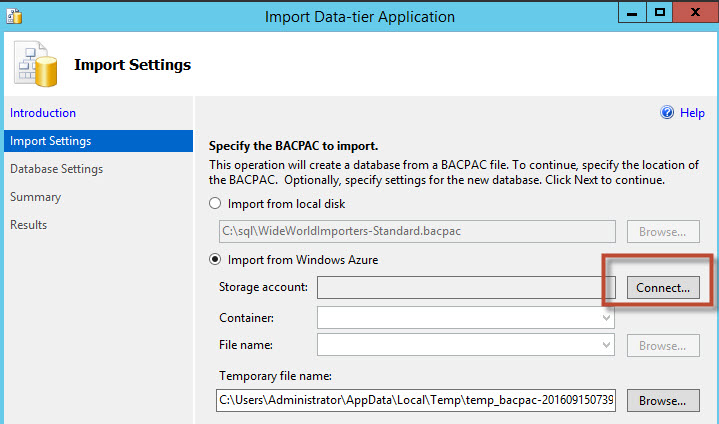
Another option is to import from an Azure Account. To do it, you need to connect the Azure Account by pressing connect:
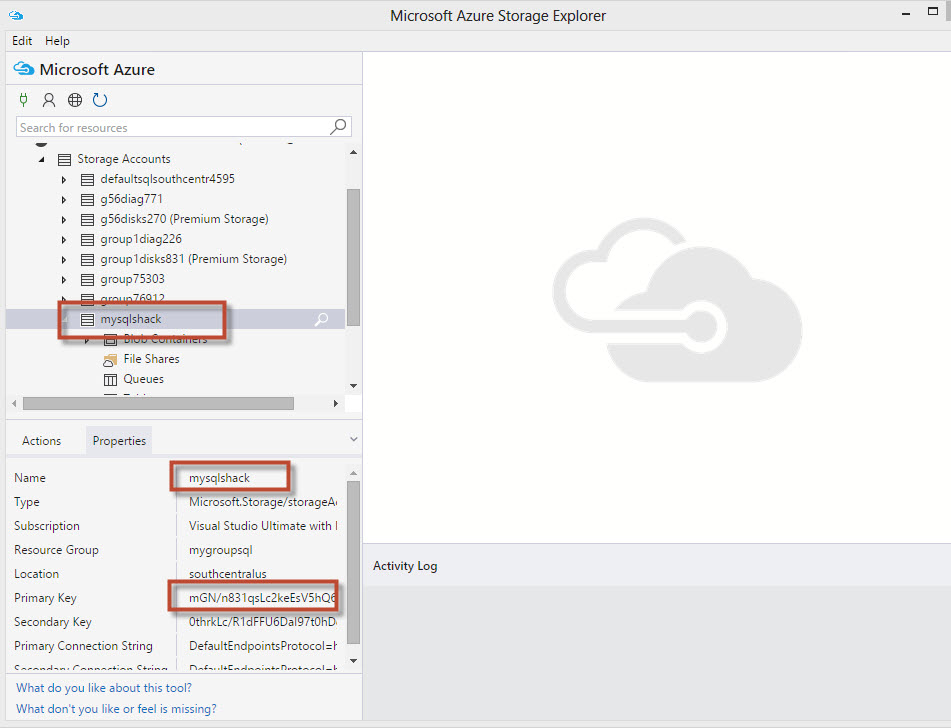
We will connect to Azure. In the MASE, you can find the storage account name created in figure 1 and the primary key used to connect to the Azure Storage Account:
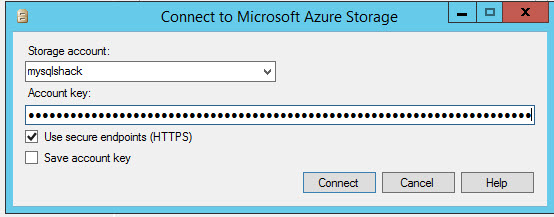
Use in Storage account the name of Figure 18 and the primary key as the account name:
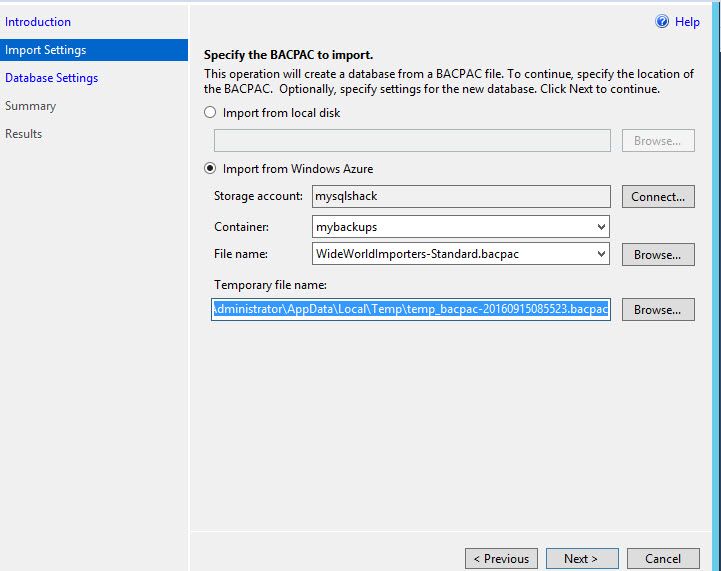
Select the container and file name of figure 2 and 3:
In settings, you can specify the database name, the edition. Basic is the cheapest option and standard is the option by default. The most expensive option is premium.

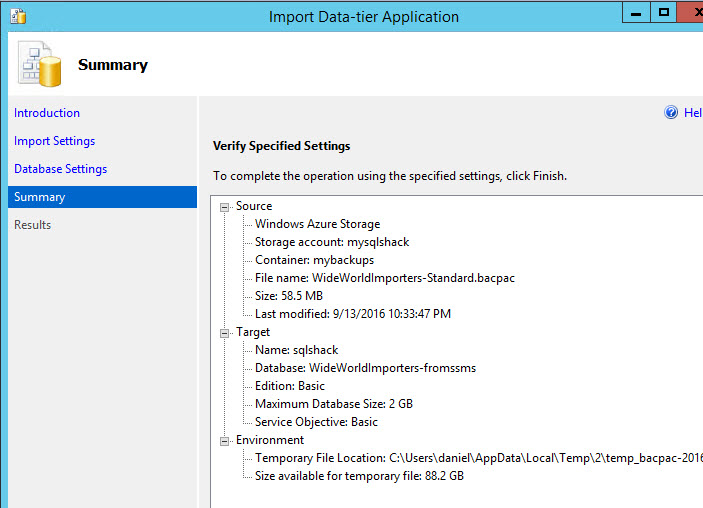
The summary will show all the options selected in the wizard:
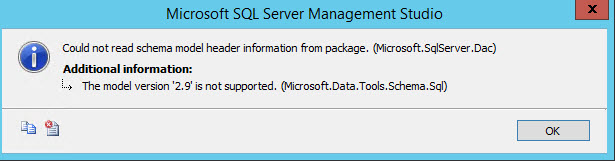
The new WideWorldImporters cannot be imported in SSMS 2014. When I try to import from my SQL Server 2014 machine. I receive the error message that the model version ‘2.9’ is not supported:
In SQL Server 2016, you will not receive errors, unless your internet connection is slow. I received the following error message when trying to import the data in a machine with slow internet connection:
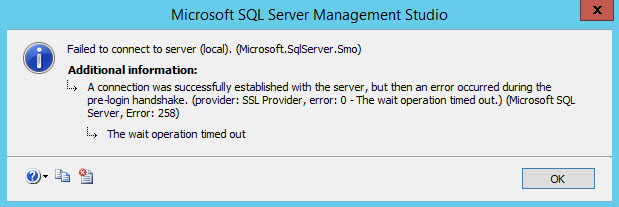
The error message says that a connection was successfully established with the server, but then an error occurred during the pre-login handshake. If you have this error, we recommend using the first method to import the database to Azure.
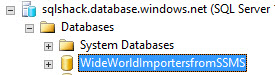
If your internet connection is fine and you have SSMS 2016 or later, everything should be fine:
Conclusion
In this article, we explained how to import a database to Azure. The first option is using the Portal and MASE. This option is recommended. The second option requires SSMS 2016 or later and it ofte fails with clients that have slow internet connections.

He has worked for the government, oil companies, web sites, magazines and universities around the world. Daniel also regularly speaks at SQL Servers conferences and blogs. He writes SQL Server training materials for certification exams.
He also helps with translating SQLShack articles to Spanish
View all posts by Daniel Calbimonte
- PostgreSQL tutorial to create a user - November 12, 2023
- PostgreSQL Tutorial for beginners - April 6, 2023
- PSQL stored procedures overview and examples - February 14, 2023