
In this article, we will review Dynamic Data Masking in the Azure SQL database. Dynamic Data Masking is a feature to limit the sensitive data to the non-privileged users by hiding the data of a column. Data is not masked and stored in the disk. Masking is applied to the result set returned to the user. The users with “db_owner” permission on “UNMASK” permission can still see the unmasked data when they query the table.
You can also go over articles here, Data masking in SQL Server to learn about data masking to protect sensitive data in on-prem SQL Server databases.
Let us see how to apply Dynamic Data Masking in the Azure SQL database using the Azure portal.
Setting up Dynamic Data Masking from Azure portal
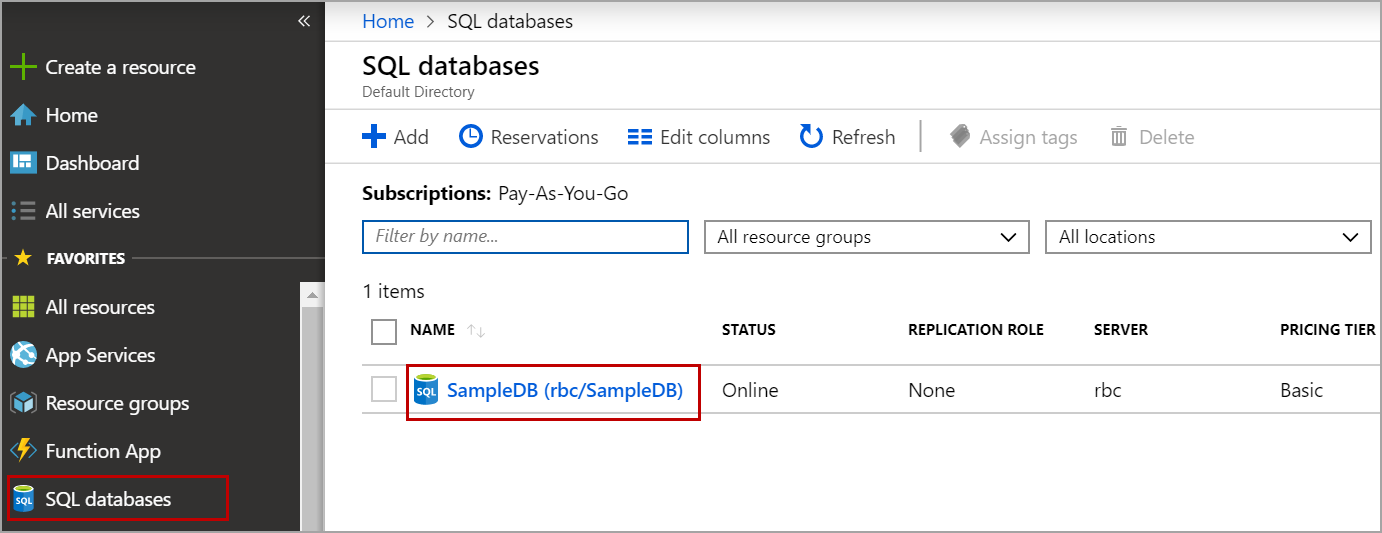
Log in to the Azure portal and click on SQL Databases. Click on the database where you are going to set up Dynamic Data Masking.
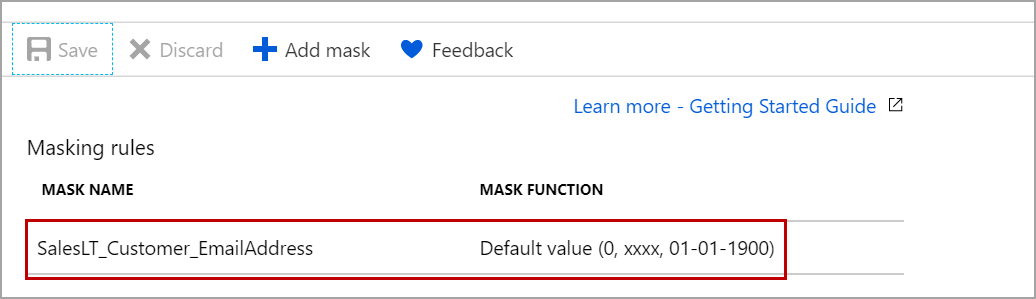
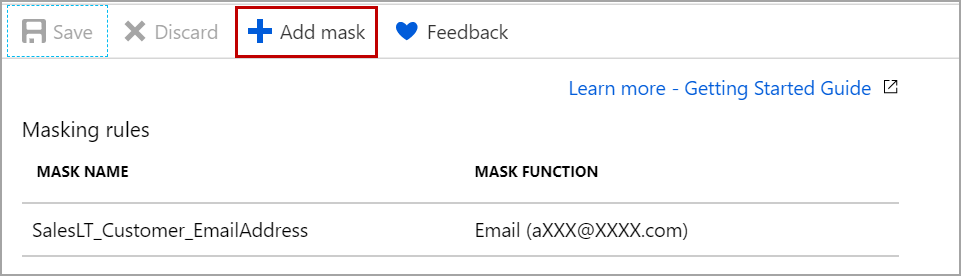
Under the security section, click on Dynamic Data Masking. This page shows the list of tables and columns in the database that is recommended for masking.
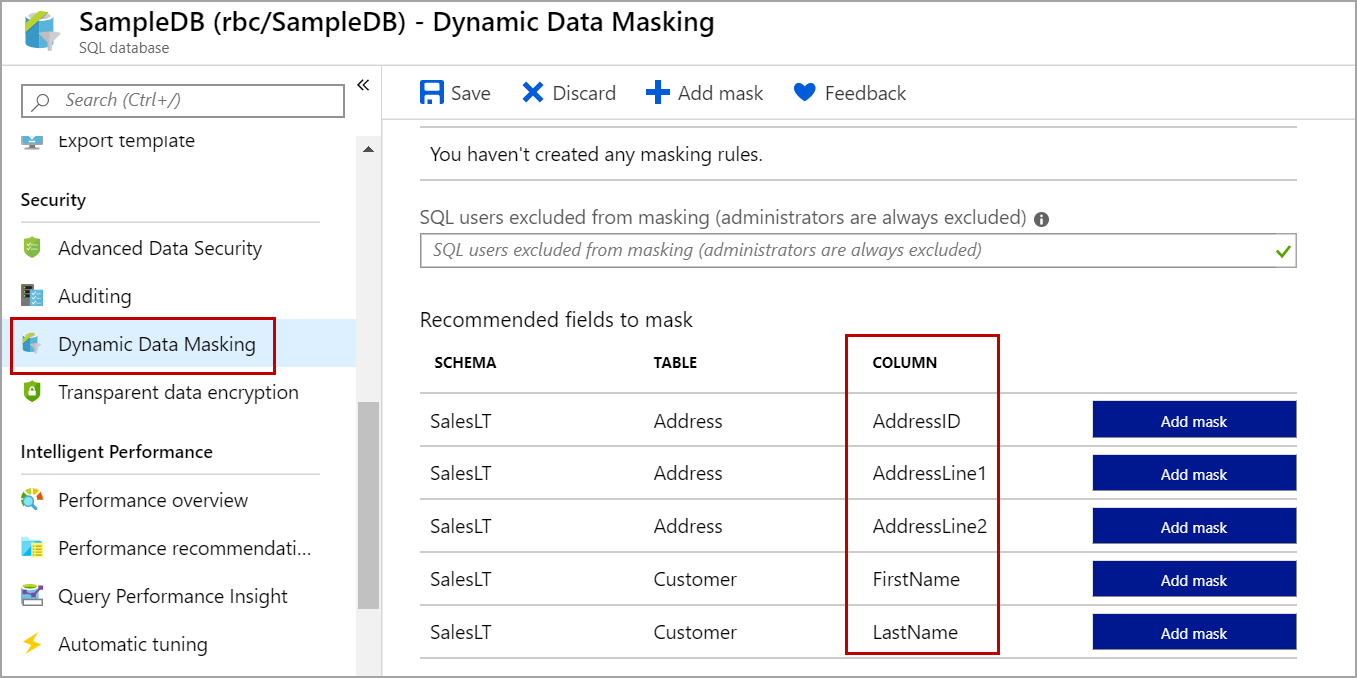
Click on Add mask button to mask the column using the default Dynamic Data Masking function. Click on Save to apply the masking.
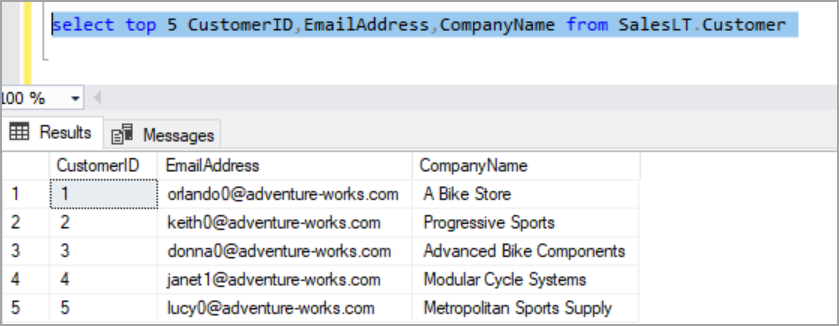
Log in to the Azure SQL Server using SQL Server management studio and execute the below query using the admin user and the user who has db_owner permission.
|
1 |
select top 5 CustomerID,EmailAddress,CompanyName from SalesLT.Customer |
We will be still able to see the unmasked data as we have the appropriate permissions to view data.
Let us create a login, user and give the user data reader access.
Execute the following script on the master database to create a login and a user. If you wish to, replace the login and the password name of your choice.
|
1 2 3 4 5 |
CREATE LOGIN testuser WITH PASSWORD = 'password' GO create user testuser for login testuser |
Execute the following script in the database that you used for dynamic data masking. This creates a user “testuser” for the login “testuser” and the user is added to the db_datareader role.
|
1 2 3 4 5 |
create user testuser for login testuser ALTER ROLE db_datareader ADD MEMBER [testuser] ; GO |
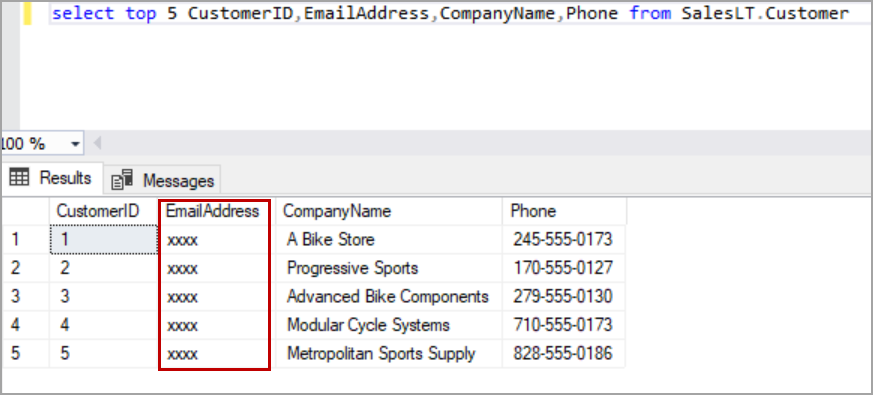
Log in to the Azure SQL server using the login we created above and execute the below query.
|
1 |
select top 5 CustomerID,EmailAddress,CompanyName from SalesLT.Customer |
We can see only limited data when the query is executed as a user with read-only access. When default masked function is used, the masked value is dependent on the data type. For a string value, the default masking function uses XXXX to mask the values.
Default dynamic data masking function uses zero when masking is applied on a column with int, bigint, bit, decimal, money, numeric, smallint, smallmoney, tinyint, float, real data types.
For date/time data types it uses “01-01-1900”.
In case you want to change the default masking function to other masking function, click on the masking rule.
Select the function you want and click on Update.
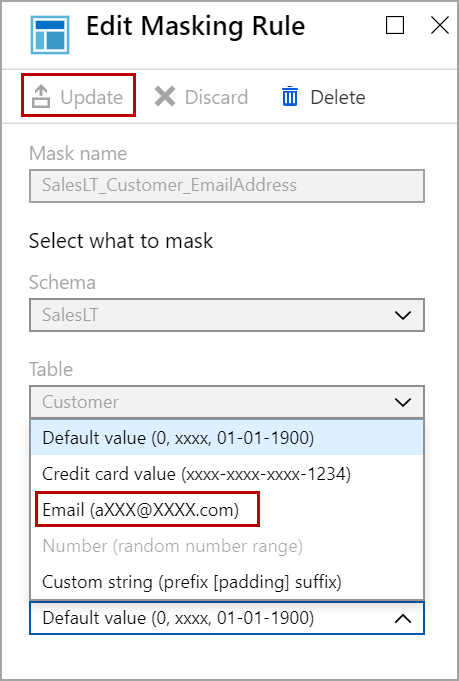
Close the rule windows and click on Save to change the rule from default function to email function.

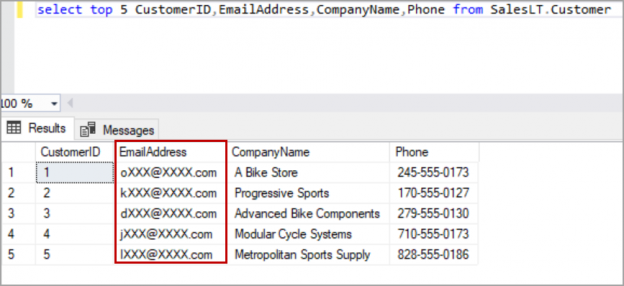
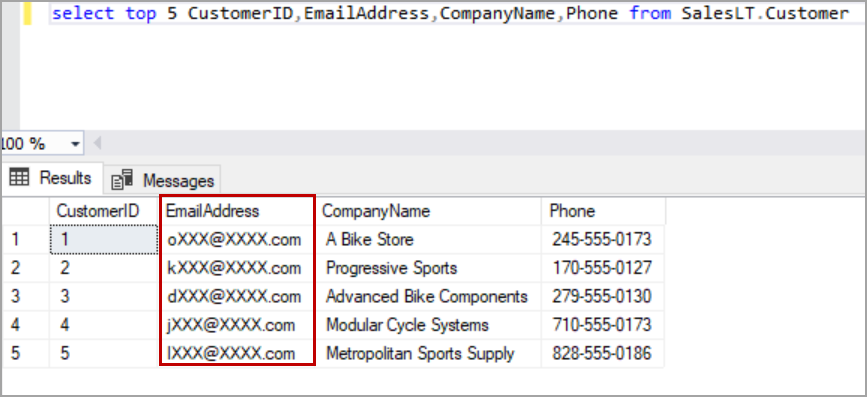
Log in to the Azure SQL Server and query the table again to see the data which is masked with email function. The only first character is visible, and the rest of part is masked with xxx@xxxx.com
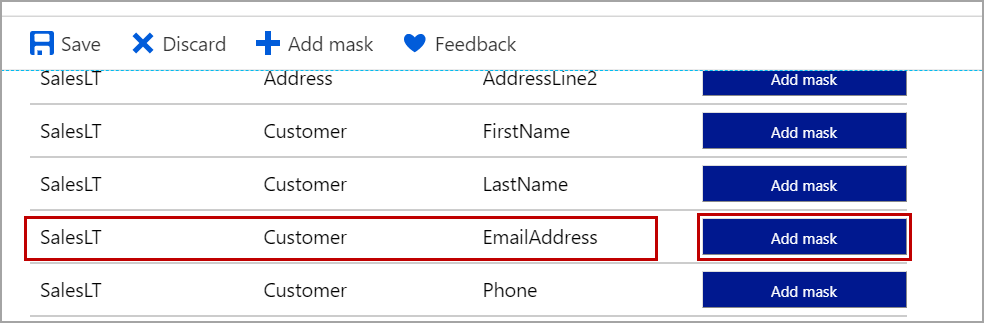
To mask the tables which are not part of the recommendations, click on Add mask.
Select the schema to populate the list of the tables in the selected schema. Select the table and column you want to mask. Select the dynamic data masking function and click on Add and then Save.
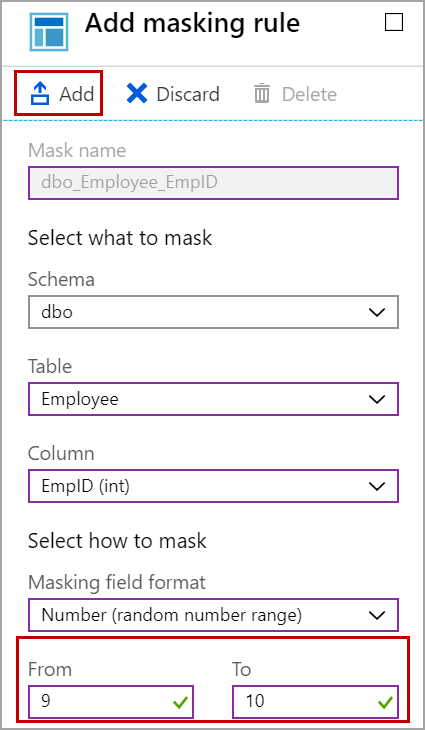
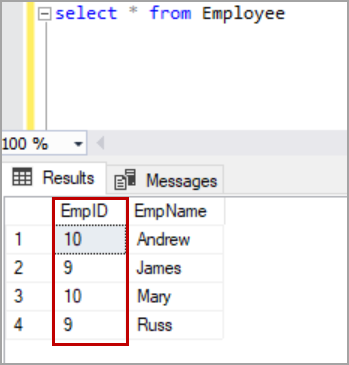
In this case, I have chosen the random format and gave the range from 9 to 10. Now the EmpID column is masked with a random value which is between the given range.
Masking string value with custom value
We can mask the string value with the format we want. Below is the example of masking string value with a custom format.
Select custom string option from the masking functions and specify the values for exposed prefix, padding string, and exposed suffix fields.
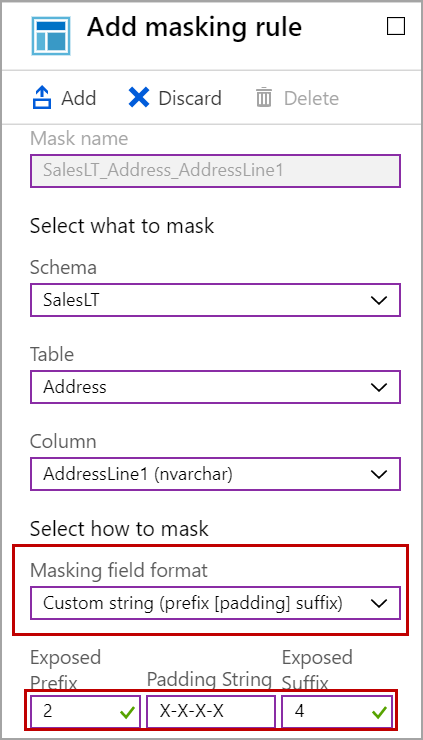
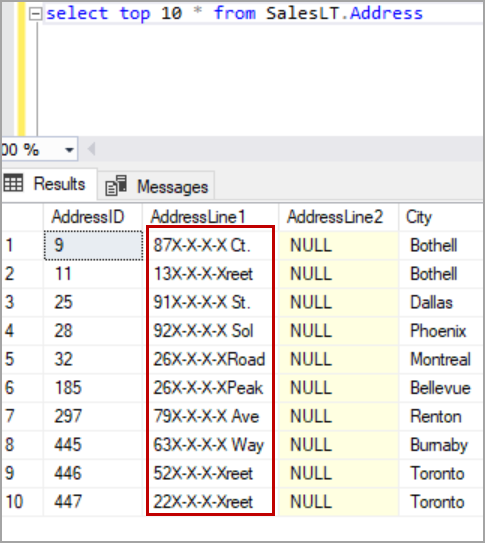
In this case, I want to expose the first two characters and the last 4 characters of the string and mask the string with “X-X-X-X”. Please refer to the below image for the result set with the custom format we used above.
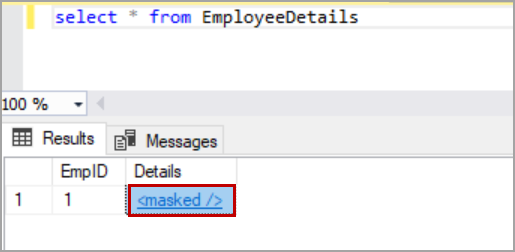
Masking column with XML type
Only default dynamic data masking function can be used to mask the column with XML type. The masked value will show on only one tag <masked />. Please refer to the below image for masked XML value.
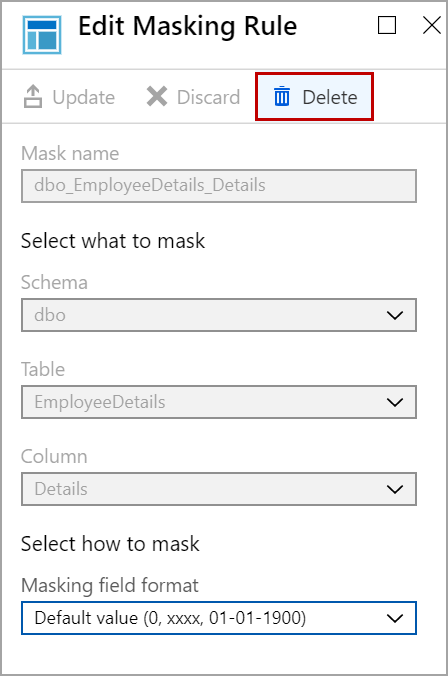
Removing masking on a column
To remove masking on a column from the Azure portal, click on the masking rule. In Edit Masking rule window, click on the Delete button and then click on Save.
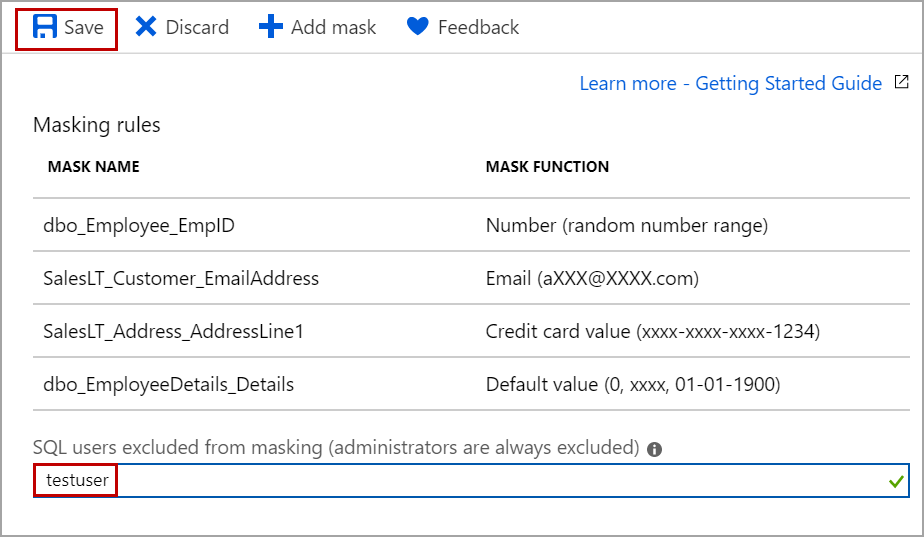
Grant access to users to view masked data
Administrators and database owners can see the data on masked columns as usual. To give access to other users, just enter the user names separated by a comma in the text box just under the masking rules and click on Save. Please refer to the below image.
Conclusion
In this article, we explored how to apply Dynamic Data Masking on Azure SQL database using the Azure portal with different masking functions and data types. In case you have any questions, please feel free to ask in the comment section below.
To continue your learning about Azure SQL, please refer to the SQL Azure.

- Geo Replication on Transparent Data Encryption (TDE) enabled Azure SQL databases - October 24, 2019
- Overview of the Collate SQL command - October 22, 2019
- Recover a lost SA password - September 20, 2019