
Receiving a comma delimited file is not new technology nor is it difficult to deal with in SQL Server. As a matter of fact, it is extremely easy. There are many cases as to why you would want to do this. For example, you have an external data source that needs to be imported into your database/table. There a couple ways to do this, however the quickest and easiest way is to use the native “import” feature within SQL Server Management Studio and you can even save it to an SSIS Package at the end of the process. The end result of using this method is that the external CSV file is loaded into a SQL Server table where columns are created and rows are populated.
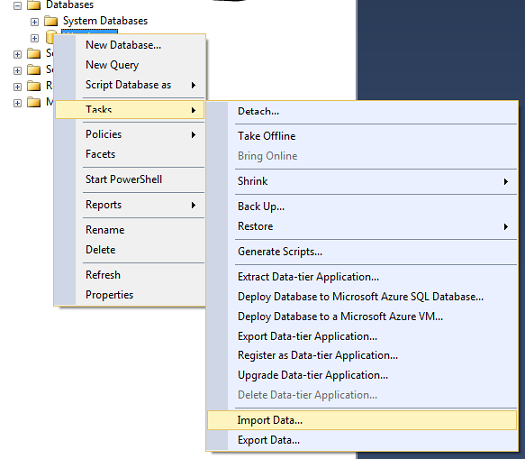
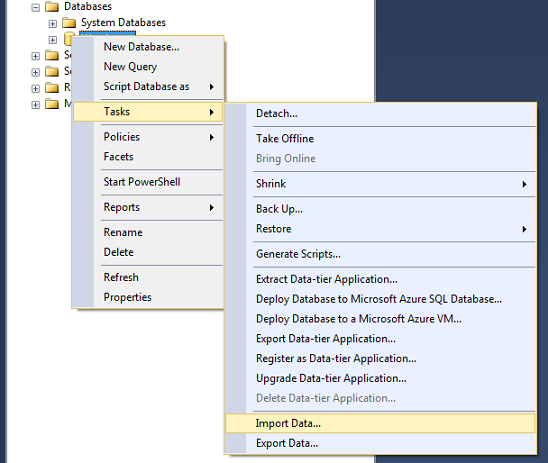
If you are only doing a single or one off import of data import then I recommend the native Import feature within SQL Server Management Studio. If you will be doing this process more than once, then I will show you how to save this process into an SSIS package at the end so stay tuned. From SQL Server 2005-2016 the feature has not changed. For this example below, I’ve used SQL Server Express 2014 however again, it is the same across the current version as well as the past several versions. To access it, from SQL Server Management Studio, expand your server branch to your databases. Right click on your database name and open the tasks menu then select Import Data. This will bring up the SQL Server Import and Export Wizard:
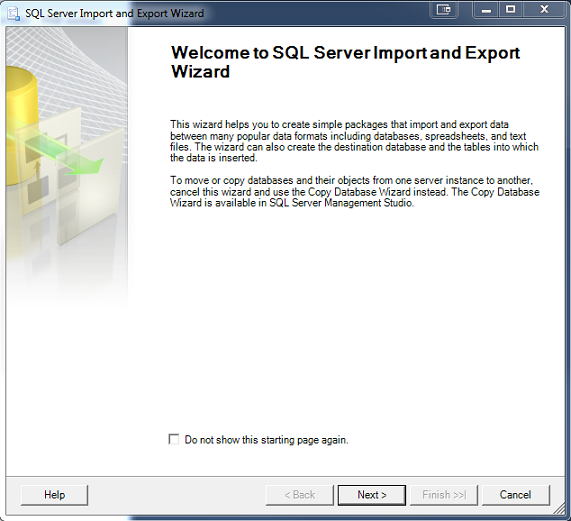
The wizard opens to the splash screen. Click Next to continue:
From the Data Source dropdown box, select Flat File Source then select your CSV file from the File Name Browse line that you have saved on your file system. Because we are using the flat file source, we can use a csv or txt file extension. In our example, we will use CSV.
Data Source
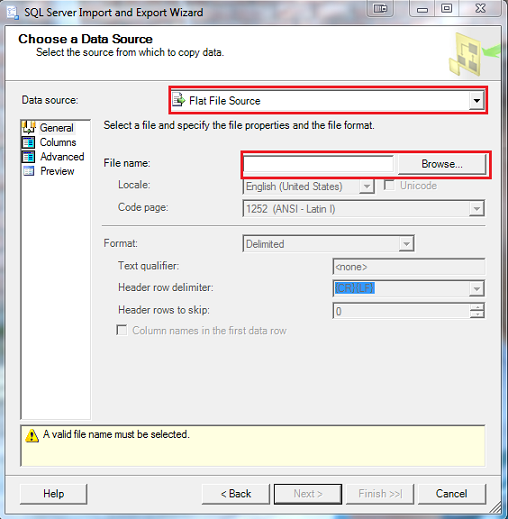
Once your file is selected, complete the rest of the form:
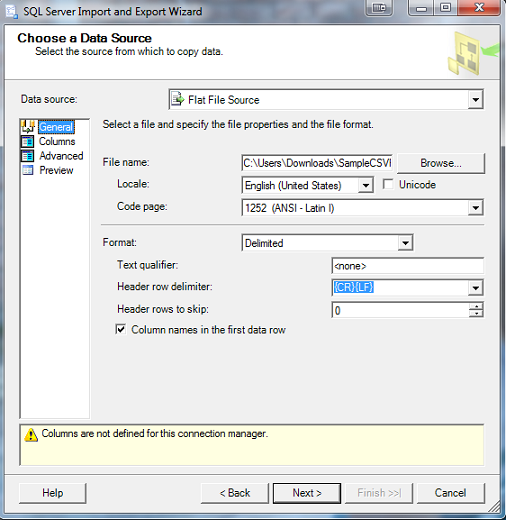
Complete the Format section. If your text file contains a quote (“) around each column/row of data then make sure you add that as the Text qualifier. Header Row Delimiter defaults to {CR}{LF} which is carriage row/line feed. If you have column names in the first row(s), you may opt to skip them by selecting the number of rows to select. If you prefer to keep your column names, just let this stay with the default of 0 and make sure you check “Column names in the first data row”.
Next, select Columns from the left hand side of the Source form.
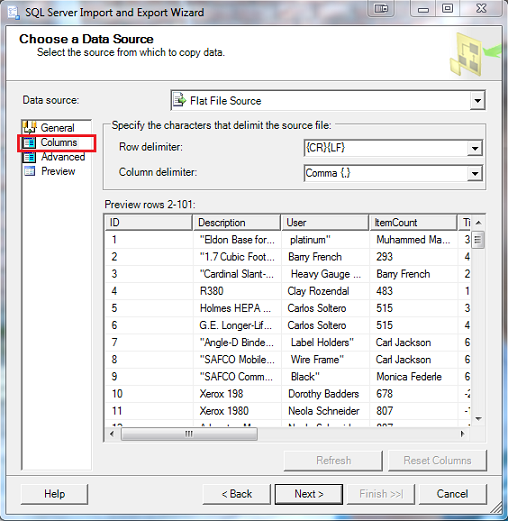
This will give you a preview of the data to be imported. Note here you will see the column headers you opted to keep.
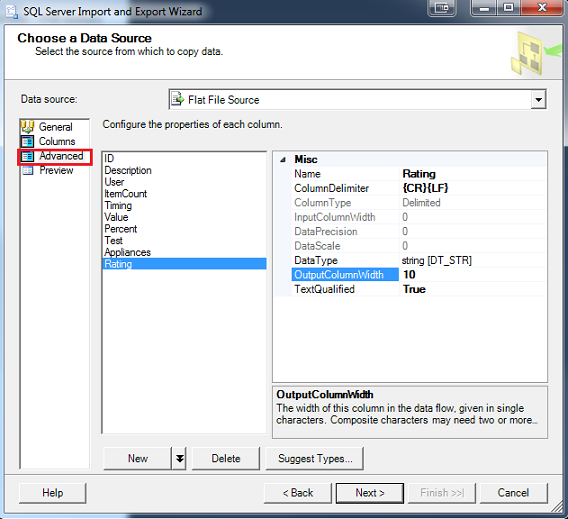
Next select the “Advanced” option from the left menu. This option is important because will you be able to select your column types and column widths for each column. It is a good idea to verify that each column type and column length is appropriate for each column.
After you have updated each column with the appropriate column type and column width, click on the Preview option on the left menu. This will show you a preview of your data. At this time, you will also be able to go back and update column types and widths if necessary.
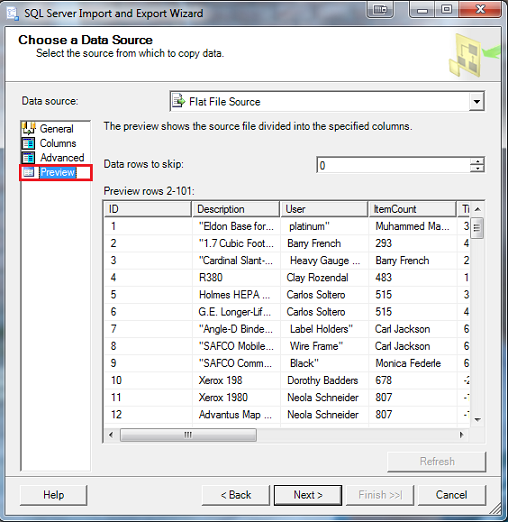
Click Next on the screen above. This will take you to the destination selection screen.
Database Destination
From here you will need to select your destination table for the data. For this example, we are going to create a table or destination within the wizard.
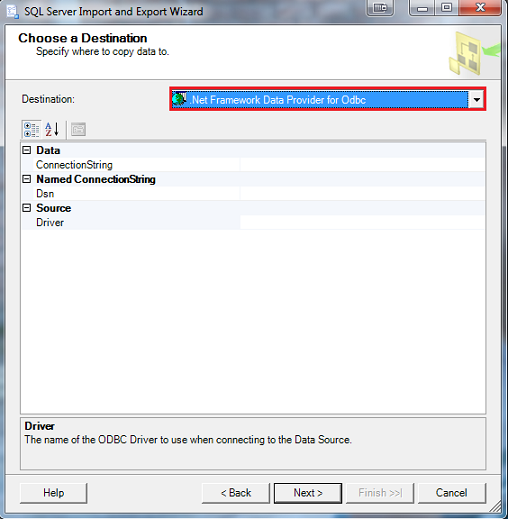
Change the destination to Microsoft OLE DB Provider for SQL Server. This will allow you to connect to your SQL Server.

Select your Server name and Database name from the drop down boxes or type them in, then select next
You will be taken to the select source and destination selection. SQL Server will automatically populate your data source that you entered at the beginning of this lesson as well as default a destination to a table named the same as your data source. If you already have a table created in your database, you may change the destination to that or just change the table name defined by SQL Server.
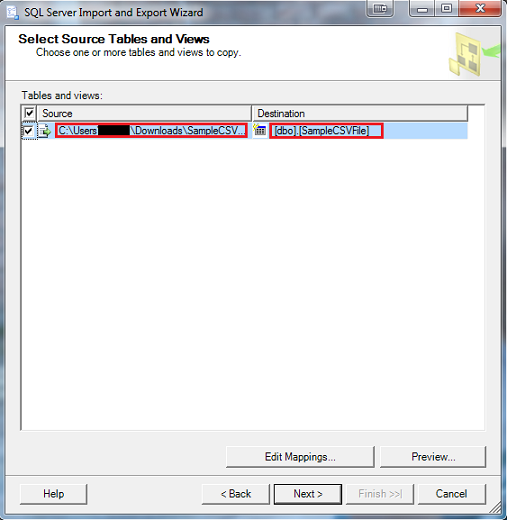
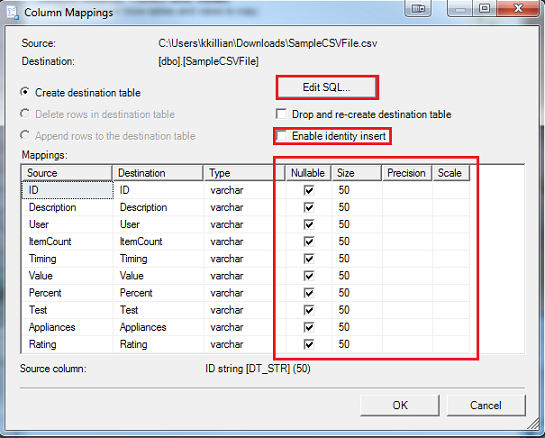
Here you will see the source CSV file we have been working with as well as the destination table in the database. I have selected to use the default name given by SQL Server however, feel free to change the name or select a different table. Click on the Edit Mappings button, if you would like to make any changes to the destination table or edit the create table script. Here you may also enable identity insert.
If no changes are necessary, then select OK on this screen and then select Preview on the next.
Preview will give you a preview of how your data will look in the table
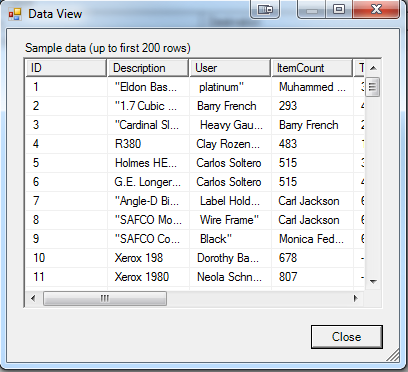
Once data is verified, close this screen and select Next.
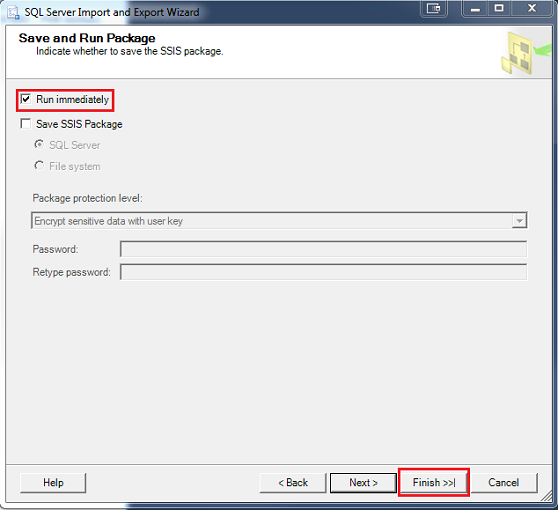
Now this screen is probably the most important screen in this series because it enables you to create an SSIS package after. I almost always use this option because you will not have to redo any of the steps above for subsequent runs. Also, the SSIS package can be added to a SQL agent job and scheduled. Since you save the SSIS package, you will also be able to modify the SSIS package too.
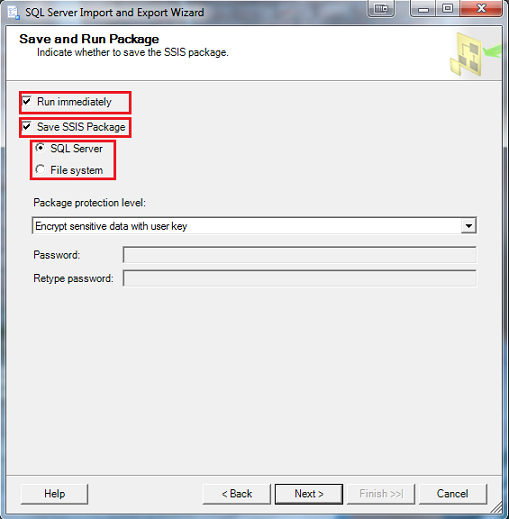
You have a choice to save your SSIS package directly into SQL Server or on your File System. Depending on how you are structured, neither is better than the other in my opinion, it just depends on how you want to organize it. Click next to continue. If you decide to save to the file system, you will be presented with this screen to save the file.
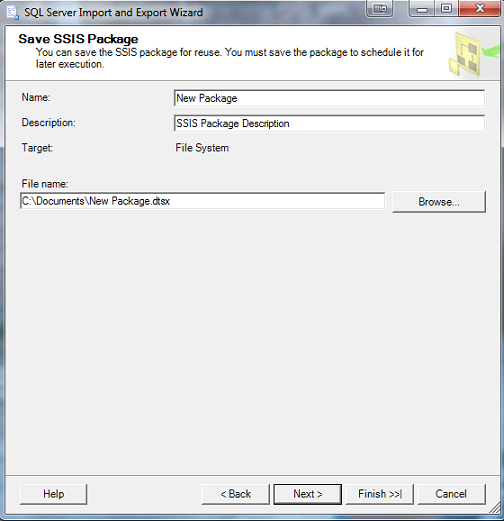
Add your file name and directory location and click next. You will be presented with a confirmation screen.
Then click Finish.
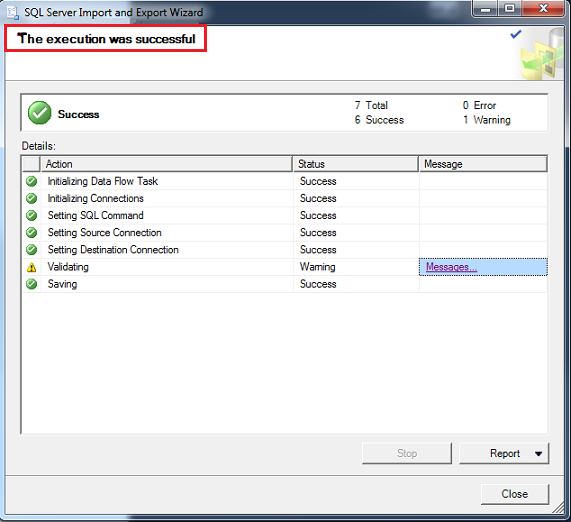
If the import is successful, you should get a confirmation.
You have successfully imported a CSV file into a SQL Server table. There are no scripts involved in this process, just the native Import feature within SQL Server Management Studio. This is basic SQL Server 101 but a very important and useful tool.
Related Links:
- Import and Export Data with the SQL Server Import and Export Wizard
- Start the SQL Server Import and Export Wizard
- Exporting SQL Server Data with SQL Server Management Studio Import and Export Wizard

For the last 15 years has focused her technology experience within the world of database solutions and specifically with MS SQL Server. She has published numerous articles spotlighting SQL Server and is an expert in monitoring and reporting on SQL Server performance.
View all posts by Kimberly Killian
- How to automatically refresh a SQL Server database - October 4, 2017
- SQL Server Index vs Statistics a consultants woes…or rants - December 29, 2016
- How to Split a Comma Separated Value (CSV) file into SQL Server Columns - December 29, 2016