

In this article, I’m going to discuss the different ways in which we can deploy SSAS cubes. SSAS or SQL Server Analysis Services is an enterprise-grade analytical data engine which helps business to create semantic models that can be used for reporting and making better decisions. The semantic layer created by SSAS can be accessed by client tools like Power BI, or Excel and reports can be prepared from thereon. SSAS comes with a few different versions, which are as follows.
- SQL Server Analysis Services – This is the on-premise version that ships with SQL Server and can be installed on any server running Windows. This version supports both multidimensional and tabular data models
- Azure Analysis Services – This is the SaaS offering from Microsoft, which can be consumed as an Azure resource. Azure Analysis Services currently supports only Tabular models with a compatibility level of 1200 or higher. You can develop the tabular data models using Visual Studio and deploy it to the Azure Analysis Services
- Power BI Premium – This is currently in preview mode and has added support for Power BI Premium datasets, which have a compatibility level of 1500 or higher. It also provides extensibility by providing client libraries and APIs which can support the open-standard XMLA protocol
SQL Server Data Tools (SSDT) is the authoring tool that is used to develop and deploy SSAS cubes. This feature comes with a stand-alone installation until Visual Studio 2017. However, for Visual Studio 2019, it can be downloaded and installed as an extension from the Visual Studio Marketplace. This article focusses only on how to deploy SSAS cubes and does not emphasize on the development of SSAS cubes.
First, it is important to know the different artifacts that are being generated while building as SSAS cube. If you see the figure below, you can see that there are four files. These files are generated when you build any SSAS project.

Figure 1 – SSAS Deployment Files
File Name | Purpose |
ASDATABASE | This is the actual deployment file that contains data related to all the dimensions and cubes that you have developed using Visual Studio. All the objects are defined in this file |
CONFIGSETTINGS | This file is specific to contain information regarding the data sources and other environment-related information. Although this information is already defined in the ASDATABASE file, it is overridden by the information from this file |
DEPLOYMENTOPTIONS | This file contains information regarding whether to deploy and process all objects and how the objects should be processed |
DEPLOYMENTTARGETS | This is a configuration file that contains the details of the server and instance name on which the project has to be deployed |
Let us now understand different methods by which we can deploy SSAS cubes. I’ll be explaining the following three methods in this article.
- Using the Analysis Services Deployment Wizard
- Using the command-line interface with Analysis Management Objects (AMO)
- Using the Database Synchronization Wizard
Analysis Services Deployment Wizard
You can start up the Analysis Services Wizard by navigating to the directory mentioned below and run the Microsoft.AnalysisServices.Deployment.exe. For my PC, which has SQL Server 2017 installed, the default location is – “C:\Program Files (x86)\Microsoft SQL Server\140\Tools\Binn\ManagementStudio\Microsoft.AnalysisServices.Deployment.exe”.
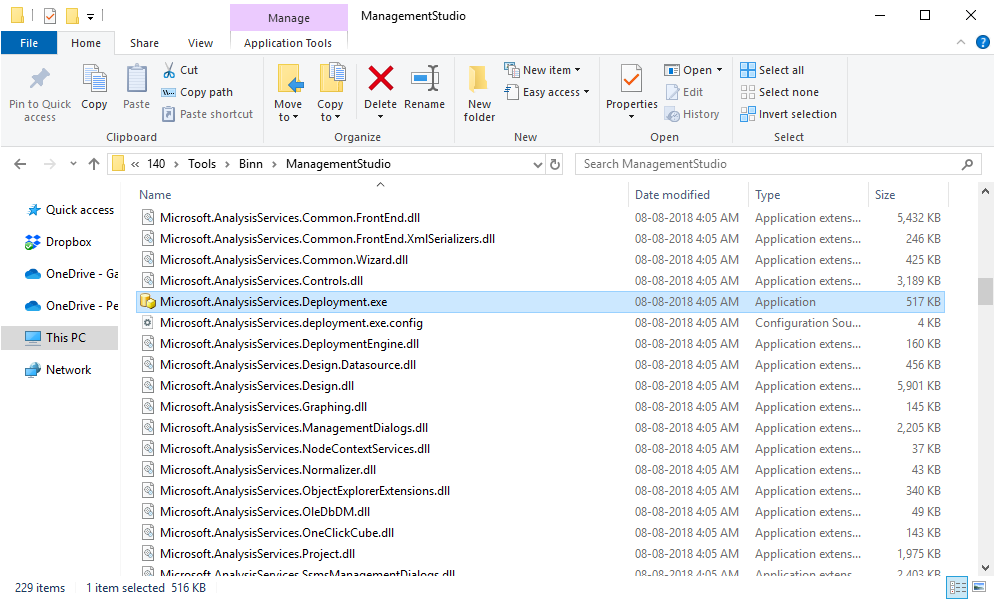
Figure 2 – Analysis Services Deployment Wizard
Once the wizard starts, you need to provide the path of the ASDATABSE file and proceed with the deployment process.
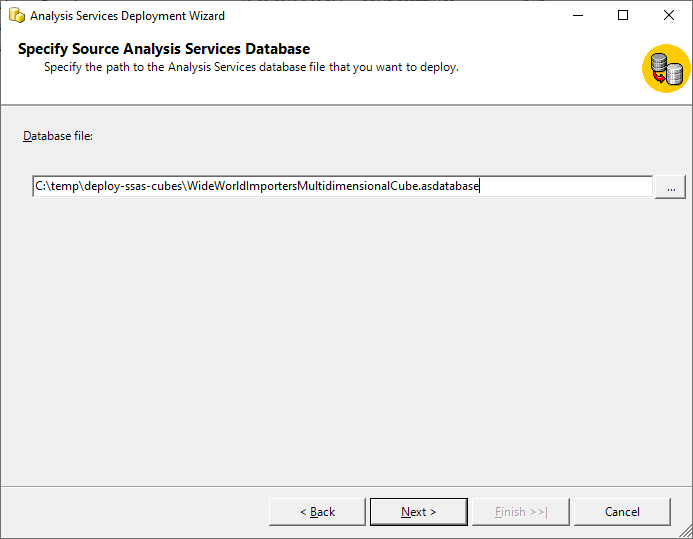
Figure 3 – Database File
In the next screen, the details of the target server and instance must be provided on which we want to deploy the SSAS cubes. Since I’m deploying it on the default instance, there is no instance name mentioned after the server name. Also, we need to provide the name of the database on which the project must be deployed. By default, it takes the name of the SSAS project as the default database name.
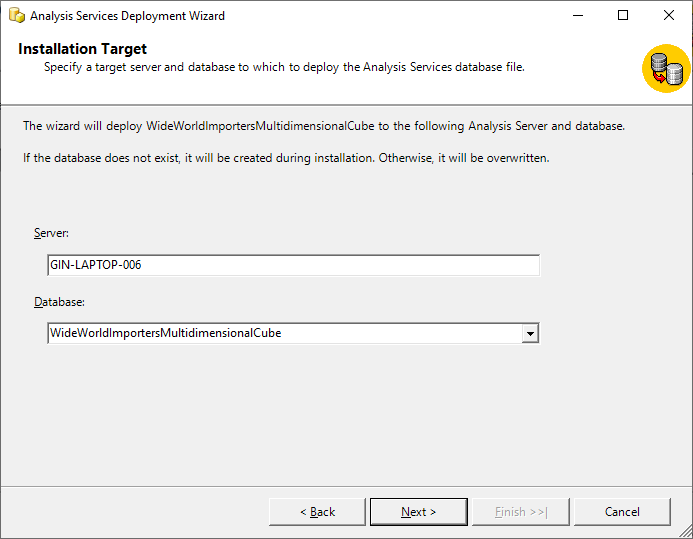
Figure 4 – SSAS Installation Target
In the following screen, you need to define the options pertaining to Partitions and Roles and memberships. In an ideal deployment scenario, we use the options “Deploy Partitions. Any existing partitions will be replaced.” and “Deploy roles and retain members. Roles will be deployed along with their members for new roles. Members for existing roles will be retained.”
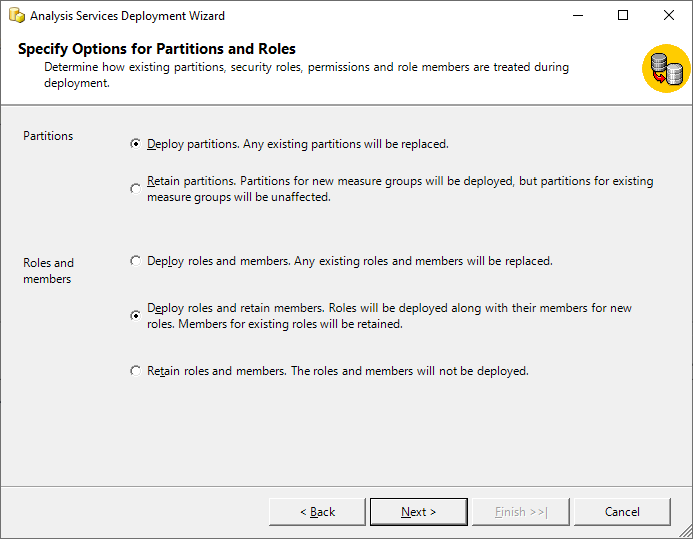
Figure 5 – Partition and Roles
In the following screen, you need to define the Data Source Connection Strings to the source of the SSAS cubes. Click on the button with three dots and define the connection. Also, select an appropriate Data Source Impersonation Information that can be used by the SSAS cube while processing the cubes.
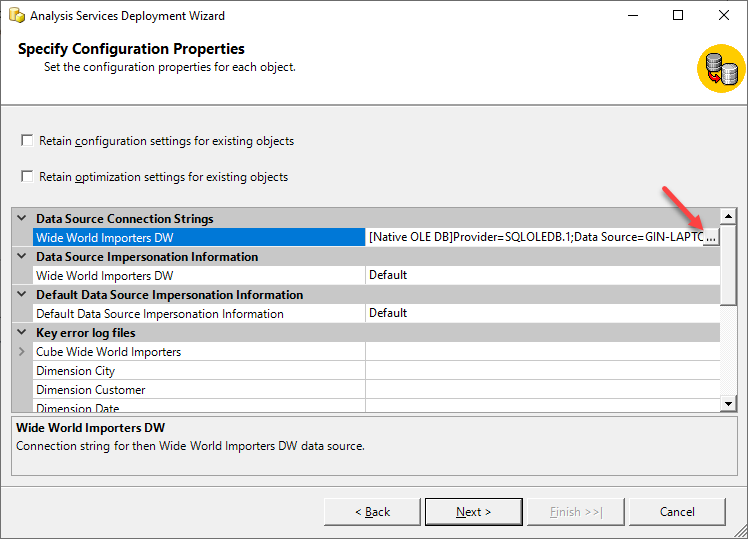
Figure 6 – Connection Properties
Finally, select the Processing Method as “Default Processing” and check the box for “Include all processing in a single transaction”. Hit Next and then Finish. The cube will be deployed and processed accordingly.

Figure 7 – Set Processing Options
The SSAS cube will be deployed, and you can browse the cubes using SQL Server Management Studio.
Analysis Management Object Command Line Interface
Navigate to the directory – “C:\Program Files (x86)\Microsoft SQL Server\140\Tools\Binn\ManagementStudio\Microsoft.AnalysisServices.Deployment.exe” and start the command prompt.
Start with the Microsoft.AnalysisServices.Deployment.exe and provide the path of the ASDATABASE file. Additionally, add the parameters “/d” and “/o” to generate a deployment script in XMLA format.
- /d – Represents that the deployment is to be done is a disconnected mode
- /o – The path of the deployment script
Microsoft.AnalysisServices.Deployment.exe
C:\temp\deploy-ssas-cubes\WideWorldImportersMultidimensionalCube.asdatabase
/d /o: C:\temp\deploy-ssas-cubes\DeploymentScript.xlma
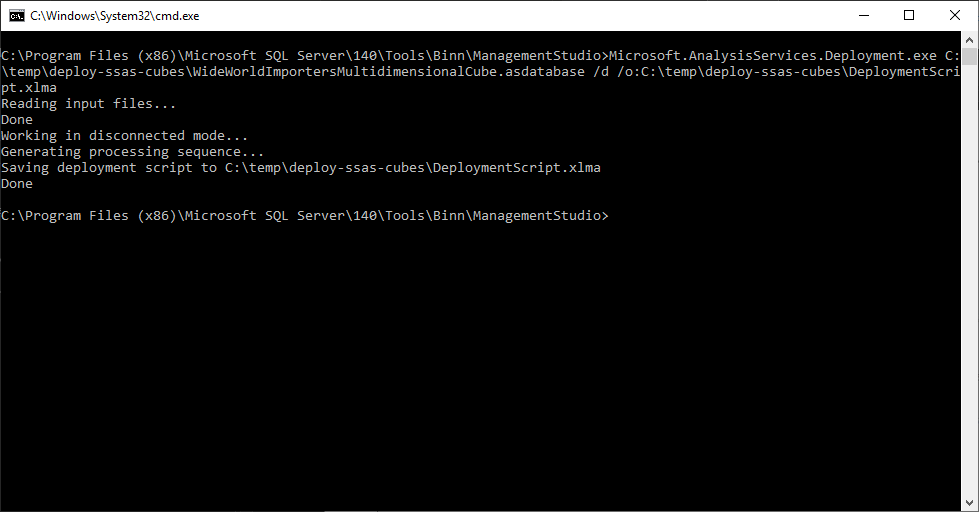
Figure 8 – Analysis Services Command-Line Deployment
Once the deployment script is generated, you can open the script in SQL Server Management Studio and execute it against the target server. It will deploy the SSAS cube to the target server as required.
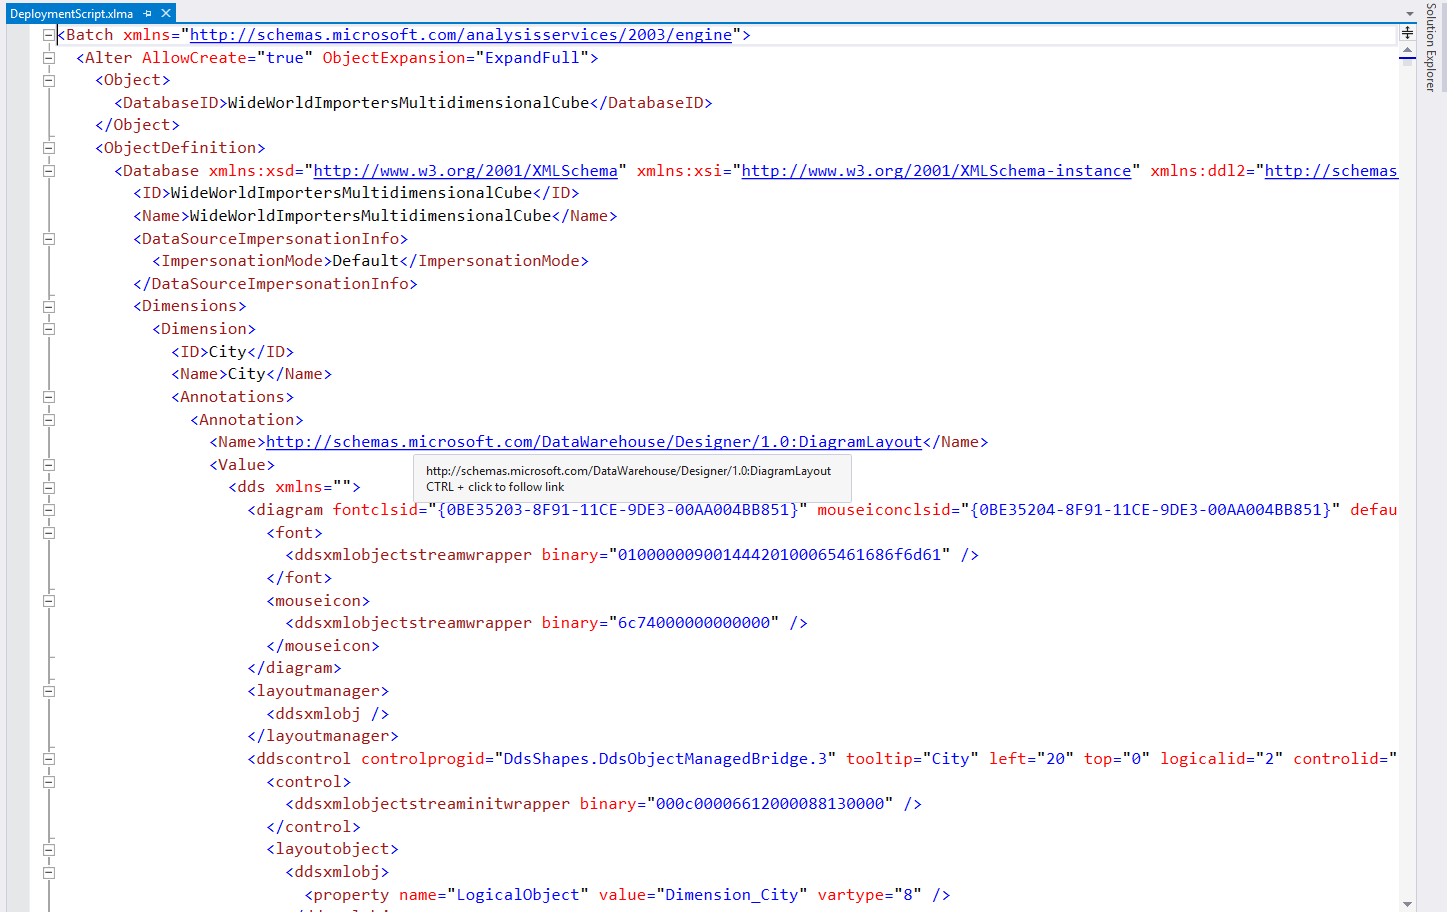
Figure 9 – XMLA Deployment Script
Database Synchronization Wizard
The Database Synchronization Wizard is another way to deploy SSAS cubes from one server to another directly. For example, this is useful when the SSAS cubes have already been tested in the test environment and are now ready to be deployed to the staging or production; we can leverage this method and deploy the SSAS cubes. The wizard compares the metadata between two instances of Analysis Services and then makes the target equivalent to that of the source by copying the metadata information from the source server to the target.
I have two instances of Analysis Services running – “SQLTEST01” and “SQLTEST02”. For this example, I’ll try to migrate the SSAS cube “WideWorldImportersMultidimensionalCube” from SQLTEST01 to SQLTEST02 using the Database Synchronization Wizard.
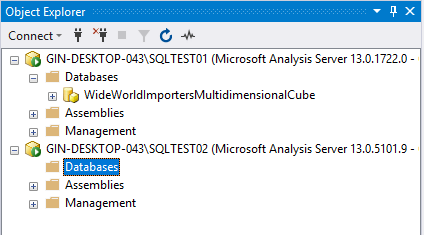
Figure 10 – SSAS Instances
Right-click on the Databases under SQLTEST02 and select Synchronize.
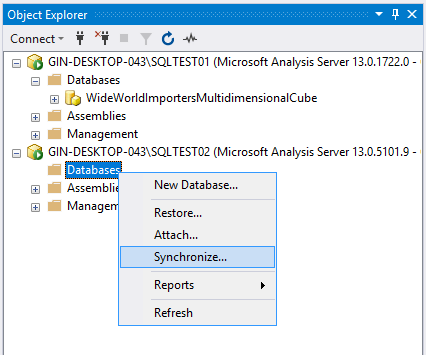
Figure 11 – Synchronize Database
In the next screen that appears, select the Synchronization Source Server as the “SQLTEST01” instance and the Database as the “WideWorldImportersMultidimensionalCube”. Click Next once done.
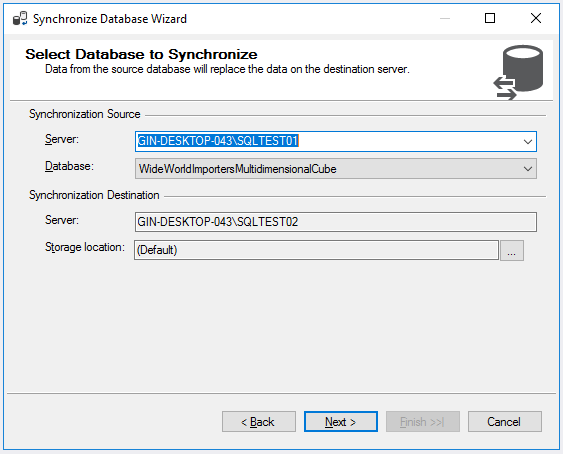
Figure 12 – Synchronization Source Database
In the following screen, leave everything as default and click on Next.
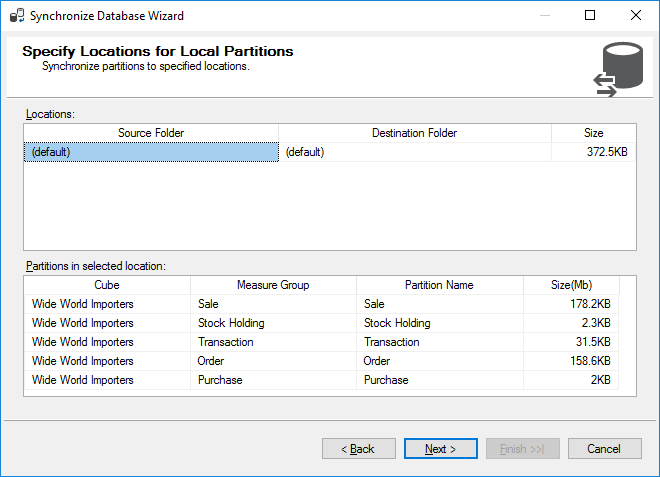
Figure 13 – Synchronization Location
Finally, select the “Copy all” option for Security roles and members and click on Next. In the next screen, select Synchronize Now and click Finish.
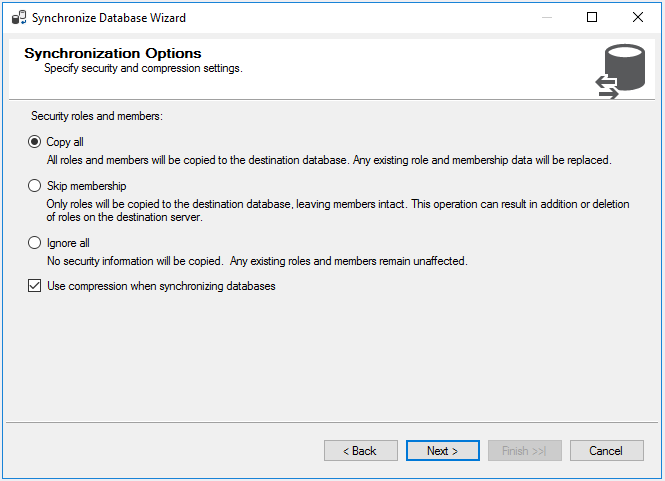
Figure 14 – Synchronization Options
Depending on the size of the database, it might take a while to synchronize the databases. You can monitor the progress in the Database Synchronization Progress window.
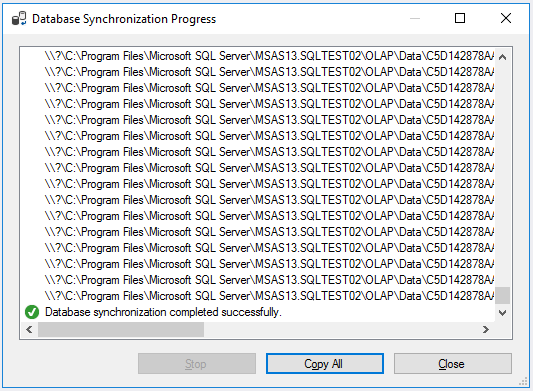
Figure 15 – Deploy SSAS Cubes using Database Synchronization
As you can see, now, the SSAS cube has been deployed to the SQLTEST02 instance as well.
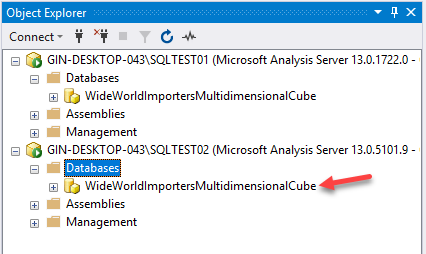
Figure 16 – Database Synchronization Completed
Conclusion
In this article, I have explained how to deploy SSAS cubes using three different methods. Although it depends on the environment that you’re trying to deploy the SSAS cubes, the most preferred way of deploying the cubes is by using Analysis Services Deployment Wizard as it has a GUI, which makes the task easier for a lot.

He is a prolific author, with over 100 articles published on various technical blogs, including his own blog, and a frequent contributor to different technical forums.
In his leisure time, he enjoys amateur photography mostly street imagery and still life. Some glimpses of his work can be found on Instagram. You can also find him on LinkedIn
View all posts by Aveek Das
- Getting started with PostgreSQL on Docker - August 12, 2022
- Getting started with Spatial Data in PostgreSQL - January 13, 2022
- An overview of Power BI Incremental Refresh - December 6, 2021