

This article will walk you through the process to create a Flexible server model of Azure Database for PostgreSQL and learn the unique features offered by it.
Introduction
Microsoft Azure platform provides a range of options to host database servers on the Azure platform in an Infrastructure-as-a-service, Platform-as-a-Service, and Software-as-a-service option. Examples of different database products offered on the Azure platform are SQL Server, MySQL, PostgreSQL, CosmosDB, Cassandra, and others. PostgreSQL is one of the most popular open-source database servers used in the industry and is available on the Azure platform in a PaaS model through the service Azure Database for PostgreSQL. To date, the most common option to deploy PostgreSQL on the Azure platform has been the Single Server option. Using this model one can deploy a PostgreSQL Server with typical settings that are used or required for a transactional system. This option is suitable where the requirements for customization of the database server are minimal. This option offers the typical capabilities of high availability, disaster recovery, managed storage, etc. But often this does not eliminate the need to customize, optimize or fine-tune the database server settings to suit the needs of the application or business to which the database server caters.
As of the draft of this article, Azure recently launched a new model of Azure Database for PostgreSQL – Flexible server, which allows a great deal of customization than the Single Server option, which is typically considered to be a start-up option when the development environments or sandbox environment are created. By the time database servers are moved to production or after the database has been deployed for a reasonable duration in production, one may need to customize it and that’s when the Flexible server deployment model may step in. In this article, we will learn how to create a Flexible server model of Azure Database for PostgreSQL and also understand the unique features associated with it.
Deploying Azure Database for PostgreSQL – Flexible server Model
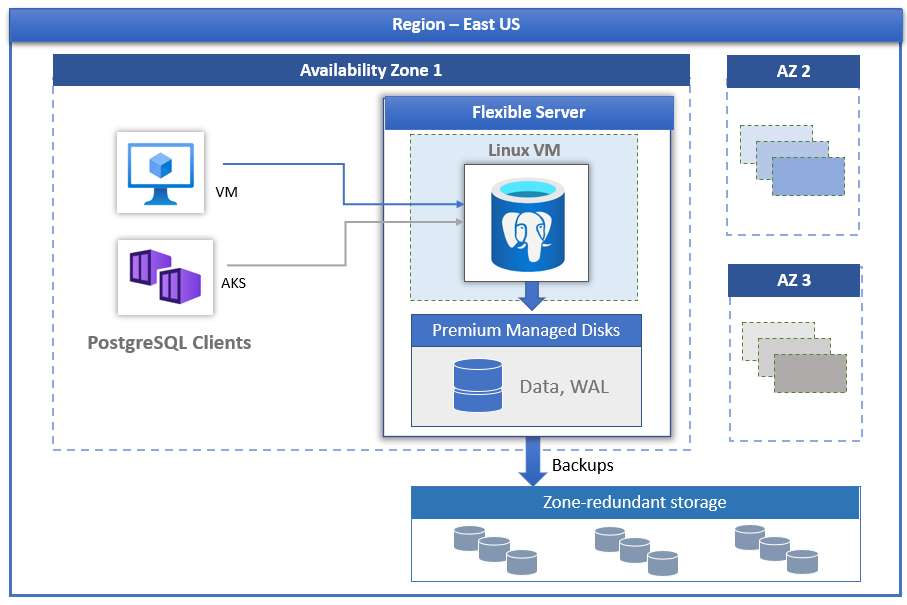
As the name suggests, the Flexible server model provides much more configuration or customization settings for database server management and operations than the single server model. Some unique features include the ability to deploy the server in multiple availability zones, cost optimization options which include stop/start/pausing of the database server, customized management windows, configuring alerts on the metrics, built-in connection pooling feature using the PostgreSQL’s native PgBouncer feature and much more. For an exhaustive list of features, refer to Azure documentation here.
Now that we know the unique offerings of the Azure Database for PostgreSQL – Flexible server model, let’s go ahead and learn how to deploy this model step by step. It is assumed that one has required privileges on the Azure platform to access/administer this service.
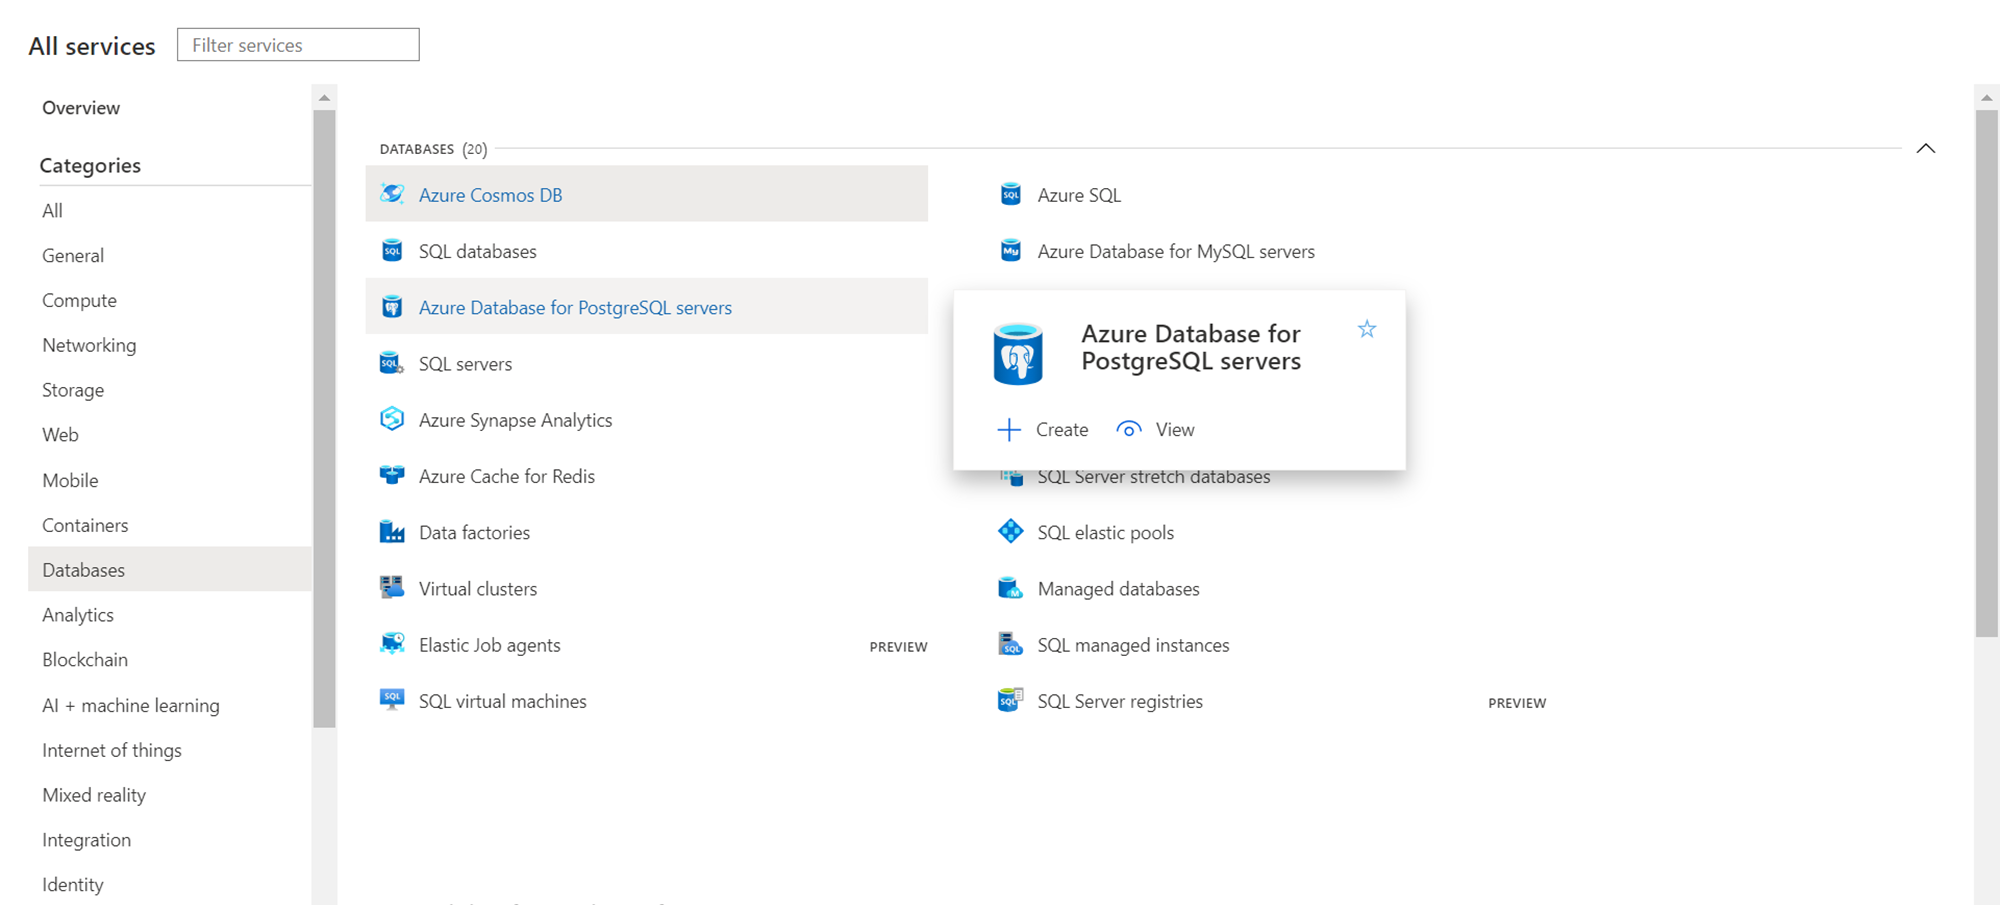
Navigate to the Azure portal and click on All Services. Under the databases section, you would find the service titled Azure Database for PostgreSQL, as shown below. Click on this link to open the dashboard from where we will start the wizard that will create the database server.
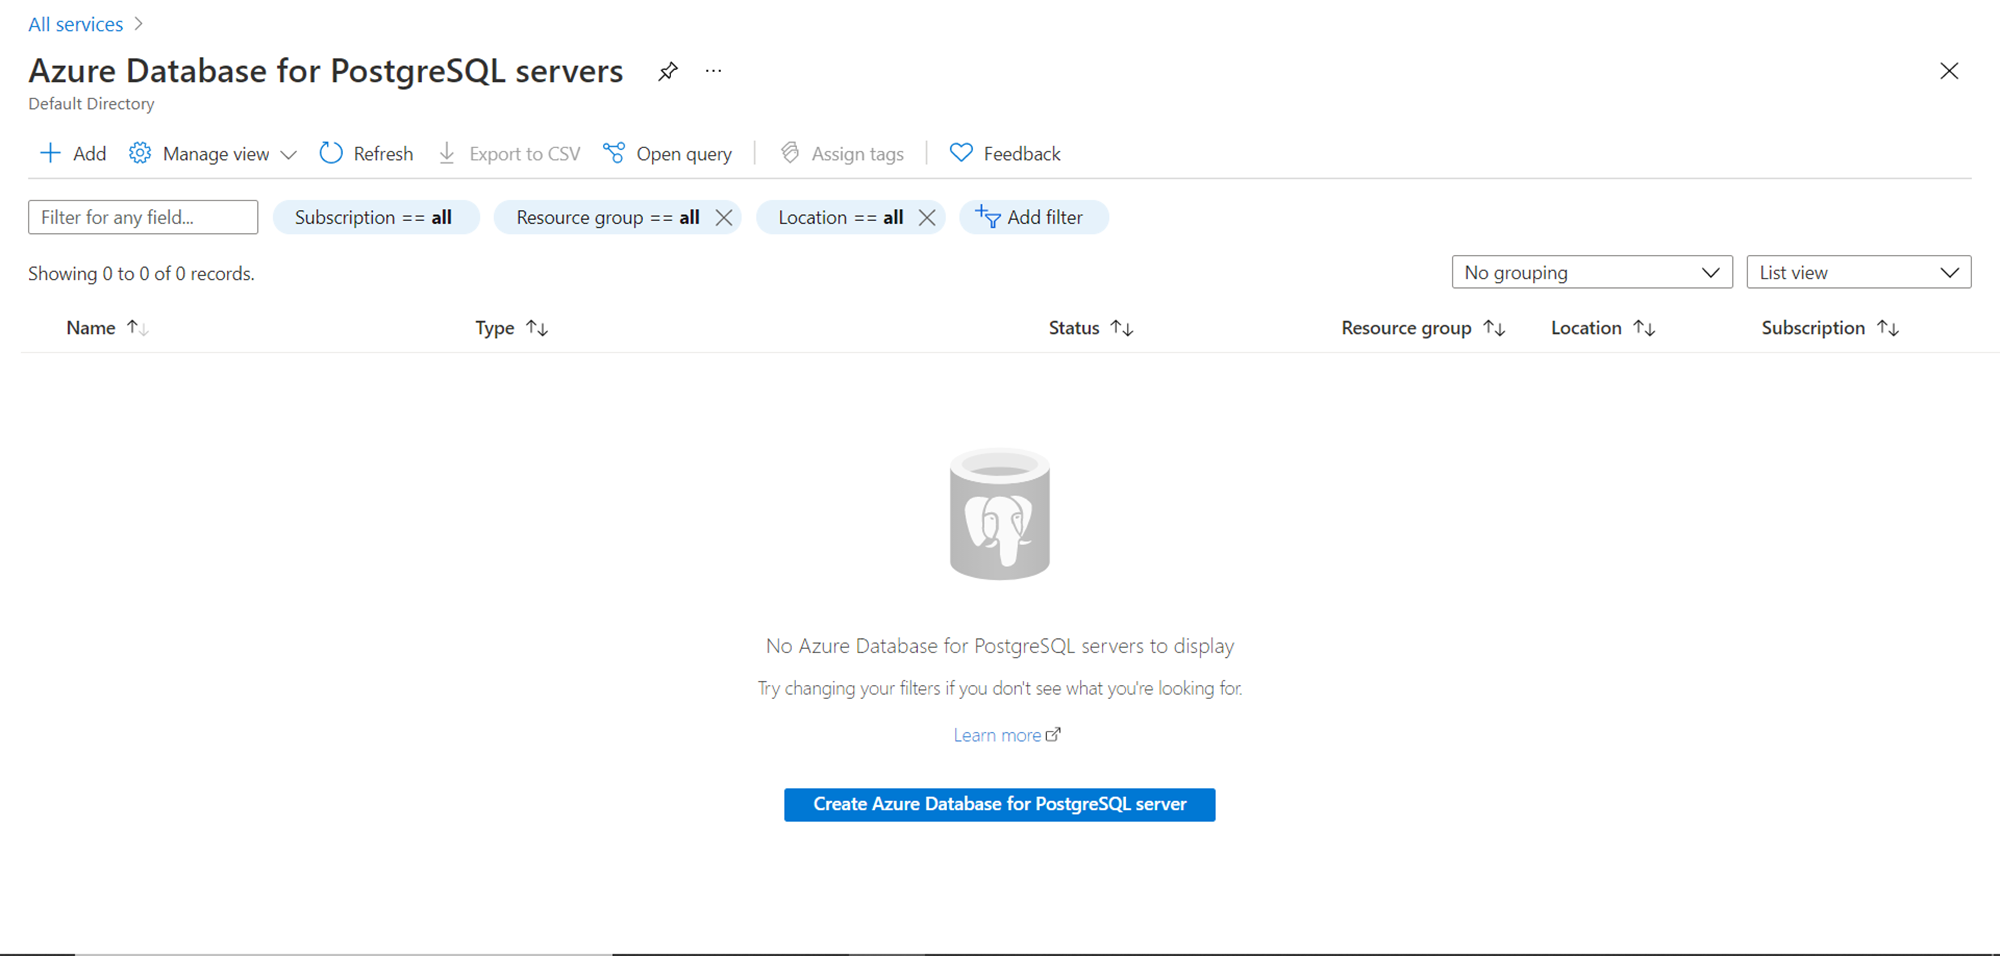
Once you are on the dashboard page, it would look as shown below. As we do not have any server created, the list would be empty. To invoke the wizard that creates the database server, click on the button titled “Create Azure Database for PostgreSQL server”.
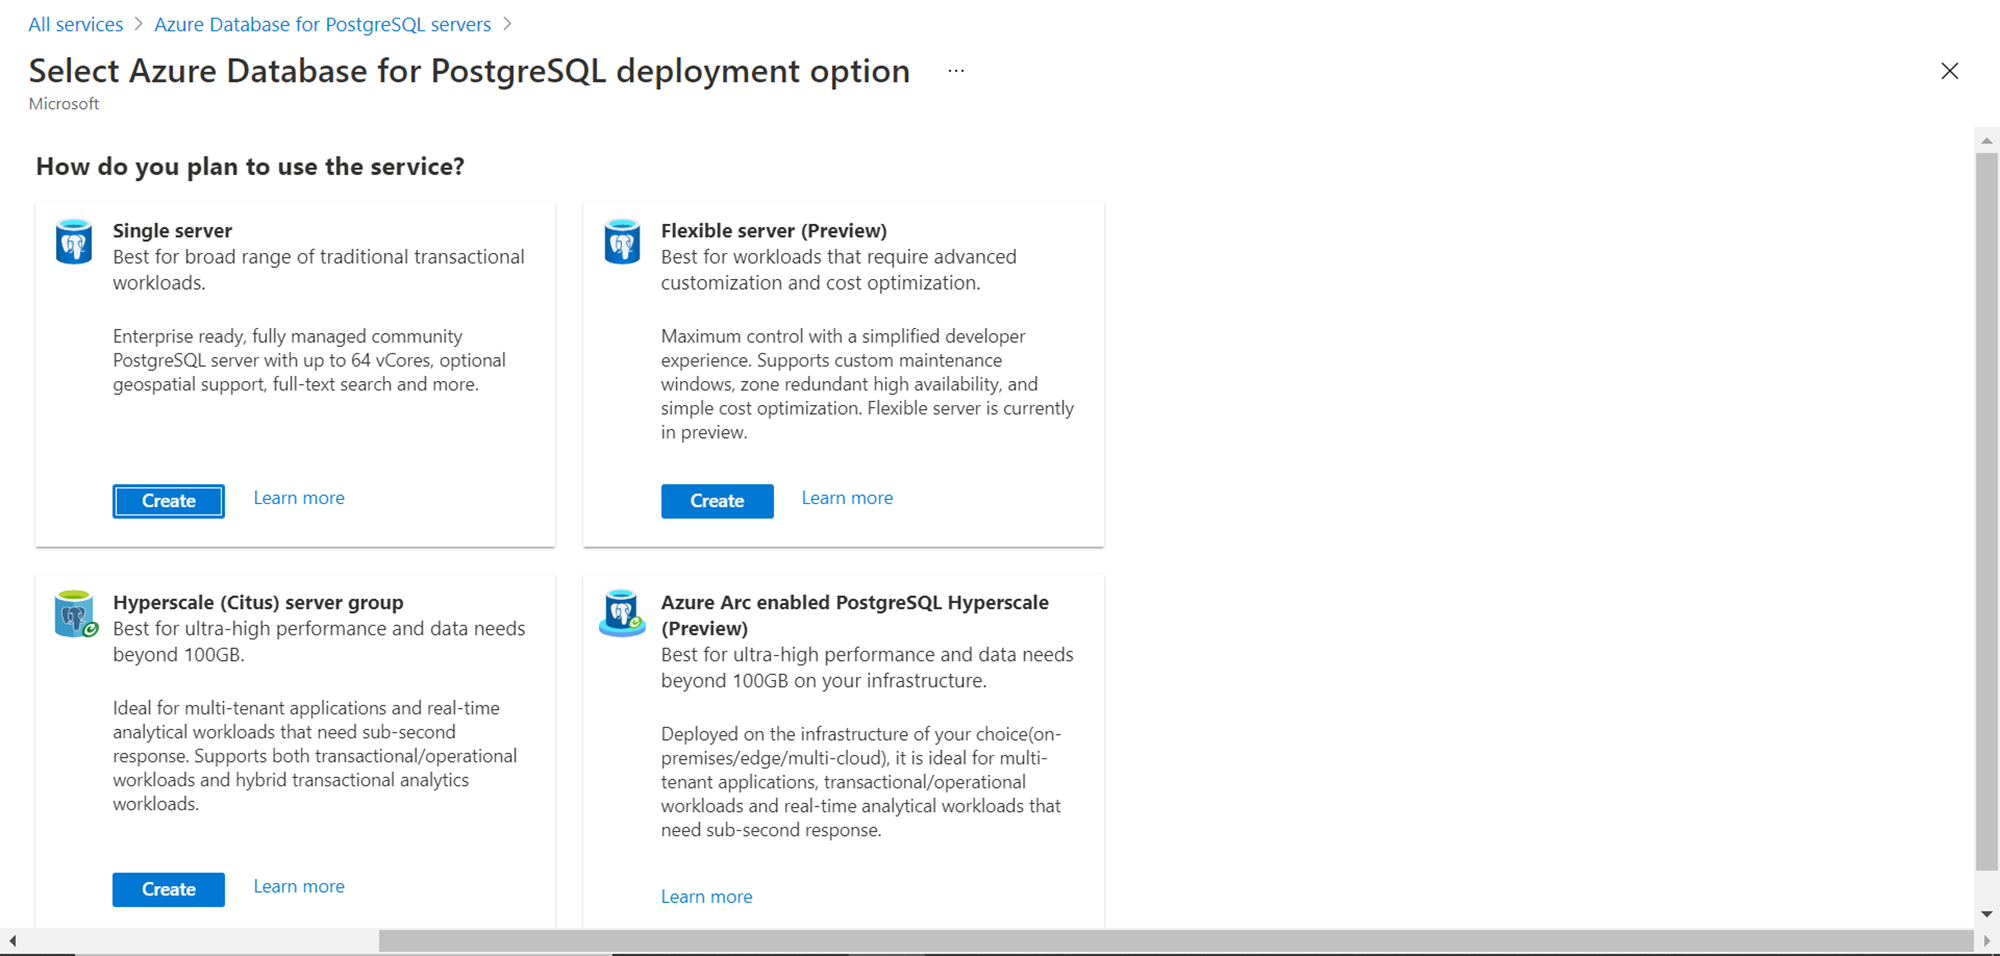
Once you click on the button, a new wizard would be invoked as shown below. Here we can see that there are four different options to deploy the PostgreSQL server. One of our interests at present is the Flexible server option. Click on the Create button in the Flexible server section.
To start with, we need to fill up the basic details like the subscription and resource group. If you do not have a resource group, you can create one and then select the same here. We then need to provide an appropriate server name as well as select the location in which the server will be created. In this case, we are creating the server in the East US location.
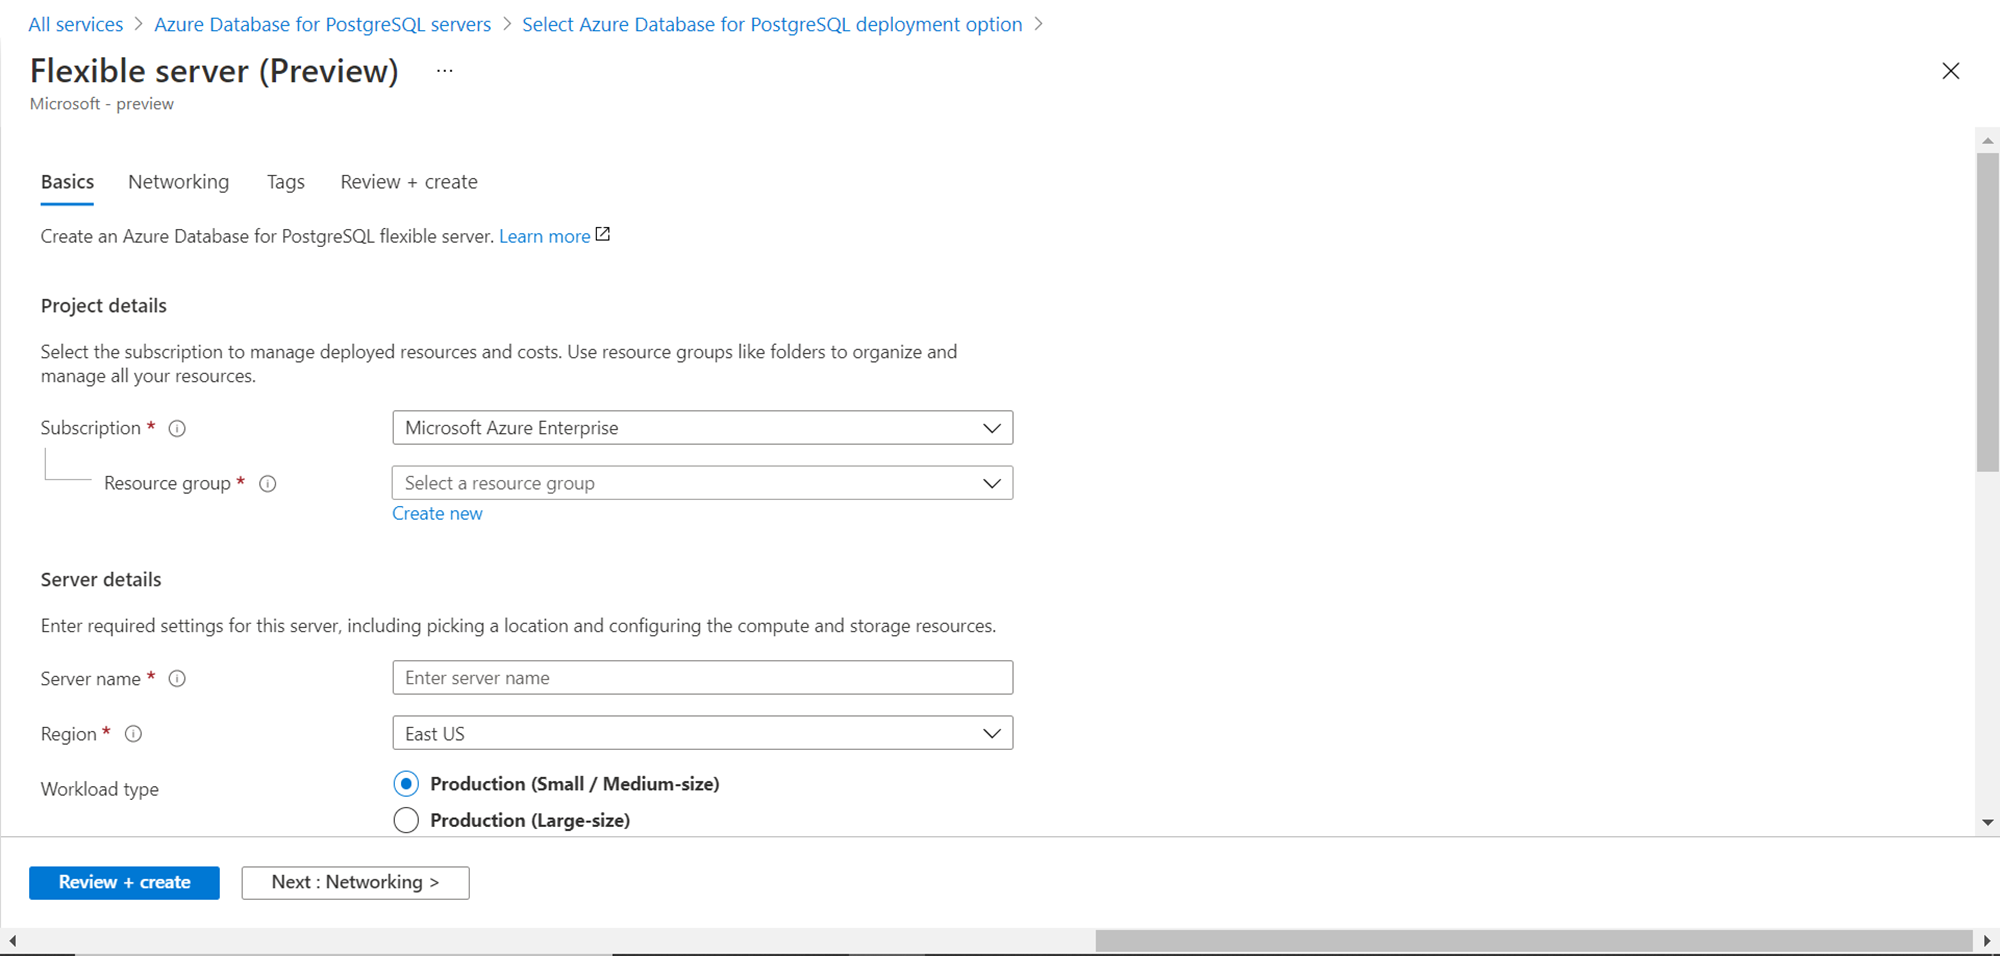
By default, the selected workload type is Production (Small/Medium size). The workload type setting selects or provides ranges of configuration, which would have proportional cost as well. For our exercise, we just intend to explore the database server and terminate it as soon as we are done. So, the ideal workload for our use-case is Development. Select this workload type as shown below. Depending on the selected workload type, the configuration options for compute + storage would become available. In the development workload type, the default option is 1 vcore, 2 GiB RAM and 32 GiB storage. It is obvious from this configuration that this configuration would be suitable for non-production environments typically.
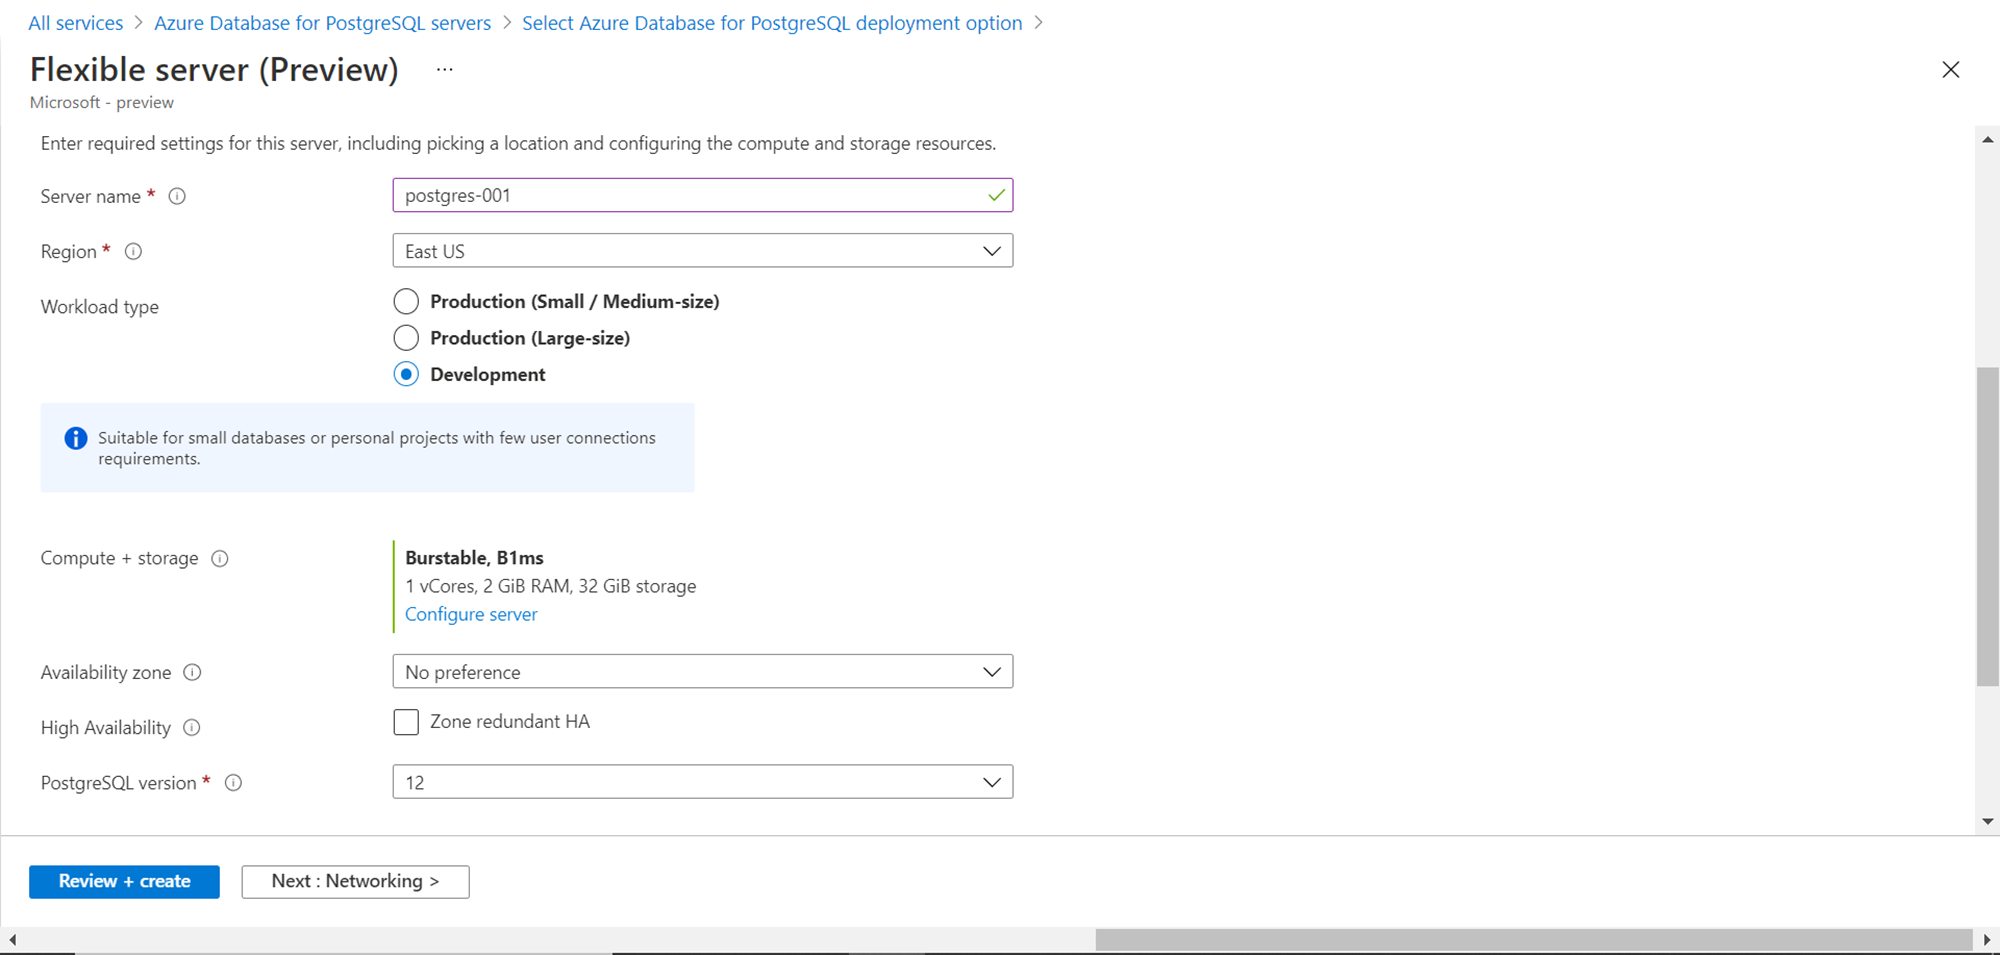
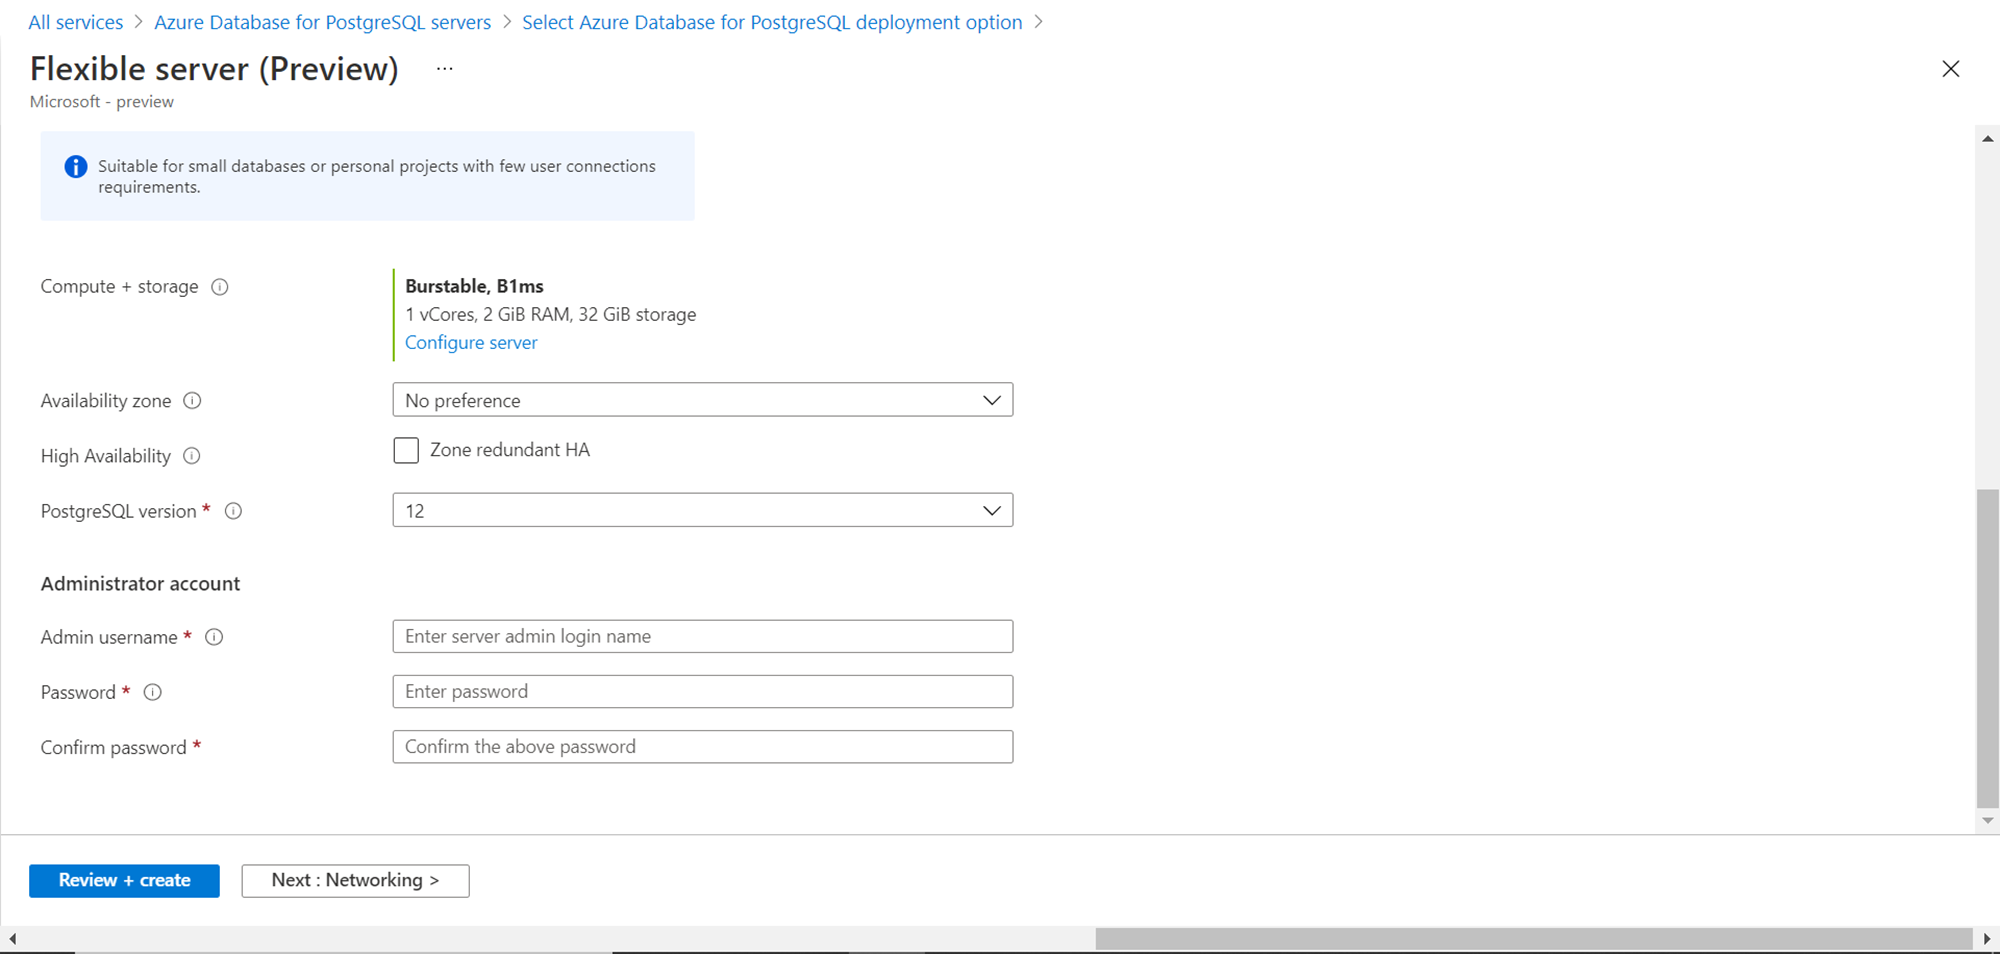
If we intend to customize the compute + storage setting, click on the Configure server link and it will provide options to customize the options. For now, we do not intend to customize the capacity as our interest is in exploring the customizations offered by this deployment model than the capacities it can scale to. So, we will proceed with the default option. Scroll down and fill in the rest of the options. If one has preferences for deploying in a specific availability zone, one can choose it. Development environments do not need to be highly available or zone redundant, but when creating a server for production workloads, one would want to check this option. Provide a username and password for the administrator account and click on the Next button to move on to the Networking section.
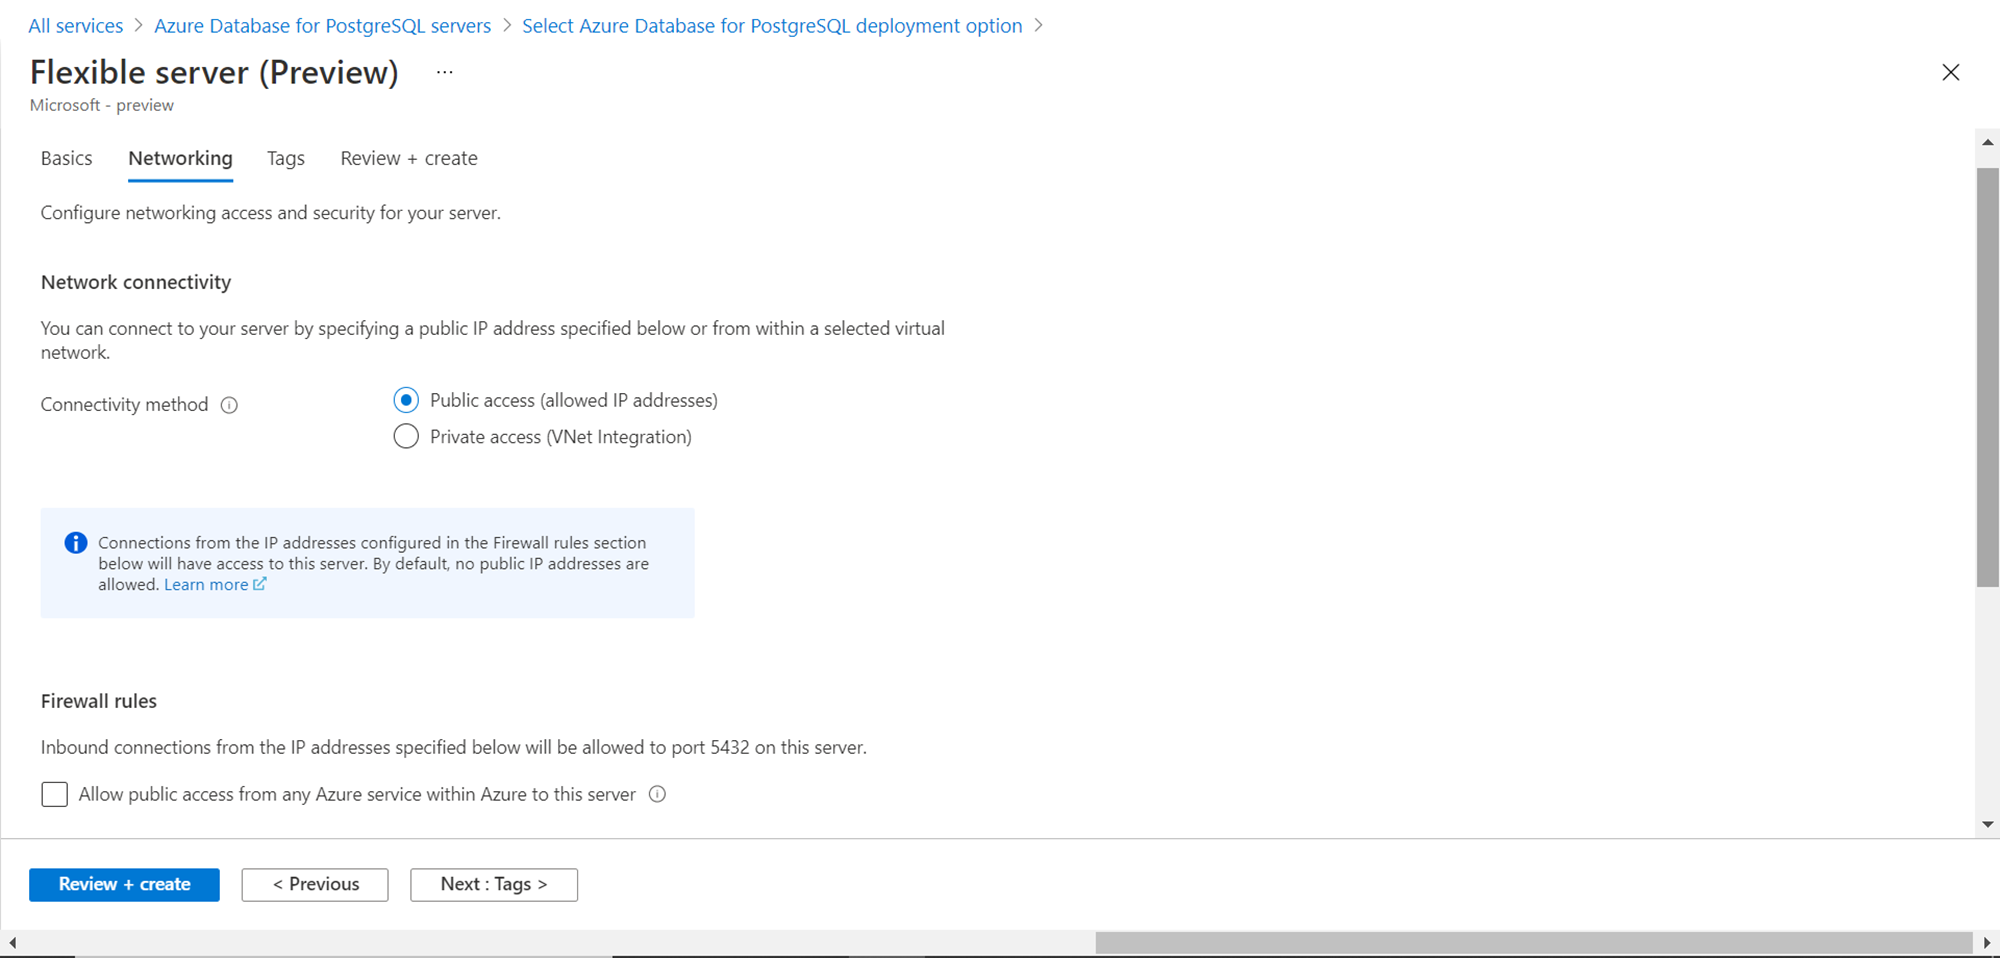
In the Networking section, we need to select whether we intend to provide public access or private access to this server. For now, we can continue with public access and add the client IP from which you are accessing the Azure portal, so that you can access this server from your machine. Once done, click on the next button to add any tags. As Tags is an optional step, we can bypass it for now, and move to the Review + Create step.
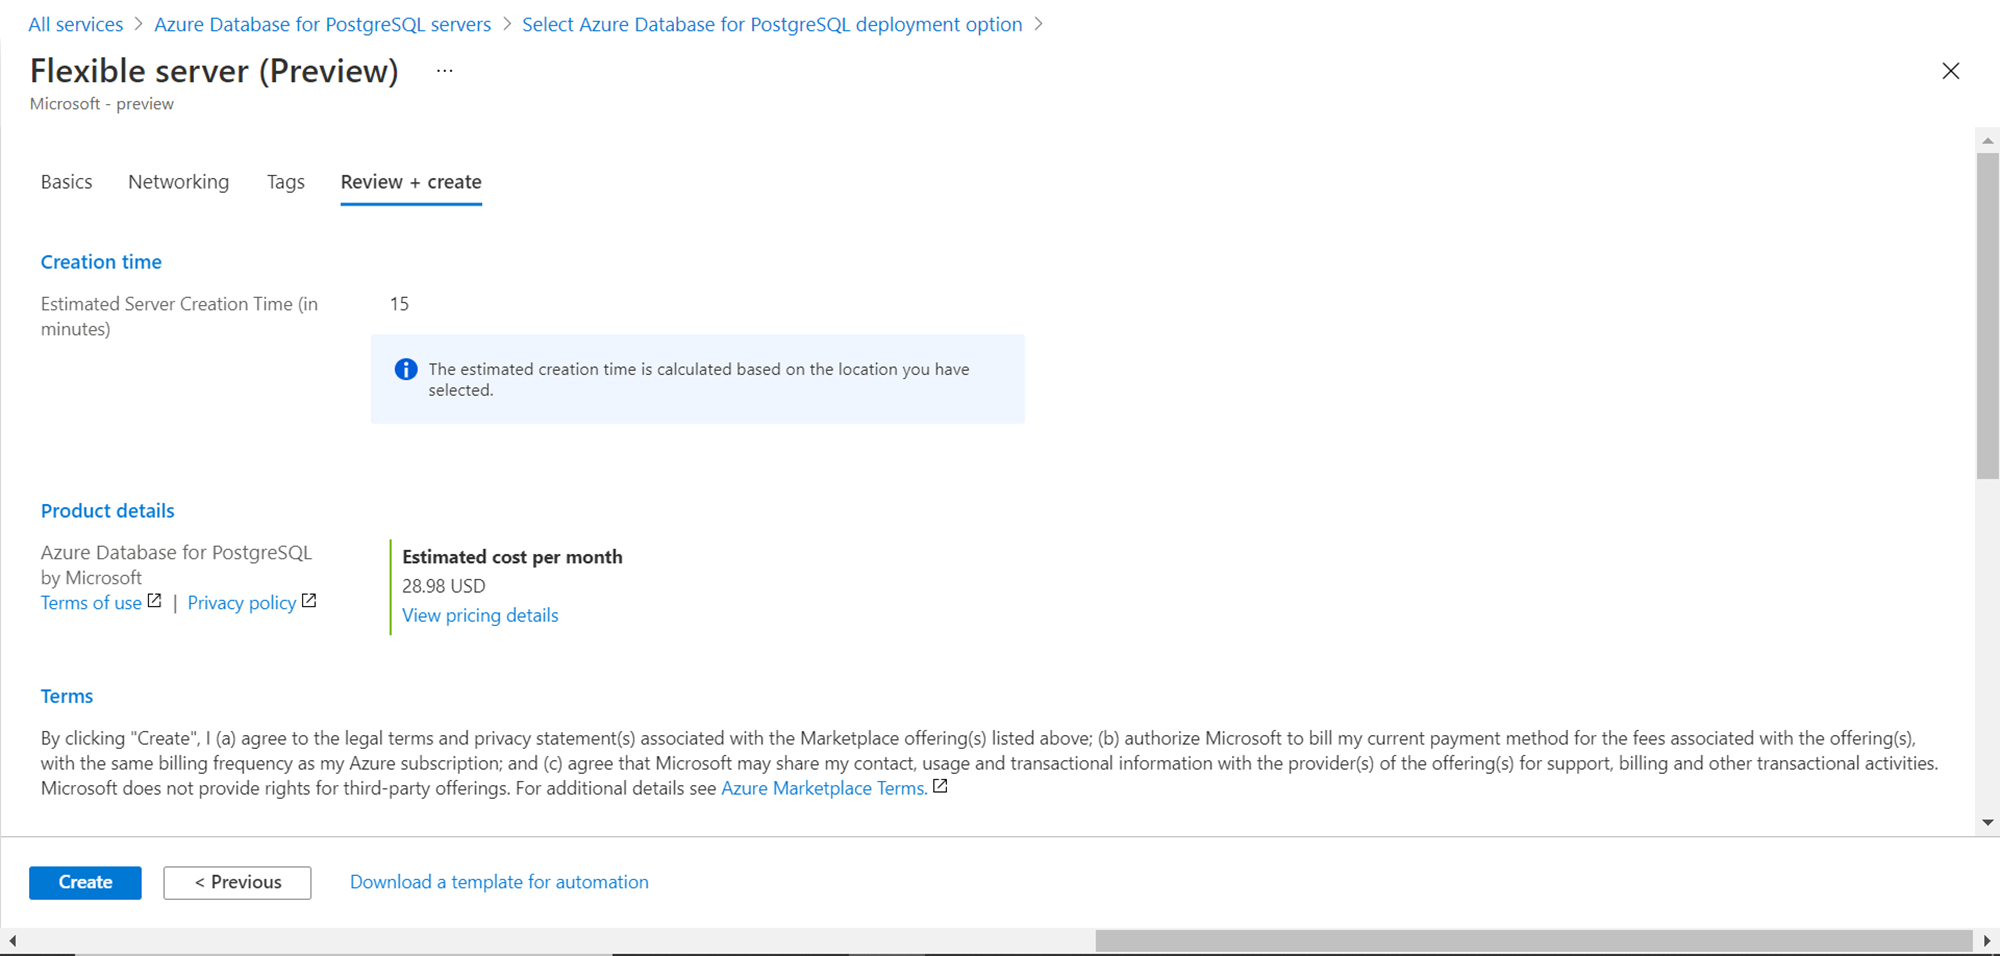
On this page, there are two details to take notice of. One is that the creation of this configuration and model of the PostgreSQL server can take up to 15 minutes and the monthly cost of this server is expected to be under $30. Considering that we are going to keep this server on for a fraction of time compared to a monthly usage, the cost for using this server for our use-case should be a couple of cents at max. Click on the Create button once done to deploy this server.
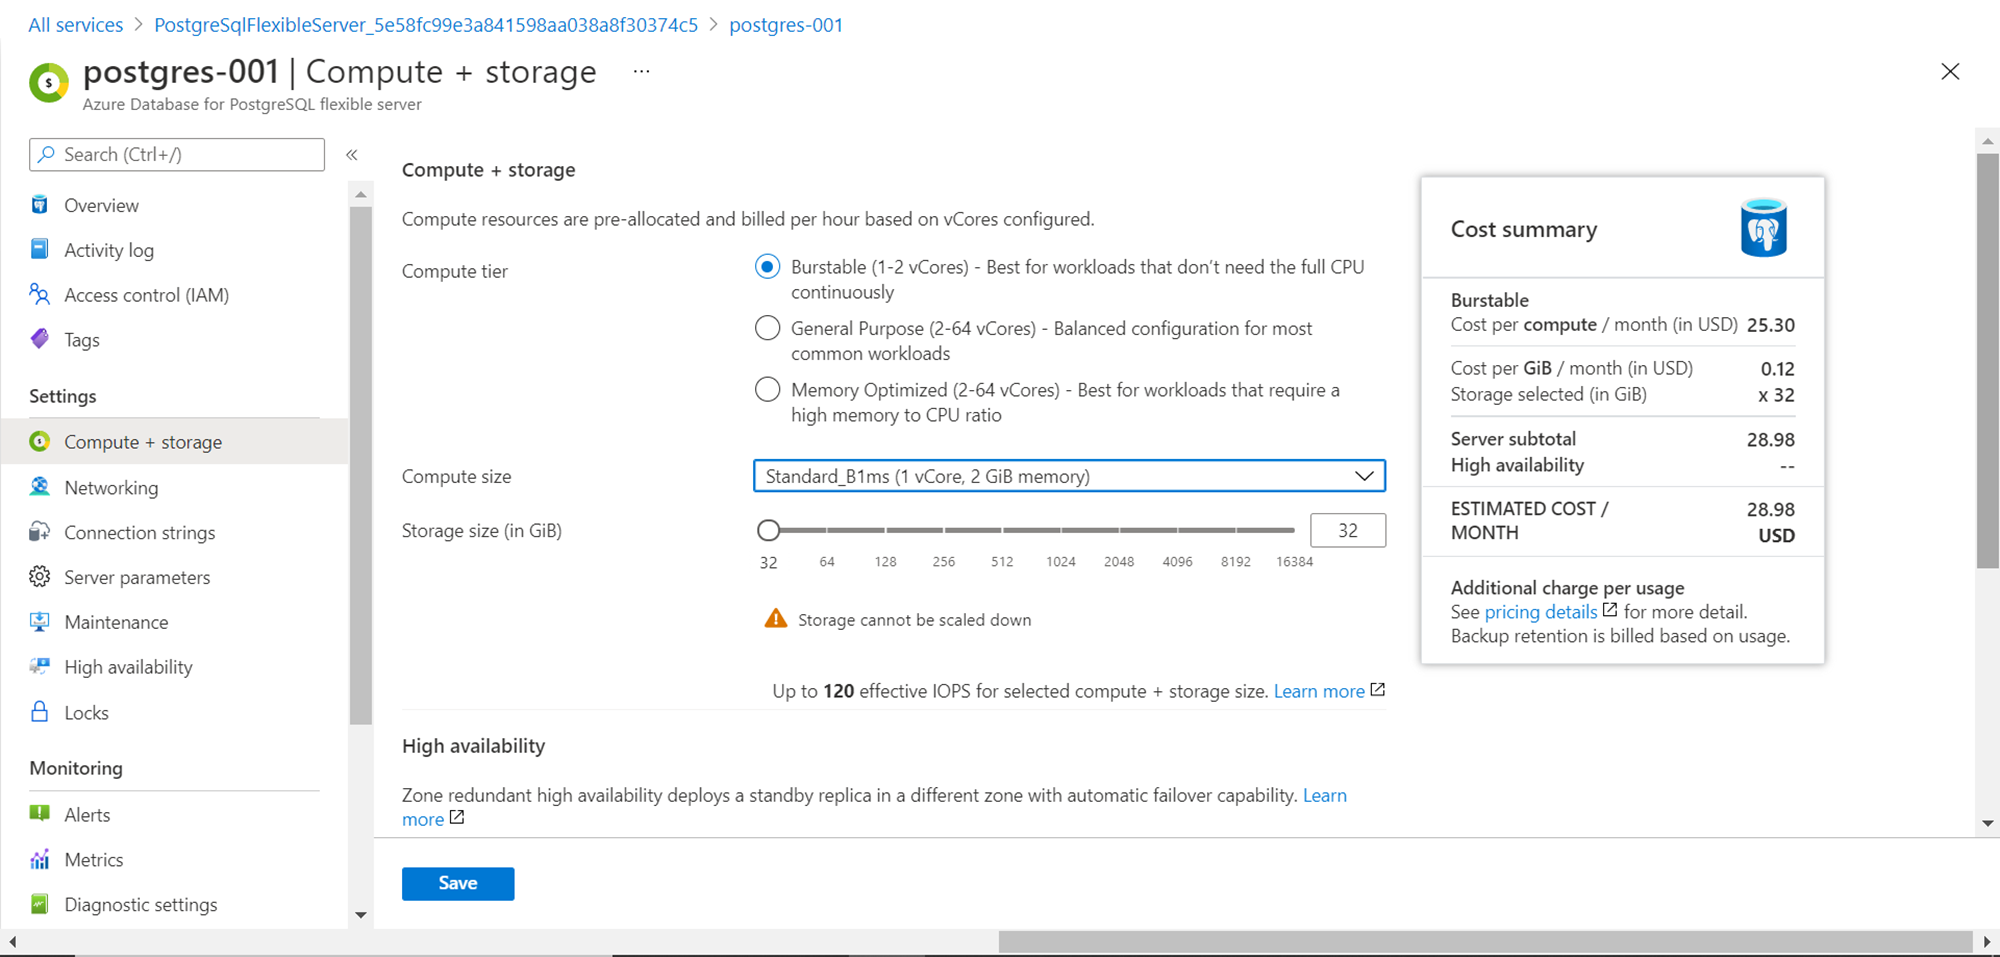
Once the server is deployed, navigate to the dashboard of this server. On the left pane, we should be able to find a variety of details and options. We intend to focus on the customization options. The first customization option can be found under the Compute + Storage setting as shown below. We can change the compute and storage tier, which would have a direct impact on capacity, performance as well as cost. We can also change the high availability setting and backup retention setting from this page.
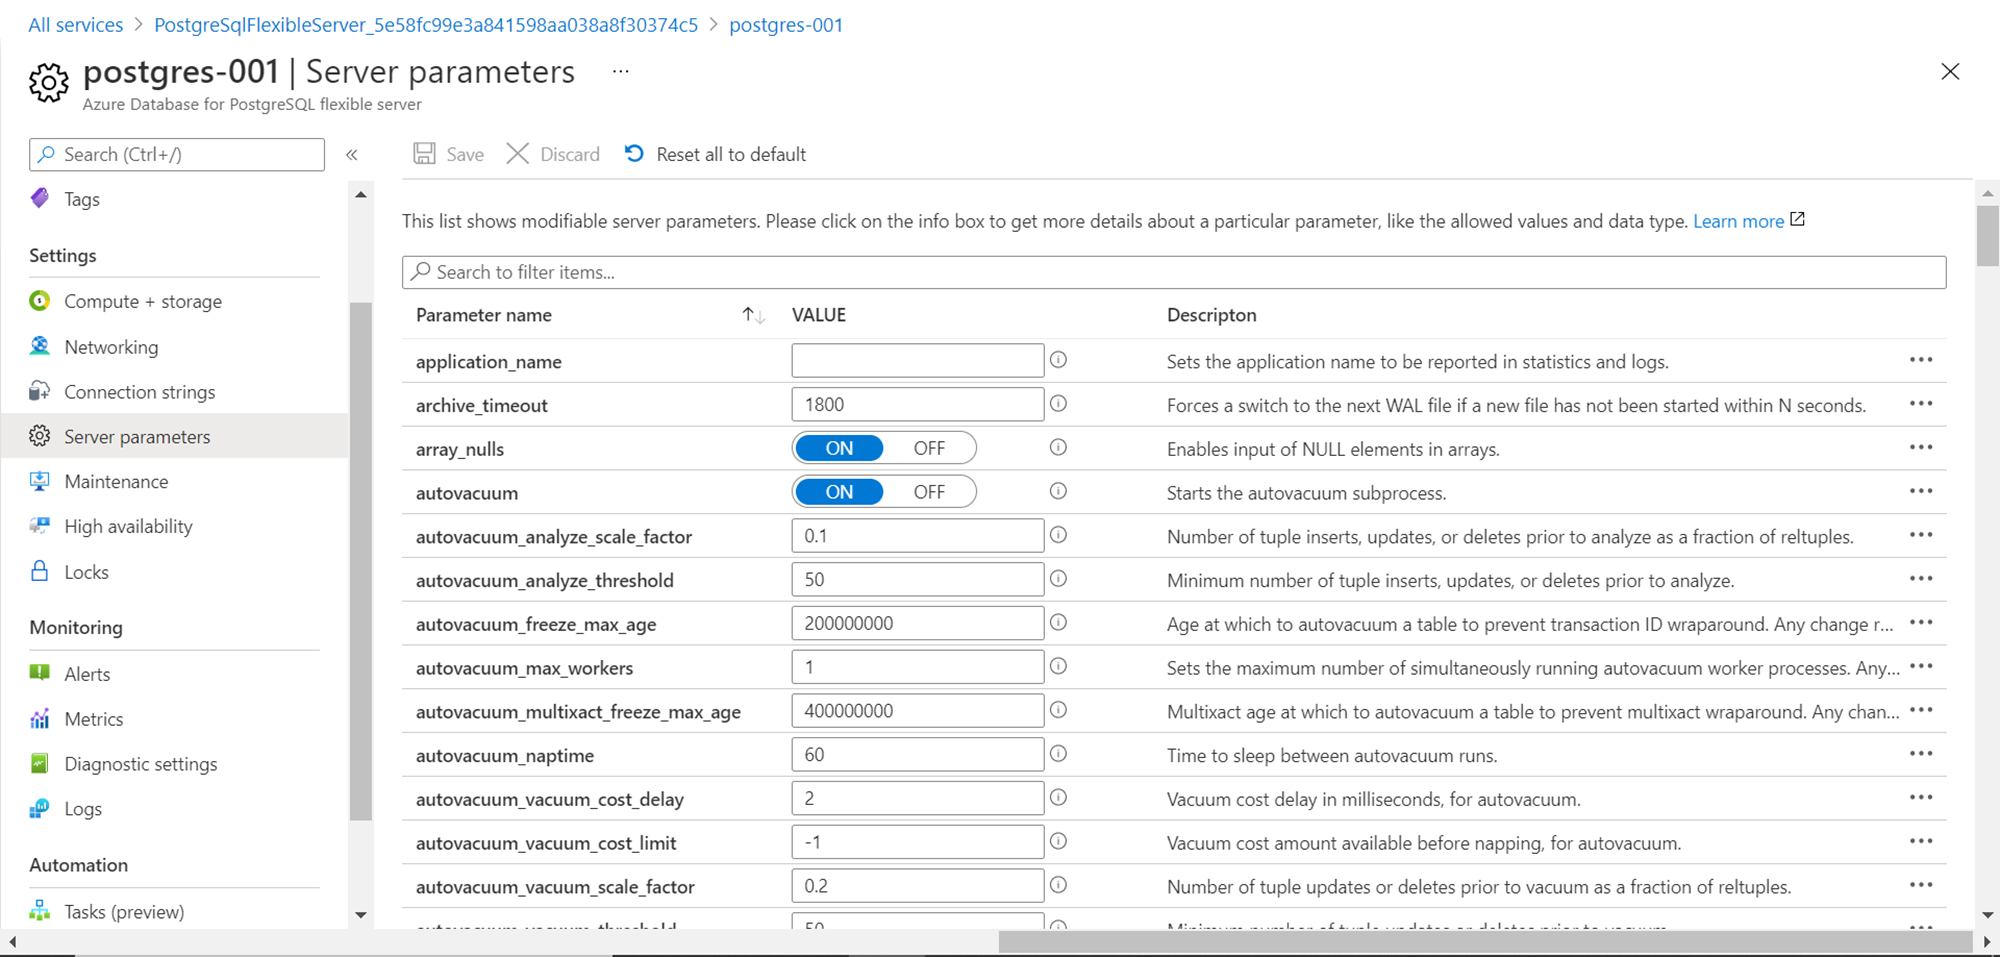
The next customization option can be found under the Server parameters link as shown below. Here we can find tons of options to configure every minute aspect of the server that affects performance, cost, configuration, and almost every factor that a database administrator would want to fine-tune depending upon requirements. This is one of the big differentiators compared to the Single Server model of Azure Database for PostgreSQL Server.
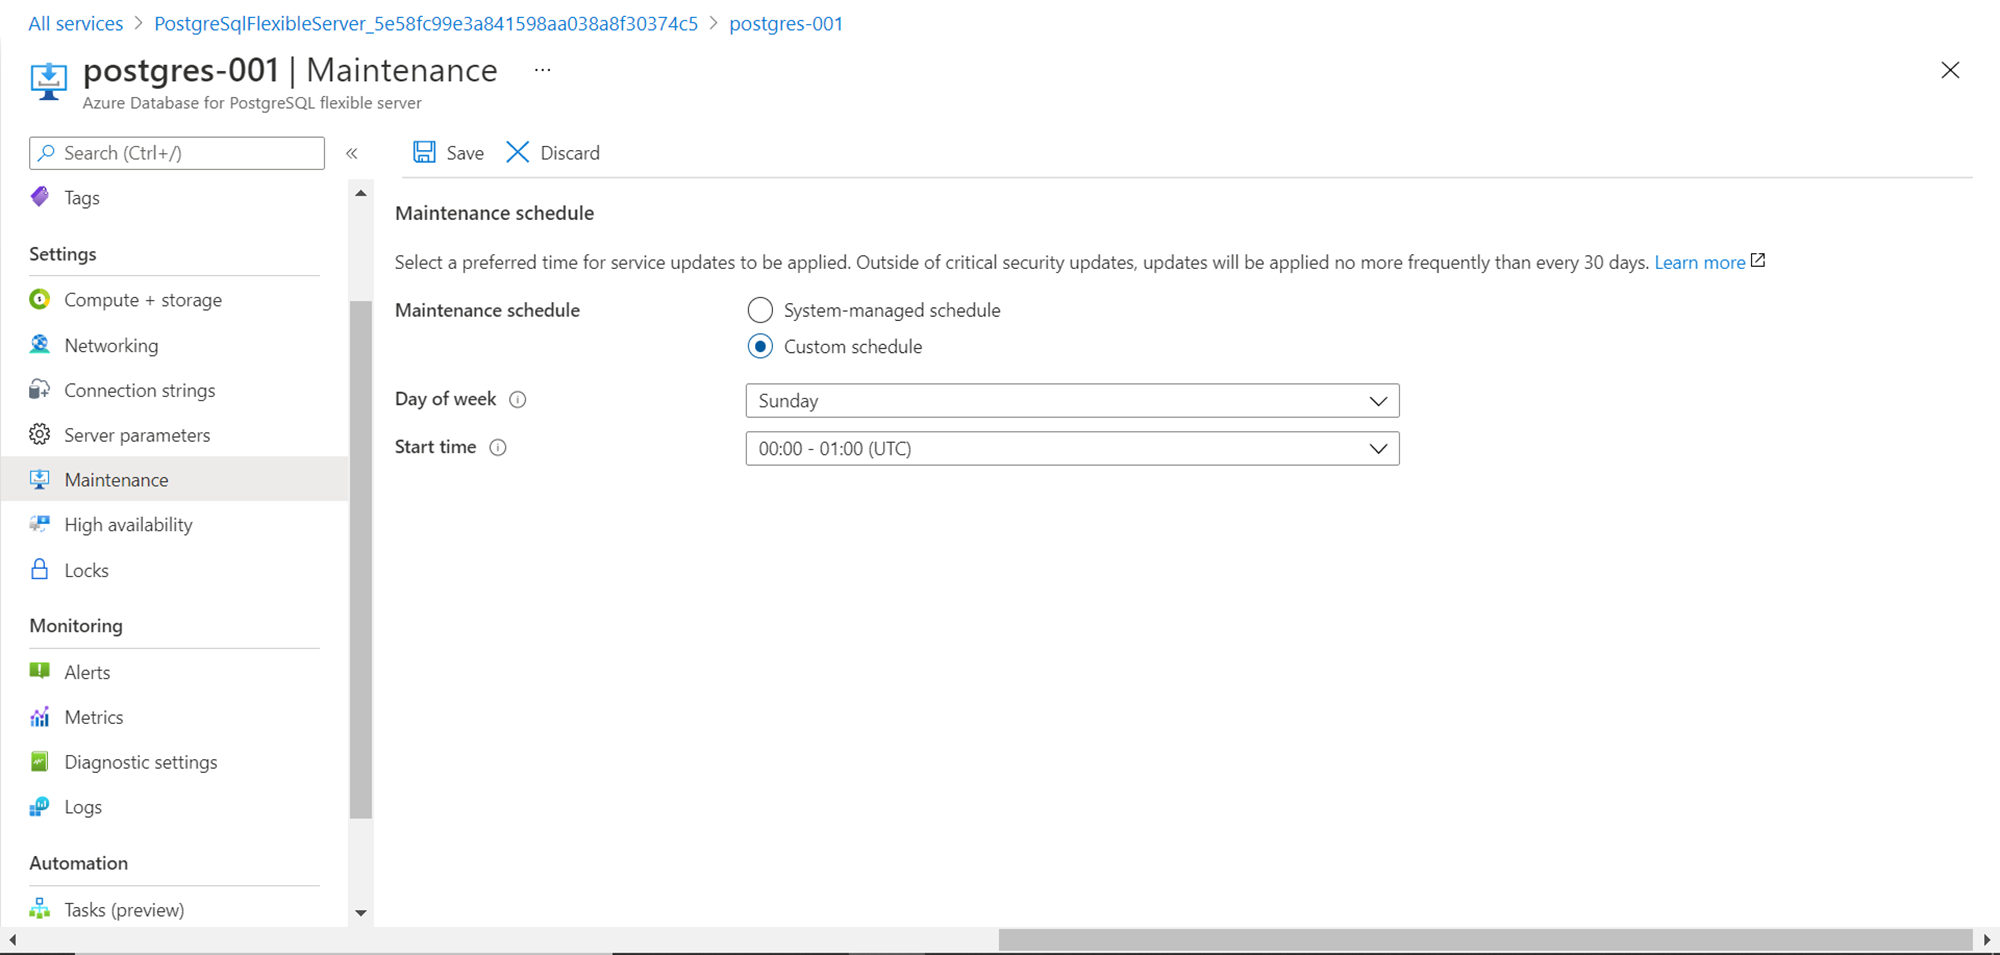
One such other setting can be found under the maintenance tab, where one can opt to create a custom maintenance schedule instead of the default one as shown below.
There are ample such settings available in the Flexible server model of Azure Database for PostgreSQL Server. We explored the major ones, but to explore them to a great depth, consider exploring different aspects of the database and tuning it using various customization parameters offered by this server model.
Conclusion
In this article, we understood the difference between primary usage of Azure Database for PostgreSQL Server – Single Server vs Flexible server model. We also learned some key differentiator capabilities offered by the Flexible server model and then we explored these capabilities as we deployed this model step-by-step.

She has a deep experience in designing data and analytics solutions and ensuring its stability, reliability, and performance. She is also certified in SQL Server and have passed certifications like 70-463: Implementing Data Warehouses with Microsoft SQL Server.
View all posts by Gauri Mahajan
- Oracle Substring function overview with examples - June 19, 2024
- Introduction to the SQL Standard Deviation function - April 21, 2023
- A quick overview of MySQL foreign key with examples - February 7, 2023