

This article will describe how to get started with Azure Analysis Services and help you understand the configuration and pricing options to create our first Analysis Services instance.
Introduction
SQL Server introduced SQL Server Analysis Services (SSAS) in 2005 for Online Analytical Processing (OLAP) workloads that require a different type of data management mechanism than typical Online Transaction Processing (OLTP) workloads. As the data in data warehouses tend to be in terabytes to petabytes, dealing with such large volumes of data needs a different engine altogether which SQL Server Analysis Services provided. With the advent of the Azure cloud, due to its obvious benefits of cloud computing, all the data workloads have been moving or migrating to the cloud. On cloud, services are available in an Infrastructure as a Service, Platform as a Service and Software as a Service model. For the entire SQL Server technology stack, Azure provides each of the equivalent components as a service like SQL Azure or SQL Managed instance which is a near equivalent of SQL Server on premises. SQL Server Analysis Services (SSAS) is no exception to this. Azure provides Azure Analysis Services which provides an Online Analytical Processing engine on Azure cloud. Let’s get started with Azure Analysis Services in this article and see how it can be configured.
Creating an Azure Analysis Services Instance
It is assumed that the reader already has an Azure account with all the necessary administrative privileges to operate and administer Azure Analysis Services. Azure provides a free $200 credit account for first-time users to try out this service as well. So, if you have never created a free account on Azure, you can consider availing this benefit to evaluate Analysis Services. Assuming you have access to an Azure account with necessary privileges, and you have already logged on to the Azure account, let’s get started with creating our first instance on Analysis Services.
Firstly, click on All Services or use the search feature and search for Analysis Services. You should be able to find a service with the name Analysis Services. Though it is known as Azure Analysis Services, in Azure you would find it by the name Analysis Services. Click on the Analysis Services item and it would open the dashboard page as shown below. This is the visual interface from where we can start creating the Analysis Services instance.
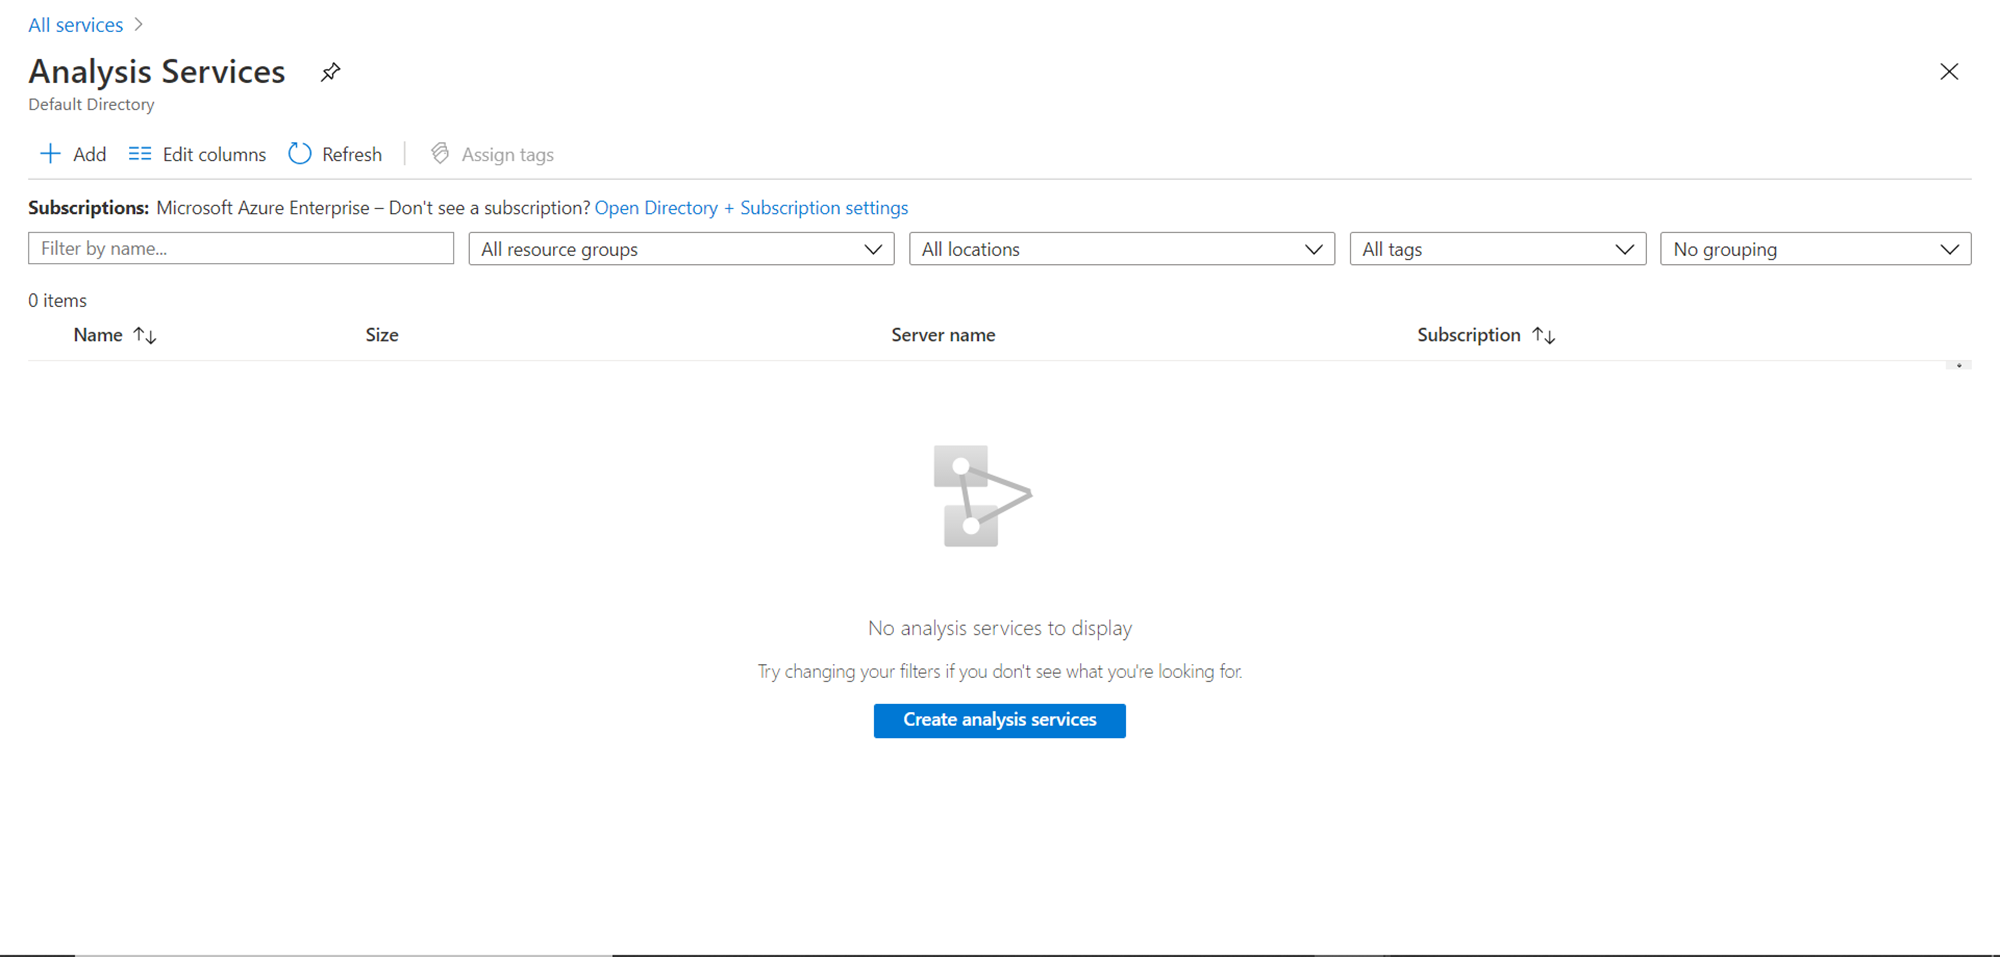
We can either click on the Add button or click on the Create analysis services button to kick-start the instance creation process. Click on either of these buttons, and a new page would appear as shown below. We need to fill up a simple list of details to submit the request for the creation of the Azure Analysis Services instance.
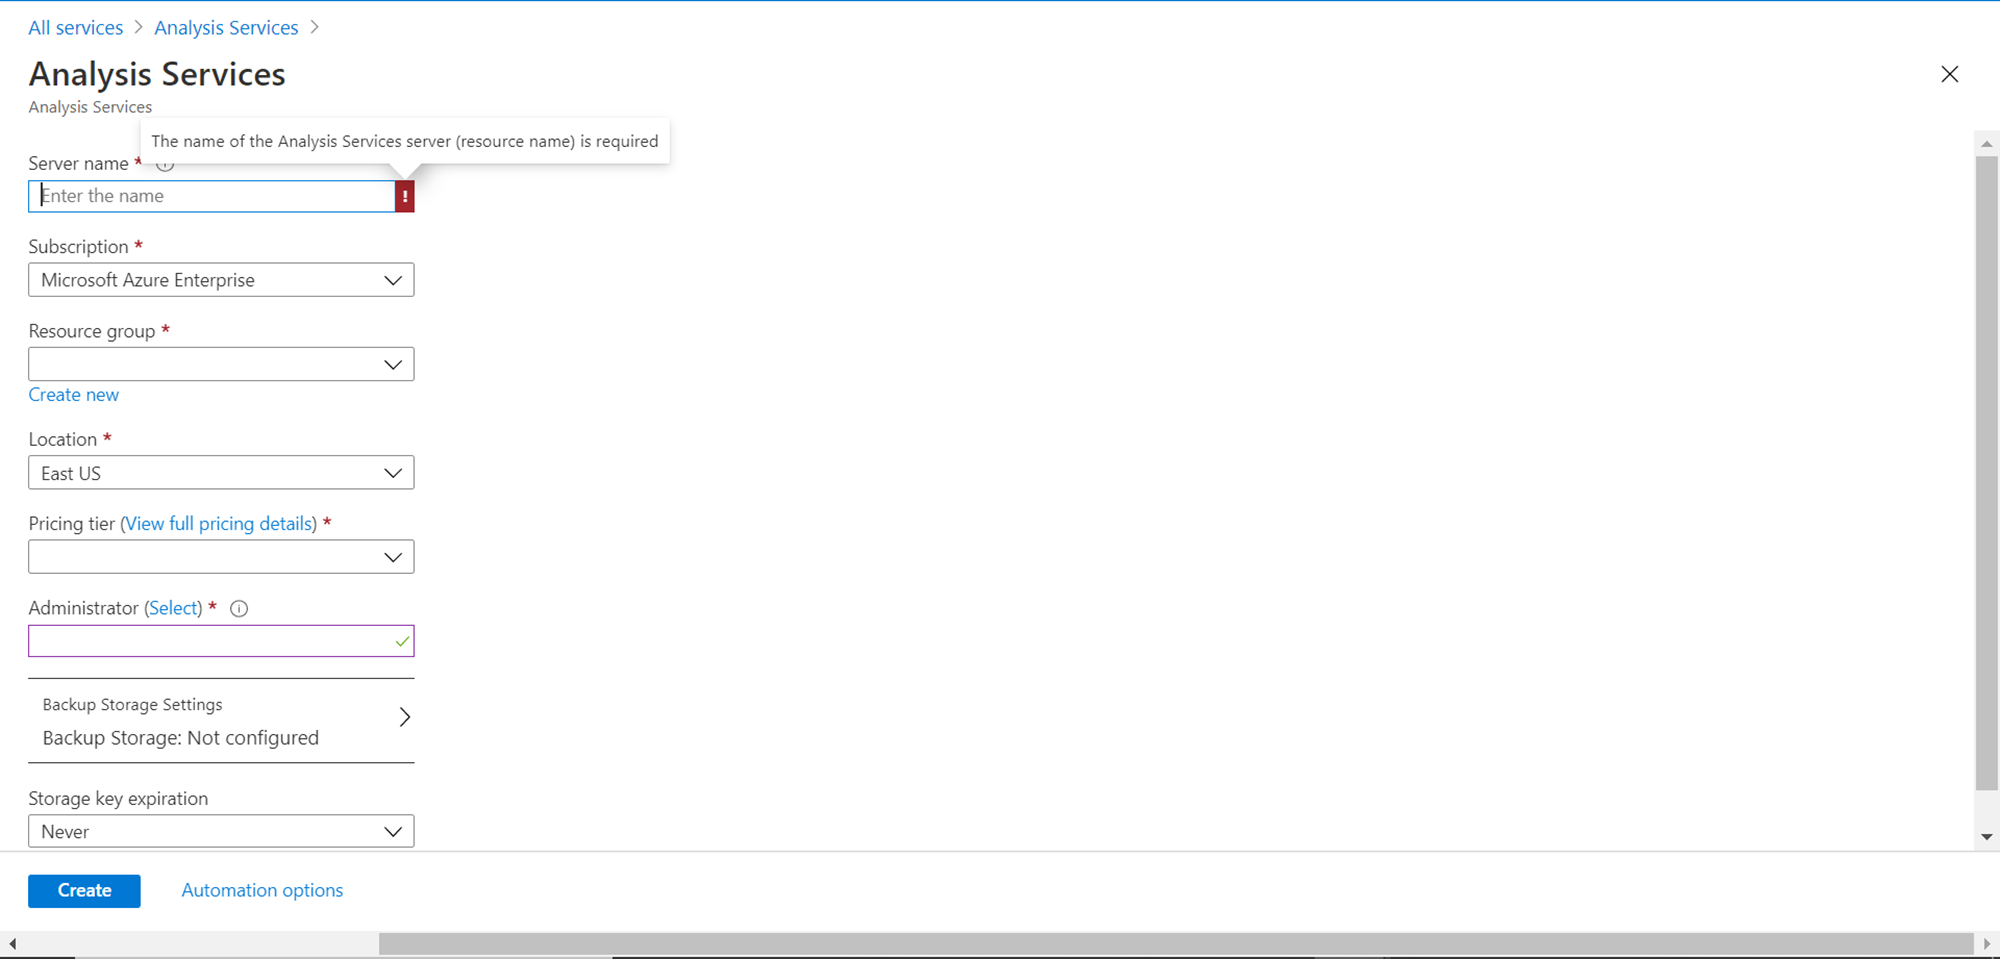
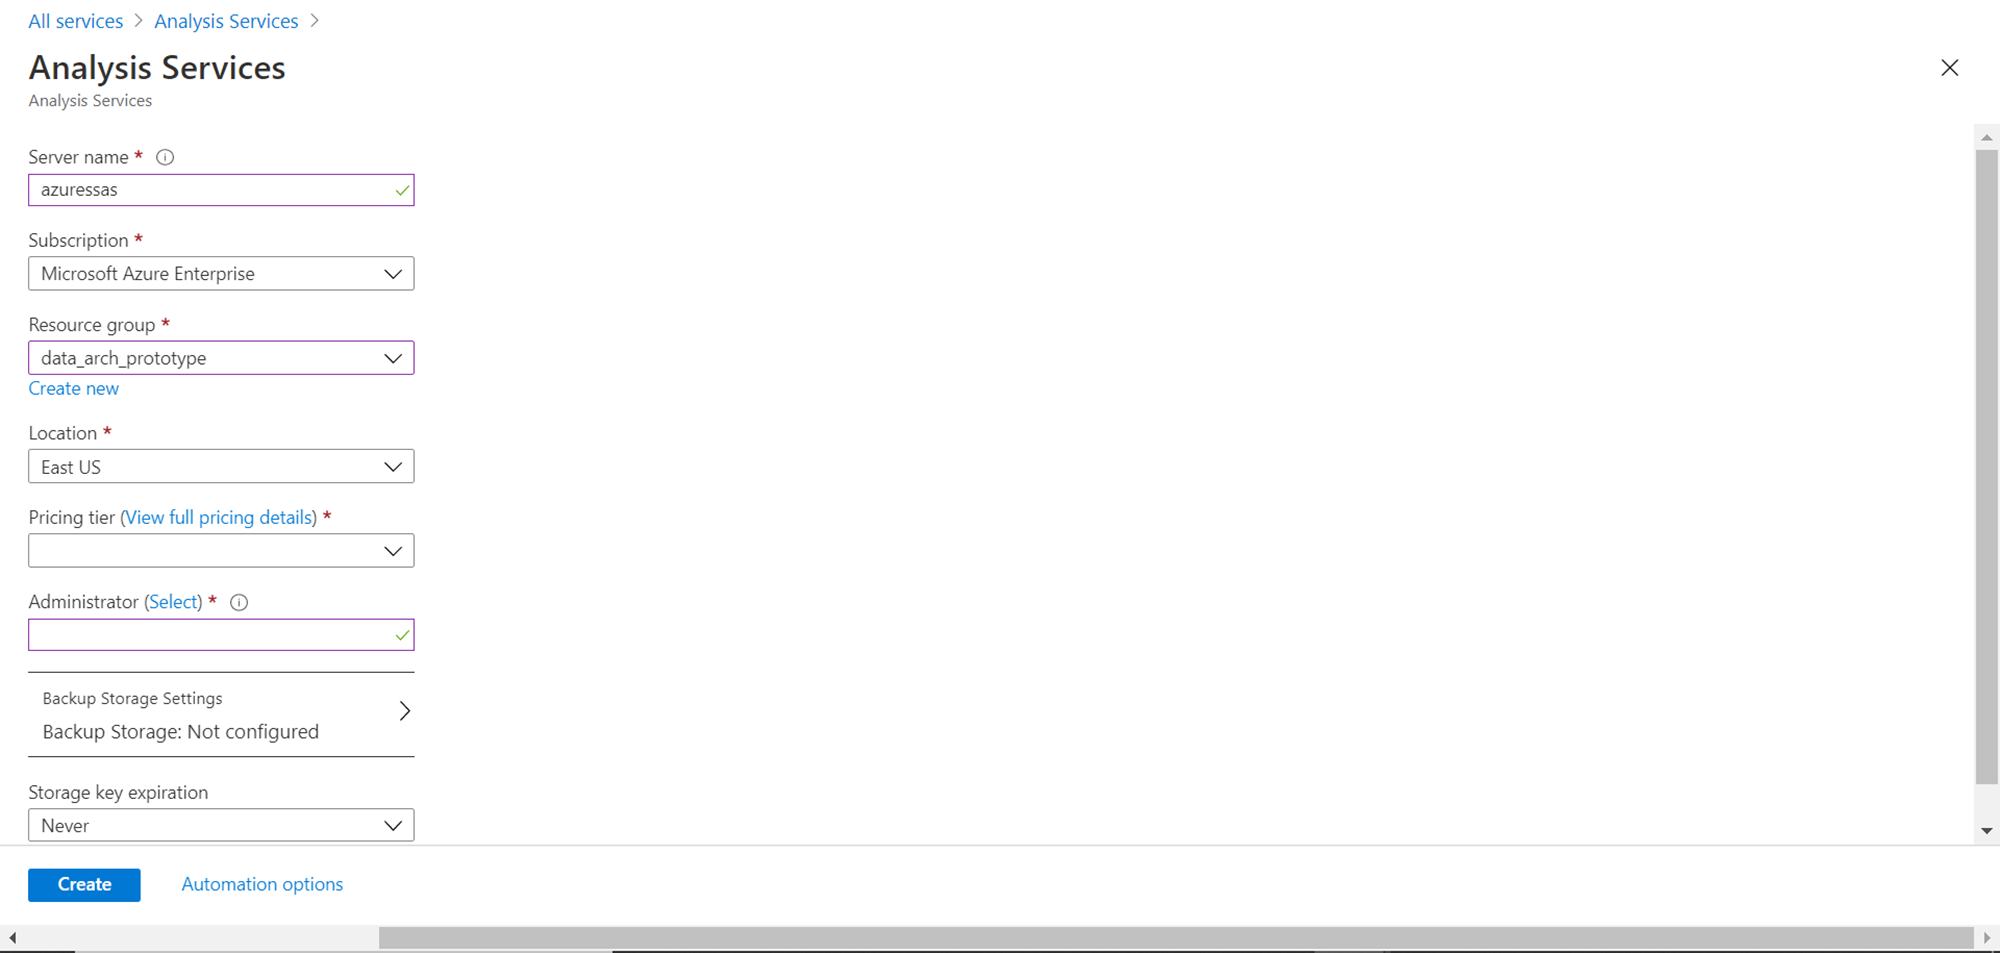
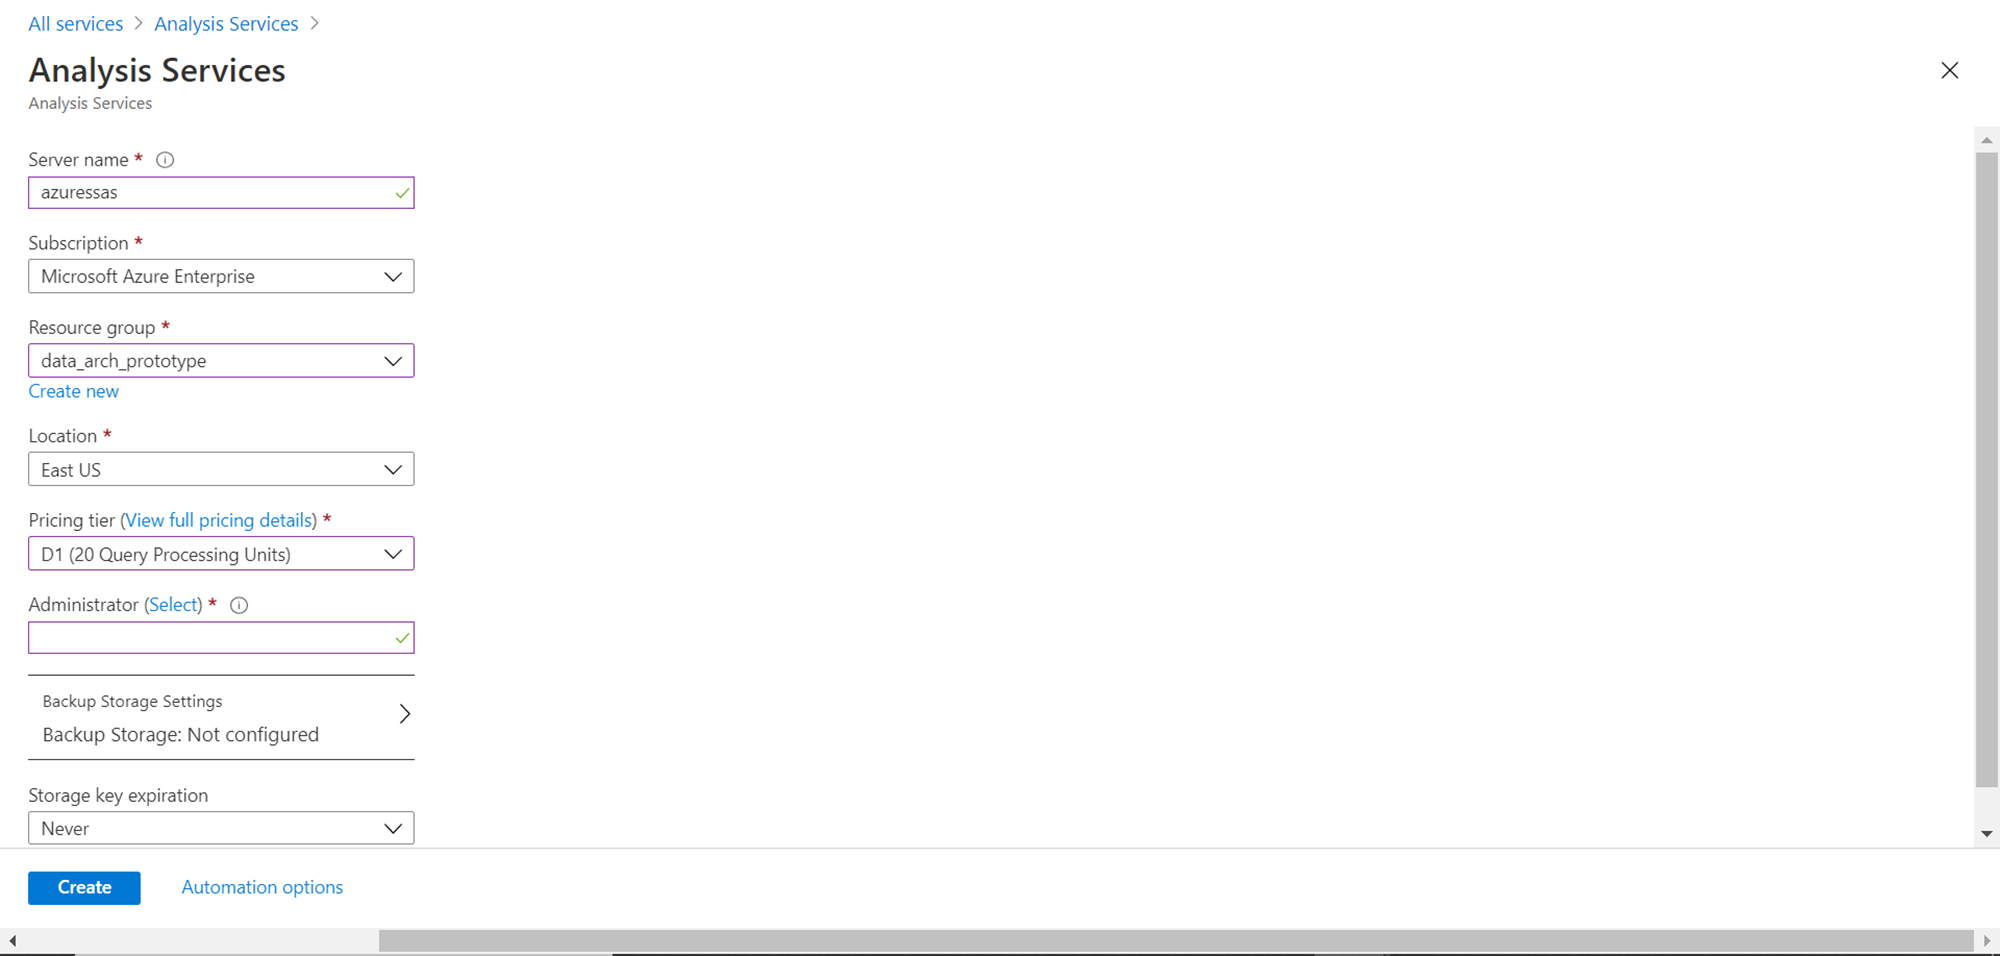
The first detail that is required is the server name which should be unique, in lower case as well as in alpha-numeric characters. Provide an appropriate server name and select the Azure subscription under which the instance should be created. As the server would be part of the resource group, we need to select the right resource group in which the server would be created. If the intention is to isolate the resources of Azure Analysis Services in a separate group, we can create a new resource group and use it while configuring the instance.
After resource group selection, the next detail to be selected is the Region. It is advisable to pick up an Azure region close to your physical location. By default, the region selected would be the region selected in the portal. Ensure that the desired region is selected. After all these details are selected and configured, the page would look as shown below.
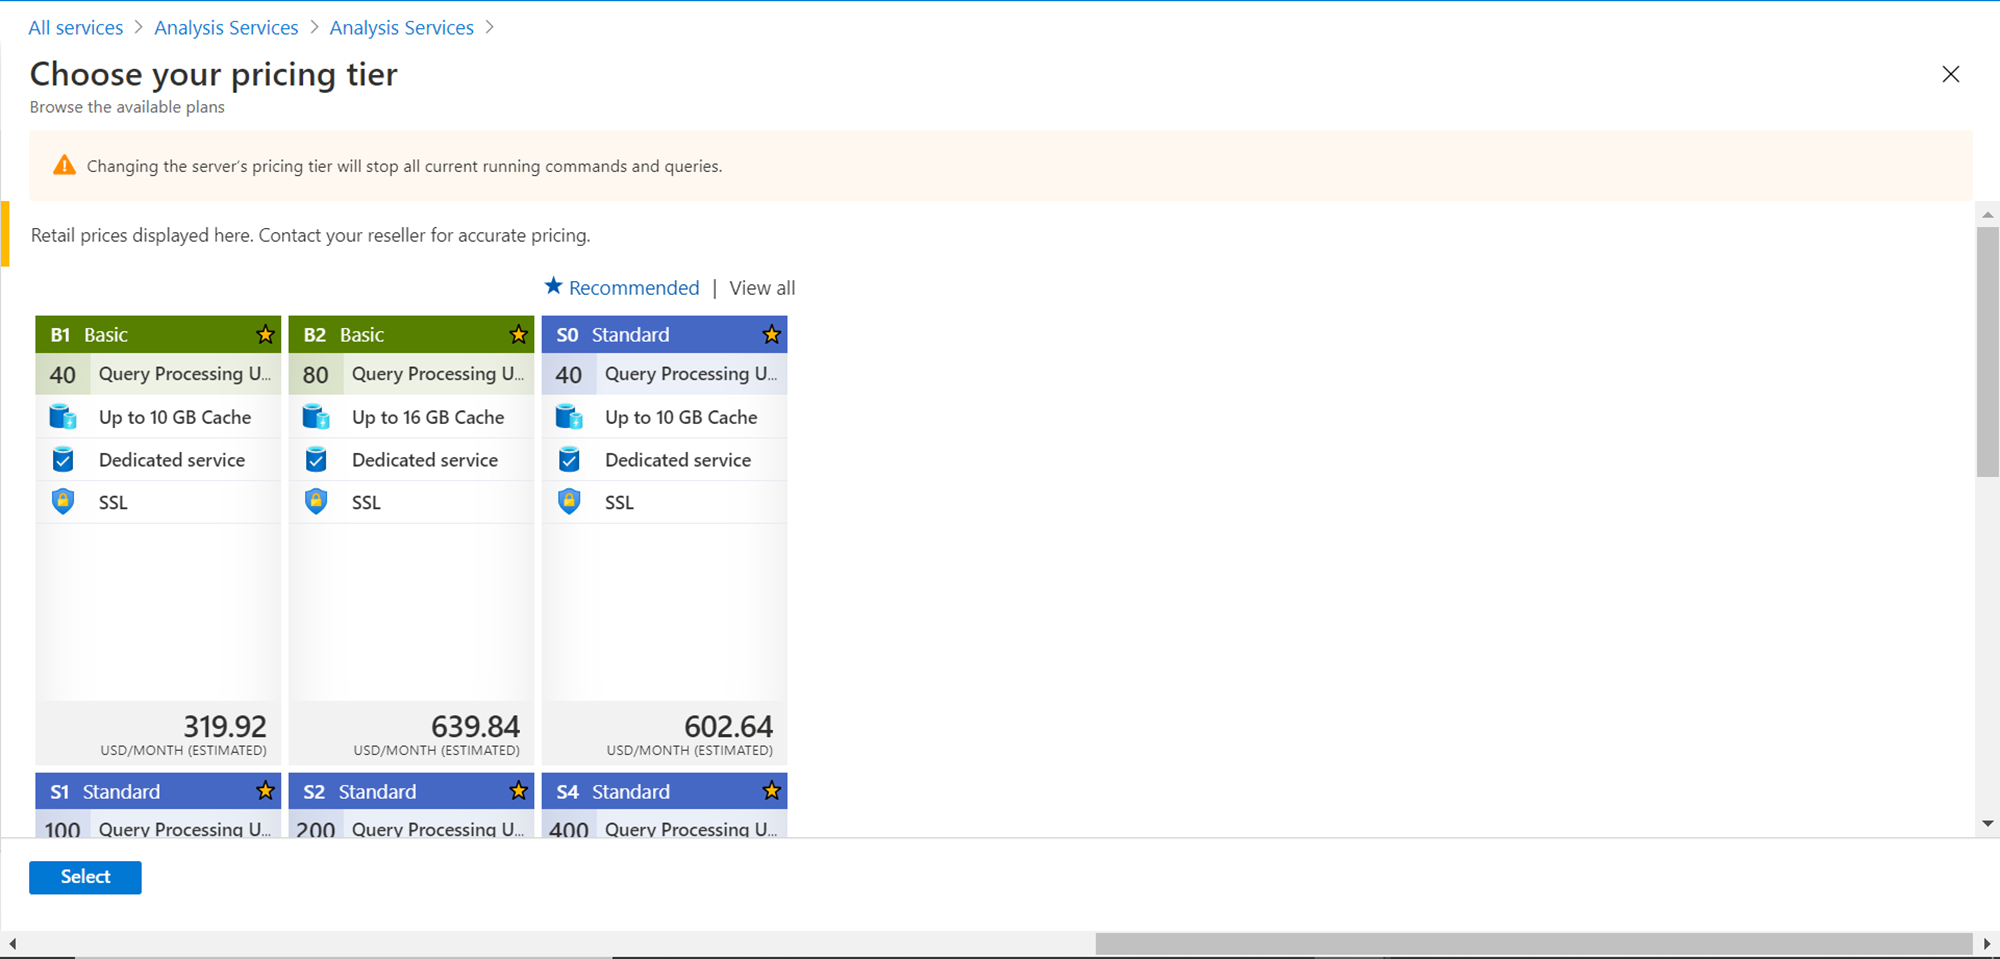
Now the next detail to be selected is the pricing tier. There are various pricing tiers available as shown below. Each pricing tier has a specific fixed set of resources and capacity available for the Azure Analysis Services instance. Each tier has a fixed set of processing units as seen in each line item as shown below.
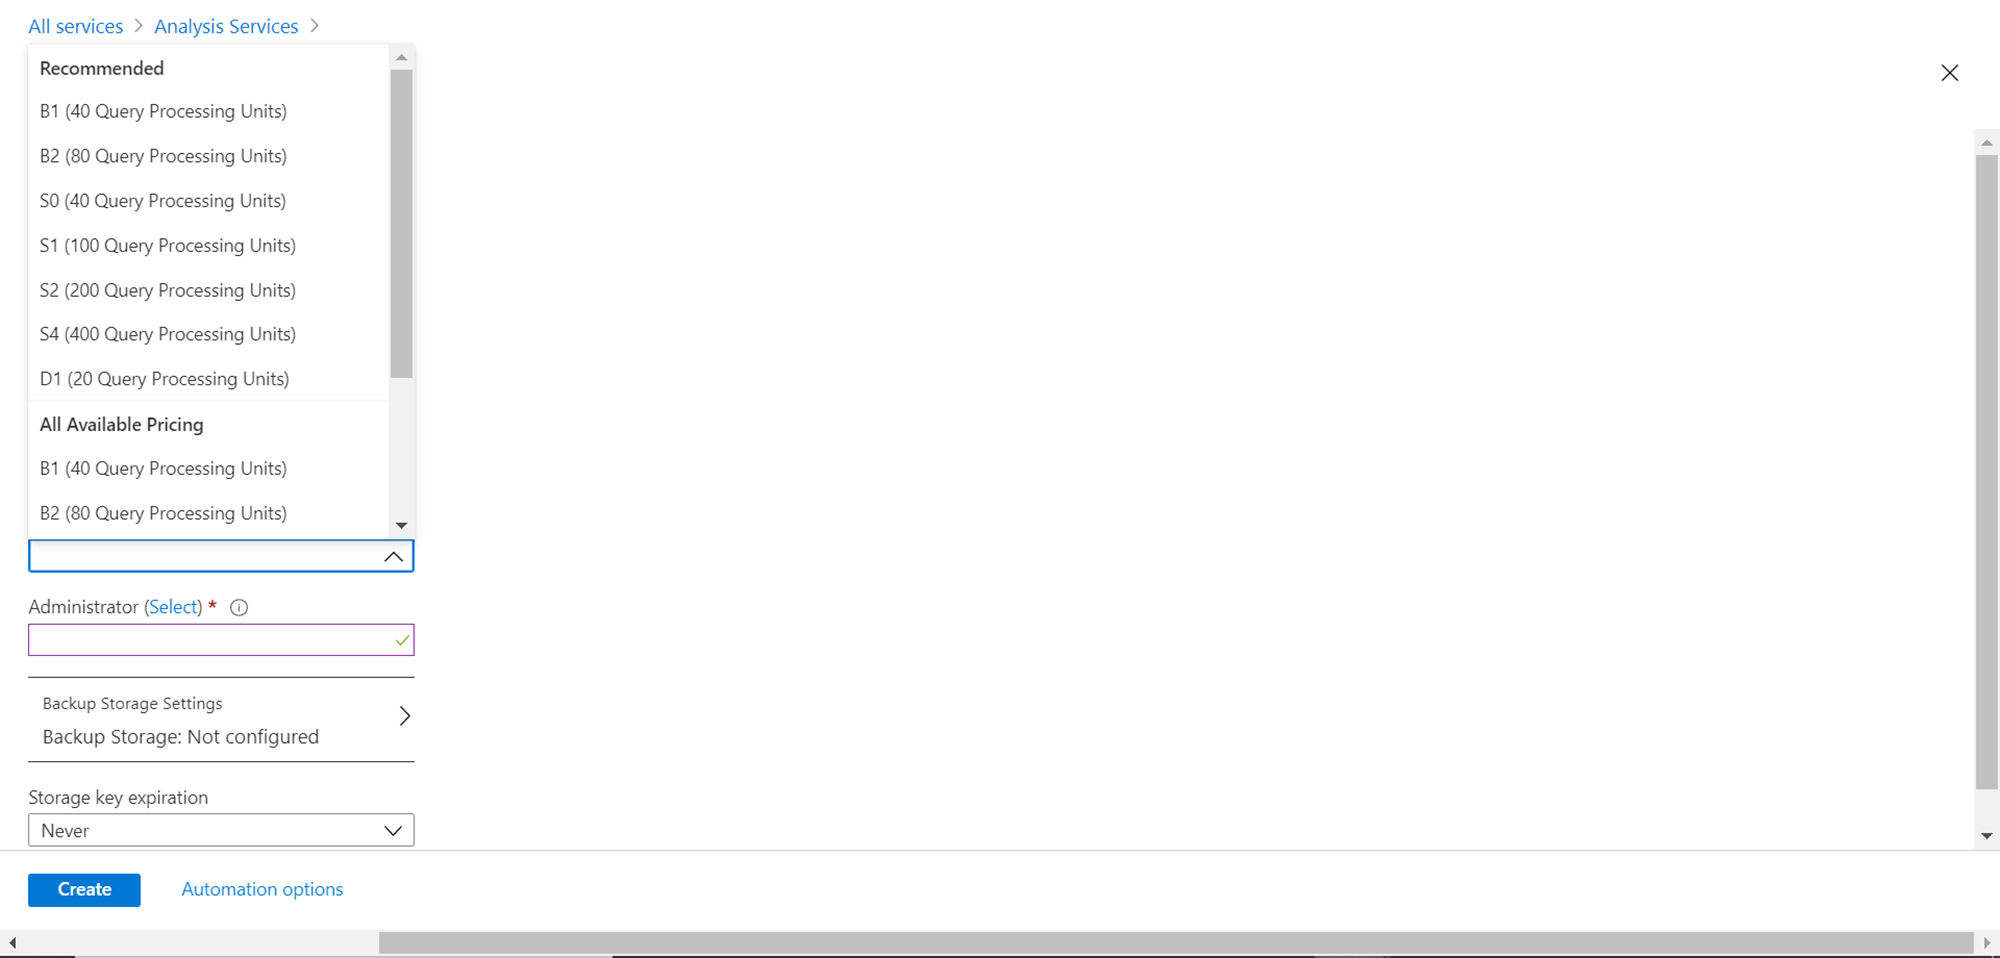
While making a decision related to pricing, we may need more details about each tier. This wizard provides a nice detail of the pricing tiers and associated resources as shown below. For example, the B tier stands for Basic Tier, which has two categories B1 and B2, which have 10 GB and 16 GB Cache respectively.
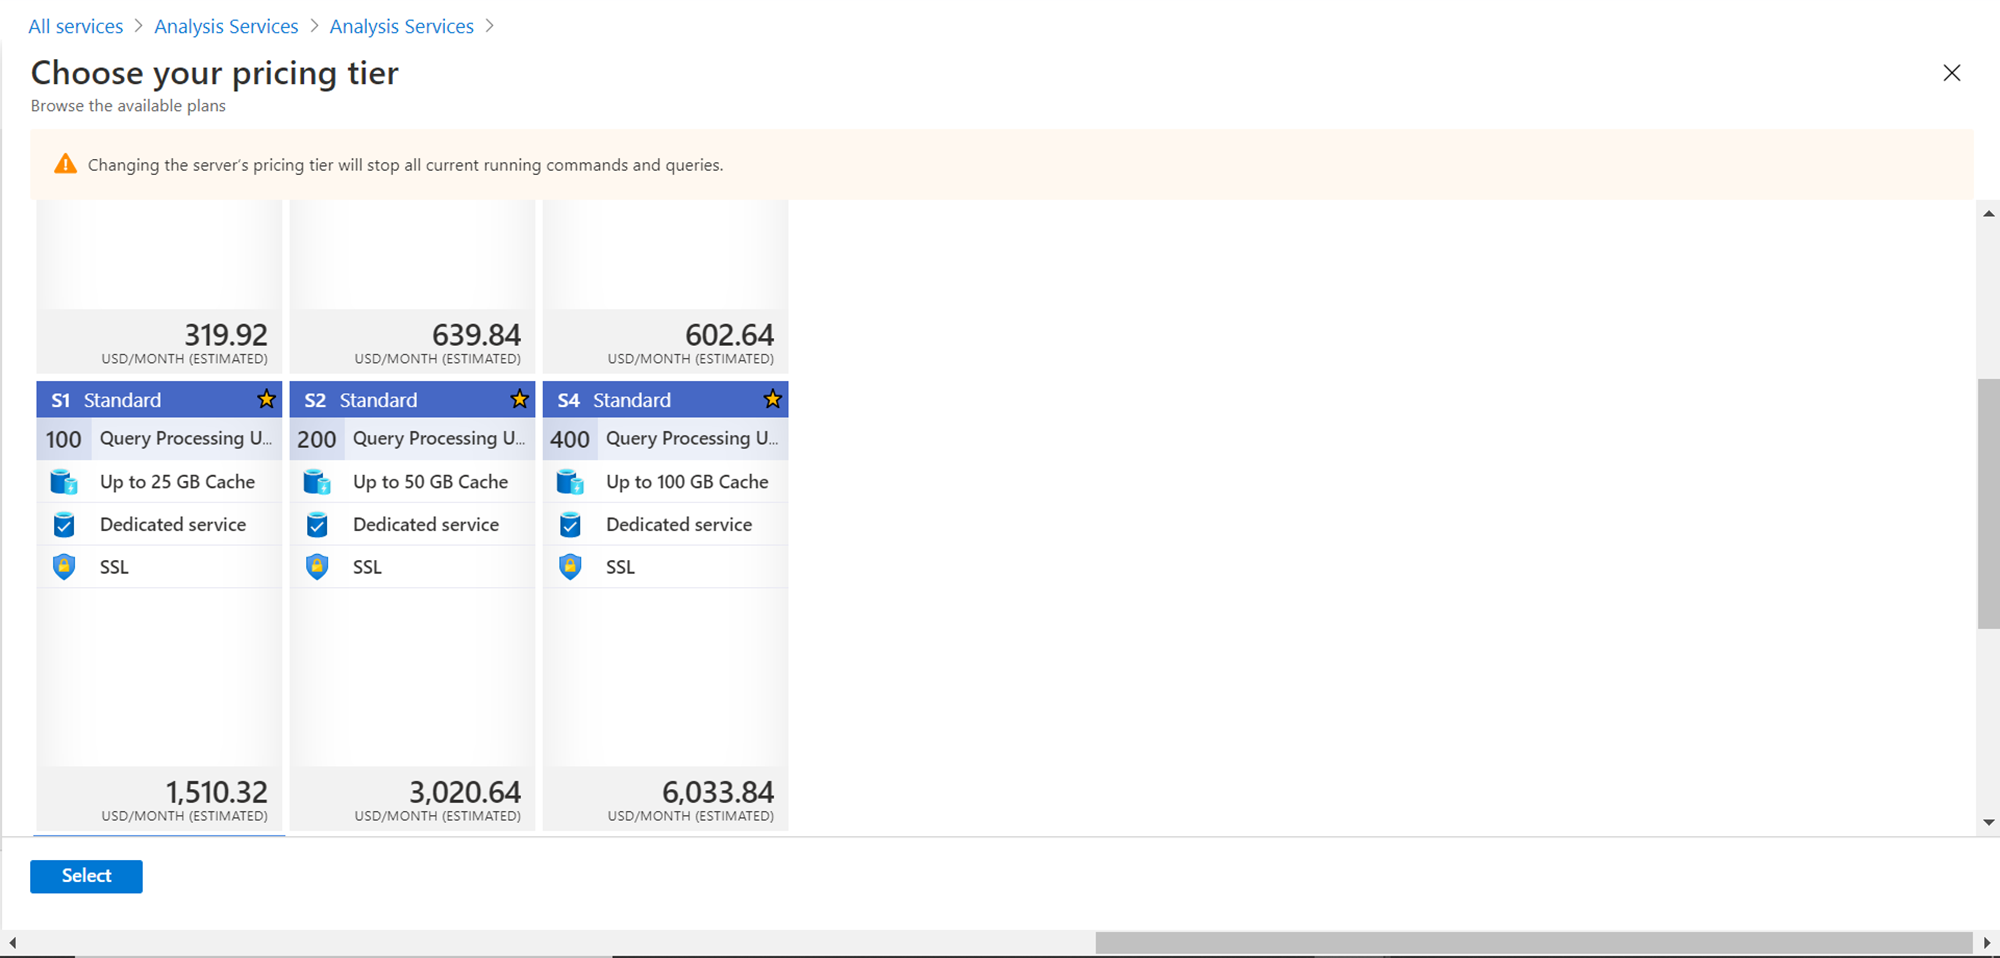
This next tier is the S-tier which stands for the standard tier as shown below. This tier has S0, S1, S2 and S4 tiers which have 10 GB, 25 GB, 50 GB and 100 GB cache with 40, 100, 200 and 400 query units respectively as shown below.
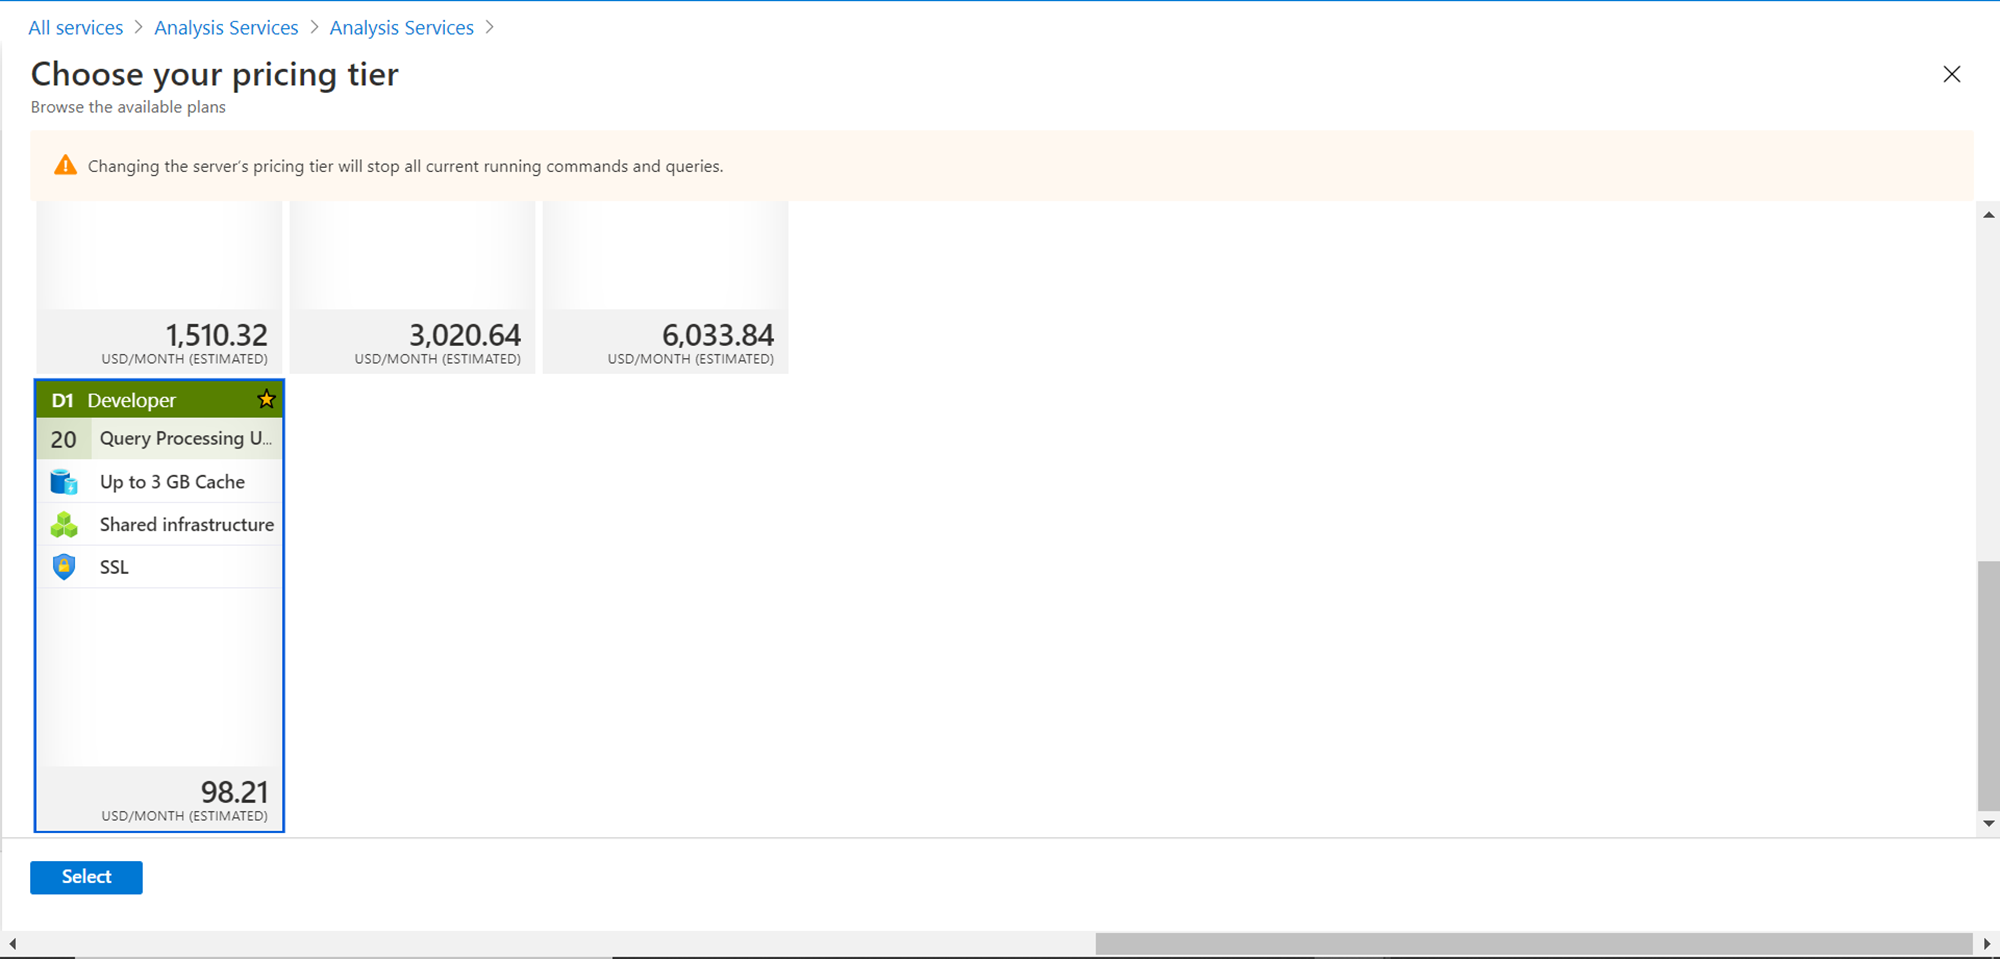
The last and the most basic tier of pricing is the developer tier which is the D1-tier. It’s the most basic tier of pricing for development use and costs $98 for a full month of usage. As we just intend to learn and evaluate the creation and usage of the Azure Analysis Services server, we will use the D1 tier for pricing. Click on the D1-tier and then click on the Select button. Once selected, it would look as shown below.
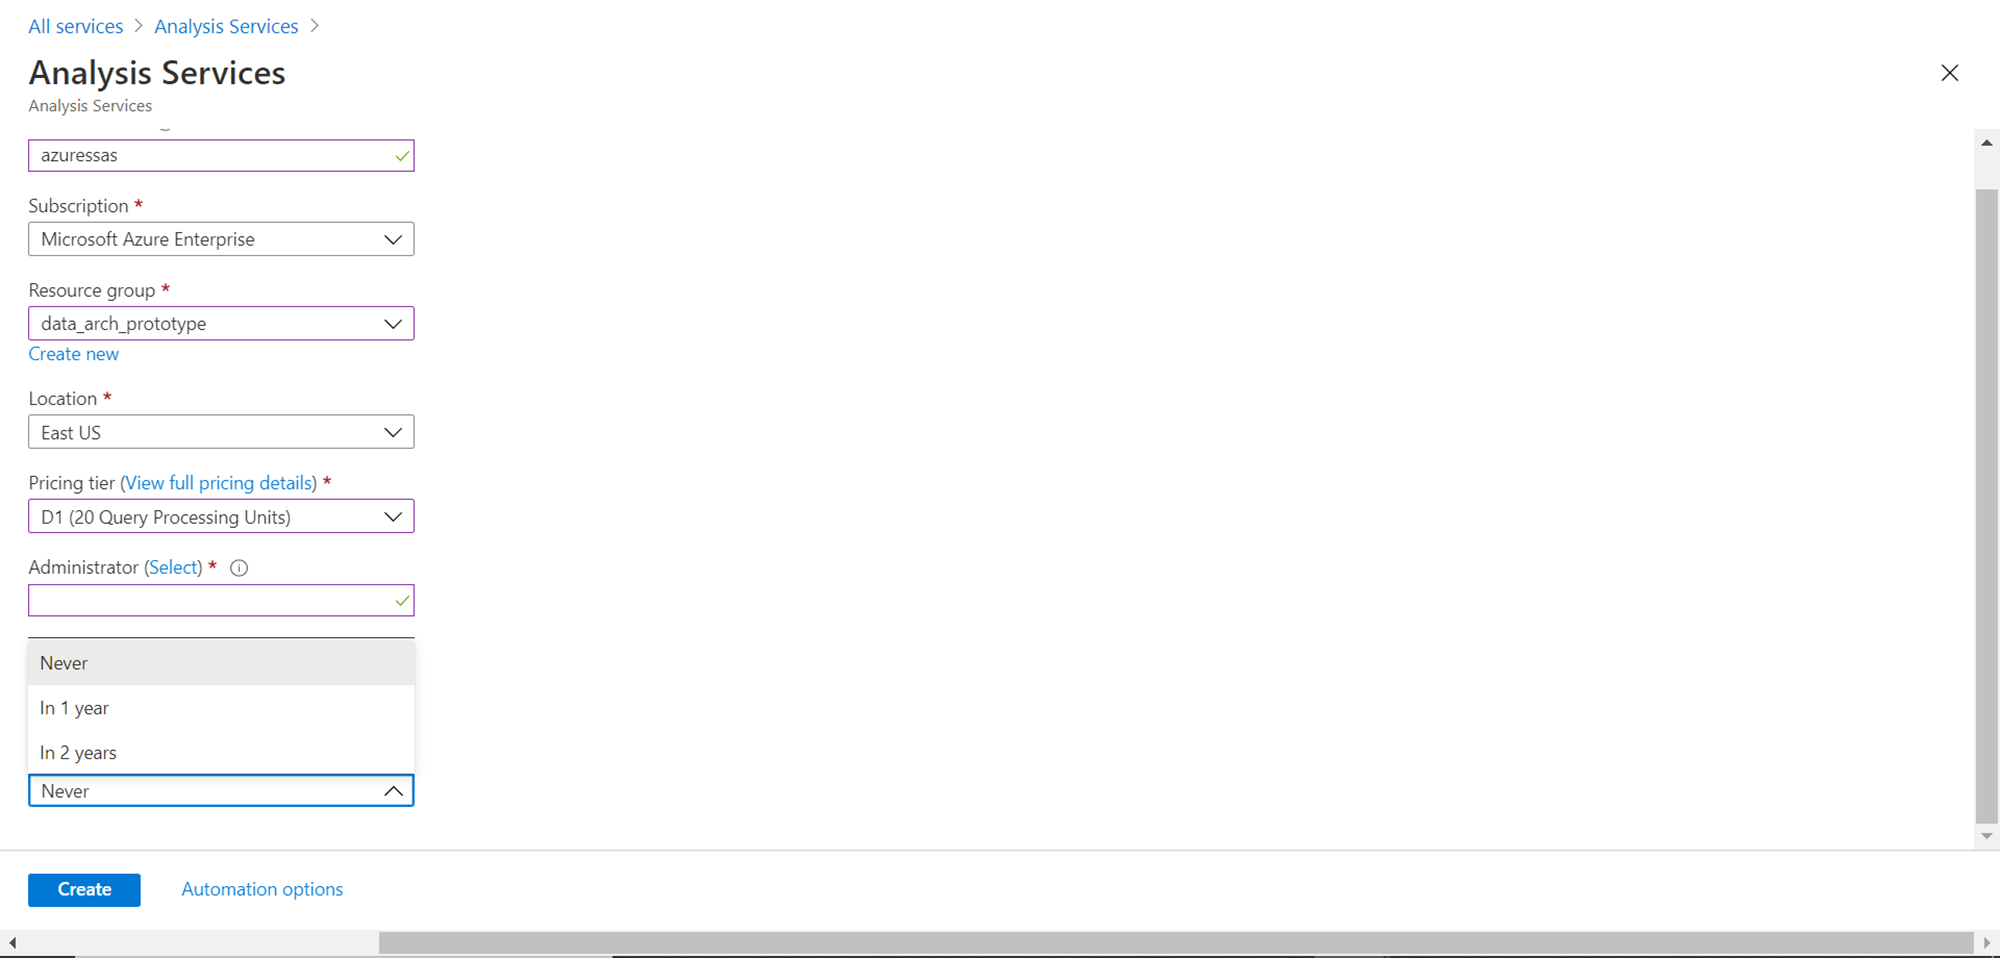
After the pricing tier is selected, select the administrator for this server instance that would be created. By default, if you are the administrator of the account or have administrative privileges, your user would be selected as the administrator of the account as shown below.
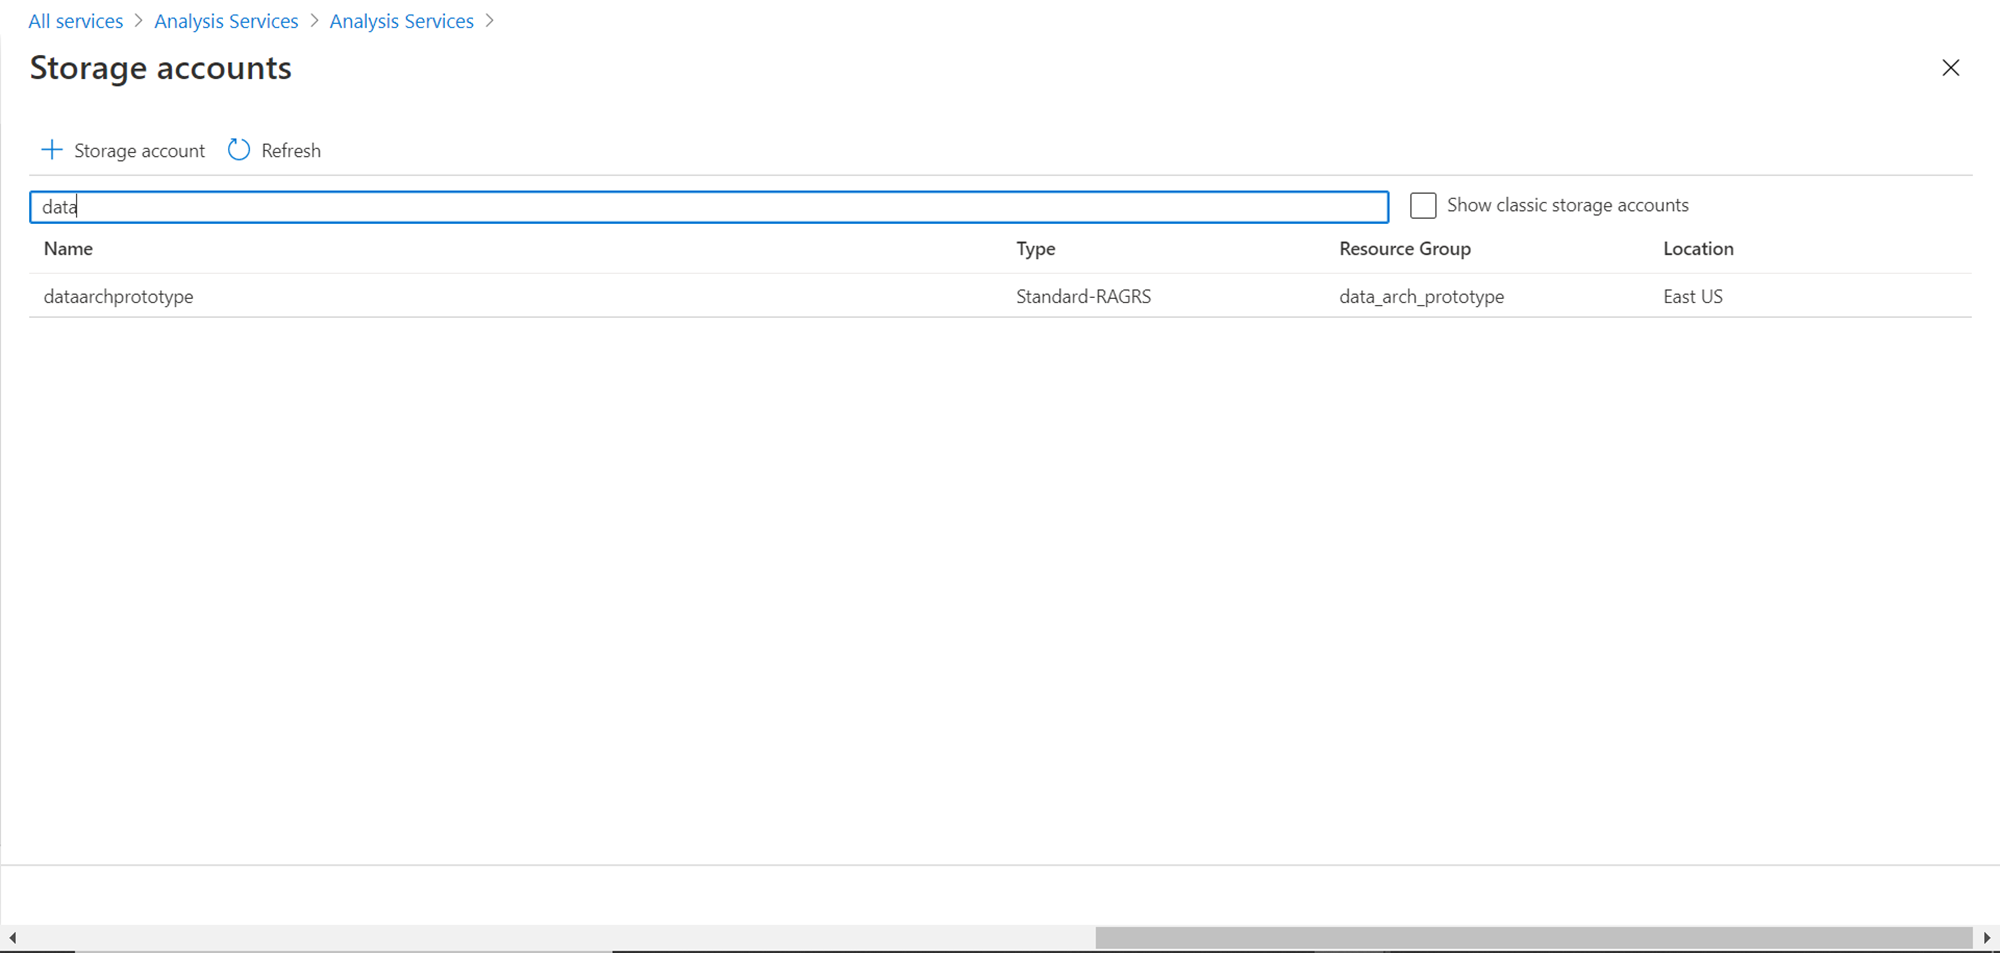
The next detail to configure is the Backup Storage Settings. As seen from the above screen, these settings are not configured by default, but is important from a data management perspective. Click on this item and it would open a new screen as shown below. Search for the desired storage account as shown below.
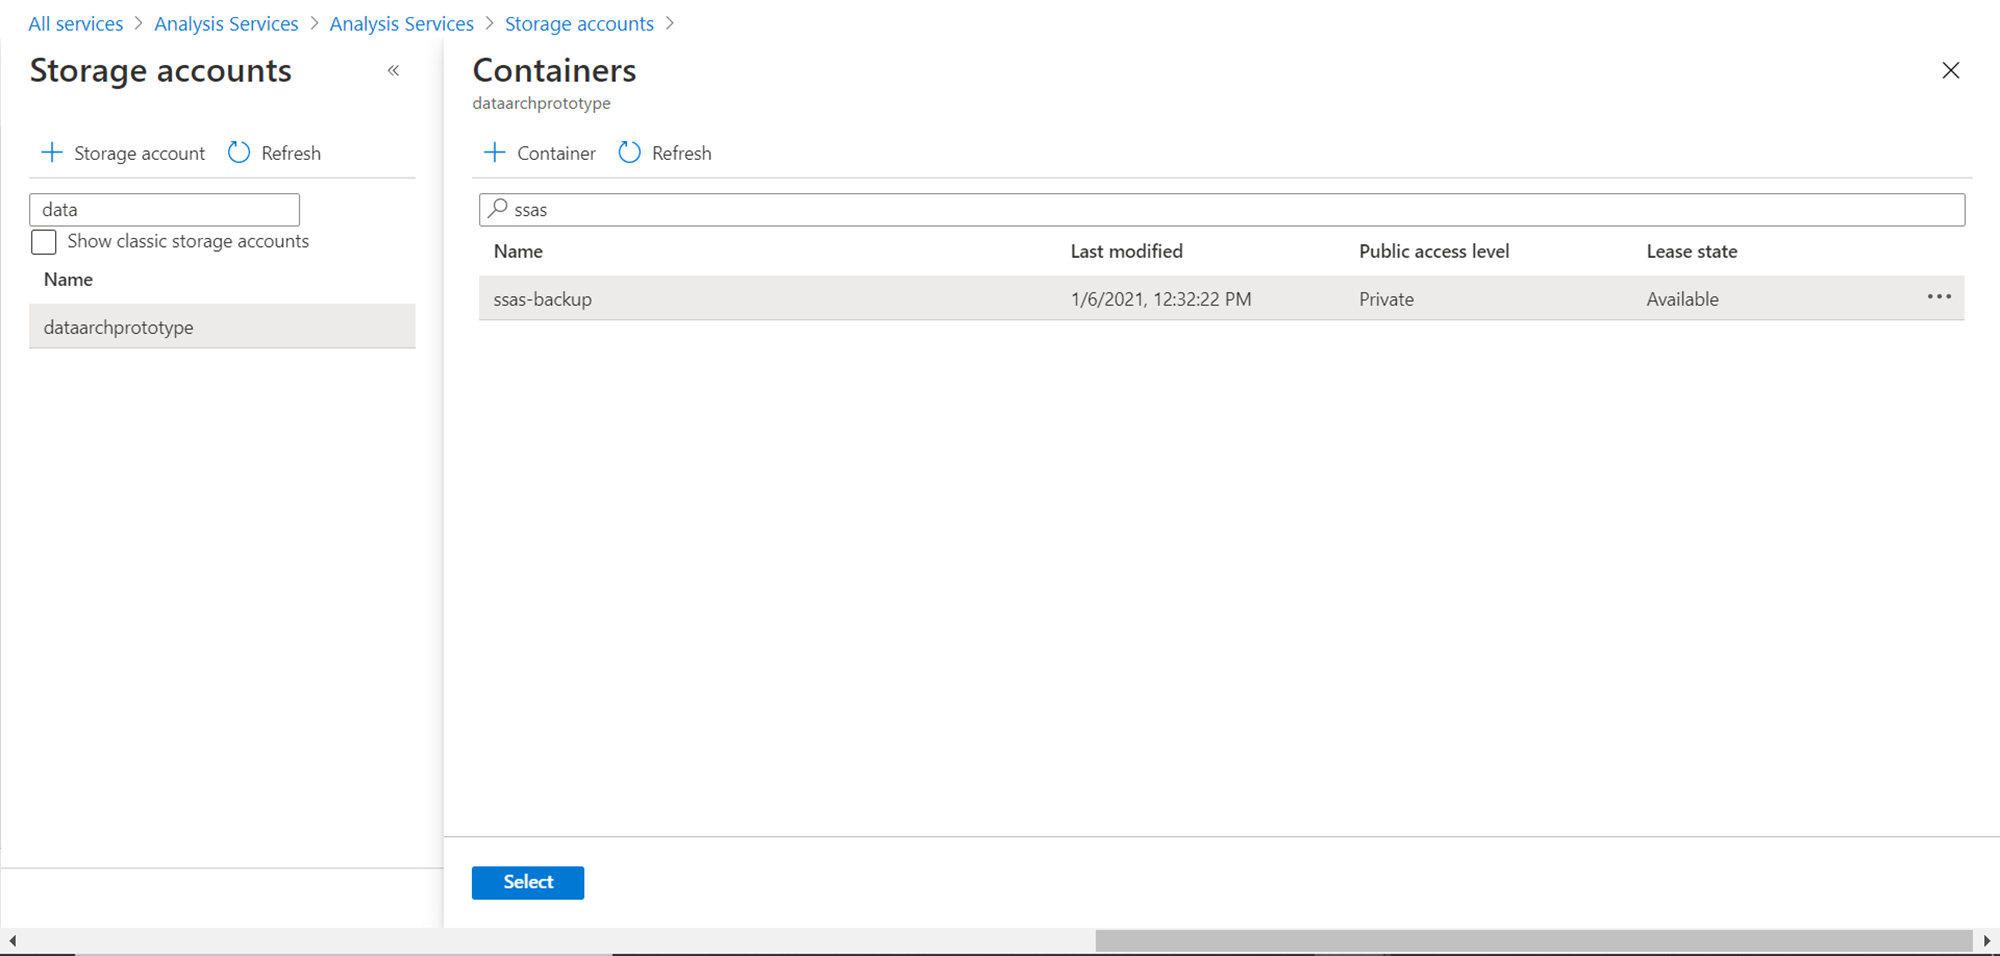
After selecting the right storage account for backup, the next step is selecting a container in the storage account. When you select the storage account, it would show the next selection step for container selection as shown below. Select the appropriate container as shown below. This interface also provides options to create a new storage account as well as new containers.
After this detail is selected, the last option is to configure when and whether the storage key for encryption expires. Either we can select a 1-Year or 2-Year term, or we can select it never expires. The default option is never expiring, and we can use the same option for now. It does not provide an option to provide a custom value for the encryption duration.
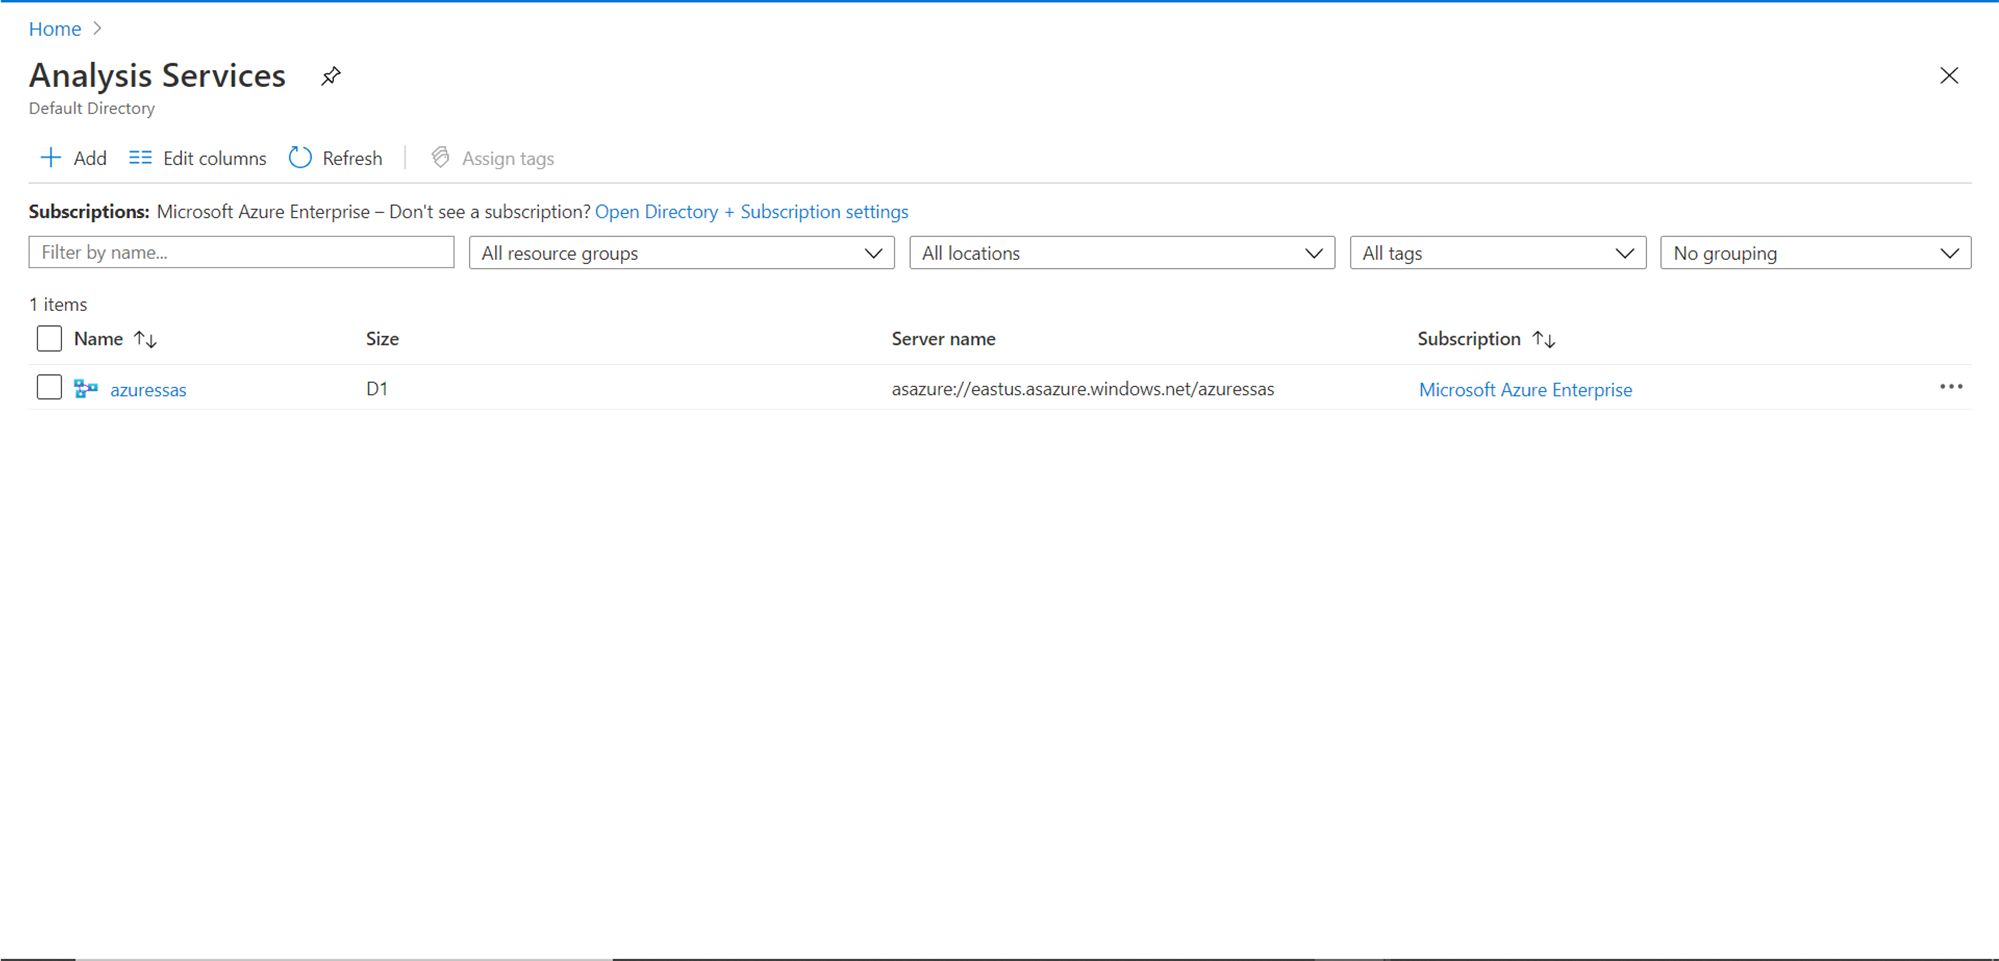
Now we are done with configuring all the details to create a new Azure Analysis Service account. Click on the Create button to start the creation process. Once you click on this button, it would start the process of creating a new instance and you would be able to see a new line-item in the list of servers as shown below. It may take some time to get into active status when we can start using this server. The server name would be in the format of <region>.asazure.windows.net/<servername> as shown below.
Once the server is in active status, click on the name of the server and it would navigate to the dashboard page of this server as shown below.

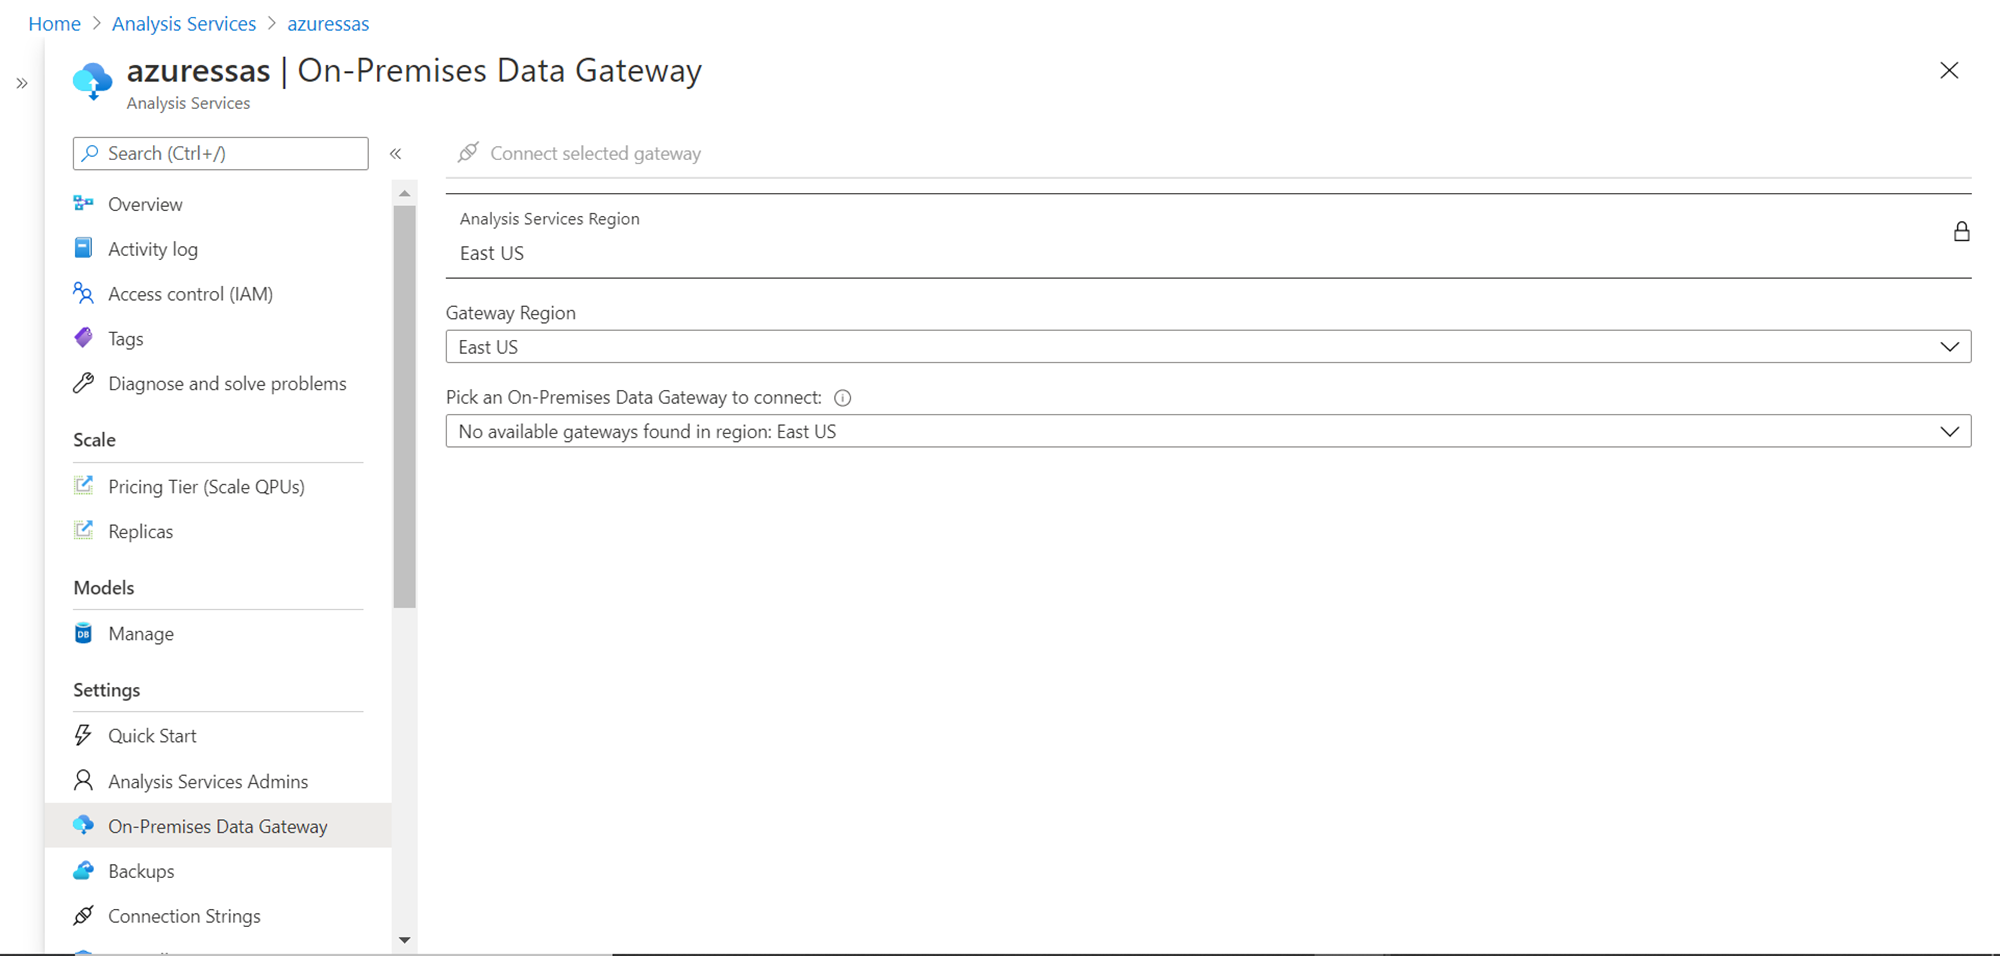
Once an instance of Azure Analysis Service is created, one can connect an on-premise instance and tools with it using an On-Premises Data Gateway. Click on the menu item on the left-pane titled “On-Premises Data Gateway” which should show the details of any available gateways.
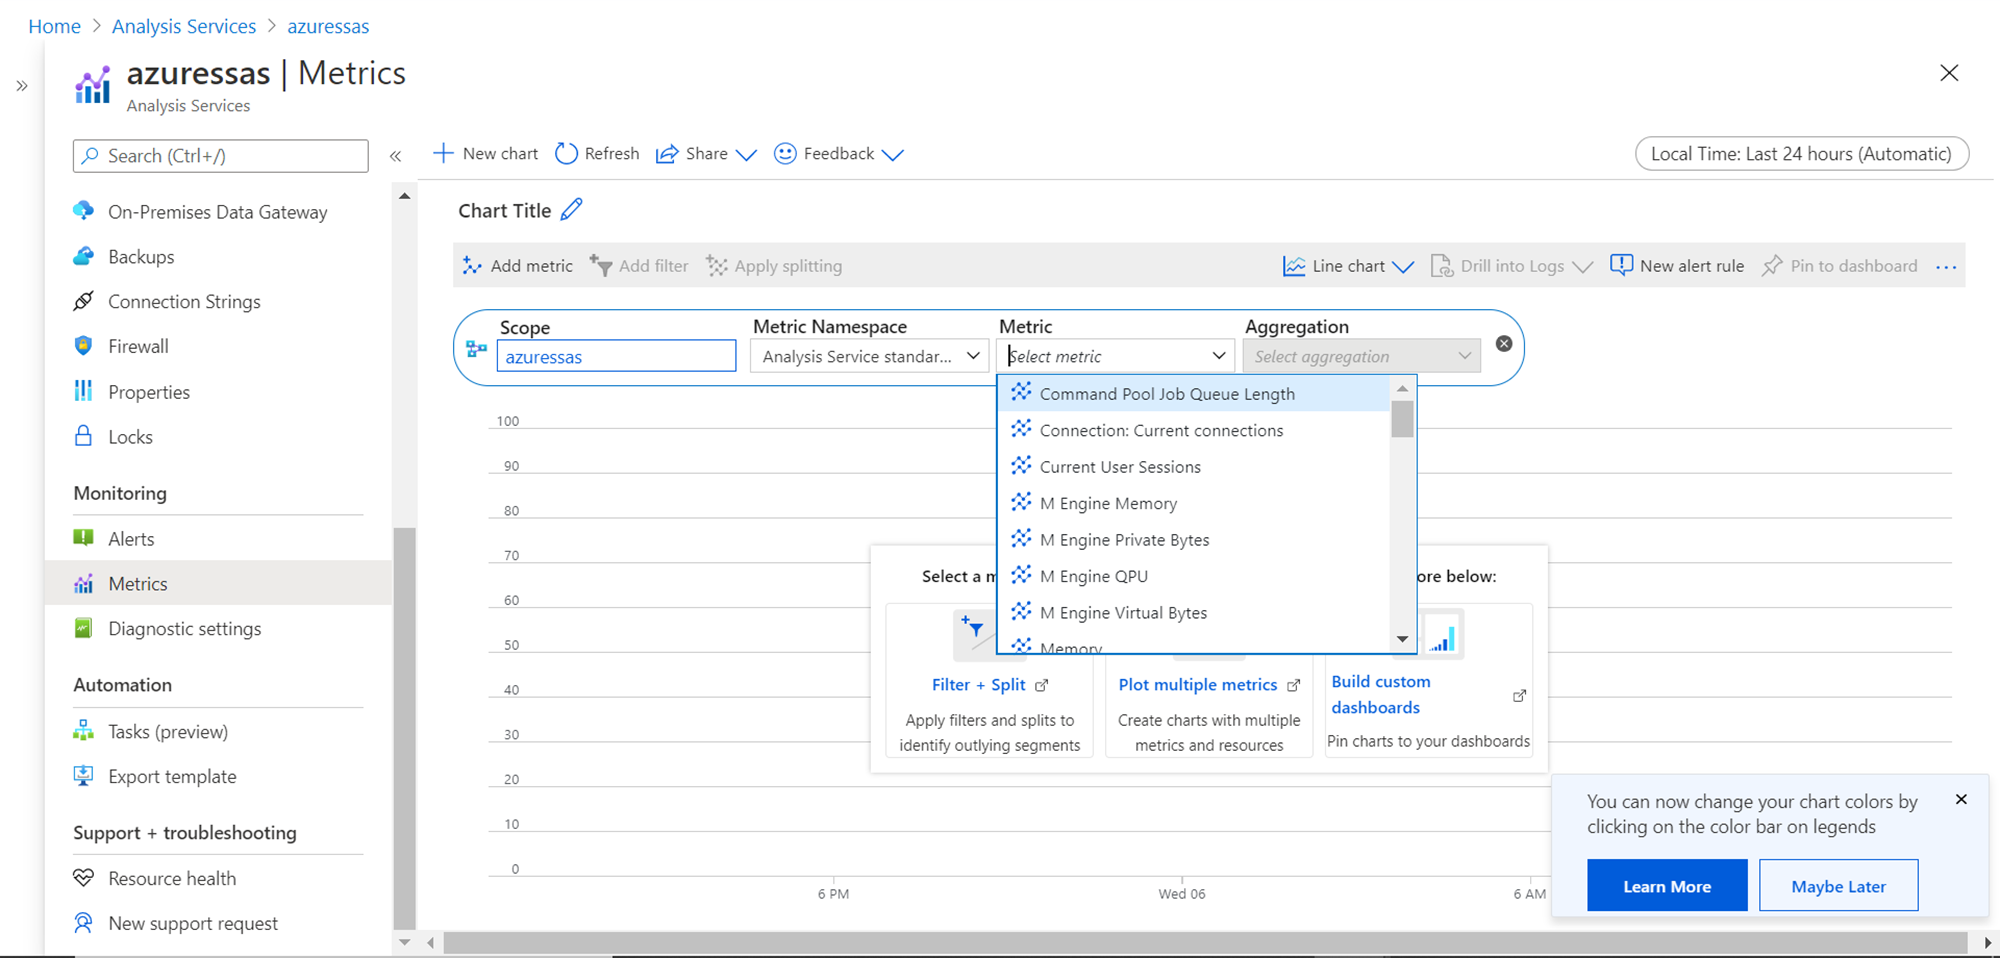
Once the server is operational, it can be monitored using the metrics section as shown below, which allows to monitor and visualize all the metrics related detail.
This concludes the creation and setup of the Azure Analysis Services instance to get started with it.
Conclusion
In this article, we learned what Azure Analysis Services is as well as understood the different configuration options to create a new instance or server, the option to connect it with on-premise tools and monitor the metrics to get started with a fresh SSAS development on Azure cloud.

She has a deep experience in designing data and analytics solutions and ensuring its stability, reliability, and performance. She is also certified in SQL Server and have passed certifications like 70-463: Implementing Data Warehouses with Microsoft SQL Server.
View all posts by Gauri Mahajan
- Oracle Substring function overview with examples - June 19, 2024
- Introduction to the SQL Standard Deviation function - April 21, 2023
- A quick overview of MySQL foreign key with examples - February 7, 2023