

In this article, you will learn how to export data from Azure SQL Database to Azure Data Lake Storage using Azure Data Factory.
Introduction
Azure SQL Database is one of the most popular repositories for hosting transactional data. Azure Data Lake Storage Gen 2 forms the data lake storage layer, which is integrated with numerous data and analytics services on Azure like Azure Synapse Analytics, Azure Databricks, Azure Cognitive Services, and many more. Often there may be a need to export data out of the transactional databases to data lakes for different purposes. There are different ways of importing and exporting data out of the Azure SQL Database. One of the recommended ways of moving data within the Azure data ecosystem is by using Azure Data Factory. Let’s go ahead and see this in action.
Initial Setup
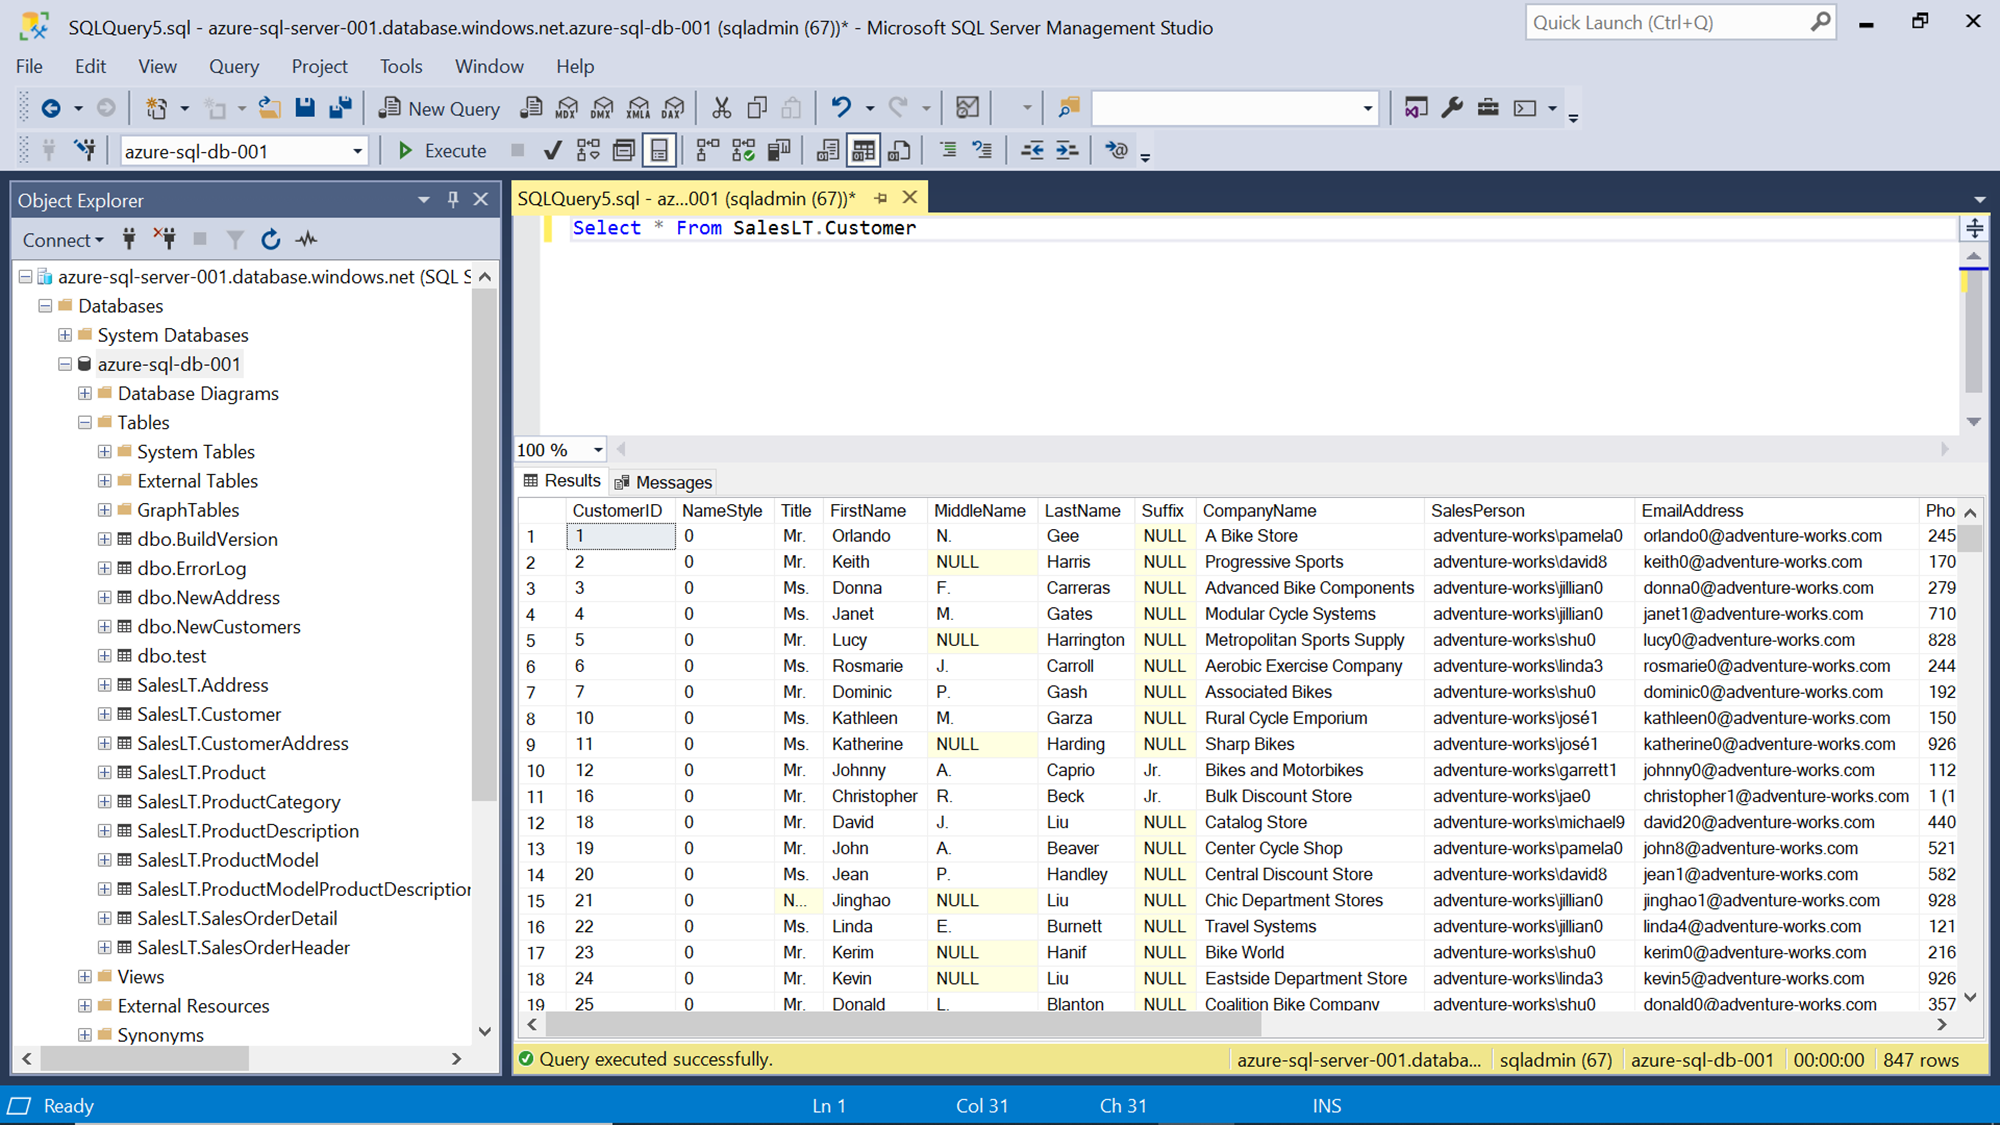
There are a few pre-requisites that need to be in place before we can start working on the Azure Data Factory to export data from Azure SQL Database to Azure Data Lake Storage. As we are going to use Azure SQL Database as the data source, we need to have a database instance with some sample data in it, so that the same can be exported. Shown below is a database with sample data in it.
We need a lake storage account as shown below. As we intend to export the data into a container in a lake storage account, click on Containers and create a container in which the exported data would be stored.

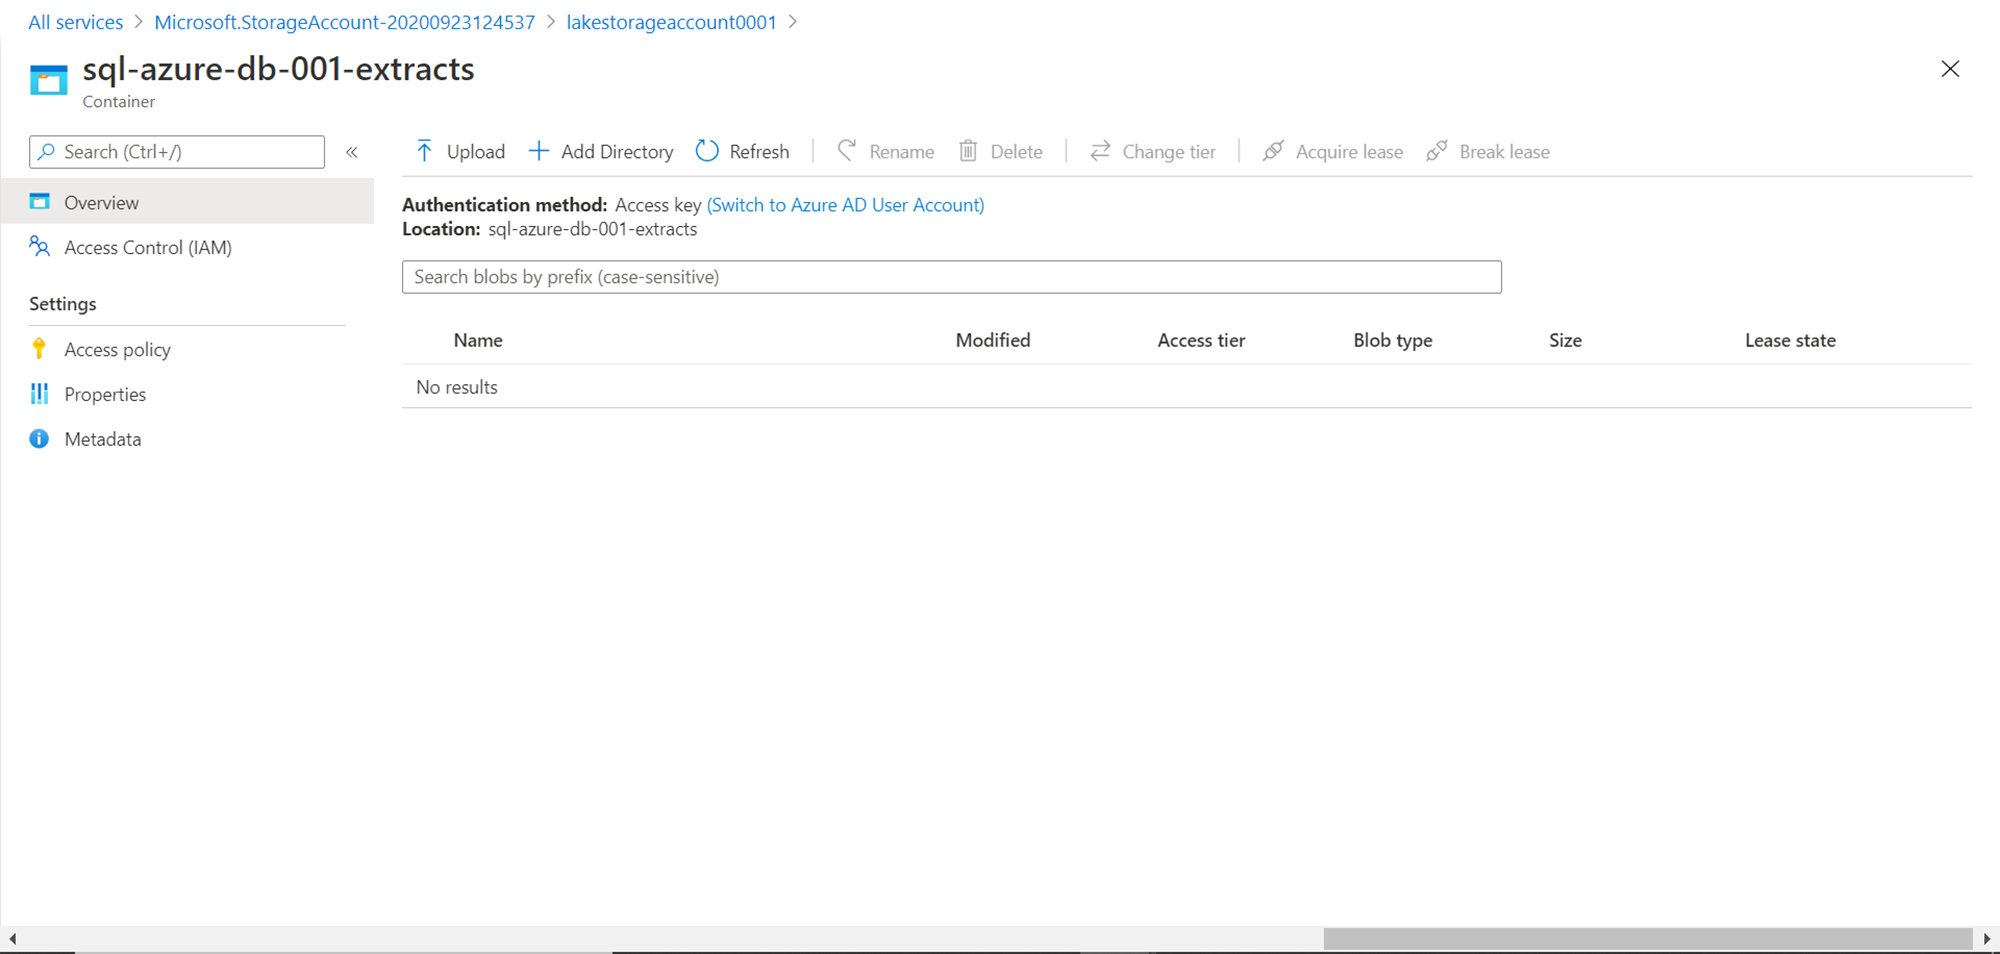
Shown below is a container created in the Azure Lake Storage account. We would use this account to store the data exported by the Azure Data Factory.
Exporting Data with Azure Data Factory
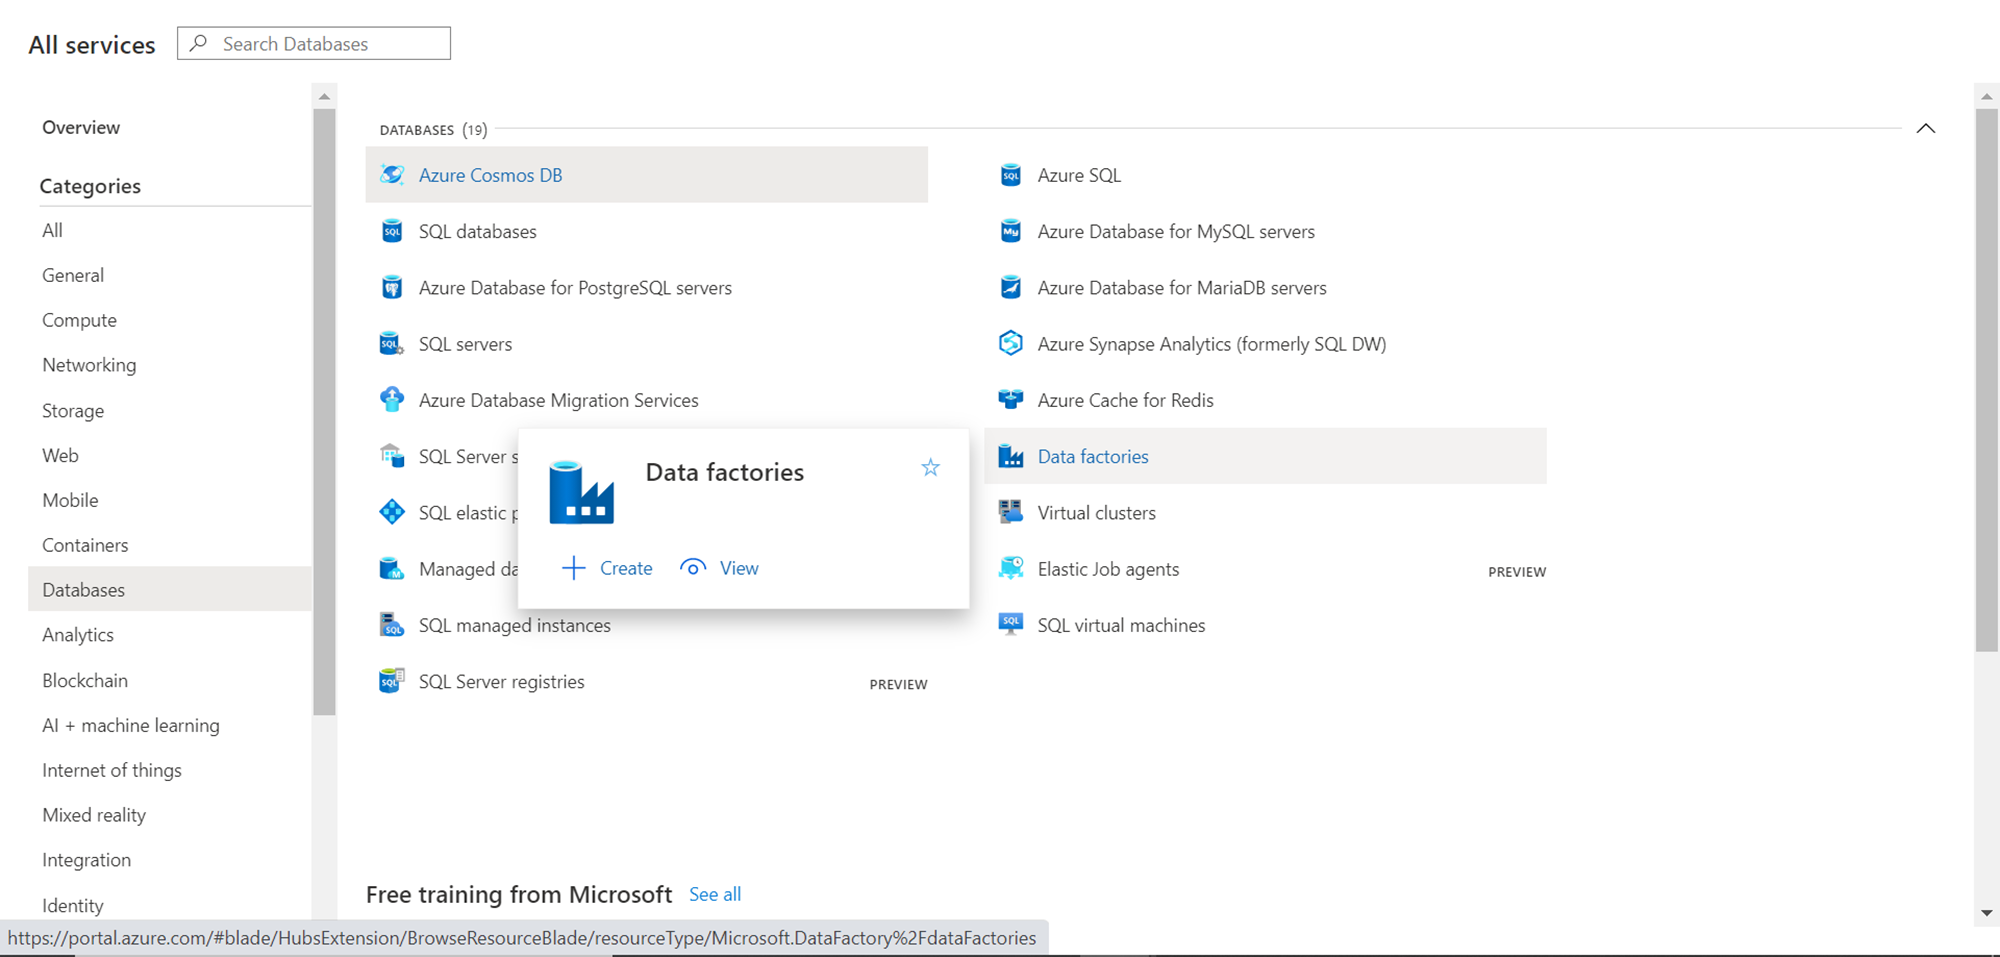
To create a data pipeline in Azure Data Factory, we need to create an instance of Data Factory. Navigate to the All services menu option, click on Databases and Click on Data factories. This would open the Data factory dashboard page.
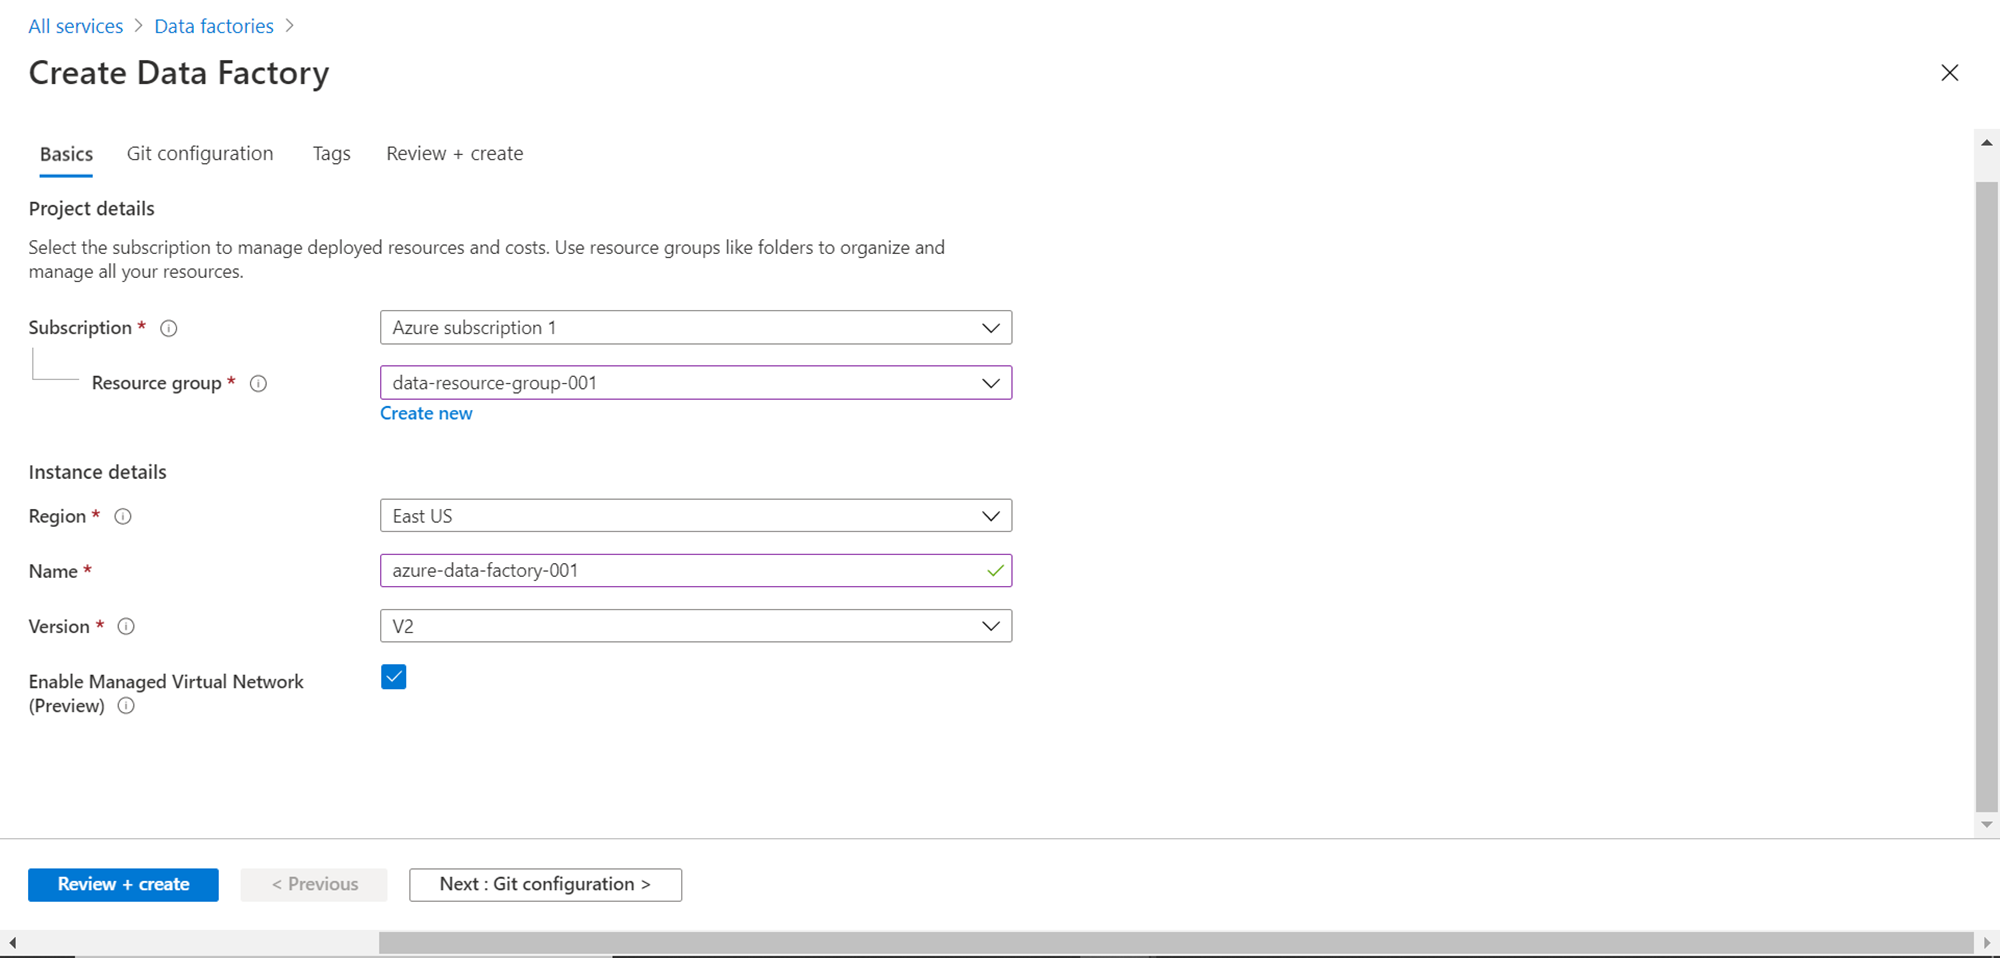
Click on the Create Data Factory button and it would open a screen as shown below. Fill up the basic details like the Subscription name, Resource group, Region, Name of the instance, and Version. The rest of the option can be the default value. Click on the Review + create button to create an Azure Data Factory instance.
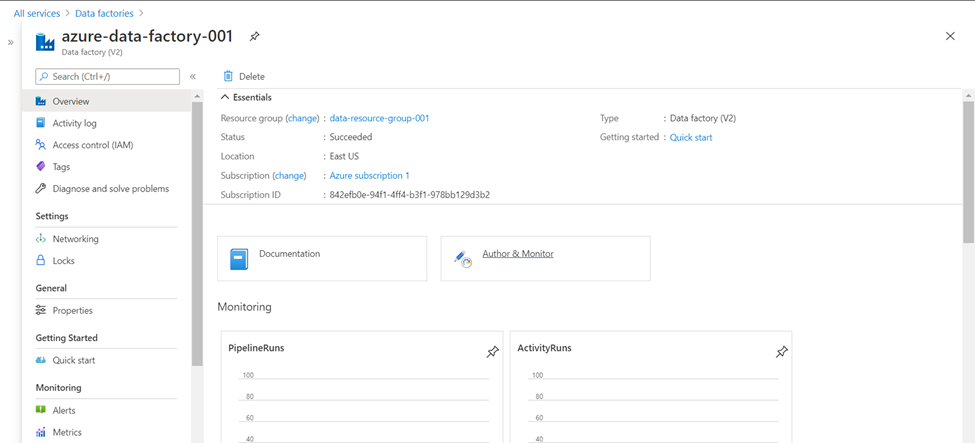
Open the instance and click on Author & Monitor button to open the Azure Data Factory portal.
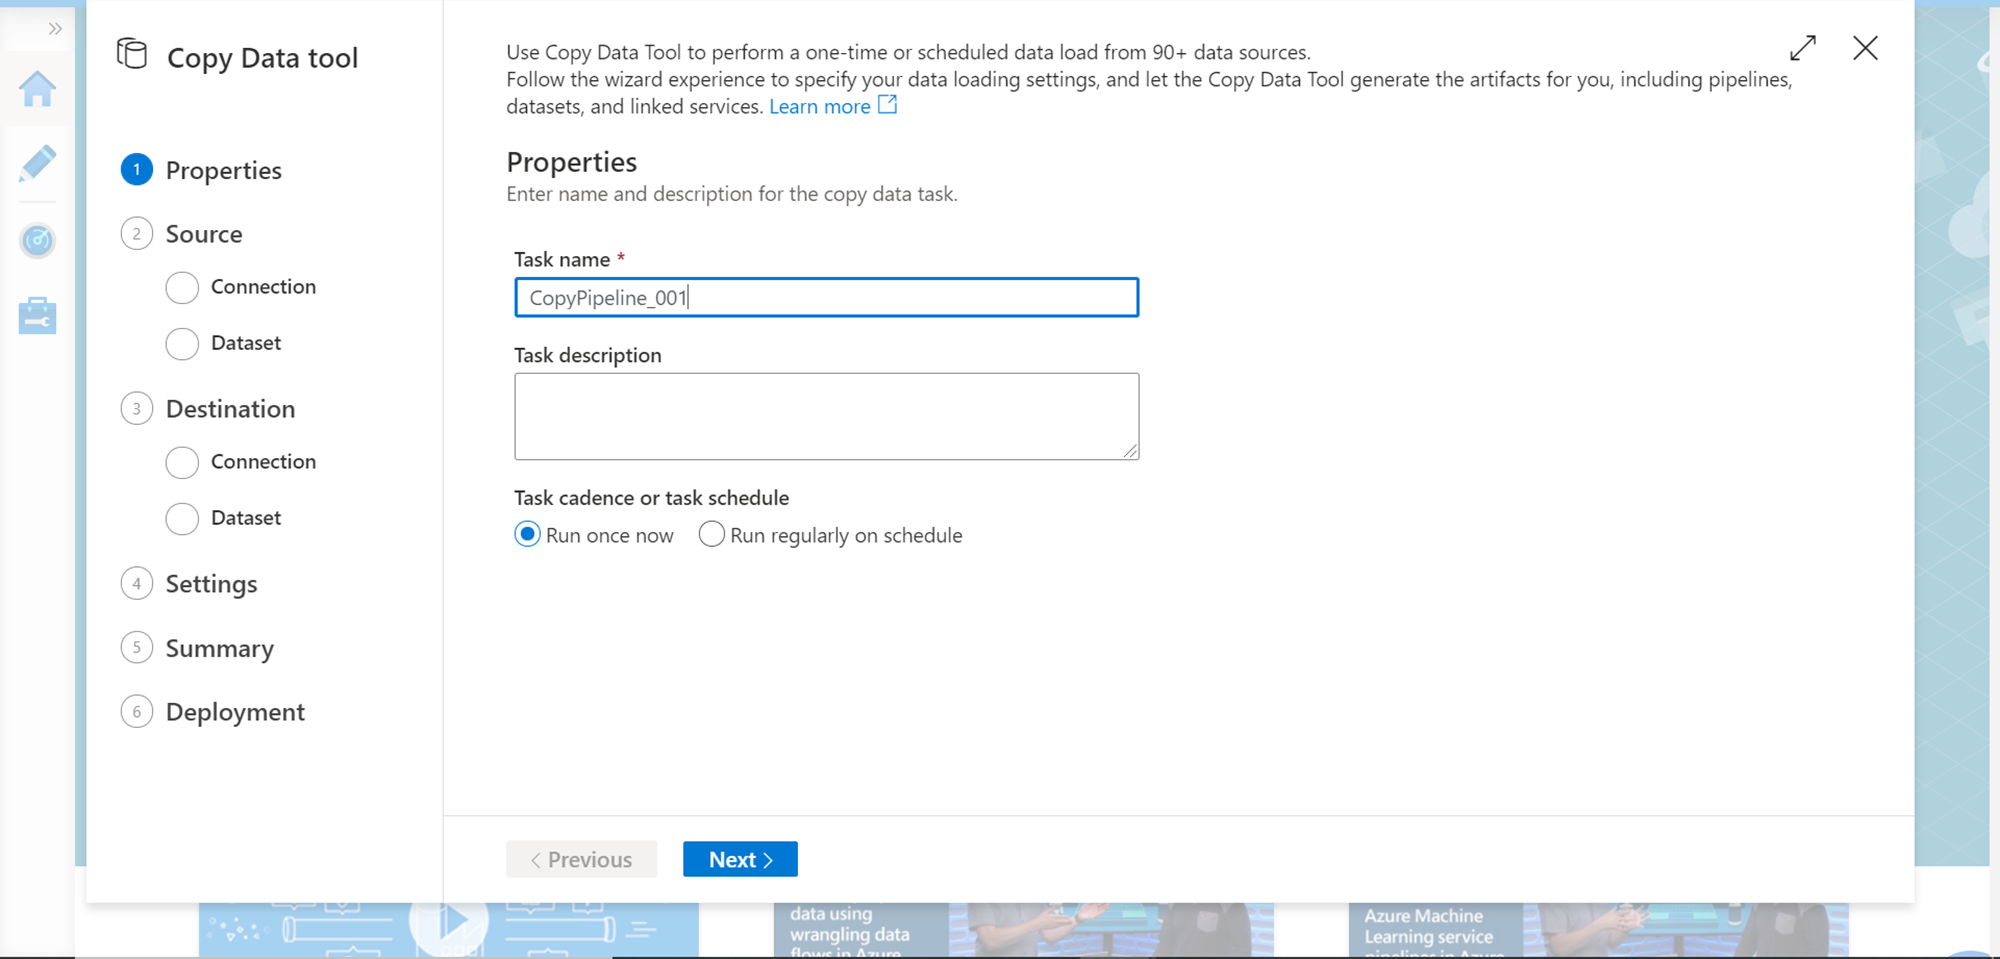
Once the portal opens, from the home page click on the Copy Data button. This would start the Copy Data tool or wizard as shown below. In this first step, provide the name of the data pipeline as shown below. Select the frequency of execution. For now, we can continue with the default option for demonstration purposes. Click on the Next button.
If you have not registered a linked service earlier, you may not have any data source connection listed and your screen may look as shown below. Click on Create a new connection button to register Azure SQL Database as the data source.

You would find the Azure SQL Database in the Azure list of data sources as shown below. Select the same and click on the Continue button.

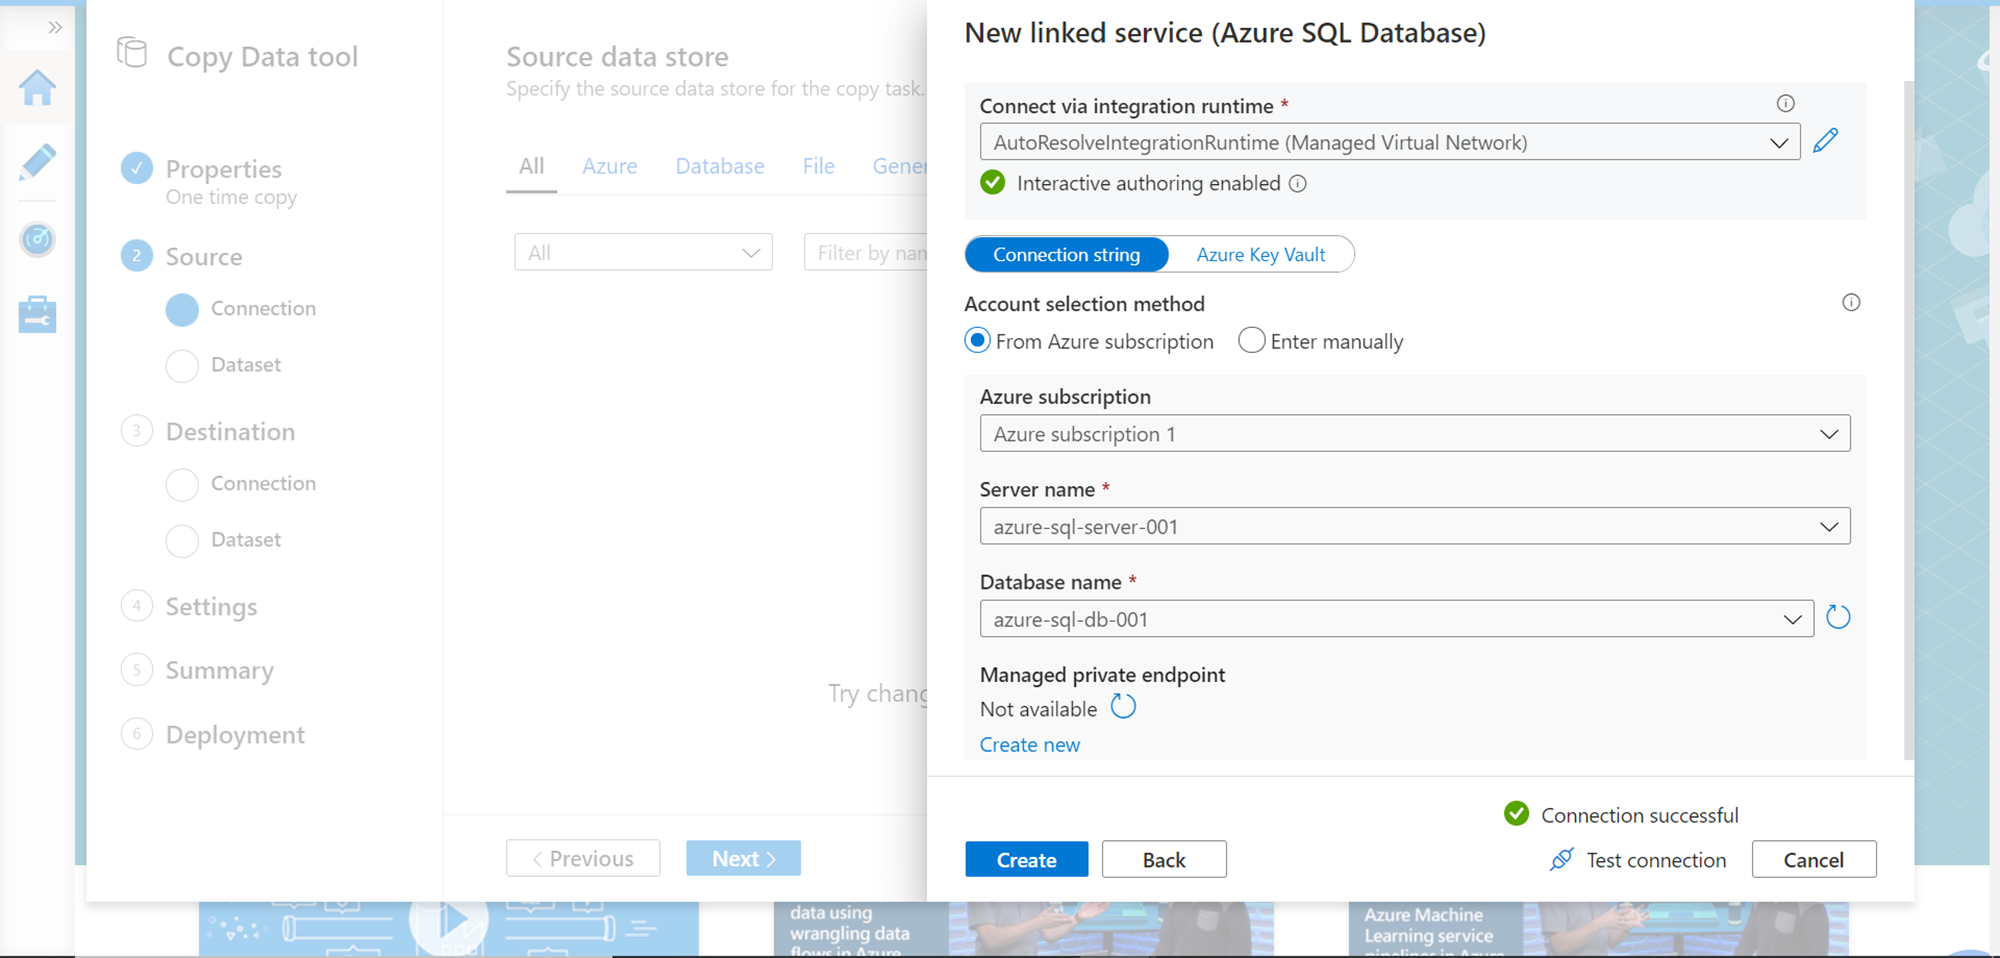
Provide connectivity details of the database as shown below. If you intend to test the connection, add the integration runtime as well. After providing the connection credentials, click on the Test connection button to test the connectivity. Once the connection is successful, click on the Create button.
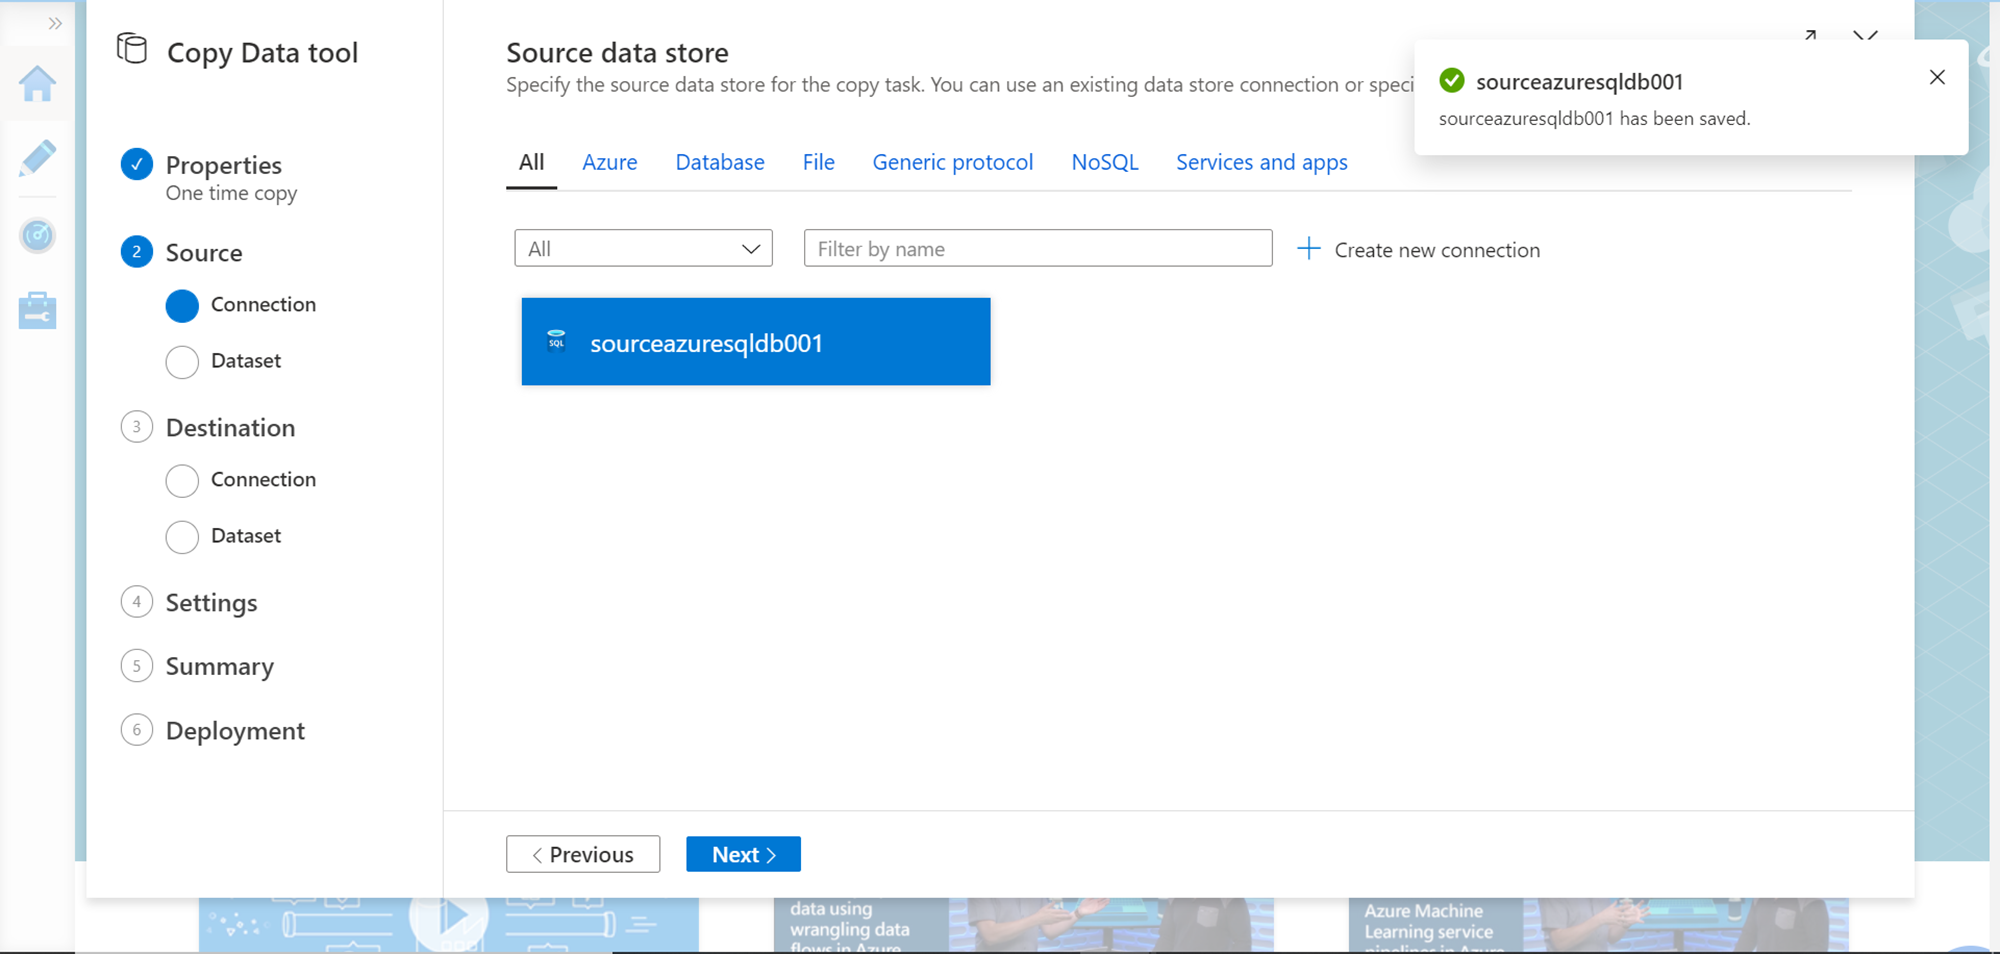
Once the data source is registered as a linked service, you would able to find the same in the data source list as shown below. Click on the Next button.
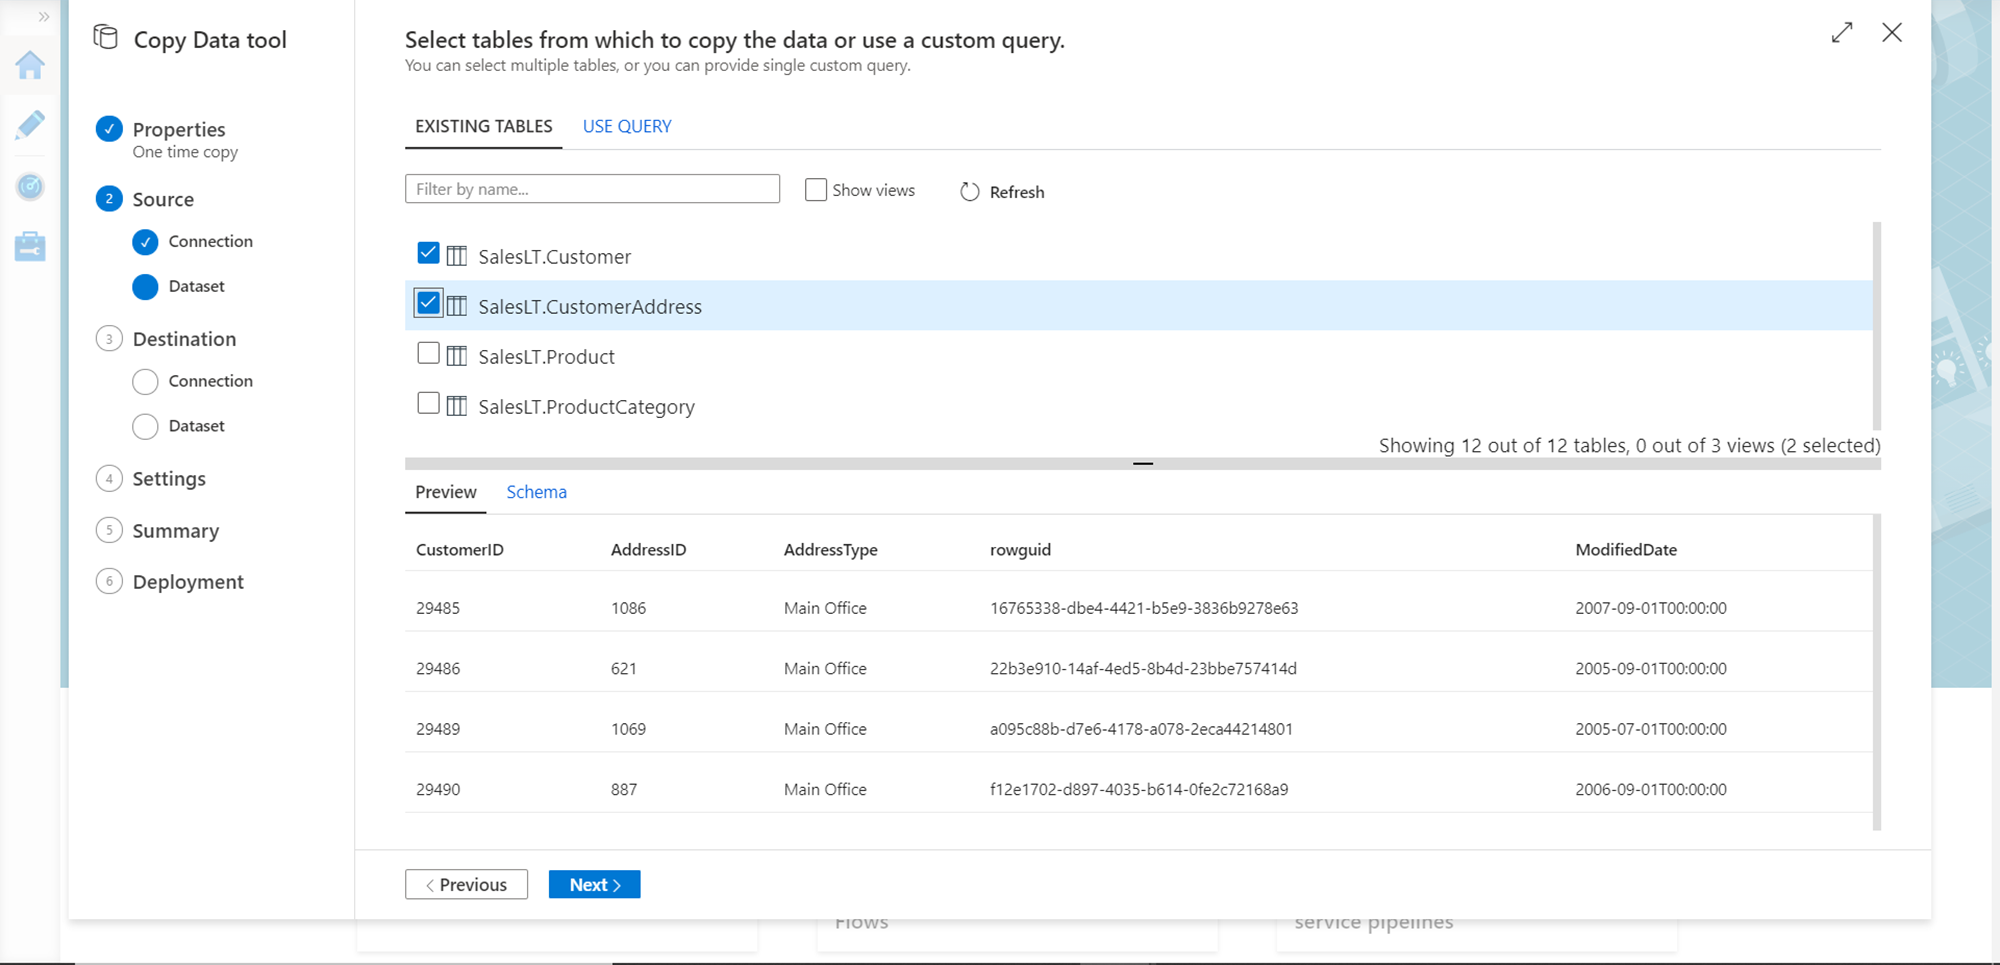
You would find the list of tables in the selected SQL database. Let’s say that we intend to export multiple tables. In this case, we have selected two tables. When you select any given table, it would show the preview as well as the schema of the table as shown below. Select the desired tables and click on the Next button.
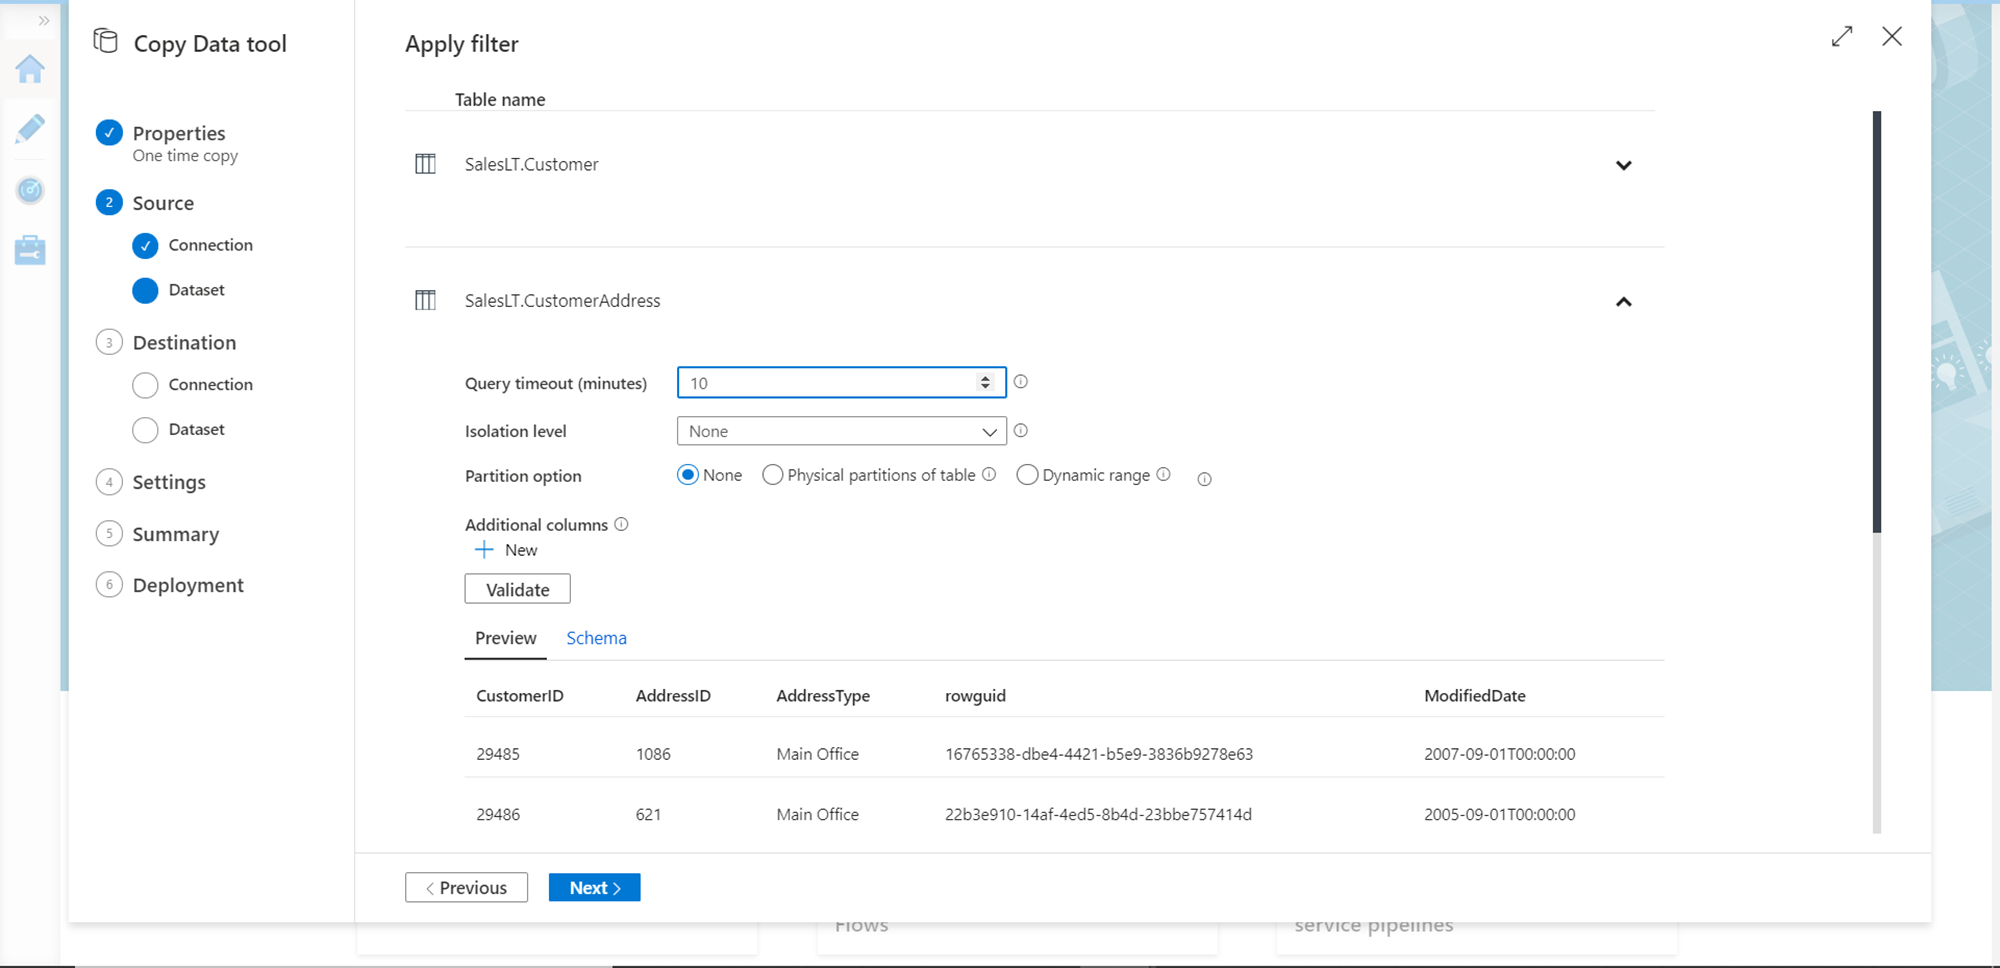
In this step, we can apply desired filters on each table separately. We can also add additional columns to the schema by clicking on the New button and then defining the details of the new columns. For now, let’s say that we just intend to export the full table as-is. So, we are not modifying any settings in this step, and click on the Next button.
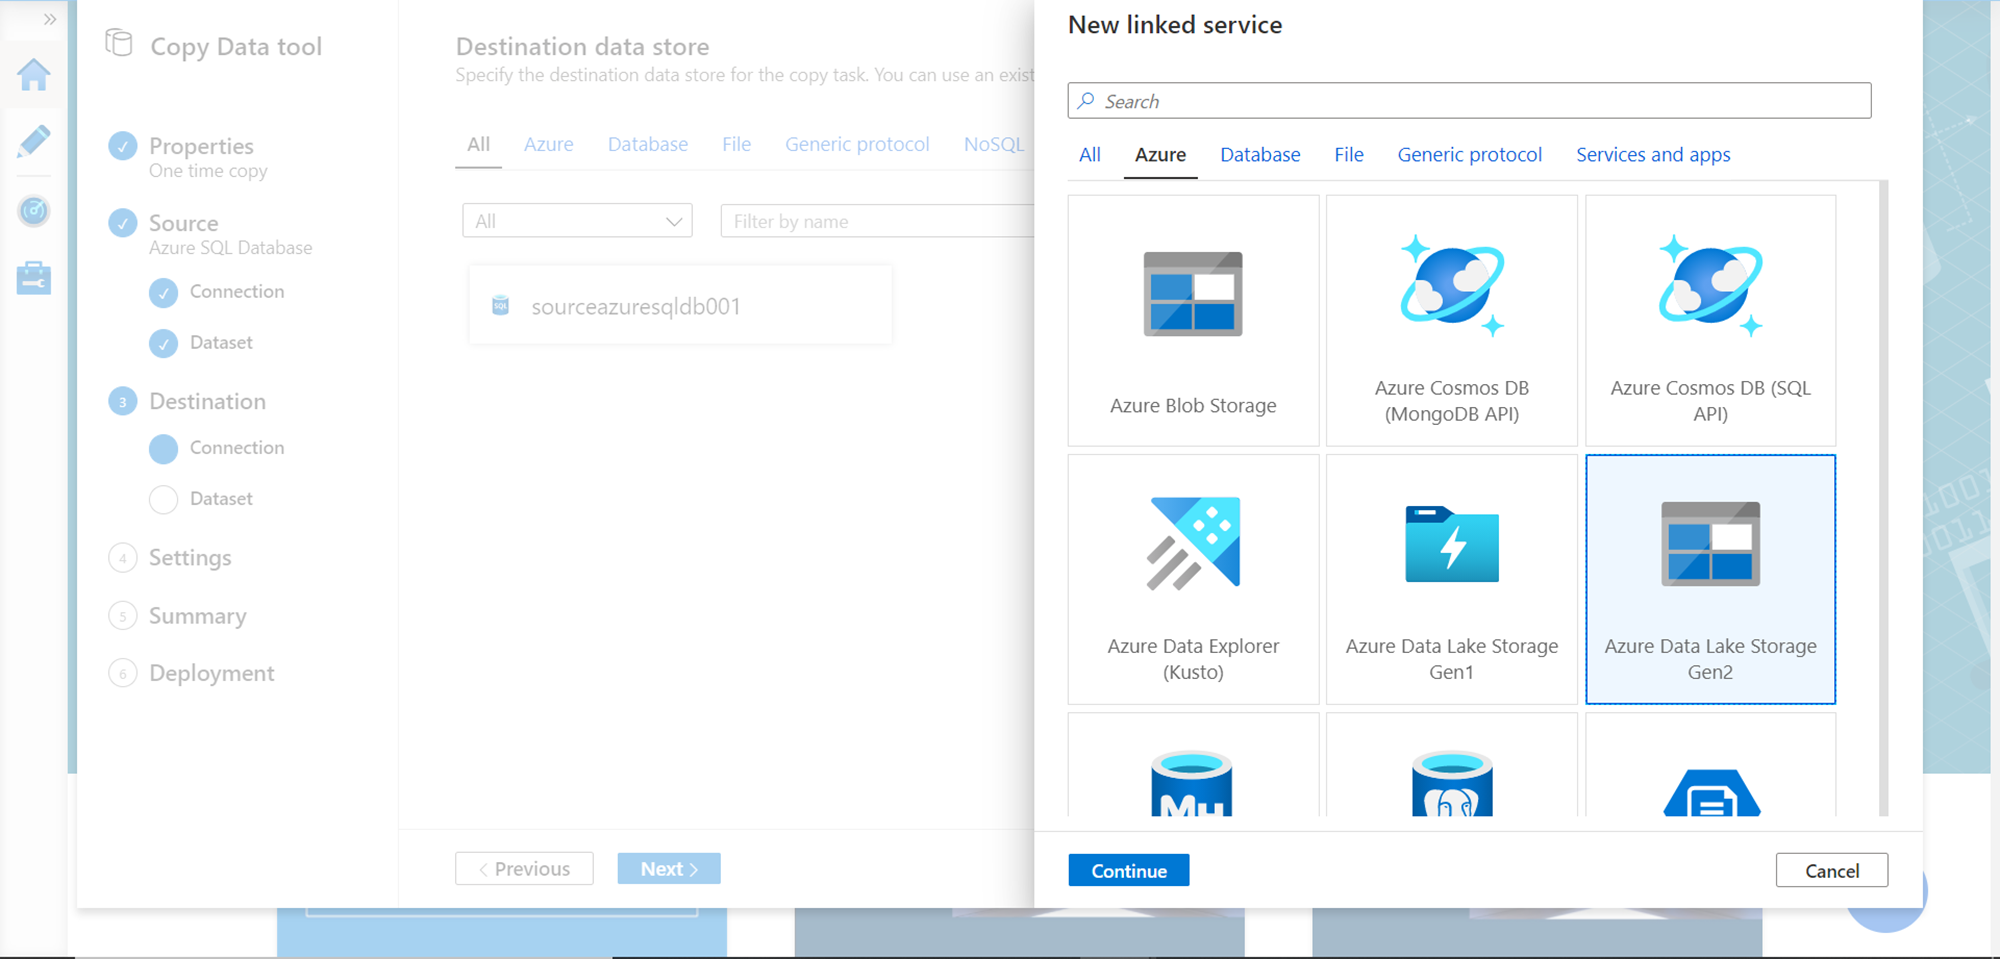
In this step, we need to register the destination as a linked service. Repeat the steps that we followed when we registered the data source, and selected Azure Data Lake Storage Gen2 as shown below.
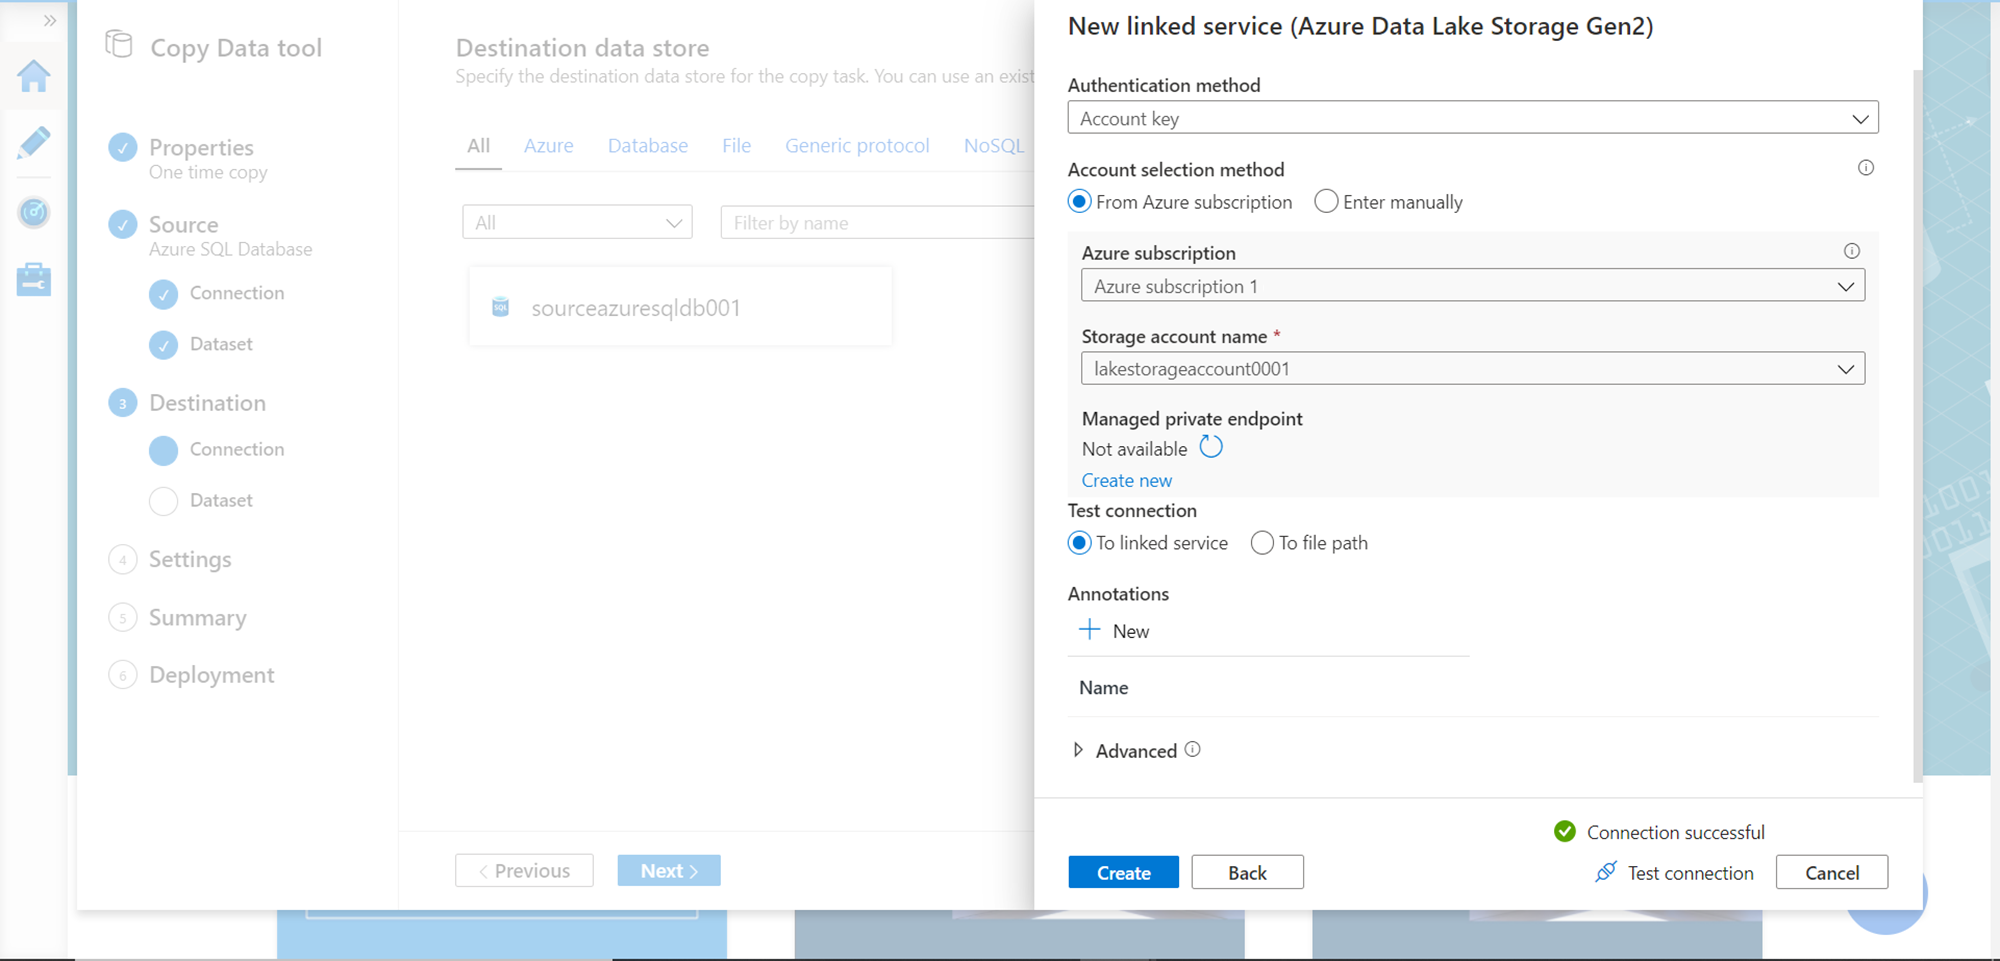
After that, provide the details of the storage account that we created in the pre-requisite section. You can select Account Key or Azure AD as the authentication method. We can test the connection to the linked service or to the exact file path. The connection that we are making is to the account in this step, so click on Test connection and you should be able to connect successfully as shown below. Click on the Create button to register the destination of the data pipeline.
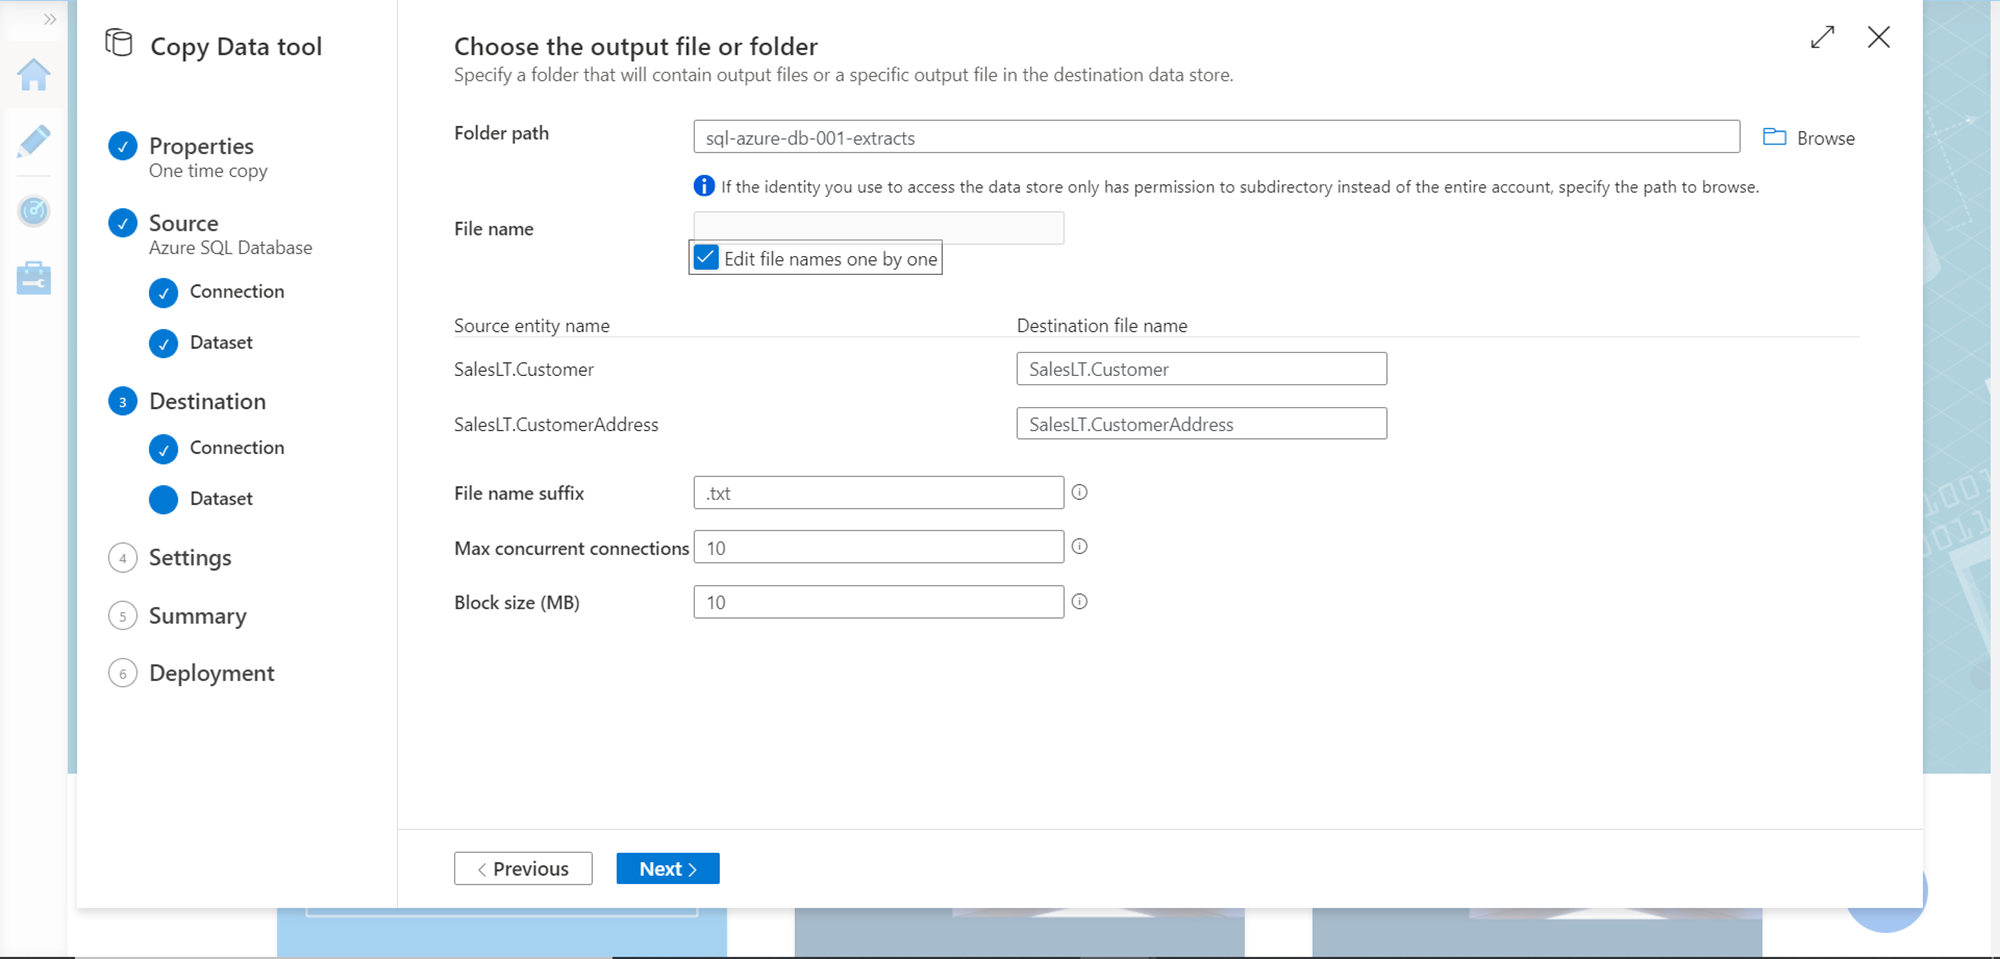
Under the data lake storage account, we need to specify the container i.e. the folder where we intend to save the exported result. Select the folder path and specify the file name for each exported table as shown below. You can modify additional file settings like suffix, concurrent connections and block size of each file to split it into multiple file blocks.
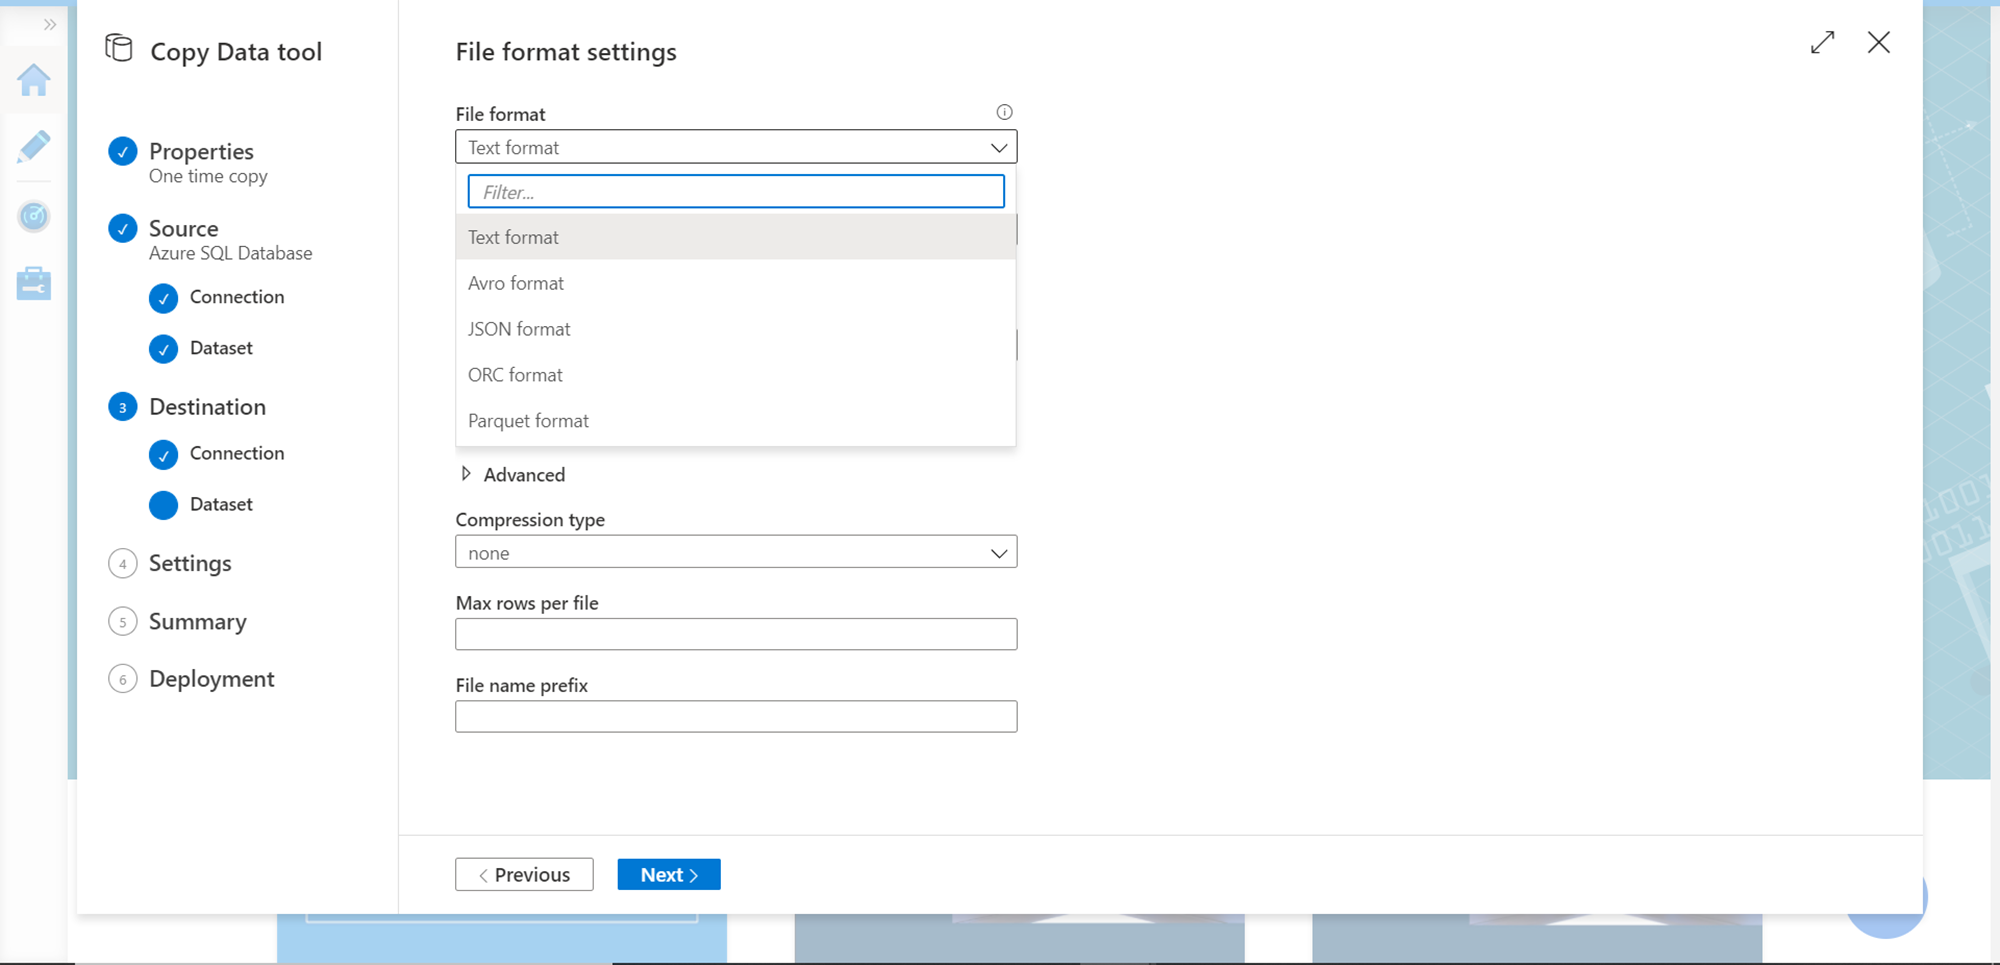
In the next step, specify file format settings like the file format, separator, compression etc. as shown below and click on the Next button.
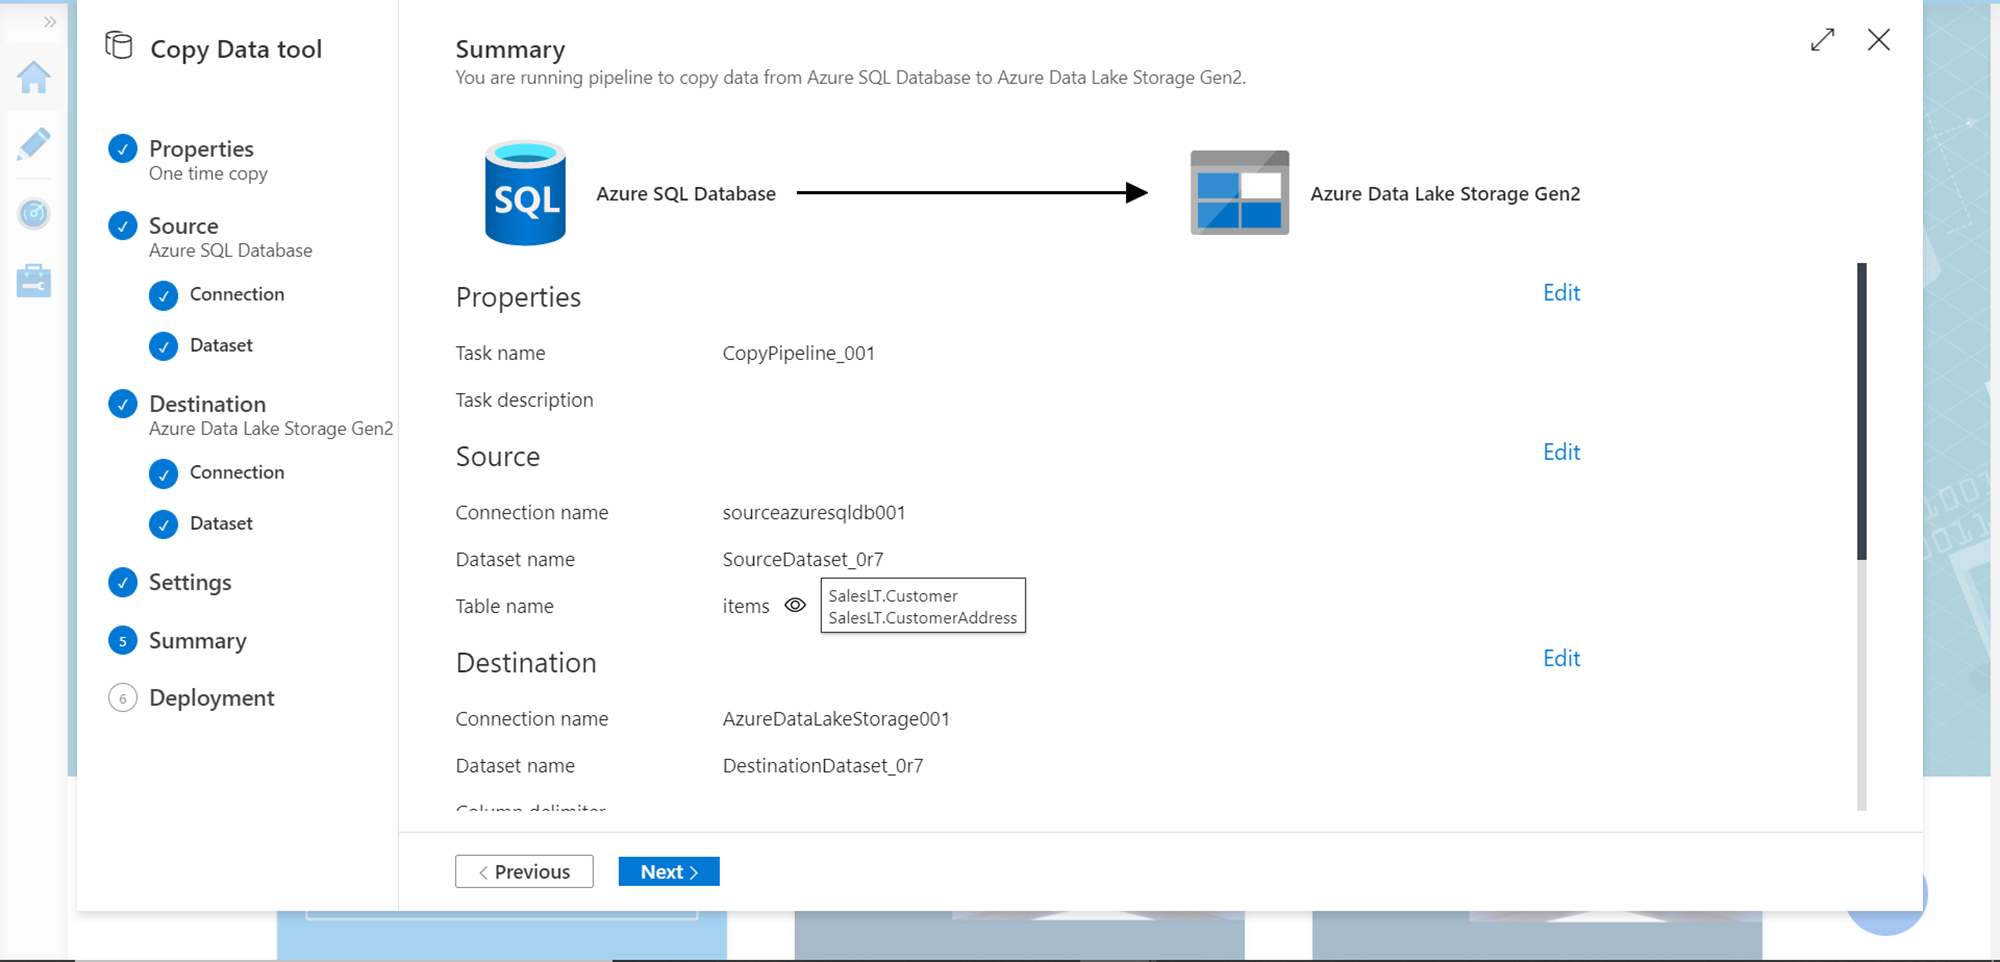
For the rest of the settings, we can continue with the default options for the purpose of this exercise. In the final step, we would find a Summary screen that would list all the details of the configuration we have specified so far as shown below. Click on the Next button the create as well as execute the pipeline.
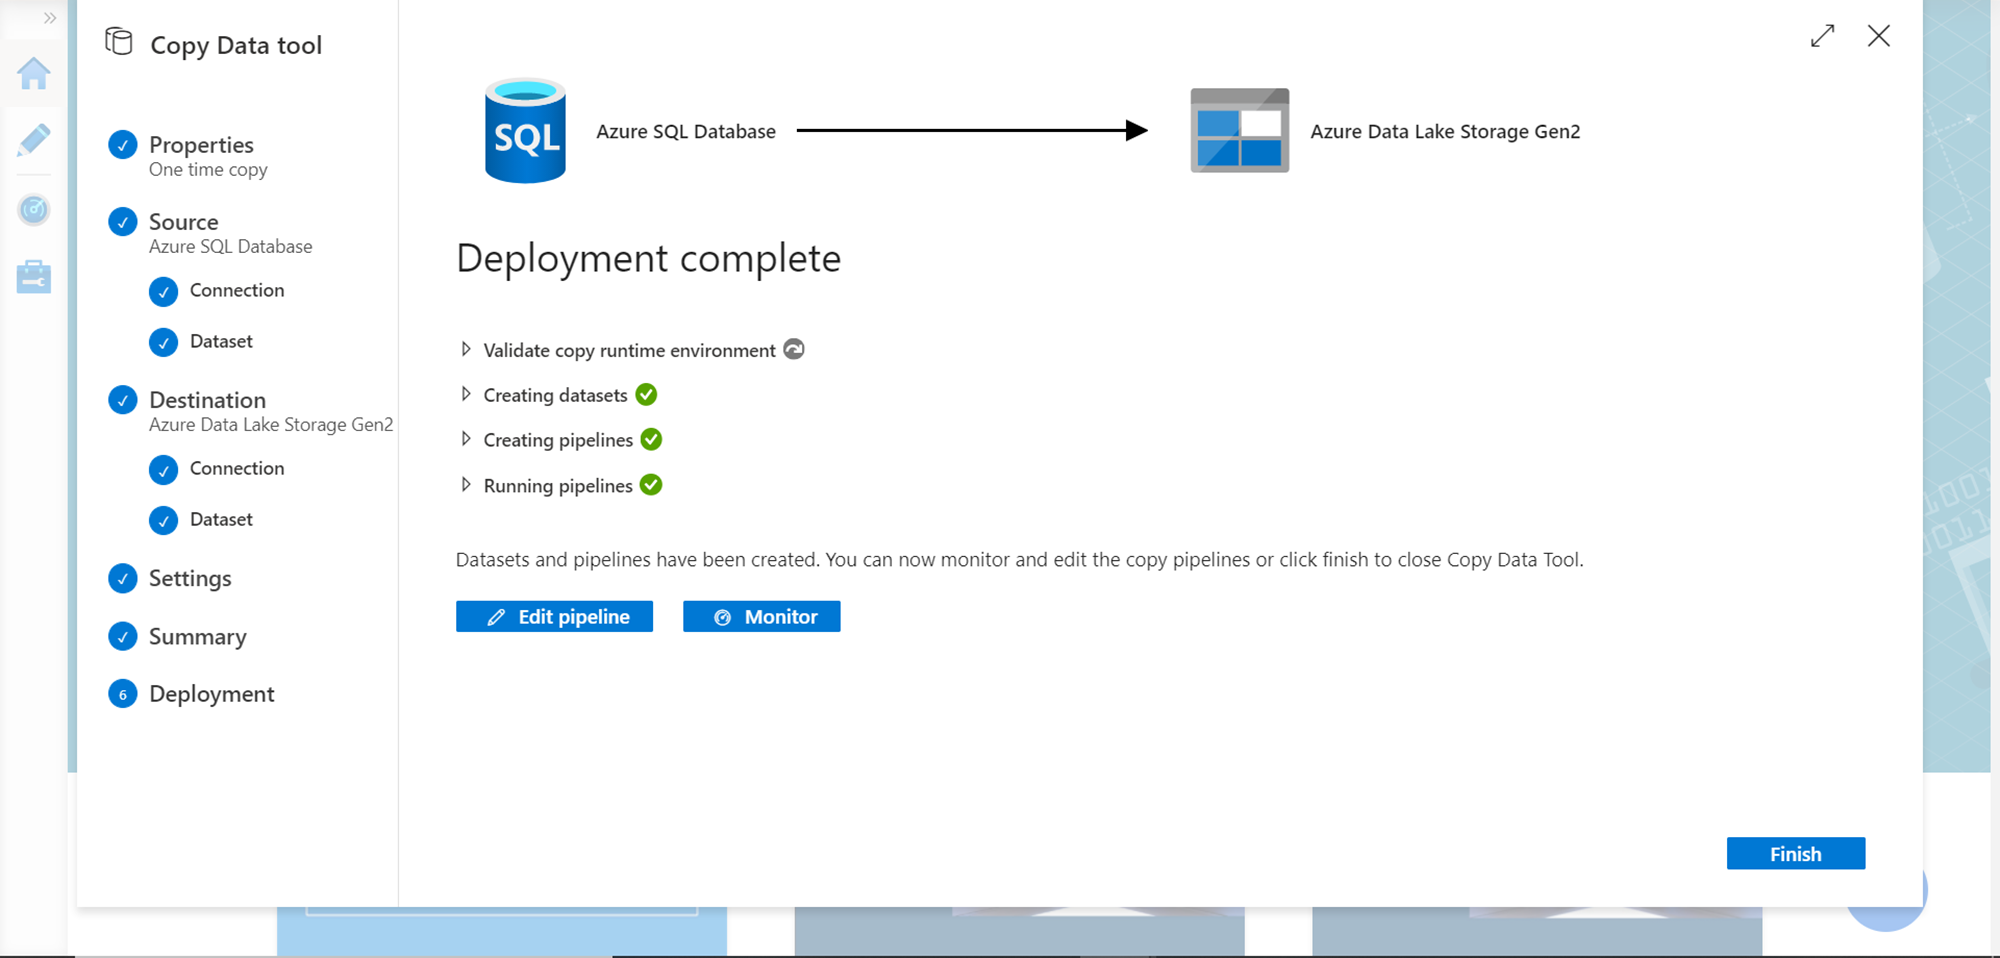
After the deployment is complete and the pipeline is executed, the successful confirmation status of the same should be available on the final step as shown below. This concludes the entire export process in case of a one-time export of the data.
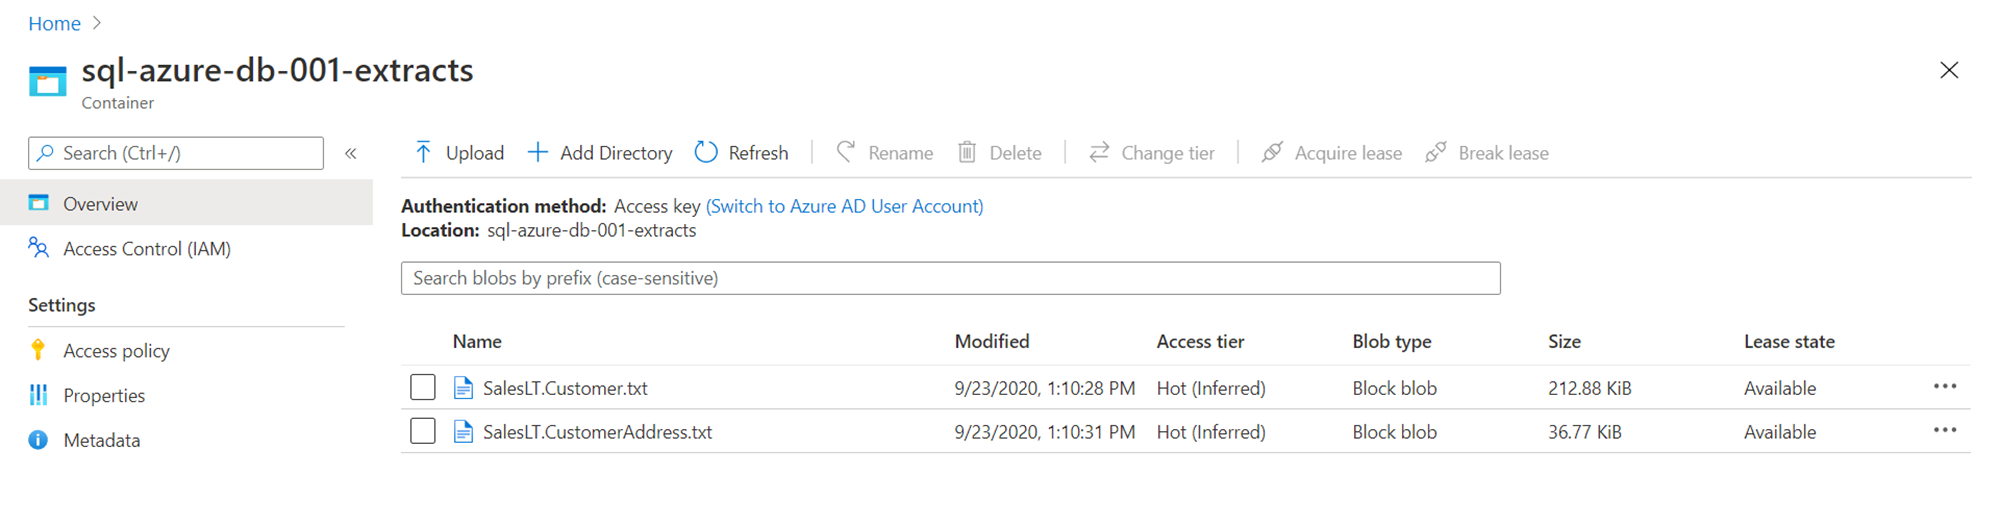
To confirm the successful export process, navigate to the container in the Azure Data Lake account and you should be able to find two files created with the same name that we specified while defining the pipeline as shown below.
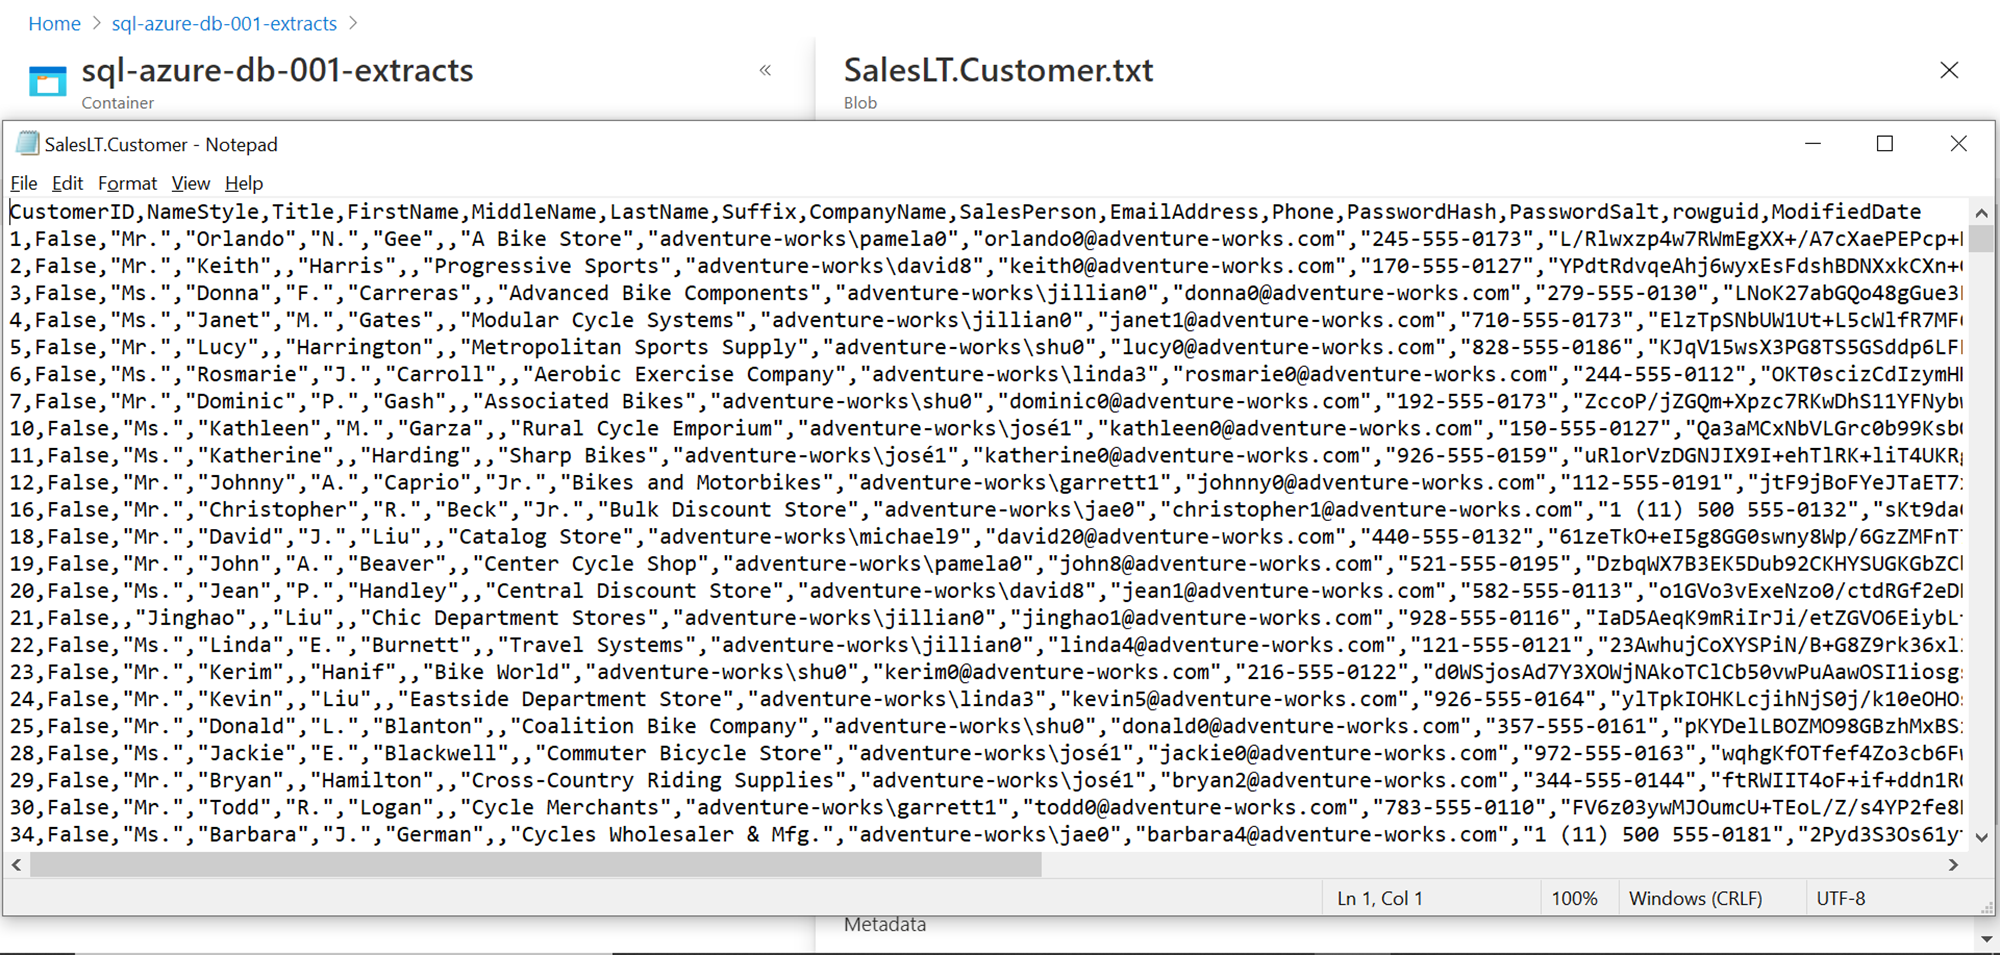
Open any file to verify the data, and you should be able to see that the data got exported in a text file format with semi-comma as the separator, as per the configuration that we specified while defining the pipeline.
In this way, we can use Azure Data Factory tool to export data from Azure SQL Database to Azure Lake Storage.
Conclusion
In this article, we created an Azure Lake Storage account with a container as well as Azure SQL Database as a pre-requisite. Then we created an Azure Data Factory instance as well as a pipeline where we sourced data from multiple tables of a SQL Database and exported the same as text files in Azure Lake Storage.

He has worked internationally with Fortune 500 clients in various sectors and is a passionate author.
View all posts by Rahul Mehta
- Finding Duplicates in SQL - February 7, 2024
- MySQL substring uses with examples - October 14, 2023
- MySQL group_concat() function overview - March 28, 2023