
This article deploys a SQL Server container using Azure Kubernetes Services (AKS).
Introduction to Kubernetes
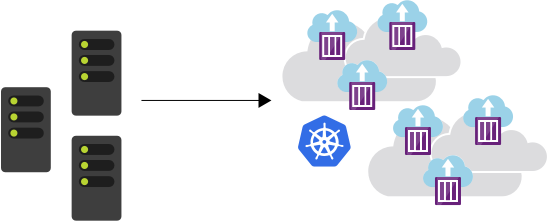
Kubernetes is a portable, open-source, extensible platform for managing and orchestrating containers. It abstracts complex container management tasks. You might run hundreds of container applications and databases in the environment, and Kubernetes provides a reliable and highly scalable control panel to manage these containers. The Kubernetes is popularly known as k8s, where the number 8 defines the number of characters between k and s of the word K[ubernete]s. It is a popular concept in cloud-based application development.
Kubernetes offers the following benefits.
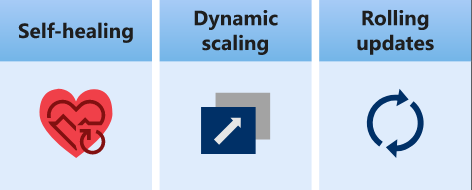
- The Kubernetes provides self-healing of containers. For example, it restarts contains on its failure.
- It can dynamically scale up or down containers.
- You can apply automatic rolling updates and rollback for container instances.
- It can store and manage sensitive information such as passwords.
Kubernetes components
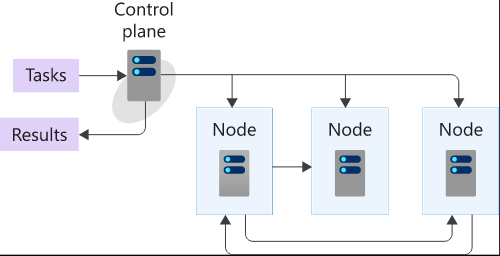
At a high level, the Kubernetes forms a cluster of servers, i.e., Nodes. The master node maintains the desired cluster state while the worker nodes run the container for application and services.
Computer Cluster
The Kubernetes cluster is responsible for controlling and scheduling the tasks. The cluster contains Nodes and Control Panels.
- Nodes: Nodes are the systems that execute the tasks.
- Control Plane: It runs the scheduling software.
Kubectl
It is a command-line tool for interacting with the Kubernetes clusters. You can create, stop, delete, auto-scale resources, describe active resources using the kubectl. We will use the kubectl in this article for resource deployment.
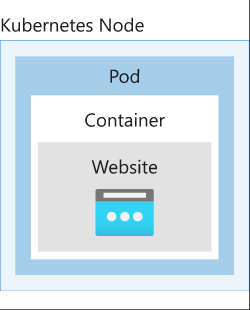
Kubernetes pods
Kubernetes Pods are the smallest unit in Kubernetes architecture, and it represents a single container instance in Kubernetes. To run the applications in Kubernetes, you package the container into the pods. The pod templates are defined using YAML files.
Deploying SQL Container in Azure Kubernetes Services (AKS)
This article uses Azure Kubernetes Service (AKS) to deploy and manage the Kubernetes cluster. It is a fully managed service that offers serverless Kubernetes with integrated CI/CD solutions, enterprise-grade security, and governance.
You can navigate to https://azure.microsoft.com/en-in/services/kubernetes-service/#overview and try Azure Kubernetes Service (AKS).
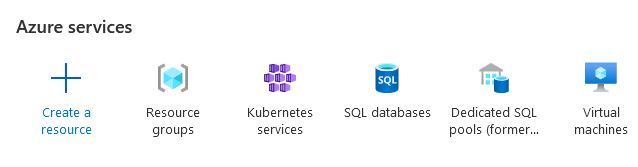
To deploy a Kubernetes cluster, launch the Azure portal and search for Kubernetes Services.
Click on create a new cluster in the Azure Kubernetes Services (AKS) that requires a few configurations input to proceed.
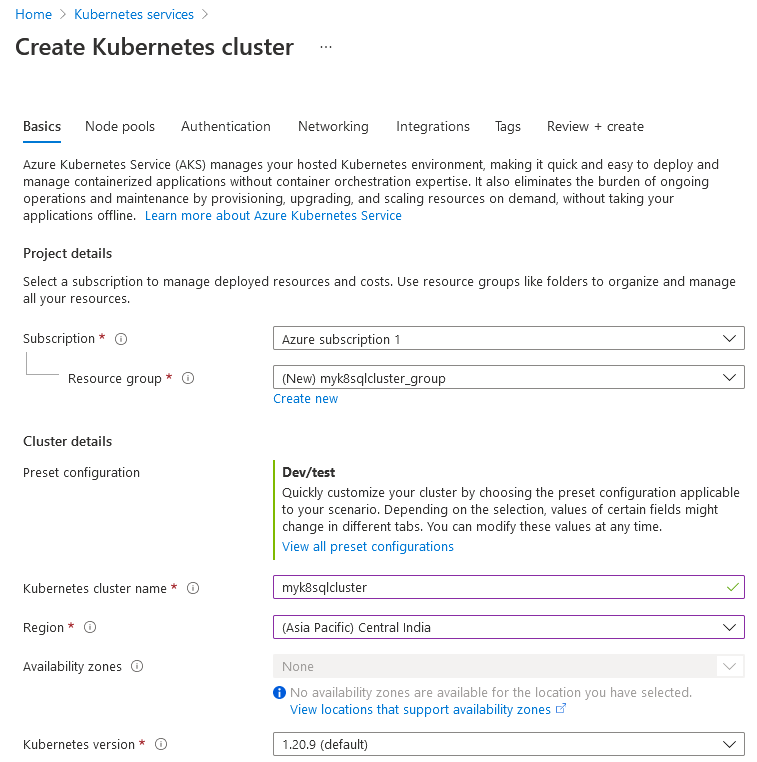
- Basics:
The basic page requires Azure subscription, resource group, Kubernetes cluster name, Region, preset configuration.
The preset configuration allows you to customize the Kubernetes cluster configuration based on your requirement. It has the following preset configurations.
- Standard: It provides a standard configuration that is suitable for most applications
- Dev\Test: It is suitable for development, testing, or learning Kubernetes. For this article, we use Dev\test preset configuration.
- Cost-optimized: Its focus is to reduce deployment costs on the production workloads.
- Batch processing: It is suitable for compute-intensive, machine learning, graphics-intensive workloads.
- Hardened access: It is suitable for large enterprises that require complete control of security and stability.
We can configure the node size, scale method (manual or auto scale), and node counts in the primary node pool.
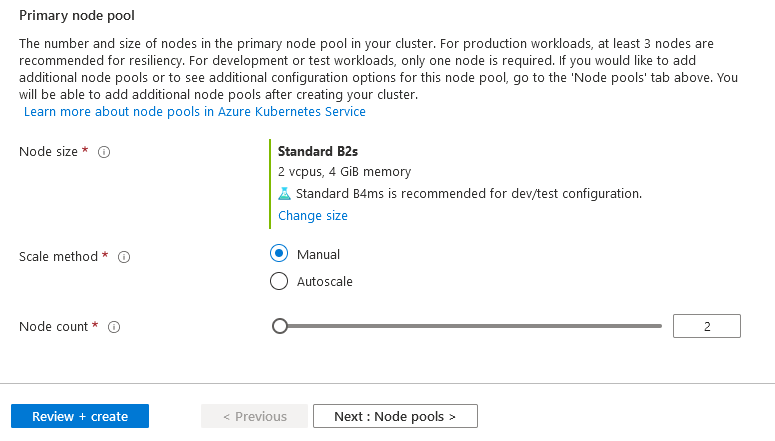
The node size depends on vCPU, RAM, Data disks, and costs. You can click on the change size and choose your optimum VM size.
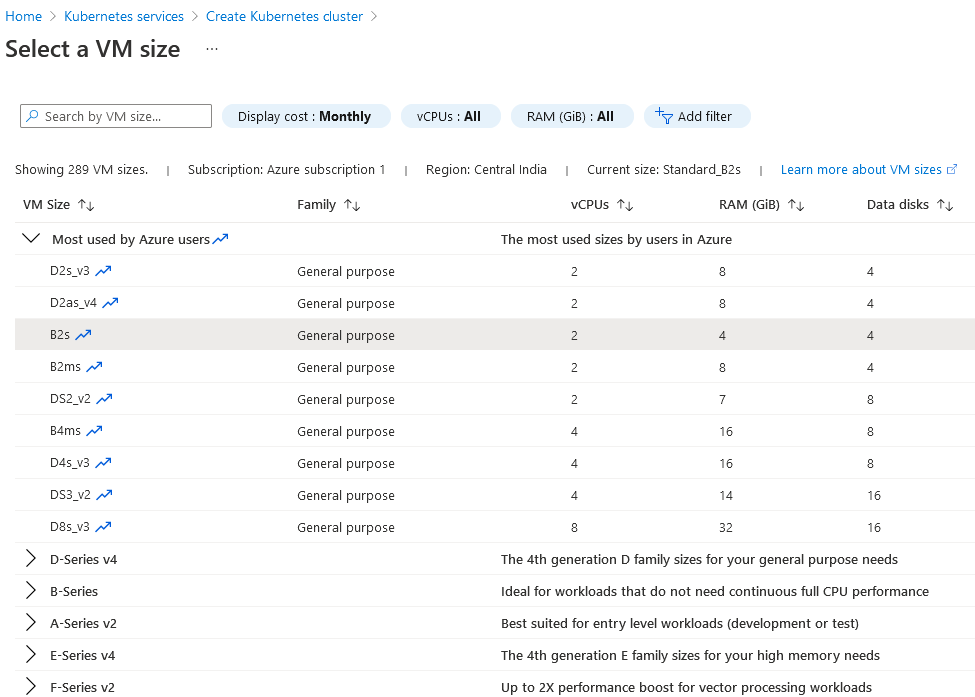
We use Standard B2s with 2 vCPU and 4 GIB memory with the Autoscale method for this article.

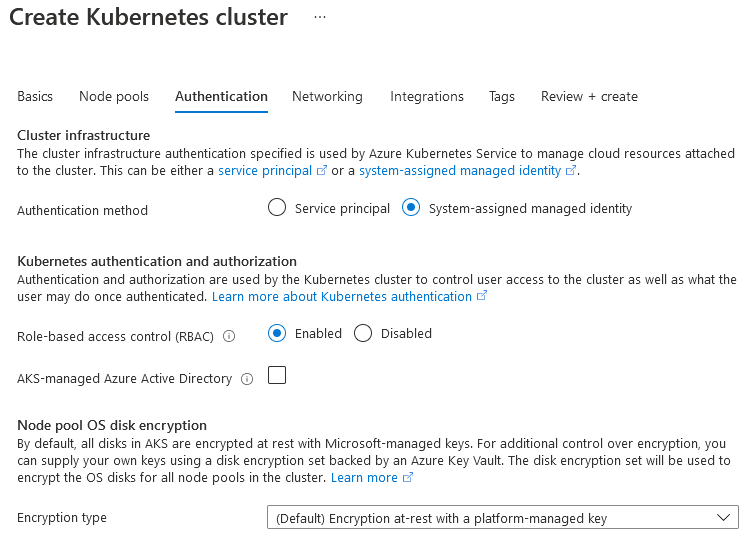
We will proceed with default configurations for the remaining options in Azure Kubernetes Services (AKS) cluster- Node pools, Authentication, Integrations, Tags.
Node Pools:

Authentication
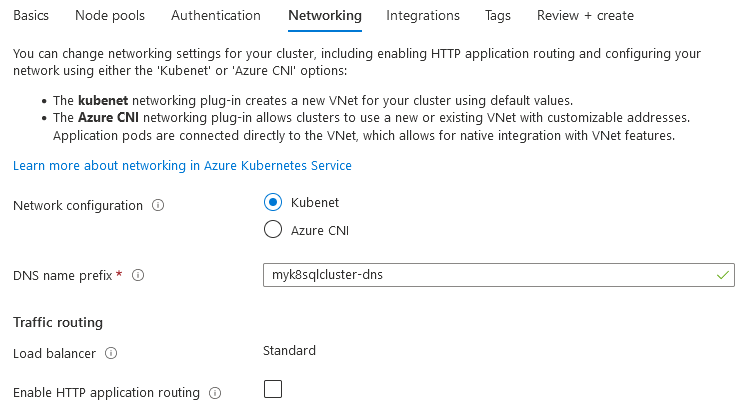
Networking
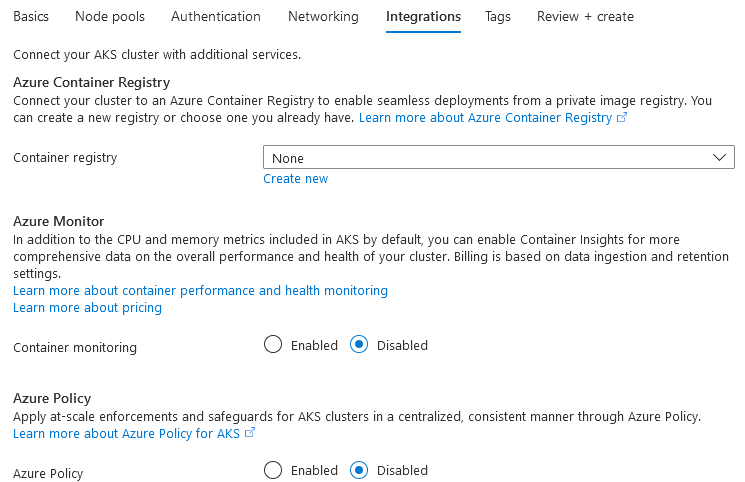
Integrations
Review + Create

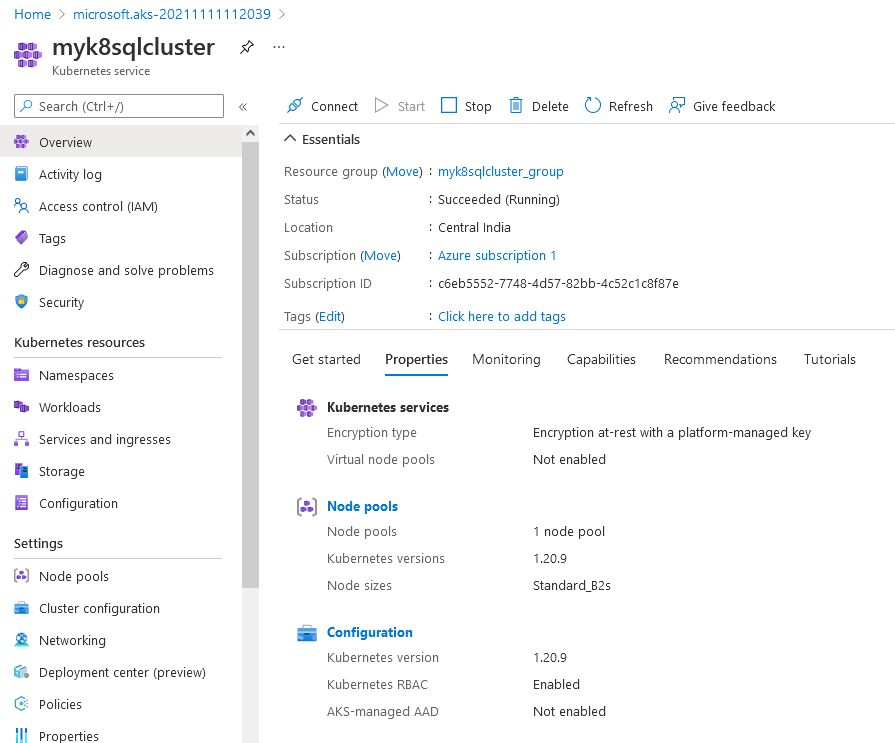
Deploy your Kubernetes cluster and view the dashboard as shown below.
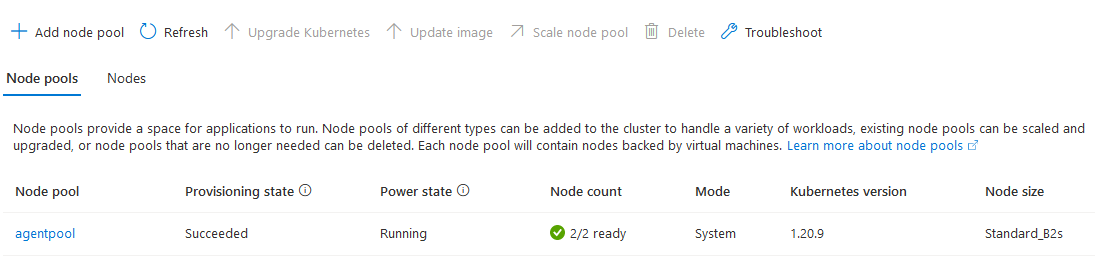
Click on Nodes. It displays node pools, individual node names, and their status.

Use Azure CLI to connect with Azure Kubernetes Services (AKS)
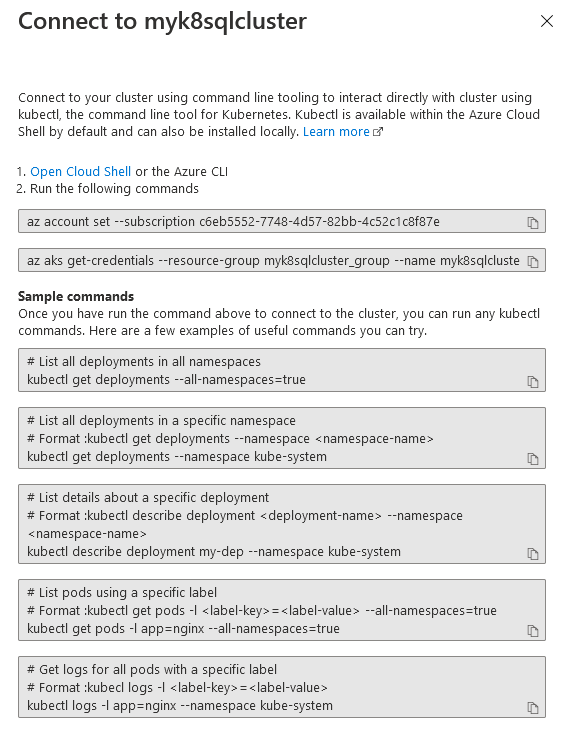
The Azure portal gives the following instructions for connecting to the Kubernetes cluster using command-line Azure CLI or Cloud Shell.
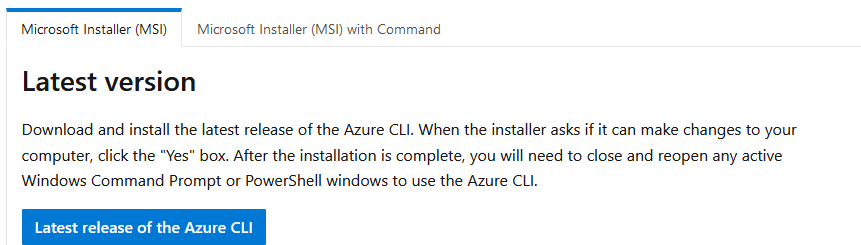
In this article, we will use Azure CLI to connect with the Kubernetes cluster. You can navigate to https://docs.microsoft.com/en-us/cli/azure/install-azure-cli-windows?tabs=azure-cli and install the latest Azure CLI on Windows, Linux, or macOS.
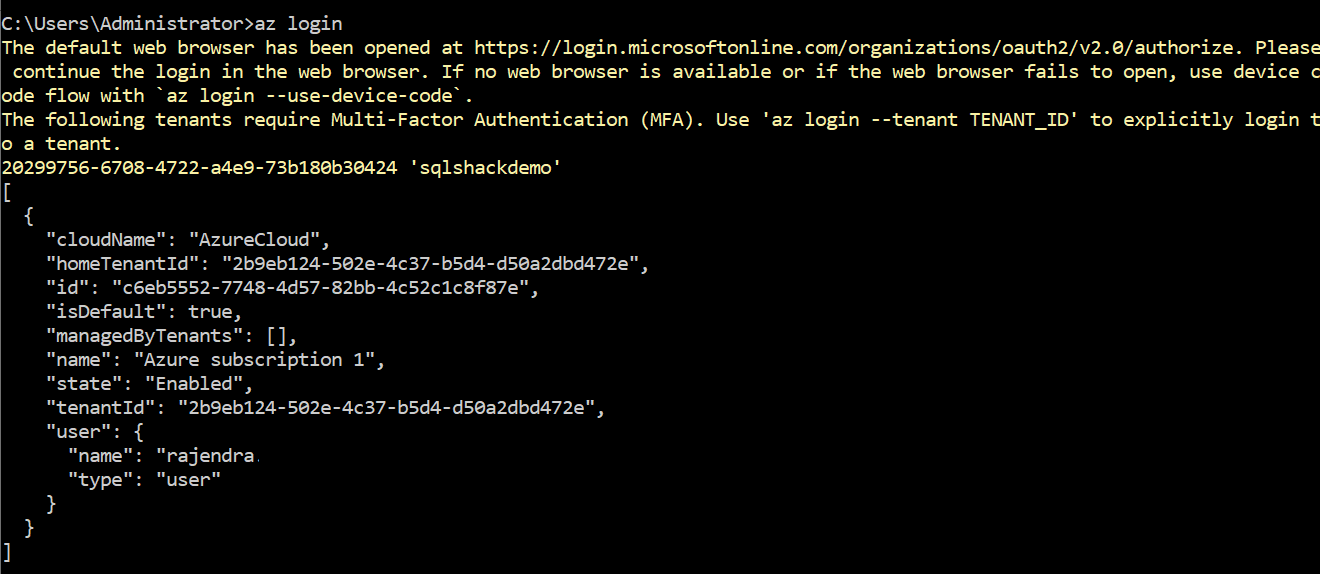
After the Azure CLI installation, launch command-prompt and authenticate to Azure using your credentials.
az login command opens a browser window for you to enter your Azure credentials. After authentication, you get the following page.
az account set –subscription <subscriptionguid>
az login
- Configure kubectl
As stated earlier, we use the kubectl command to connect with the Kubernetes cluster. We run the az aks get-credentials command to configure kubectl.
The az aks get-credentials require an input of the resource group and Kubernetes cluster that we deployed earlier.
az aks get-credentials –resource-group myResourceGroup –name myAKSCluster

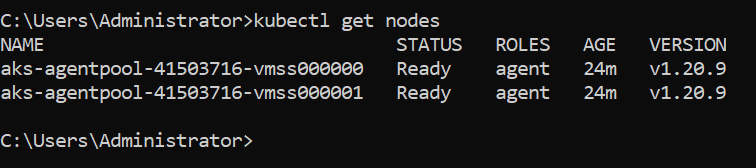
- Get Kubernetes cluster information
We can run the command – kubectl get nodes – to get a list of cluster nodes, status, uptime, and version.
- Store the SA password for SQL deployment
In this step, use the kubectl create generic mssql and store the SQL Server administrator password. In this example, I used a generic password; however, you should use a complex password. The below command creates a secret named mssql in Kubernetes, and it stores the value for SA_PASSWORD.
kubectl create secret generic mssql –from-literal=SA_PASSWORD=”India@1234”

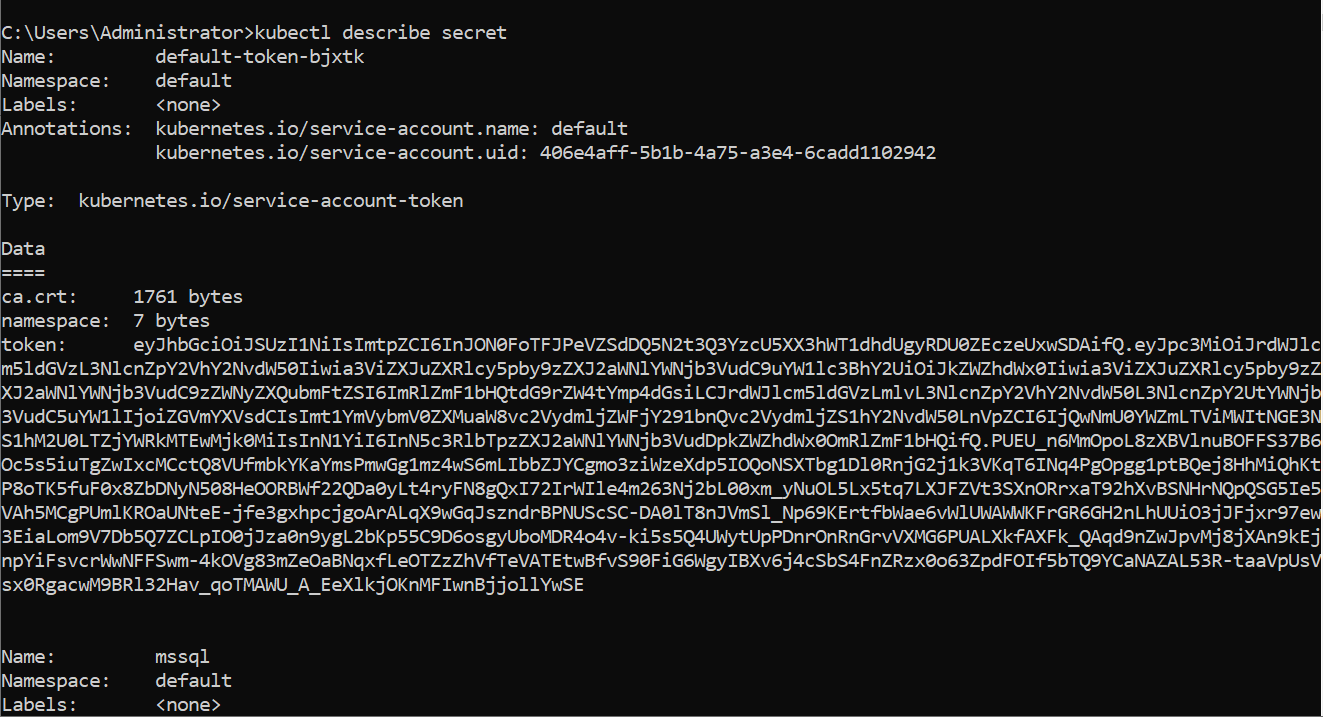
Use the kubectl describe secret command to validate the secret mssql.
Create a persistent storage
The next step requires configuring a persistent storage volume. This persistent volume is independent storage where Kubernetes stores SQL Server databases, and Kubernetes pods will access this storage later.
To create persistent storage, we need to create a YAML file. You can use notepad, Visual Studio Code, or any preferred editor to create the file.
The following script declares a storage class, provisioner, account type, and persistent volume name.
- Type: Storage class
- Name: Azure-disk
- Provisioner: azure-disk
- Storage account type: Standard LRS
|
1 2 3 4 5 6 7 8 9 10 11 12 13 14 15 16 17 18 19 20 21 22 23 |
kind: StorageClass apiVersion: storage.k8s.io/v1 metadata: name: azure-disk provisioner: kubernetes.io/azure-disk parameters: storageaccounttype: Standard_LRS kind: Managed --- kind: PersistentVolumeClaim apiVersion: v1 metadata: name: mssql-data/ annotations: volume.beta.kubernetes.io/storage-class: azure-disk spec: accessModes: - ReadWriteOnce resources: requests: storage: 8Gi |
Save this file in YAML extension such as pvc.yml. To create the persistent storage volume and bound to persistent volume in the Kubernetes cluster, run the following script.
kubectl apply -f c:\Azure\pvc.yml
Validate the persistent storage volume using the descript command below. Here, mssql-data is the name of the persisted volume.
describe pvc mssql-data
Its output says – Successfully provisioned volume.

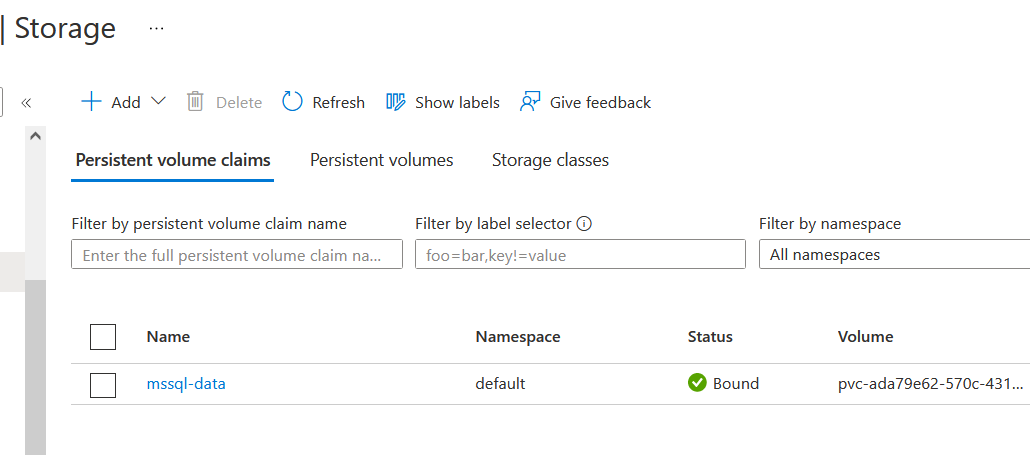
You can also validate the storage in the Kubernetes cluster storage section. As shown below, the volume named mssql-data is bound to the Kubernetes cluster.
- Create a Kubernetes deployment object
This step creates a Kubernetes deployment object to create the container that hosts the SQL Server instance. The deployment object creates a replica set and pod.
- It creates a manifest (a YAML file) to describe the deployment configurations.
- It uses the mssql-server-linux docker image for SQL Server installation.
- It retrieves the SA password from the mssql secret created earlier using kubectl.
- Specify the SQL Server edition using the MSSQL_PID. Currently, we set it as Developer. You can choose the values such as Express, Standard, Enterprise ( for production license)
- The deployment uses the persistentVolumeClaim – mssql-data as defined earlier.
- The script defines port 1433 for SQL Server connections.
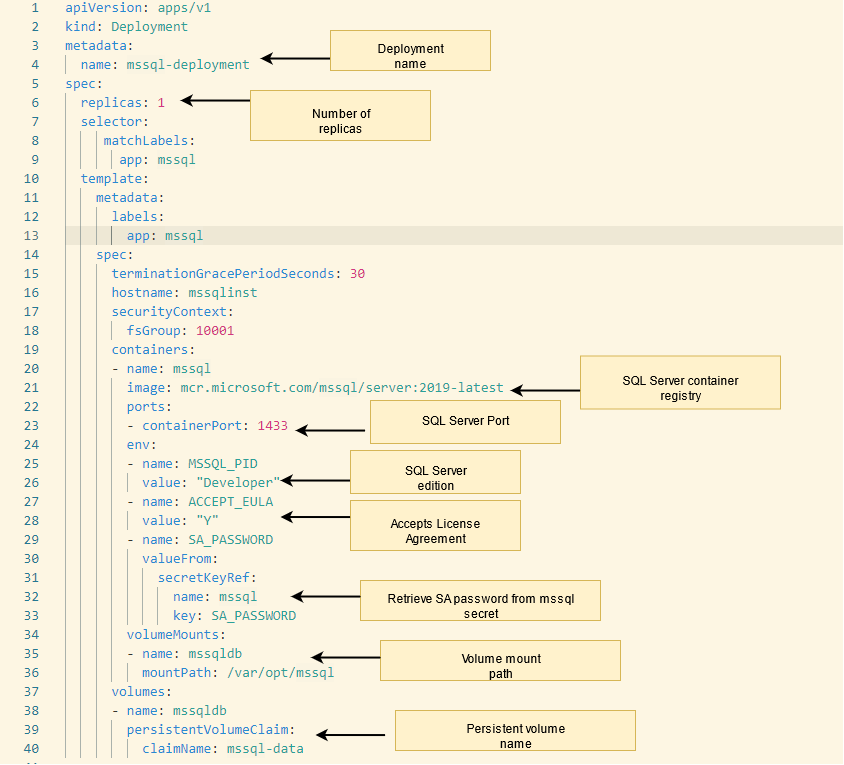
Copy the following script in a preferred editor and save it in a format such as sql.yml
|
1 2 3 4 5 6 7 8 9 10 11 12 13 14 15 16 17 18 19 20 21 22 23 24 25 26 27 28 29 30 31 32 33 34 35 36 37 38 39 40 41 42 43 44 45 46 47 48 49 50 51 52 53 54 55 |
apiVersion: apps/v1 kind: Deployment metadata: name: mssql-deployment spec: replicas: 1 selector: matchLabels: app: mssql template: metadata: labels: app: mssql spec: terminationGracePeriodSeconds: 30 hostname: mssqlinst securityContext: fsGroup: 10001 containers: - name: mssql image: mcr.microsoft.com/mssql/server:2019-latest ports: - containerPort: 1433 env: - name: MSSQL_PID value: "Developer" - name: ACCEPT_EULA value: "Y" - name: SA_PASSWORD valueFrom: secretKeyRef: name: mssql key: SA_PASSWORD volumeMounts: - name: mssqldb mountPath: /var/opt/mssql volumes: - name: mssqldb persistentVolumeClaim: claimName: mssql-data --- apiVersion: v1 kind: Service metadata: name: mssql-deployment spec: selector: app: mssql ports: - protocol: TCP port: 1433 targetPort: 1433 type: LoadBalancer |
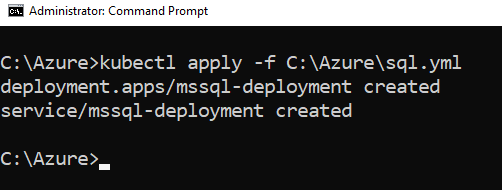
To create the deployment, use the kubectl apply command and specify the path of this YML file.
kubectl apply -f C:\Azure\sql.yml
As shown below, it creates the deployment and service mssql-deployment as defined in the script.
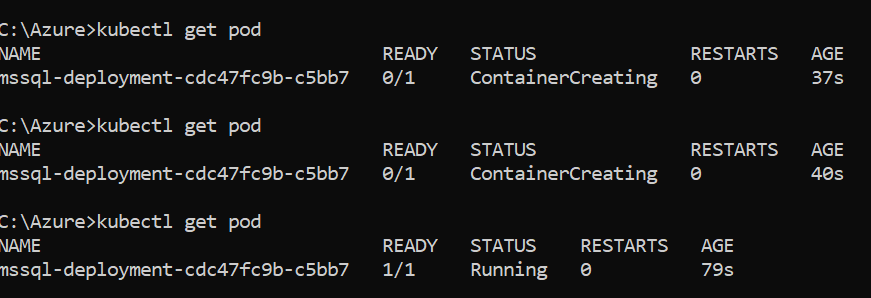
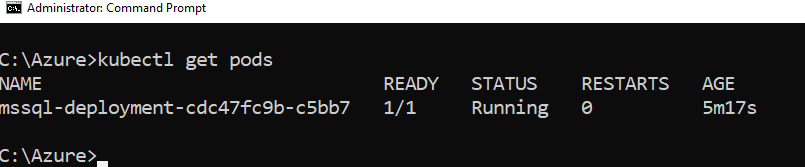
The SQL Server instance runs in the container, and it is connected to persistent storage. Run the command – kubectl get pod to get pod name, status, and age.
The cluster pulls the SQL Server docker image from the docker hub during the pod creation and performs the configuration. Once the image is pulled, the subsequent deployments are quicker as it does not need to download the image again.
As shown below, the pod status changes to Running from ContainerCreating.
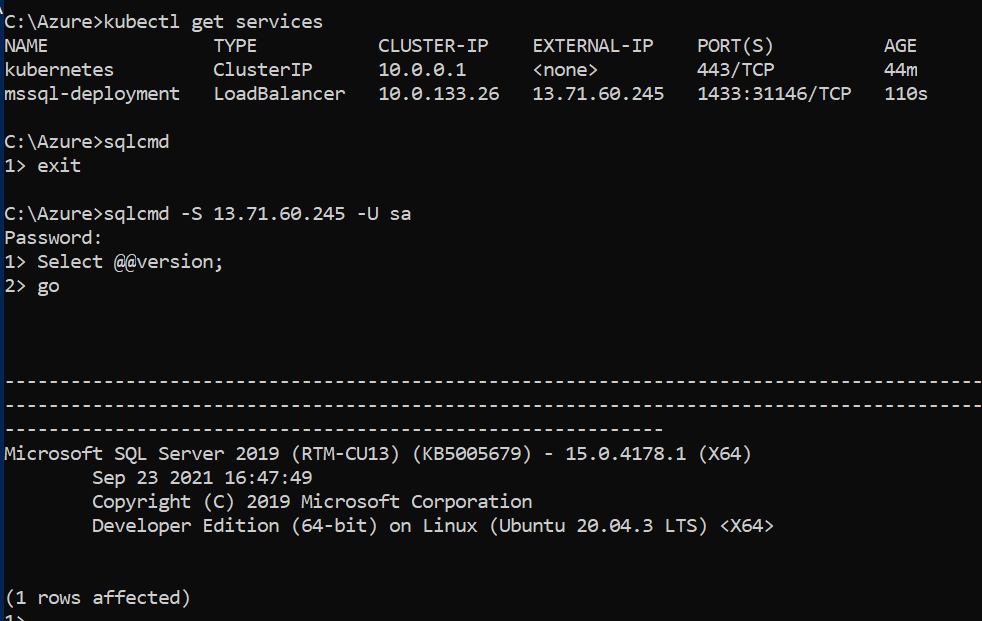
The kubectl get services to return the Kubernetes cluster IP and external IP address. You need an external IP address for connecting to the SQL Service. As shown below, internally port 1433 is mapped with the 31146.

Connect to SQL Server using SQLCMD
You can use SQLCMD, SSMS, or Azure Data Studio to connect with an external IP address and verify that Microsoft SQL Server 2019 CU13.
Verify Pod Failure and Recovery in Azure Kubernetes Services (AKS)
The Kubernetes automatically detects any failure and restart or deploy the Pod. It is connected to persisted storage, so you do not lose any data.
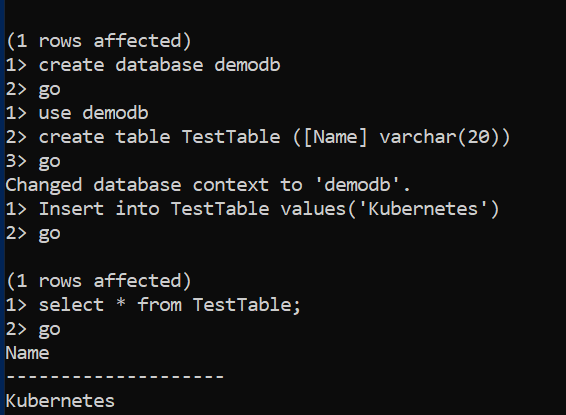
Let’s create a new database [demodb], table, and insert a record to test the failure and recovery.
Now, run the kubectl get pods command to get pods name, status. Its status is ready and running, as shown below.
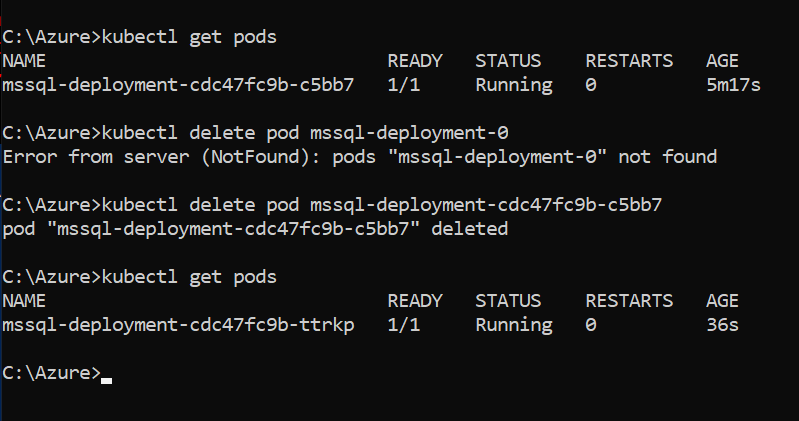
Let’s delete the pod using the kubectl delete command. The command requires a pod name as an input.

Azure Kubernetes Services (AKS) cluster automatically creates the pod and connects with persistent storage to recover SQL Server instance. You can use kubectl get pods to verify that a new pod is deployed in Kubernetes storage.
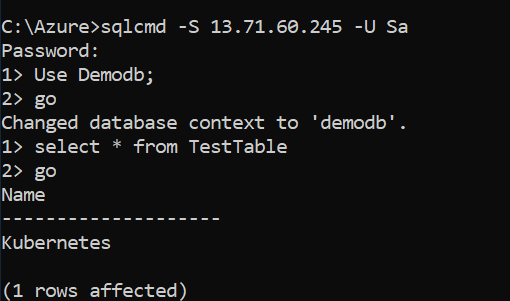
The external IP address of pods gets a new external IP address. As shown below, the new external IP address is 13.71.60.245

Let’s connect to the SQL instance and verify that you can access the record inserted in the previous pod. As shown below, the database [demodb] and record “Kubernetes” are available.
HA solution on Kubernetes running in Azure Kubernetes Services
As explored in this article, Kubernetes acts as a cluster orchestrator. Suppose you have a mssql-server container in a pod. The replica set ensures that if a node fails, the pod is recovered automatically.

The following diagram shows mssql-server container failed. The Kubernetes maintains the correct healthy replica sets and maintains a new container with a similar configuration. The mssql-server connects with the same persistent storage and connects to mssql-server.
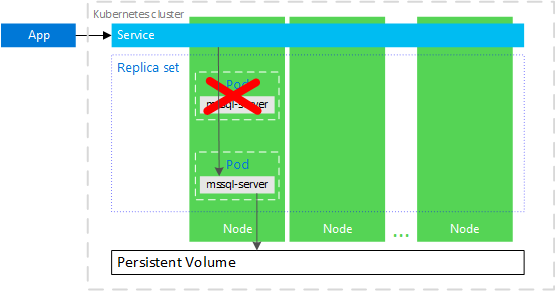
Similarly, the below diagram shows that the node running the mssql-server container failed. The Kubernetes starts a new pod on a different node and connects the mssql-server container with persistent storage.

Image reference: Microsoft
Conclusion
This article deploys a Kubernetes cluster using the Azure Kubernetes Services (AKS) and configures a SQL Server Linux docker image. We used the kubectl command to configure Kubernetes, creating and managing POD. The Kubernetes automatically recovers pods with persistent storage. You can follow this article for K8s cluster deployment with SQL Server.

I am the author of the book "DP-300 Administering Relational Database on Microsoft Azure". I published more than 650 technical articles on MSSQLTips, SQLShack, Quest, CodingSight, and SeveralNines.
I am the creator of one of the biggest free online collections of articles on a single topic, with his 50-part series on SQL Server Always On Availability Groups.
Based on my contribution to the SQL Server community, I have been recognized as the prestigious Best Author of the Year continuously in 2019, 2020, and 2021 (2nd Rank) at SQLShack and the MSSQLTIPS champions award in 2020.
Personal Blog: https://www.dbblogger.com
I am always interested in new challenges so if you need consulting help, reach me at rajendra.gupta16@gmail.com
View all posts by Rajendra Gupta
- Understanding PostgreSQL SUBSTRING function - September 21, 2024
- How to install PostgreSQL on Ubuntu - July 13, 2023
- How to use the CROSSTAB function in PostgreSQL - February 17, 2023