
This article will walk you through the process of creating Azure Data Shares for an Azure SQL Database.
Introduction
A typical data ecosystem of any large-scale enterprise consists of numerous data repositories as well as different groups of users who need to consume or access this data for a variety of purposes. At times, these data repositories may be integrated, and at times these data may exist in a siloed manner. Such siloed data topologies create the need for data sharing. Also, generally, there are third-party partner systems with which an enterprise constantly needs to exchange data which creates a requirement for data sharing within and across the enterprise. Azure supports several data repositories of which one of the most popular data repositories is SQL Database.
Azure provides a mechanism to create governed data shares using Azure Data Share. Data sharing is a two-part process – the first part is creating the data share of the desired data repository and data object with the intended configuration and scope for data sharing. The second part is accepting the data share and configuring the received data share for consumption. In this part of the article, we will learn how to create a data share for Azure SQL Databases.
Creating a new Azure Data Share
As we will be discussing data shares, the fundamental element that we need here is data in the first place. We will be using Azure SQL Database as our source repository to create the data share. It is assumed that one has an Azure account, an Azure SQL Server instance with an Azure SQL Database hosted on it and with out-of-box sample data loaded in it. In case, you are unaware about it, you can check out this article, Getting started with Azure SQL Database, to learn more details on it. Our intention is to share some database objects from this sample data.
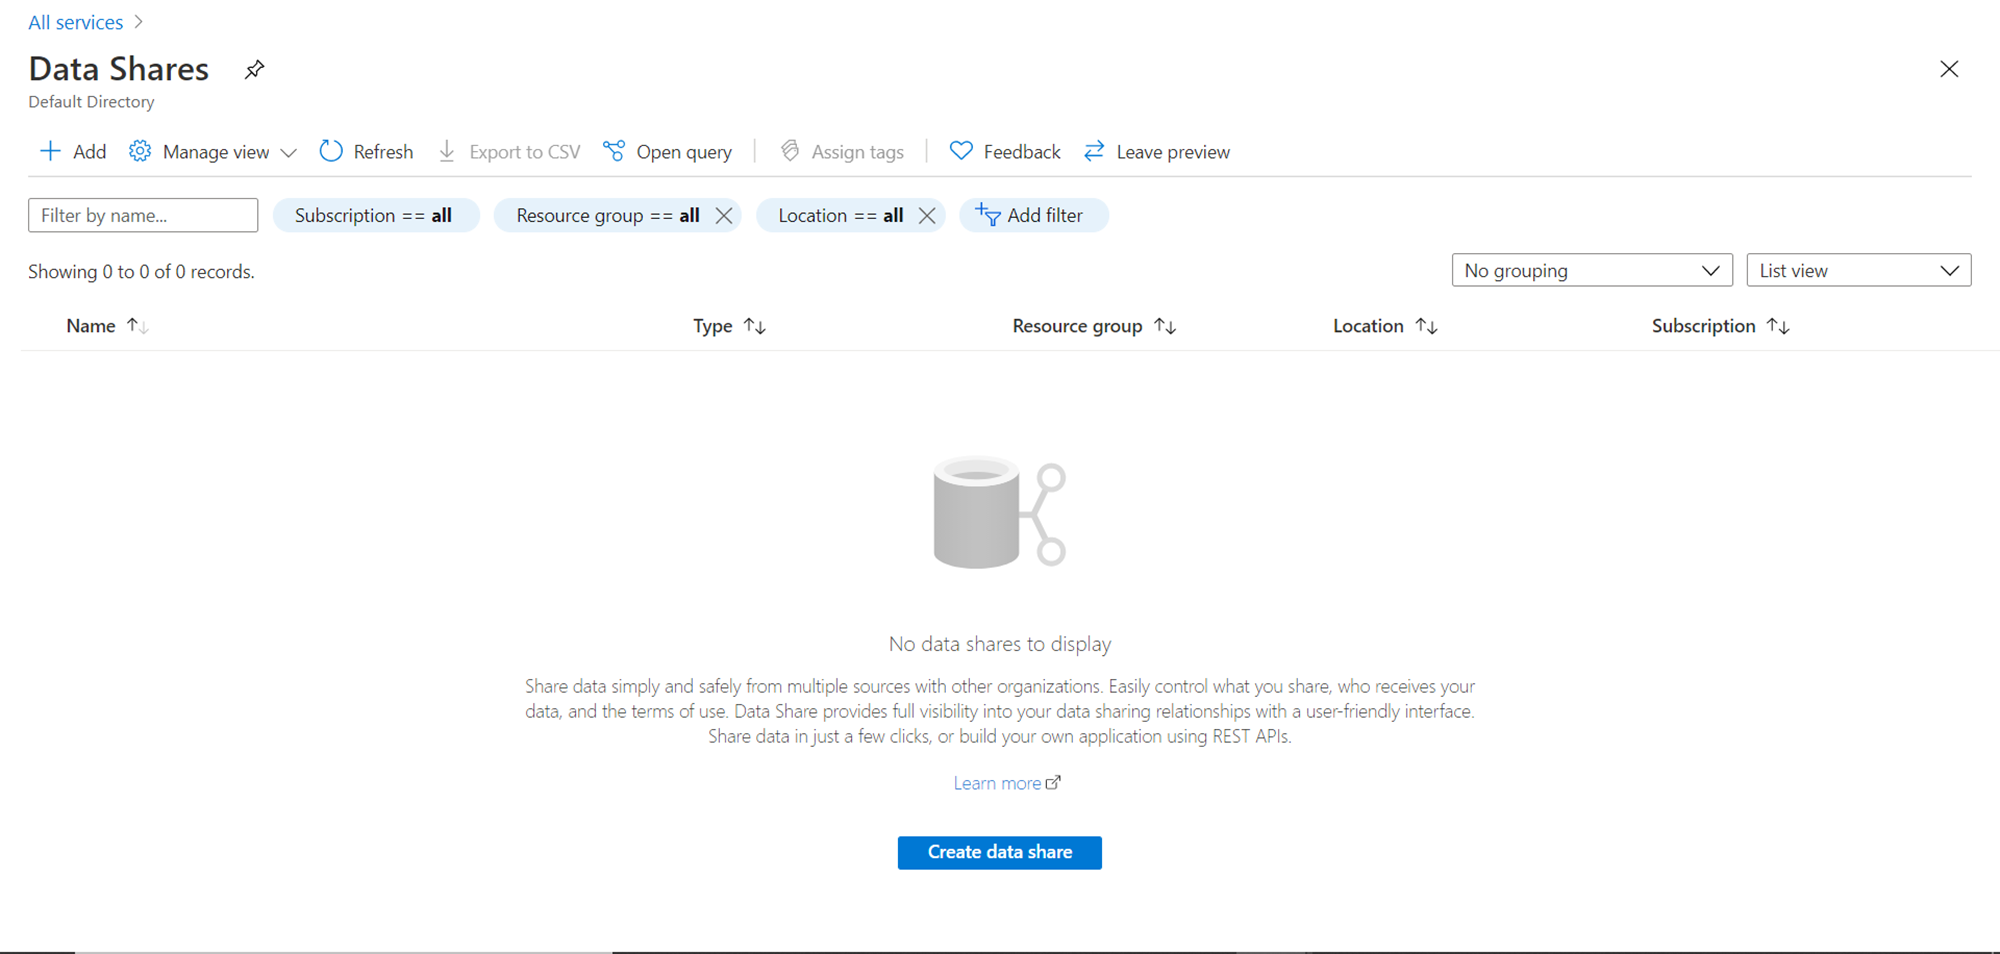
The first step is to navigate to Azure Data Shares from the menu pane of the Azure portal or by searching for it. The dashboard of Azure Data Share looks as shown below.
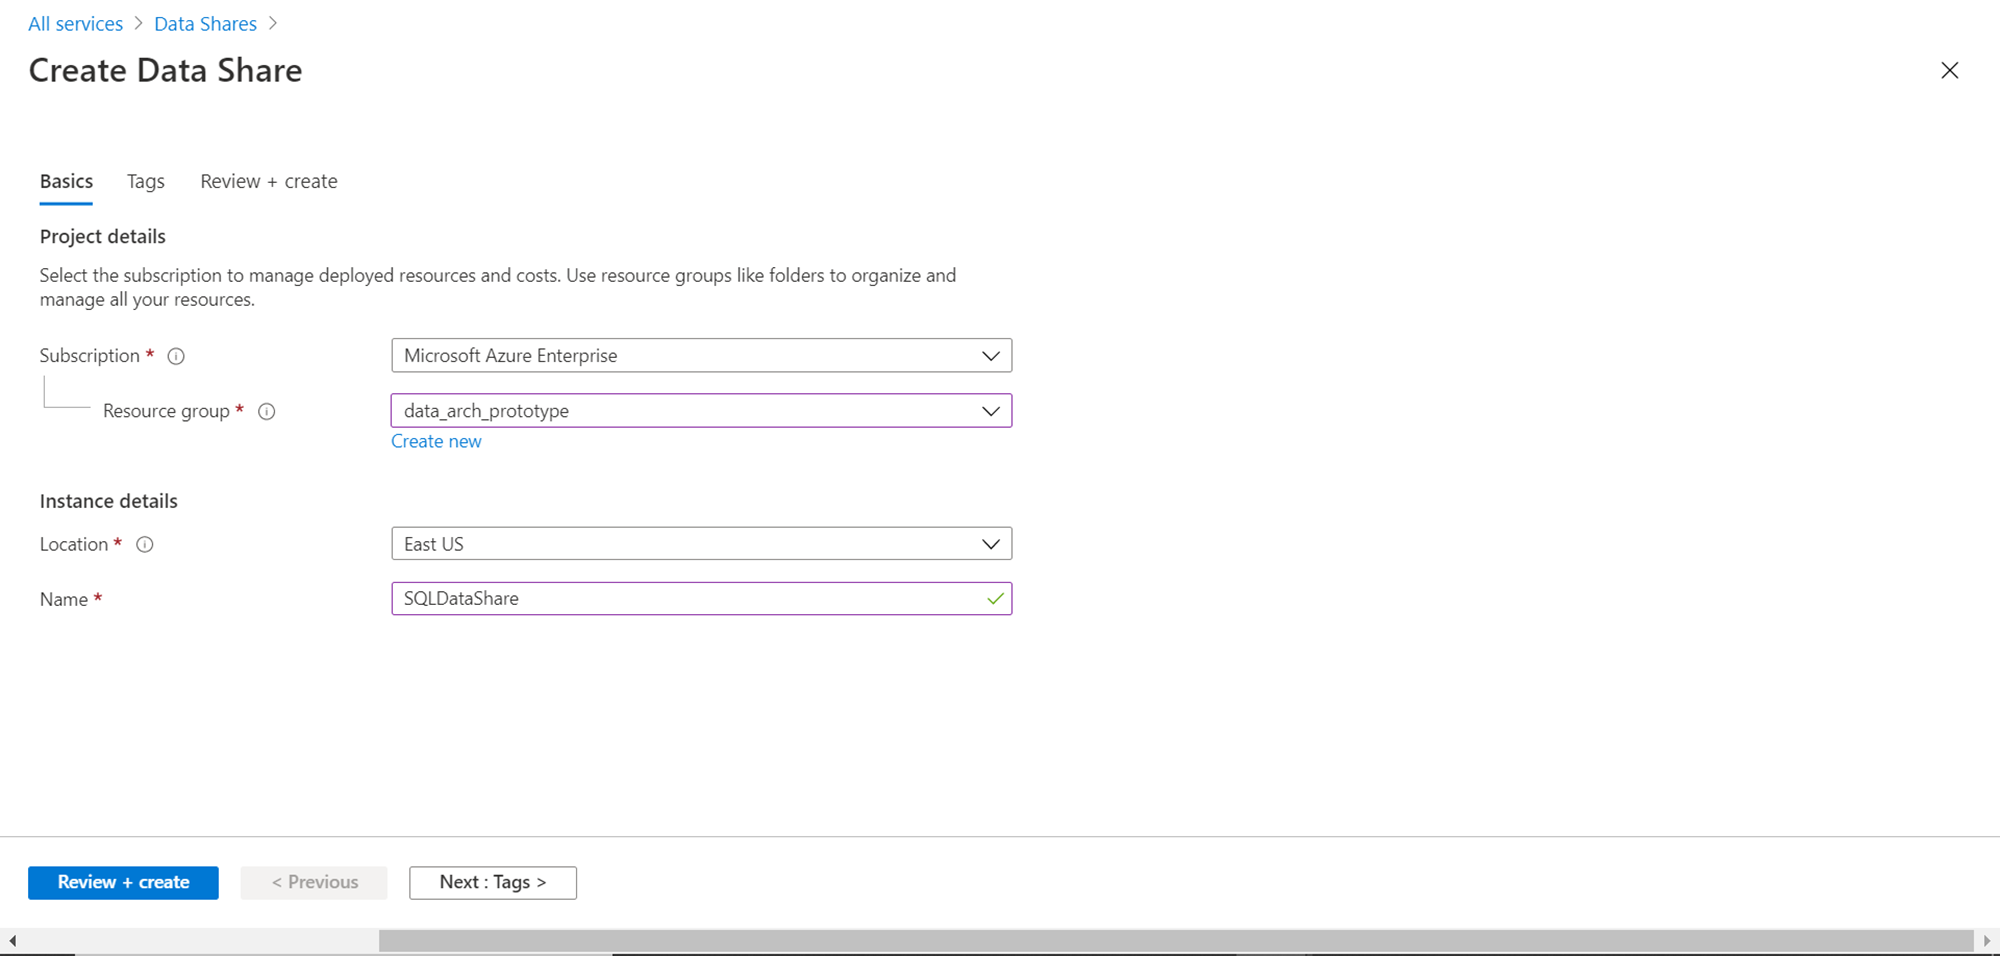
Click on the create data share button to create a new data share account. This will bring up a new screen as shown below. Provide the basic details like the Subscription, Resource group and an appropriate Name for the account as shown below.
Click on the Review + create button and it will create a new instance of the data share. Once created, open it and the dashboard of the data share instance would look as shown below.
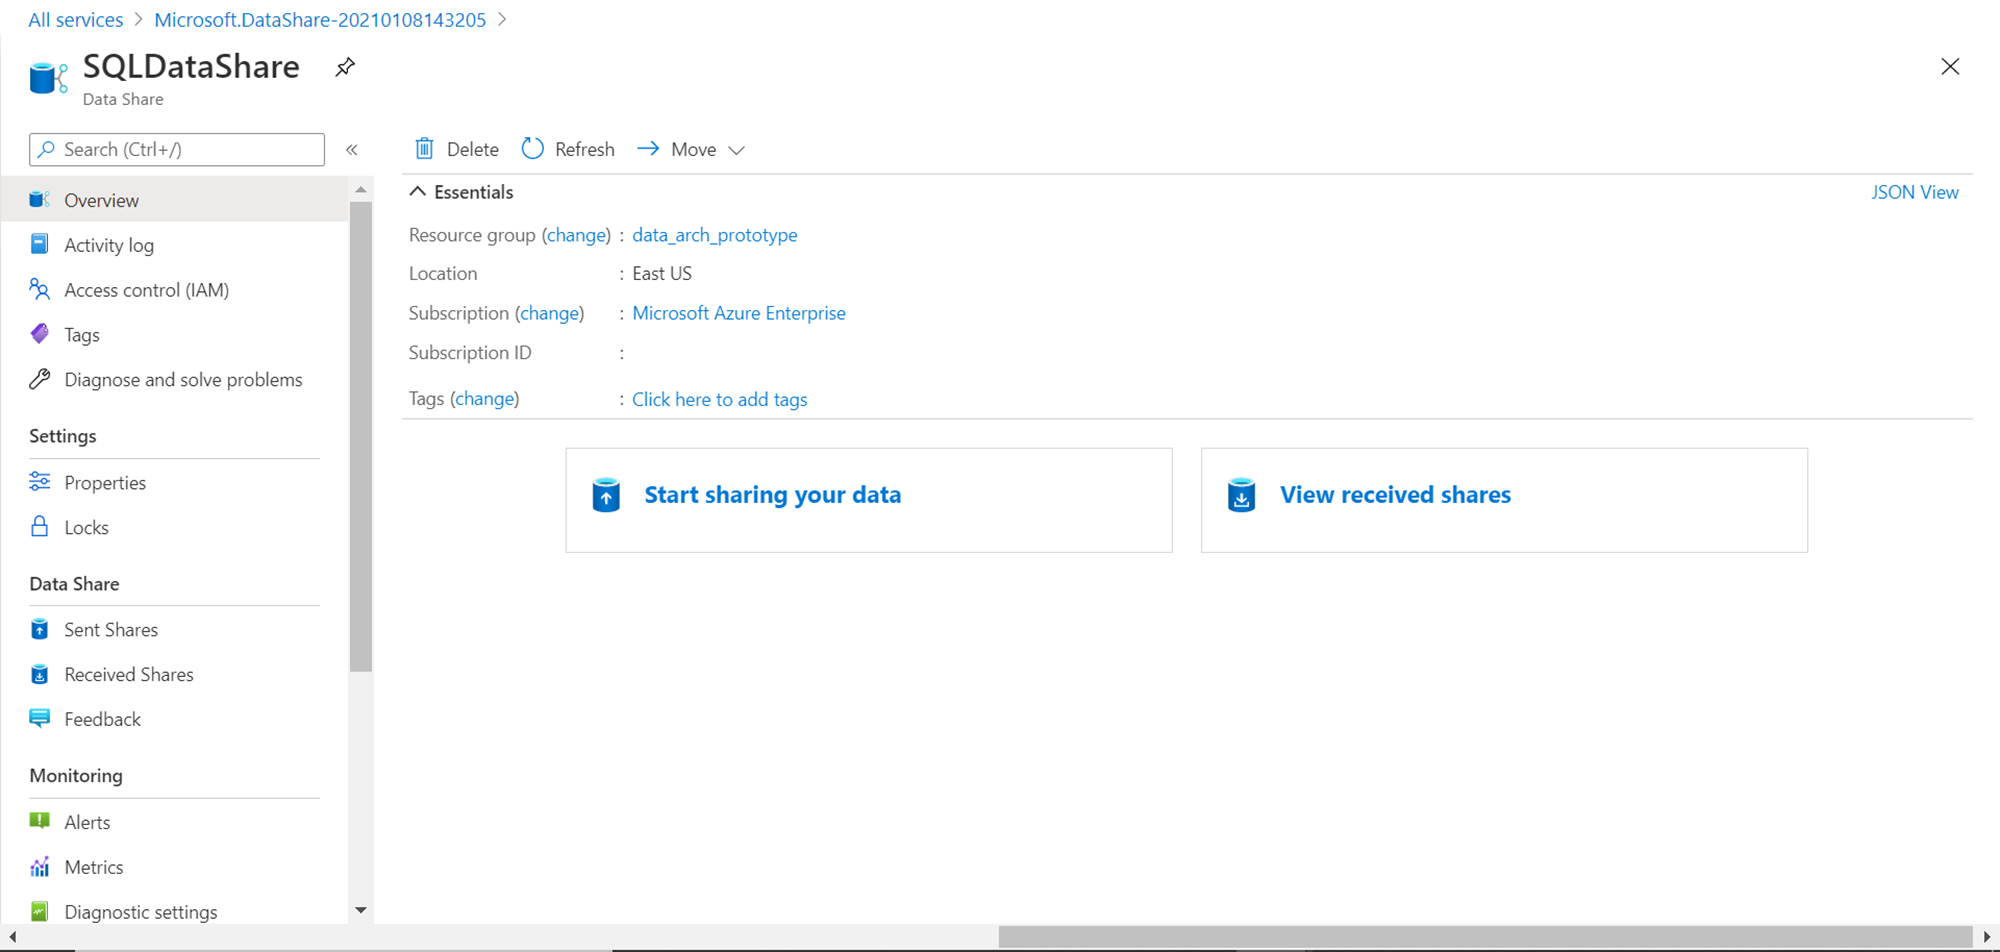
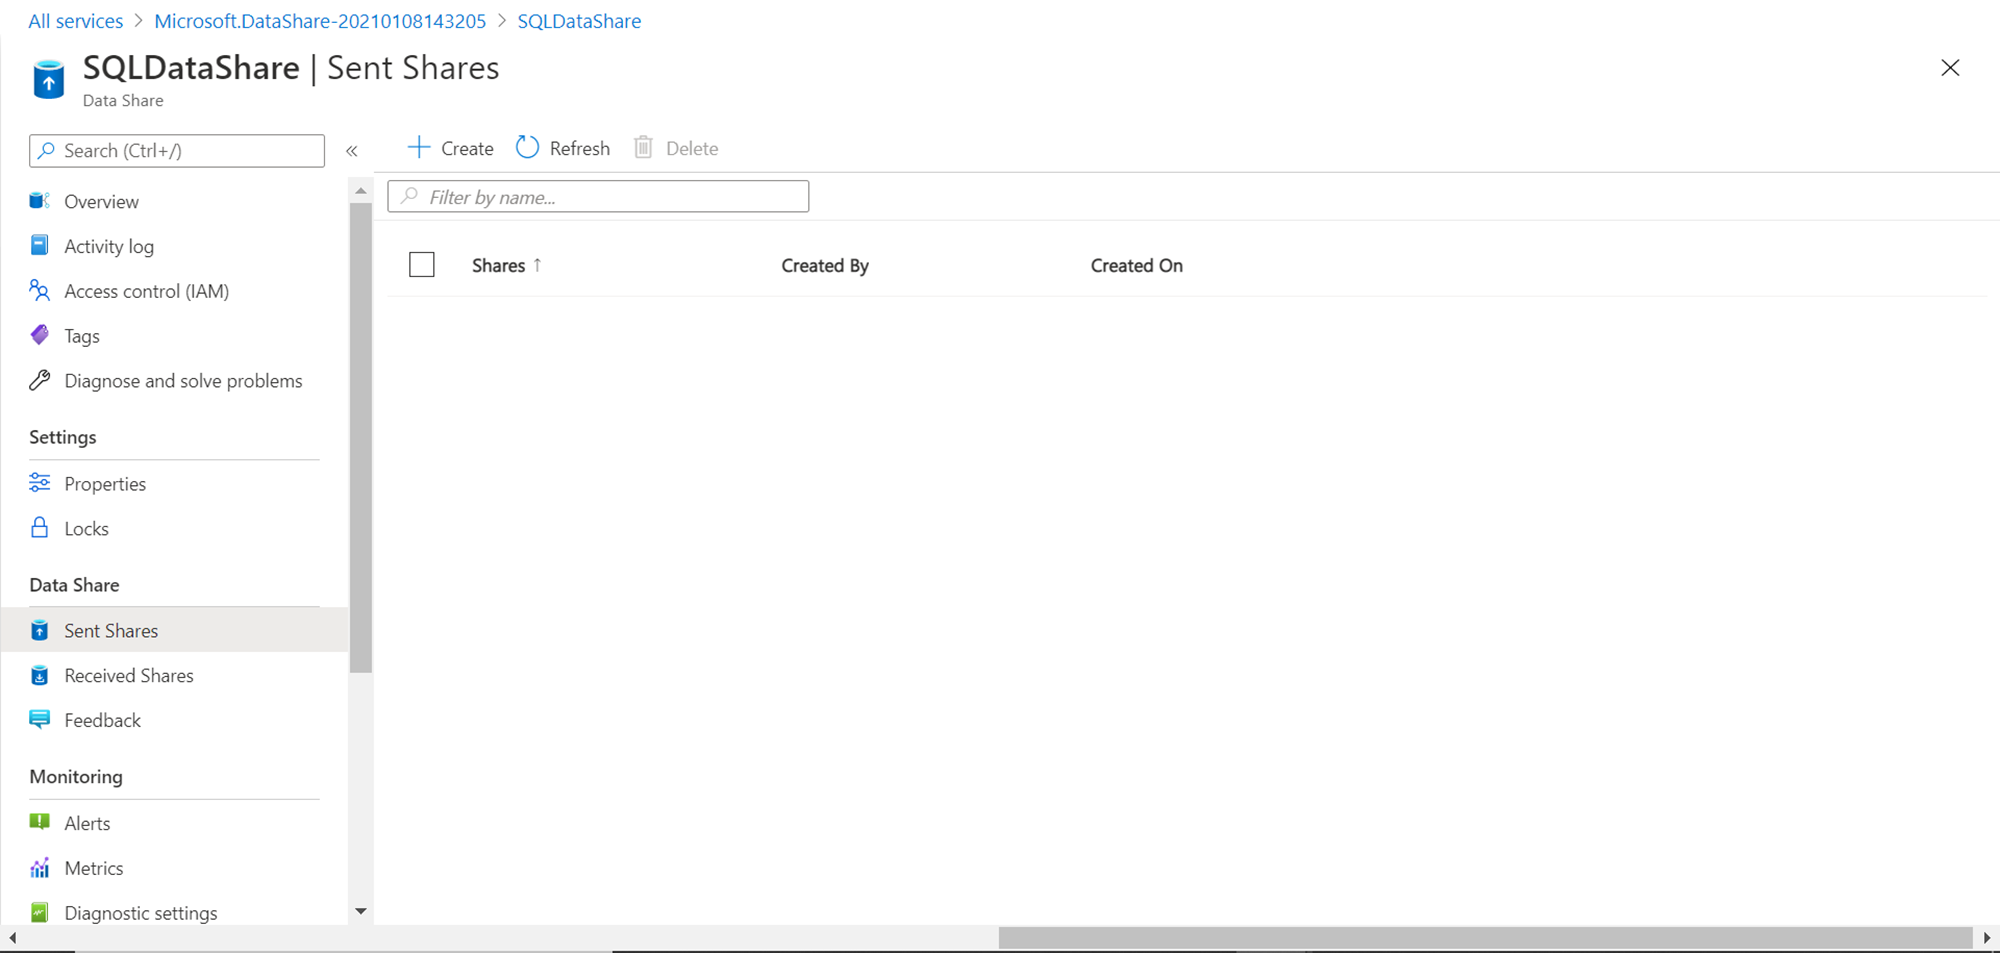
As evident from the dashboard, there are two basic functions in the data sharing process – Share data shares and View received data shares. In this part of the article, we intend to create a new data share of Azure SQL Database. Click on the Start sharing your data button. This will bring up a new screen as shown below.
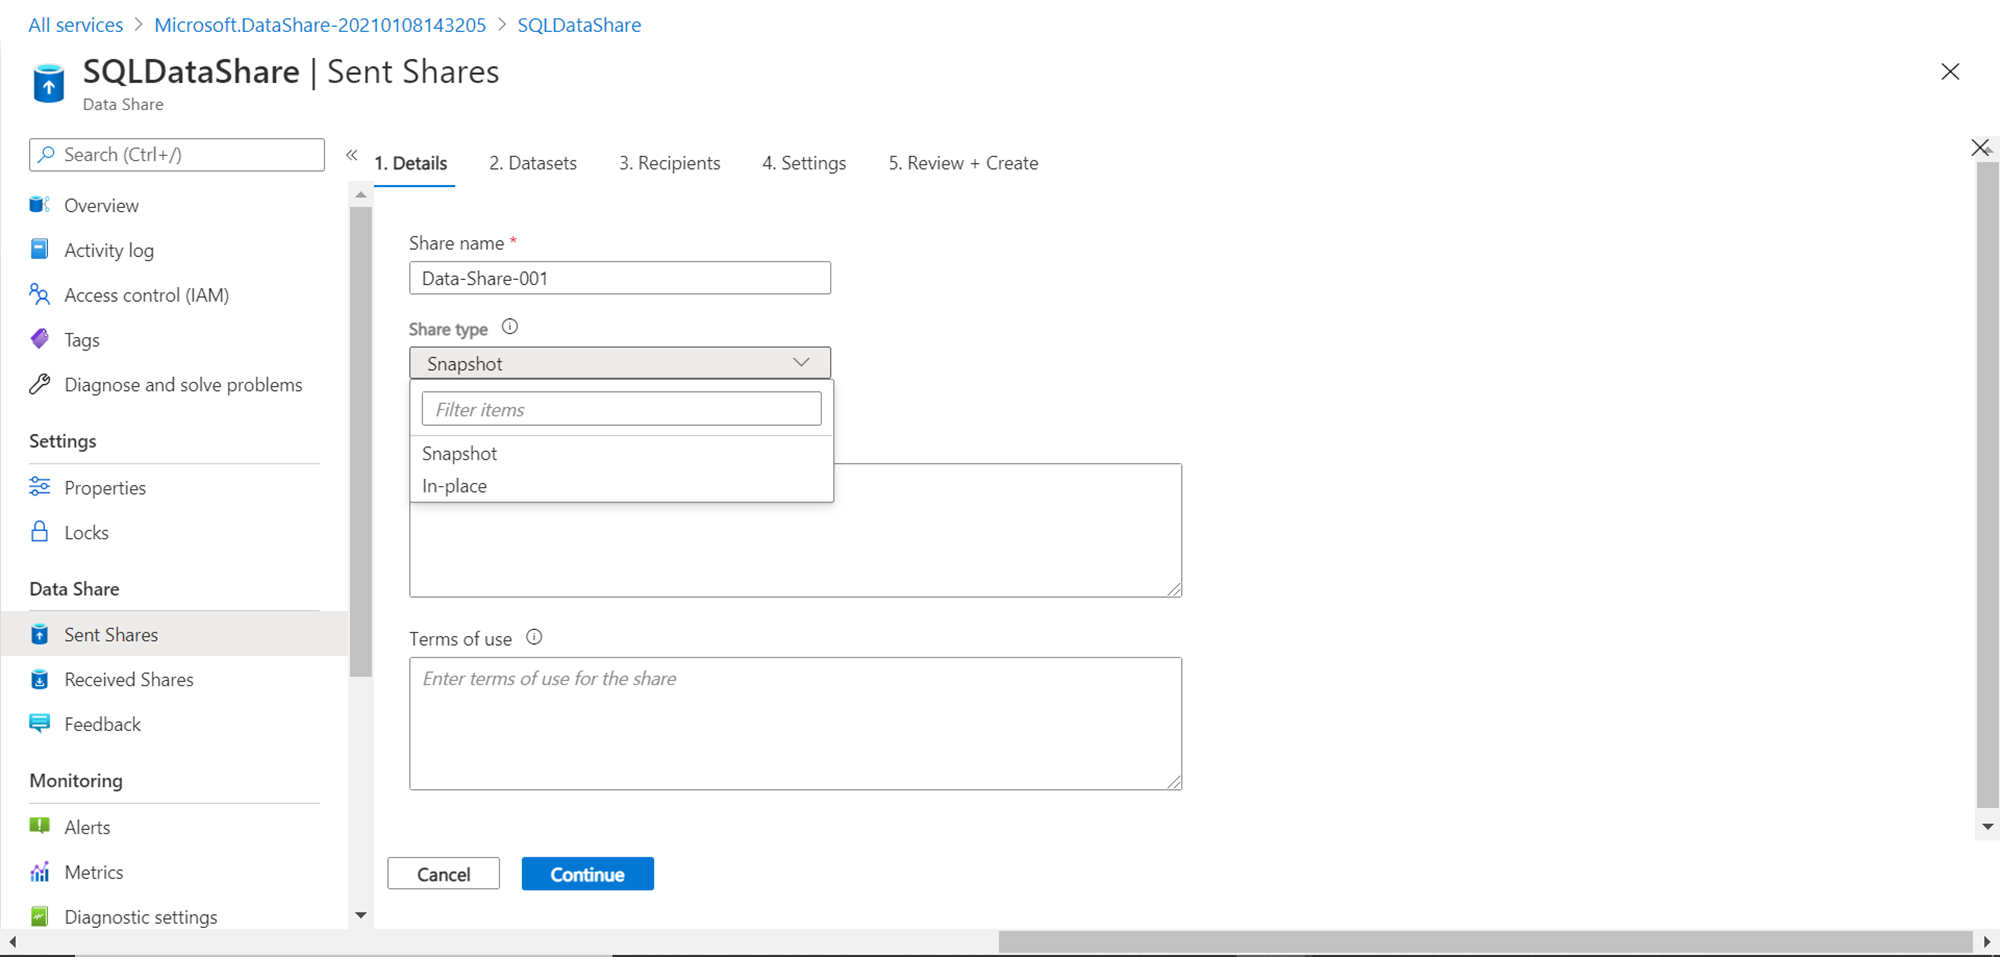
Click on the Create button, which will start a new wizard to create the data share. In this five-step process, the first step is to provide the basic details of the data share like share name, description and terms of use for the data share being created. The description and terms of use are for informational purposes. The important part is share type which filters the type of data repositories that one can select for creating the data share. As we intend to use Azure SQL Database, select the snapshot type which covers most of the data repositories supported by Azure. Once done, click on the Continue button as shown below.
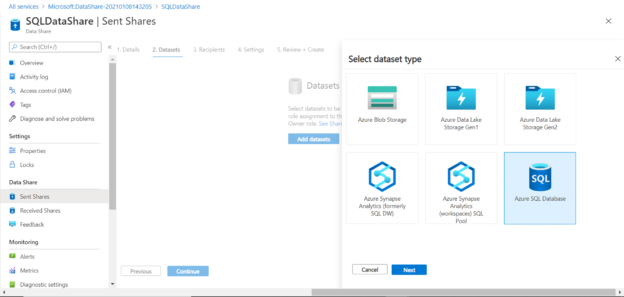
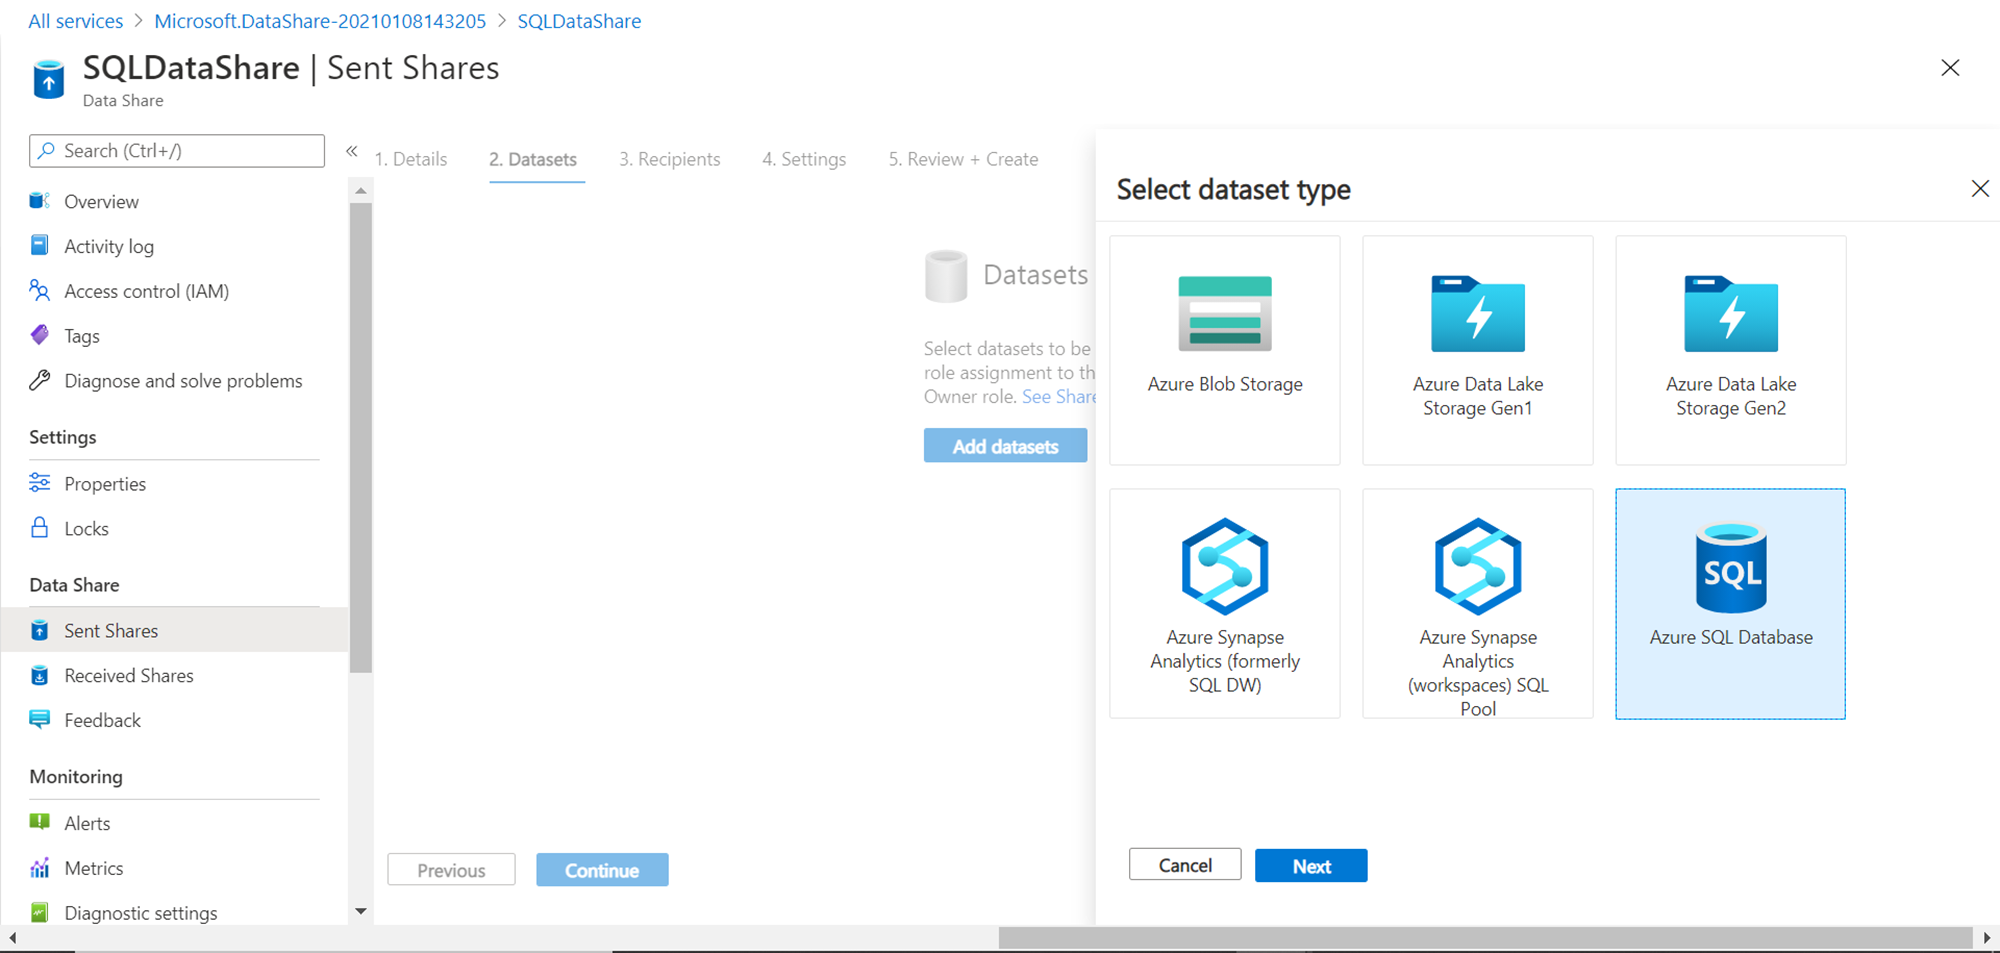
Datasets: In this step, we need to select the type of data repository. As our source is an Azure SQL Database, select the same from the list of data sources as shown below. Once done, click on the Next button.
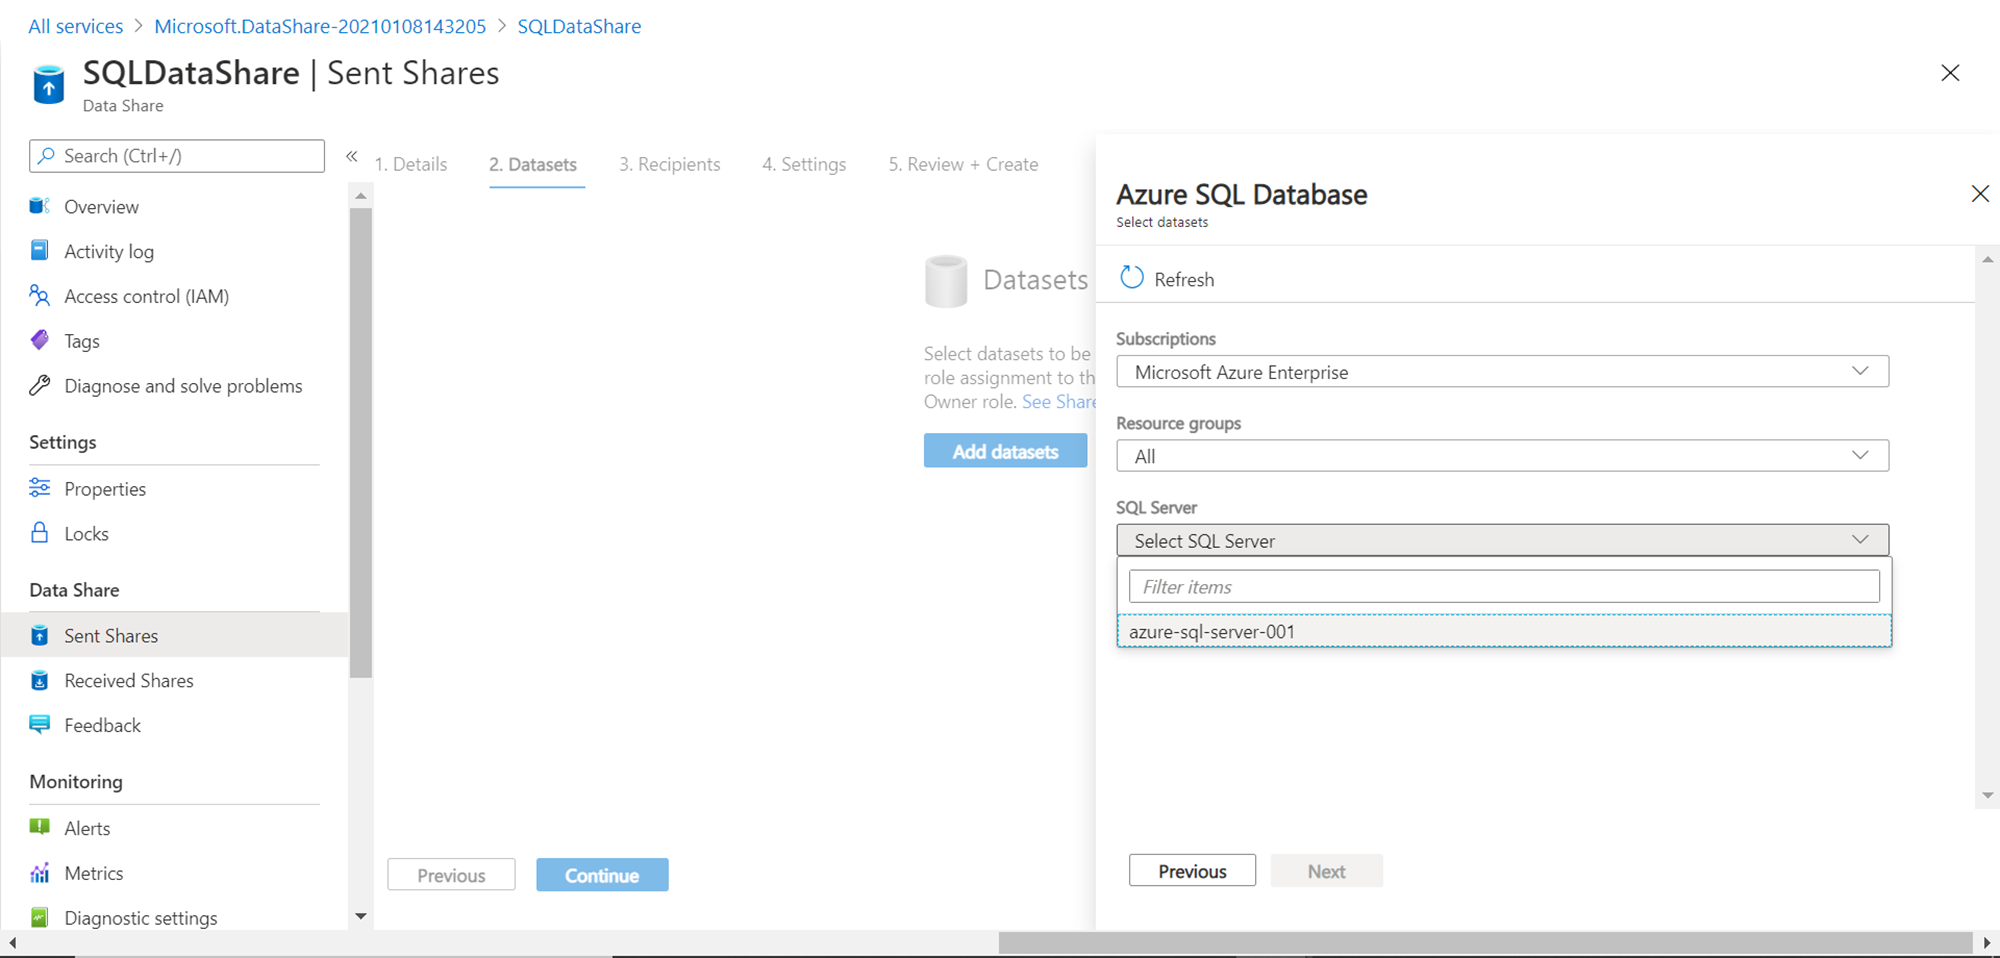
Now that we have selected the type of source repository, we need to specify the exact instance details which would be used as the source. Specify the name of the Azure SQL Server instance which hosts the source Azure SQL Database as shown below and click on the Next button.
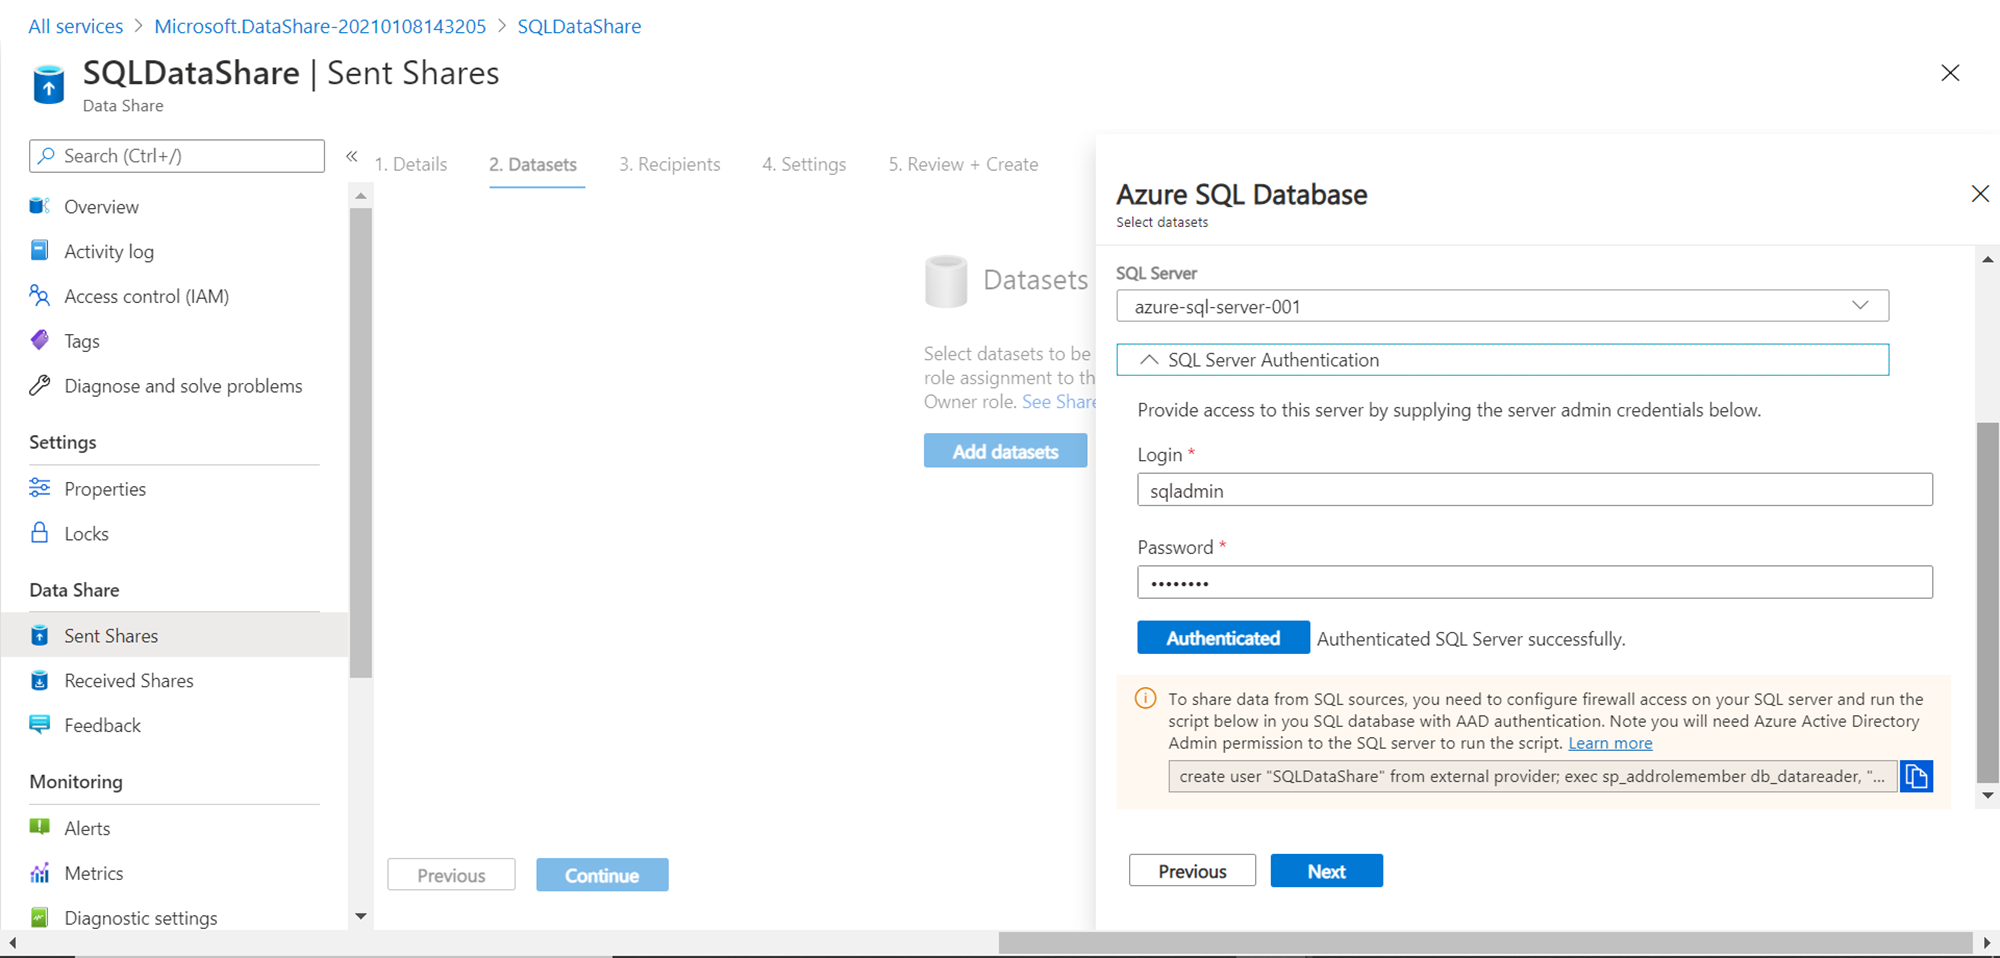
Provide the connection credentials and click on the Authenticate button. If authentication passes successfully, we would be able to see a successful authentication confirmation as shown below. It also provides a small script that creates a new user named SQLDataShare (which is the name of the data share) in the source database and adds this to the data reader role. Log on to Azure SQL Database using Active Directory authentication, execute this script, and then return to this page and click on the Next button.
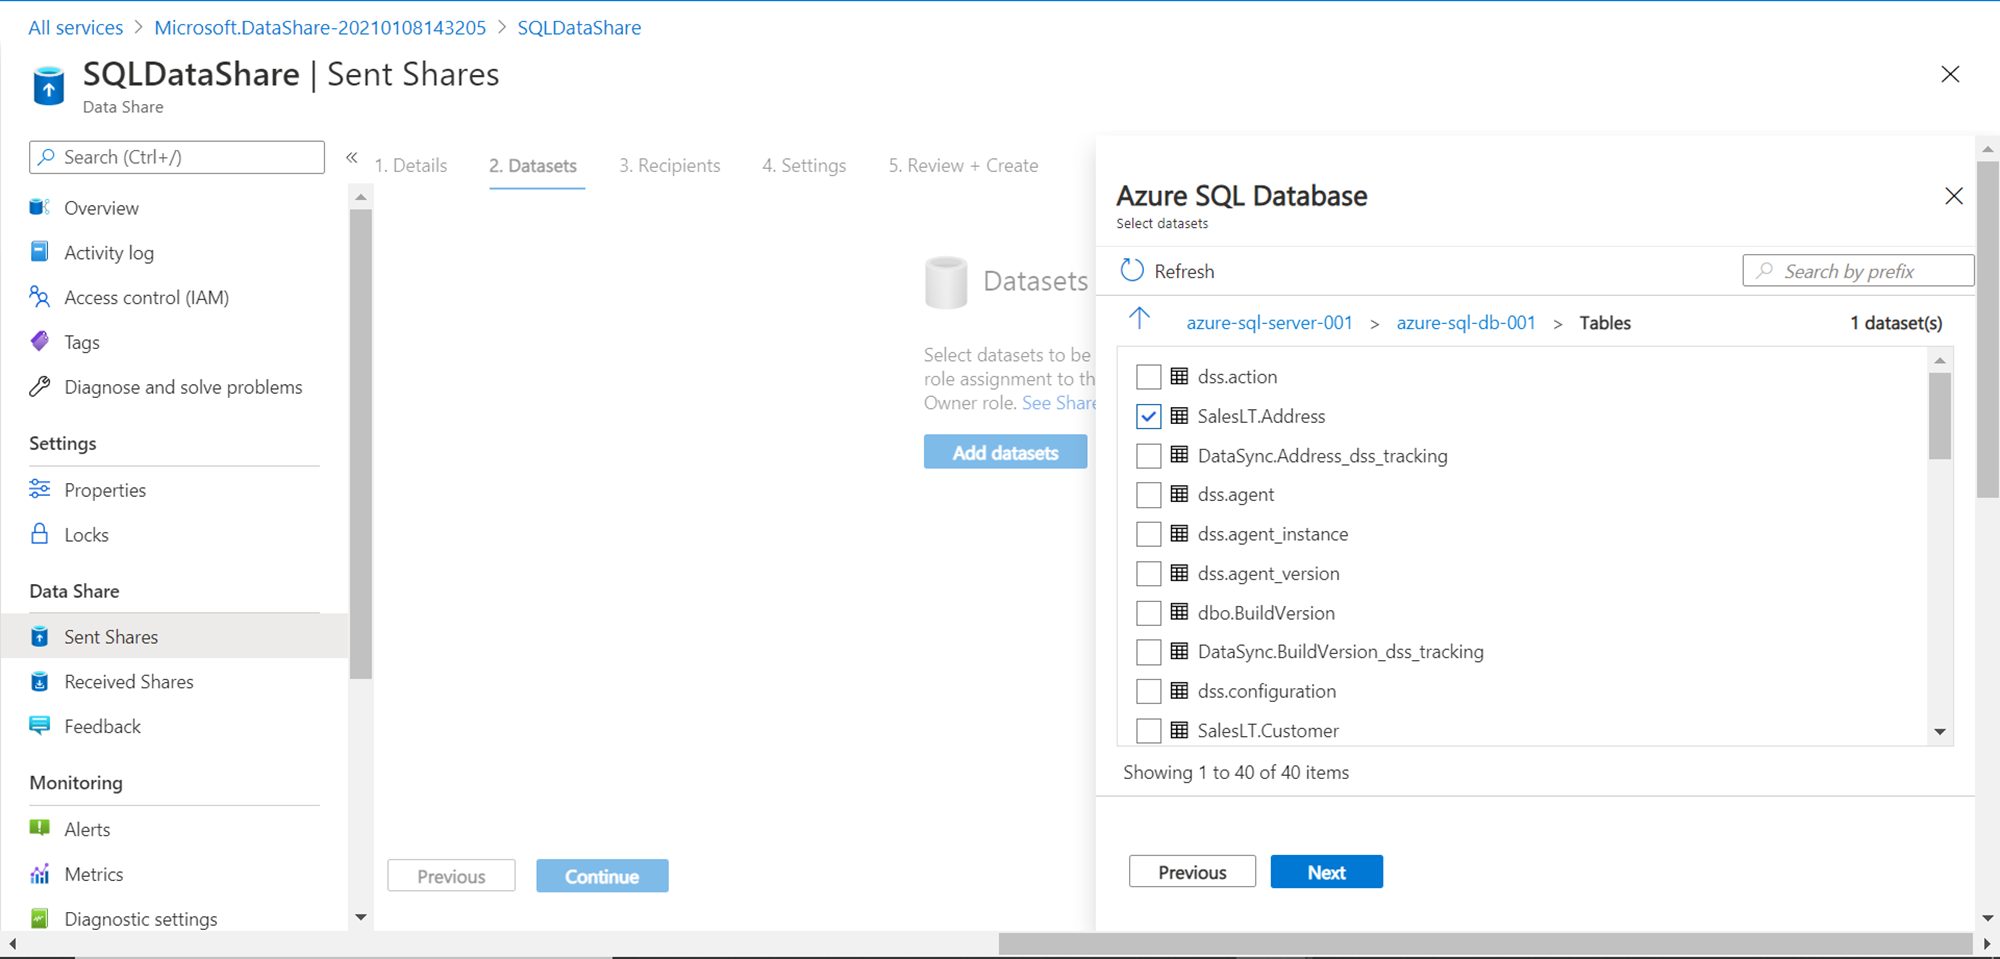
If the configuration has been done correctly as explained above, we should be able to the list of data objects in the configured source database, which we intend to share. Select the desired database objects and click on the Next button.
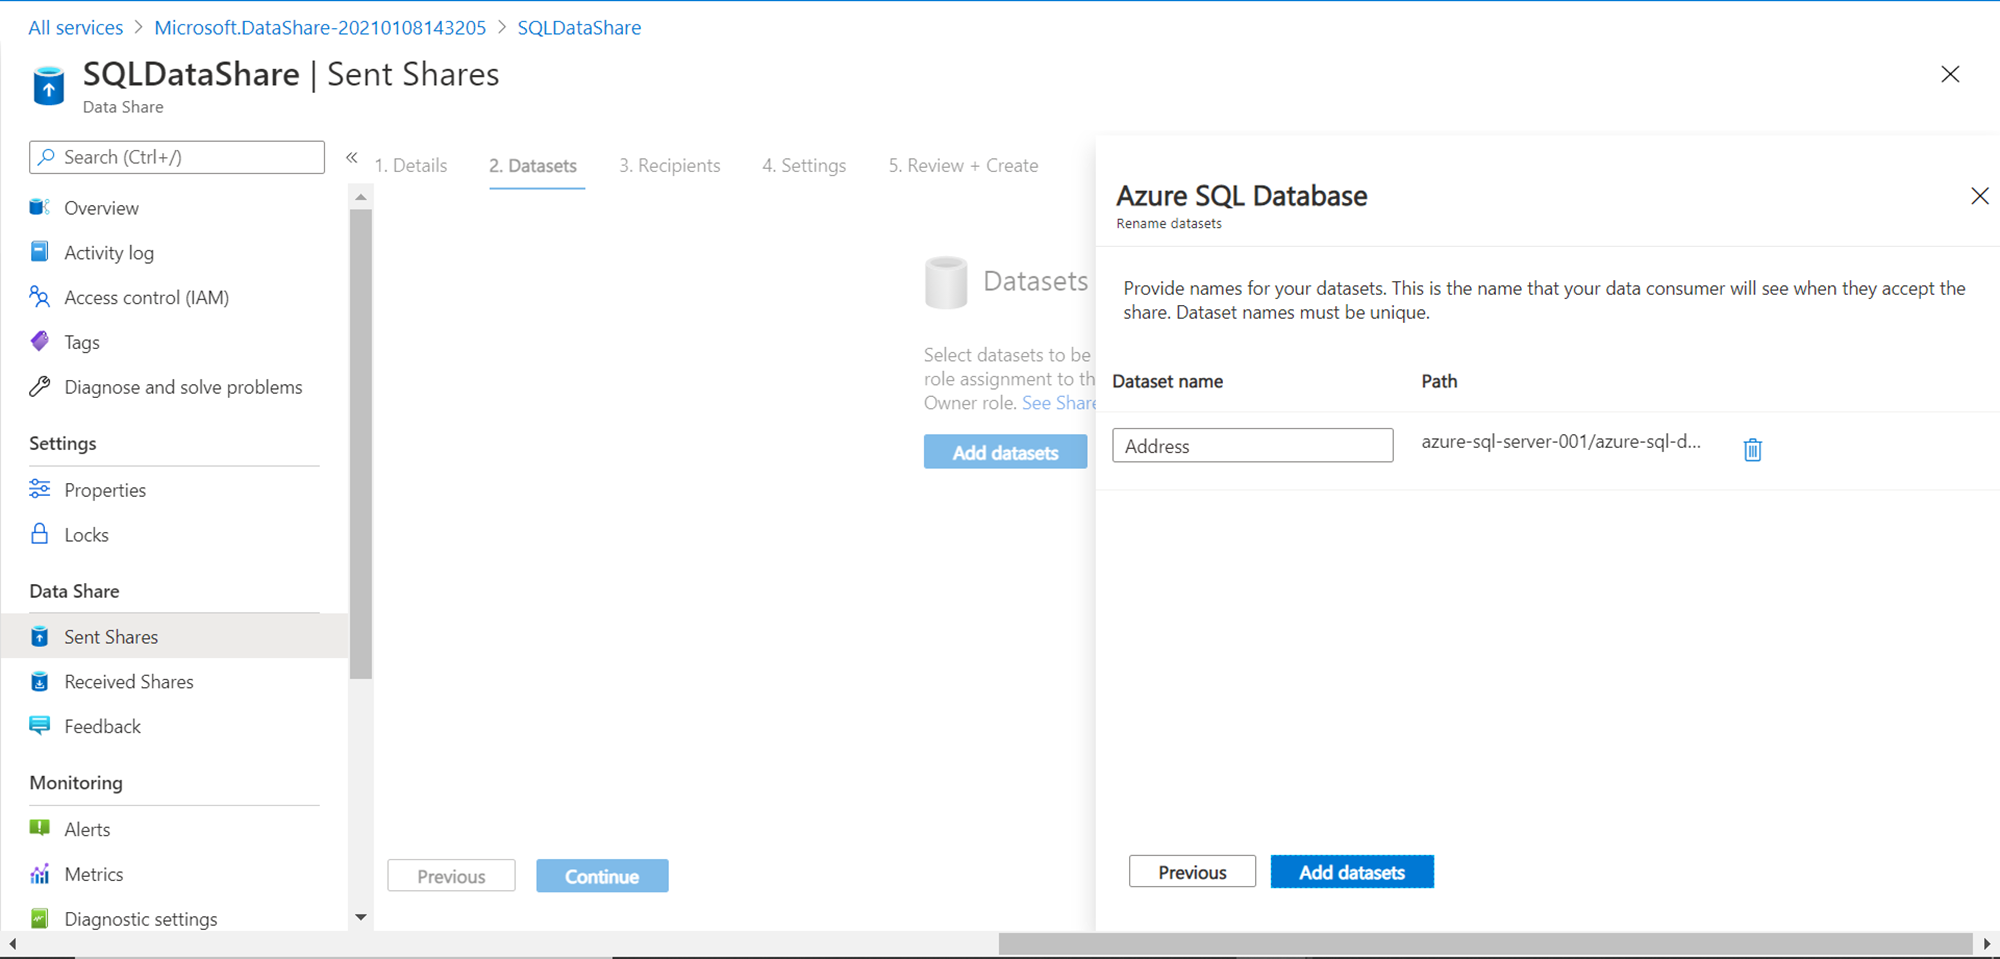
Now we have the option to specify a dataset name before sharing. We will use the suggested dataset name and move to the next step.
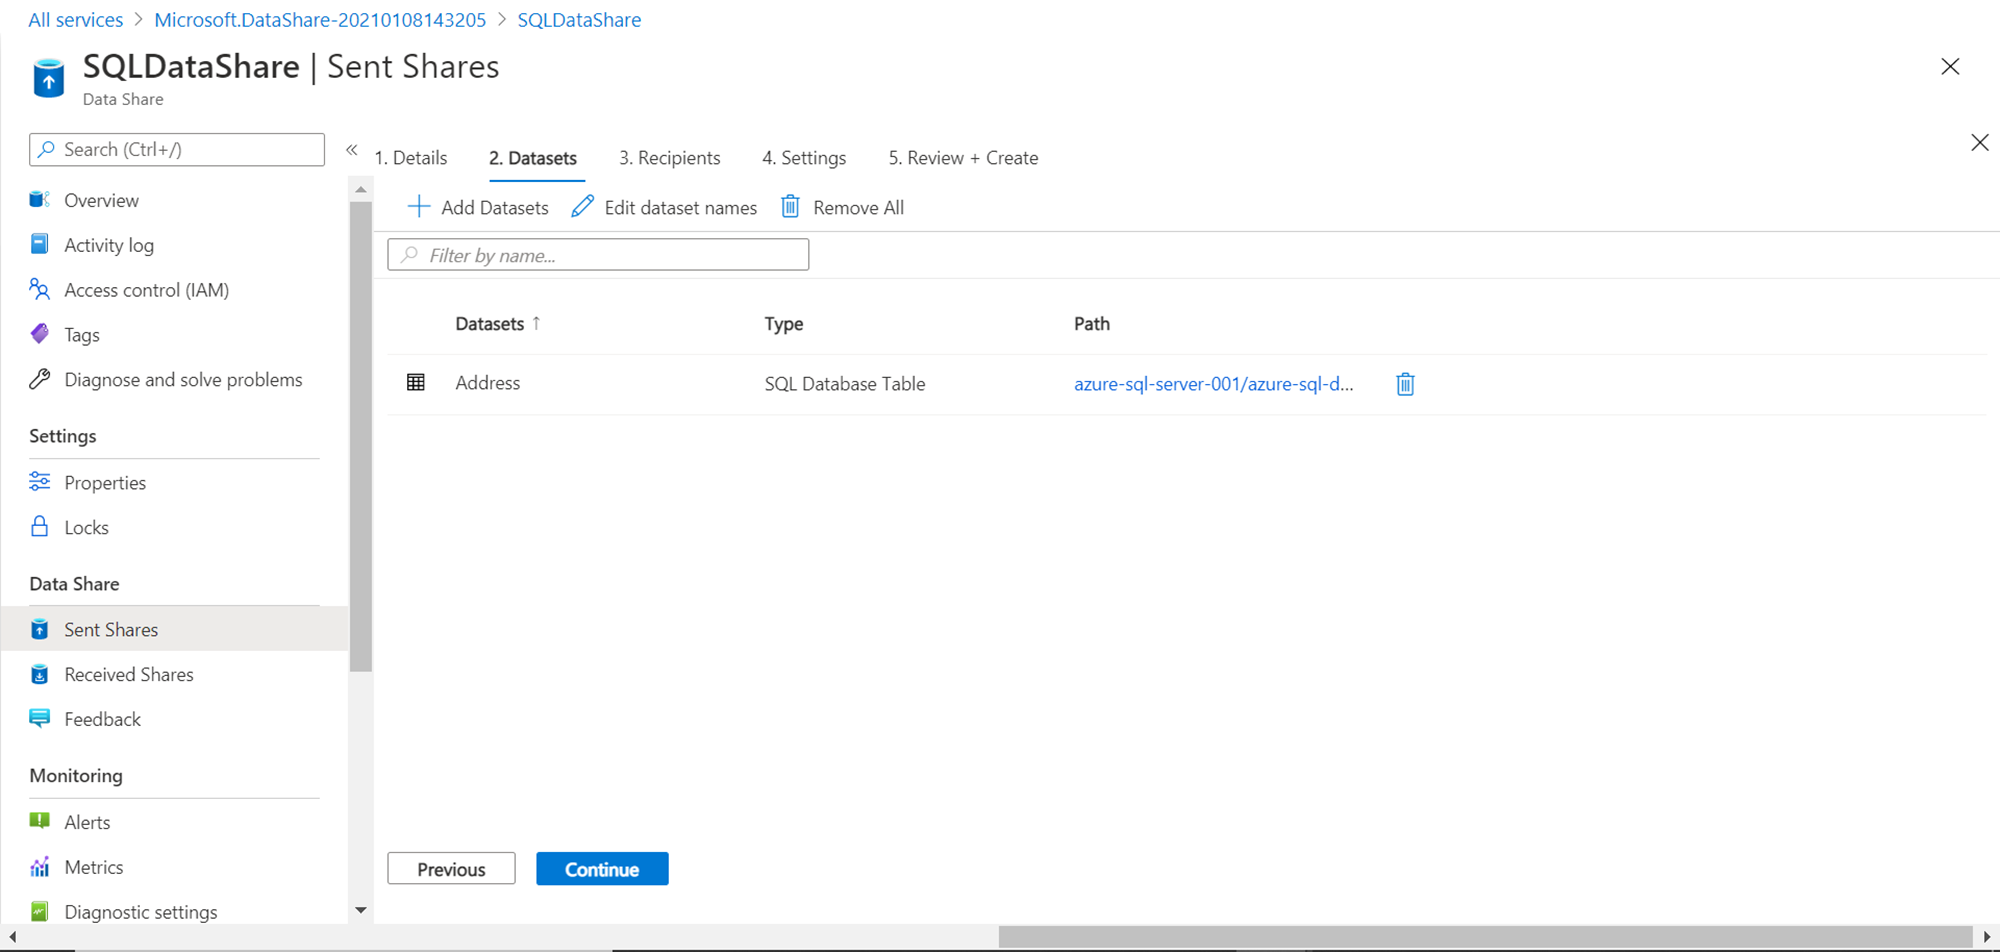
The final step here is to confirm the details which complete the creation of the dataset as shown below.
Recipients: Now that the dataset is created, click on the Continue button. In this step, we need to specify the recipient of the dataset. Provide the Azure login email ID of the recipient with whom we intend to share the dataset. We also have the option to set an expiration period post which the sharing will be stopped. After adding the details, click on the Continue button.

Settings: In the Settings step, we can configure the snapshot schedule for the dataset. This is an optional step, so we can skip this step and click on the Continue button to navigate to the last step. In the last step, we just need to review the details configured so far and confirm it to create a new data share. Once the data share has been created, it would look as shown below.
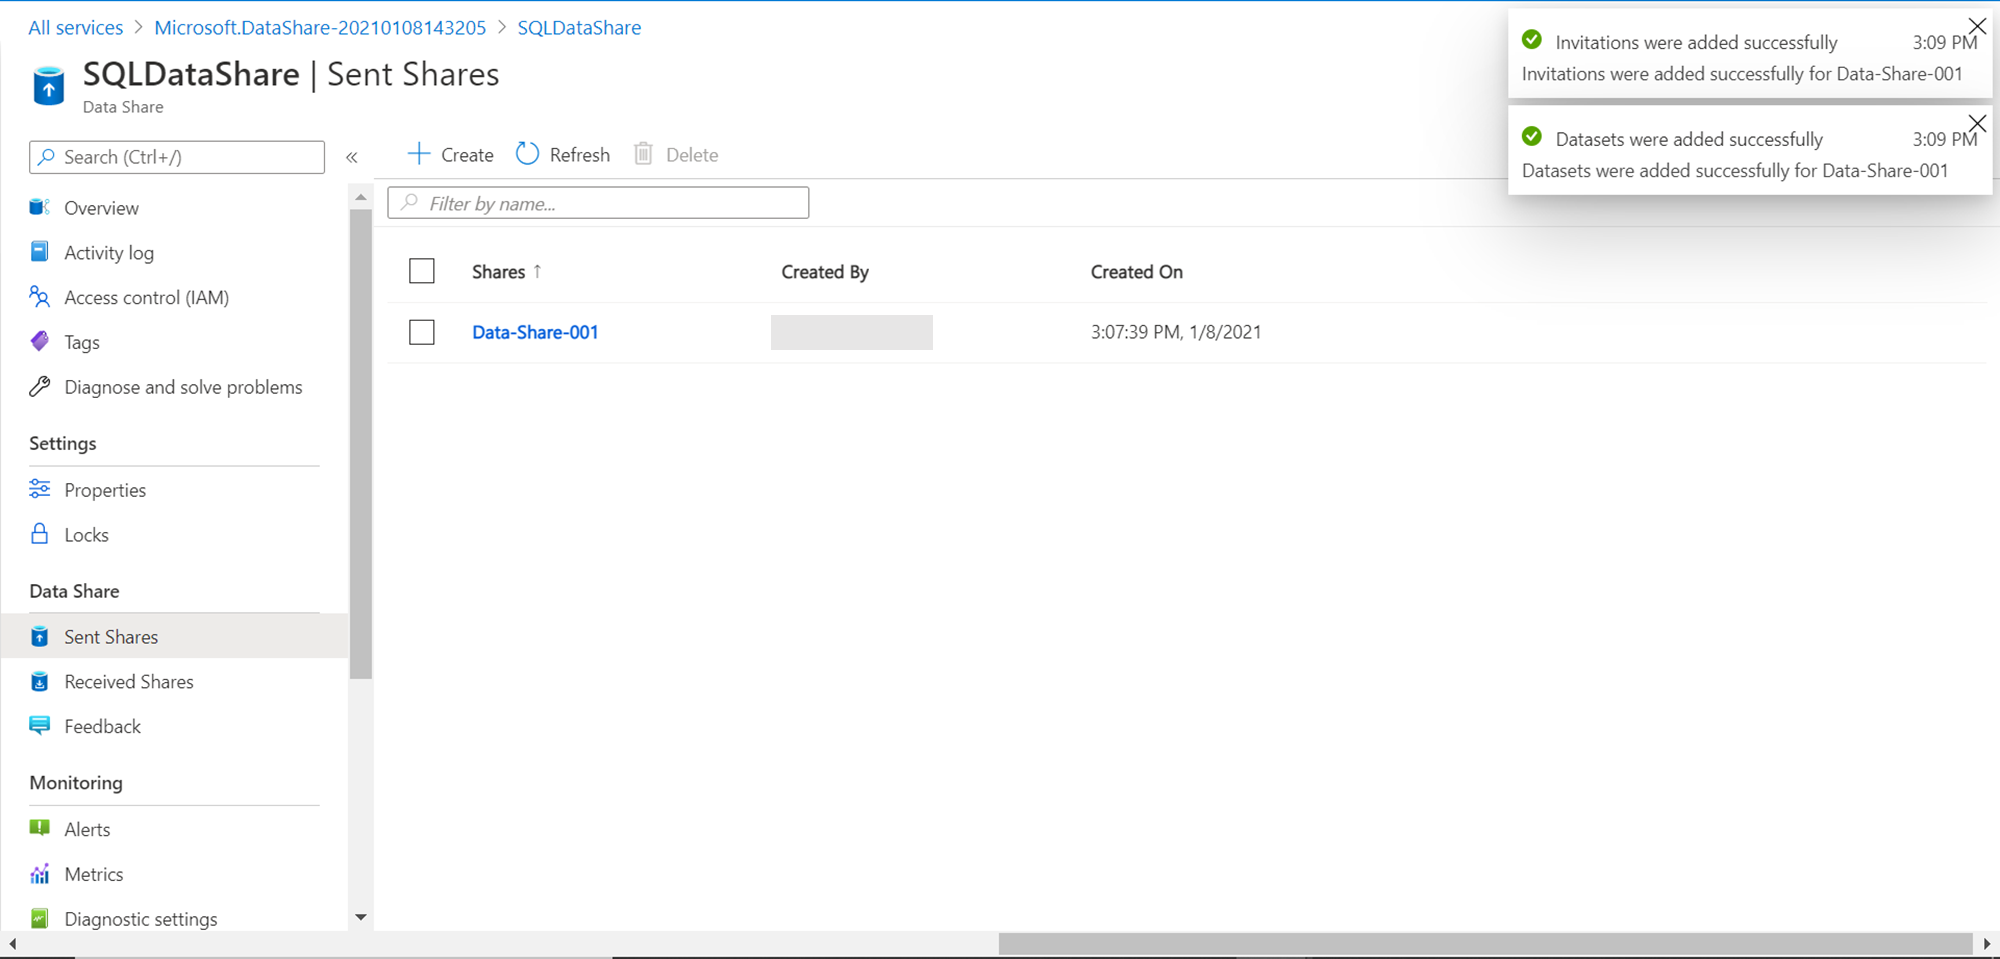
We can click on the newly created data share and verify the details that we configured while creating it. In this way, we can create a data share of SQL Database using Azure Data Share.
Conclusion
In this article, we learned the concept of data sharing and implemented the process of creating a new data share using Azure SQL Database as the data source. We also learned how to configure a dataset within a data share and understood how to configure the source database to integrate with Azure Data Share.

She has a deep experience in designing data and analytics solutions and ensuring its stability, reliability, and performance. She is also certified in SQL Server and have passed certifications like 70-463: Implementing Data Warehouses with Microsoft SQL Server.
View all posts by Gauri Mahajan
- Oracle Substring function overview with examples - June 19, 2024
- Introduction to the SQL Standard Deviation function - April 21, 2023
- A quick overview of MySQL foreign key with examples - February 7, 2023