
This article will help you understand the process to accept an incoming or received data share of Azure SQL Database and integrate it with the desired data repository to start consuming it.
Introduction
In the previous article, Creating Azure Data Shares for Azure SQL Database, we learned how to create a new data share and configure datasets from scoped database objects and share it with recipients. This was the first part of the data sharing process and is typically done by data owners who initiate the process of sharing the data. On the other end, when the recipient receives the data shares, there are a set of steps that a consumer needs to perform to start consuming the data. Let’s go ahead and learn how to accept an incoming data share and start consuming it.
Consuming a received Azure Data Share
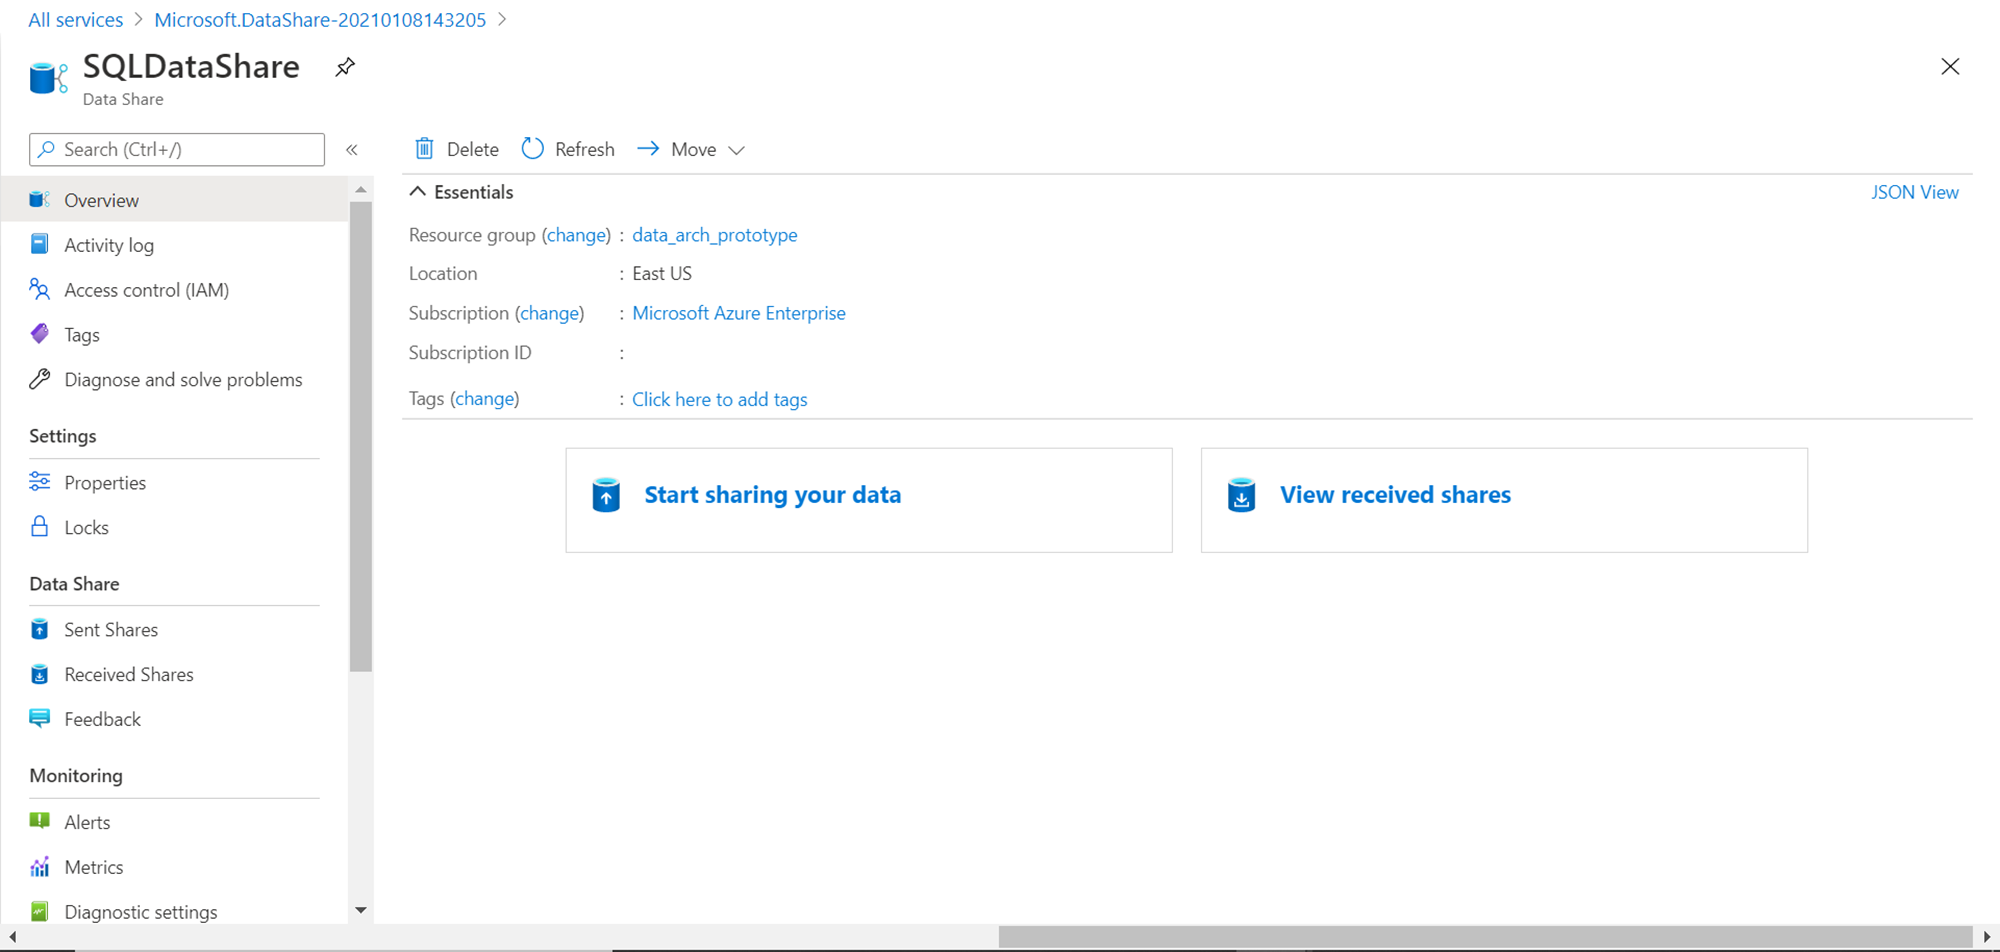
In the previous article, we learned how to create a new Azure Data Share instance. It is assumed that on the consumer or the recipient’s account as well, a data share account is already created, as it is required to consume the received data share. Once you open the dashboard of the data share account, it will look as shown below.
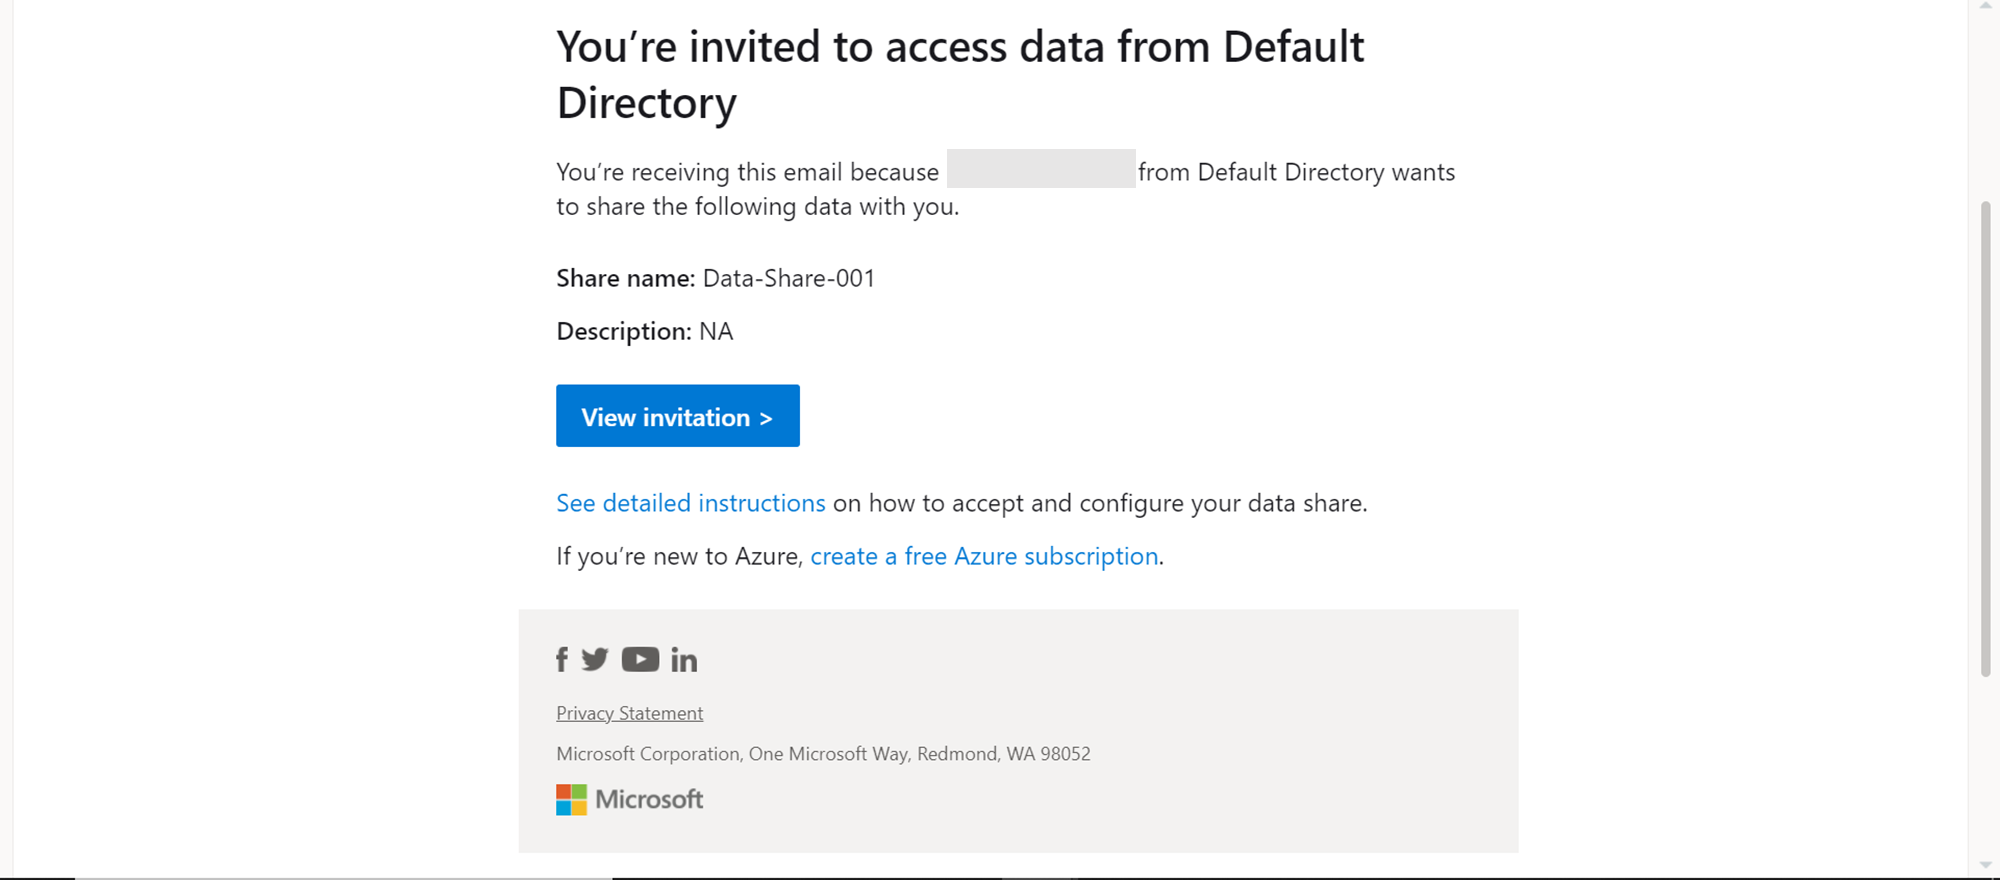
Once a data share is created, the recipient receives an email notification as shown below. One can click on the View Invitation button to directly navigate to the list of data shares.
The received data share can also be seen by clicking on the View received shares section of the dashboard page. Click on the button that shows the data shares and it would show the received data share, that we created in the previous article as shown below. This is the data share that was created in the previous article.

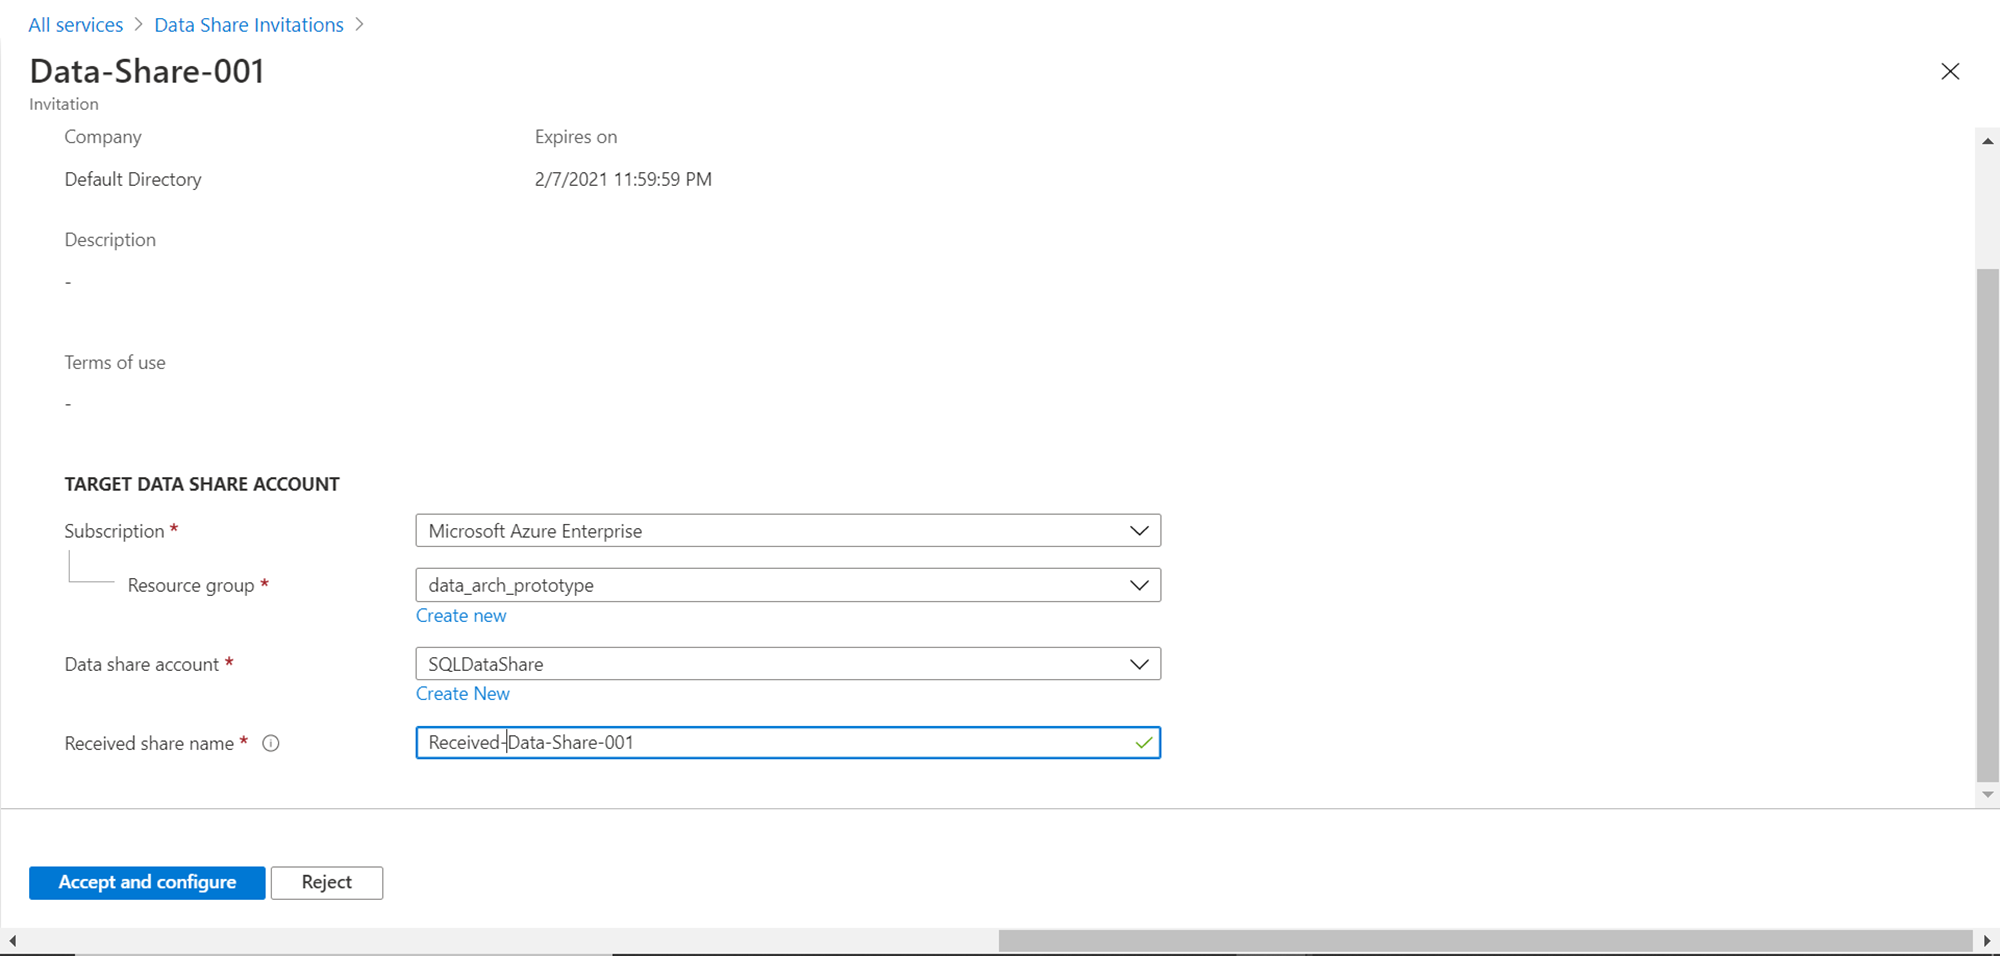
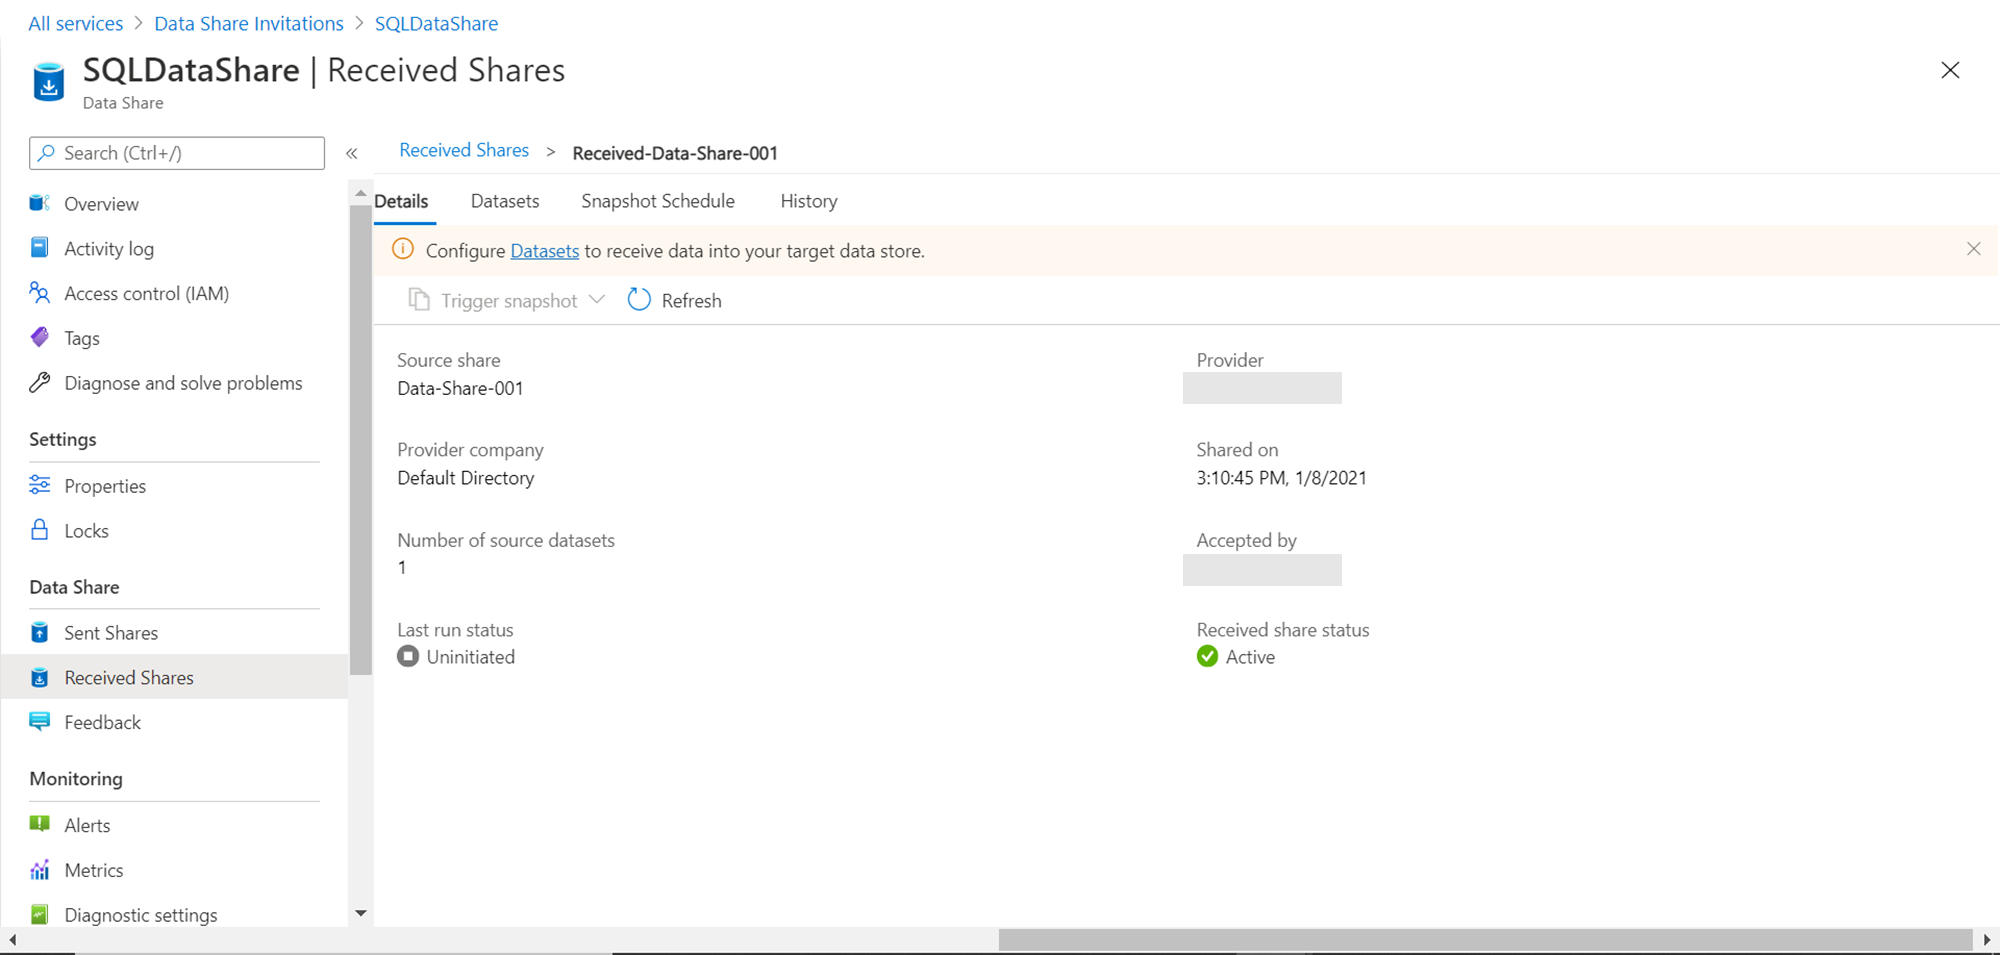
Click on the name of the share to view the details of this data share as shown below. One has two options to address this data share. Either we can accept and configure the data share or reject the data share. The details of the data share can be seen below. We did not specify the description or terms of use of the data share; hence it looks blank on the below screen. We intend to configure this data share on an Azure SQL Database so we can start consuming it. Specify the target data share account details like subscription, resource group, data share account name and the name that one wants to assign to the received data share. Click on the Accept and configure button.
This would open a new screen as shown below. This screen confirms that the incoming data share has been accepted and shows the details of who provided the share and who accepted it. It shows that this share contains one dataset within it and it has not been initiated yet, which means it has not been consumed yet.
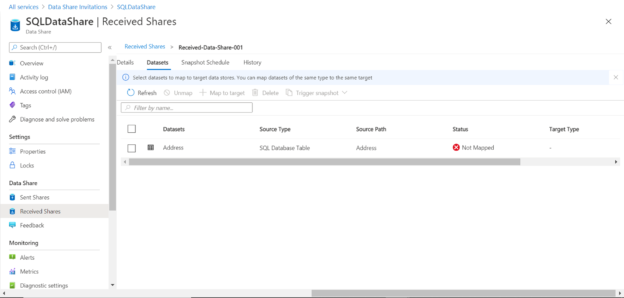
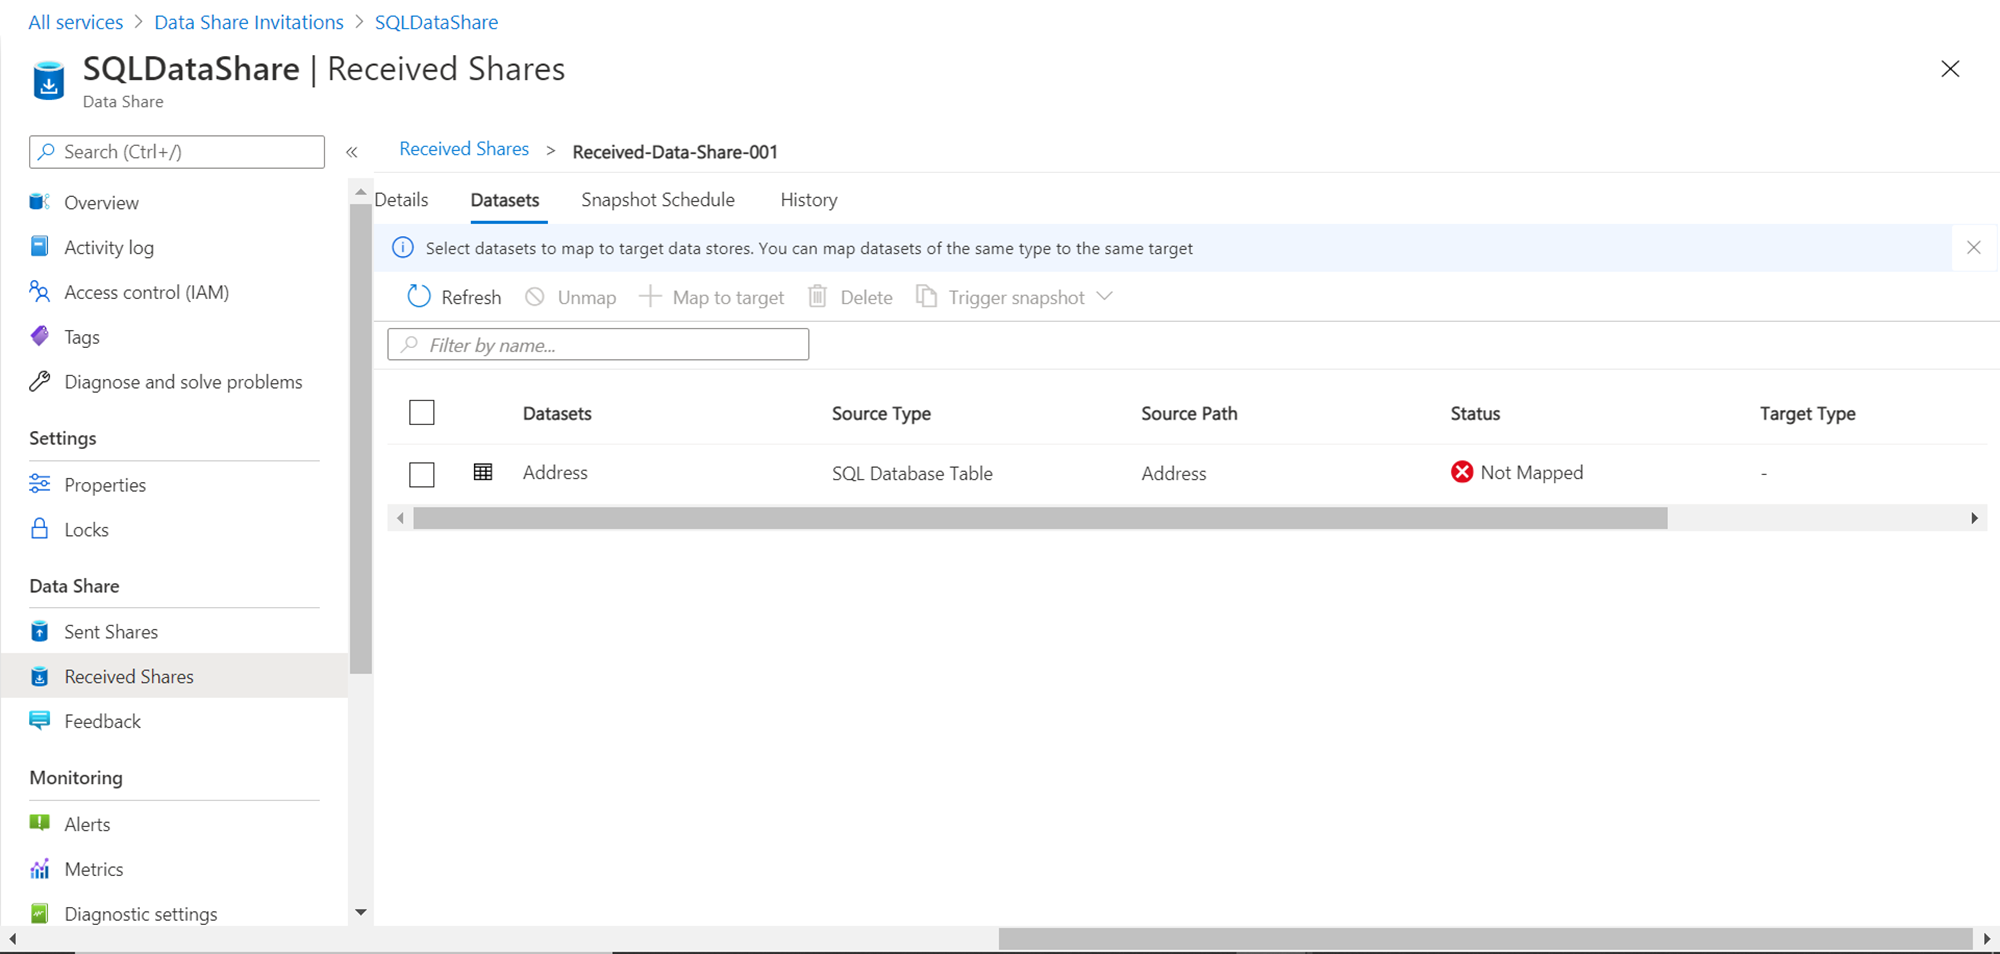
The informational message below the menu bar shows that the datasets need to be configured for consumption. Click on the dataset link to navigate to the dataset tab. It would look as shown below. We configured only the Address table while creating the dataset in the previous article, which is shown below. It specified the type of data source as well. The status shows that it has not been mapped with a data repository in the consumer account.
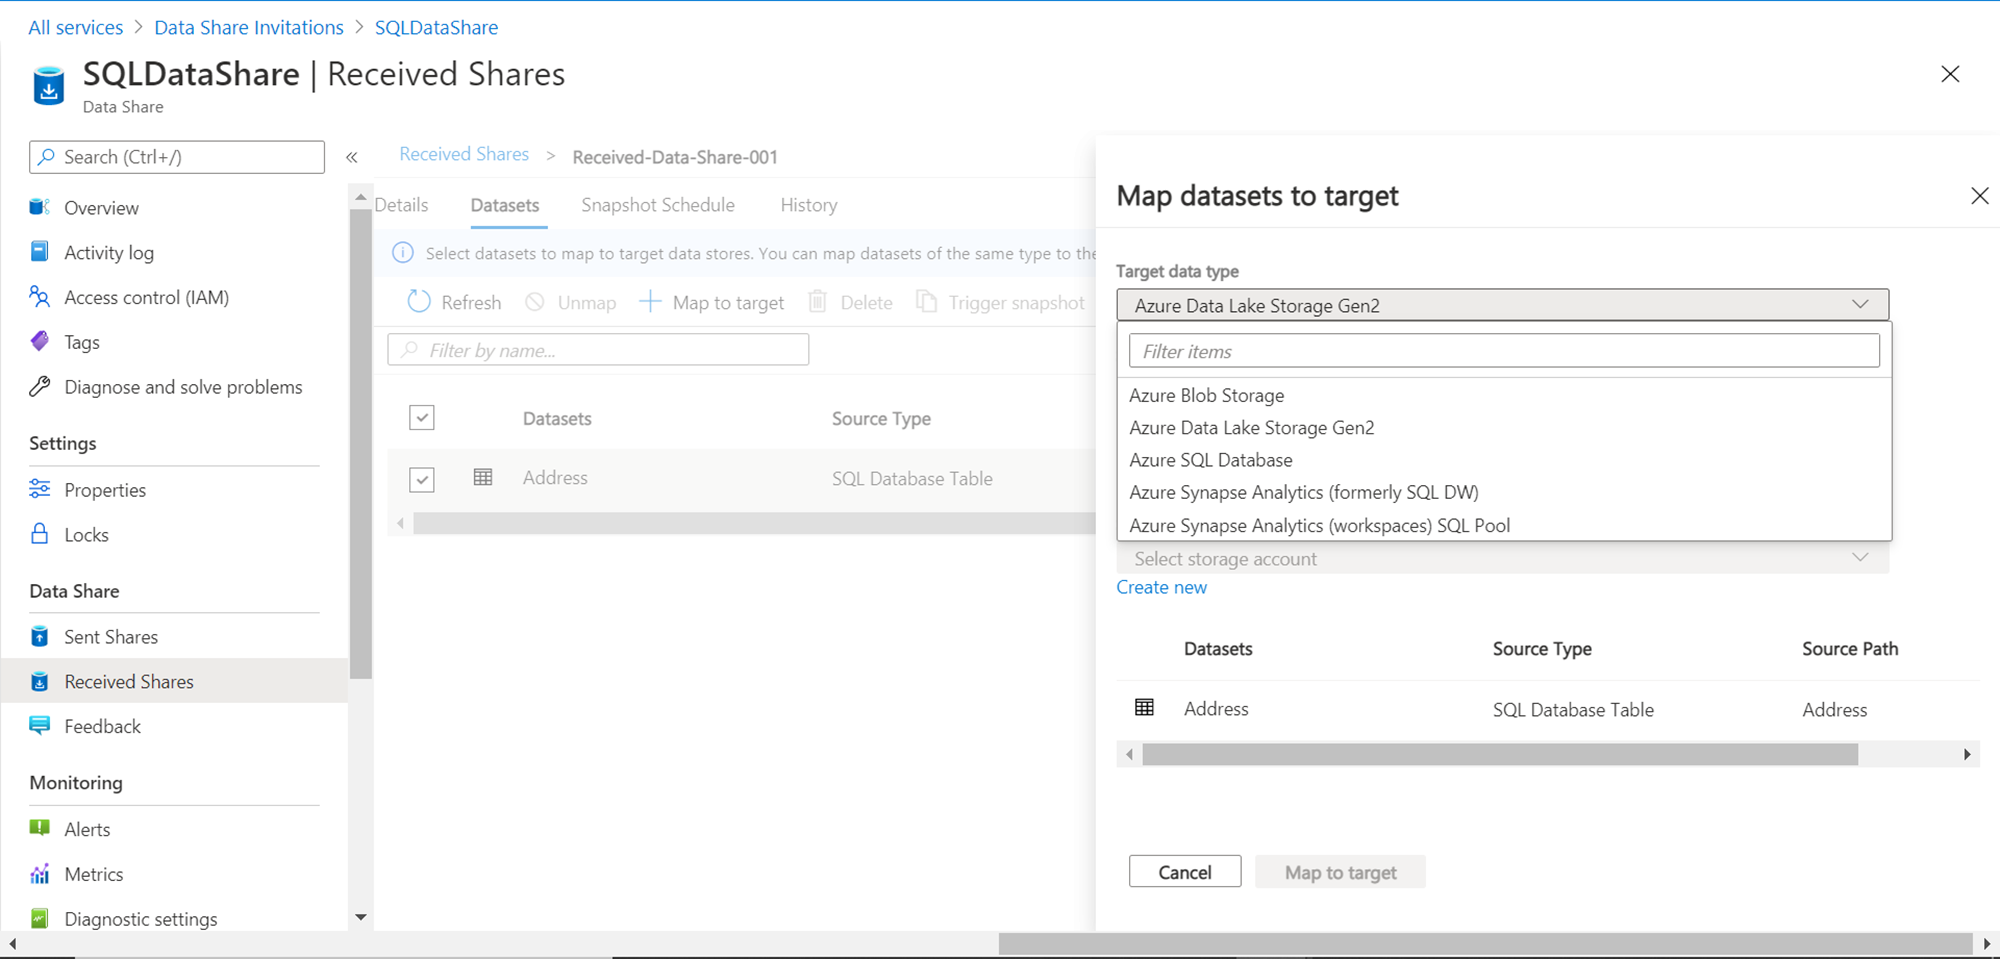
The information message states that datasets need to be mapped to data stores, which should be of the same type as the source. This means we need to have an Azure SQL Database in the account from which we desire to consume the data share. It’s assumed that an Azure SQL Database has already been created and is ready for use. Select the table in the data share and click on the Map to target button. This would pop-up a new wizard as shown below. We need to provide details related to the mapping of a shared data object in the target data repository. The Target data type lists different types of data repositories including the Azure SQL Database.
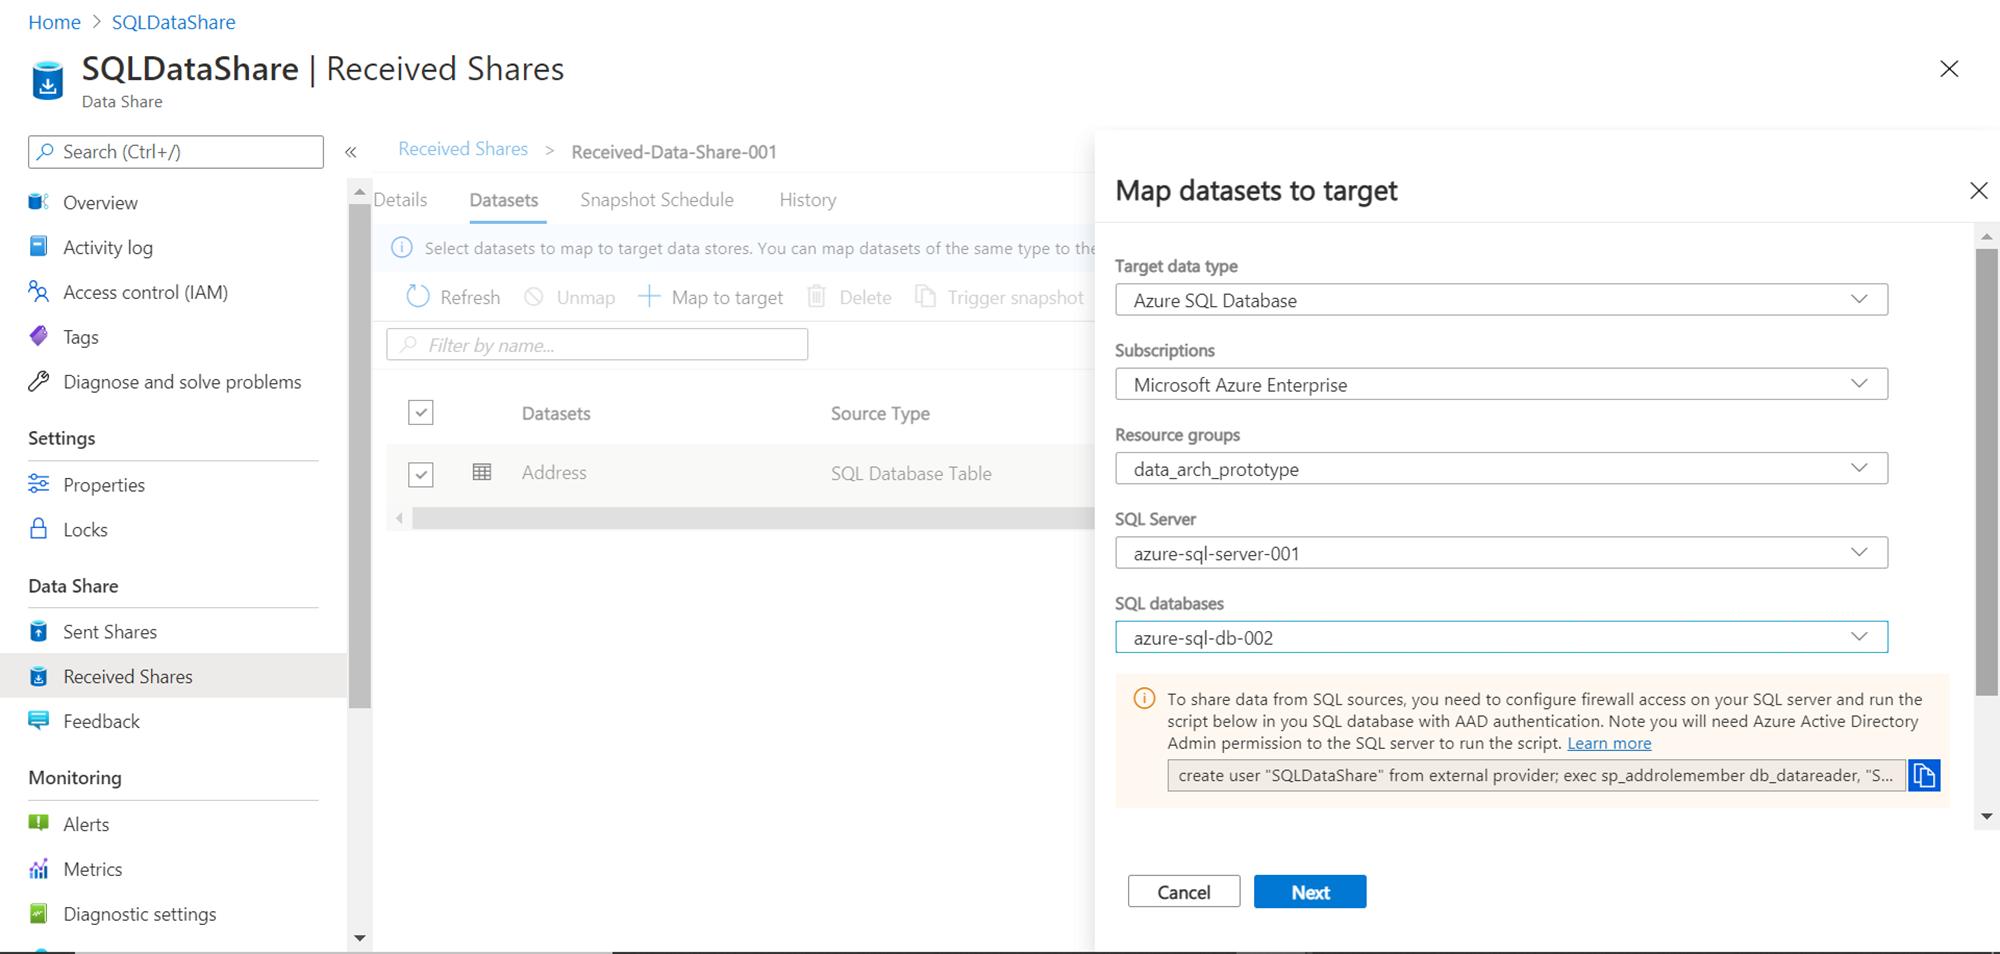
Select SQL Database and provide relevant details of an Azure SQL Server instance and a database hosted on it, on which we intend to host the shared table as shown below. It would show an information message with a script, which creates a user on the database and provides the user with the required privileges to create and update this shared table. Execute this script on the Azure SQL Database and click on the Next button.
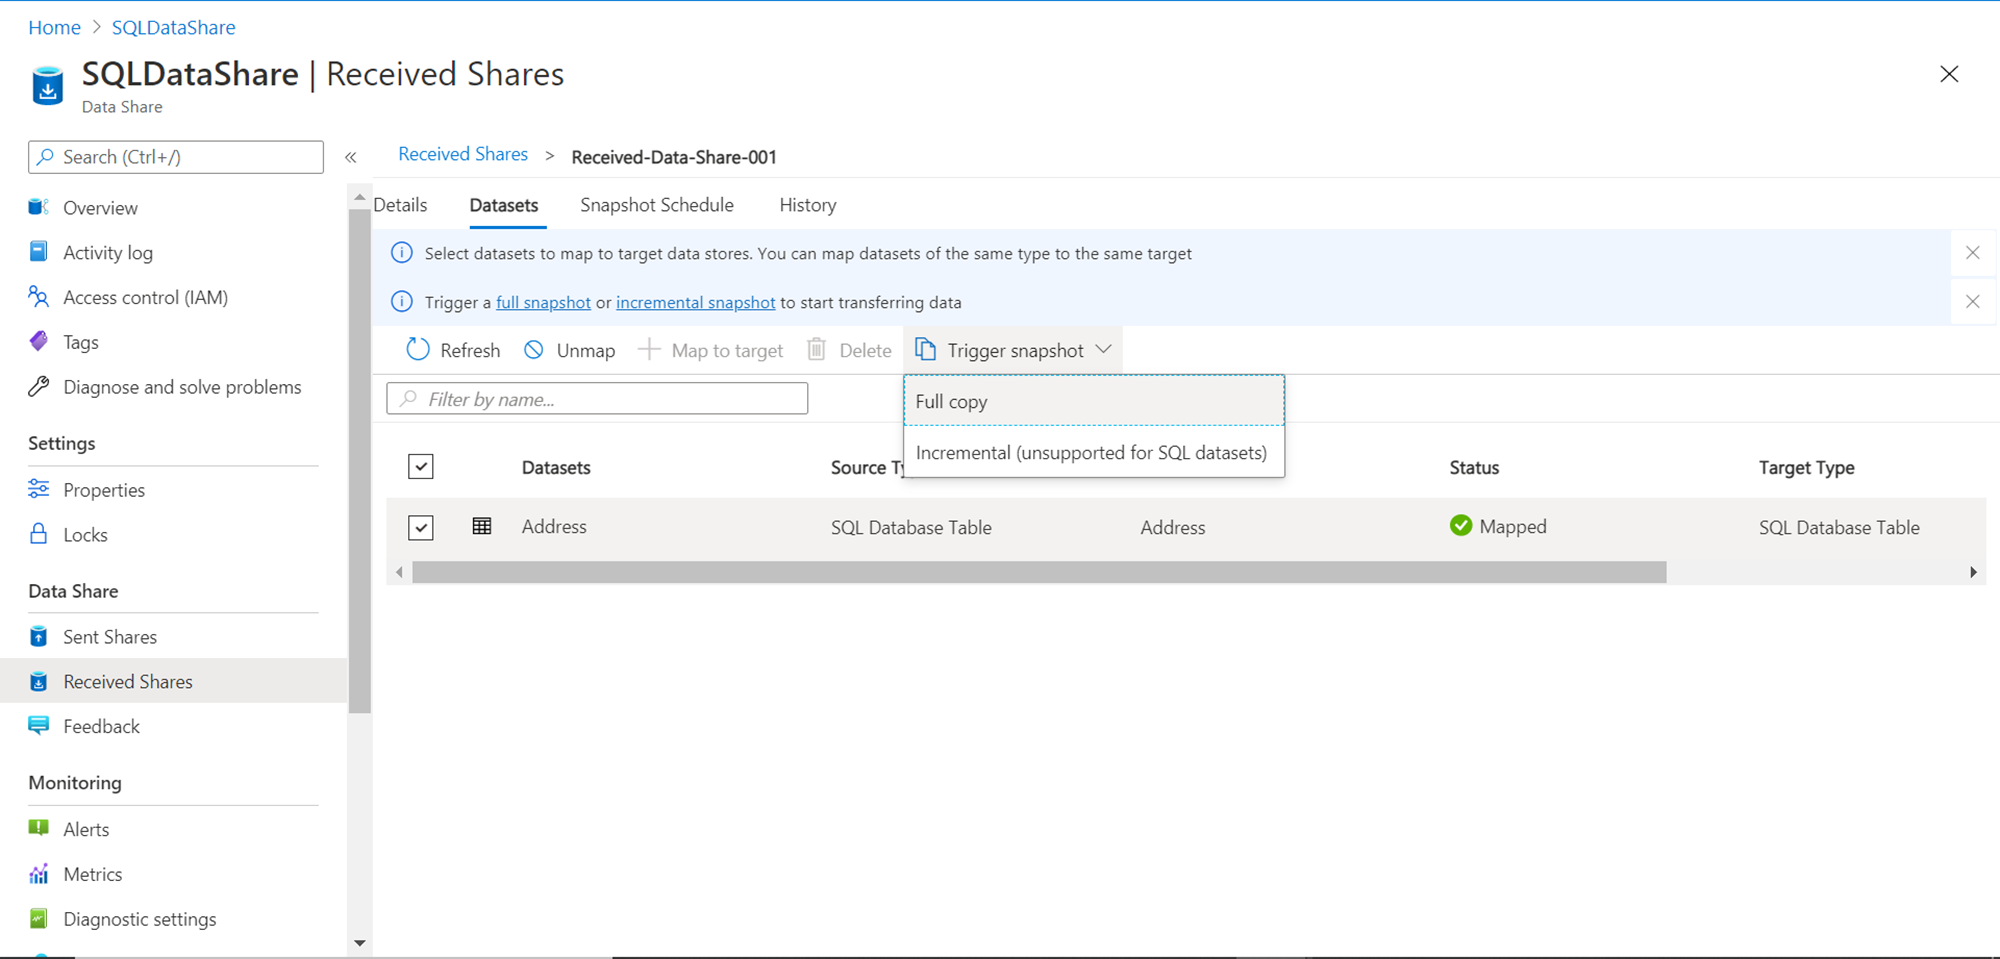
In this step, we have the option to provide a new name to the database object that was shared in the dataset. For now, we do not intend to change the name, so we can continue with the same name. Click on the Map to target button which completes the mapping of the shared dataset from the source repository to the target data repository. Once the mapping is complete, the next step is to trigger the snapshot of the shared dataset in the target data repository. Click on the Trigger snapshot button and it would show two options – Full Copy or Incremental (unsupported for SQL datasets) as shown below. As it’s the first time we are creating the shared table in the Azure SQL Database, we will select the Full copy option for now. Consequently, we can select an Incremental option for loading the differential data.
Once the snapshot process is completed, you would be able to see the new table listed in the target Azure SQL Database. Query this table and finally, we would be able to access the data in this newly created table.

In this way, we can consume data from a received data share of an Azure SQL Database using Azure Data Shares.
Conclusion
In this article, we continued with the setup of the previous article where we created an Azure Data Share. We accepted the received data share, mapped it to a target data repository, configured the hosting repository so that Azure Data Share can integrate with it and finally created a full snapshot of the dataset to consume to shared data.

She has a deep experience in designing data and analytics solutions and ensuring its stability, reliability, and performance. She is also certified in SQL Server and have passed certifications like 70-463: Implementing Data Warehouses with Microsoft SQL Server.
View all posts by Gauri Mahajan
- Oracle Substring function overview with examples - June 19, 2024
- Introduction to the SQL Standard Deviation function - April 21, 2023
- A quick overview of MySQL foreign key with examples - February 7, 2023