
In this article, I’m going to explain how to configure an RDS Environment in Amazon Web Services (AWS) for SQL Server. Amazon RDS, also known as the Amazon Relational Database Service, is a Database-as-a-Service offered by Amazon. This enables us to create an instance of a relational database in RDS including many databases like SQL Server, MySQL, PostgreSQL etc. The entire hosting is managed by AWS, so there is no worry to maintain any on-premises data center or infrastructure from the customer’s end.
Amazon RDS also provides other useful features in addition to the database service. The users can also migrate their existing on-premises databases to RDS Environment, create backups of the same on the cloud and store the backups in Amazon S3 (another file storage service from Amazon). We can also automate the backups as per our needs and choose a convenient pricing model as per the requirements. In this article, I’ll explain how to create an RDS instance and then demonstrate how to restore a backup from a local PC to the RDS database that we will be creating.
Step 1: Set up an RDS Environment
The very first step in configuring the RDS Environment would be to sign-up for an AWS Account. The free tier is eligible with RDS Service running for 750 hours per month. Once you create an account and sign in to the AWS console, search for the service “RDS” and select RDS from the drop-down menu.
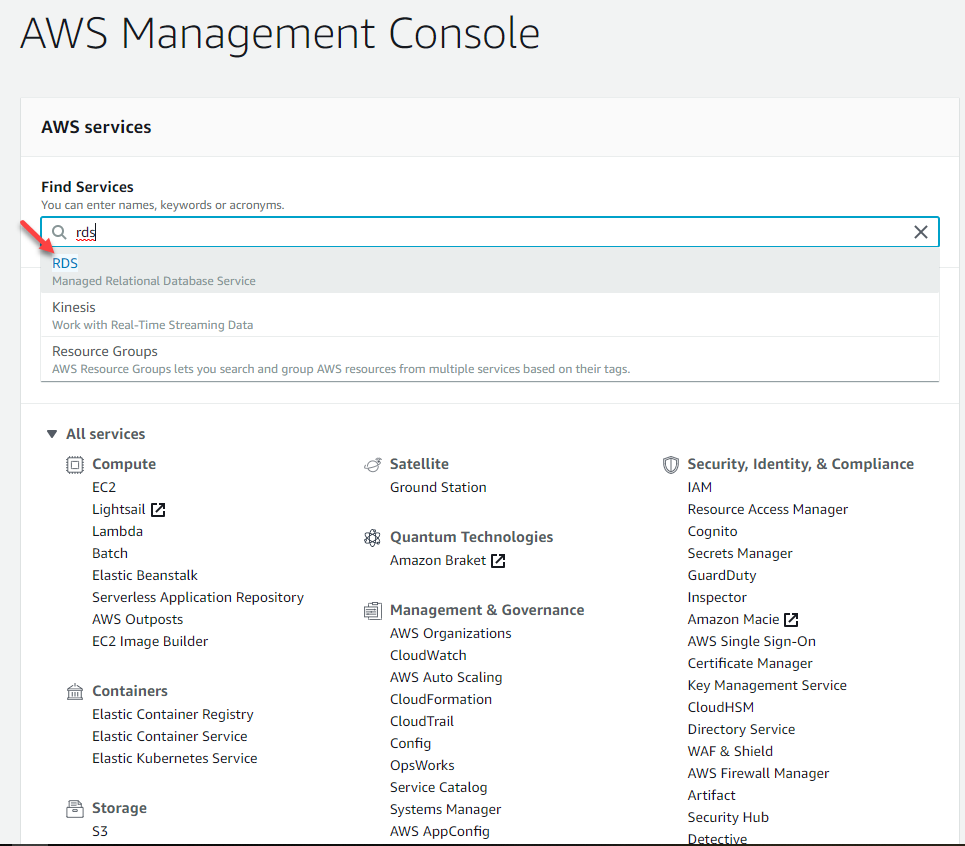
Figure 1 – RDS Configuration
Click on the drop-down, a new portal for Amazon RDS will show up where you can manage all your RDS instances. Here, navigate to the Databases on the left-hand pane and click on Create Database.

Figure 2 – Create Database
Step 2: Creating the Database
You’ll be navigated to the database creation page, where you can configure the RDS environment further. Select Standard Create as the database creation method. Select SQL Server as the engine and SQL Server Express Edition as the edition.
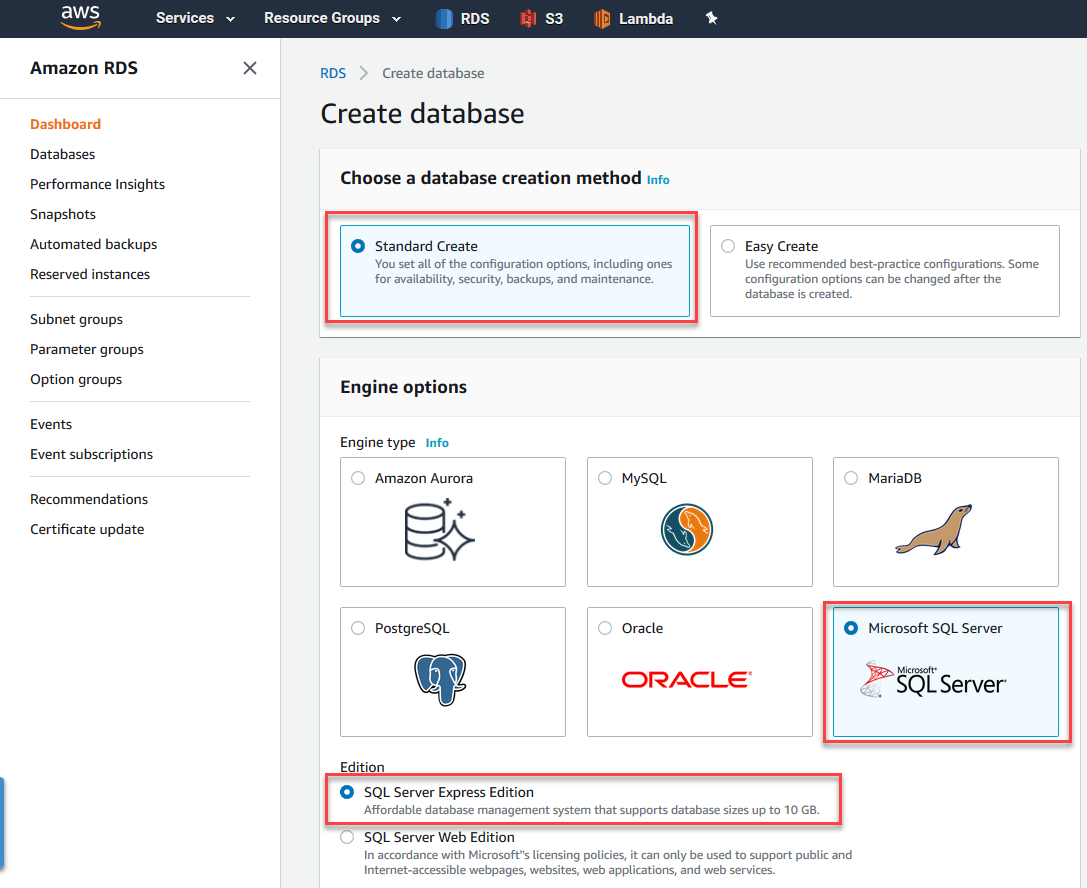
Figure 3 – Creating the Database
We will configure the RDS environment for the latest version of SQL Server which is 2017. Please select the version accordingly. Choose Free Tier as the template and provide an instance name and username for the instance. Remember that you’ll be connecting to this instance using the user details that you configure here.
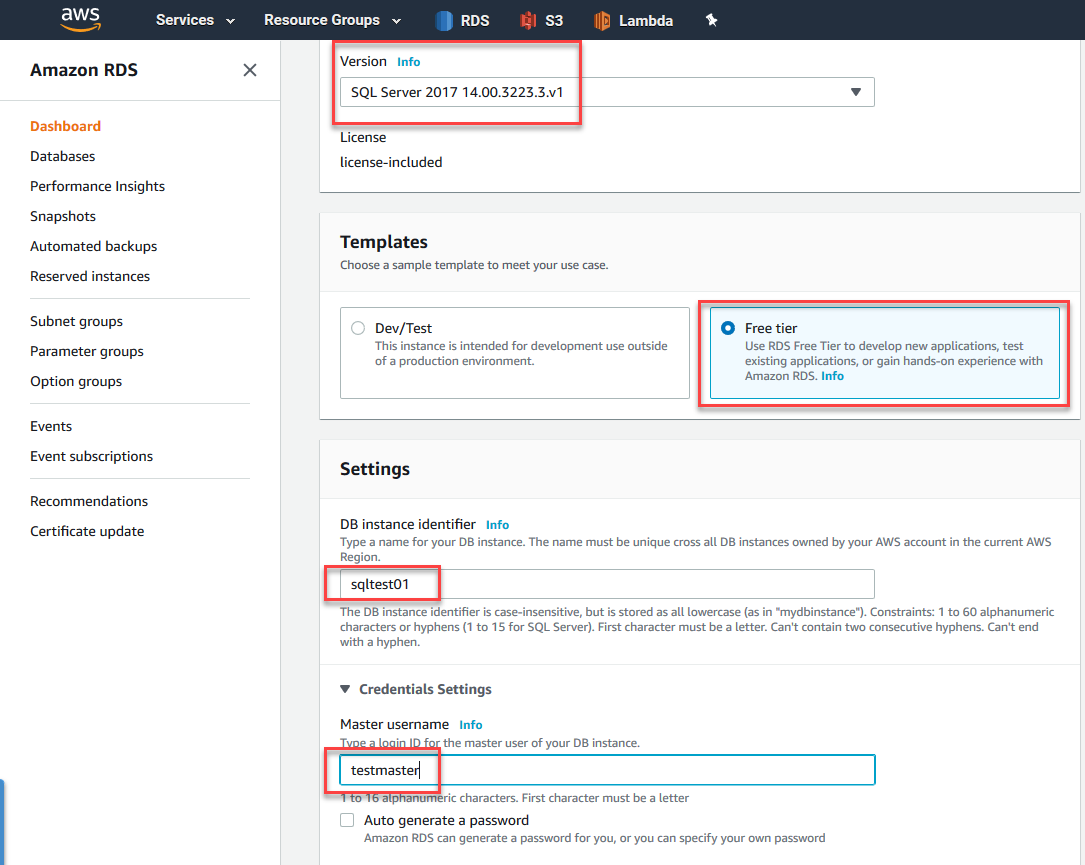
Figure 4 – Choosing Version and Template
Once you have provided the instance name and the master username, the next step is to provide a master password for the user. Please provide a strong password that is at least 12 characters long. For more security, I usually go with a length of 16 and a combination of alphanumeric characters.
Select the instance size as db.t2.micro and storage type as General Purpose SSD with 20 Gigabytes of storage.
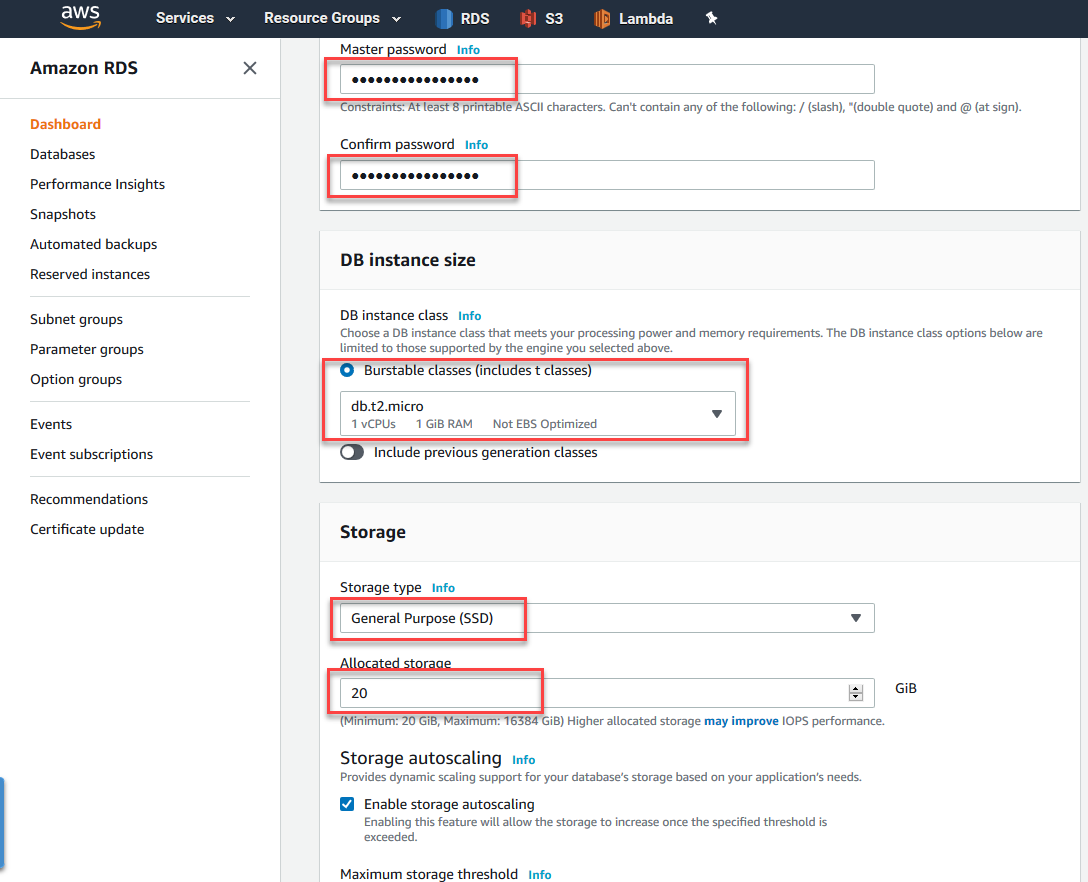
Figure 5 – Configuring Instance Size
When you scroll below, the next section is to configure the connectivity to the database instance. For the Virtual Private Cloud select the Default VPC that is available. Repeat the same for the Subnet Group as well, we will use the Default Subnet available here. Since we would like to be able to connect to the RDS environment from the public domain and not only within AWS, select Yes for the Publicly accessible option. Also, for the VPC Security Group, select Choose Existing and select the Default.
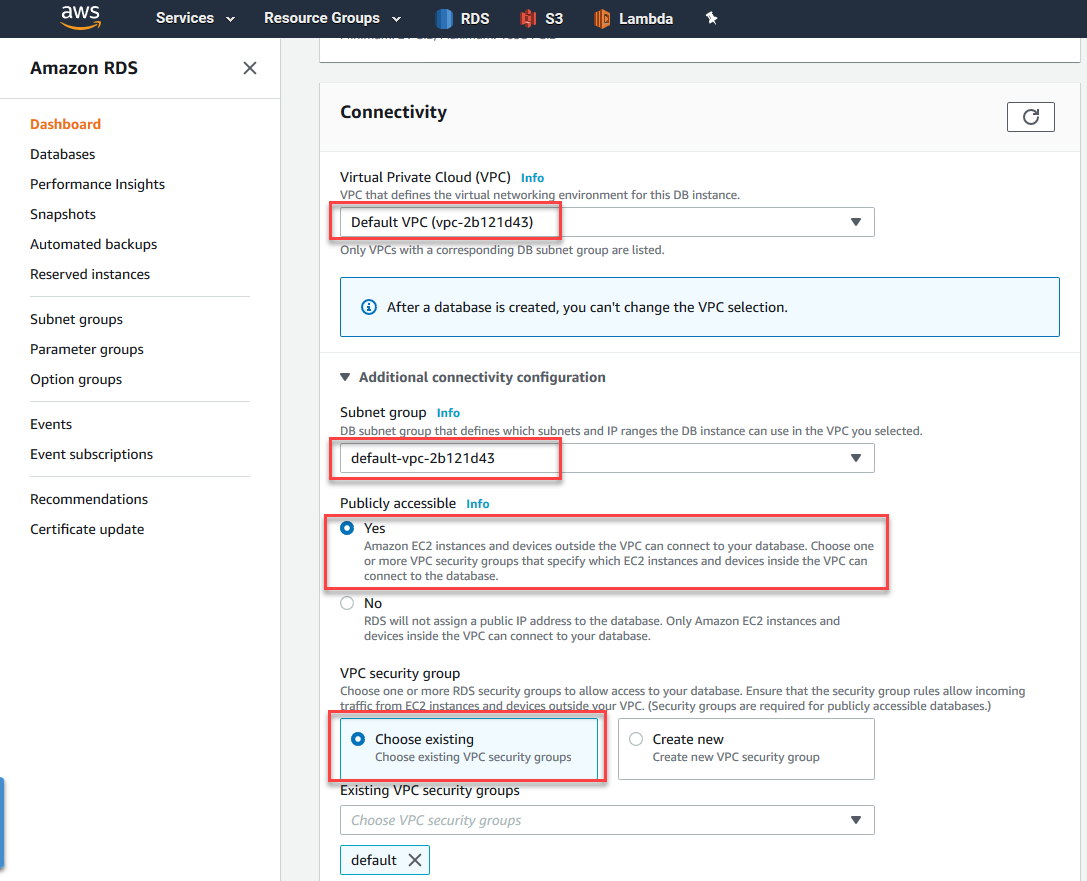
Figure 6 – Configure Connectivity
Once all the configurations are done as required, click on Create Database.
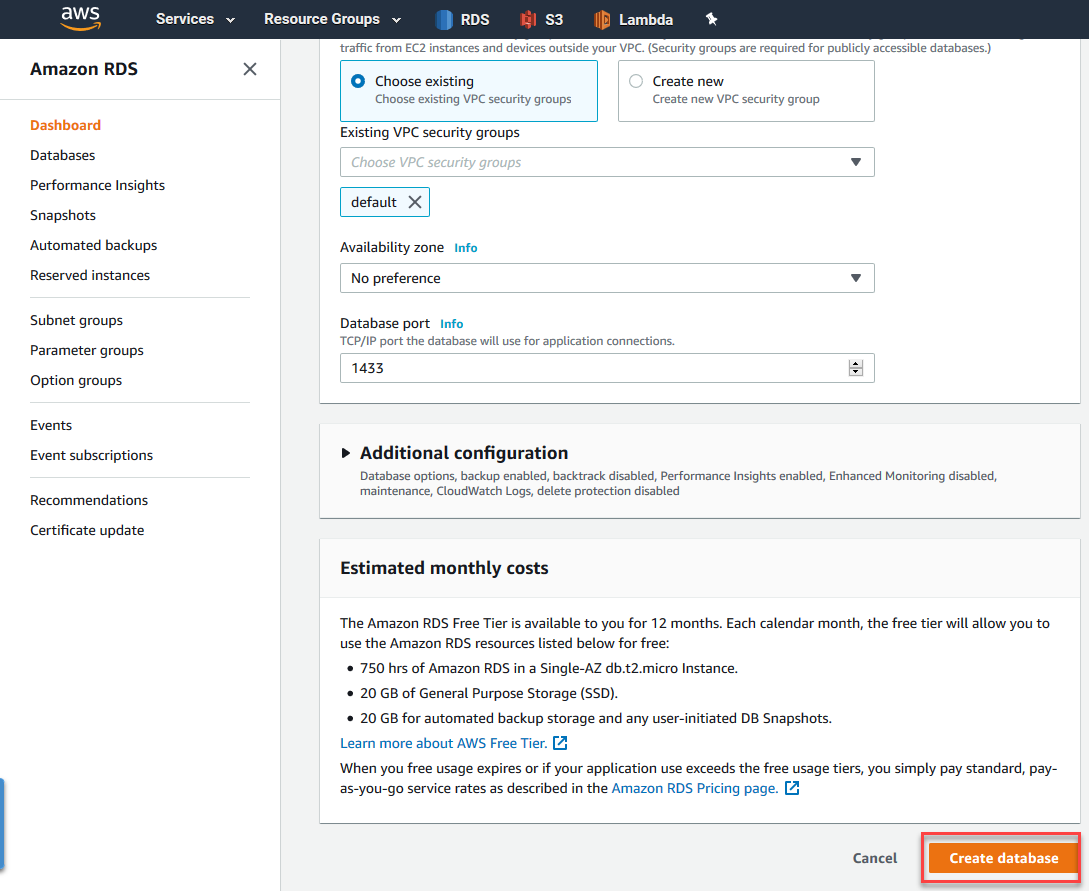
Figure 7 – Create Database
Step 3: Configuring the RDS Database
As you create the database in the previous step, it will take some time for AWS to create the instance up and running. Meanwhile, you can monitor the status while it is being created as follows.
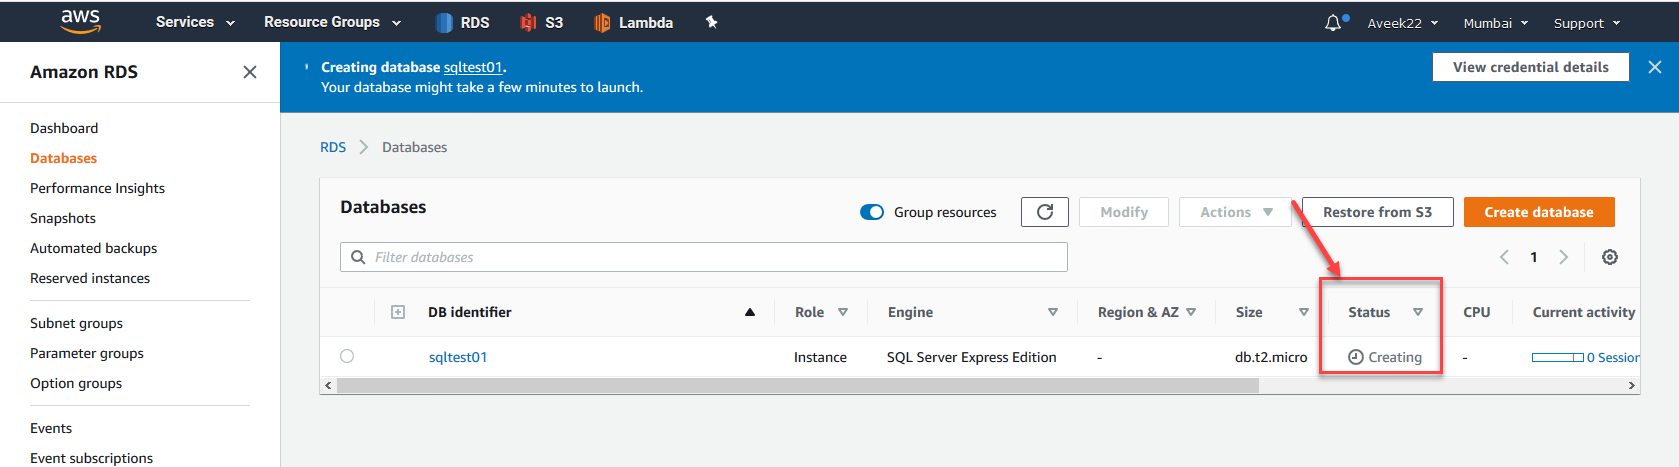
Figure 8 – Creating a Database
Once the database is created the status will be updated to Available.

Figure 9 – Database Available
You can now copy the endpoint of this RDS environment and keep it safe to connect from any client application like SQL Server Management Studio later.
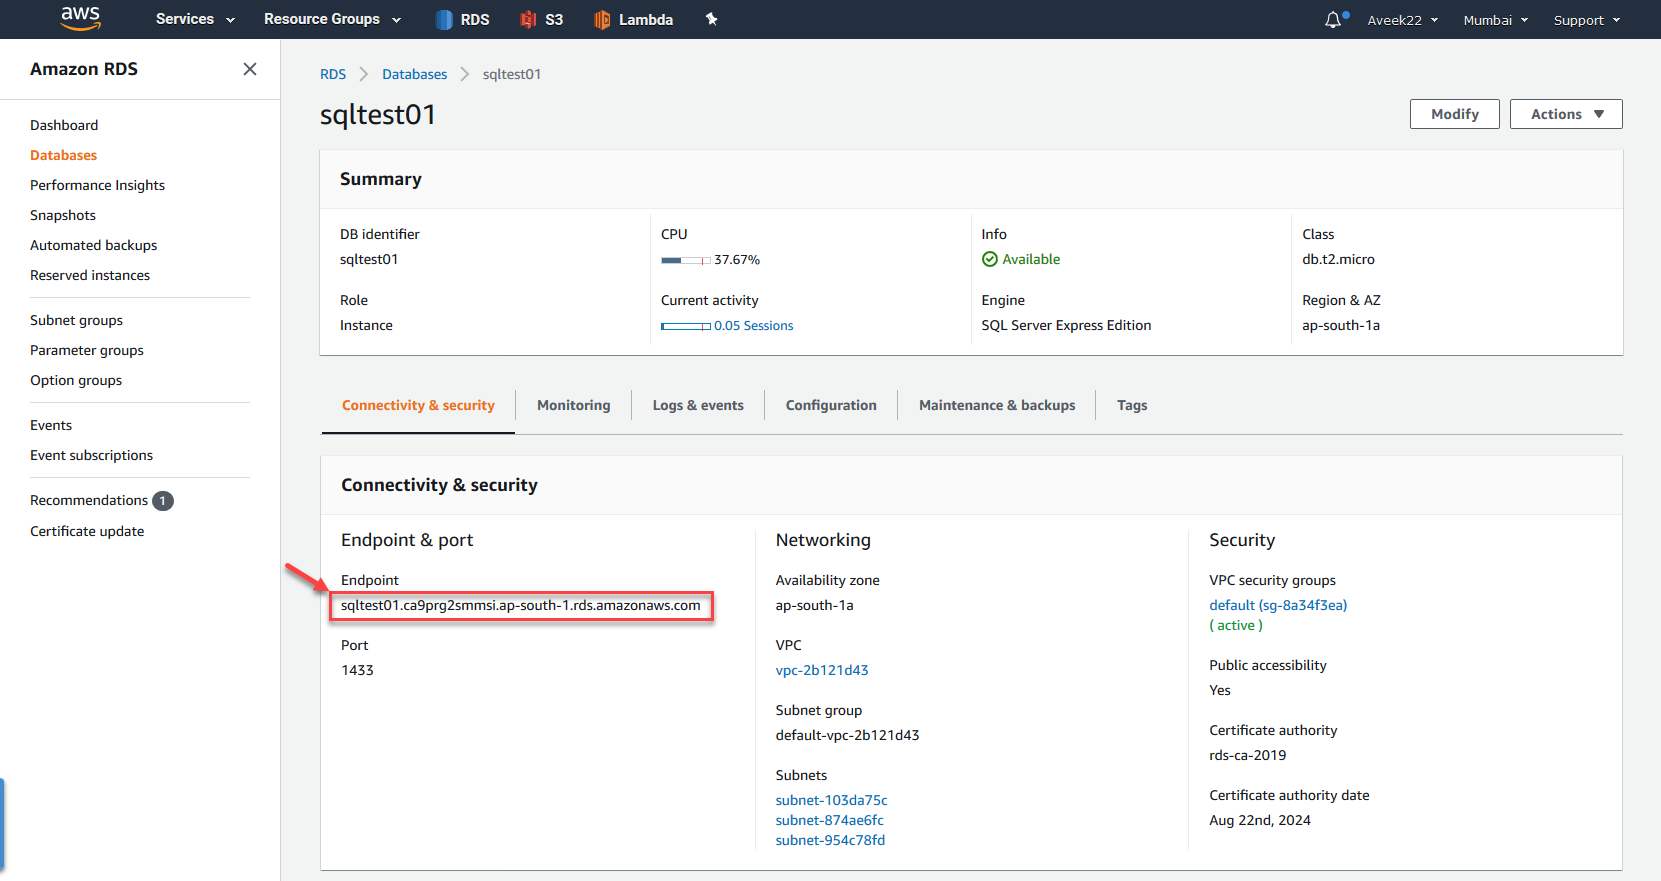
Figure 10 – RDS Endpoint
The next step is to configure the Security Group to allow inbound traffic to access the SQL Server. In order to do this, click on the Default VPC Security Group. You’ll be navigated to a new page to manage the traffic.
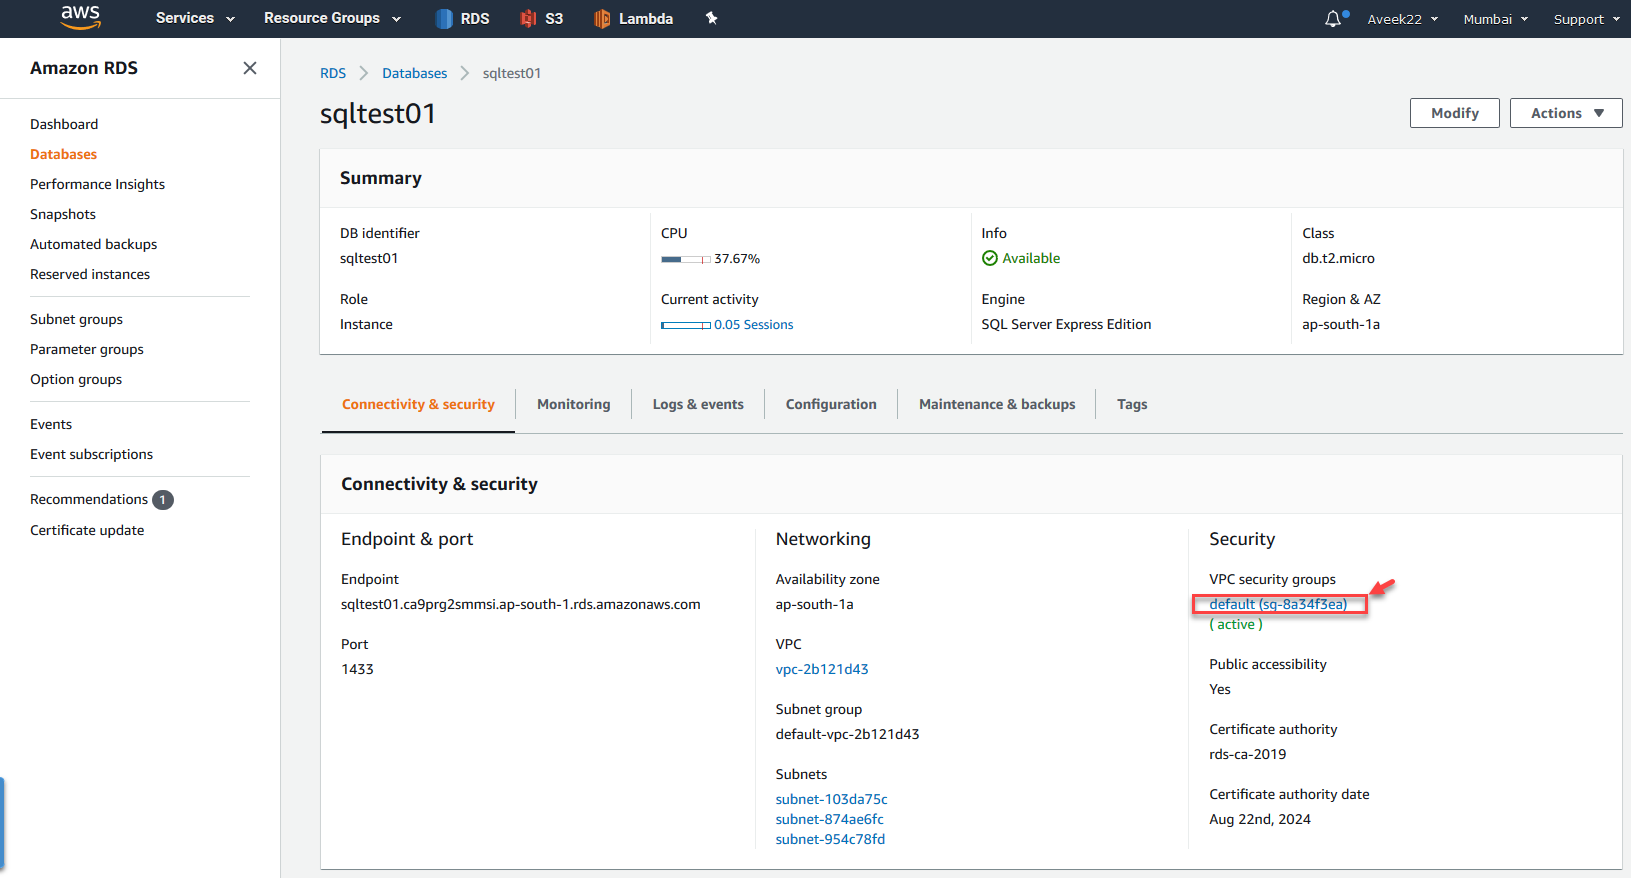
Figure 11 – Selecting the Default Security Group
In the Security Groups page that appears, you can see all the security groups that are available in your AWS account. Since I’m using the default group only, there is only one security group. Click on the security group to configure further.
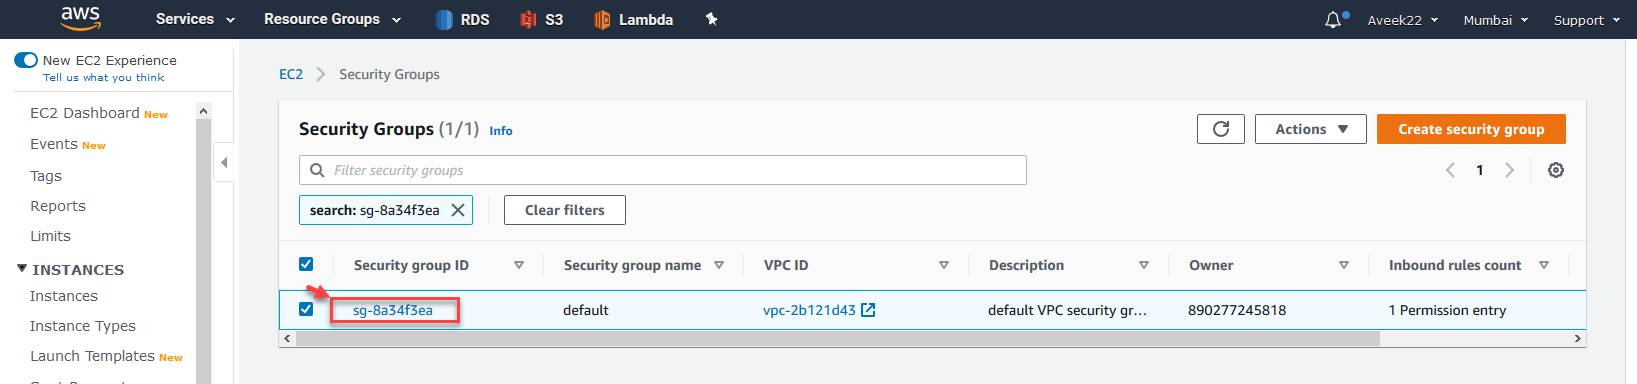
Figure 12 – Security Groups
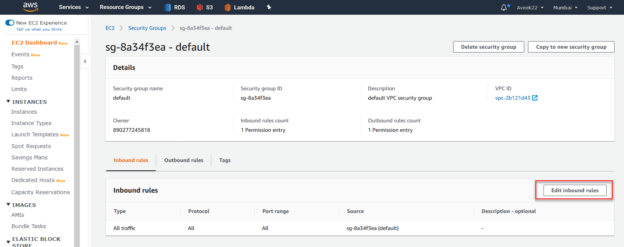
In the Security Group page, click on Edit Inbound Rules.

Figure 13 – Edit Inbound Rules
Click on Add Rule and add a rule for Custom Type to the port 1433 (default for SQL Server) with source as Anywhere. This will allow traffic from outside the AWS environment to connect to the RDS environment.
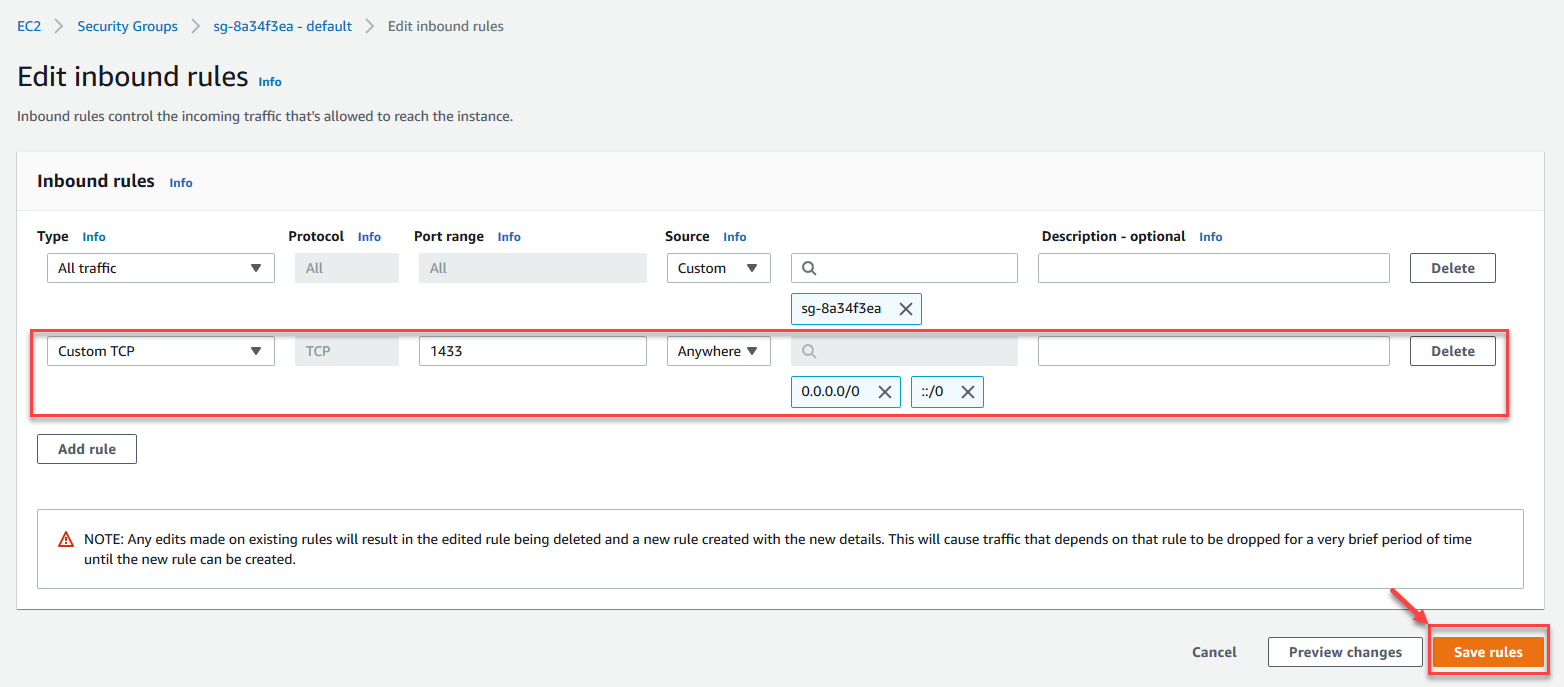
Figure 14 – Adding Custom Rule
Once the rules are added, you can see all the rules available for the security group.
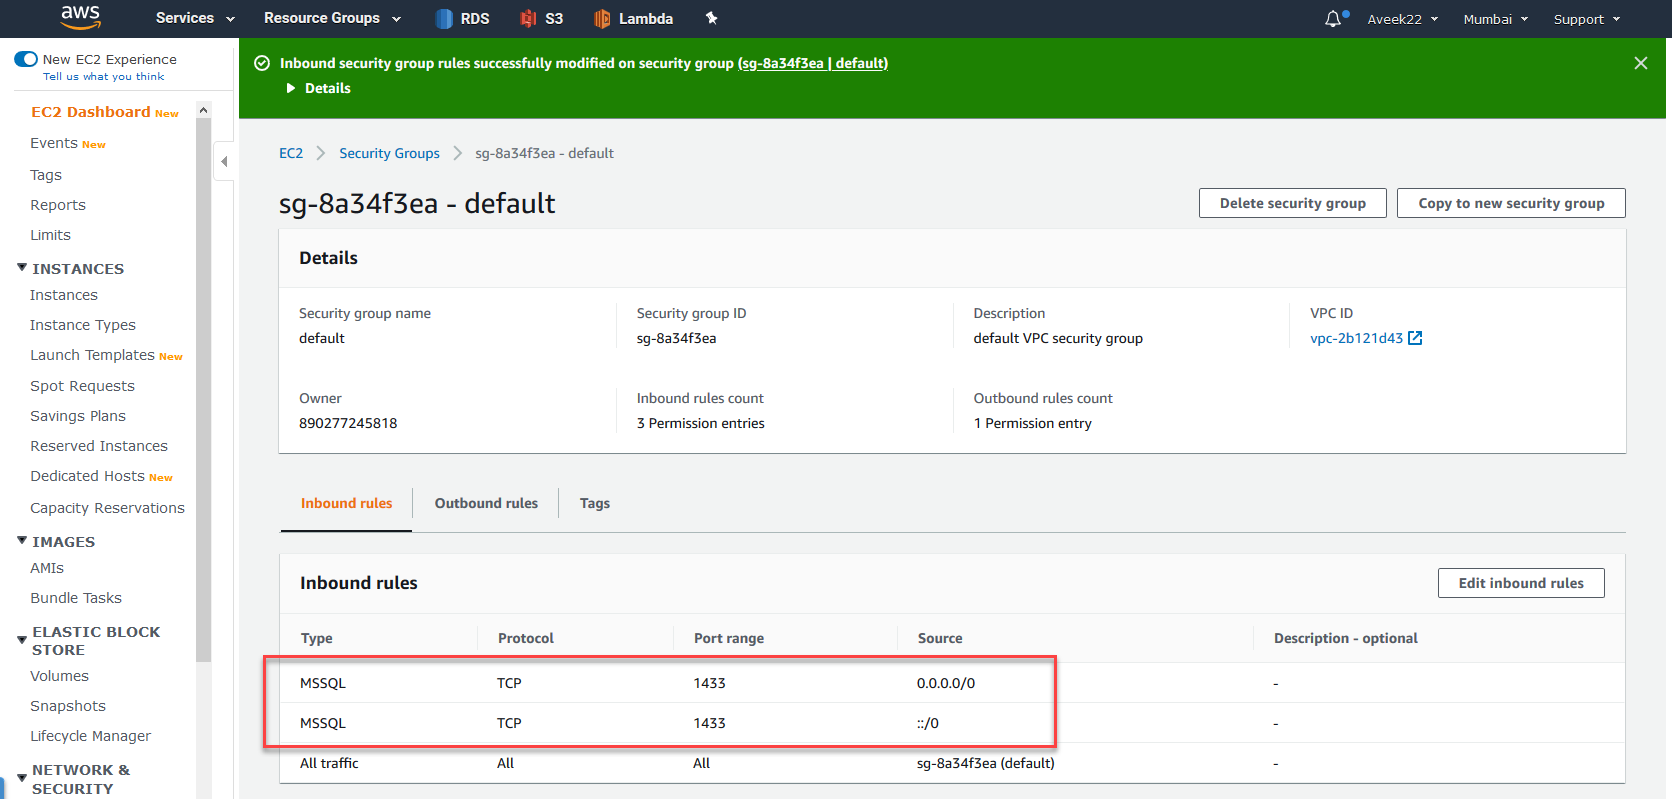
Figure 15 – Inbound Rules
Step 4: Connecting to the RDS Environment
Start the SQL Server Management Studio and provide connection details. Enter the endpoint that we selected in the previous steps as the Server Name. Provide the username and the master password that we had set while creating the database.
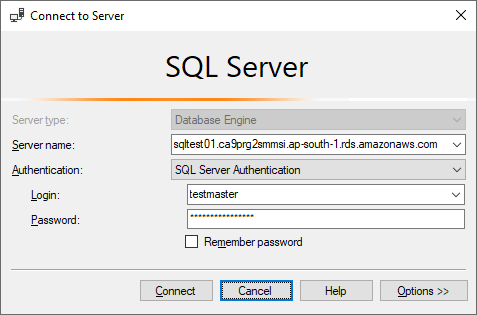
Figure 16 – Connecting using SSMS
You can see that the connection to the RDS database is successful and a default database with the name RDS is available.
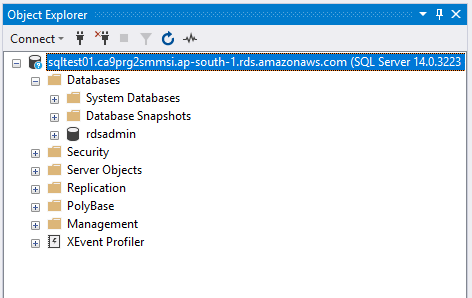
Figure 17 – RDS Connection Successful
Step 5: Additional Configuration for restoring a backup
In order to restore a backup from a local PC to the RDS database, it is essential that we first upload the backup (BAK) file to AWS S3. You can think of S3 as a file system on the cloud, like OneDrive or Google Drive. Also, we will need to configure the Subnet Groups and Option Groups for the database in order to restore the backup from S3.
Click on Subnet Groups and provide the details as shown in the figure below. Select the default VPC and click on Add all the subnets related to this VPC.
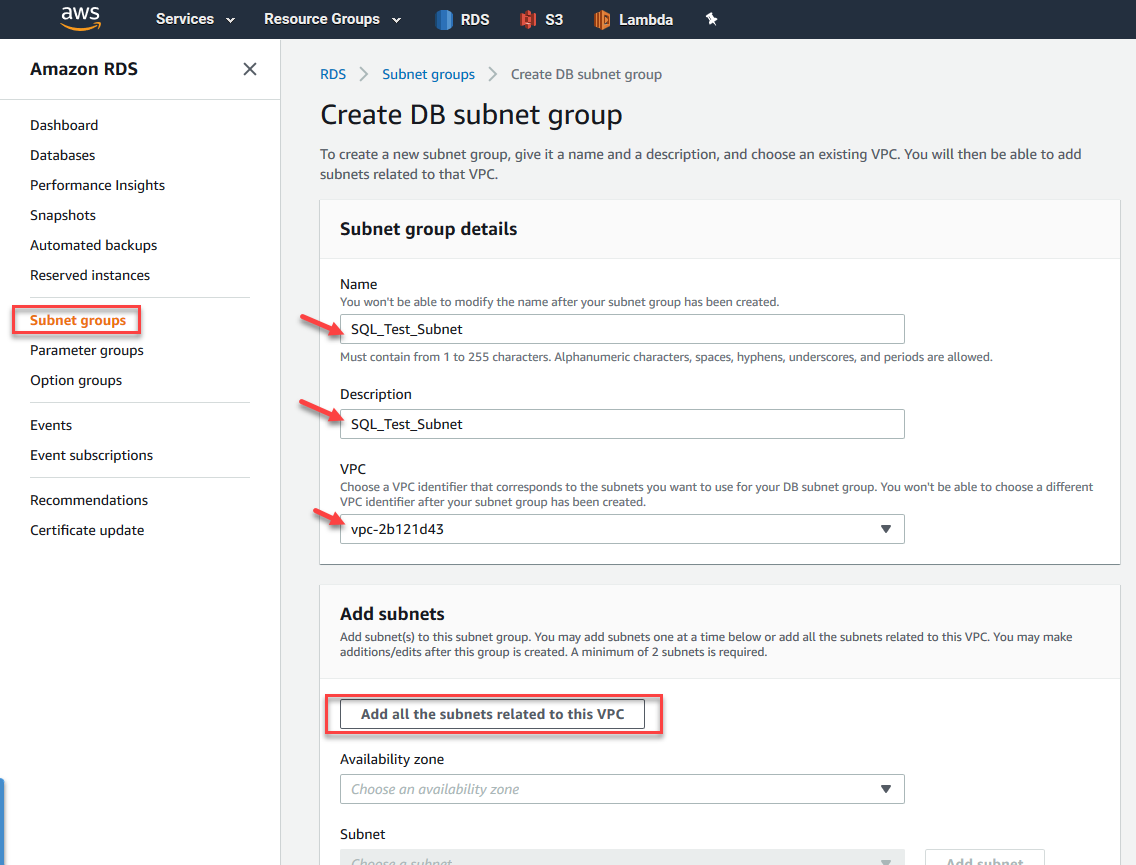
Figure 18 – Creating DB Subnet Group
Scroll below and click on the Create button to create the DB subnet group.
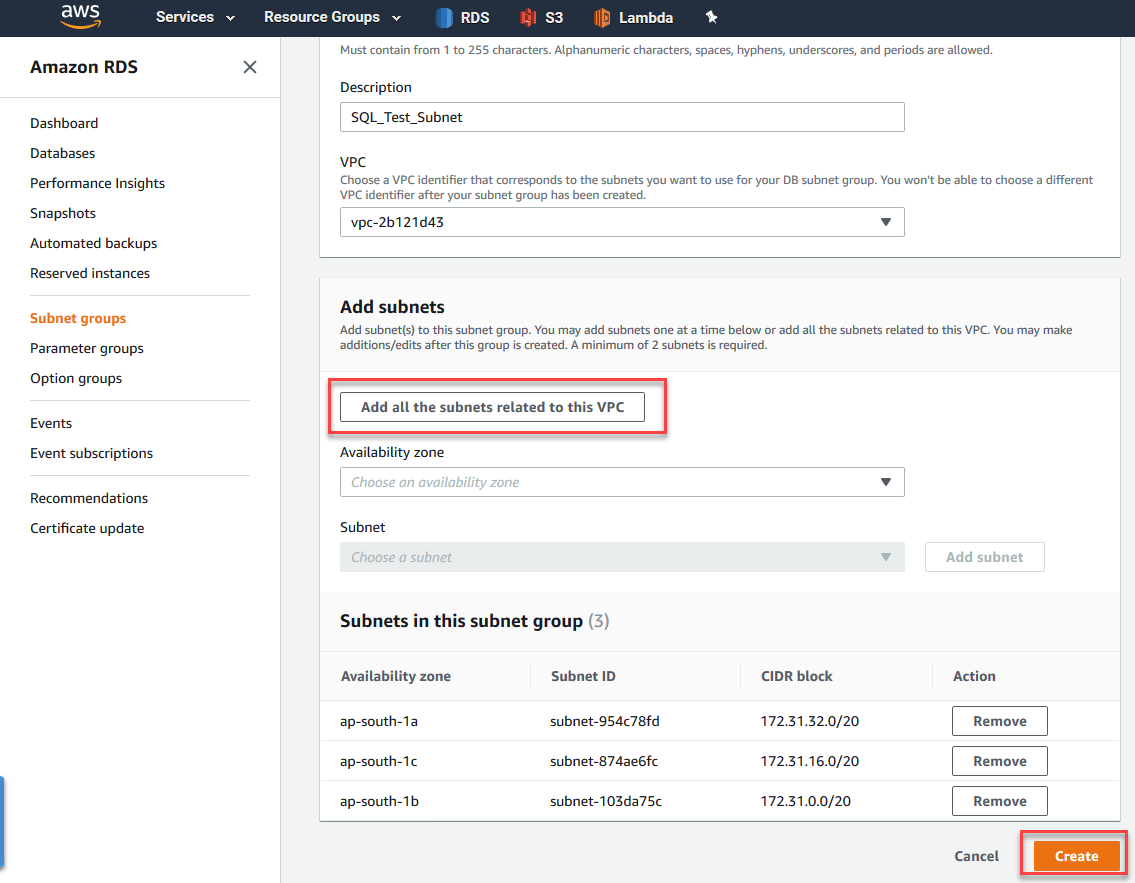
Figure 19 – Creating DB Subnet Group
You can see the DB Subnet Group once created.
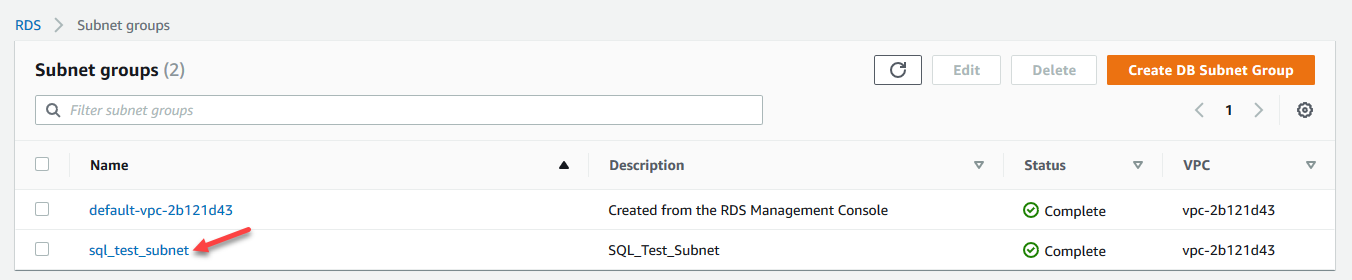
Figure 20 – DB Subnet Group Created
The next step is to set up the option group where we will define which option we would like to choose. In this case, we will choose the option to restore a database.
Click on Option Groups on the left-hand pane. Provide the details as shown in the figure below. Select sqlserver-ex as the Engine and the Engine Version as 14. Click on Create once completed.

Figure 21 – Creating Option Group
Once the option group is created select it and click on Add option. This will enable us to add options for the option group that we selected.
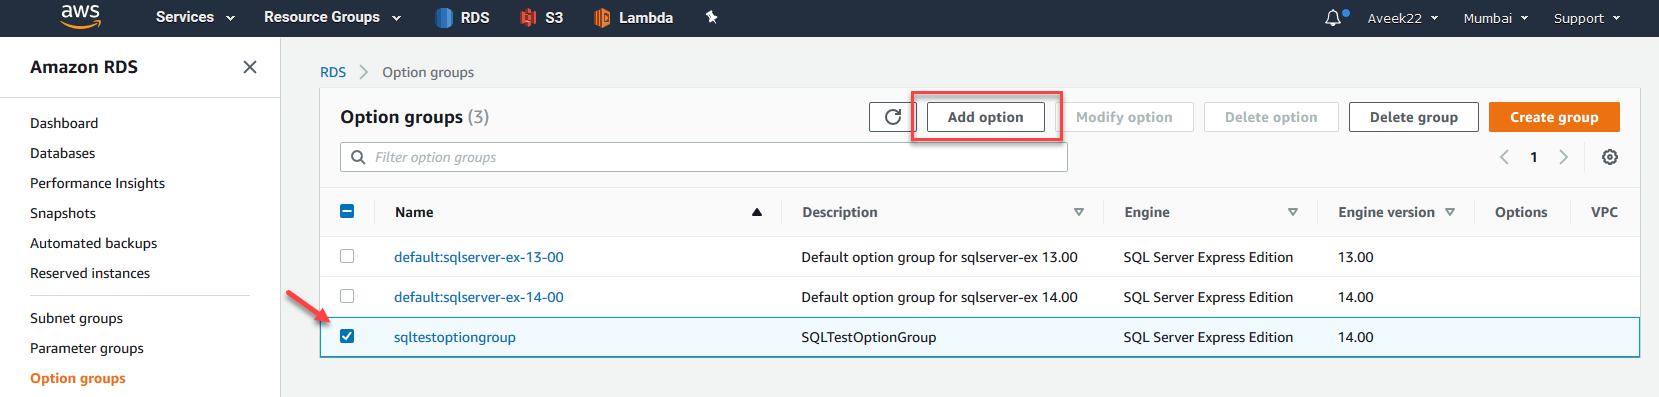
Figure 22 – Add Options
In the Add Option page, select the option as SQLSERVER_BACKUP_RESTORE. Choose the Create a New Role option and provide a name for the IAM role.
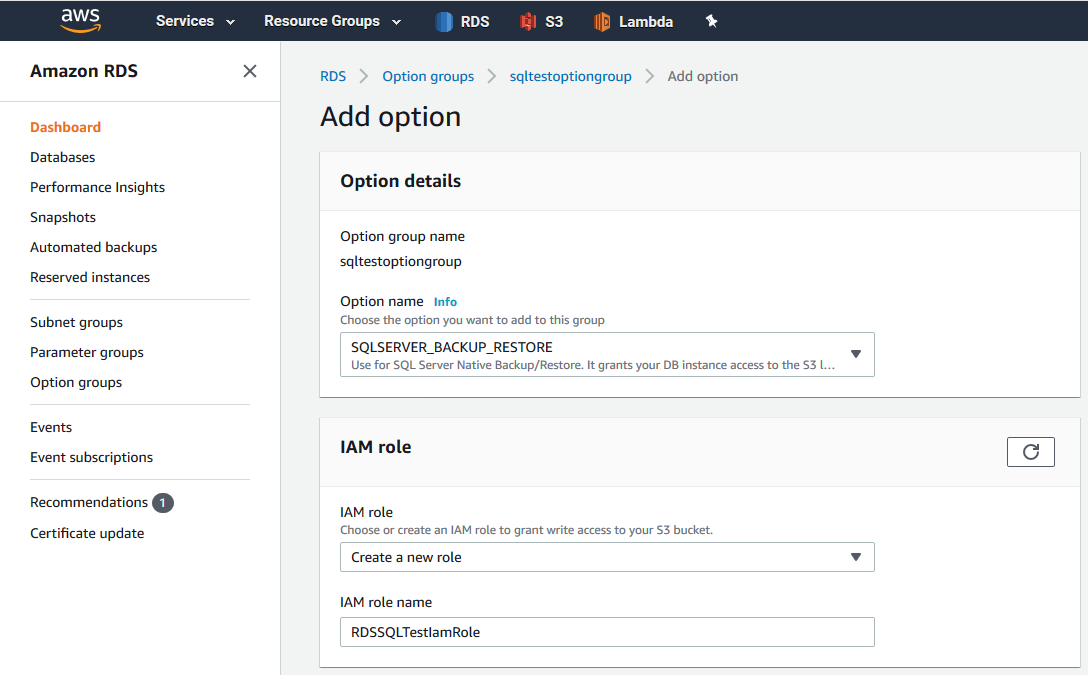
Figure 23 – Selecting Option
The next step is to provide the S3 bucket name from which the backup file will be available. A bucket in S3 is the root level folder once you’re in your s3 console. Select the option as Immediately for scheduling so that the changes are applied right away. Once completed, click on Add option.
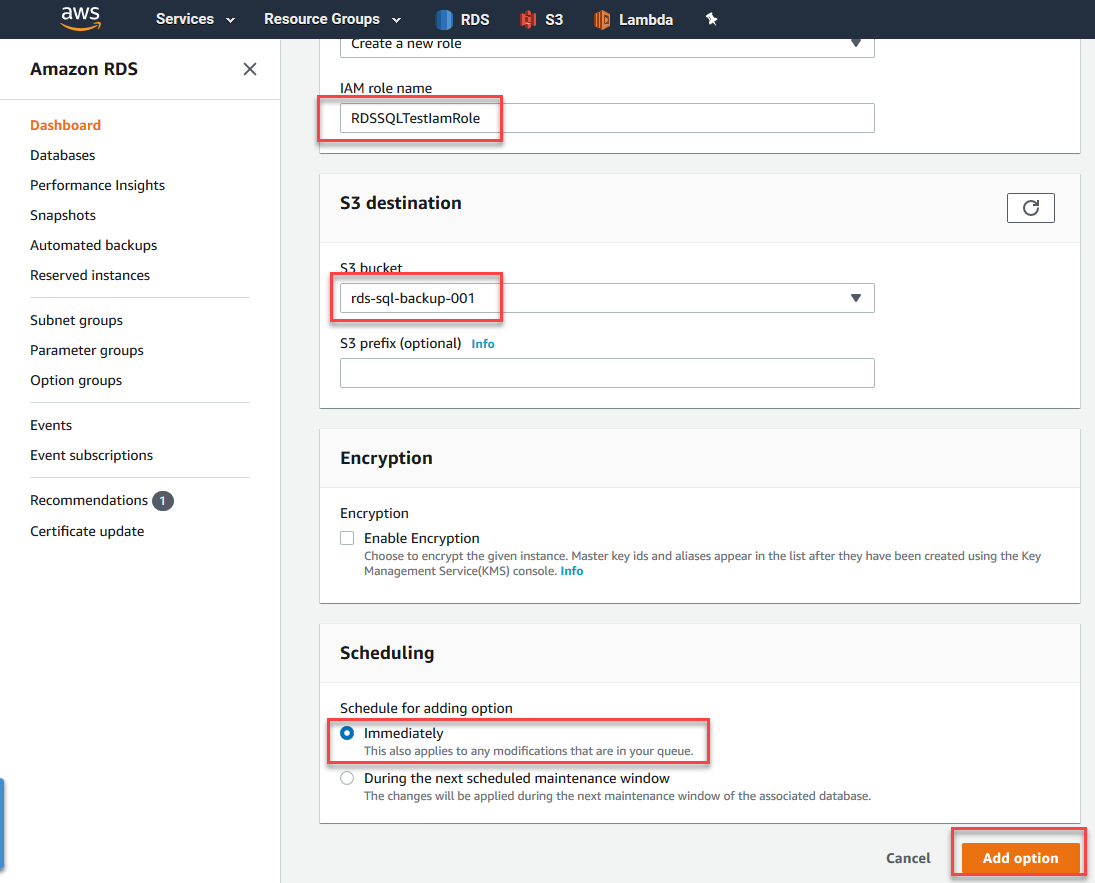
Figure 24 – Add Option
Now that the option group is created, we need to tell the RDS environment to use the new option group that we just created.
Click on Databases on the left-hand pane and click on Modify.
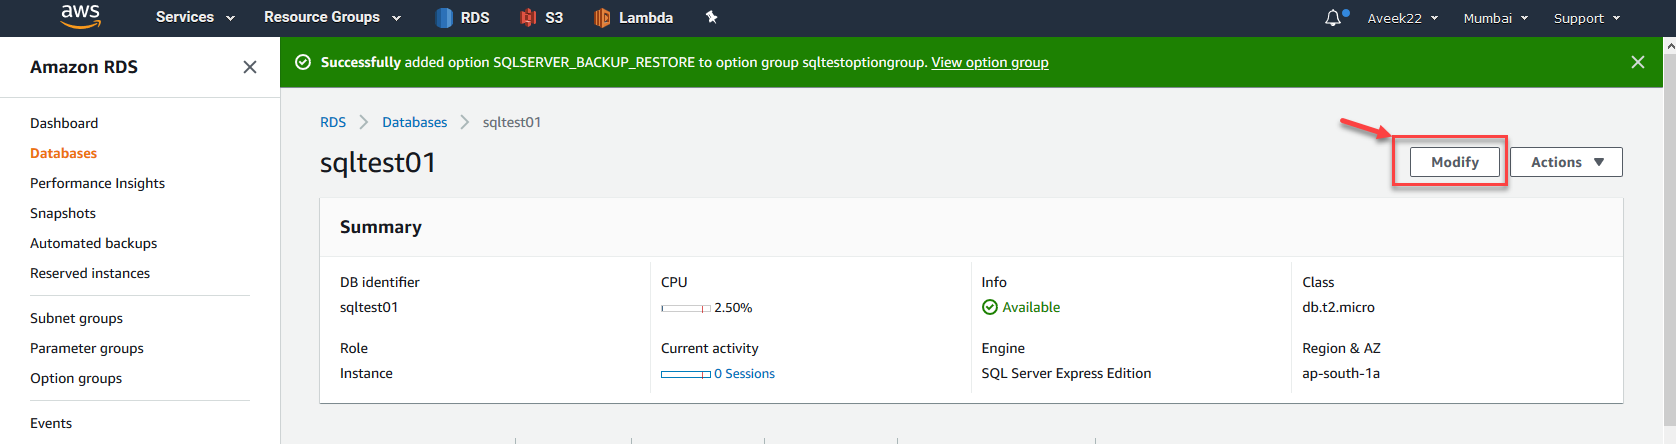
Figure 25 – Modify Database
In the Database options page, select the name of the Option group from the drop-down.

Figure 26 – Selecting Option Group
Step 6: Upload the backup to S3
In order to upload the backup file to S3, navigate to the S3 console in AWS, and open the bucket that you defined in the previous steps. Upload the backup file from your local PC to the bucket.
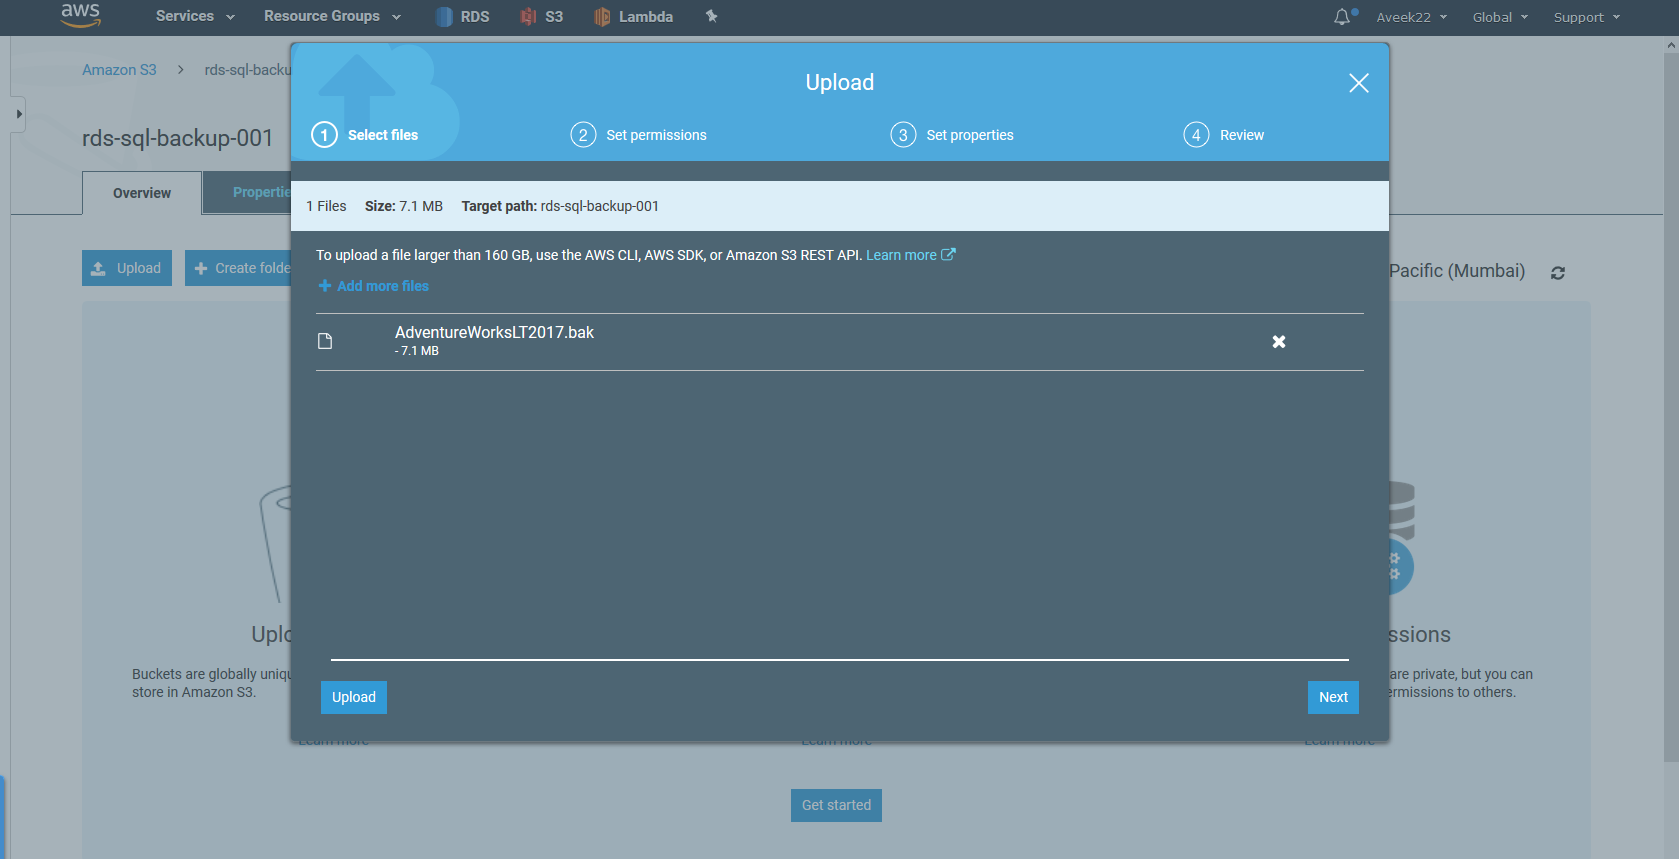
Figure 27 – Uploading Backup File
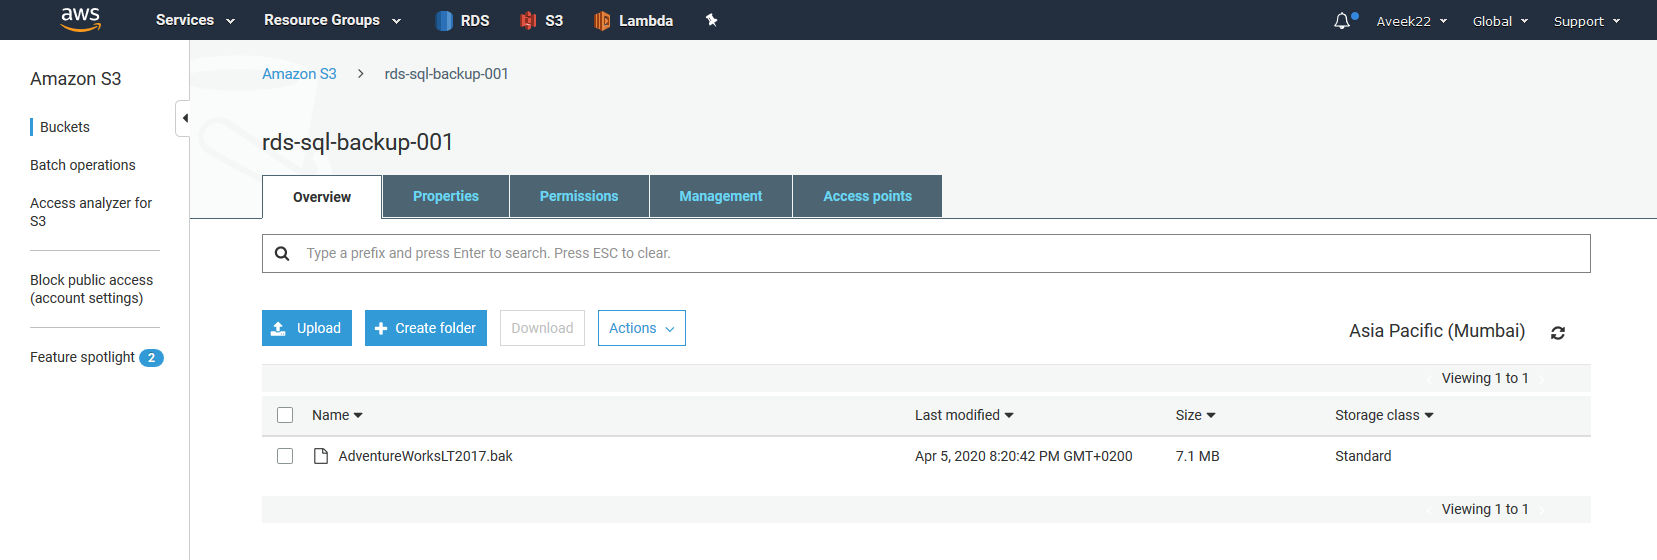
Figure 28 – Backup File Uploaded
Step 7: Restore the Backup
The final step now is to restore the backup from S3 into the RDS environment. In order to do that, simply execute the script below after connecting to the RDS instance. This script will connect to the backup file stored in S3 and restore the backup to the RDS database instance.
|
1 2 3 |
EXEC msdb.dbo.rds_restore_database @restore_db_name = 'AdventureWorks', @s3_arn_to_restore_from = 'arn:aws:s3:::rds-sql-backup-001/AdventureWorksLT2017.bak' |

Figure 29 – Restore Database Script
The restore process might take some time to complete. You can check the status of the restore by running the script below. Once the restore is completed, you’ll see that the value for Lifecycle has been updated to “SUCCESS”.
|
1 |
exec msdb.dbo.rds_task_status |

Figure 30 – Restore In Progress

Figure 31 – Restore Completed
Once the backup is completed, you can also browse the database from the SSMS Object Explorer.
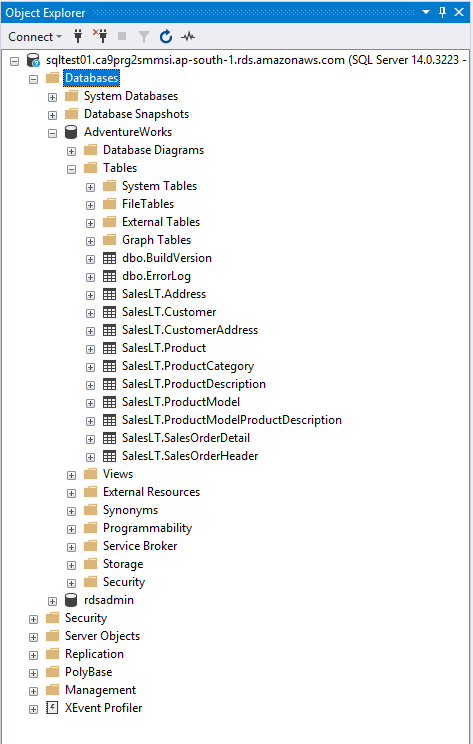
Figure 32 – Browsing the Restored Database in RDS Environment
Conclusion
In this article, I have explained how to configure an RDS environment from scratch and then restore a backup from the local PC to the RDS database.

He is a prolific author, with over 100 articles published on various technical blogs, including his own blog, and a frequent contributor to different technical forums.
In his leisure time, he enjoys amateur photography mostly street imagery and still life. Some glimpses of his work can be found on Instagram. You can also find him on LinkedIn
View all posts by Aveek Das
- Getting started with PostgreSQL on Docker - August 12, 2022
- Getting started with Spatial Data in PostgreSQL - January 13, 2022
- An overview of Power BI Incremental Refresh - December 6, 2021