
With the evolution of the Cloud, specifically talking about Azure, SQL Server team started to take advantage of the new opened horizon. We already discussed pros and cons of send backups to Azure, now let’s check how to do this!
Following the “Hybrid Scenarios series”, we already discussed about the connectivity options, and pros and cons of store our backup files in Azure.
In this article, we will specifically talk about the two options that we currently have, involving Azure: Blob Storage and Managed Backups.
In the end of the day, you will have your SQL Server database’s backup safe, in Azure, but there are some differences that distinguish (a lot) both options.
Let’s check it out!
Backup to Azure Storage
This is the first option that we have, and if your SQL Server version is >= 2012 SP1 CU2, you are covered and can take advantage of this!
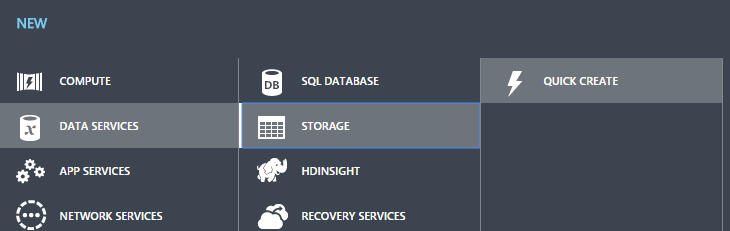
This solution is based on Azure Storage account, so the first step would be create an Azure Storage account. In order to perform this, just go to the Azure Portal and select New > Data Services > Storage > Quick Create
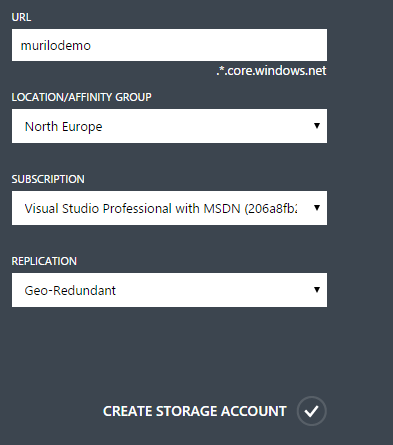
Fill all the details and click on ”Create Storage Account”:
Wait for its creation…

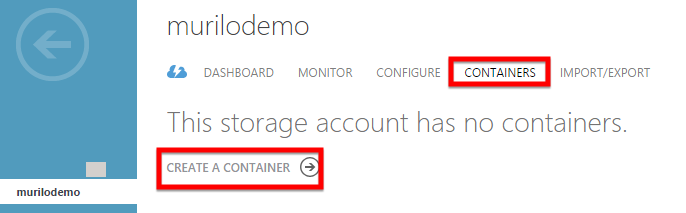
After the creation, go to your Storage Account, and select “Containers” and the option “Create Container”:
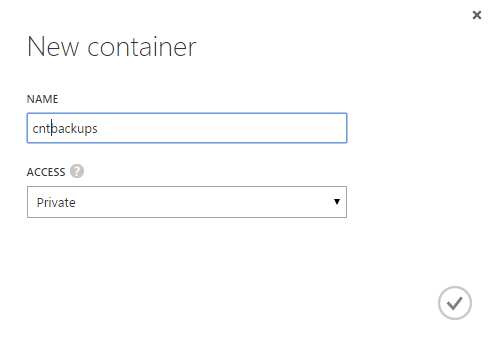
Fill the container’s name, and proceed:
The backup files will be stored in Azure Storage as a Binary Large Object (Blob). A file of any type and size.
Now, go to this link and download your Publishing Profile.
Save the file in your server, and create the Credential. One of the ways to perform this, is proceed as you would perform a backup, as follows:
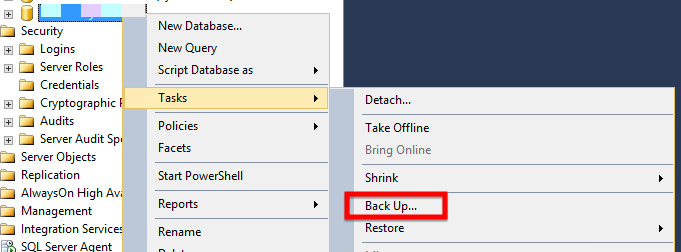
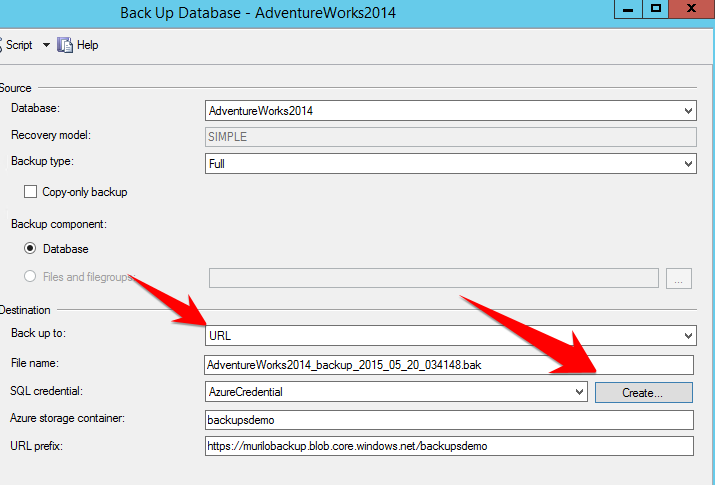
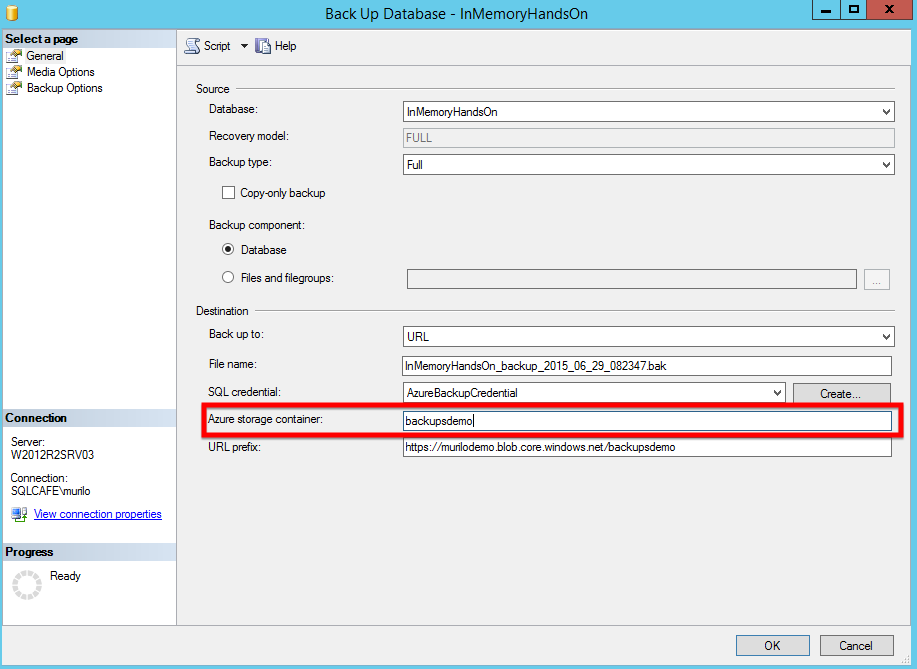
In the backup configuration panel, select the option to Backup to URL and click in the “Create” button (PS: In the image, I already have a credential created):
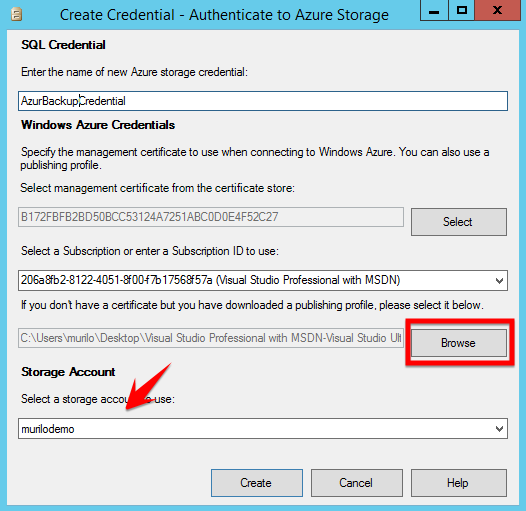
The following windows will be opened. Click in “Browse” and select the Publishing Profile that you just downloaded. Select the Storage account and click on create:
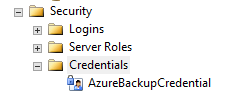
After that, you will notice that the credential will be created, if you check under Security -> Credentials, in SSMS.
Going back to the Backup window, you will notice that you already have a credential in the list-box labeled as “SQL Credential”. Jut select the created one and fill the “Azure storage container” field, with the one that you created in the beginning of this guide.
After that step, you are ready to use Azure Blob Storage as your backup’s container!
Let’s generate the backup script, from the UI:

Notice that now we are referring to an URL as backup destination and also passing the created credential as the one holding the information to connect and write into that Azure container.
What about maintenance plans? I, personally, don’t like to use the native SSMS Maintenance Plans. I rather prefer the nice scripts from Ola Hallengren, SQL Server MVP.
However, the maintenance plans are there, and a lot of people use this… And here’s a good news for the maintenance plan’s lovers: This is following SQL Server’s evolution. By adding a “Back Up Database Task” we can set, in the “General” tab, to backup to an URL.

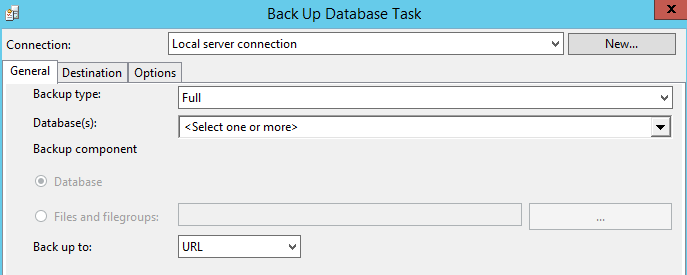
By choosing the URL option, you will need to set the “Azure Storage Container” in the “Destination” tab.
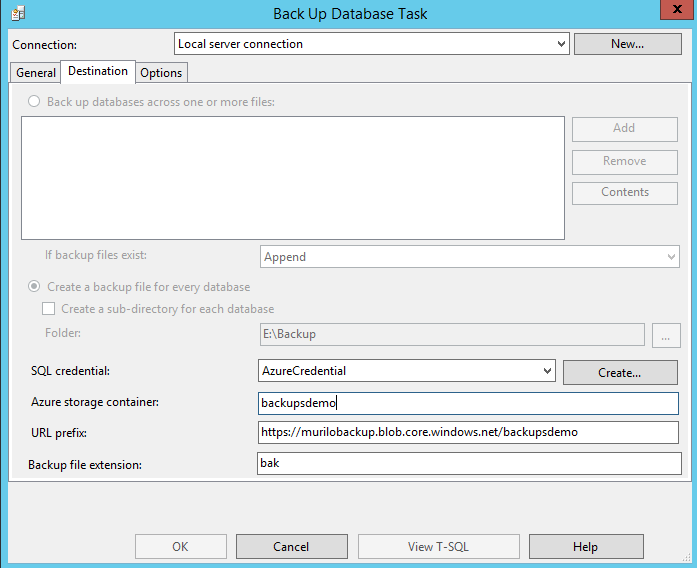
After that, just follow as normal and set the other options.
Well, this is pretty much it about backup to Azure Storage. So now we can go ahead and check the next option…
Managed Backups
As the option that we just saw, the objective of Managed Backups is keep the backup files in the Azure Blob Storage. So what is the difference here?
To start, the Managed Backups are available from SQL Server 2014 only (not in SQL Server 2012) and there’s an additional gain here…In order to explain that gain, let’s see an example.
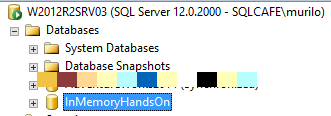
I have the following database:
That database is set in FULL Recovery Model. The used backup strategy is:
- Daily FULL backups
- Transaction log backups at every 15 minutes
- The backup retention policy is 2 months
<Attention this is not a real scenario :)>
Is that strategy right? Nobody cares, this is just a company policy, and even if this database is not modified more than one time per week, we need to follow this rules.
Here is the result of the constant backups:
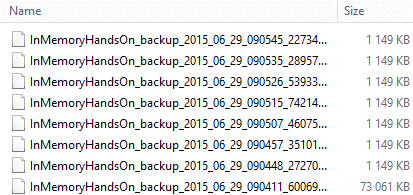
We have almost no activity in the database, but log backups at every 15 minutes, generate files of 1.15 Mb even if there’s nothing new.
In the end of the day we would have 96 transaction log backups, and even without activity, those files will be taking, at least, 110 Mb! And I’m not counting with the FULL backup here… With a 2 months retention policy, we will have 6.6 GB of useless backups.
The DBAs already alerted the management about this, but there’s a problem: nobody can predict when the database activity is going to happen…And normally when it happens, a lot of changes are made.
So, to be safe, they decided to keep it this way.
</End of that fabulous scenario>
Why all that story?? Just to show the utility of the new Managed Backup! Apart of all the advantages in send the backup files to Azure, this feature has also the capability of automate the backups, based in a retention period! This retention period can variate from 1 to 30 days.
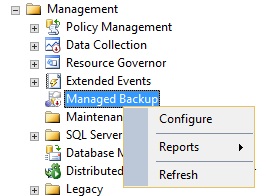
The Managed Backup can be enabled from the SSMS, just going to Management, and clicking on “Configure” option.
Just mark the “Enable managed backup” option, select the retention period, the credential, click ok, and we are done!

How it works?
We can split this in two parts:
- FULL Backup
Basically, a full backup is made under one of the following situations:- When Managed backup is enabled
- The log grows more than 1Gb
- The last FULL Backup is 1 week older
When the log backup chain breaks
- Transaction Log Backup
There are also some conditions that trigger a t-log backup:- When a FULL Backup is performed
- When there are no log backups (ever)
- If the t-log grows more than 5Mb
- When the last log backup is 2 hours older
As you can see, based on simple events, Microsoft automated the backup process, and if you think, this makes sense! I’d like to have it working for on-premises as well 🙂
Something important, when we activate the feature, the already existing database won’t be added to the Managed Backups radar, we need to do this manually.
The following code is enabling the Managed Backups in the “DemoDB” database:
|
1 2 3 4 5 6 7 8 9 10 11 12 13 |
USE msdb; GO EXEC smart_admin.sp_set_db_backup @database_name='DemoDB' ,@enable_backup=1 ,@retention_days =30 ,@credential_name ='AzureCredential' ,@encryption_algorithm ='AES_256' ,@encryptor_type= 'Certificate' ,@encryptor_name='MyBackupCert' GO |
For all newly created database, it will take care.
If you want to disable the backups in a specific database, just run the following:
|
1 2 3 4 5 6 7 8 |
Use msdb; Go EXEC smart_admin.sp_set_db_backup @database_name='<DATABASE_NAME>' ,@enable_backup=0; GO |
You can find more details in the official documentation, including some functions that help us manage this feature, as we do not have much options in the SSMS UI:
SQL Server Managed Backup to Microsoft Azure
I hope this was useful! I’m going to publish more articles, showing how to integrate on-prem and Azure.
Thank you!

With experience working in Portugal, Holland, Germany and United Kingdom, he's always available to learn and share his knowledge, in order to contribute to SQL Server community,
View all posts by Murilo Miranda
- Understanding backups on AlwaysOn Availability Groups – Part 2 - December 3, 2015
- Understanding backups on AlwaysOn Availability Groups – Part 1 - November 30, 2015
- AlwaysOn Availability Groups – Curiosities to make your job easier – Part 4 - October 13, 2015