
Introduction
Database backups are important and always something you should have in any environment. Outside of needing them to restore a given database they have some information that can be useful in certain situations. One situation I found them convenient is with consolidation projects. If the databases are online you can obviously go to the source SQL Server instance to gather that information, but as a consultant I don’t necessarily have access to every environment. You may have the same issue if you are being brought into a project and your customer or department manager just wants you to advise on how you would setup the server. One easy request is to have them point you where the backups are stored and ensure you have access to the files.
The backup of a database can tell you everything from the compatibility level of the database to the date the database was created. You can find out the physical file names, size, and even the disk block size where the database was stored on the source server. The size is the information I am most interested in with consolidation projects. I can utilize this to analyze how much storage space I will need for the new server, and work out how I am going to need that storage carved up.
After I get all that information together I pull it into Excel and then utilize pivot tables to calculate out the storage totals for all the databases, and can also create tables on drive letter or file type. I found PowerShell to be the best method, for me, to pull all the information out of the backup files into a format I could bring into Excel. I did actually consider writing PowerShell that would put it directly into Excel for me but that is not a strong area I use often so decided against it for right now. In this article I want to share the tool I created for this in PowerShell. I will then go through how I build the Pivot tables in Excel.
The Script
Let me introduce you to, “GetBackupInformation.ps1”. This script will look like it does a good bit, but is pretty basic. I have included help information along with comments in the script itself to help with two things: (1) You learn how to use the script and (2) you possibly learn some new things with PowerShell. A few points about this script:
- Minimum required is PowerShell 3.0 or higher.
- You will need access to at least one SQL Server instance, but it can be Express Edition.
- The data is output to the console or a parameter is provided to spit it to a CSV file. **
- The Connection String and Delimiter parameters I set to default vales, so you can change those to your environment or pass them each time.
** I added the ability for this script to output to the console in the event you may want to send this data to another source altogether (Power BI, database, etc.). It is up to you once you have the output to take it and do what you want.
The background of this script came from having to use this process a few times, I decided to finally sit down and make it more robust. It could have been made complex by using SMO to read the backup files but I like shortcuts. I settled on just using T-SQL RESTORE command to read the backup file information, this is the reason a SQL Server instance is required. The script will simply execute “RESTORE FILELISTONLY” and “RESTORE HEADERONLY” against each backup file path that is passed to the script, which even on large backups these commands should only take a few seconds to execute, (should). The script will handle reading a single backup, multiple backup files, or a single backup file with multiple backups (backup set).
|
1 2 3 4 5 6 7 8 9 10 11 12 13 14 15 16 17 18 19 20 21 22 23 24 25 26 27 28 29 30 31 32 33 34 35 36 37 38 39 40 41 42 43 44 45 46 47 48 49 50 51 52 53 54 55 56 57 58 59 60 61 62 63 64 65 66 67 68 69 70 71 72 73 74 75 76 77 78 79 80 81 82 83 84 85 86 87 88 89 90 91 92 93 94 95 96 97 98 99 100 101 102 103 104 105 106 107 108 109 110 111 112 113 114 115 116 117 118 119 120 121 122 123 124 125 126 127 128 129 130 131 132 133 134 135 136 137 138 139 140 141 142 143 144 145 146 147 148 149 150 151 152 |
<# .SYNOPSIS Script to pull out information about backup files .DESCRIPTION Script to pull out information of a single or multiple backup files .PARAMETER connectionString String. Connection string to connect to SQL Server instance. .PARAMETER bacupfiles System.IO.FileInfo array. File information array. .PARAMETER csvFile String. Full path to CSV file for output of backup information, file is deleted if it exist. .PARAMETER delimiter String. Delimiter for CSV file. .EXAMPLE Output backup information to console of all backups in directory, using SQL Server instance on local host GetBackupInformation -cn "Server=localhost;Integrated Security=true;Initial Catalog=master;" -backupFiles (Get-ChildItem C:\temp\backups) .EXAMPLE Output backup information of single backup to console, using SQL Server instance on local host GetBackupInformation -cn "Server=localhost;Integrated Security=true;Initial Catalog=master;" -backupFiles (Get-ChildItem C:\temp\backups\MyBackup.bak) .EXAMPLE Output backup information to CSV of all backups in directory, using SQL Server instance on local host GetBackupInformation -cn "Server=localhost;Integrated Security=true;Initial Catalog=master;" -backupFiles (Get-ChildItem C:\temp\backups) -csvFile C:\temp\BackupInfo.csv -delimiter "|" #> [cmdletbinding()] param( [Parameter(Mandatory = $false,Position = 0)] [Alias("cn")] [string]$connectionString = "Server=localhost\number12;Integrated Security=true;Initial Catalog=master;", [Parameter(Mandatory = $false,Position = 1)] [Alias("bkfiles")] [System.IO.FileInfo[]]$backupFiles, [Parameter(Mandatory = $false,Position = 2)] [Alias("csv")] [string]$csvFile, [Parameter(Mandatory = $false,Position = 3)] [string]$delimiter = "|" ) $sqlcn = New-Object System.Data.SqlClient.SqlConnection $sqlcn.ConnectionString = $connectionString try { $sqlcn.Open(); } catch { $errText = $error[0].ToString() if ($rrText.Contains("Failed to connect")) { Write-Verbose "Connection failed." Return "Connection failed to $server" $error[0] | select * } } if ($csvFile) { if (Test-Path $csvFile) { Remove-Item $csvFile -Force } } $result = [pscustomobject]@{BackupFile=$null; DatabaseName=$null; CompatibilityLevel=0; RecoveryModel=$null; LogicalName=$null; FileGroupName=$null; sizeMB=0; sizeGB=0; Type=$null; LocalDrive=$null} foreach ($b in $backupFiles) { $qryHeader = @" RESTORE HEADERONLY FROM DISK = N'$($b.FullName)'; "@ $sqlcmd = $sqlcn.CreateCommand() $sqlcmd.CommandText= $qryHeader $adp = New-Object System.Data.SqlClient.SqlDataAdapter $sqlcmd $dataHeader = New-Object System.Data.DataSet $adp.Fill($dataHeader) | Out-Null $headerRowCount = $dataHeader.Tables[0].Rows.Count if ($headerRowCount -eq 1) { $qryFilelist = @" RESTORE FILELISTONLY FROM DISK = N'$($b.FullName)'; "@ $sqlcmd.CommandText= $qryFilelist $dataFilelist = New-Object System.Data.DataSet $adp.Fill($dataFilelist) | Out-Null $fileListRowCount = $dataFilelist.Tables[0].Rows.Count for ($f=0; $fileListRowCount -gt $f; $f++) { $result.BackupFile = $b.Name $result.DatabaseName = $dataHeader.Tables[0].Rows.DatabaseName $result.CompatibilityLevel = $dataHeader.Tables[0].Rows.CompatibilityLevel $result.RecoveryModel = $dataHeader.Tables[0].Rows.RecoveryModel $result.LogicalName = $dataFilelist.Tables[0].Rows[$f].LogicalName $result.FileGroupName = $dataFilelist.Tables[0].Rows[$f].FileGroupName $result.sizeMB = $dataFilelist.Tables[0].Rows[$f].size/1mb $result.sizeGB = $dataFilelist.Tables[0].Rows[$f].size/1gb $result.Type = $dataFilelist.Tables[0].Rows[$f].Type $result.LocalDrive = $null if ($csvFile) { $result | Export-Csv -Path $csvFile -Delimiter $delimiter -NoClobber -NoTypeInformation -Append } else { $result } } #end for fileListRowCount } # end single backup set else { #clearing the contents of the dataset $dataFileList.Reset() for ($h=0; $headerRowCount -gt $h; $h++) { #for getting backup info within backup set need to specify file number $fileNum = 1 $qryFilelist = @" RESTORE FILELISTONLY FROM DISK = N'$($b.FullName)' WITH FILE = $($fileNum); "@ $sqlcmd.CommandText= $qryFilelist $dataFilelist = New-Object System.Data.DataSet $adp.Fill($dataFilelist) | Out-Null $fileListRowCount = $dataFilelist.Tables[0].Rows.Count for ($f=0; $fileListRowCount -gt $f; $f++) { $result.BackupFile = $b.Name $result.DatabaseName = $dataHeader.Tables[0].Rows[$h].DatabaseName $result.CompatibilityLevel = $dataHeader.Tables[0].Rows[$h].CompatibilityLevel $result.RecoveryModel = $dataHeader.Tables[0].Rows[$h].RecoveryModel $result.LogicalName = $dataFilelist.Tables[0].Rows[$f].LogicalName $result.FileGroupName = $dataFilelist.Tables[0].Rows[$f].FileGroupName $result.sizeMB = $dataFilelist.Tables[0].Rows[$f].size/1mb $result.sizeGB = $dataFilelist.Tables[0].Rows[$f].size/1gb $result.Type = $dataFilelist.Tables[0].Rows[$f].Type $result.LocalDrive = $null if ($csvFile) { $result | Export-Csv -Path $csvFile -Delimiter $delimiter -NoClobber -NoTypeInformation -Append } else { $result } } #end for fileListRowCount #this is to clear the dataset as we are done with te current data $dataFileList.Reset() #incrementing file number to get the next backup set $fileNum++ } #end for headerRowCount } } #end foreach file #close the connection to SQL Server $sqlcn.Close(); #start up Excel automatically by uncommenting below line #Start-Process Excel.exe |
Example Data
The below screen shot illustrates how the script can be used and provides a sample of what backup information I am pulling:
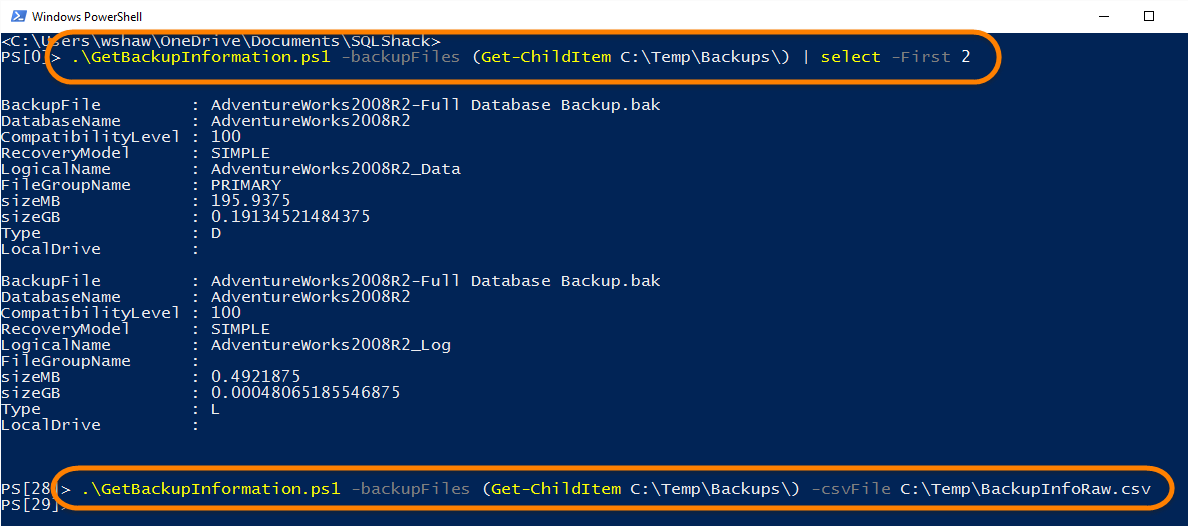
The last command I am utilizing the CSV parameter, and will use that file to import into Excel.
One note, if you notice the “LocalDrive” column is empty. I went ahead and just added this column, but do not currently populate it until I bring the data into Excel. If you have a standard drive letter mapping for data and log drives, you could add some logic to the script to have it populate this column if you wish.
Building the Pivot
I start out just bringing the CSV file into Excel and doing a bit of formatting. I also filled in the “LocalDrive” columns with some drive letters for reference on drive size.

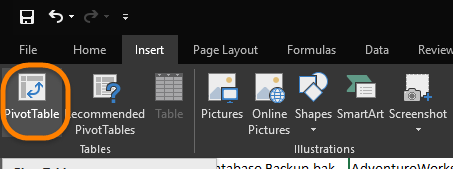
Now you go into the Insert ribbon and click on “PivotTable”:

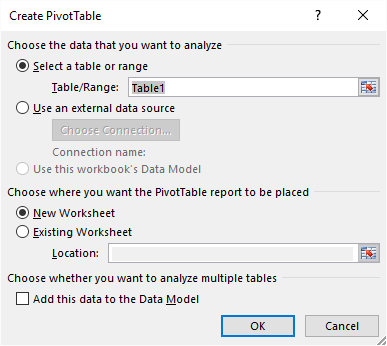
Click OK
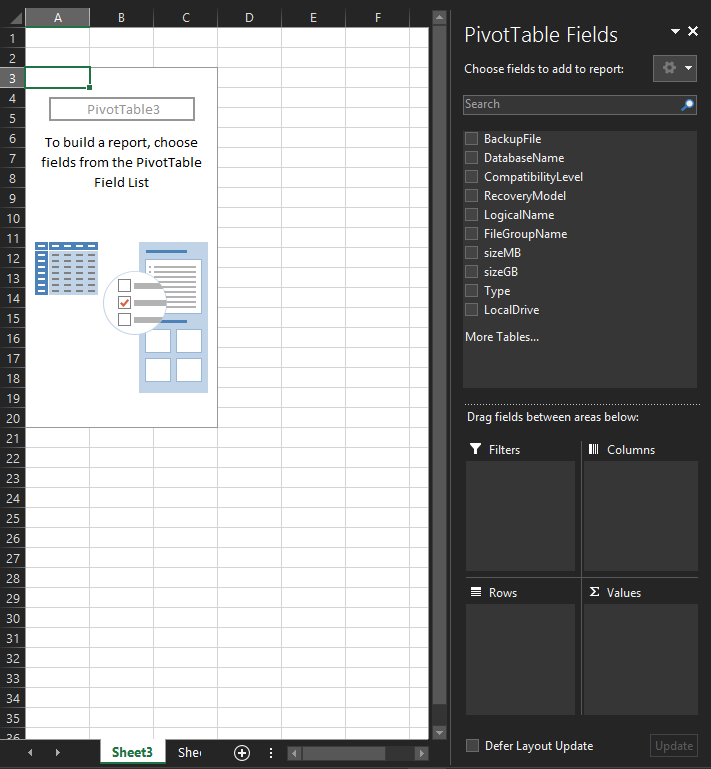
A new worksheet is going to be created and you will be presented with something similar to the below screenshot.
You can now just click on the check box for the data you want to include, and Excel will take a guess where you want it to go (Rows, Columns, etc.). I however tend to just drag and drop where I want it to go.
So just drag the following rows to the noted areas:
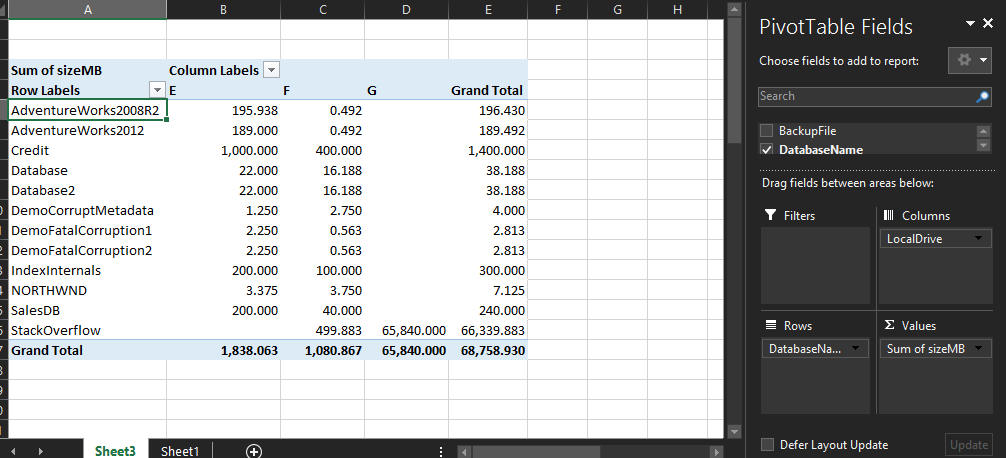
- Rows: DatabaseName
- Columns: LocalDrive
- Values: sizeMB (or sizeGB if you wish)
In the end it should look something like this:
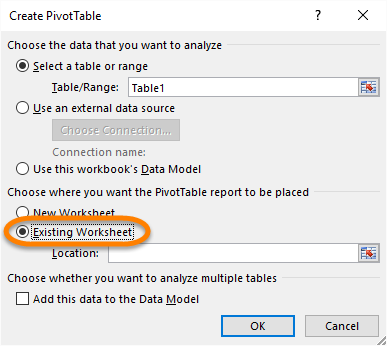
Now I want to add another PivotTable to this same spreadsheet, this new table will show me the size of each database based on “Type” column. You can repeat the above steps and the only change is when you get to the step 2, before you click on OK perform the following step:
Select “Existing Worksheet”
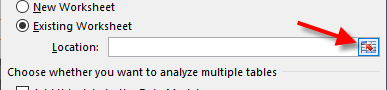
Now click on the location selector
This is just going to point Excel where you want the new table created.
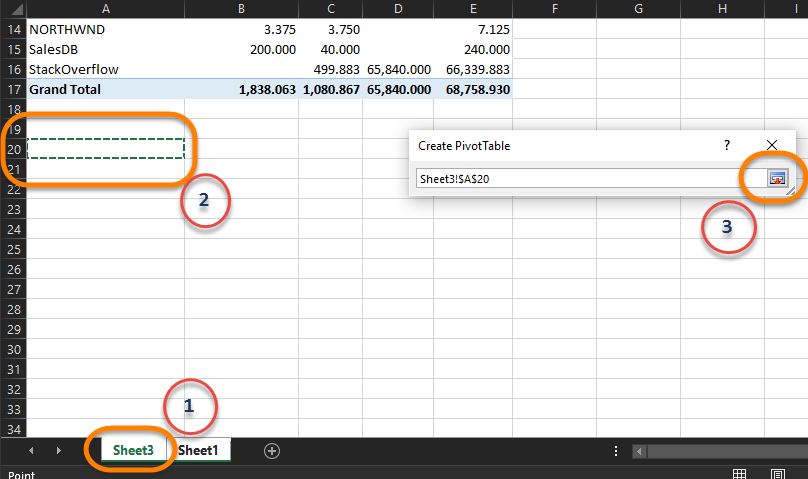
- Click on “Sheet3”
- Click on cell “A20”
- Click on location selector to back to the previous screen
- Click OK.
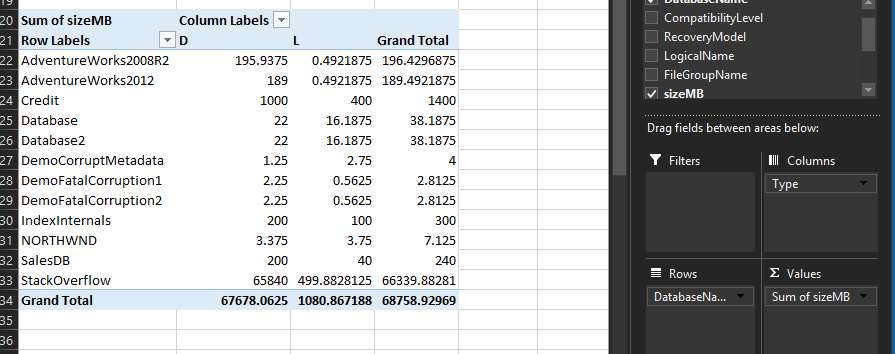
- To create the next table, you follow same as we did above with the exception that “Columns” you would want to use “Type” instead of “LocalDrive” as we did previously.
This should leave you with a table similar to below:
Summary
I hope this script will provide you with some insightful information with any consolidation project you may be working on, or even just in your day-to-day work as a DBA. I have found PivotTables in Excel can help make some tasks as a DBA very quick and easy. If you have not noticed this can also be a good tool for visually showing the numbers in a manner upper management can understand why that purchase request is being submitted for more storage.
References

After spending 6 years in the system and network administration world he found he enjoyed working and learning SQL Server. Since 2010 he has been involved in SQL Server.
He is passionate about PowerShell and automation around SQL Server and Windows. His experience is focused in SQL Server administration and some BI development (SSIS, SSRS).
View all posts by Shawn Melton
- Learning PowerShell and SQL Server – Introduction - April 23, 2018
- Connecting PowerShell to SQL Server – Using a Different Account - January 24, 2017
- How to secure your passwords with PowerShell - January 18, 2017