
In continuation to the part 1, on how to setup a SQL Server Availability Groups, let’s now check how to create the Availability Group itself and put the databases in sync.
For this purpose, we will be using the “New Availability Group” wizard. To access this option, expand the “AlwaysOn High Availability” node and right click the “Availability Groups” folder.

A new window will be presented, with a summary of in what the wizard will help us. You can see an example in the next image.

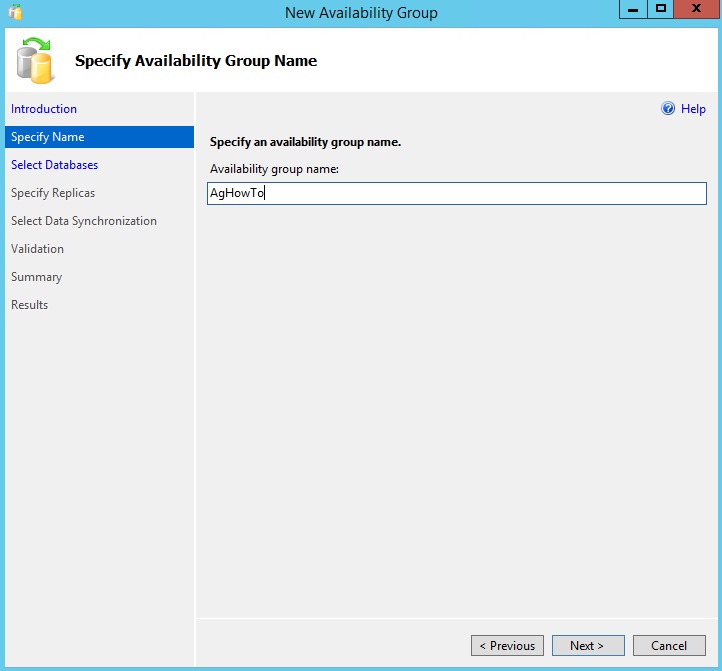
Click “Next” to proceed, and let’s start the actual configuration. In the first step we need to input an Availability Group name. This is just a name to help us identify a group, nothing related with the listener.
I will be using the name “AgHowTo” in order to demonstrate all the steps to follow. Fill the name, as desired, and click “Next”.
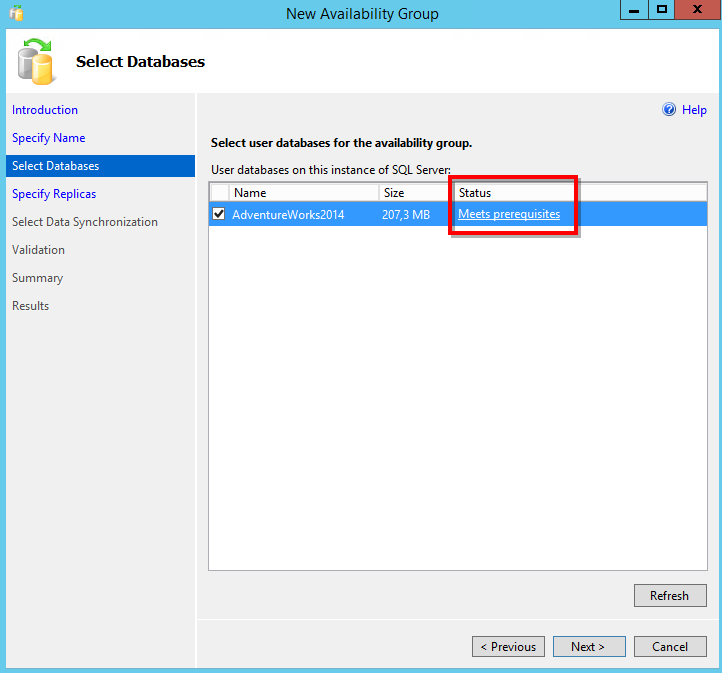
On this second step, we will be asked to select all the databases that we want to include in our Availability Group.
Notice that there’s a column “Status” where the message “Met the prerequisites” is being shown. To meet the prerequisites, the wizard means that our database is in the FULL recovery mode, and that we have a FULL backup (at least one, to start the chain), and a subsequent transaction log backup or a differential backup.
If the database is not meeting the basic requisites, just verify the referred points, and click in the “Refresh” button, in order to have an updated list of the available databases.
Select all the databases that you want to include on this Availability group, by picking the checkbox in the first column. Now click “Next”.
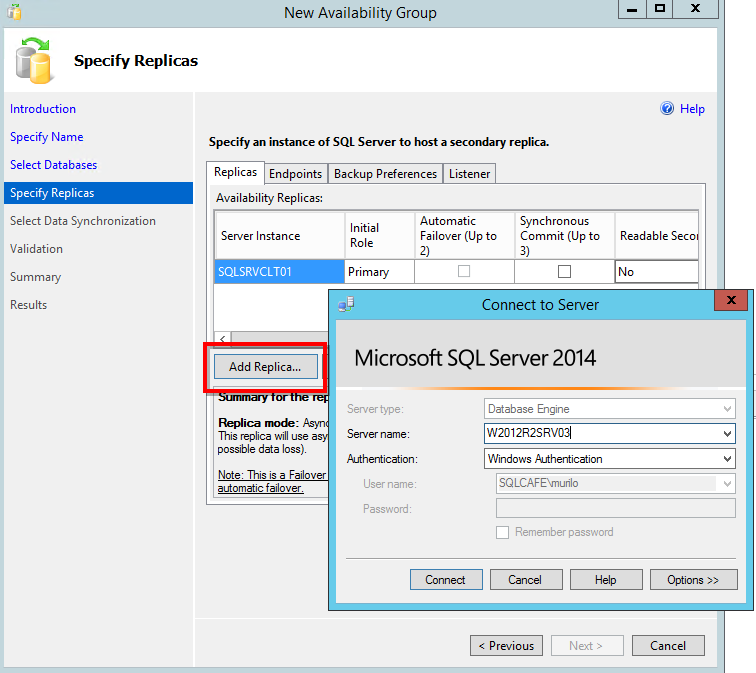
It’s time to add the replicas! Notice that a primary replica (the current instance) is already added. In order to add another replica, click the “Add Replica” button, perform the login, which can be by Integrated Security or SQL Server Login, and a new replica will be available in the “Replicas” list.
Notice that you can always include more than one replica. Currently, we have a limit of 8 replicas for SQL Server 2014 and a limit of 4 replicas for SQL Server 2012.
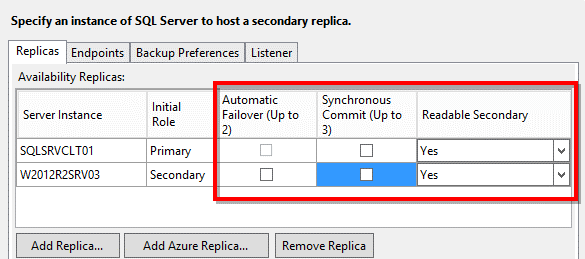
To proceed with this article, I added only one more replica, the standalone SQL Server. You need to take a decision of what will be the role of your replicas. You can choose to have readable, read-intent, or non-readable secondary. This option makes all the difference, when you are looking to have a load-balancing solution, a high availability solution or just a disaster recovery instance.
Notice that the synchronization mode is also very important, where you need to choose to have a Synchronous commit – you need to receive an ack message from the secondary replica in order to successfully complete the transaction – or an Asynchronous one, where the acknowledge message is not required.
In that same step, you can also set if a certain replica will be available for automatic failover. In case of this need, remember that you need to have this replica marked as “Synchronous Commit” in order to assure that no data is lost in the case of an unplanned failover.
To finalize this step, just as information, you can also add an Azure Replica, but this is something to talk on another occasion…
Click “next” to proceed.
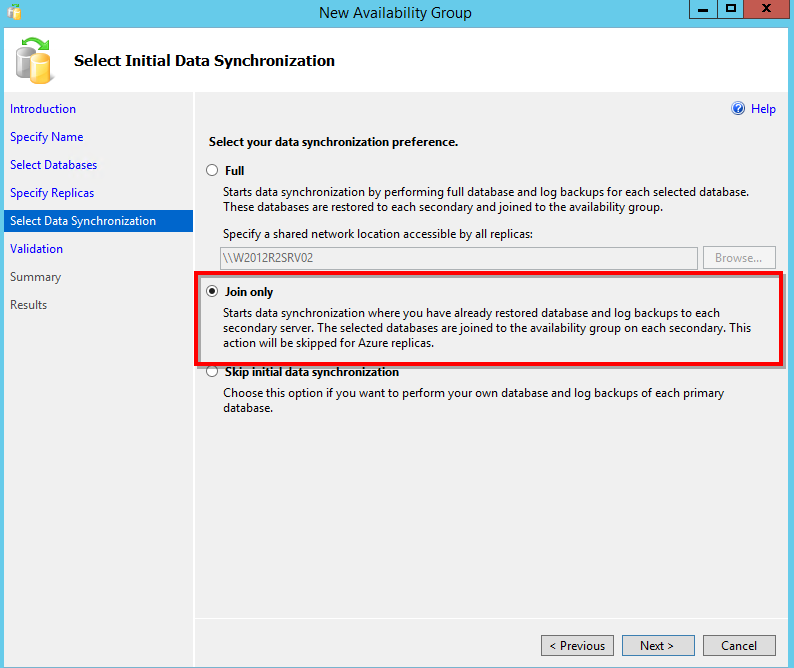
Now it’s time to select the preference for the initial data synchronization. In our case we will pick the “Join only” option, because we already have a replica with the full and t-log backups restored and open to receive new data, as the database is “In Recovery” mode.
You have two more options, the first is the “Full” option. Going to this way, you will need to refer some fileshare where SQL Server will perform and save the required backups of the selected databases and will use it to restore each one in the added secondary node.
The last option is “Skip initial data synchronization”. Use this option if for any reason you don’t want to synchronize the databases now.
<quick note>
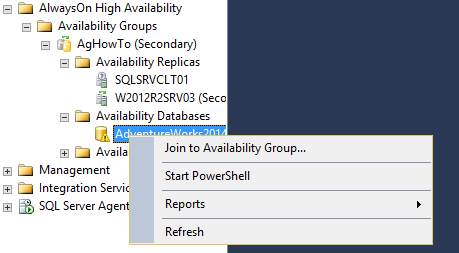
In order to go ahead and add a new database in the Availability Group, you will need to perform all the steps already described in the part 1 of this article, and from the secondary node right-click the database under the folder “Availability Databases” and choose the first option “Join to Availability Group” .
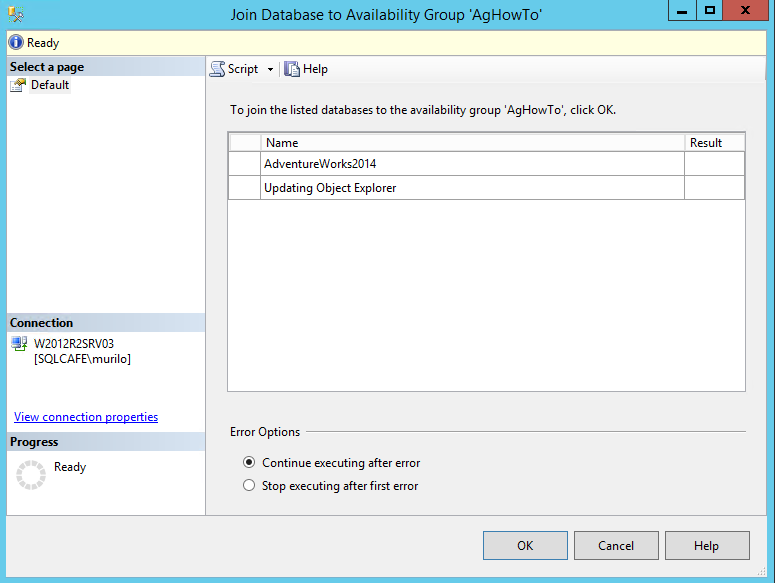
A new window will be shown, in order to confirm your intention. You just need to click “Ok” and, if the database in the secondary instance is ready, this should work fine and start synchronizing the respective secondary replica with the primary replica immediately.
</quick note>
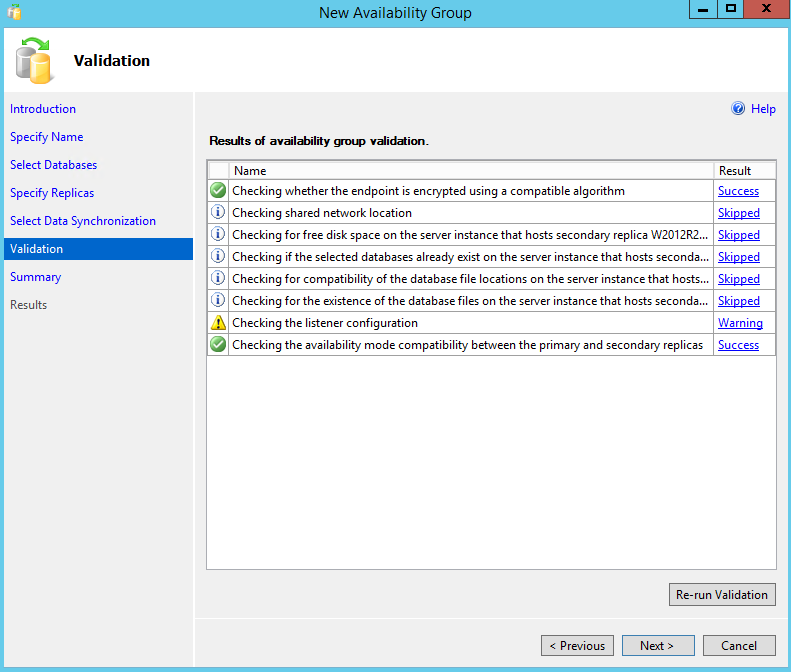
We are almost there! So now SQL Server will run some validation tests, and if we are ok we can click on “Next” and go to summary.
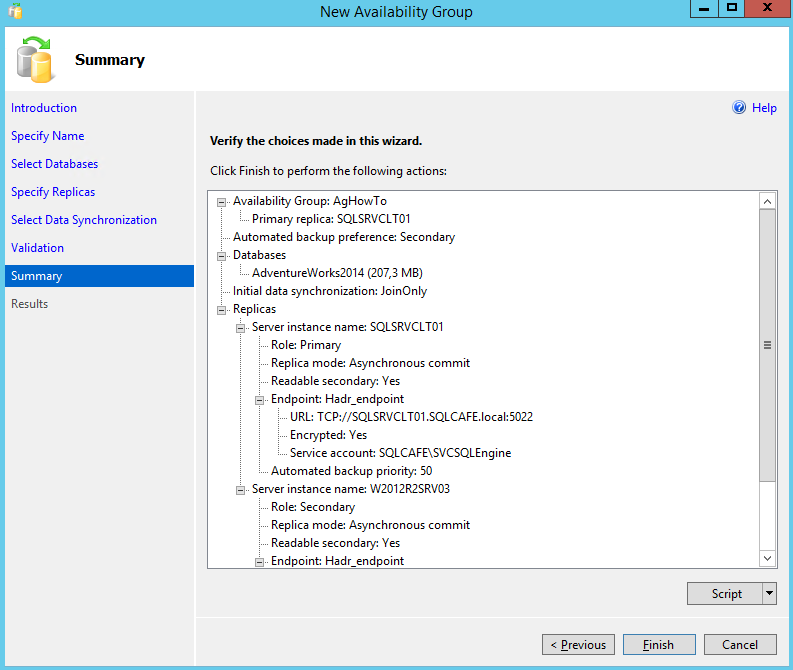
On this step, we just need to review the options taken and advance, by clicking on “Finish”.
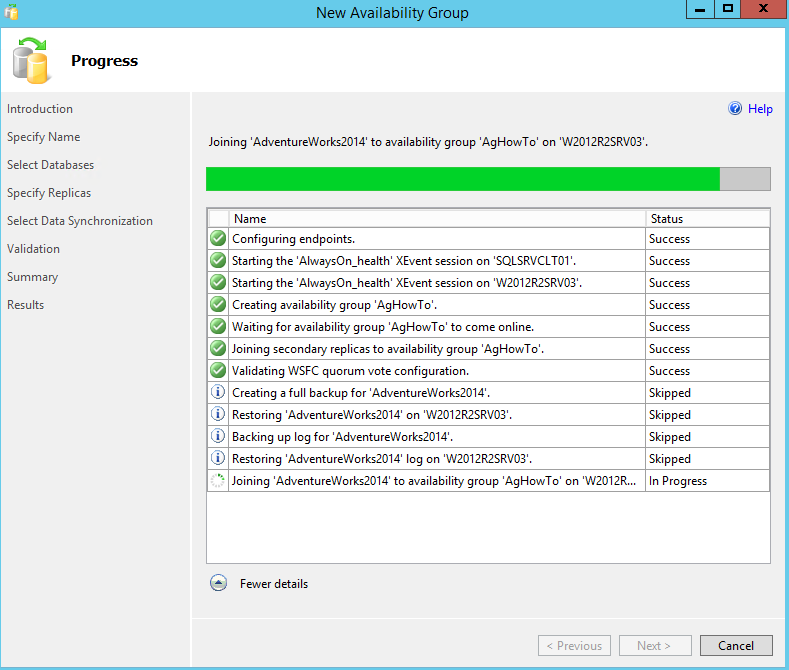
Now we have some action here 🙂 SQL Server will execute all the steps in order to create the desired availability group and synchronize the replicas as we defined in the previous steps.
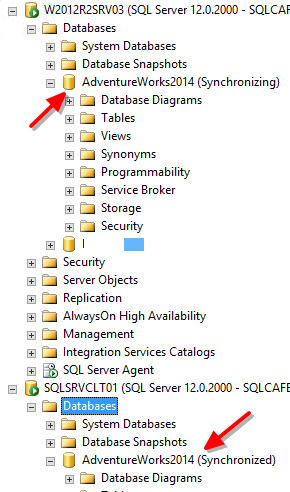
With the success of the Availability Group wizard execution, we will now have a brand new Availability Group in our instance, and all the included databases would be in sync. In order to verify the configuration, connect in all the replicas and check if everything is matching with what we have defined.
One more part of our configuration is done! With this, we are already able to say that we have an AG, and this is actually an enough step for some business requirements. But Availability Groups are more than just a renamed database mirroring 🙂 Check the part 3 for this series to see how to configure the listener for an Availability Group, in order to have a single entry point for the included databases.
Other articles in this series:
- AlwaysOn Availability Groups – How to setup AG between a clustered and standalone instance (Part 1)
- AlwaysOn Availability Groups – How to setup AG between a clustered and standalone instance (Part 3)

With experience working in Portugal, Holland, Germany and United Kingdom, he's always available to learn and share his knowledge, in order to contribute to SQL Server community,
View all posts by Murilo Miranda
- Understanding backups on AlwaysOn Availability Groups – Part 2 - December 3, 2015
- Understanding backups on AlwaysOn Availability Groups – Part 1 - November 30, 2015
- AlwaysOn Availability Groups – Curiosities to make your job easier – Part 4 - October 13, 2015