
Lately, database administrators often hear the question “have you tried Azure?“ or “can we use Azure for some of our databases?“. For me it was hard to answer these questions at first, but after a while I got to know what is really important behind these situations. In fact, what really matters is assessing the current environment, calculating the most suitable pricing tier and preparing a smooth migration.
Within the article we will cover the following steps:
- calculating the Database transaction units (DTUs) and choosing a suitable pricing tier
- preparing an on premise SQL database for a migration to Azure
- and migrating your database
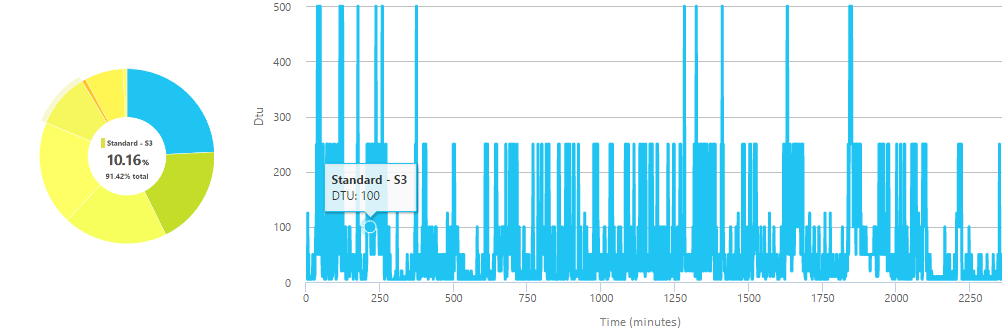
Assessing your current environment has been made easier, with the advent of Azure SQL Database DTU Calculator* which allows you to calculate the required Database transaction units and the suitable pricing tier.
The calculator provides you with a PowerShell script to use, but let us do it the hard way. There are four counters we would need. I’ve added them to performance monitor and captured data for one hour and before that I have started a normal workload operations to run.
The counters include:
Processor – % Processor Time
Logical Disk – Disk Reads/sec
Logical Disk – Disk Writes/sec
Database – Log Bytes Flushed/sec
Once we have the *.blg file with the data we should export it to a comma separated values (CSV) file using the RELOG utility, and then upload it to the Azure SQL Database DTU Calculator.
C:\ >relog “Performance Counter.blg” -f csv -o perlog.csv
The outcome, for the instance I have, is showing me that most of my workload is below 250 DTUs and 95% of it can be covered by the tier ‘Standard – S3’ which is limited at 100 DTUs.
To prepare your on premise SQL database for the migration we would need to find if there are any compatibility issues and fix them. There are several ways to do this, but in our case we will use SQL Server Data tools for Visual Studio.
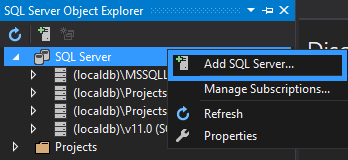
As a start, we will import the database schema of the database we will be migrating, to do so, in Visual Studio open the SQL Server Object explorer and add a new SQL Server – the one where your database is hosted.
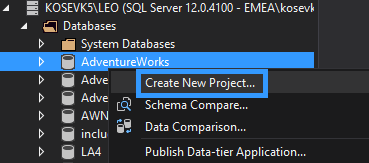
After locating your database, right click on it and create a new project.
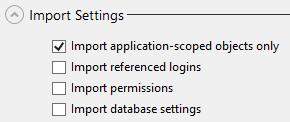
Within the ‘Import database’ box under the import settings make sure that you are importing the application-scoped objects only and skipping the referenced logins, permissions and the database settings.
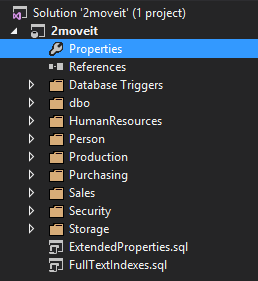
Within the solution explorer you will see all objects scripted in their own files and distributed among different containers. Once the schema import is completed, it is required to configure the desired platform to which the project will be published, in our case that would be the latest version of Azure SQL Databases.
Open the Properties of the solution to configure the target platform.
From the list of ‘Target platforms’ choose ‘Microsoft Azure SQL Database V12’.

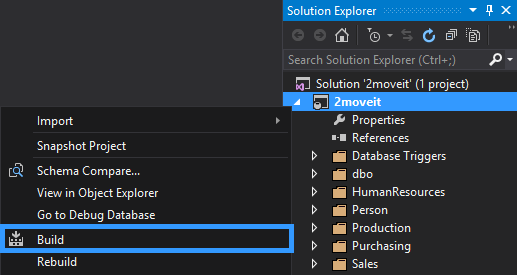
Once this is completed, we can now do the first build of the project to verify that there are not any errors.
To do so right click on the solution and select Build to build the project.
Most of the times there will be Errors or Warnings detected and displayed on the ‘Error list’ for each incompatibility.
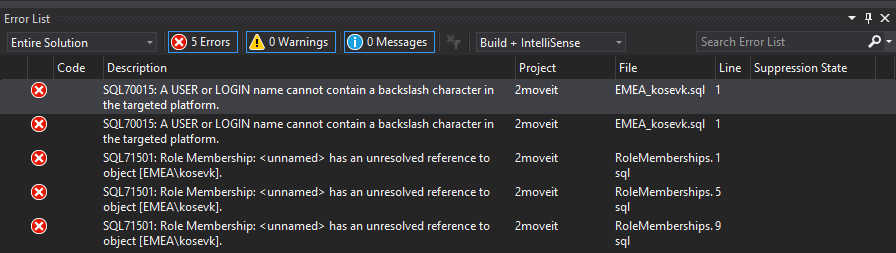
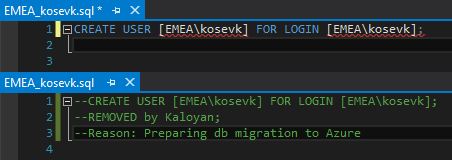
From the details in the ‘Error List’ you can see that within the files EMEA_kosevk.sql and RoleMemberships.sql there are incompatibilities. To fix them you should either edit or remove the T-SQL code causing it. In our case there is a login containing a backslash character and three references to it. To fix the error in this case we should remove the T-SQL code.
Note that there are features that are not supported** in Azure SQL Databases such as ‘EXECUTE AS logins’ or Global temporary tables, be sure to check them.
Once your database is verified for compatibility errors we can now publish the schema as a copy of the database, depending on the version of your SQL Server you may need to change the target platform. As we are using SQL Server 2016 we can move forward.
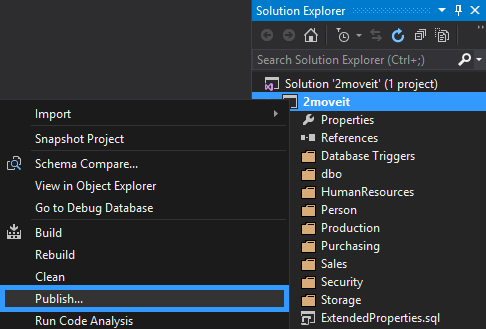
Start the publishing process by right clicking the project and then Publish.
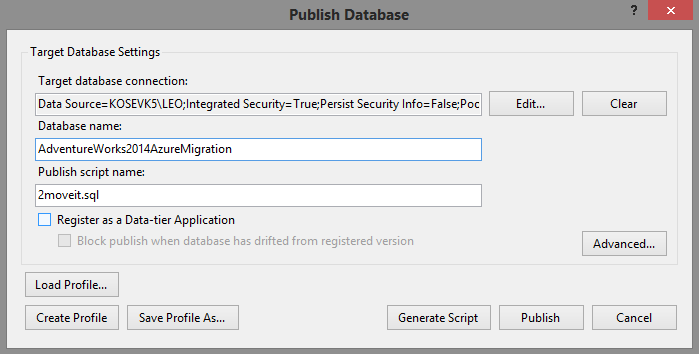
Once the Publish operations completes successfully, we now have a compatible with Azure SQL databases copy of the schema.

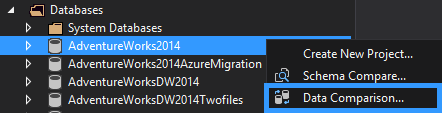
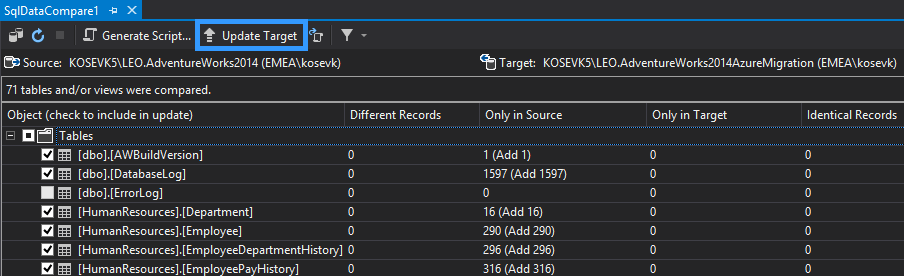
We will now have to load the data in the new database. Using the SQL Server Data tools we will do a Data comparison and with its help we will move the data.
In the SQL Server object explorer choose your source database and then right click ‘Data Comparison’.
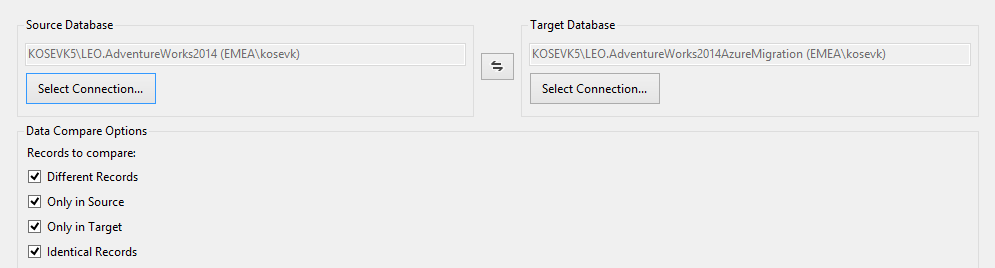
You can now review the differences between the two databases and if everything looks good on your side, click Update Target to migrate data from our source database in the one we are preparing for the migration.
An alternative for medium to big databases, is to use Transactional Replication or BCP utility for both data load (or skip the data load) and the migration to Azure.
To migrate our database to Azure we will be using the SQL Server Management Studio.
There are of course other ways to do the same, easiest of all is using the SQL Database migration Wizard***. You can of course utilize Transactional replication or BACPAC.
Now that the SQL Server Management Studio (SSMS) is a standalone product, there is no excuse not to keep it up to date, this way you ensure that the studio will be in sync with the changes and updates of the Azure portal and API.
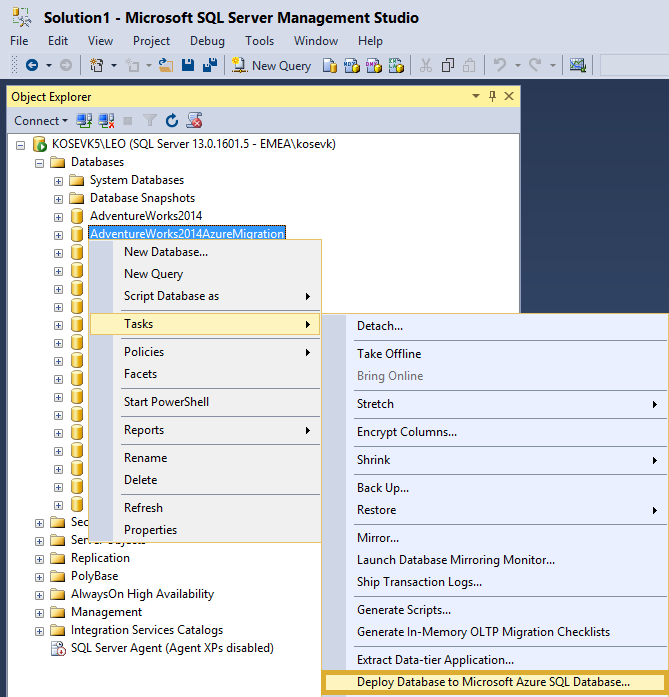
To start the migration within SSMS right click on the database copy we prepared, then Tasks, Deploy Database to Microsoft Azure SQL Database.
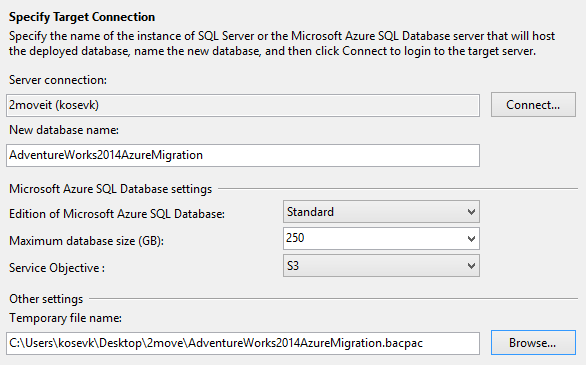
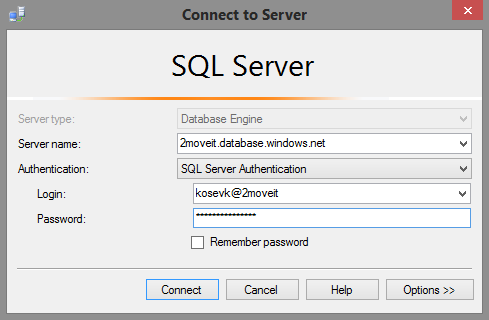
Configure the connection details and the Azure SQL Database settings.
The SQL Server 2moveit.database.windows.net has been created in advance. The results from the DTU calculations we have performed in the beginning will help us set the correct edition and service objective now. Additionally notice that the migration wizard is creating a temporary .bakpac file as well.
Once the process is started the .bacpac file will be filled with a data and then loaded to the Azure SQL Database. Depending on the speed of your disks and internet connection this may take a while.
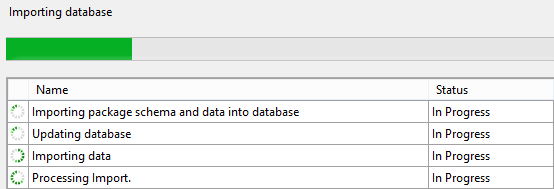
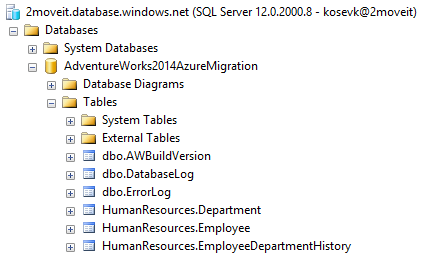
After the operation is completed we can see our migrated database.
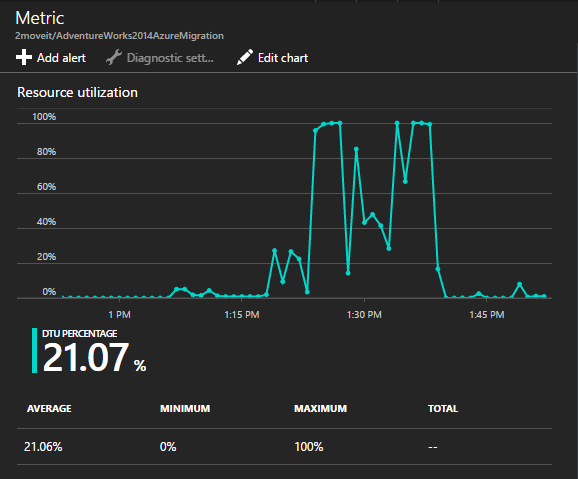
Upon creating our database we have set a DTU limit, however during the application lifecycle there may be need to extend them and choose a higher pricing tier. The recommendations from the DTU calculator do provide a good starting point, however it is best to monitor your databases after migrations to determine if the initial configurations are right for you. Azure SQL database provides you with overview of your database performance directly from the Azure Portal and directly from query your database****.

View all posts by Kaloyan Kosev
- Performance tuning for Azure SQL Databases - July 21, 2017
- Deep dive into SQL Server Extended events – The Event Pairing target - May 30, 2017
- Deep dive into the Extended Events – Histogram target - May 24, 2017