
In the previous articles, we discussed how to use the Azure Data Factory to move data between different data stores, how to transform data before writing it to a predefined sink, how to run an SSIS package using Azure Data Factory and how to use iterations and conditions activities in Azure Data Factory.
In this article, we will see how to schedule an Azure Data Factory pipeline using triggers.
Triggers Overview
Previously, we used the manual execution of the pipelines, also known as on-demand execution, to test the functionality and the results of the pipelines that we created. But it does not make sense to employ someone to execute that pipeline during the night or rely on a human to remember when to execute a specific pipeline. From that point, we can see the need to have another automated way to execute the pipeline at the correct time, which is called Triggers.
Azure Data Factory Triggers determines when the pipeline execution will be fired, based on the trigger type and criteria defined in that trigger. There are three main types of Azure Data Factory Triggers: The Schedule trigger that executes the pipeline on a wall-clock schedule, the Tumbling window trigger that executes the pipeline on a periodic interval, and retains the pipeline state, and the Event-based trigger that responds to a blob related event.
Azure Data Factory allows you to assign multiple triggers to execute a single pipeline or execute multiple pipelines using a single trigger, except for the tumbling window trigger.
Let us discuss the triggers types in detail.
Schedule Trigger
The schedule trigger is used to execute the Azure Data Factory pipelines on a wall-clock schedule. Where you need to specify the reference time zone that will be used in the trigger start and end date, when the pipeline will be executed, how frequent it will be executed and optionally the end date for that pipeline.
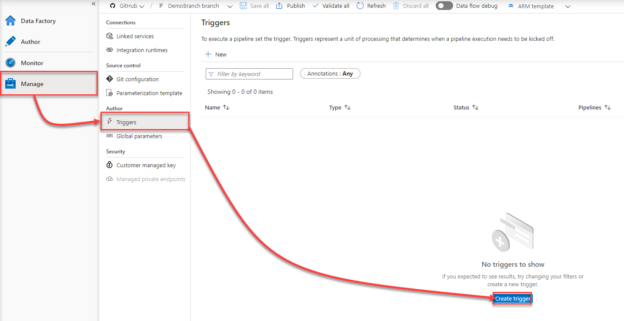
Azure Data Factory trigger can be created under the Manager page, by clicking on + New or Create Trigger option from the Triggers window, as shown below:

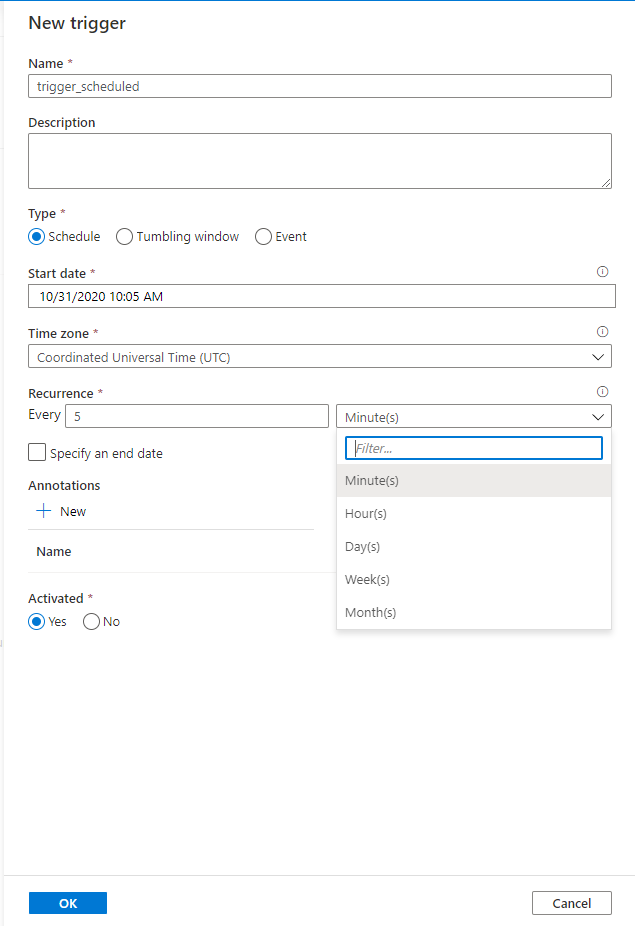
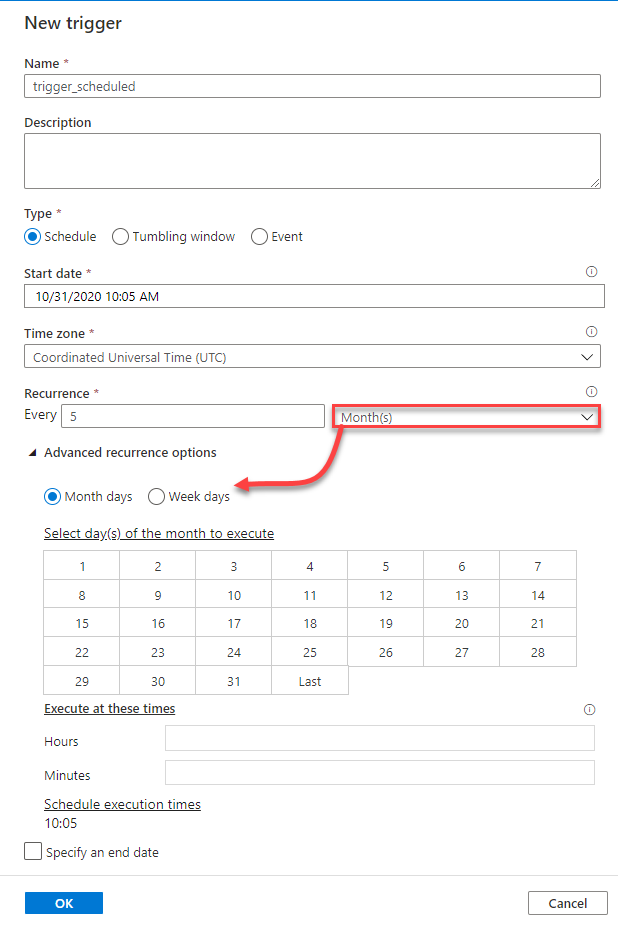
In the New Azure Data Factory Trigger window, provide a meaningful name for the trigger that reflects the trigger type and usage, the type of the trigger, which is Schedule here, the start date for the schedule trigger, the time zone that will be used in the schedule, optionally the end date of the trigger and the frequency of the trigger, with the ability to configure the trigger frequency to be called every specific number of minutes or hours, as shown below:
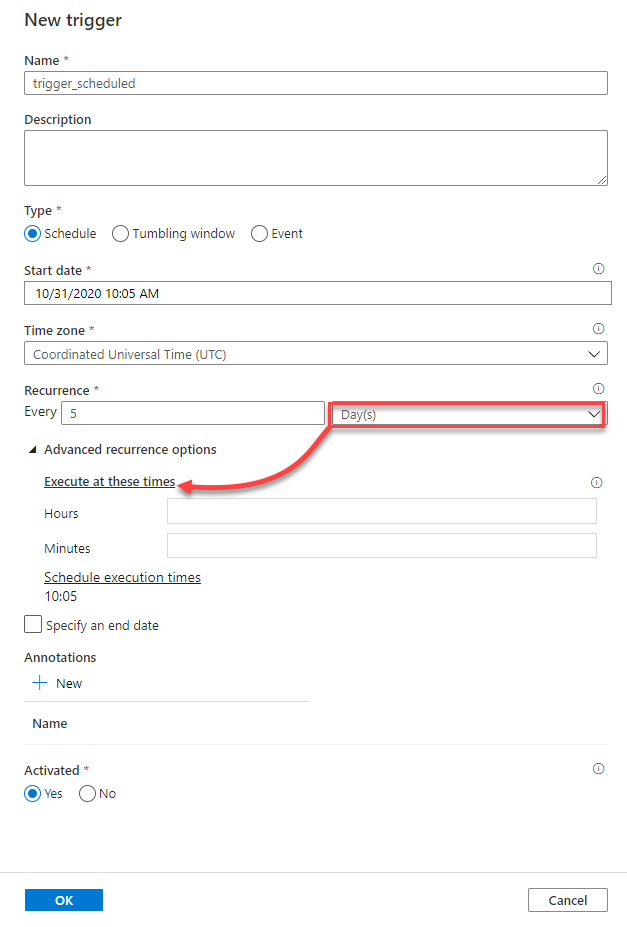
Or every number of days, which allows you to specify the times when this trigger will be called, as below:
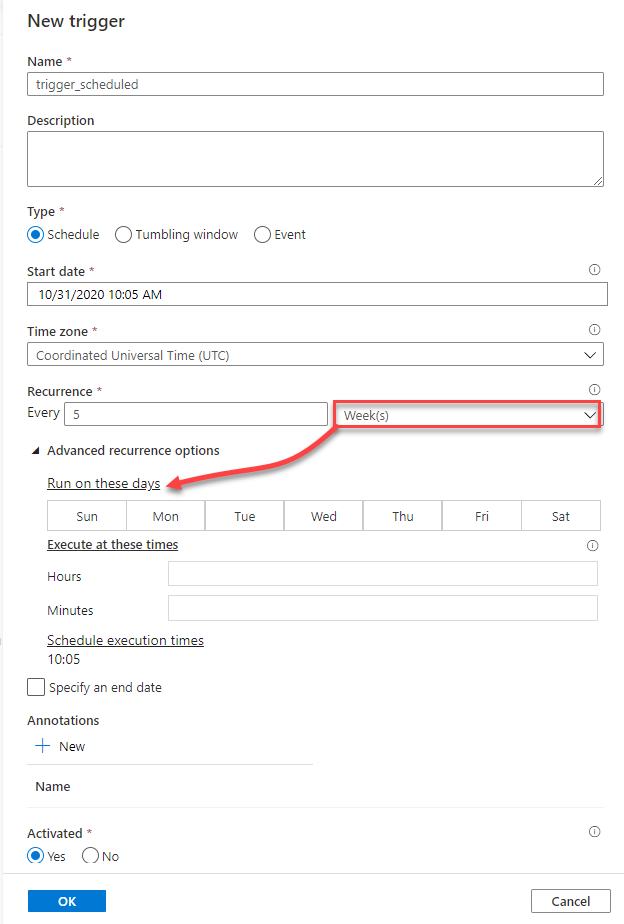
With weeks choice, the schedule trigger provides you with the ability to specify the days and the time when the trigger will be called, as shown below:
And the last option is the monthly occurrence of the trigger, where it allows you to choose the month days and times when the trigger will be called, or the weekdays and times for the trigger execution, as below:
Tumbling Window Trigger
The Azure Data Factory Tumbling window trigger is fired at a periodic time interval from a specified start time, while retaining state. You can imagine it as a series of fixed-sized, non-overlapping, and contiguous time intervals. It can be used to execute a single pipeline for each specified time slice or time window.
The Tumbling window trigger fits when working with time-based data, where each data slice has the same size. It can pass the start time and end time for each time window into your query, in order to return the data between that start and end time.
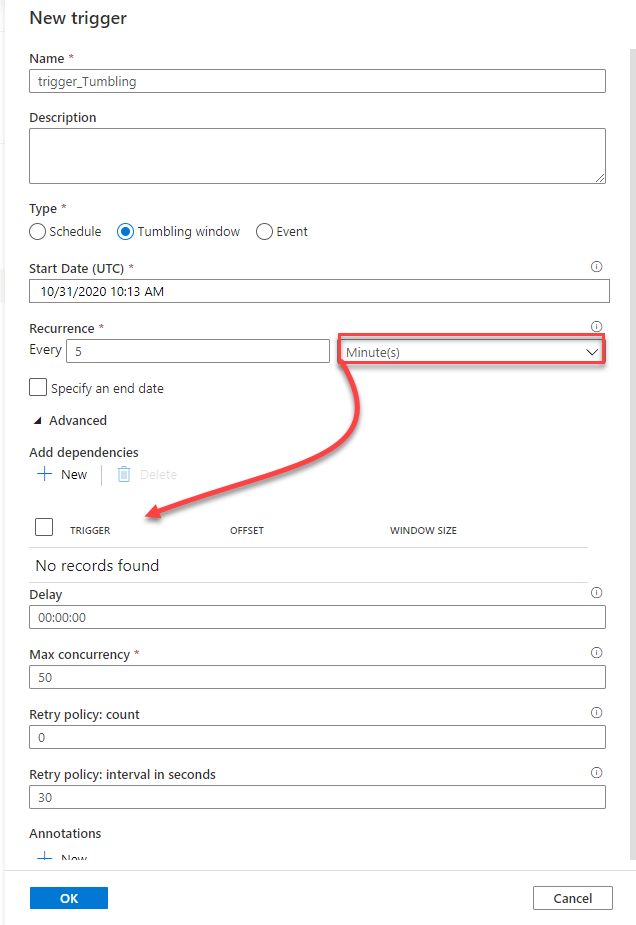
When creating the Tumbling window trigger, you need to provide a meaningful name for that trigger, the trigger type, which is Tumbling window here, the start date and optionally the end date in UTC, the trigger calling frequency, with the ability to configure advanced options such as the delay, to wait a certain time after the window start time before executing the pipeline, limit the max concurrent tumbling windows running in parallel and retry count and interval, and define dependencies to ensure that the trigger will start after another tumbling window trigger completed successfully, as shown below:
Event-Based Triggers
The event-based trigger executes the pipelines in response to a blob-related event, such as creating or deleting a blob file, in an Azure Blob Storage.
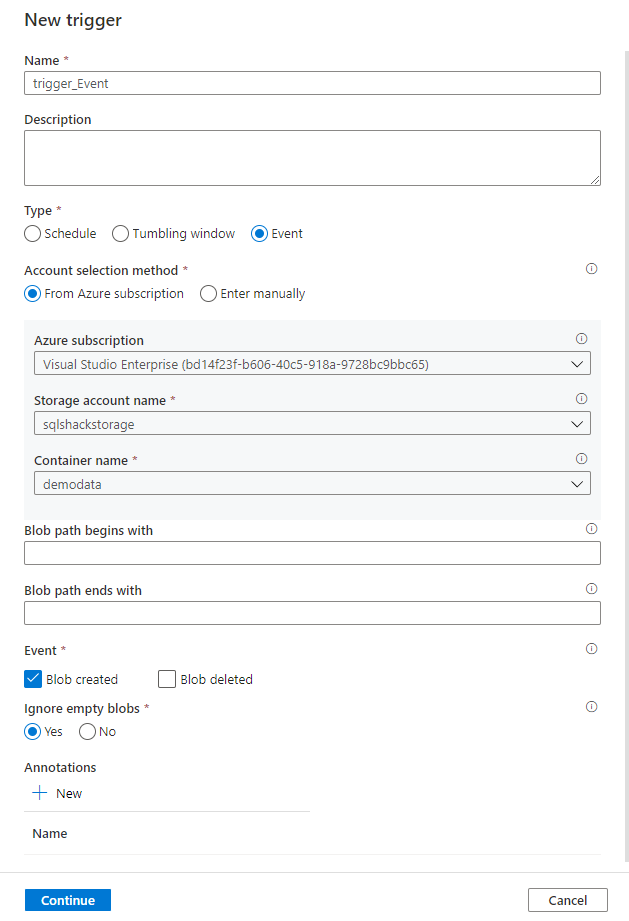
When creating an ADF event-based trigger, you will be asked to provide a meaningful name for the trigger, the type of the trigger, which is event trigger, the subscription that hosts the Azure Storage Account, the Storage Account name, the Container name, a filter for the blob files that you are interested in, whether the trigger will be fired when a blob is created, deleted or both and to ignore any empty blob file, as shown below:
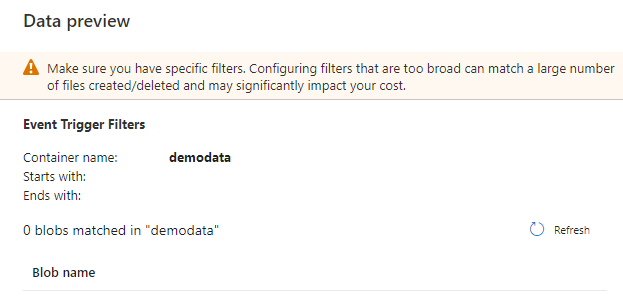
The Data Preview window will help in validating the provided path or any issue with the Azure Storage Account before creating the event trigger, as below:
After creating the triggers, you can review, edit or enable it from the Triggers page, where you can see that the three pipelines are disabled and not connected to any pipeline yet, as shown below:
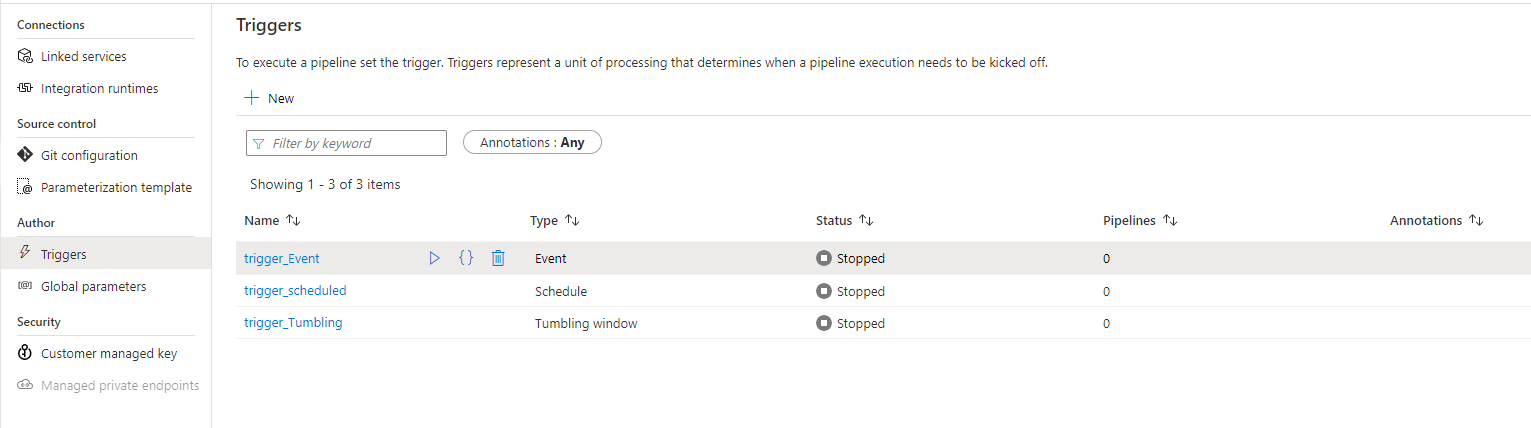
Make sure to publish the created triggers in order to be able to use it to execute the ADF pipelines.
Add Trigger to Pipeline
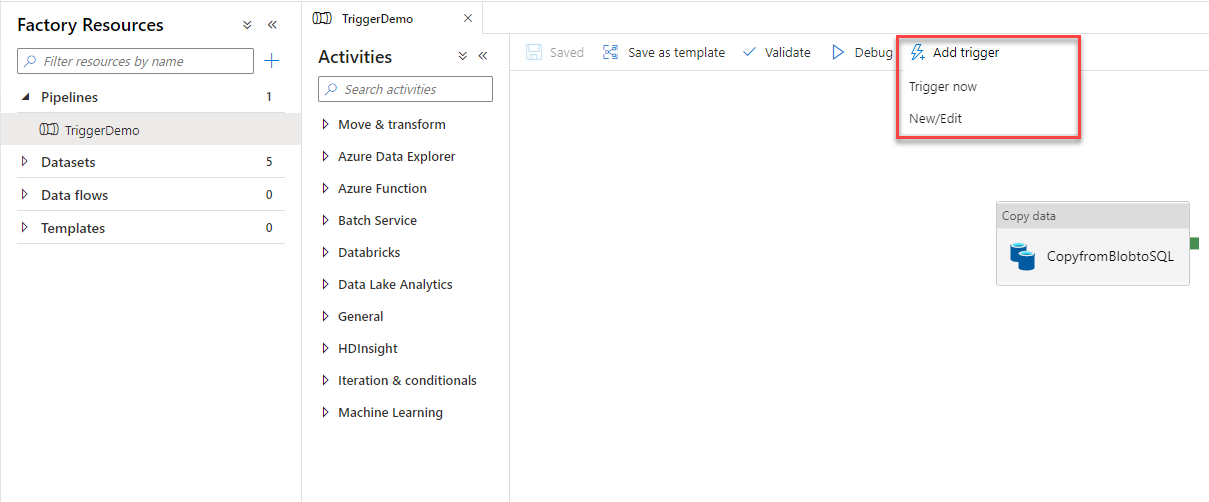
Now, with the three triggers created successfully, we will add the triggers to a previously created pipeline. This can be performed from the Author page, by clicking on the pipeline and choose the Add Trigger option, that allows you to run the pipeline manually, using the Trigger Now option, or schedule the pipeline by adding a trigger from the New/Edit option, as shown below:
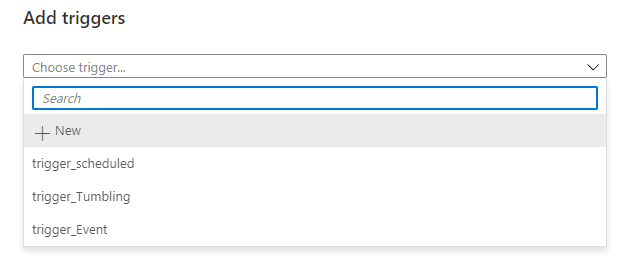
From the Add Triggers window, you will see the three created triggers, where you can choose the trigger, or triggers, that will be used to execute that pipeline, as shown below:
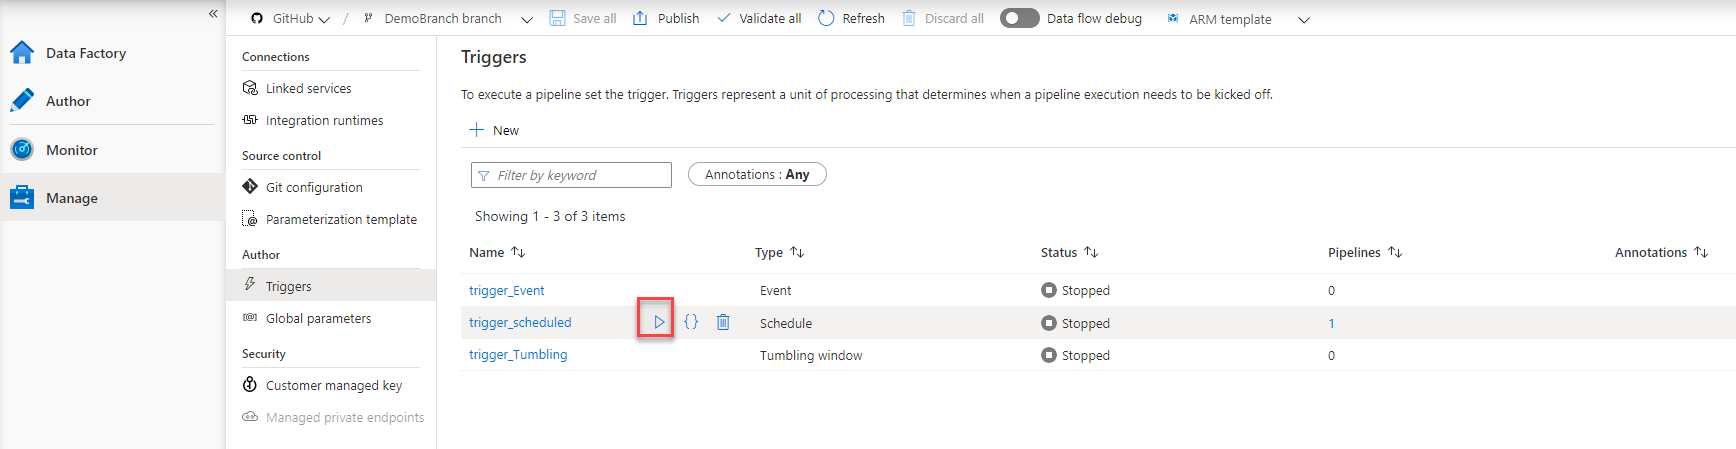
Before adding the trigger, let us enable that trigger from the Triggers window, as below:
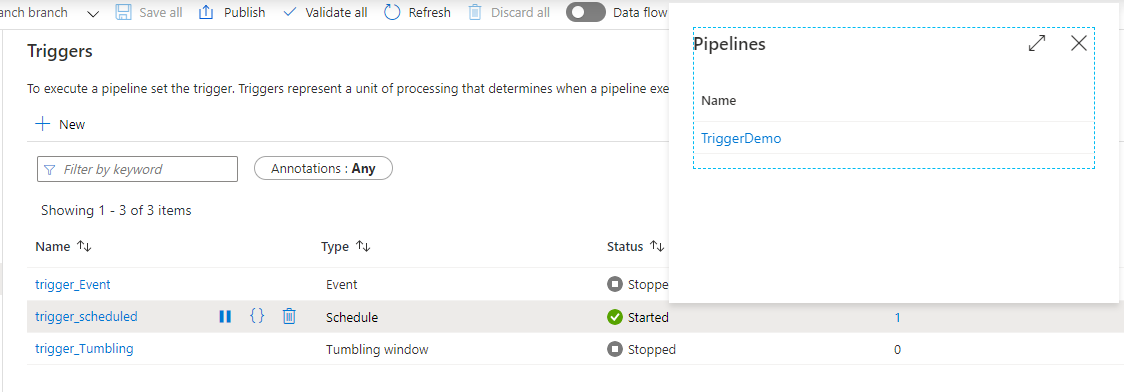
Then add it from the pipeline page. Once added, you will see from the Triggers page, that the trigger is connected to a new pipeline, and the pipelines list can be shown by clicking on the number in blue, as shown below:
To check the trigger execution, browse to the Monitor page and click on the Trigger Runs option, and you will see that the trigger enforces the pipeline to be executed every 5 minutes, as shown below:

Now, let us disconnect the Schedule Trigger from the pipeline, by clicking on the Add Trigger in the Pipeline page and remove it, then choose to connect the Tumbling Window trigger, and monitor the pipeline execution, from the Azure Data Factory monitor page, you will see that the pipeline is executed based on the tumbling window trigger settings, as shown below:

The case is different with the event trigger, where the trigger will not be executed at a specific time. Instead, it will be executed when a new blob file is added to the Azure Storage account or deleted from that account, based on the trigger configuration.
In the event trigger that we created previously, we configured it to be fired when a new blob file is created in the storage account. If we upload a new blob file to our container, as shown below:
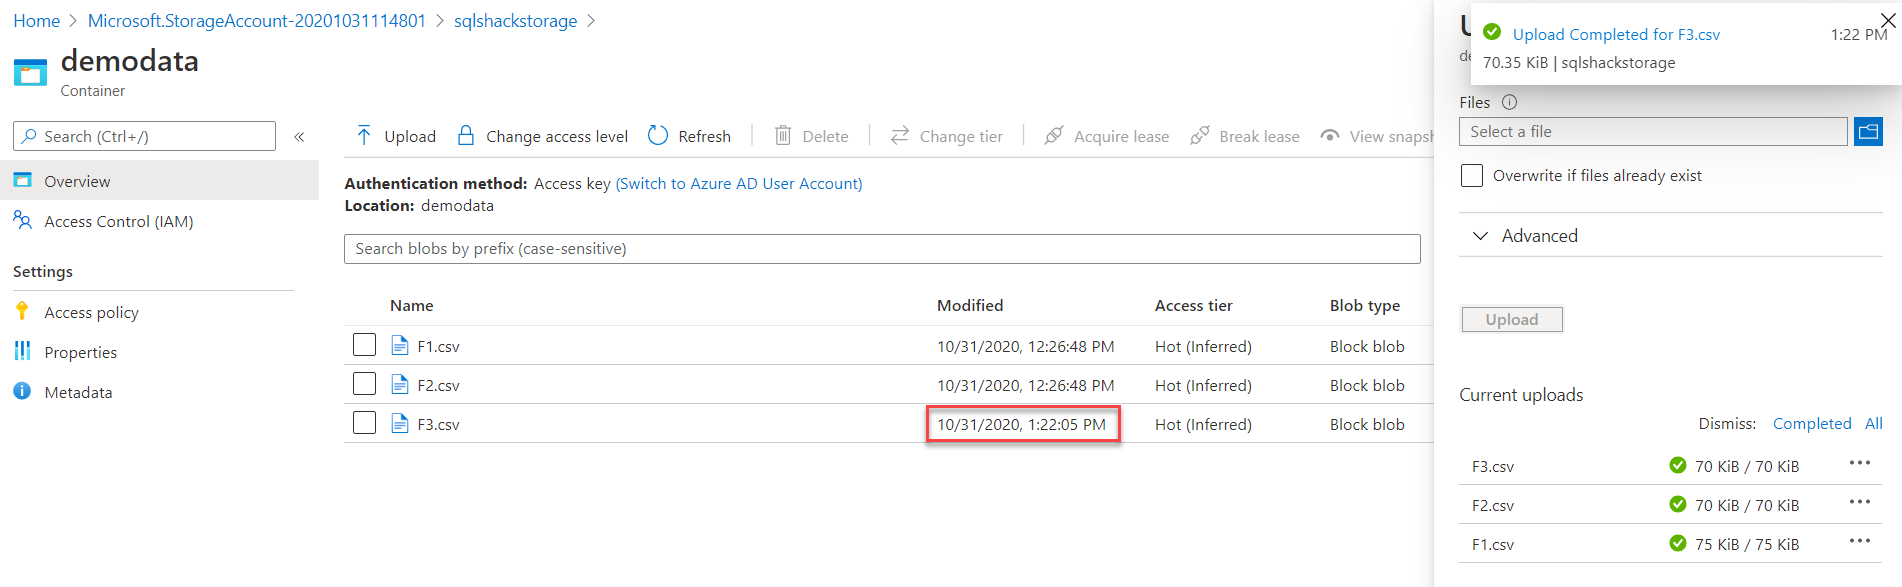
You will see that the pipeline will be executed automatically, as the trigger firing criteria has occurred, as shown below:

Conclusion
In this article, we discussed the different types of Azure Data Factory triggers, how to create these triggers and add it to an existing pipeline then monitor the pipeline execution. Hope you found it useful!
Table of contents

He is a Microsoft Certified Solution Expert in Data Management and Analytics, Microsoft Certified Solution Associate in SQL Database Administration and Development, Azure Developer Associate and Microsoft Certified Trainer.
Also, he is contributing with his SQL tips in many blogs.
View all posts by Ahmad Yaseen
- Azure Data Factory Interview Questions and Answers - February 11, 2021
- How to monitor Azure Data Factory - January 15, 2021
- Using Source Control in Azure Data Factory - January 12, 2021