
Now that Karla’s restore process is mature, it is time to pre-stage the means of reporting on these events. Two major actions have been taken for each database tested. First a restore operation occurred. The restore operation validates that the backup file is well formed and that there is nothing wrong with the data which would cause a failure. Next CheckTables was executed to thoroughly inspect for data corruption and any consistency errors. Each of these two actions will have their own methods of providing evidence of successful completion. Recall the requirements set by Karla, in part 1 of this series, for the reporting piece.
- Evidence of test and results must be logged as part of the automated system.
-
Test results must be available without DBA interaction.
- Queries must be pre-written and available to be run by unprivileged users such as via SQL Server Reporting Services.
The first requirement is that the logging must be part of the automated system. This means that we need to create a database and a couple of tables to record the results, in addition to some tweaks to the Restore-Database function. Before we walk down that path, however, let us take a look at what is available directly from SQL Server system tables and commands so it becomes clear why this work is necessary.
Built-in command for integrity check evidence
|
1 2 3 |
DBCC DBINFO ('Test11') WITH TABLERESULTS |

DBCC DBINFO is an undocumented DBCC command. DBINFO returns a wealth of information but what is important to integrity checking is the dbi_dbccLastKnownGood field. This field has a DATETIME value of when the last successful integrity check were conducted.
There are two problems with this method, however. First, it is undocumented. I would not fault someone for using an undocumented command, but when there is another way, it should usually be considered because the syntax or operations can change without notice with version upgrades. In addition, they are not officially supported so bugs may occur without fix.
The second problem is the most important. This command can only be executed on an existing database. Given that Karla has a static test server which will likely have limited disk space, she needs to drop the databases after she is finished testing them. By dropping the databases only the SQL Server error logs remain to parse out integrity evidence and those rotate out of existence over time.
Built-in query for restore evidence
|
1 2 3 4 5 6 |
SELECT MAX( restore_date ) AS LastRestoreDate , destination_database_name AS databaseName FROM msdb.dbo.restorehistory GROUP BY destination_database_name; |
This query will access MSDB’s restorehistory table. Every time a restore operation completes, a record is logged in this table. This is how one could prove that the restore for a particular database occurred and when.
NOTE: The system stored procedure sp_delete_backuphistory will purge records from this table. The KillDatabase method that was covered in part 1 does NOT call this procedure nor does T-SQL’s DROP DATABASE command. Dropping a database with SSMS, however, has this option checked by default. The check-box to beware of is labeled, “Delete backup and restore history information for databases.”
There is a fear that the sp_delete_backuphistory stored procedure could be executed and the results get purged. This is a low risk in my opinion, though, because proper access and development discipline can prevent this from happening. Another drawback is that long term storage of data in this table can affect performance of MSDB. This is a low risk as well because it can be handled with an archive strategy.
As can be seen, restore evidence can be retrieved with minimal concerns. So why should Karla create new tables? Because enough concerns with the integrity checks are present to need its results logged, and having the evidence of the restores linked to the integrity checks will make for a clearer data set for the reports.
But I digress…
Database design
The second requirement is that test results must be available without DBA interaction. This is critical because audits can be very time consuming. If the DBA is needed to provide evidence too often then the quality of their work may suffer or responsiveness to issues degrade. In addition, if the DBA were to implement this system and then deescalate themselves, auditors would be comfortable that the data has not been tampered with. To handle the need for unprivileged users to run the queries, the results will be provided via SSRS. So let us build the foundation of the reports, the database and table structure.
|
1 2 3 4 5 |
USE master CREATE DATABASE BackupTest; GO |
There are no special requirements for database creation for this process. Recommend configuring your database in accordance with your organization’s standards.
|
1 2 3 4 5 6 7 8 9 10 11 12 13 14 15 16 17 18 19 |
USE BackupTest CREATE TABLE [dbo].[RestoreResult] ( restoreResultId UNIQUEIDENTIFIER NOT NULL CONSTRAINT PK_RestoreResult_restoreResultId PRIMARY KEY NONCLUSTERED, originatingServerName SYSNAME NOT NULL, databaseName SYSNAME NOT NULL, backupFilePath NVARCHAR(256) NOT NULL, startDateTime DATETIME2(3) NOT NULL CONSTRAINT DF_RestoreResult_startDateTime DEFAULT (SYSUTCDATETIME()), endDateTime DATETIME2(3) NULL, errorMessage VARCHAR(MAX) NULL ); CREATE CLUSTERED INDEX IX_RestoreResult_endDateTime_startDateTime ON [dbo].[RestoreResult] (endDateTime DESC, startDateTime DESC); CREATE NONCLUSTERED INDEX IX_RestoreResult_databaseName_originatingServerName ON [dbo].[RestoreResult] (databaseName ASC, originatingServerName ASC); |
In RestoreResult table there will be a globally unique identifier (GUID) for uniquely identifying the row and linking the to-be-created CheckDbResult table. The originating server, database names, and backup file paths are stored to track what was checked. Finally, the start and end dates, and error messages are stored as evidence of the restore operation and its success or failure.
|
1 2 3 4 5 6 7 8 9 10 11 12 13 14 15 16 17 18 |
USE BackupTest CREATE TABLE [dbo].[CheckDbResult] ( checkDbResult UNIQUEIDENTIFIER NOT NULL CONSTRAINT PK_CheckDbResult_checkDbResult PRIMARY KEY NONCLUSTERED, restoreResultId UNIQUEIDENTIFIER NOT NULL CONSTRAINT FK_CheckDbResult_restoreResultId FOREIGN KEY REFERENCES [dbo].[RestoreResult] (restoreResultId), startDateTime DATETIME2(3) NOT NULL CONSTRAINT DF_CheckDbResult_startDateTime DEFAULT (SYSUTCDATETIME()), endDateTime DATETIME2(3) NULL, errorMessage VARCHAR(MAX) NULL ); CREATE CLUSTERED INDEX IX_CheckDbResult_endDateTime_startDateTime ON [dbo].[CheckDbResult] (endDateTime DESC, startDateTime DESC); CREATE NONCLUSTERED INDEX IX_CheckDbResult_restoreResultId ON [dbo].[CheckDbResult] (restoreResultId ASC); |
In the CheckDbResult table there is a GUID as the primary key and a foreign key reference to the RestoreResult table. Date fields and error message columns are once again used to indicate the status of the integrity checks.
Logging mechanism
As noted, there was no logging coded in part 1. This gave an understanding of how to automate the restore process but now there is need for a few tweaks. The Restore-Database function and our inputs into the script will be modified so that the logging can occur on each of the asynchronous threads.
First the script input needs one new parameter.
|
1 2 3 4 5 |
[Parameter(Mandatory=$true)] [ValidateNotNullorEmpty()] [string]$loggingDbName, |
The $loggingDbName is fairly self-explanatory. This will be the name of the database which contains the RestoreResult and CheckDbResult tables.
Next there is the new parameters for the Restore-Database function.
|
1 2 3 4 5 6 7 8 9 |
[parameter(Mandatory=$true)] [ValidateNotNullorEmpty()] [string]$origServerName, [parameter(Mandatory=$true)] [ValidateNotNullorEmpty()] [string]$loggingDbName, |
Once again, the logging database name is passed in and now the originating server is added. The rest of the logged data is already available to the script and function.
Logging commands
|
1 2 3 4 5 6 7 8 9 10 11 12 13 14 15 16 17 |
#Log restore process - start [string]$restoreResultId = [System.Guid]::NewGuid().ToString(); [string]$sql = "INSERT INTO [dbo].[RestoreResult] ([restoreResultId] ,[originatingServerName] ,[databaseName] ,[backupFilePath]) VALUES ('$restoreResultId' ,'$origServerName' ,'$newDBName' ,'$backupFilePath');" Invoke-Sqlcmd -ServerInstance $serverName -Database $loggingDbName -Query $sql -QueryTimeout 30; |
Seen above, this is a basic T-SQL INSERT command being executed utilizing existing variables to populate the VALUES section. The endDateTime and errorMessage columns are left as NULL because this command is executed immediately before the restore operation is initiated. The startDateTime is automatically populated via default constraint.
The next addition will be a T-SQL UPDATE statement, also using Invoke-SqlCmd, to populate the endDateTime column and the errorMessage column, if there was an error. To accomplish this, the restore operation’s error handling will be revised. Previously the restore command was simply on its own, now it is wrapped in Try-Catch and the error message is concatenated into a string.
|
1 2 3 4 5 6 7 8 9 10 11 12 13 14 15 16 17 18 19 20 |
# Restore the database $errList = @(); try { $smoRestore.SqlRestore($server) } catch { [System.Exception] $err = $_.Exception $errList += $err; while ( $err.InnerException ) { $err = $err.InnerException $errList += $err; write-output $err.Message }; } |
An $errList variable is populated with all available exception messages. Then it is concatenated into the $errMsg variable for command building.
|
1 2 3 4 5 6 7 8 9 10 |
#Log restore process - end $restoreEndUtc = Get-Date; [string]$restoreEnd = $restoreEndUtc.ToUniversalTime(); [string]$errMsg; foreach($msg in $errList) { $errMsg += $msg + "'r'n"; } |
Finally, here is the T-SQL UPDATE statement referred to above.
|
1 2 3 4 5 6 7 8 9 10 11 |
$sql = "UPDATE [dbo].[RestoreResult] SET [endDateTime] = '$restoreEnd' "; if($errMsg -ne $null) { $sql += ",[errorMessage] = '$errMsg' "; } $sql += "WHERE restoreResultId = '$restoreResultId';"; Invoke-Sqlcmd -ServerInstance $serverName -Database $loggingDbName -Query $sql -QueryTimeout 30; |
That last Invoke-SqlCmd completes the restore process and the logging of its results. The integrity checks follow next and use the exact same format for logging. One important note is that the $restoreResultId variable is re-used in the CheckDbResult table INSERT statement so that this entire process can be linked in the reports.
|
1 2 3 4 5 6 7 8 9 10 11 12 13 14 15 16 17 18 19 20 21 22 23 24 25 26 27 28 29 30 31 32 33 34 35 36 37 38 39 40 41 42 43 44 45 46 47 48 49 50 51 |
if($conductIntegrityChecks) { #Log integrity checks - start [string]$checkDbResultId = [System.Guid]::NewGuid().ToString(); [string]$sql = "INSERT INTO [dbo].[CheckDbResult] ([checkDbResultId] ,[restoreResultId]) VALUES ('$checkDbResultId' ,'$restoreResultId');" Invoke-Sqlcmd -ServerInstance $serverName -Database $loggingDbName -Query $sql -QueryTimeout 30; #Integrity checks $errList = @(); try { $server.Databases[$newDBName].CheckTables("None"); } catch { [System.Exception] $err = $_.Exception $errList += $err; while ( $err.InnerException ) { $err = $err.InnerException $errList += $err; write-output $err.Message }; } #Log integrity checks - end $checkDbEndUtc = Get-Date; [string]$checkDbEnd = $restoreEndUtc.ToUniversalTime(); [string]$errMsg; foreach($msg in $errList) { $errMsg += $msg + "'r'n"; } $sql = "UPDATE [dbo].[CheckDbResult] SET [endDateTime] = '$checkDbEnd' "; if($errMsg -ne $null) { $sql += ",[errorMessage] = '$errMsg' "; } $sql += "WHERE checkDbResultId = '$checkDbResultId';"; Invoke-Sqlcmd -ServerInstance $serverName -Database $loggingDbName -Query $sql -QueryTimeout 30; |
Example data from RestoreResult

Example data from CheckDbResult

SQL Server Reporting Services
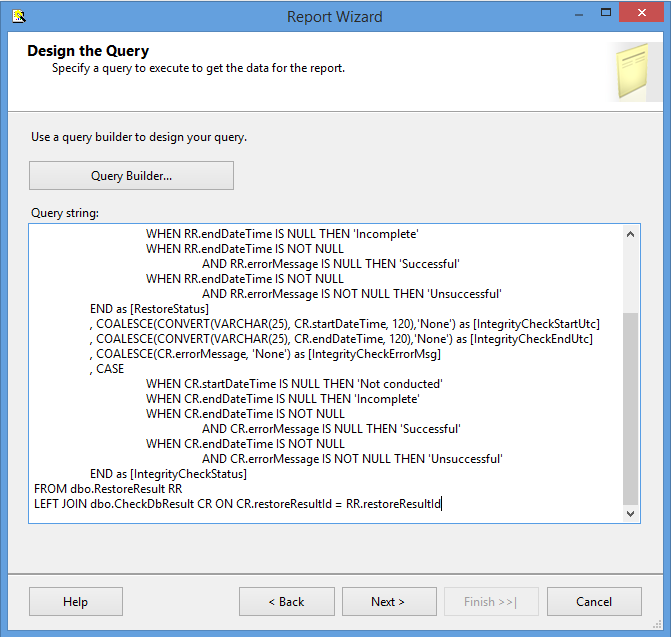
The data is in. It is time to take a look at it. The below query conducts a simple LEFT JOIN between our tables and polishes the data a little bit for ease of viewing. Aliases were added for clarifying things such as the fact that the dates are stored with UTC time values, all NULLs are replaced with more descriptive strings, and two status columns are added so that the viewer doesn’t have to decipher what indicates a success or failure.
|
1 2 3 4 5 6 7 8 9 10 11 12 13 14 15 16 17 18 19 20 21 22 23 24 25 26 27 28 |
SELECT originatingServerName as [OriginatingServerName] , databaseName as [DatabaseName] , backupFilePath as [TestFile] , CONVERT(VARCHAR(25), RR.startDateTime, 120) as [RestoreStartUtc] , COALESCE(CONVERT(VARCHAR(25), RR.endDateTime, 120),'None') as [RestoreEndUtc] , COALESCE(RR.errorMessage, 'None') as [RestoreErrorMsg] , CASE WHEN RR.endDateTime IS NULL THEN 'Incomplete' WHEN RR.endDateTime IS NOT NULL AND RR.errorMessage IS NULL THEN 'Successful' WHEN RR.endDateTime IS NOT NULL AND RR.errorMessage IS NOT NULL THEN 'Unsuccessful' END as [RestoreStatus] , COALESCE(CONVERT(VARCHAR(25), CR.startDateTime, 120),'None') as [IntegrityCheckStartUtc] , COALESCE(CONVERT(VARCHAR(25), CR.endDateTime, 120),'None') as [IntegrityCheckEndUtc] , COALESCE(CR.errorMessage, 'None') as [IntegrityCheckErrorMsg] , CASE WHEN CR.startDateTime IS NULL THEN 'Not conducted' WHEN CR.endDateTime IS NULL THEN 'Incomplete' WHEN CR.endDateTime IS NOT NULL AND CR.errorMessage IS NULL THEN 'Successful' WHEN CR.endDateTime IS NOT NULL AND CR.errorMessage IS NOT NULL THEN 'Unsuccessful' END as [IntegrityCheckStatus] FROM dbo.RestoreResult RR LEFT JOIN dbo.CheckDbResult CR ON CR.restoreResultId = RR.restoreResultId |

At this point the report mechanism becomes a matter of personal choice or organization standards. Some organizations have existing SQL Server Reporting Services (SSRS) implementations, others might be using Crystal Reports, or there could be an existing in-house support application and all this query needs is a view or stored procedure to call its home. For the purposes of demonstration, the basic steps for exposing this data via an SSRS report are shown.
Building the report
Prerequisite: SQL Server Data Tools – Business Intelligence for Visual Studio 2013.
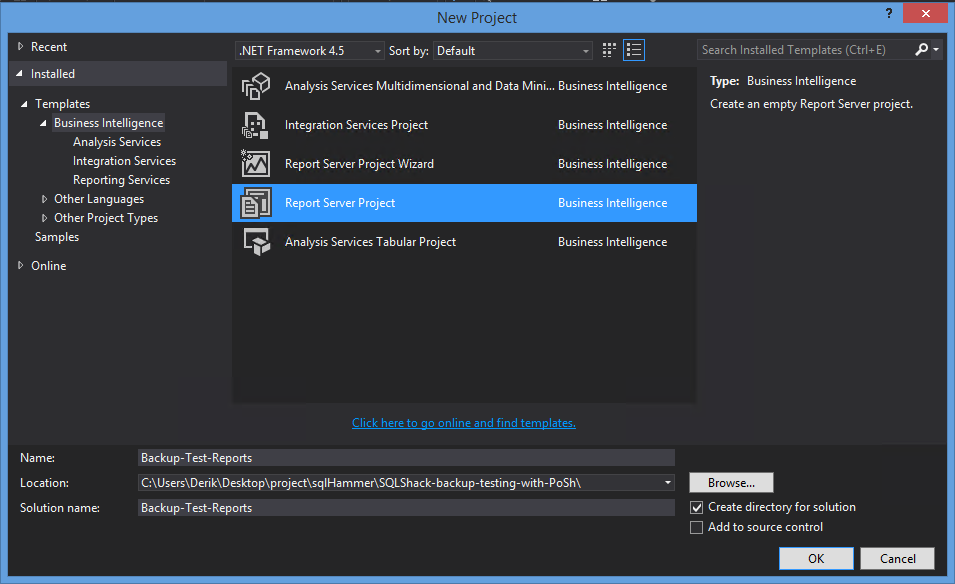
- Open Visual Studio 2013 and navigate to the menu bar. Click File > New > Project.
-
Select the Report Server Project under Business Intelligence and populate the project name and directory. Click OK.

-
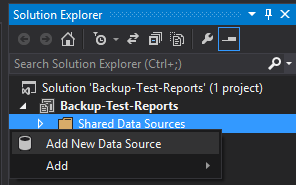
In the Solution Explorer, right-click on the Shared Data Sources folder and select Add New Data Source.
-
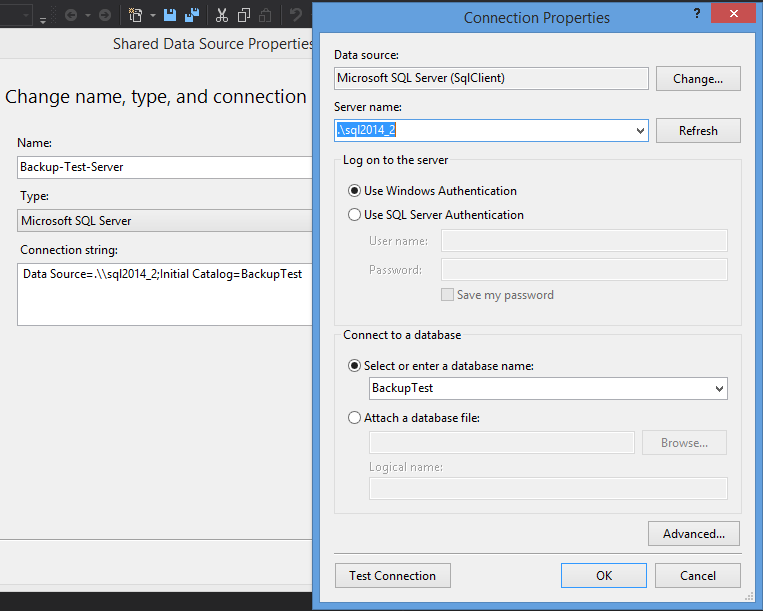
Select Microsoft SQL Server for Type and then configure your connection string. Click OK.
-
In the Solution Explorer, once again, right-click the Reports folder and select Add New Report.
-
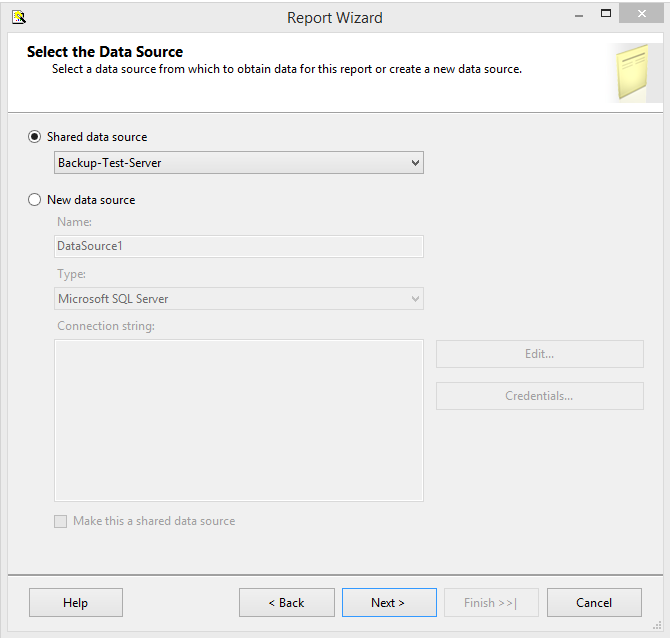
Select the shared data source that has been created already and click Next.
-
Paste in the T-SQL query and click Next.
-
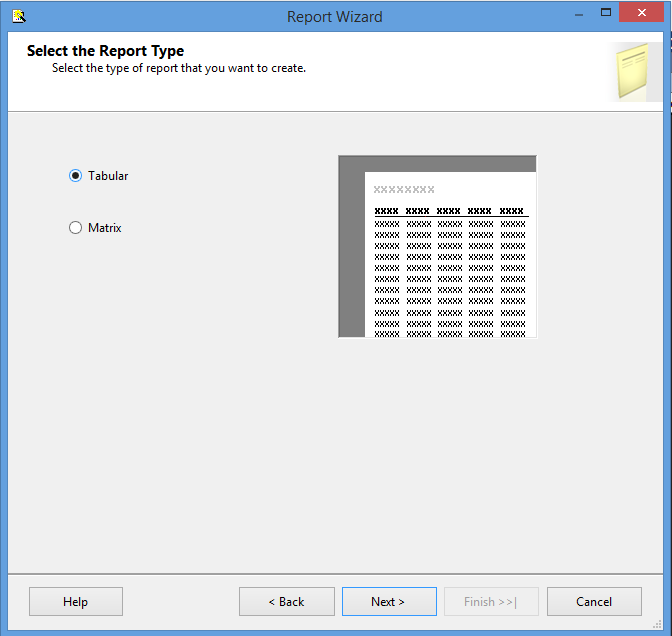
Select Tabular and click Next.
-
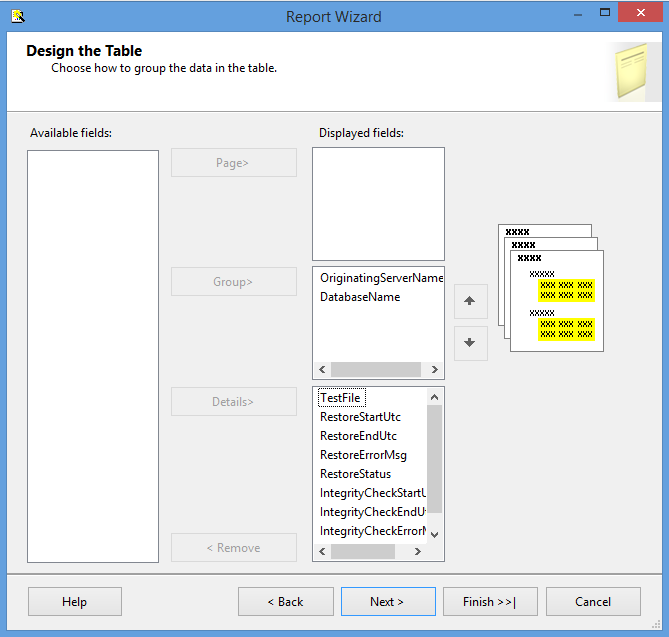
On this step Karla can pick and choose how she wants the report formatted. For the demonstration OriginatingServerName and DatabaseName were selected for the Group section and all other fields as Details.
-
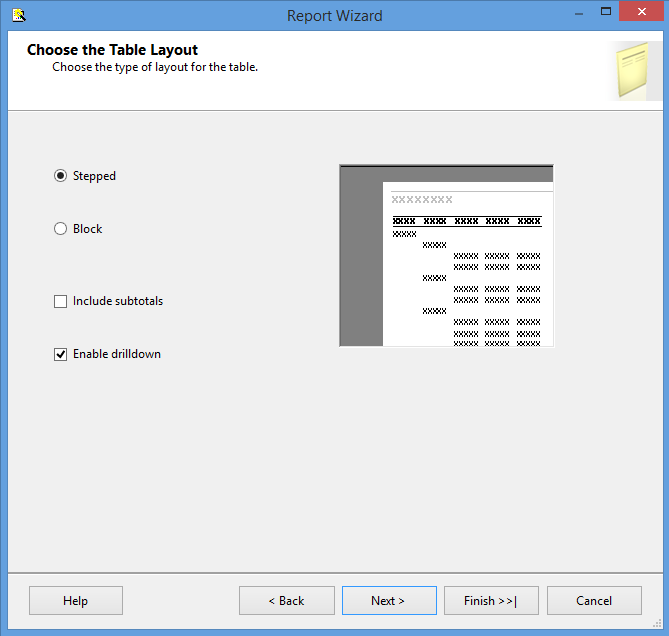
Select the layout type and make sure to Enable drilldown. The drilldown will be important for when the same database is tested regularly over a period of time.
-
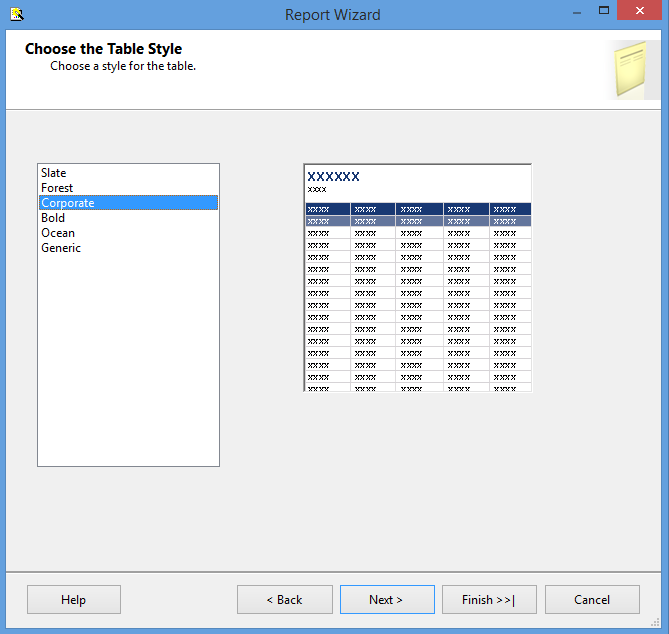
Now select the color scheme.
-
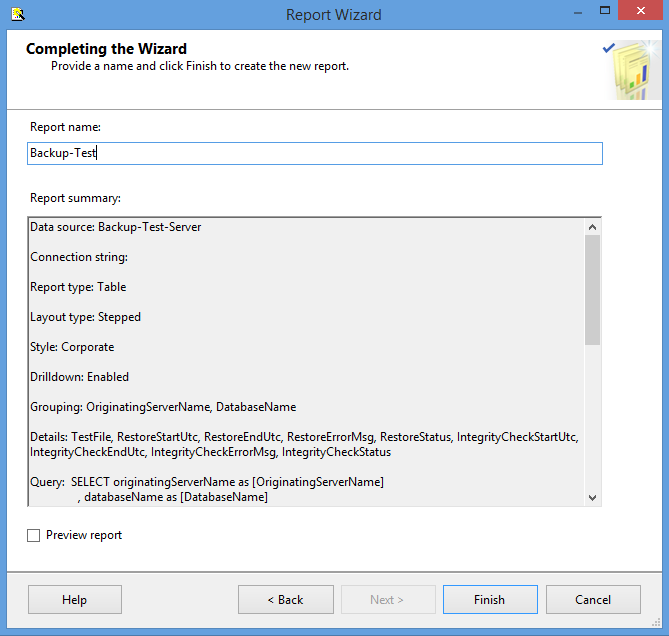
Pick a report name and, finally, click Finish.

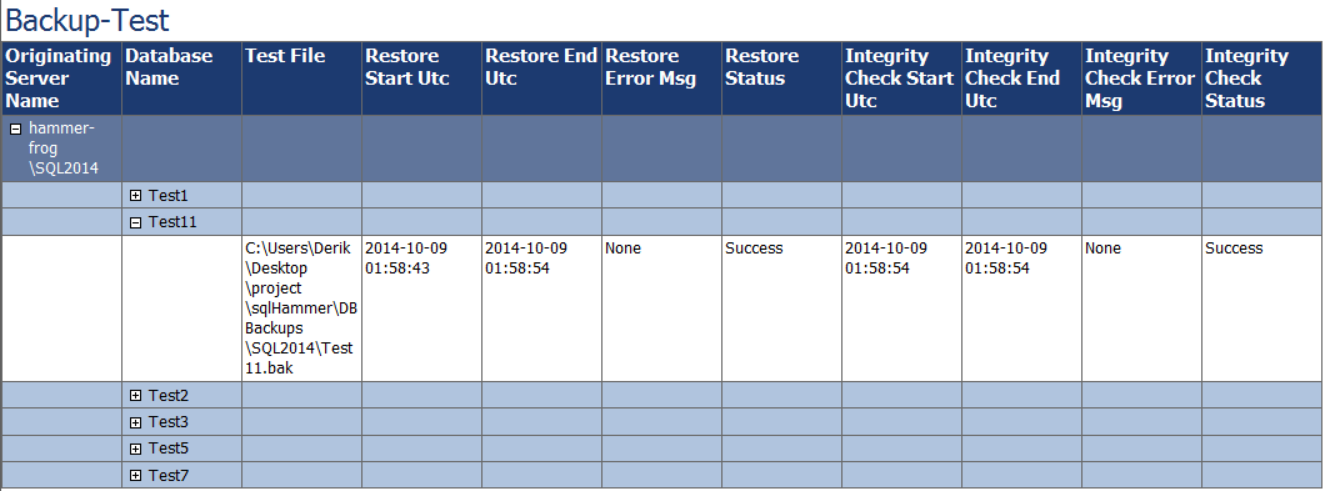
Report Preview
After all of that setup, the report will look like this.
Wrap-up
In this part of the series reporting on the results of restore tests and integrity checks was covered. Two methods of querying result data were explored and the necessary logging mechanism was scripted into the Restore-Database function originally created in part 1. Finally, an SSRS report was created to handle viewing by unprivileged users.
With this process running regularly restore testing can be pushed to the back of Karla’s mind with intervention only required if a test flags a particular backup file as a failure.
Previous article in this series:

Derik thanks our #sqlfamily for plugging the gaps in his knowledge over the years and actively continues the cycle of learning by sharing his knowledge with all and volunteering as a PASS User Group leader.
View all posts by Derik Hammer
- SQL query performance tuning tips for non-production environments - September 12, 2017
- Synchronizing SQL Server Instance Objects in an Availability Group - September 8, 2017
- Measuring Availability Group synchronization lag - August 9, 2016