
In the article, An overview of SQL Machine Learning with R scripts, we learned the R services integration with SQL Server 2019. We also explored a few useful external packages.
There is a famous adage in English: “A picture is worth a thousand words”. You can represent your information using the image in various formats such as JPEG, PNG, GIF. Usually, we use various client tools such as MS Paint, Photo, photoshop or other client applications for working with the images. You can convert image format, modify the size, applying various effects, multiple animated images.
SQL Machine Learning language – R makes us capable of working with the images directly with the SQL Server. In this article, we will use SQL Machine Learning using R scripts for image processing.
Pre-requisites
You should follow the article, External packages in R SQL Server and configure the following:
- Install Machine learning language R for SQL Server 2019
- Use the sp_configure command to enable the execution of the external script
- Install the magick external package to work with the images
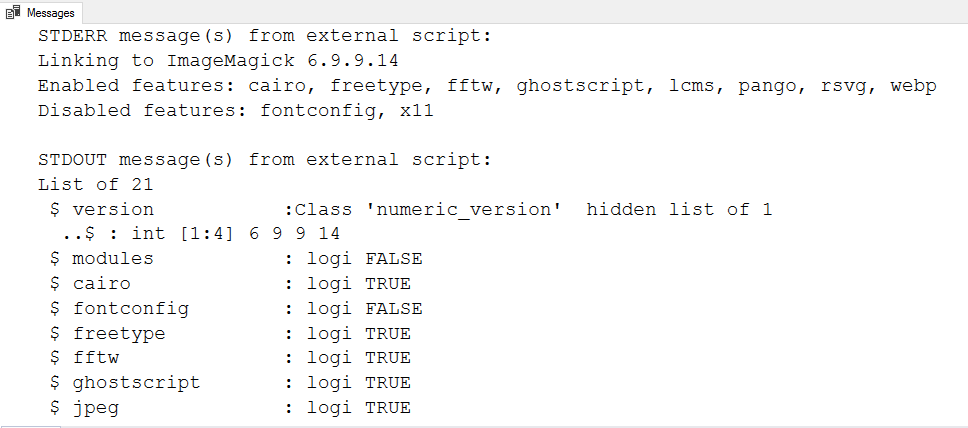
Once you have installed the magick package, you can run the following R scripts to verify it is working fine or not.
|
1 2 3 4 5 6 |
execute sp_execute_external_script @language = N'R', @script = N' library(magick) print(str(magick::magick_config())) ' |
Work with images using SQL Machine Learning with R scripts
For this article, I will use the Mickey Mouse image. You can use any image for demo purposes.

Image Source: Pinterest
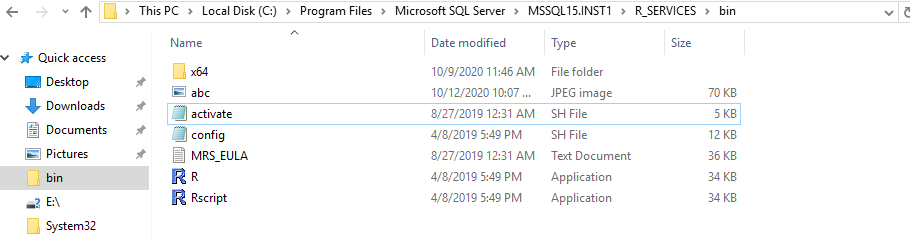
By default, R services install in the C:\Program Files\Microsoft SQL Server\MSSQL15.INST1\R_SERVICES\bin directory. Here, you get an application R for running the scripts directory using R services.
For this article, I will show the script in using the R application and its equivalent T-SQL using the sp_execute_external_script stored procedure.
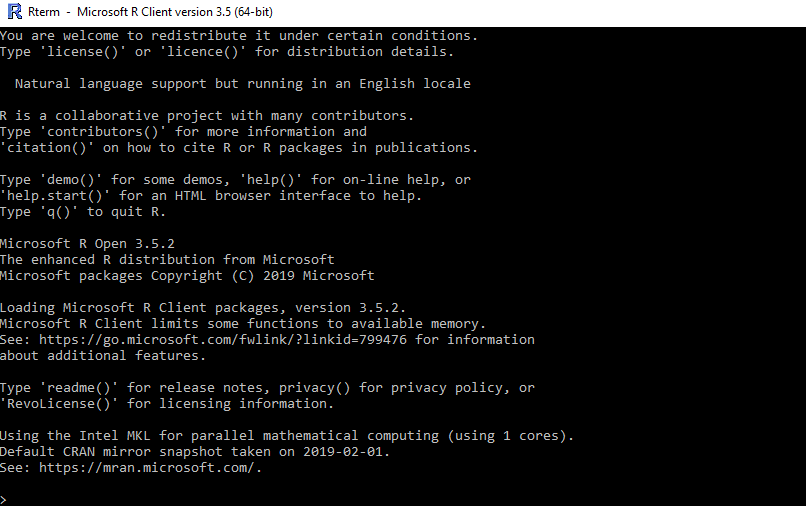
Launch the R application as an administrator, and you get the following Microsoft R client.
Similar to figure 1, we can run the following command to check the image formats supported by the Magick module.
>str(magick::magick_config())

Load the magick library in your R client.
>library(magick)

Read the image properties using R scripts
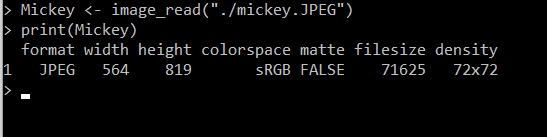
To read the image, we use the image_read() function in the SQL machine learning language R.
>Mickey <- image_read(“./mickey.JPEG”)
>print(Mickey)
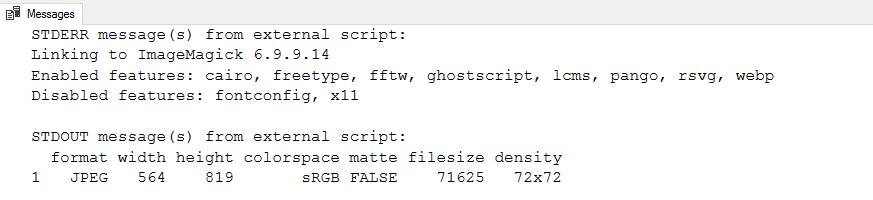
To use the same script in the SQL Server 2019, we can run the following T-SQL.
@language: Specify R language.
@script: In the script, we import the Magick library and specify the image_read() function for retrieving image properties. In the script, you can specify either URL or image complete path. In my case, I stored the image in the default bin directory of R services.
|
1 2 3 4 5 6 7 8 |
execute sp_execute_external_script @language = N'R', @script = N' library(magick) mickey <- image_read("C://Program Files//Microsoft SQL Server//MSSQL15.INST1// R_SERVICES//bin//mickey.jpeg") print(mickey) ' |
You get the same output that we received from the R client. It returns the image format, height, width, color space, file size and density.
Export an image in another format to a file on disk
Many times, we require the image in a specific format. For example, if your application requires an image in the PNG format, you need to convert the existing image to the PNG format.
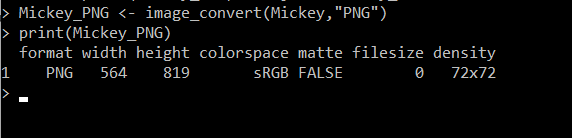
To convert the image format, R uses the image_convert() function. In my demo, the existing file format is JPEG. Let’s convert it into PNG format and save it on the disk. To save the file in the required format, we use the image_write() function.
In the below command, we check the image properties after converting them into the PNG format.
>Mickey_PNG <- image_convert(Mickey,”PNG”)
>print(Mickey_PNG)
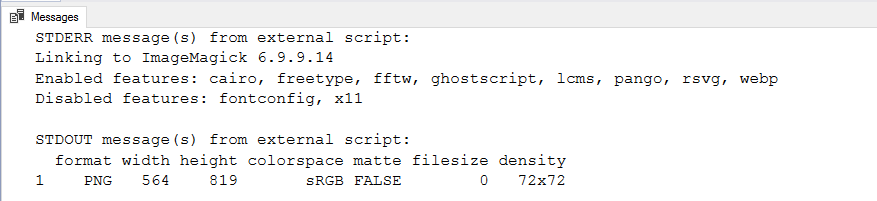
In the output, verify the image format as PNG. In the below image, we see [filesize] as zero because we have not stored the file on the disk yet.
> Mickey_PNG <- image_convert(Mickey,”PNG”)
>print (Mickey_PNG)
Now, save this file using the image_write() function. Here, we specify the format as PNG for the new file.
> image_write(Mickey_PNG, path = “./Mickey_png.png”, format = “png”)

Now, again read the PNG file and verify its properties. Now, it shows you the file size as well.
>Mickey1 <- image_read(“./mickey_png.png”)
>print(Mickey1)

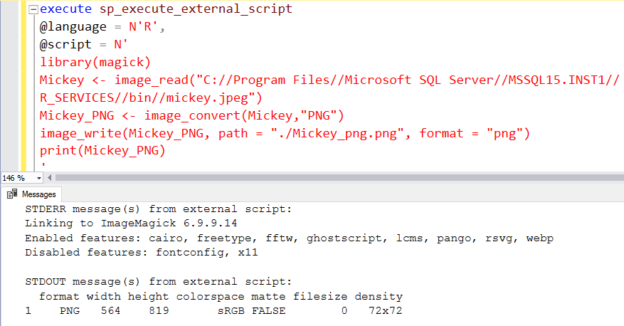
In the below T-SQL script, we combined the above-specified R scripts, and you get a similar output in SSMS as well.
|
1 2 3 4 5 6 7 8 9 10 |
execute sp_execute_external_script @language = N'R', @script = N' library(magick) Mickey <- image_read("C://Program Files//Microsoft SQL Server//MSSQL15.INST1// R_SERVICES//bin//mickey.jpeg") Mickey_PNG <- image_convert(Mickey,"PNG") image_write(Mickey_PNG, path = "./Mickey_png.png", format = "png") print(Mickey_PNG) ' |
Change the Image width using R
Suppose you require changing the image width. To edit using the R, we use the function image_scale() and specify the width in px. As per the previous image, our image width is 564 px.
In the below R script, we first read the image properties using the image_read() and later use the image_scale() function to modify its width. We save this file with a new name in the JPEG format.
> Mickey1 <- image_read(“./mickey_png.png”)
> target <- image_scale(Mickey1,”200″)
> image_write(target, path = “./Mickey_10.JPEG”, format = “JPEG”)

Now, open the image file, and you get the new image size.

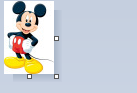
Similarly, if further modify the image size to 50px, it becomes small, as shown below.
> target <- image_scale(Mickey1,”50″)
> image_write(target, path = “./Mickey_10.JPEG”, format = “JPEG”)
The equivalent T-SQL code for use with SQL Server Machine learning language – R is as below.
|
1 2 3 4 5 6 7 8 |
execute sp_execute_external_script @language = N'R', @script = N' library(magick) Mickey1 <- image_read("C://Program Files//Microsoft SQL Server//MSSQL15.INST1//R_SERVICES//bin//Mickey.jpeg") target <- image_scale(Mickey1,"50") image_write(target, path = "./Mickey_10.png", format = "JPEG") ' |
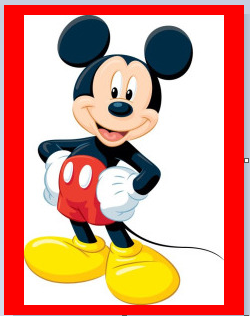
Image Borders using R scripts
We use image borders and backgrounds to make more impact using our images. You can also use a specific color border to showcase your organization branding.
>Mickey1 <- image_read(“./mickey_10.JPEG”)
>target <- image_border(Mickey1,”red”,”20×10″)
> image_write(target, path = “./Mickey_11.JPEG”, format = “JPEG”)
You can quickly convert from R script into the SQL Server Machine learning language format. The R script remains the same, and you need to embed it into the sp_execute_external_script stored procedure.
|
1 2 3 4 5 6 7 8 |
execute sp_execute_external_script @language = N'R', @script = N' library(magick) Mickey1 <- image_read("C://Program Files//Microsoft SQL Server//MSSQL15.INST1//R_SERVICES//bin//Mickey.jpeg") target <- image_scale(Mickey1,"50") image_write(target, path = "./Mickey_10.png", format = "JPEG") ' |

Flip and rotate an image using the R script
Suppose we want to rotate an image with a specific angle or flip the image (180 degrees). Usually, it can be done with only image editor tools. We have embedded functions in the R Maginc library.
To rotate an image with 45 degree, use the image_rotate() function.
>target <- image_rotate(Mickey1, 45)
> image_write(target, path = “./Mickey_11.JPEG”, format = “JPEG”)
Now, open the image and you see the image rotated by 45 degree.

Similarly, if we want to flip the image (180 degrees), we can use the image_flip() function.
> target<- image_flip(Mickey1)
> image_write(target, path = “./Mickey_11.JPEG”, format = “JPEG”)
The image looks as below:

To reverse the flip, we can use the image_flop() function and image returns to the original format.
> target<- image_flop(Mickey1)
> image_write(target, path = “./Mickey_11.JPEG”, format = “JPEG”)

The T-SQL script to flip the image is below. You can modify the same script using the image_flop() function to flip it again and bring it in the original shape.
|
1 2 3 4 5 6 7 |
execute sp_execute_external_script @language = N'R', @script = N' library(magick) Mickey1 <-image_read("C://Program Files//Microsoft SQL Server//MSSQL15.INST1//R_SERVICES//bin//Mickey.jpeg") target <- image_flip(Mickey1) image_write(target, path = "./Mickey_11.png", format = "JPEG") |
Special effects for the image using R scripts
In this part, we will apply a few special effects on the image using R scrips. You can apply various effects, but we will look at a few examples in this article.
The charcoal effect
The charcoal effect is popularly known as sketch images. Suppose, we want a sketch of Mickey Mouse. Instead of using 3rd party application, run the quick R script, and you get an image after applying the Charcoal effect as shown below.
> target<- image_charcoal(Mickey1)
> image_write(target, path = “./Mickey_11.JPEG”, format = “JPEG”)

Blur an image
We can blur an image by applying the low-pass filter to an image. Nowadays, the latest mobile cameras have the functionality to blur an image as well.
In the R script, we can use a function image_blur() and get the image in blur format. It uses two parameters – radius and sigma as input values.
- Radius: It shows the pixels for transformations
- Sigma: It is the standard deviation for the Laplacian
Run the below code in R client, and you get following blur image.
> target<- image_blur(Mickey1,20,5) > image_write(target, path = “./Mickey_11.JPEG”, format = “JPEG”)

Oil paint image
It is getting interesting to see how good R in handling the images. If we want to see how my image will look in the oil paint, use the image_oilpaint() function.
> target<- image_oilpaint(Mickey1)
> image_write(target, path = “./Mickey_11.JPEG”, format = “JPEG”)
The output image is as shown below.

Negative of an image
Do you want to view the negatives of an image? If yes, R has a new function image_negate() to show the negatives of an image.
> target<- image_negate(Mickey1)
> image_write(target, path = “./Mickey_11.JPEG”, format = “JPEG”)
The output image is as shown below.

You can convert these animation effects function into the T-SQL code and be familiar with the R language.
Text annotation for an image using R scripts
Usually, in an organization, we classify the information as confidential, private, public, internal. It is an attribute of the image that defines the image type.
To add the text annotation, we use the function image_annotate() function and specify the following values.
- Text: Here, we wish to add the text CONFIDENTIAL for our image
- Size: It is the font size
- Color: Font color
- Box color: Specify the color for the box in which you write the text
- Degree: It is the angle at which the box is rotated
- Location: It is the location of the text box
Once you run the below code, your image looks like below.
> > target<-image_annotate(Mickey1, “CONFIDENTIAL”, size=20, color=”blue”, boxcolor=”Yellow”, degree=45, location=”40+120”
> image_write(target, path = “./Mickey_11.JPEG”, format = “JPEG”)

The equivalent SQL Server Code in SQL Machine learning R is as below.
|
1 2 3 4 5 6 7 8 |
execute sp_execute_external_script @language = N'R', @script = N' library(magick) Mickey1 <-image_read("C://Program Files//Microsoft SQL Server//MSSQL15.INST1//R_SERVICES//bin//Mickey.jpeg") target<-image_annotate(Mickey1, "CONFIDENTIAL", size=20, color="blue", boxcolor="Yellow", degree=45, location="40+120") image_write(target, path = "./Mickey_11.png", format = "JPEG") ' |
Conclusion
In this article, we explored the SQL Machine Learning Language R scripts for interacting with the images and modifying those images. I recommend you write the code in the R client first and then convert the code into the T-SQL stored procedure for easy troubleshooting.

I am the author of the book "DP-300 Administering Relational Database on Microsoft Azure". I published more than 650 technical articles on MSSQLTips, SQLShack, Quest, CodingSight, and SeveralNines.
I am the creator of one of the biggest free online collections of articles on a single topic, with his 50-part series on SQL Server Always On Availability Groups.
Based on my contribution to the SQL Server community, I have been recognized as the prestigious Best Author of the Year continuously in 2019, 2020, and 2021 (2nd Rank) at SQLShack and the MSSQLTIPS champions award in 2020.
Personal Blog: https://www.dbblogger.com
I am always interested in new challenges so if you need consulting help, reach me at rajendra.gupta16@gmail.com
View all posts by Rajendra Gupta
- Understanding PostgreSQL SUBSTRING function - September 21, 2024
- How to install PostgreSQL on Ubuntu - July 13, 2023
- How to use the CROSSTAB function in PostgreSQL - February 17, 2023