
In this article, we will configure an SSIS package to generate a composite output in the flat-file destination.
Problem overview
Recently, I received a requirement to get an output of a query in a text file. It is simple to get an output in the flat-file using SSMS options.
- Results to text
- Result to file
But my requirement was a little different. Let me explain the output format first. In this article, I will use the [AdventureWorksDW2017] sample database. You can download the backup copy from the Microsoft docs and restore it in the SQL instance.
|
1 2 3 4 5 6 7 8 |
SELECT [ModelRegion] ,[TimeIndex] ,[Quantity] ,[Amount] ,[CalendarYear] ,[Month] ,[ReportingDate] FROM [AdventureWorksDW2017].[dbo].[vTimeSeries] |
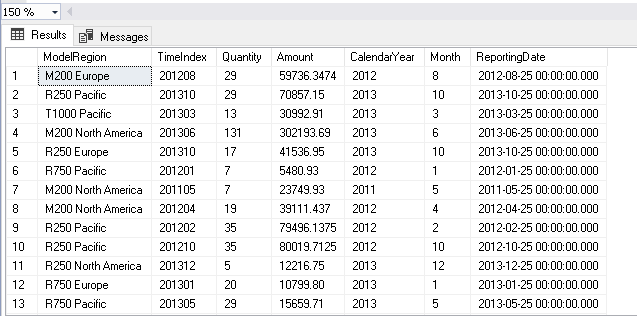
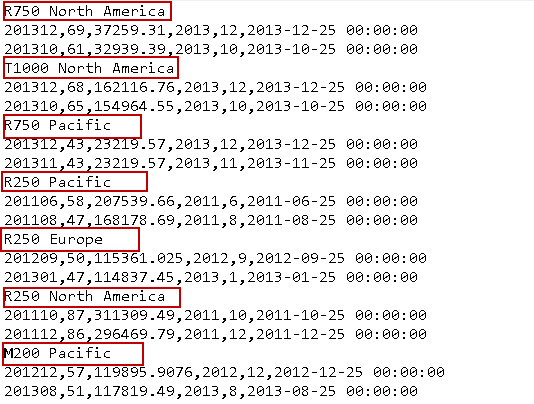
In the above query output, the first column shows the [ModelRegion]. Our requirement is to get output in the following format. It should show [ModelRegion] as a header followed by data in the corresponding rows in the next lines.
If you have small rows in the SQL table, you can get all rows in a text file and manually format the data. But I do not want to prepare data manually. SSIS package always comes for rescue in these situations. Let’s see how SSIS can satisfy the requirement.
You can go over these articles here, Integration Services (SSIS) to gain basic knowledge of SSIS packages before proceeding with this article.
Create an SSIS package to get output in a flat-file with column header
You should have a visual studio 2019 with SQL Server Data tools and integration service extension. You can refer to this article, Install SSDT with Visual Studio 2019 for more details.
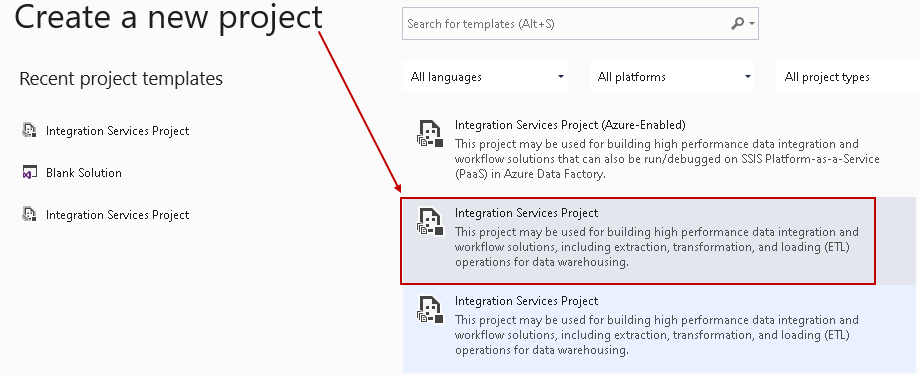
Create a new SSIS project using the Integration Service project option shown below.
Specify the project name and location as per your requirement.

Define variables
In this project, we define user variables. An SSIS variable is an object that stores the values, and you can reference these variables in the package. SSIS provides a few system variables as well, and you can use these system variables, especially for auditing and debugging purposes.
Let’s create the following user variables for our SSIS package configuration.
User::ModelRegion: In this variable, we store the distinct values of [ModelRegion] column from the below query
123SELECT DISTINCT([ModelRegion])FROM [AdventureWorksDW2017].[dbo].[vTimeSeries];- User::QueryDetails: In this variable, we store the records for a corresponding [ModelRegion].
To define a variable in the SSIS package, right-click on the blank area of Control flow and select Variables.
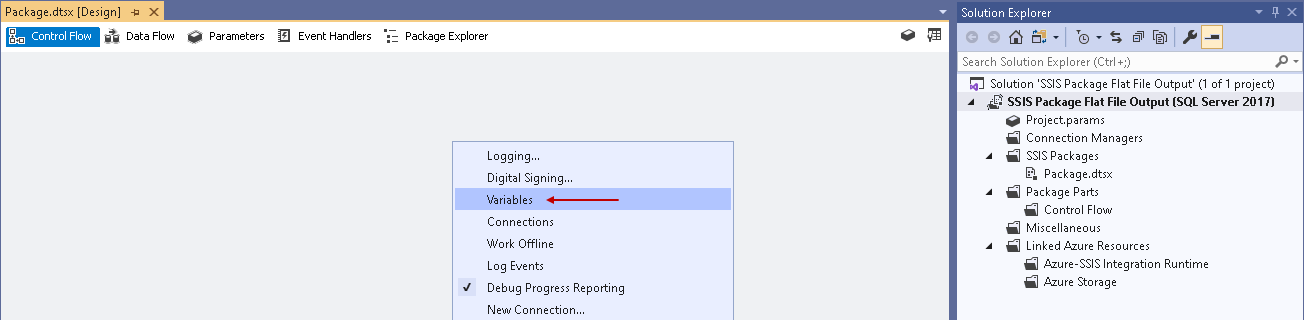
In the variables window, click on Add variables( as pointed by the arrow) and add the variables defined above. You can choose appropriate data types for a user variable.

Add an execute SQL task
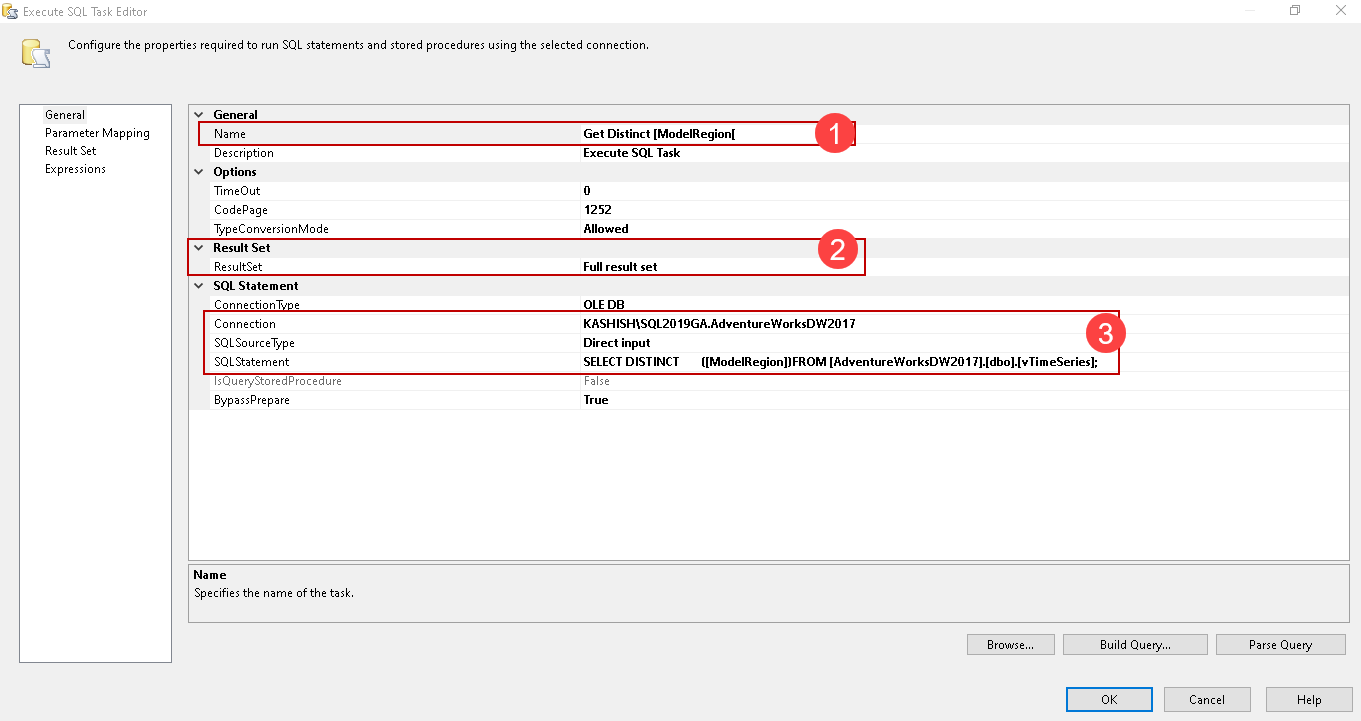
Now, drag an execute SQL task in the control flow and open its properties. In the execute SQL editor, make the following configurations.
- Name: Specify a suitable name for the task
- Result set: Select the Full Result set from the drop-down. It this case, the result set can contain multiple values
- Connect details:
- Connection type: OLE DB
- Connection: Create a new SQL connection or choose an existing SQL instance connection, authentication method (Windows or SQL), and default database for SQL OLE DB connection
- SQL Source type: Direct input. We use the SQL query in the direct input method
- SQL Statement: Here, specify the SQL query to get distinct [ModelRegion] values
Click on the Result set in the left-hand menu and map the variable User::ModelRegion. Here, you always use value 0 for the full result set.
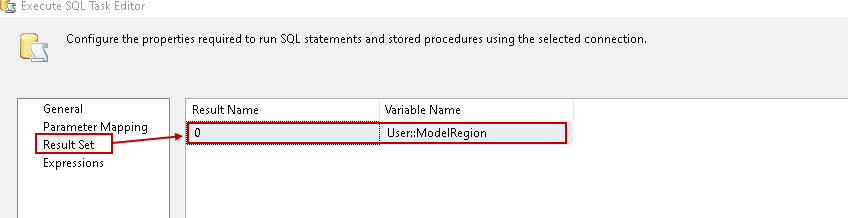
It completes the configuration for executing the SQL task.
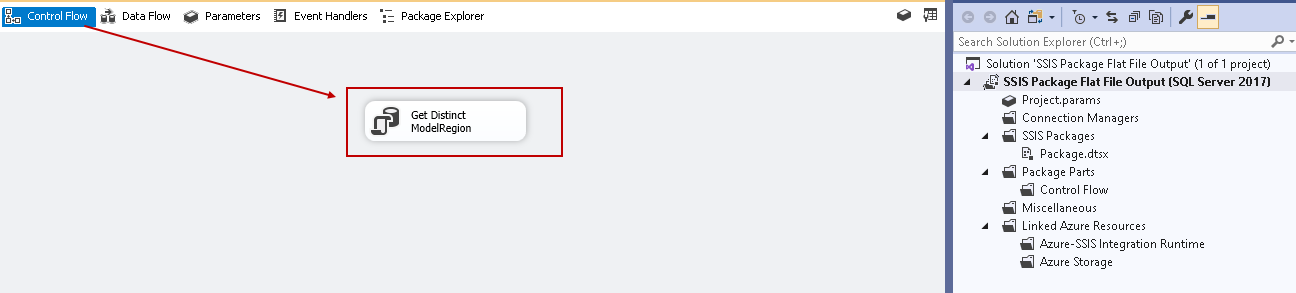
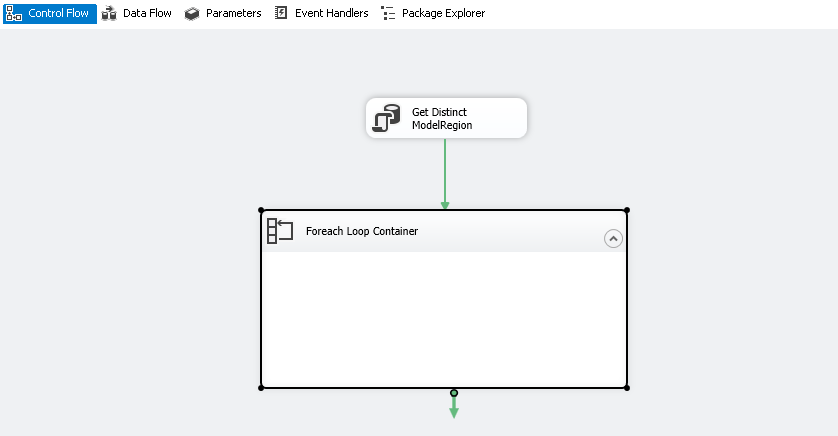
Add a Foreach loop container
Now, drag the Foreach loop container and join it with executing the SQL task created earlier. It runs the tasks specified inside the loop for each value received from executing the SQL task.
You can refer to this article, Using SSIS ForEach Loop containers to process files in Date Order to learn about this container.
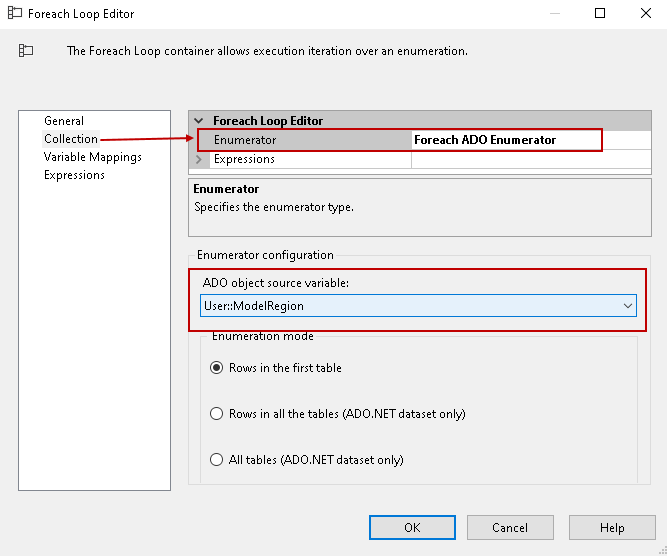
Double click on this Foreach loop container to configure it. On the collection page, make the following changes.
- Enumerator: Select Foreach ADO Enumerator to loop through the list of distinct values of [ModelRegion]
- ADO object source variable: Select the variable User::ModelRegion from the drop-down
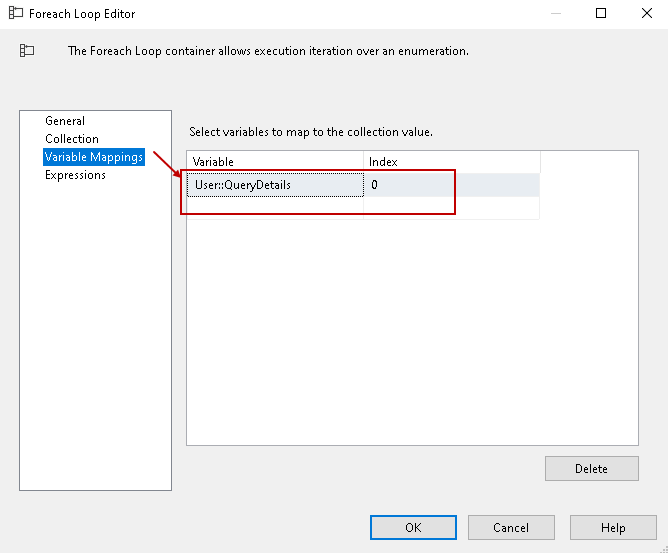
Click on the Variable Mappings and map the variable User::QueryDetails from the drop-down values. It automatically takes value 0 for the index column.
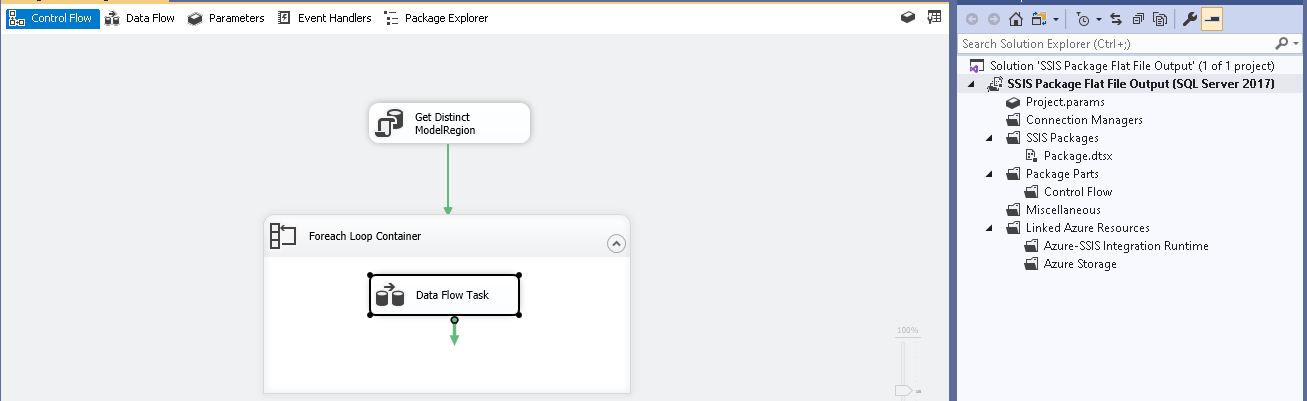
Add data flow tasks in the Foreach loop container
Now, drag a data flow task inside the for each loop container. You can rename this data flow task, but let’s go with a default name.
Open the data flow task editor and add the following components.
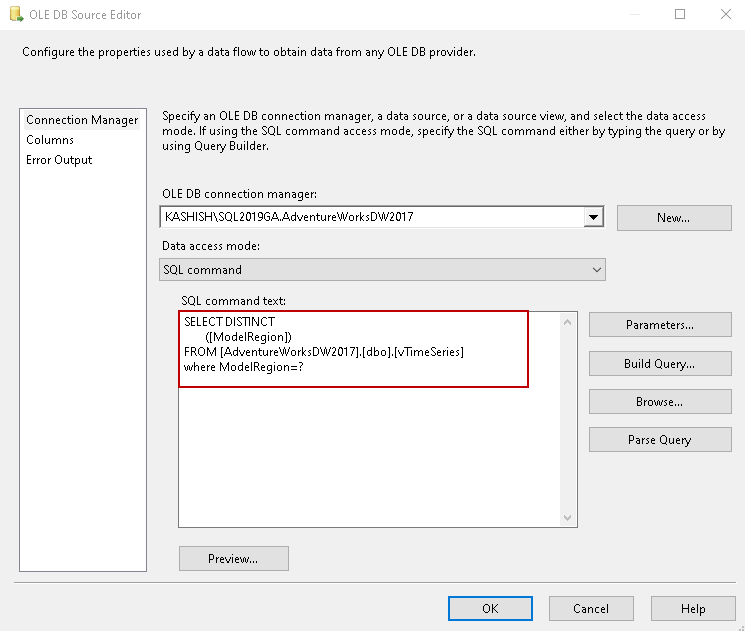
- OLE DB Source:
In this source, specify the SQL instance connection and paste the following SQL query and filter records with parameters
|
1 2 3 4 |
SELECT DISTINCT ([ModelRegion]) FROM [AdventureWorksDW2017].[dbo].[vTimeSeries] where ModelRegion=? |
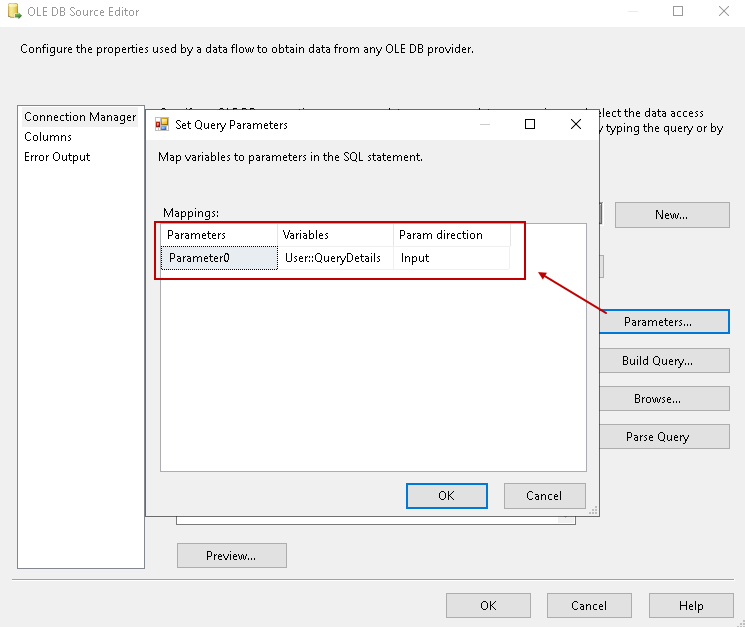
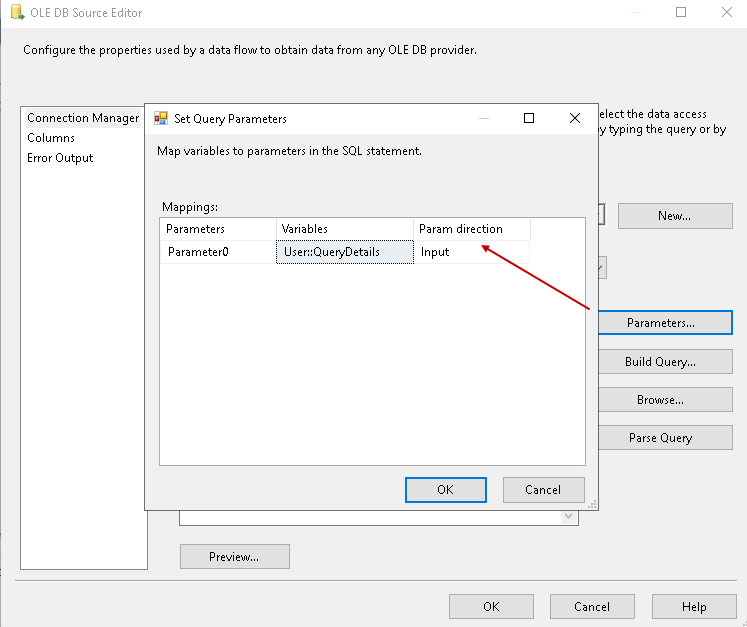
Click on the Parameters and map the SSIS variable, as shown below.
- Parameters: Parameter 0
- Variables: User::QueryDetails
- Param direction: input
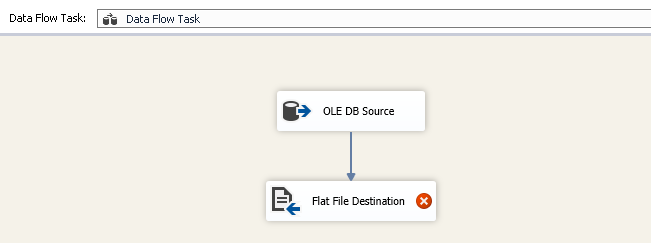
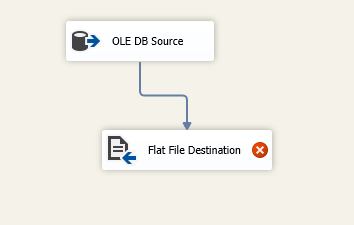
Click Ok and add a flat file destination. Here, the red cross shows configuration is not complete for the task.
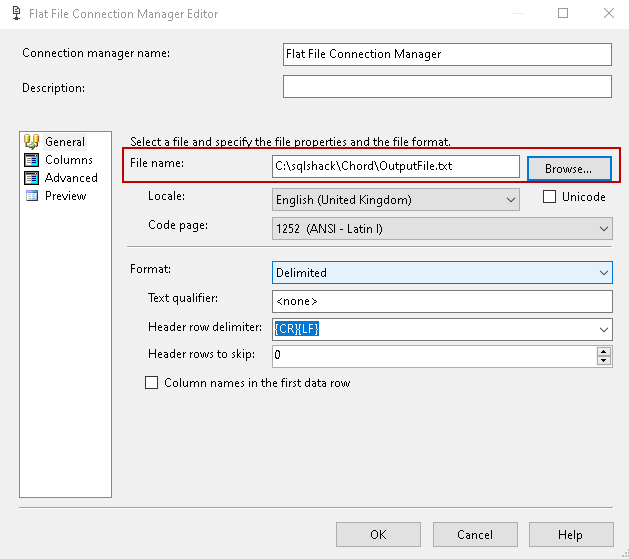
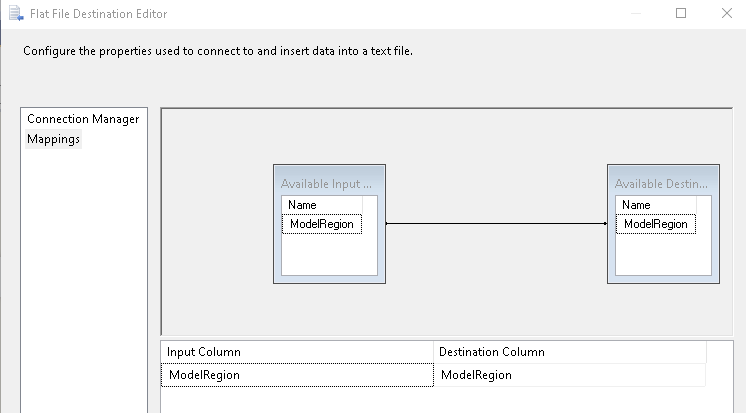
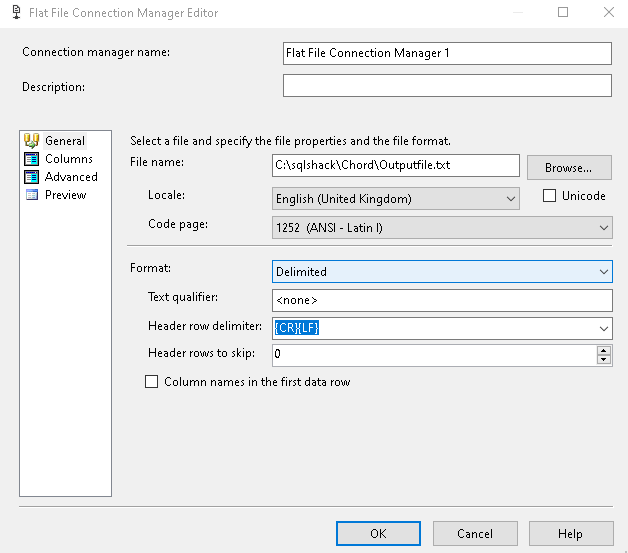
In the flat file destination editor, specify a text file name and location. We can leave the other configurations such as text qualifier, header row delimiter as default.
Click on Mapping and verify Mapping between SQL query output and flat-file column. In this demo, we have input and output columns as [ModelRegion].
Now, go back to the control flow area and add another data flow task. This data flow task will add the details for a particular [ModelRegion] in the flat file.
Open the data flow task editor for it and add the same OLE DB source and flat file destination.
In the OLE DB editor, specify the SQL query that returns values for data rows corresponding to a [ModelRegion].
For this demo, I added the top 2 clauses to show output with the top two rows as per the amount in descending order.
|
1 2 3 4 5 6 7 8 9 10 |
SELECT top 2 [TimeIndex] ,[Quantity] ,[Amount] ,[CalendarYear] ,[Month] ,[ReportingDate] FROM [AdventureWorksDW2017].[dbo].[vTimeSeries] where ModelRegion=? order by Amount desc |

Click on the Parameters and do the variable mapping, as shown below.
- Parameters: Parameter 0
- Variables: User::QueryDetails
- Param direction: input
Add the flat file destination, as shown below.
In the flat file connect manager editor, add a new flat file, but it should point to the same text file we used earlier for output. The second data flow task should write in the same flat-file as per our requirement.
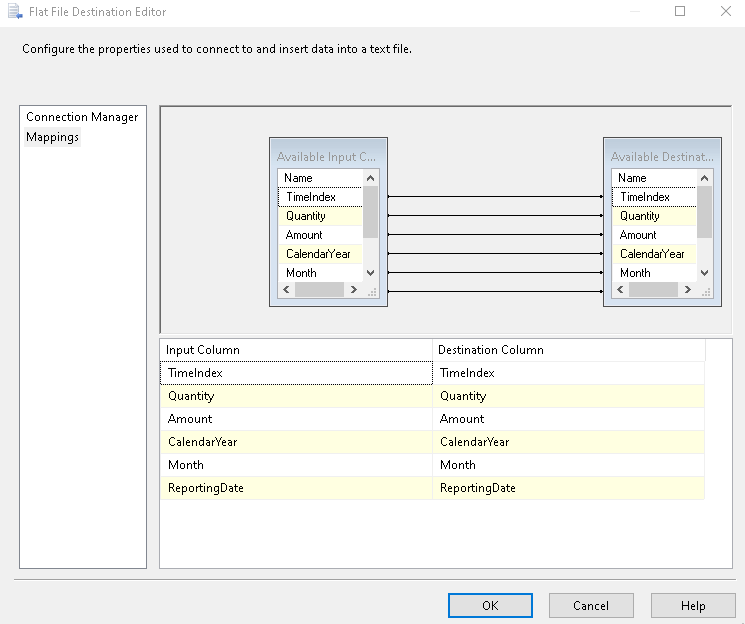
In the mappings, verify the columns from SQL query and flat file output.
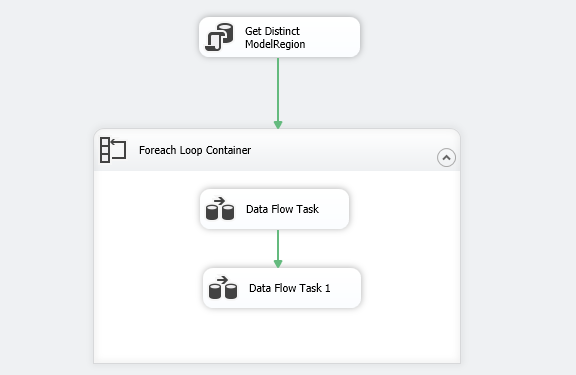
Click Ok, and we see the following SSIS package configuration.
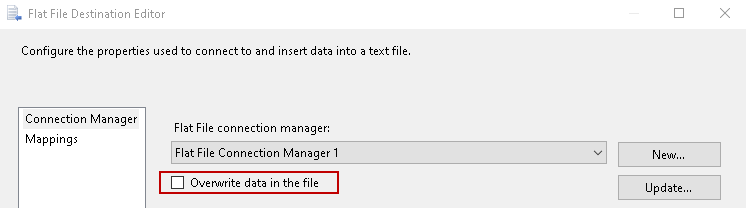
You should also uncheck option – Overwrite data in the file from both of the flat files, as shown below. If we enabled this option, it overwrites data in the flat file in each loop.
Understanding SSIS package logic used in this article
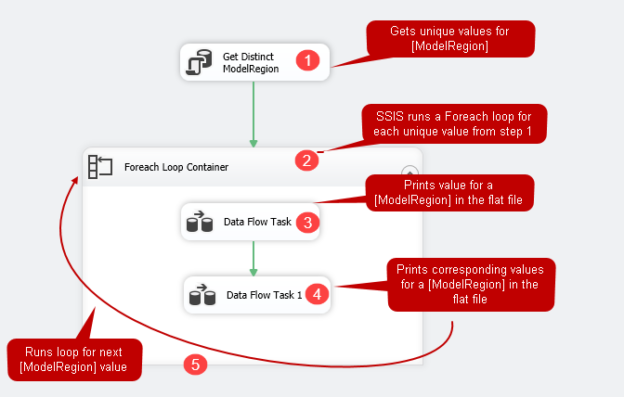
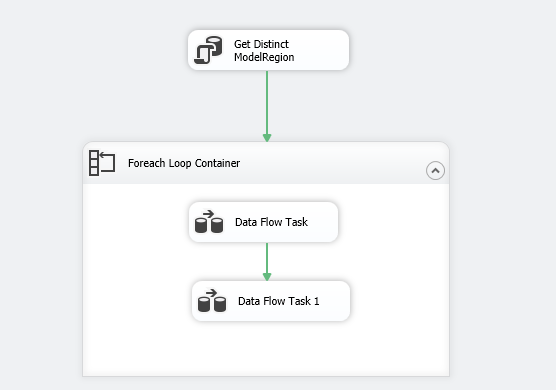
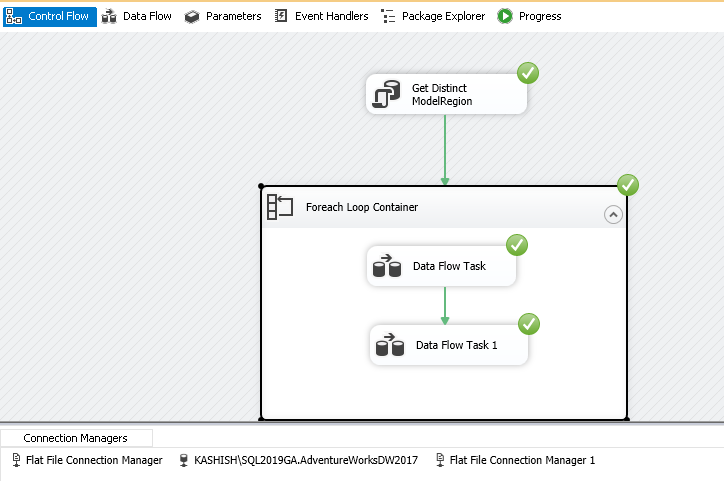
Click Ok, and we see the following SSIS package. Before executing this package, let me walk through you the complete logic we implemented in this article.
- First, it runs the execute SQL task (in this case, Get Distinct [ModelRegion]) and gets unique values for the [ModelRegion] in the full Result set variable
-
Next, it runs a Foreach loop container for each unique value
- For the first unique value, it executes the first data flow task. In this data flow task, we print the [ModelRegion] value in the flat file
- Then it goes to the second data flow task and prints the values corresponding to a [ModelRegion] for which loop is executing
- It continues the execution of the package for remaining values and completes once it writes all values in the flat file

Execute the SSIS package using the Start button in the menu bar. It runs the package successfully, as shown below. In case of any error, we get a red cross icon on the respective failed task.
Go to the destination directory, which we specified in the flat file connection, and view the records. It satisfies our initial requirements.

Conclusion
In this article, we explored how SSIS packages help to generate composite outputs as per our requirements. It helps us avoid manual tasks and automate things without writing any complicated code. It is useful for both database administrators and developers.

I am the author of the book "DP-300 Administering Relational Database on Microsoft Azure". I published more than 650 technical articles on MSSQLTips, SQLShack, Quest, CodingSight, and SeveralNines.
I am the creator of one of the biggest free online collections of articles on a single topic, with his 50-part series on SQL Server Always On Availability Groups.
Based on my contribution to the SQL Server community, I have been recognized as the prestigious Best Author of the Year continuously in 2019, 2020, and 2021 (2nd Rank) at SQLShack and the MSSQLTIPS champions award in 2020.
Personal Blog: https://www.dbblogger.com
I am always interested in new challenges so if you need consulting help, reach me at rajendra.gupta16@gmail.com
View all posts by Rajendra Gupta
- Understanding PostgreSQL SUBSTRING function - September 21, 2024
- How to install PostgreSQL on Ubuntu - July 13, 2023
- How to use the CROSSTAB function in PostgreSQL - February 17, 2023