
Introduction
In previous chapters, we taught how to create SQL Databases in Azure. In this new chapter, we will show you the new SQL Data Warehouse Service in Azure.
The new SQL Data Warehouse is a Service provided by Microsoft Azure, where you can access to the dimensions and fact tables and you can create powerful reports with BI Power view (in Azure also). The Data Warehouse service is a columnar, petabyte-scale service.
Requirements
An Azure subscription already created.
Getting started
In this new article, we will create a new SQL Data Warehouse in Azure and show some properties. In future articles, we will talk about creating report and connecting to the data.
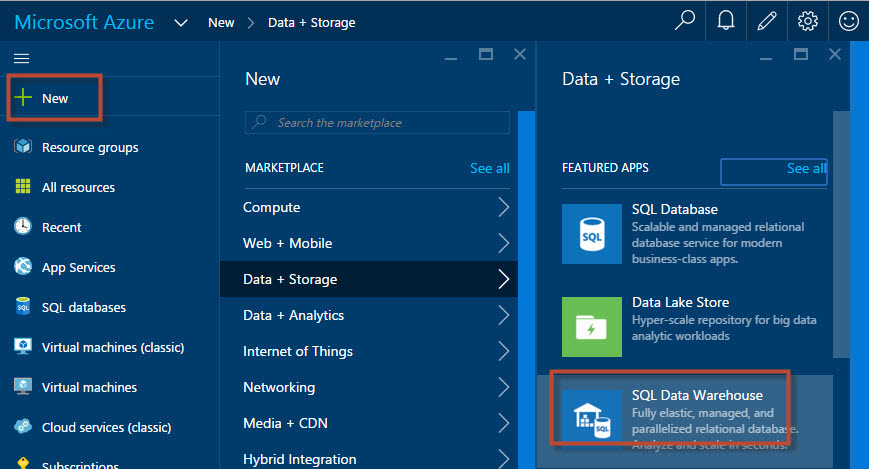
In the Azure Portal, press the New option and select Data+Storage➜SQL Data Warehouse.

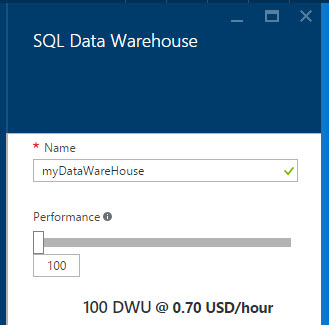
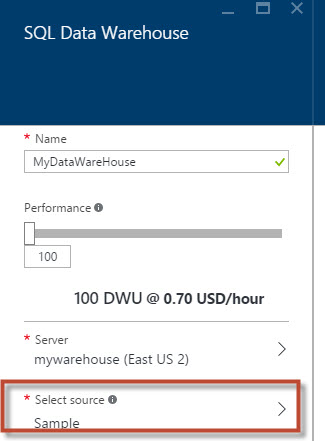
Figure 1. The new SQL Data Warehouse Specify the SQL Data Warehouse new name. Make sure that the name is unique.
Figure 2. The SQL Data Warehouse name. In the performance section, you will have the DWU and the price per hour. When you increase the DWUs, the price is also raised. The minimum value is 100. The DWUs are Data Warehouse Units. The DWU is used to measure how fast the rows are scanned, loaded and copied. If you need more performance, you need to increase the DWUs. The prices depend on the Region. It is usually cheaper to have your Data Warehouse in US than in Europe. In Austria is the more expensive region followed by Brazil.
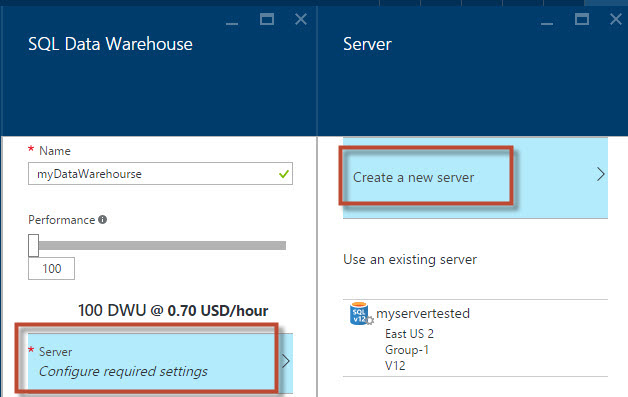
Click on the Server section. You can create a new server or use an existing one (if any). In this example, we will create a new server.
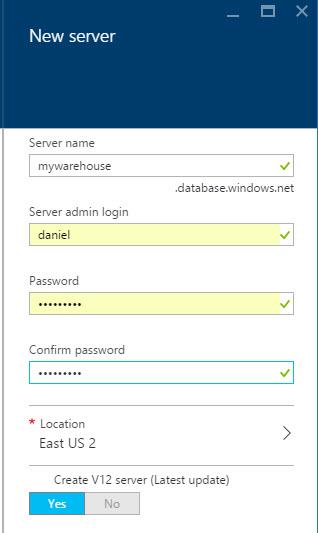
Figure 3. Performance and Server options Specify a server name, a login and a password. You can specify the location to store the server. The last version of SQL Server is V12.
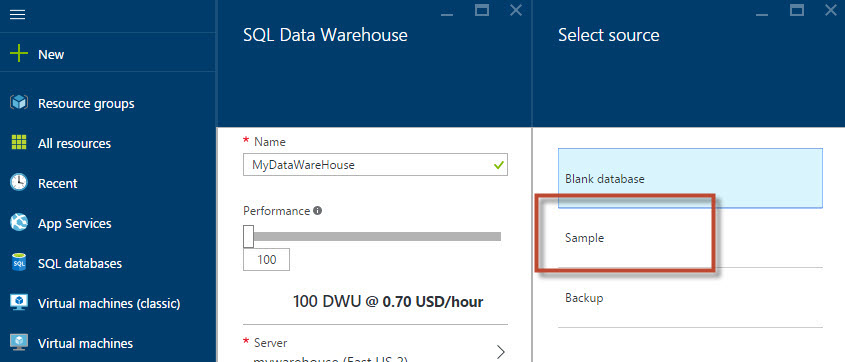
Figure 4. The Server information In the select source, select the Sample option. This option will allow creating a database based on a sample database.
Figure 5. Select source Select the Sample option. This option will let you select an already created database.
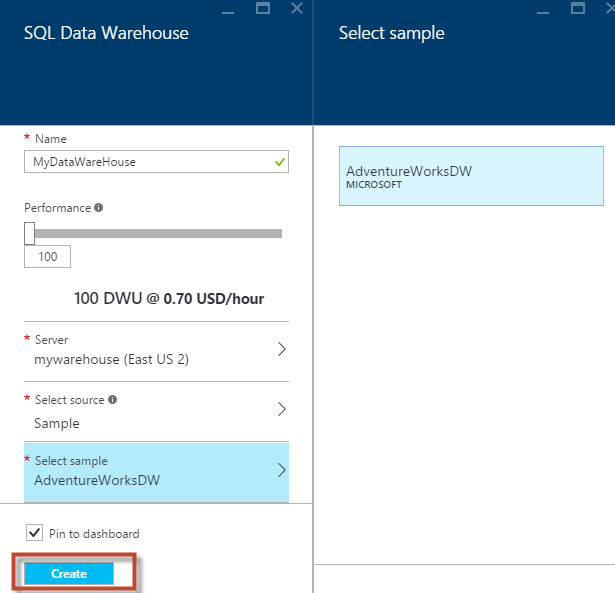
Figure 6. Adding the sample database. Select the AdventureWorksDW. This will create the Adventureworks Database, which is a fictitious company similar to the adventurewordsDW used in Analysis Services. This is a classic database with several tables and views used for testing purposes. You could also create a blank database or load from a backup. Once selected, press the create button to create the database.
Figure 7. The AdventureWorksDW In the menu, you will receive a message that the Database creation is in progress.
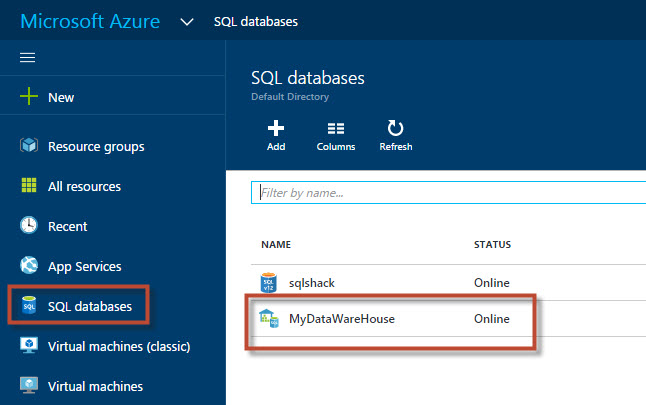
Figure 8. Creating the SQL Data Warehouse Once created, in the SQL databases of the Azure Portal, click on the Data Warehouse database created. As you can see the normal SQL databases and the SQL Data Warehouse databases are in the same place, but the icons are different.
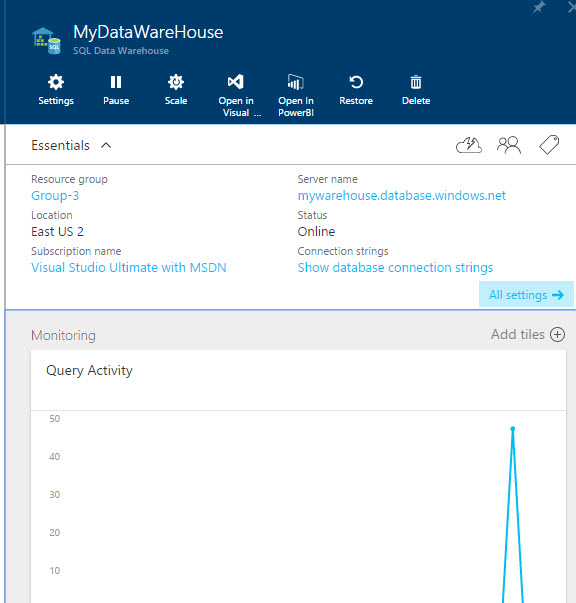
Figure 9. The SQL databases You have the option to configure the settings, you can pause the database. The scale option (DWUs used) can be changed. You can open the database in Visual Studio or create reports using PowerBI. Here you have the options to restore the database or delete the database. You will be able to see the Group, location, subscription, server name, connection strings and a graphic of the query activity.
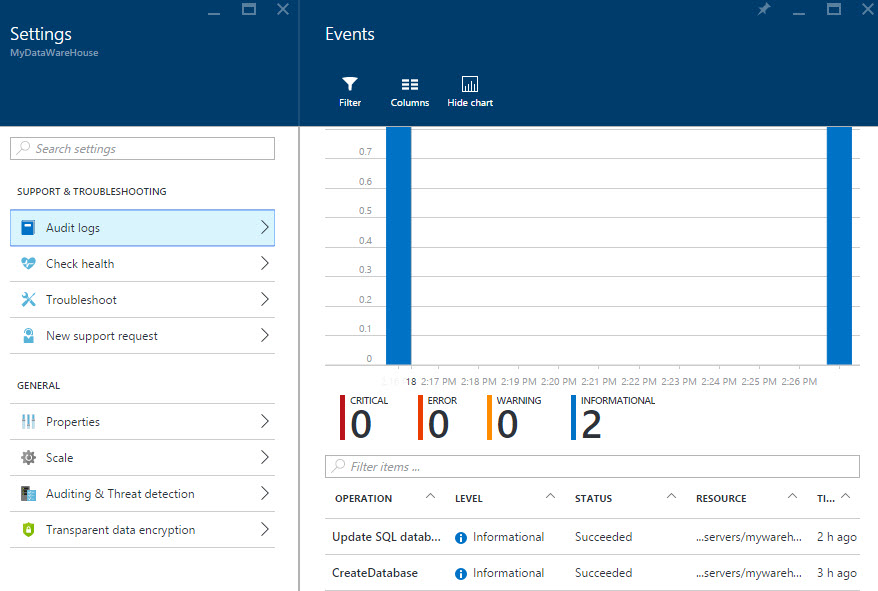
Figure 10. The status and Data The audit logs store the errors, warnings and informational messages. If the error is critical, the category of the message is critical. The color for a critical error is red, an error is orange, a warning is yellow and an informational message is blue. It is possible to filter errors or hide the charts.
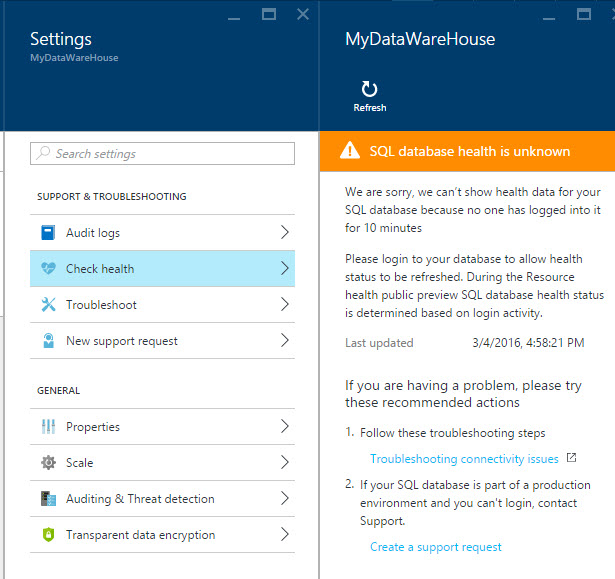
Figure 11. The log messages. The check health shows the status of the database. If there is nobody connected, you will receive a message similar to the following:
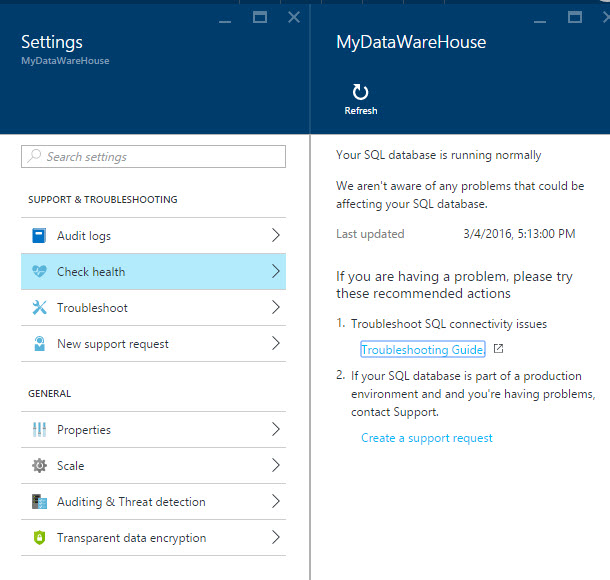
Figure 12. Check health If you connect to the database. You will receive a message of the status of the database. If you have problems, you have the option to troubleshoot or submit a ticket with a support request.
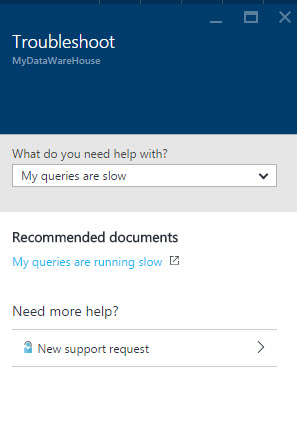
Figure 13. The database health status. The troubleshot option will help you with common problems. It will give you links of pages with solution to your problems like slow queries or connectivity problems.
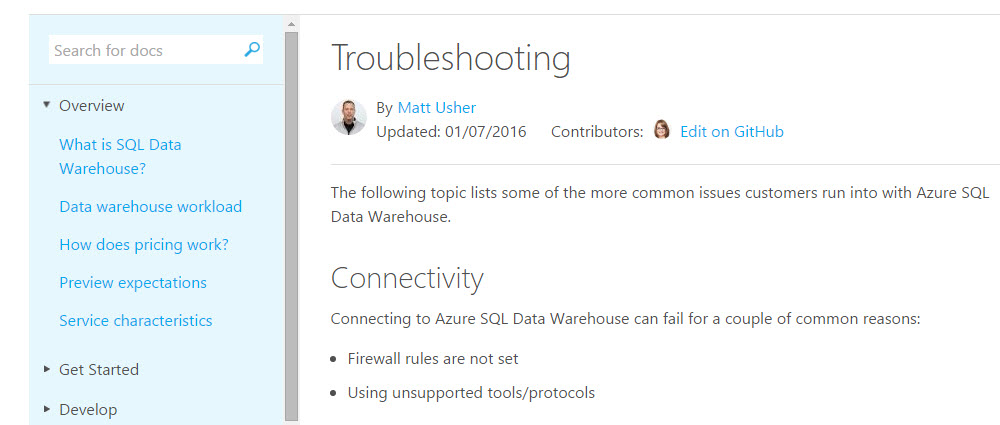
Figure 14. Troubleshooting options The Troubleshooting pages will give you diferent possible solutions to your problem.
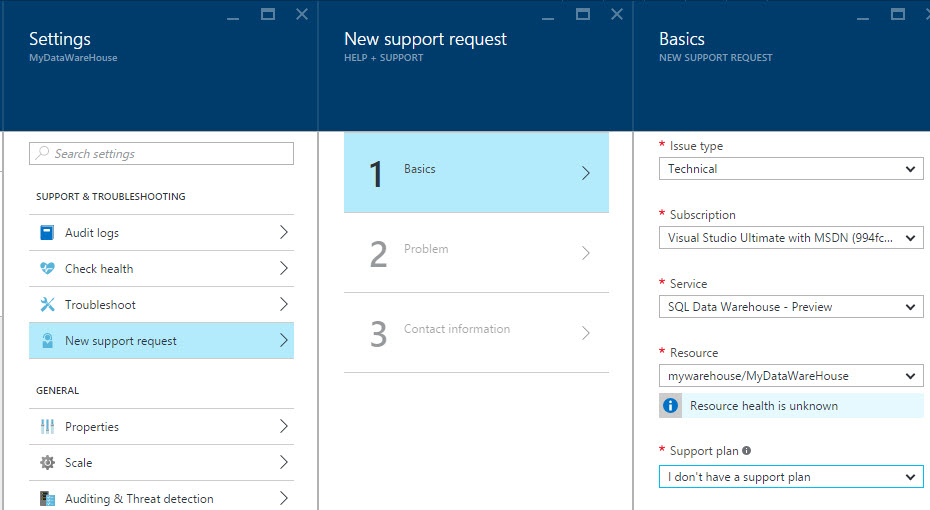
Figure 15. The troubleshooting document If the troubleshooting option did not solve your problem, you can send a support request. This option will let you contact with someone from tech support from Microsoft. Sending s support request has 3 steps. The first one is to write the type of request. The second option is to describe the problem and finally you will send the contact information.
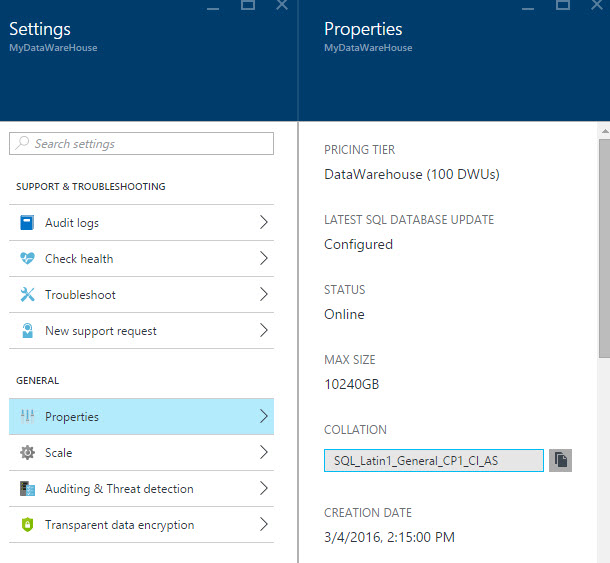
Figure 16. Support request In the properties, you can see the DWU units used, the status of the database, the collection and the Max Size for the database.
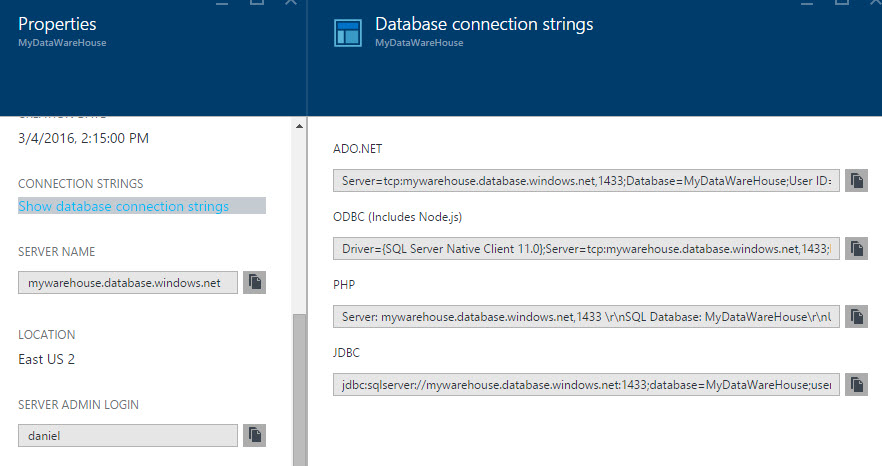
Figure 17. SQL Data Warehouse Properties The connection string will show the code required to connect to the data warehouse database using ADO.net, ODBC, PHP, JDBC connection.
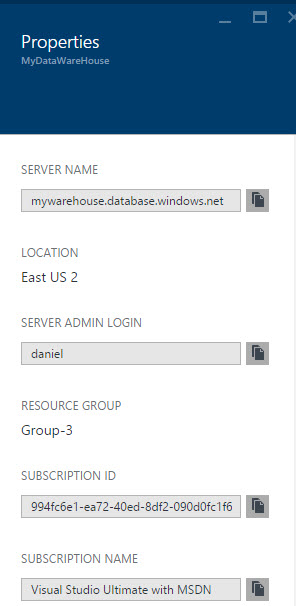
Figure 18. String connections In the properties, you can also see the server name, the location and the login. You can also see the group where it is located and the subscription information.
Figure 19. More properties The scale option is one of the most important options. If you pay more, you have a better performance in few seconds. In the scale section, you can increase or decrease de DWU. For example, I may want to have 500 DWUs during peak hours and 200 DWUs during the rest of the day. I could configure the Task Scheduler of my operative system to run a PowerShell script to change it automatically. The minimum values is 100 DWUs and currently the maximum value is 2000 DWUs (at 0.7 and 14 USD per hour respectably).
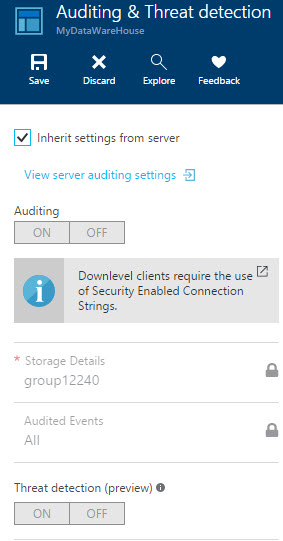
Figure 20. The Scale option The audit and threat detection properties are inherited from the server. If you discard the default option, you can configure your settings.
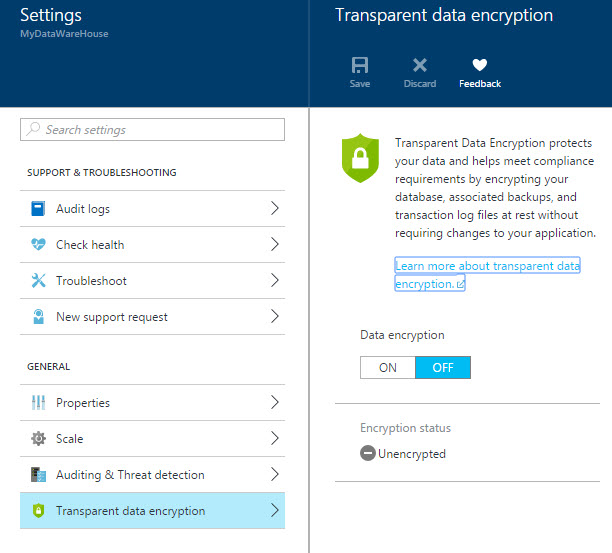
Figure 21. Auditing settings. The transparent encryption allows you to encrypt your data in a secure way. By default, the data is not encrypted.
Figure 22. Transparent data encryption


Conclusion
But as you can see, creating a new SQL Data Warehouse is a straightforward process. In future articles we will talk about creating reports and working with the data.

He has worked for the government, oil companies, web sites, magazines and universities around the world. Daniel also regularly speaks at SQL Servers conferences and blogs. He writes SQL Server training materials for certification exams.
He also helps with translating SQLShack articles to Spanish
View all posts by Daniel Calbimonte
- PostgreSQL tutorial to create a user - November 12, 2023
- PostgreSQL Tutorial for beginners - April 6, 2023
- PSQL stored procedures overview and examples - February 14, 2023