

In this article, we will learn how to deploy SSIS packages which are typically built on developer workstations, to Azure Data Factory using Visual Studio and Data Tools.
Introduction
SQL Server Integration Services (SSIS) has been the most popular tool and technology stack for Extract-Transform-Load (ETL) operations and other related tasks like data cleansing, data preparation, etc. Before the cloud paradigm gained popularity, SSIS packages used to be developed locally on developer workstations and deployed on the server using tools like Visual Studio and SQL Server Data Tools. In the era of cloud computing where every imaginable data service is found on the cloud, SSIS also has its place on the Azure cloud. Azure Data Factory supports SSIS runtime which enables executing SSIS packages on Azure cloud with the SSIS runtime provided as a managed runtime service on the Azure cloud. Developers continue to develop new packages or modernize existing packages and deploy them on cloud-based services like SQL Azure or Data Factory, using Visual Studio as the IDE for development and deployment. Let’s go ahead and learn to deploy SSIS packages to Azure Data Factory using Visual Studio and Data Tools.
Pre-requisites
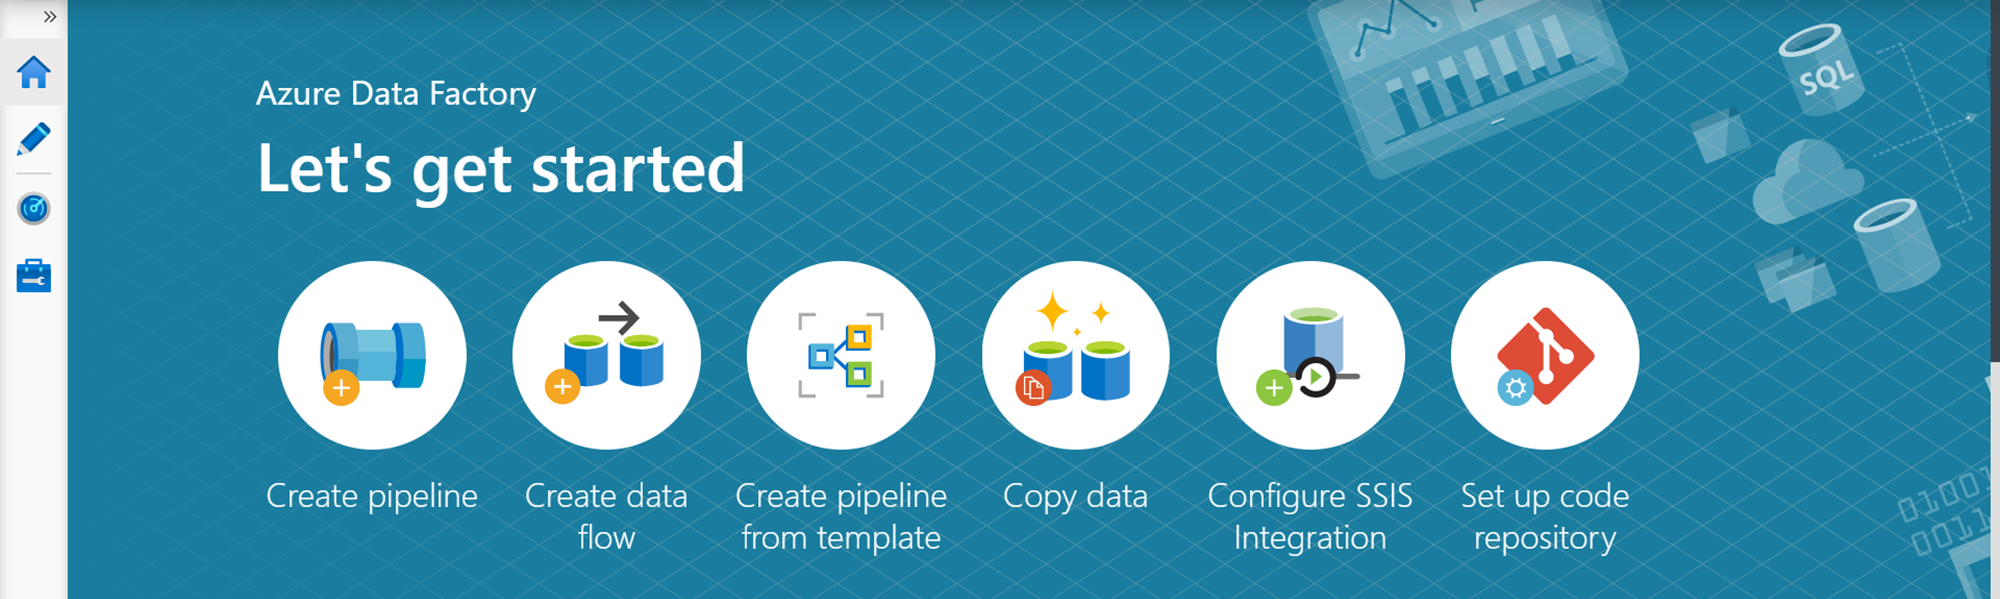
Before we start an exercise where we would focus on using a sample SSIS package and deploying it on Azure, we need some pre-requisites in place. The first thing we need is a Data Factory account, as we are going to deploy the package on this account. This can be easily created by opening the Data Factory service and creating a new account. Once this account is created, open the Azure Data Factory portal and it would look as shown below.
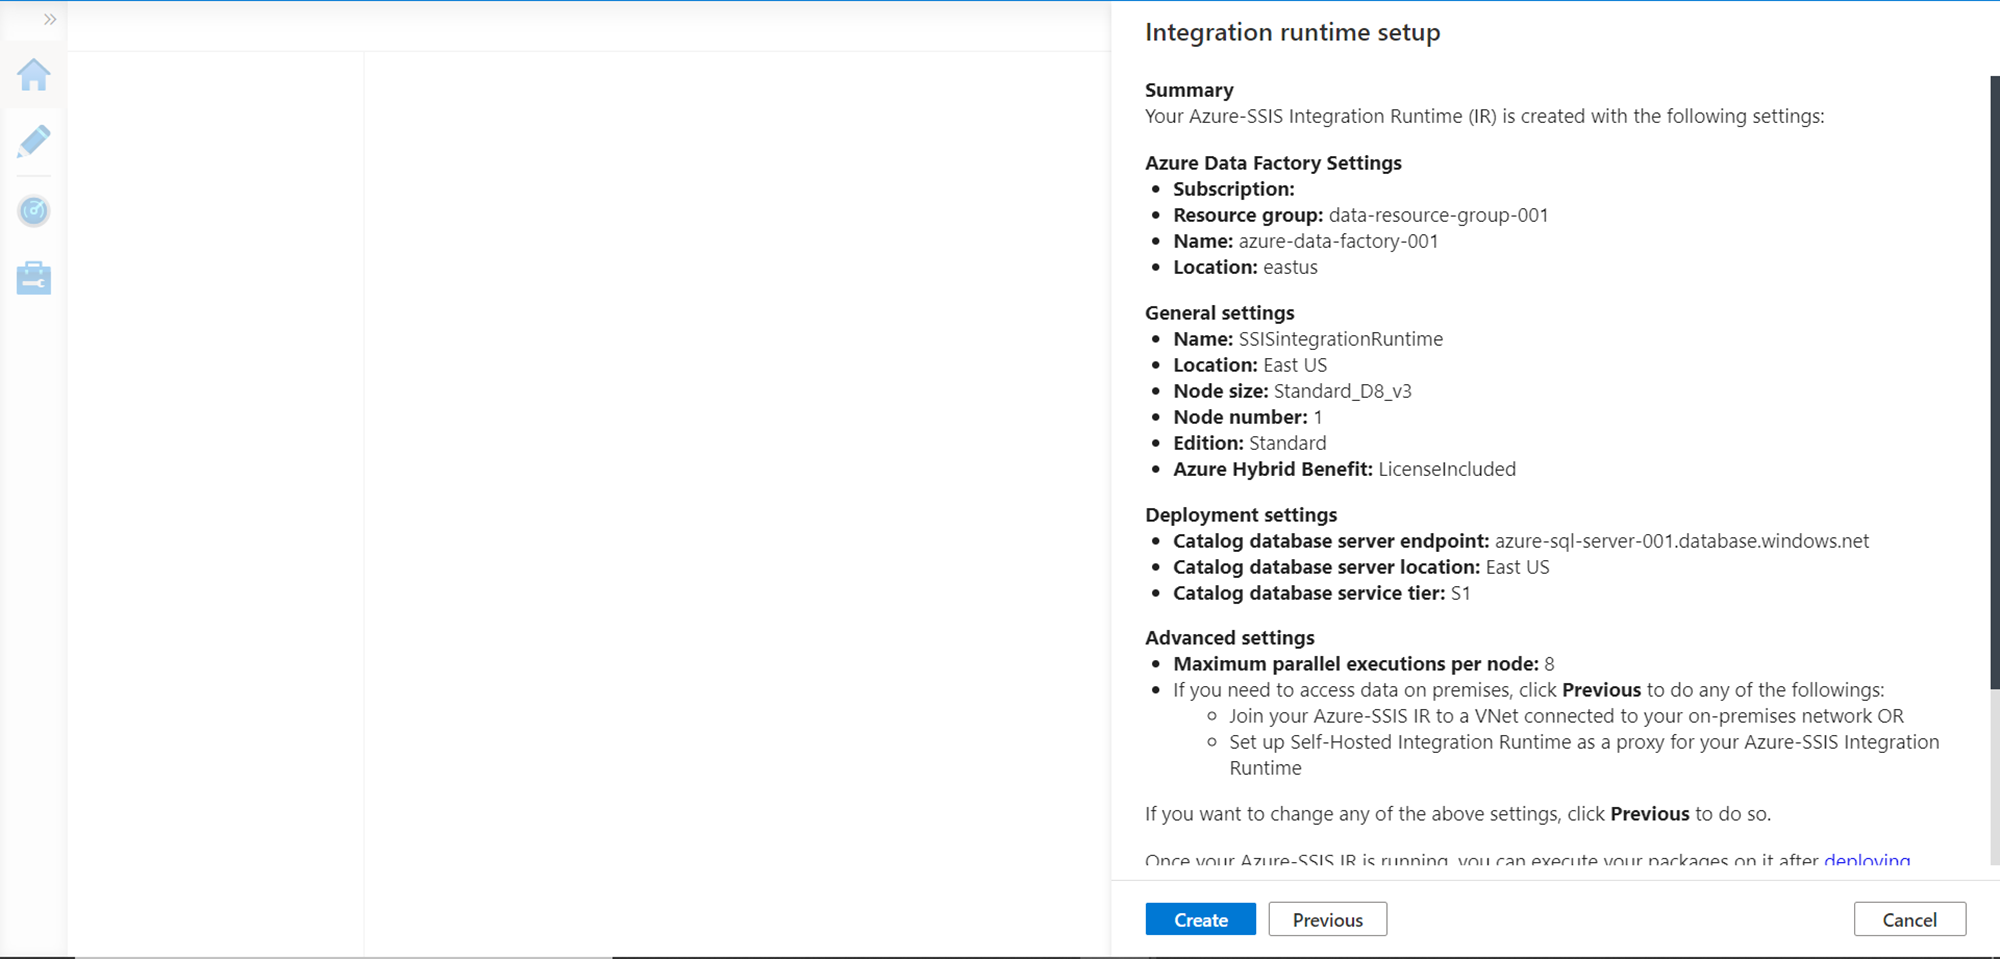
As seen above, ADF supports SSIS Integration which can be configured by creating a new SSIS Integration runtime. To create the same, click on the Configure SSIS Integration, provide the basic details and create a new runtime. Once it’s created, it would look as shown below. The details to be filled up to create this runtime can also be found in the Summary section as shown below.
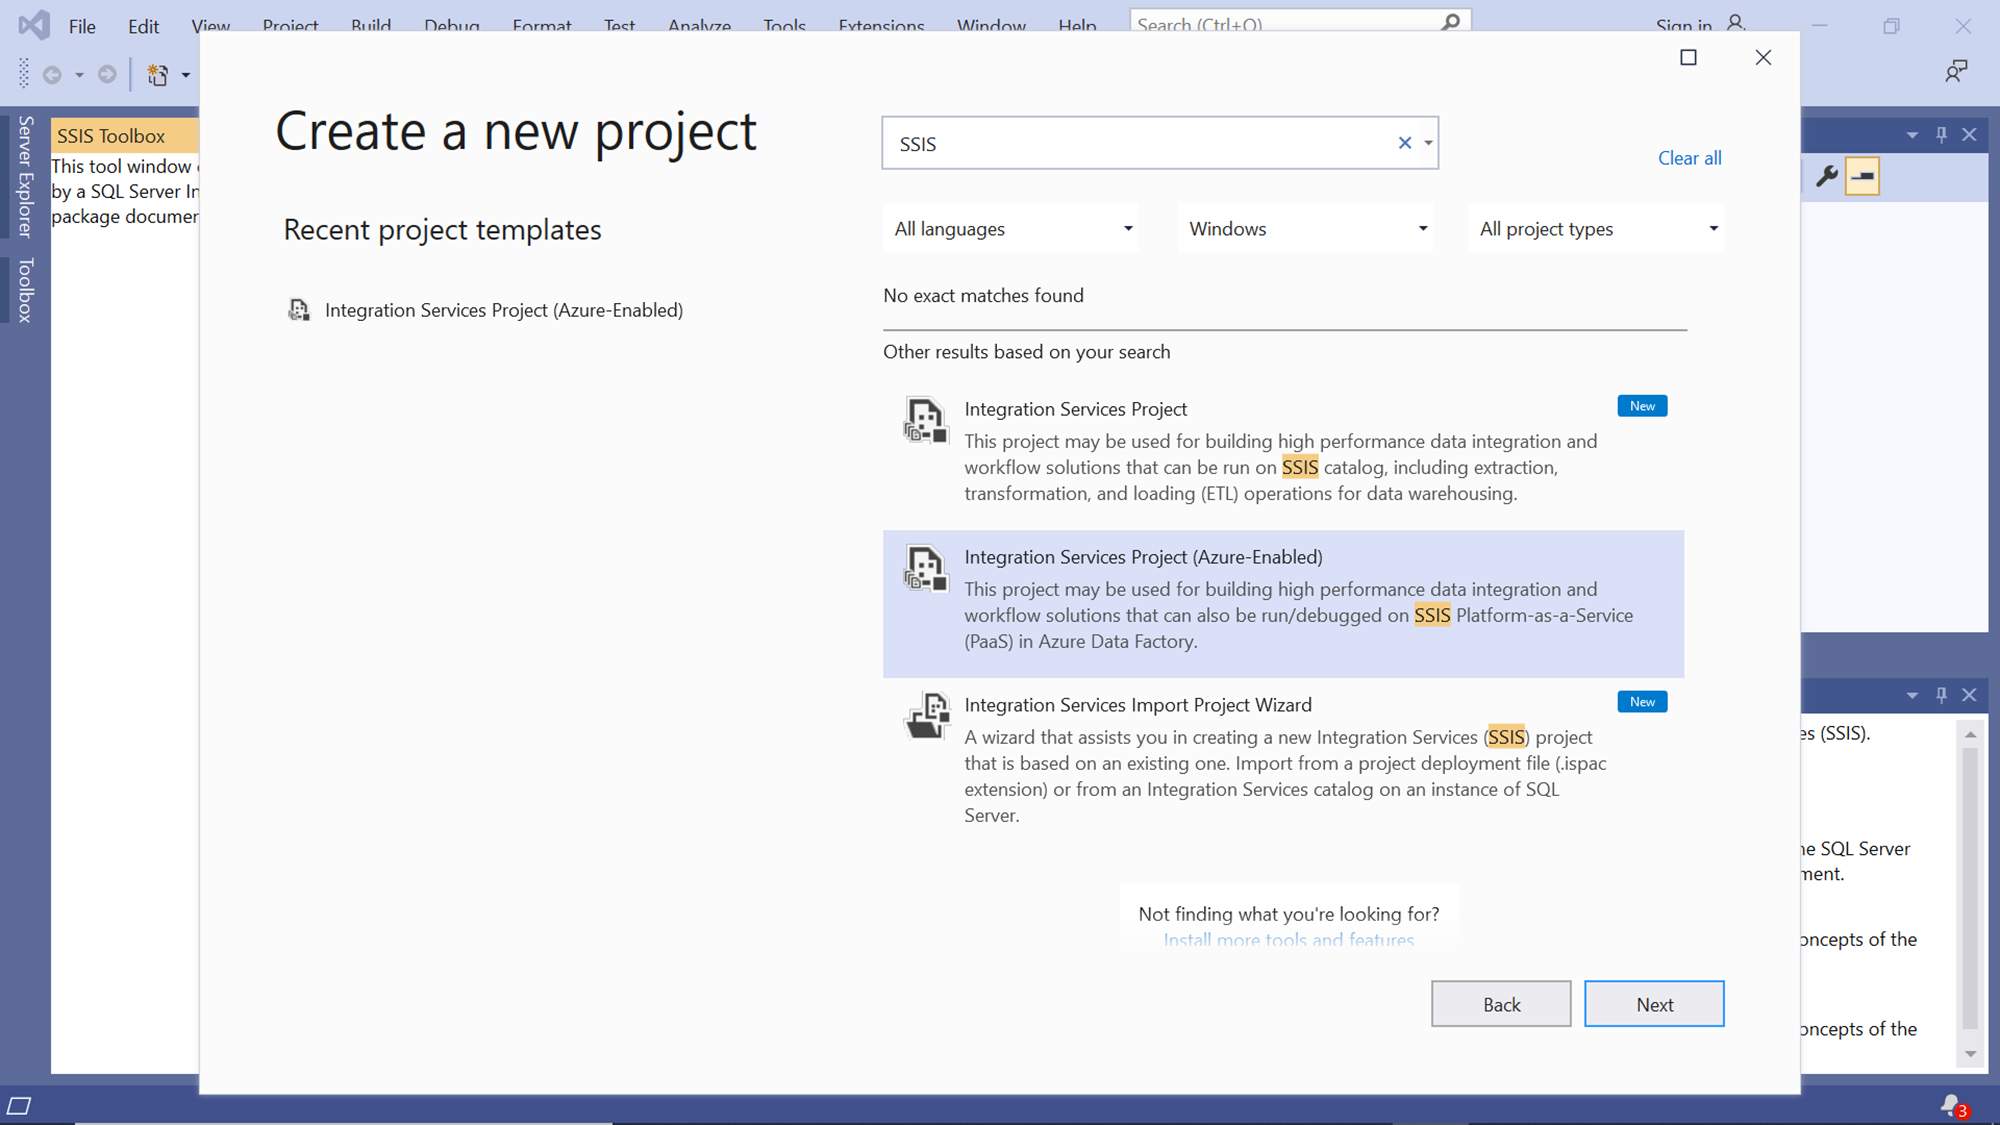
The next pre-requisite is that we need Visual Studio Data Tools with the required packages and nuggets installed that are required to create an SSIS package locally on a developer workstation. Once this setup is in place, once test it by trying to create a new SSIS project. While creating a new project, we can try to find an SSIS project templates and you should be able to find the Azure enables SQL Server Integration Services project as shown below. This is an indication that you have the right tools available in Visual Studio to deploy or port your SSIS package to Azure.
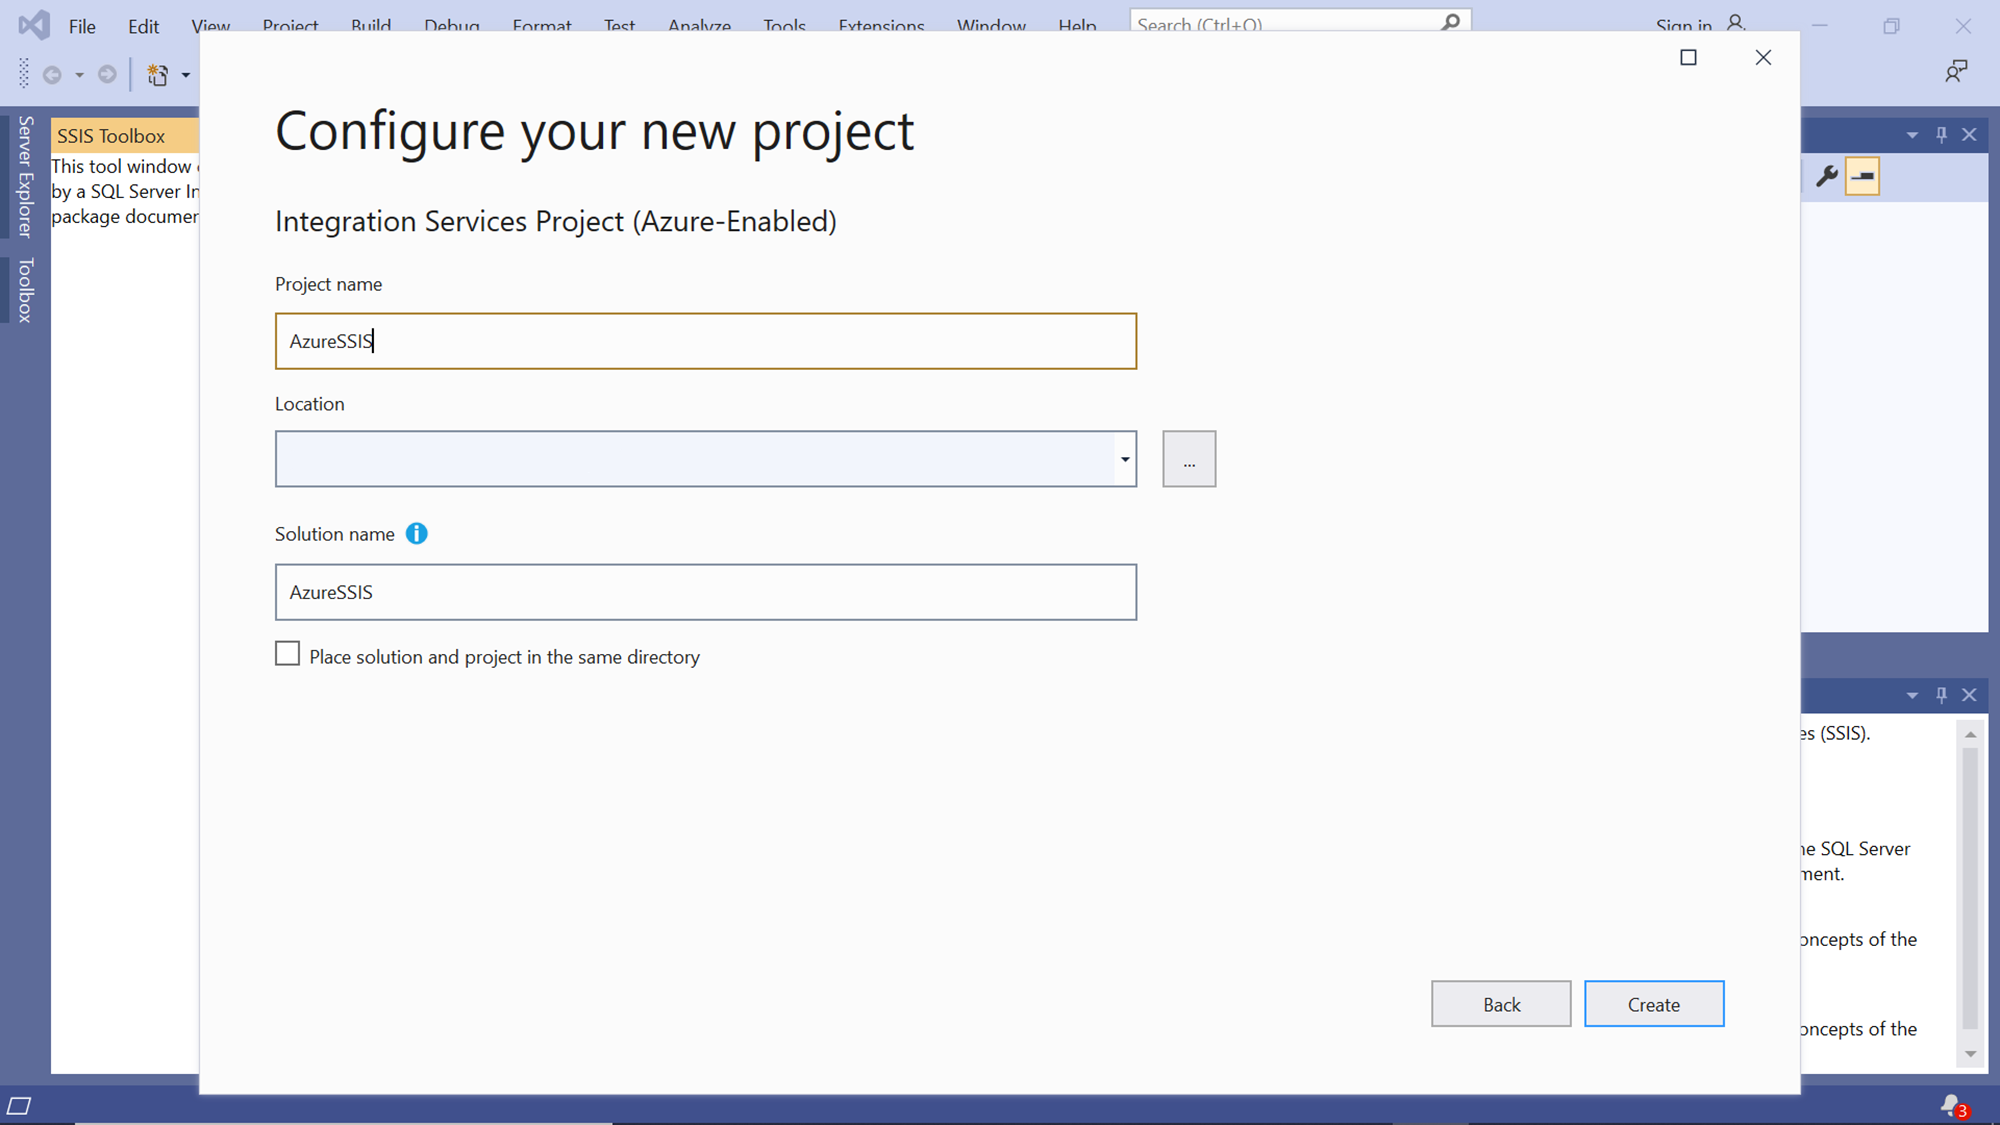
Provide basic details of the new Azure-Enabled SSIS project and create a new SSIS project as shown below. Once this project is created, this completes the other pre-requisite for the exercise that we would perform to deploy the SSIS package on Azure.
Deploying SSIS packages on Azure Data Factory
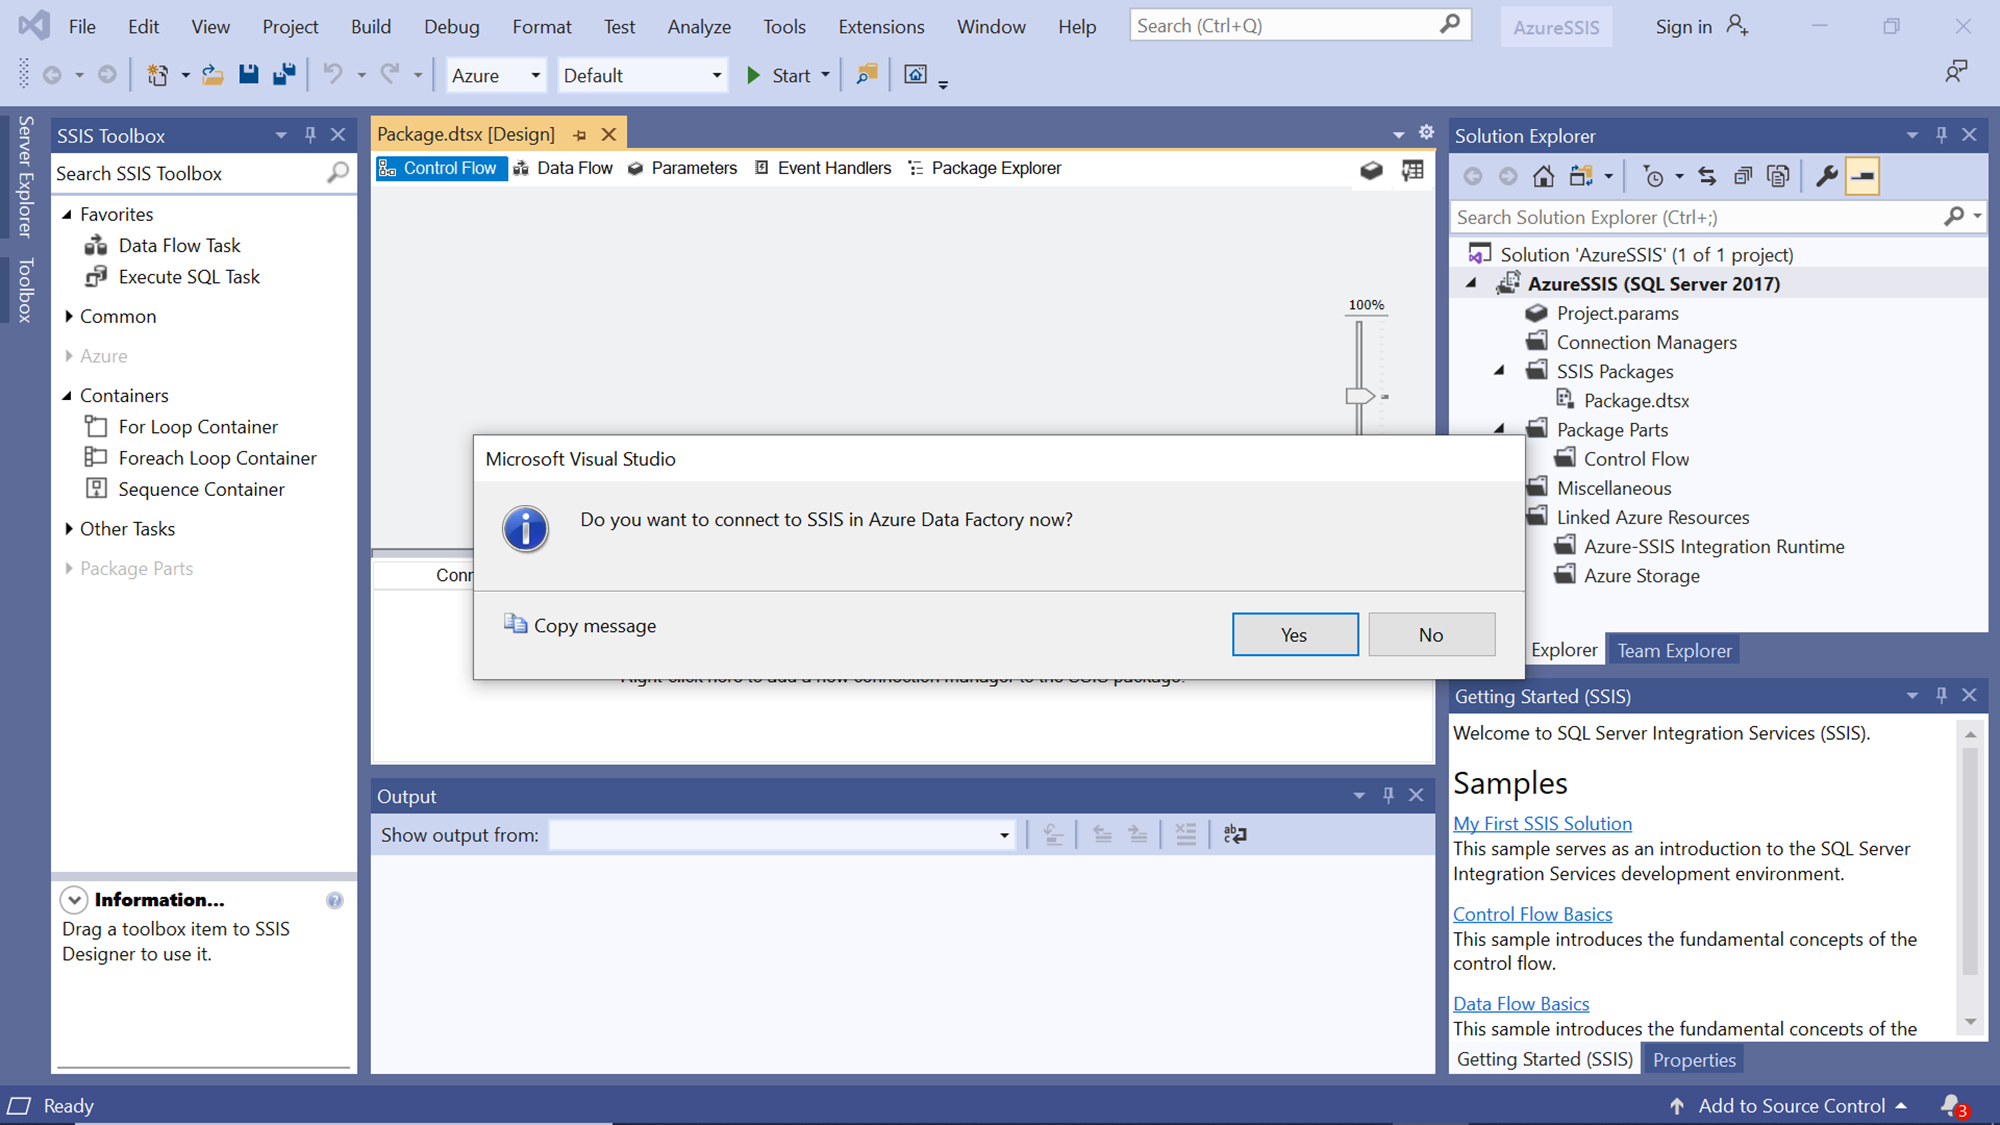
Once we create a new SSIS project as shown above, upon creation, it would prompt us to connect to SSIS in Azure Data Factory as shown below. We can connect directly, but at times one may not have an ADF account or SSIS runtime-created when the ETL package development in SSIS would have started. To simulate this situation, we would click on No and not connect to SSIS right now.
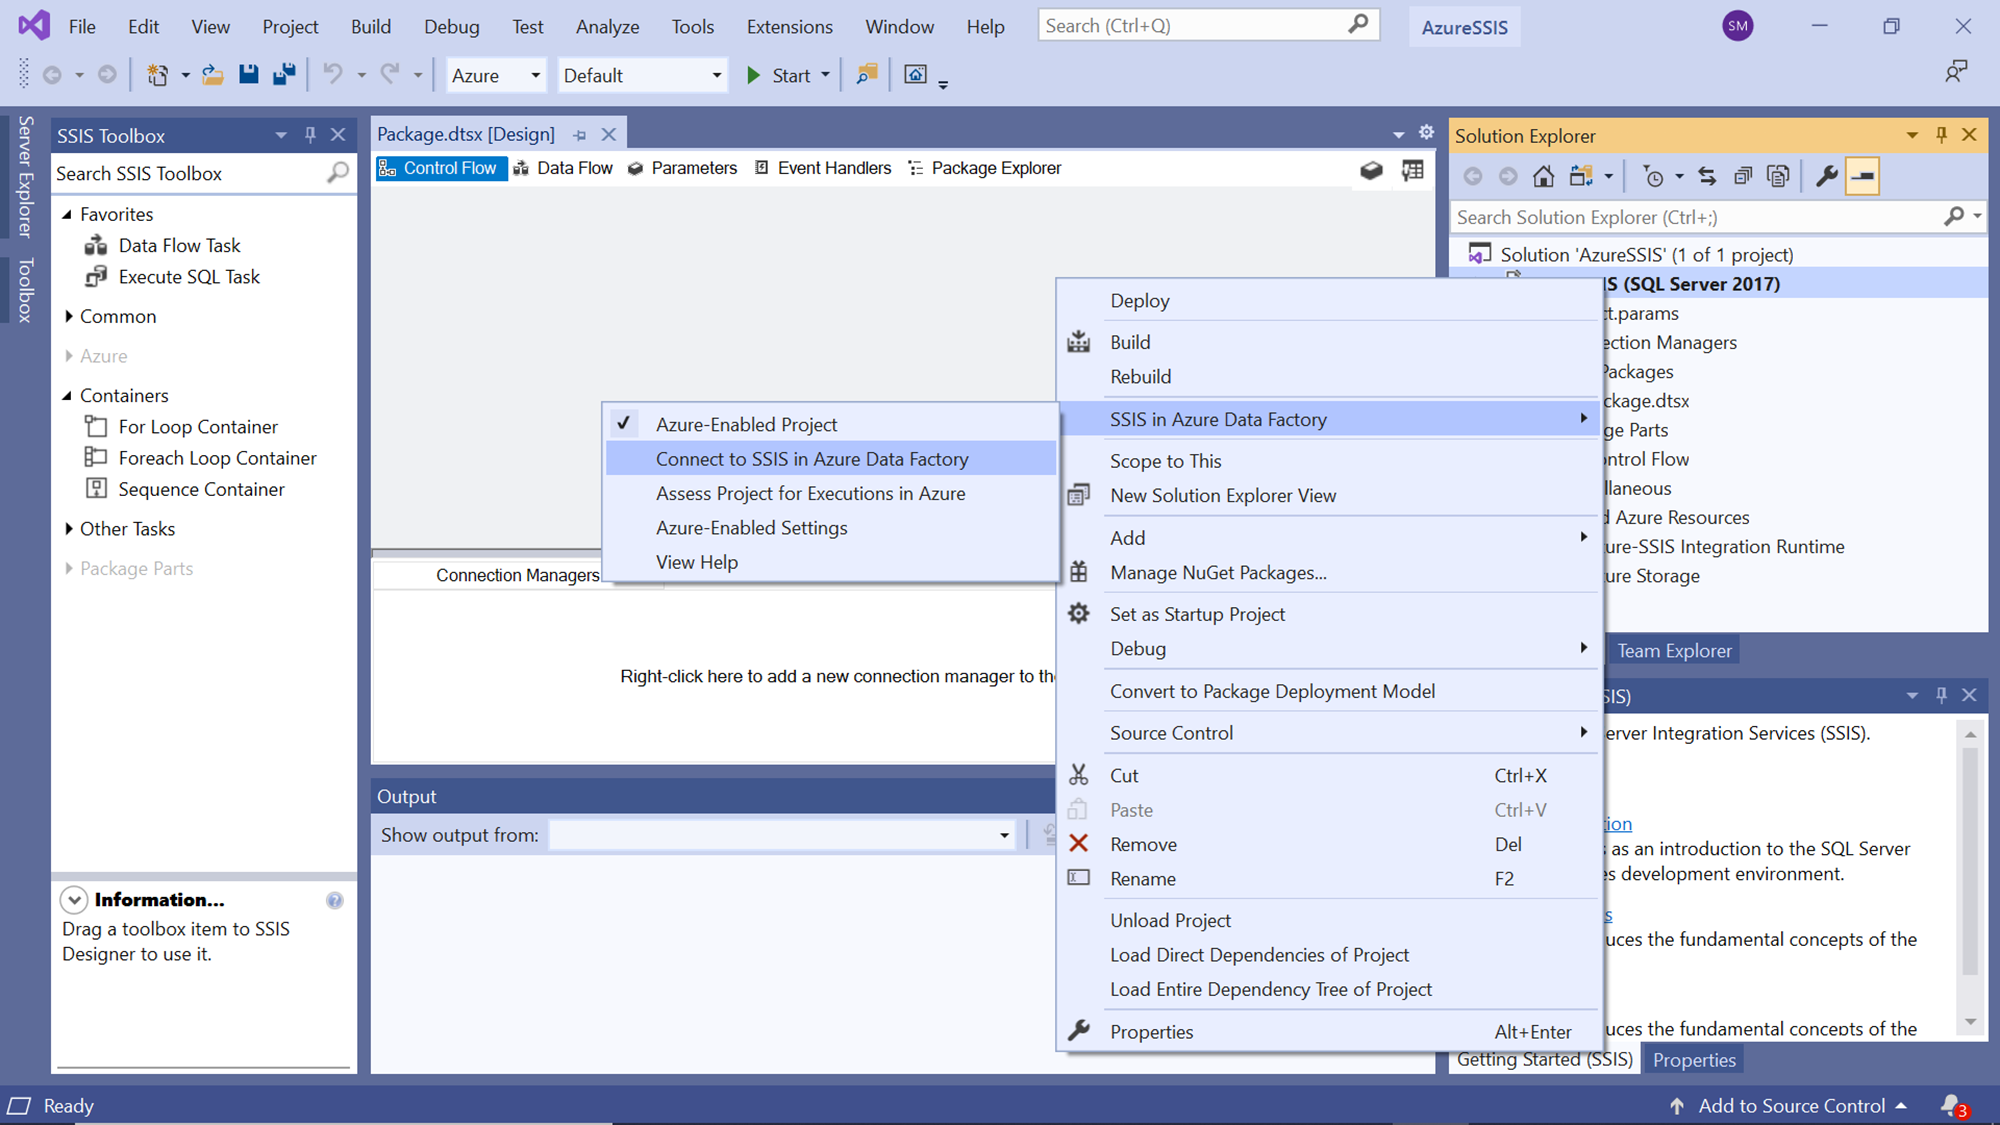
Whenever one is ready to connect to Data Factory from the IDE, one can right-click on the project and select SSIS in the Azure Data Factory menu option and click on Connect to SSIS in ADF sub-menu item as shown below.
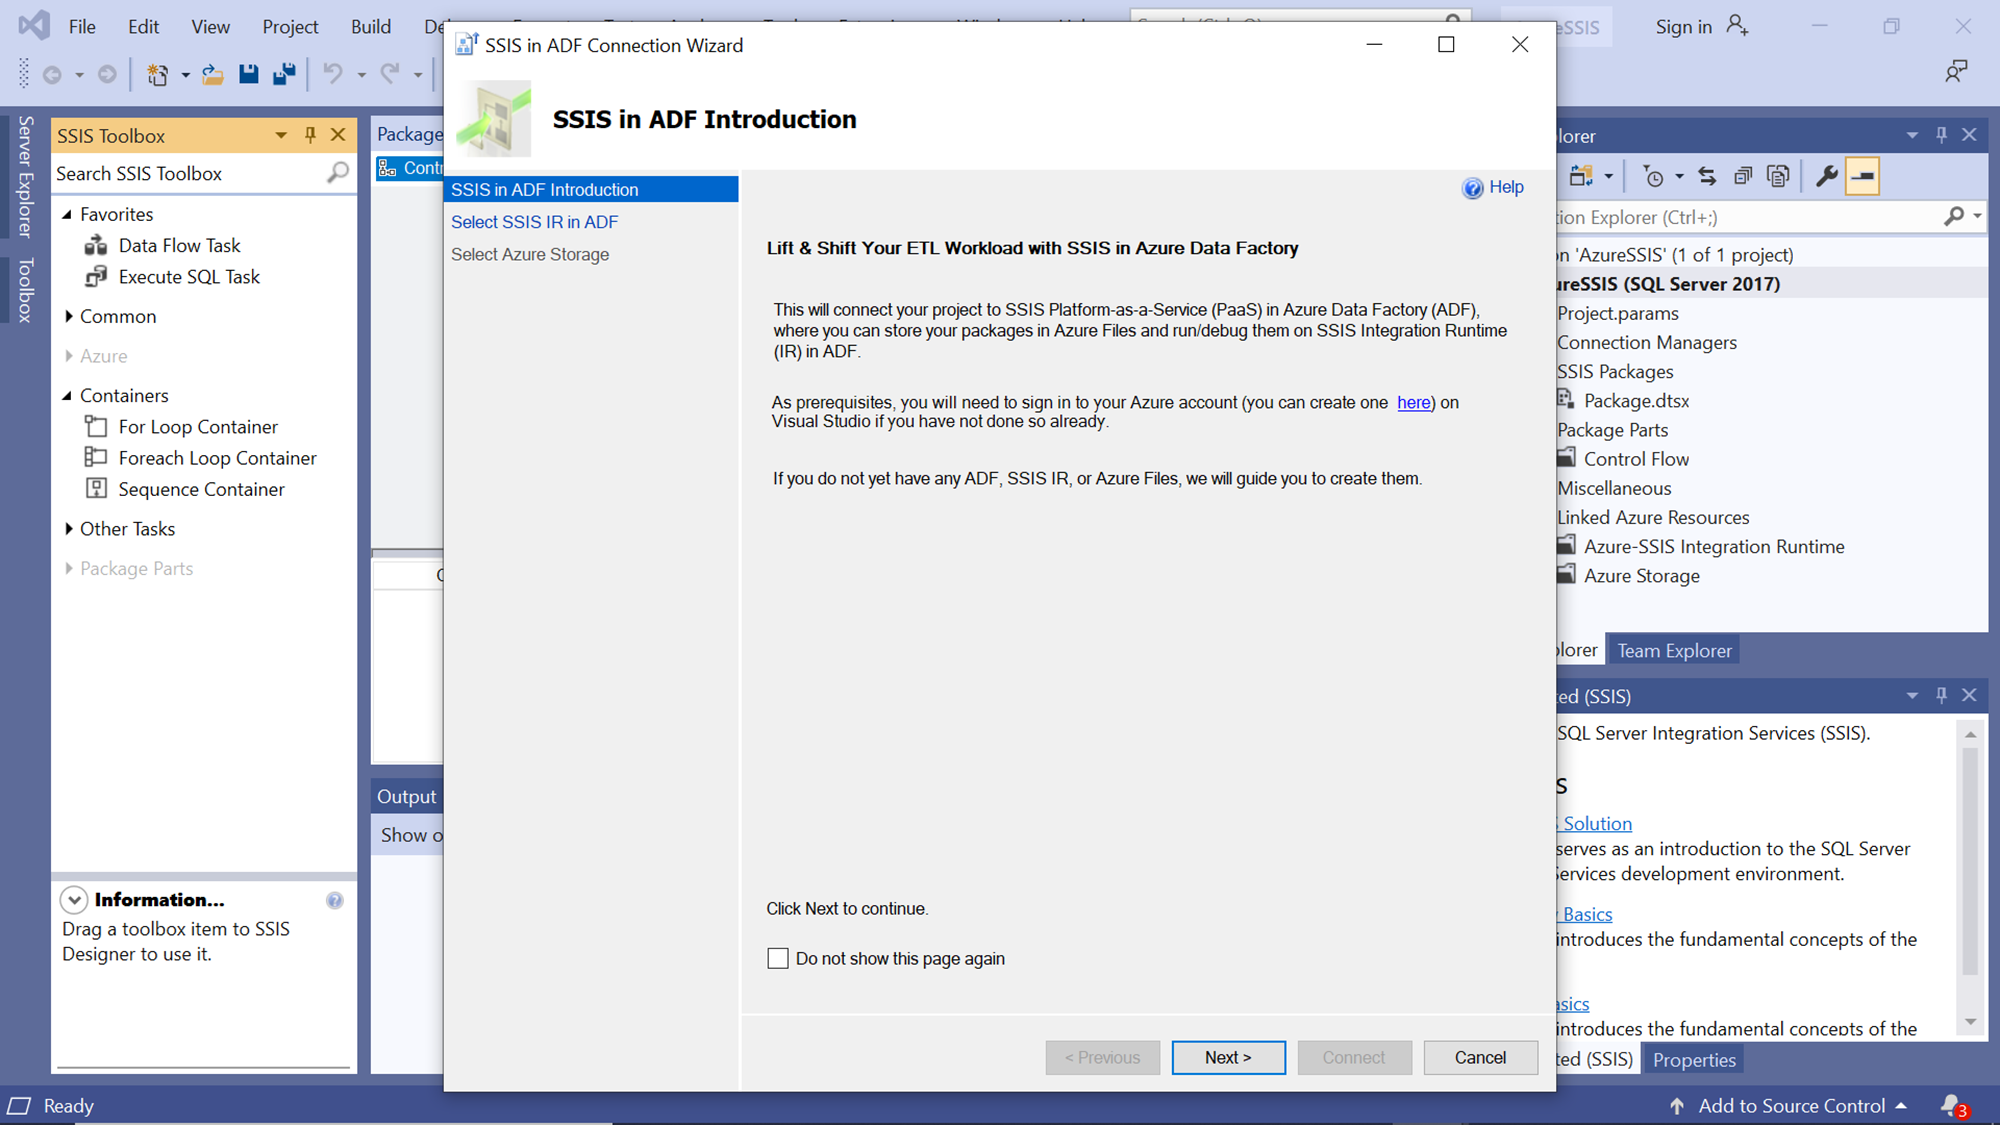
This would bring a new wizard as shown below. The first page introduces and explains how one can lift and shift their ETL workloads with SSIS in Azure Data Factory. Read the details and click on the Next button.
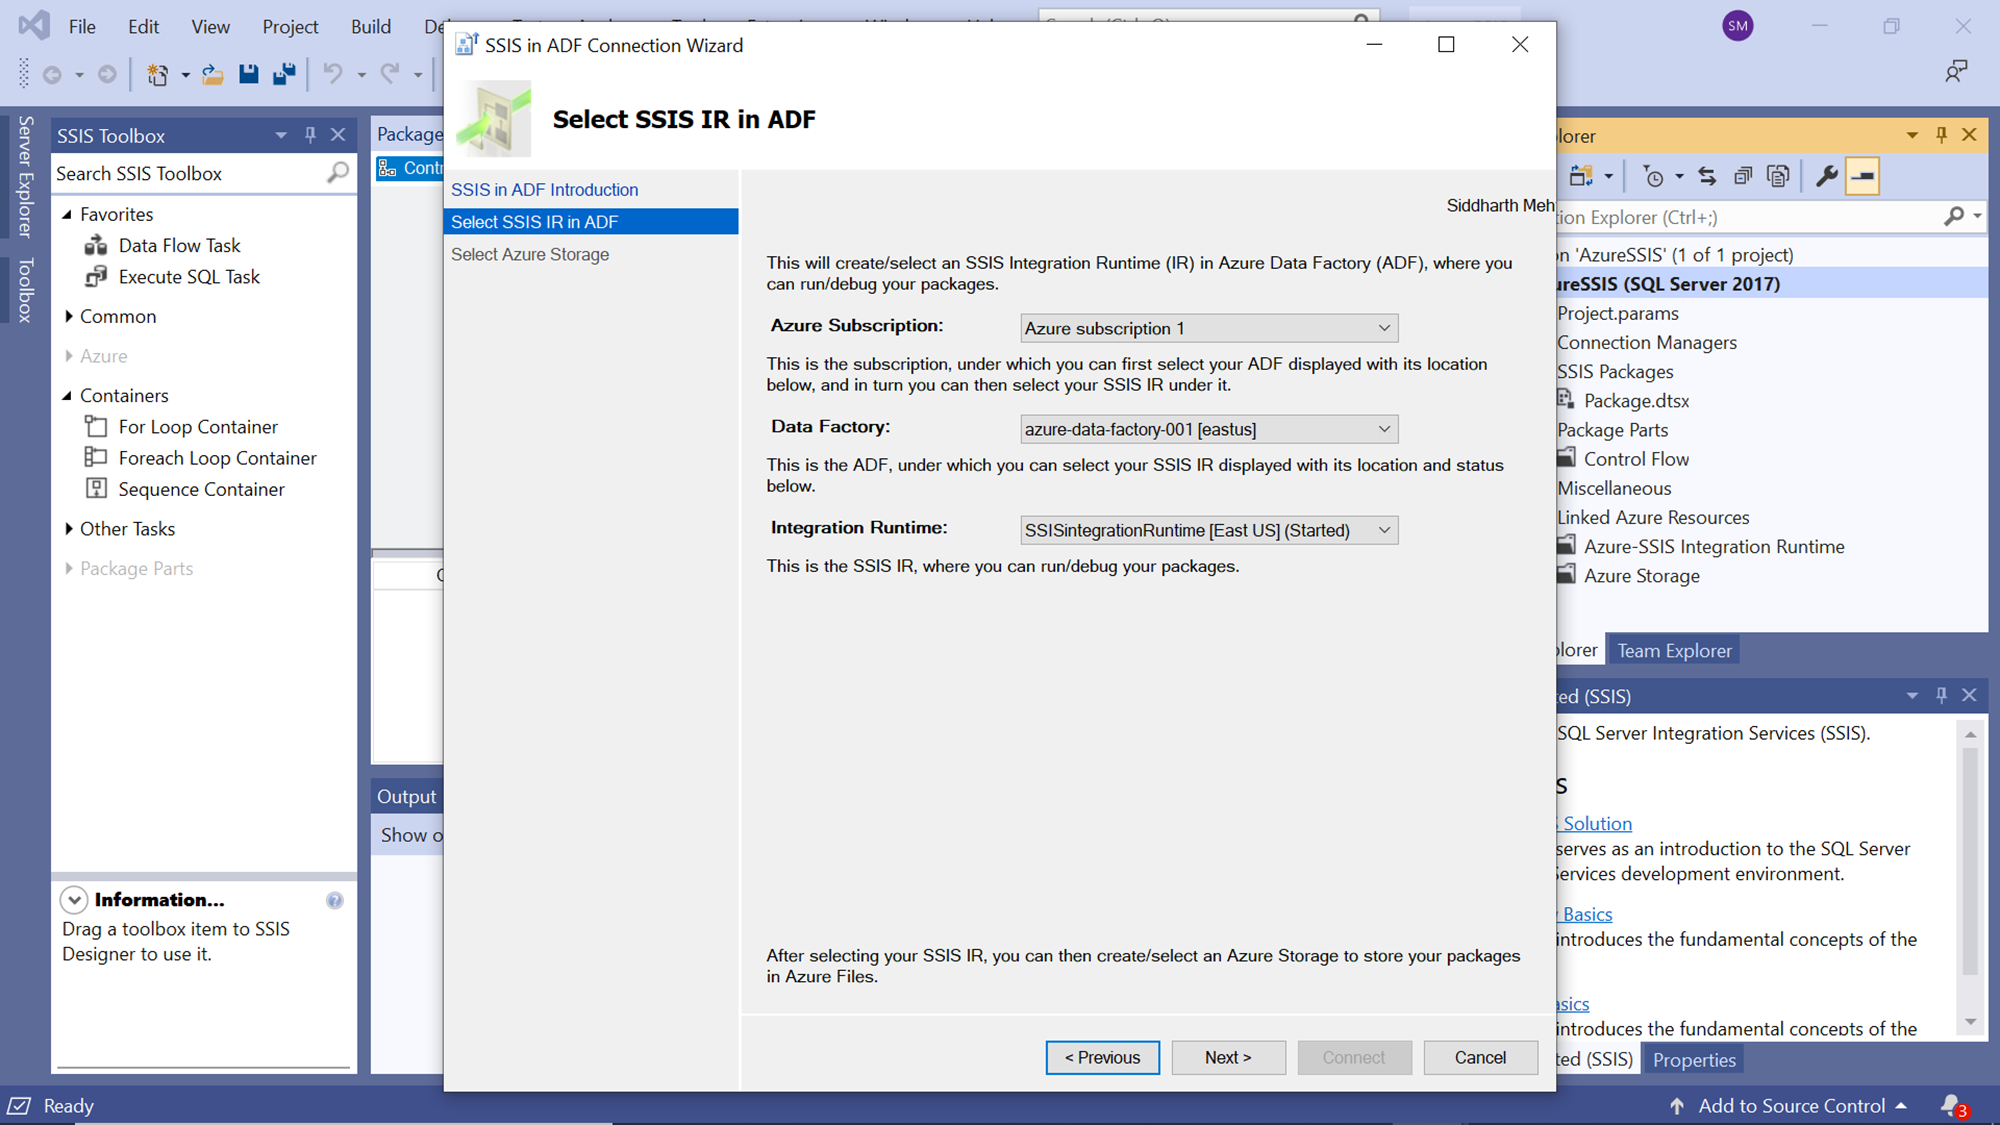
In this step, we need to select the Integration runtime in the Azure Data Factory account that we created earlier. Provide the subscription and rest of the details as shown below and select the Integration Runtime with which we want to associate our SSIS project hosting SSIS packages.
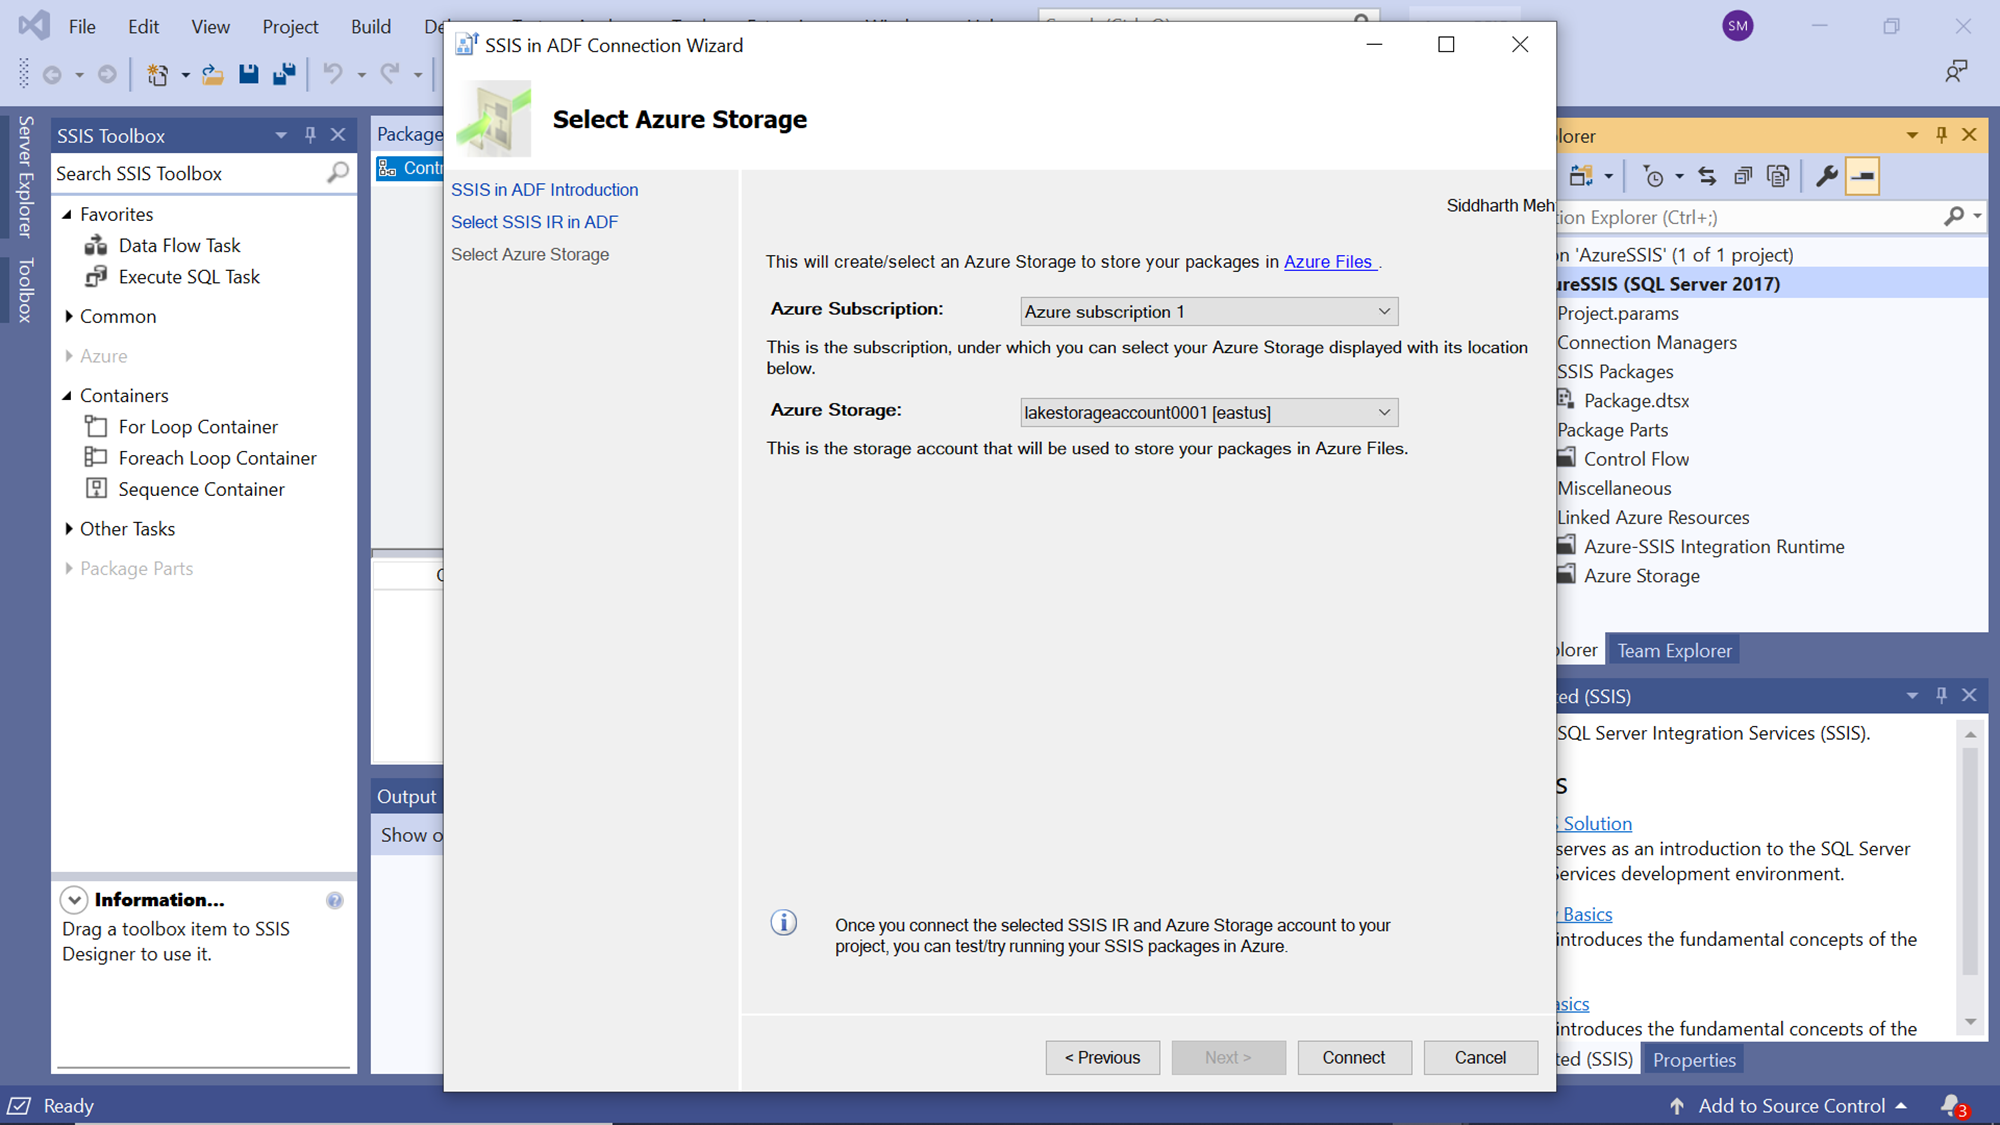
In this step, we need to specify the storage account in Azure where we would store the project and package files. When we create the data factory account, typically one would have created a new storage account as well. Create or Select the account as shown below and click on the Connect button. Once the connection is successful, it can be deemed that the project is now connected to SSIS Integration Runtime on Azure.
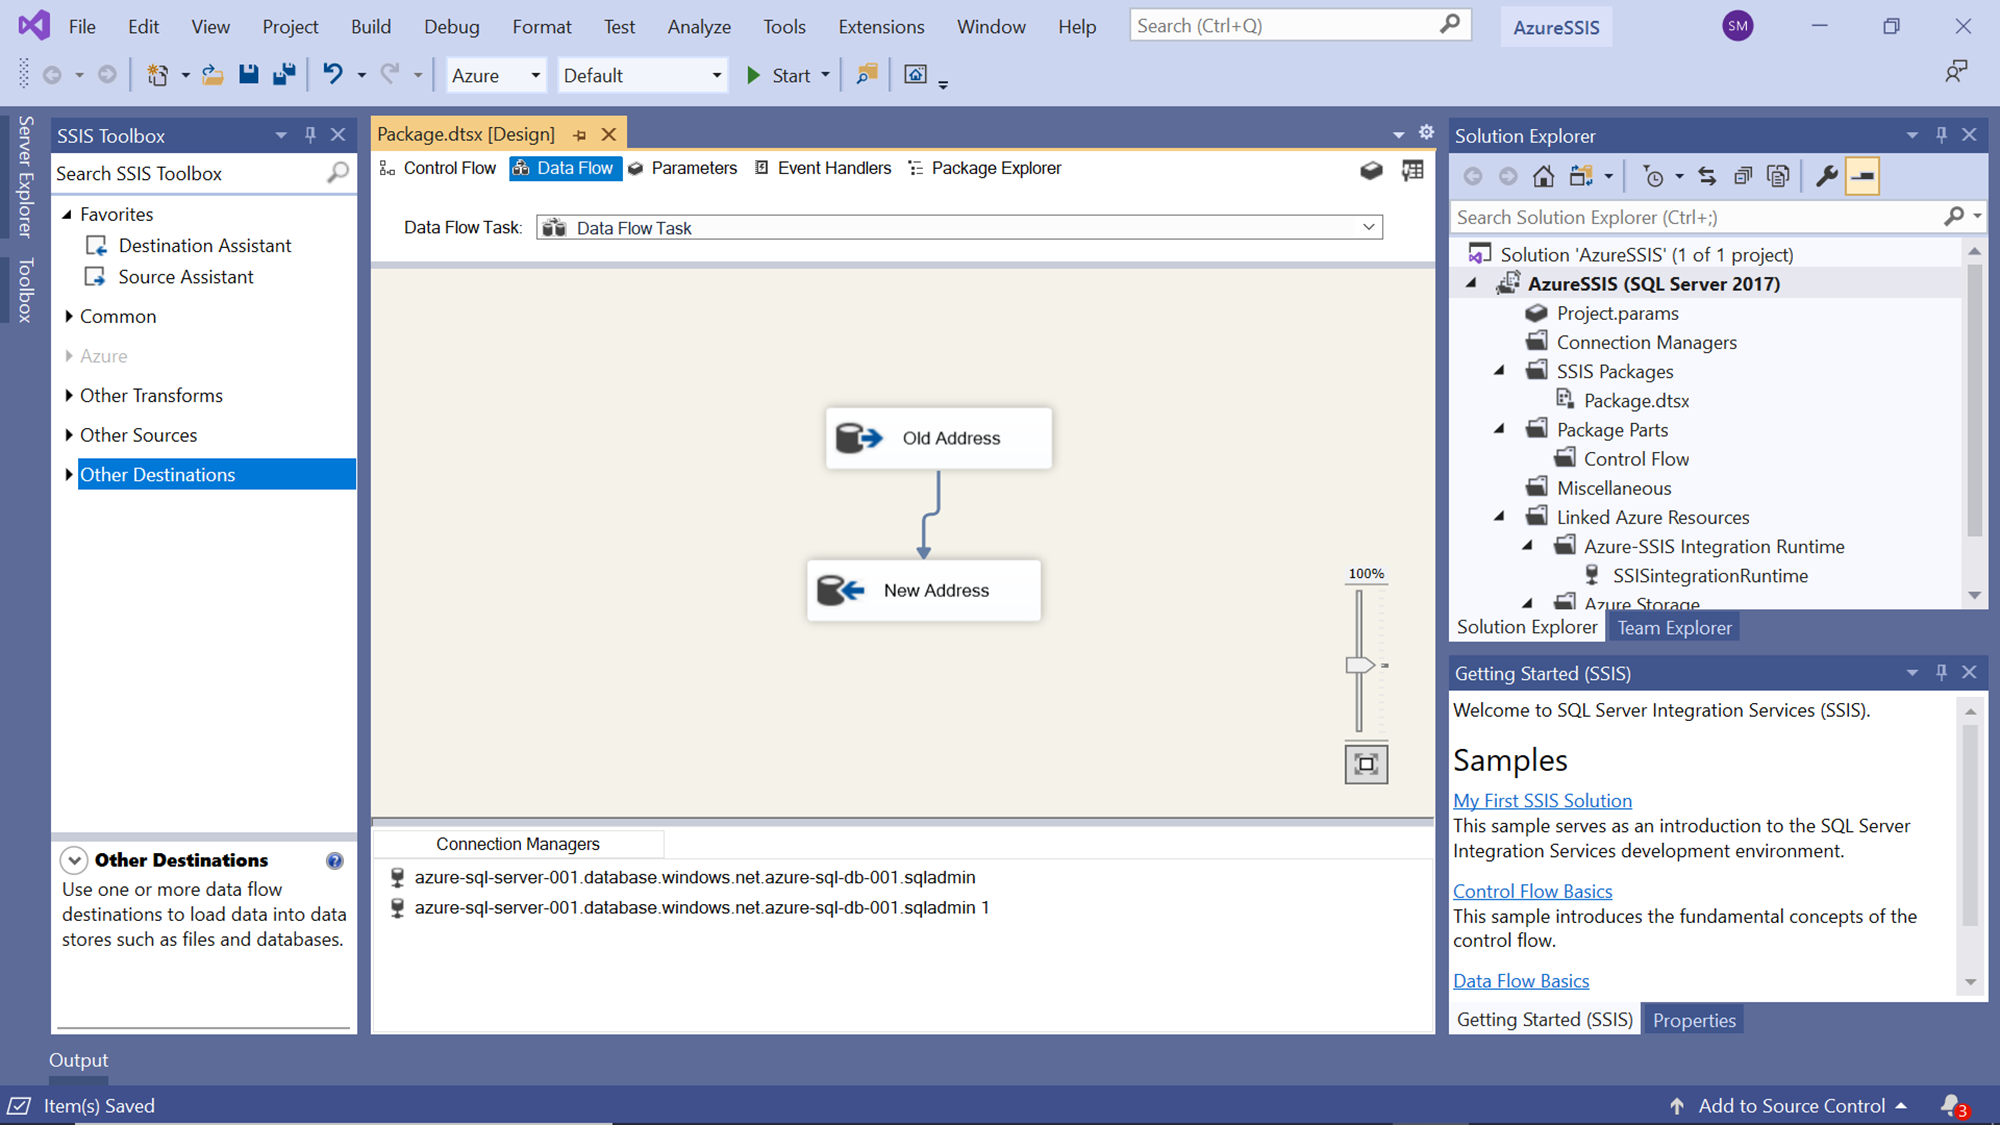
Now that our project is connected to the Integration Runtime, add some controls on the package to simulate a simple to medium complexity package. Here I have added just a data flow task with a source and destination to import and export data from one repository to another. Once done, the package would look as shown below.
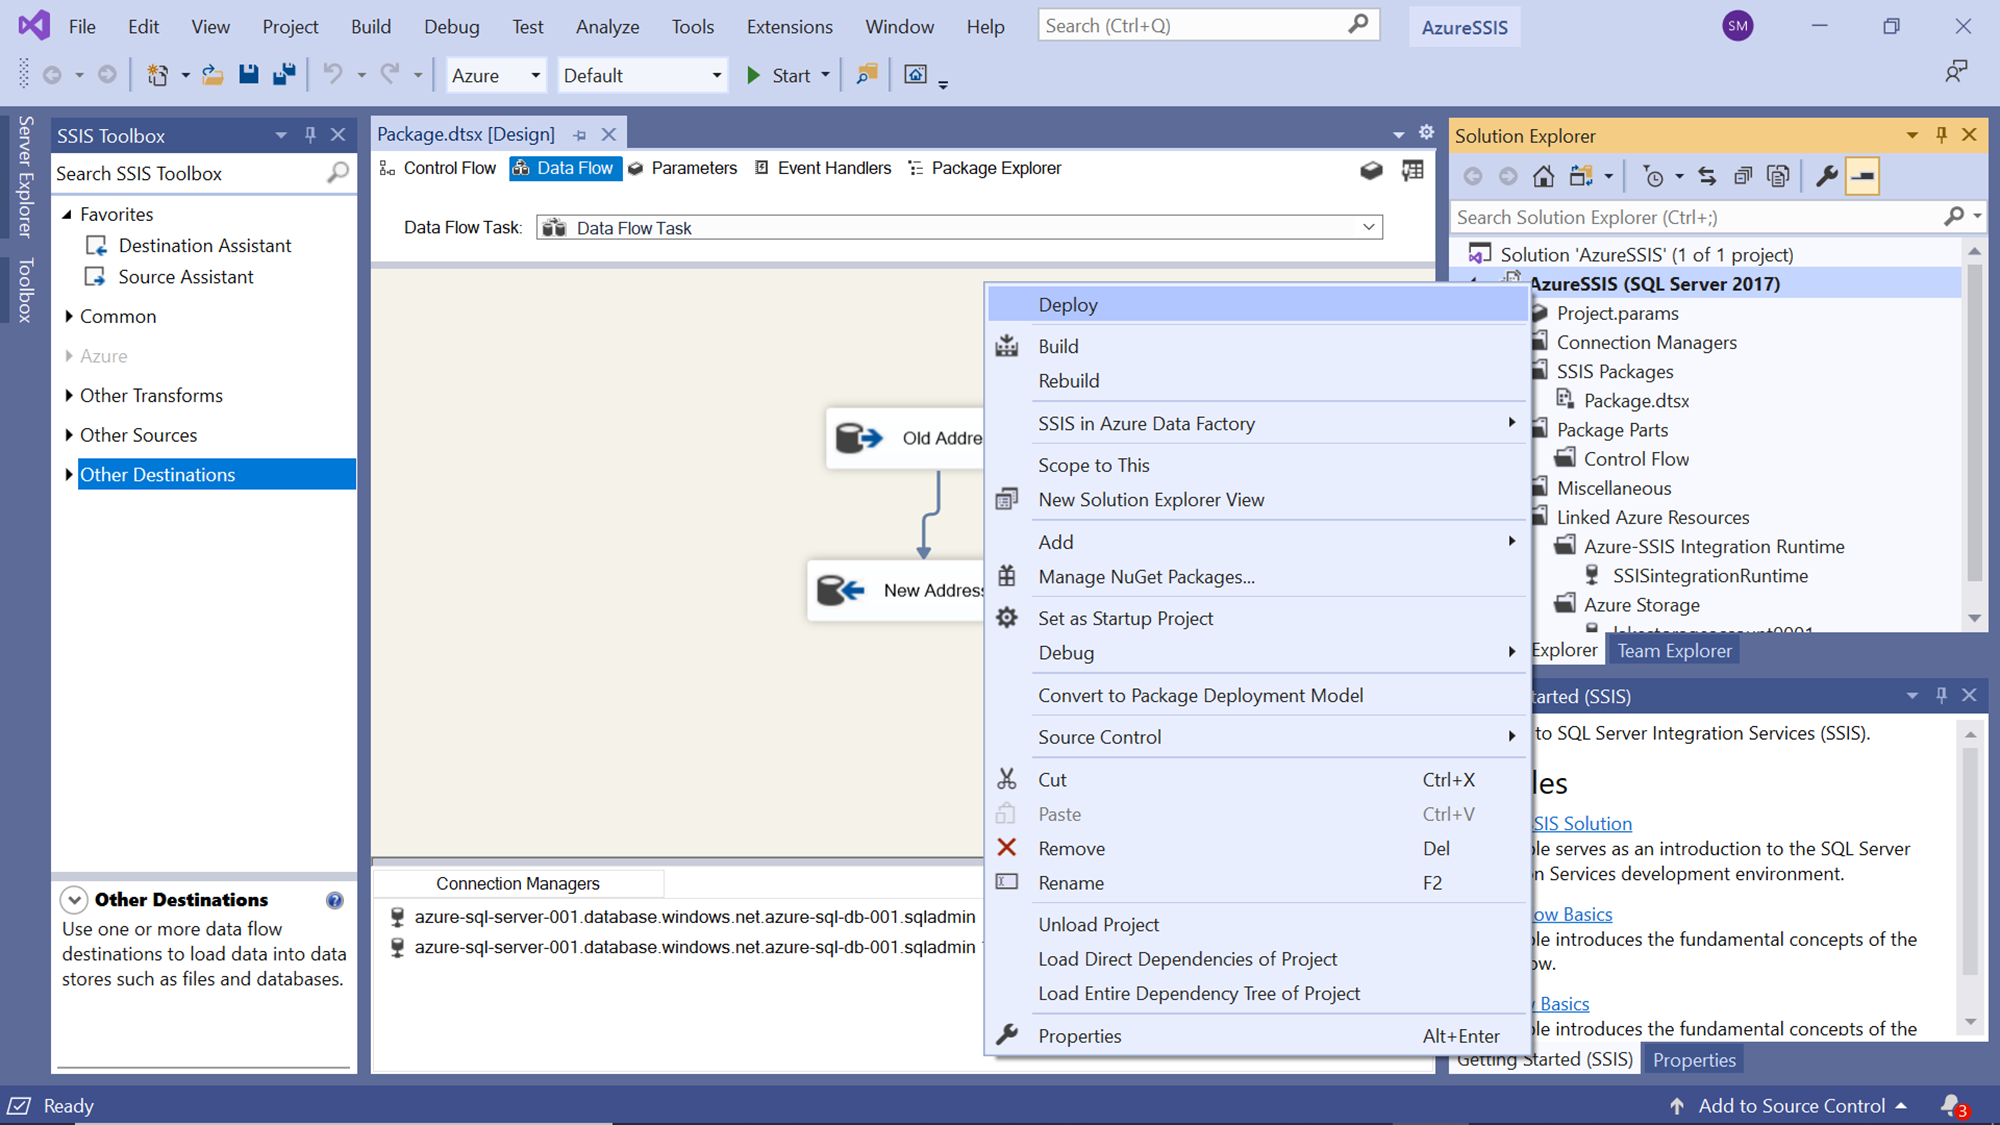
Once the package is ready, we should ensure that the package does not have any errors. An easy way to test this is by building the package. Right-click on the project and select the Build menu item as shown below. Once the build is successful, follow the same steps and select the Deploy menu item to start the deployment as shown below.
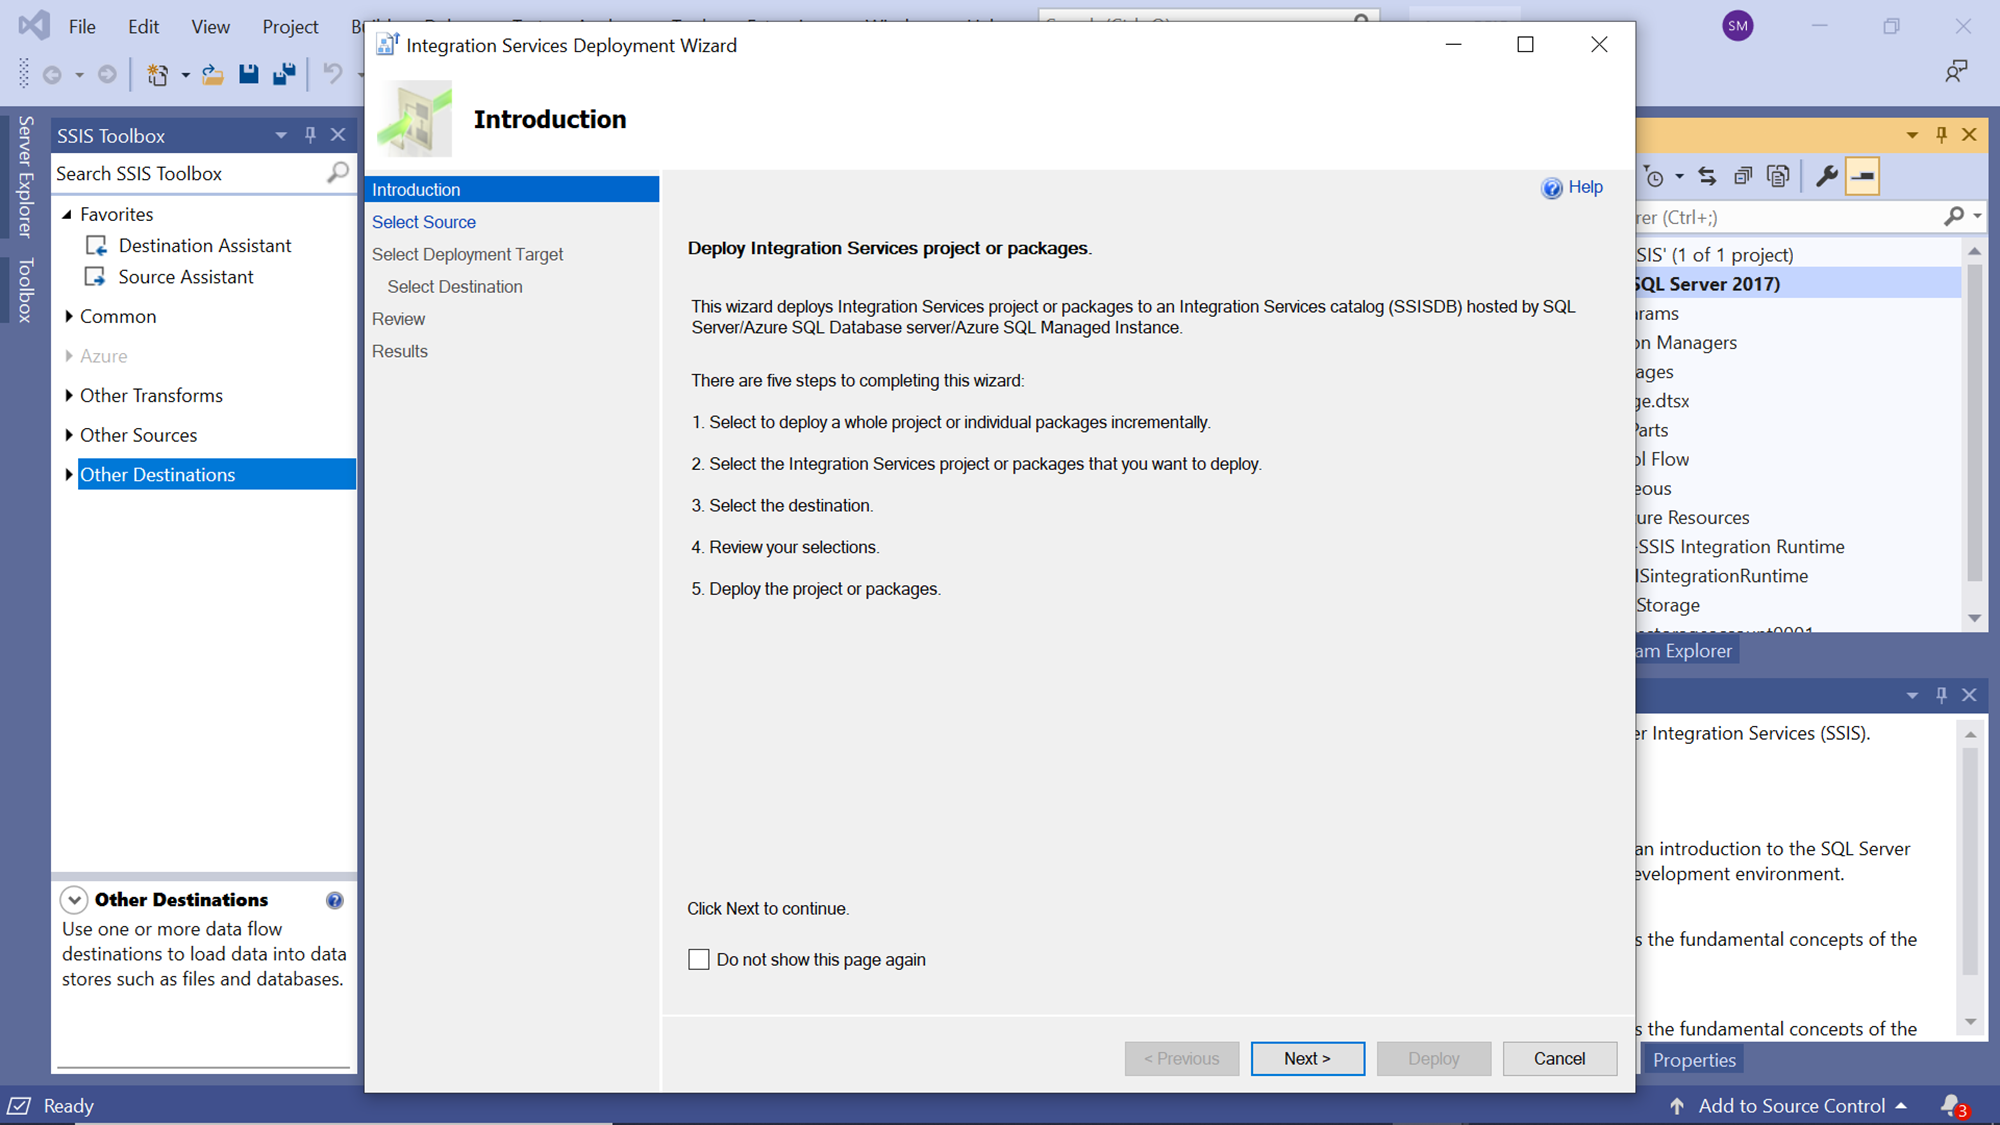
This would open a deployment wizard as shown below. The first step is the introduction of this wizard, which informs us that this wizard would deploy the package to an SSIS catalog in any of the supported data repositories on Azure. Click on the Next button.
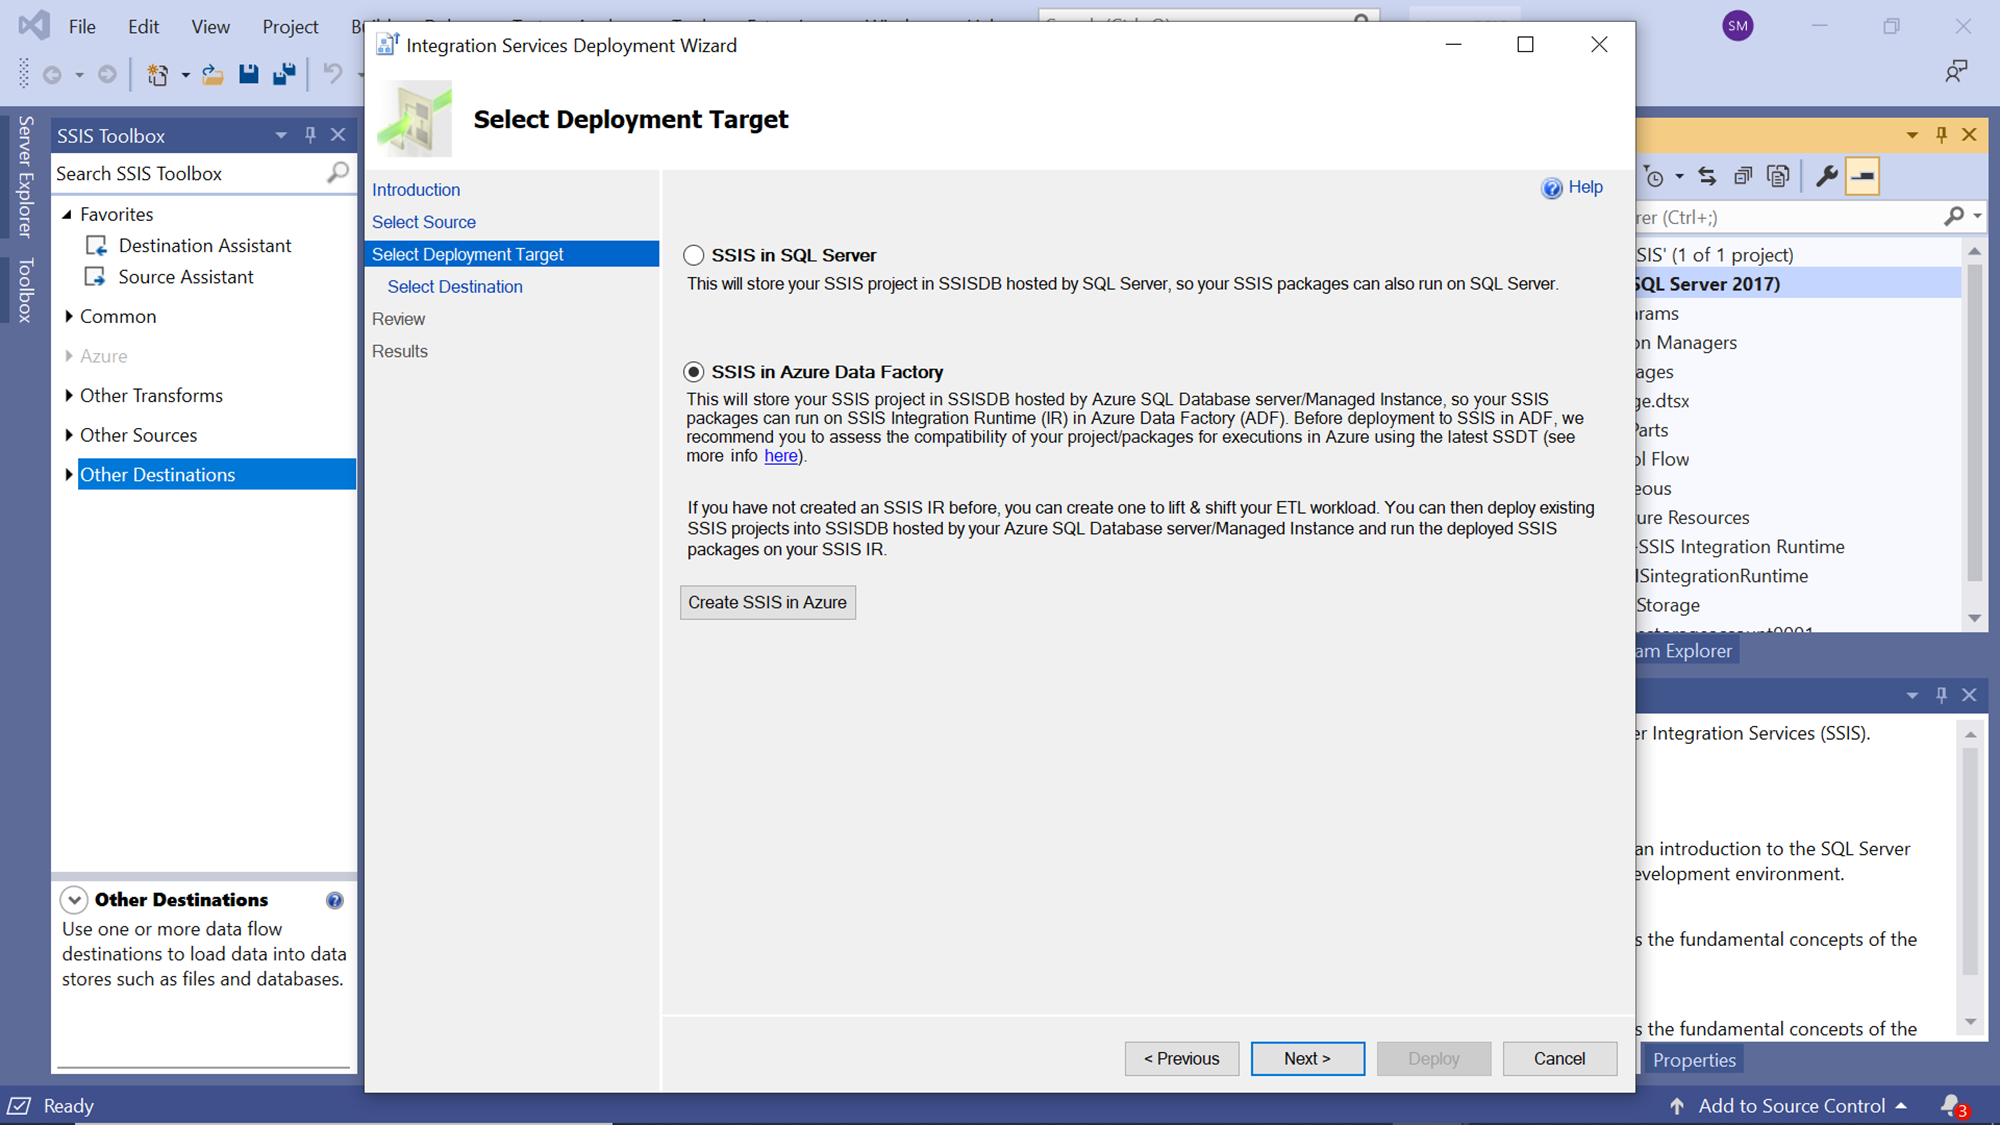
In this step, we can select to store the SSIS project in SSIS DB on SQL Server or on SSIS in ADF. As we have created as an Azure Data Factory account and an integrated runtime, we will go with SSIS in Data Factory. It also provides an option to create an integrated runtime with the button titled “Create SSIS in Azure” as shown below. After selecting the desired option, click on the Next button.
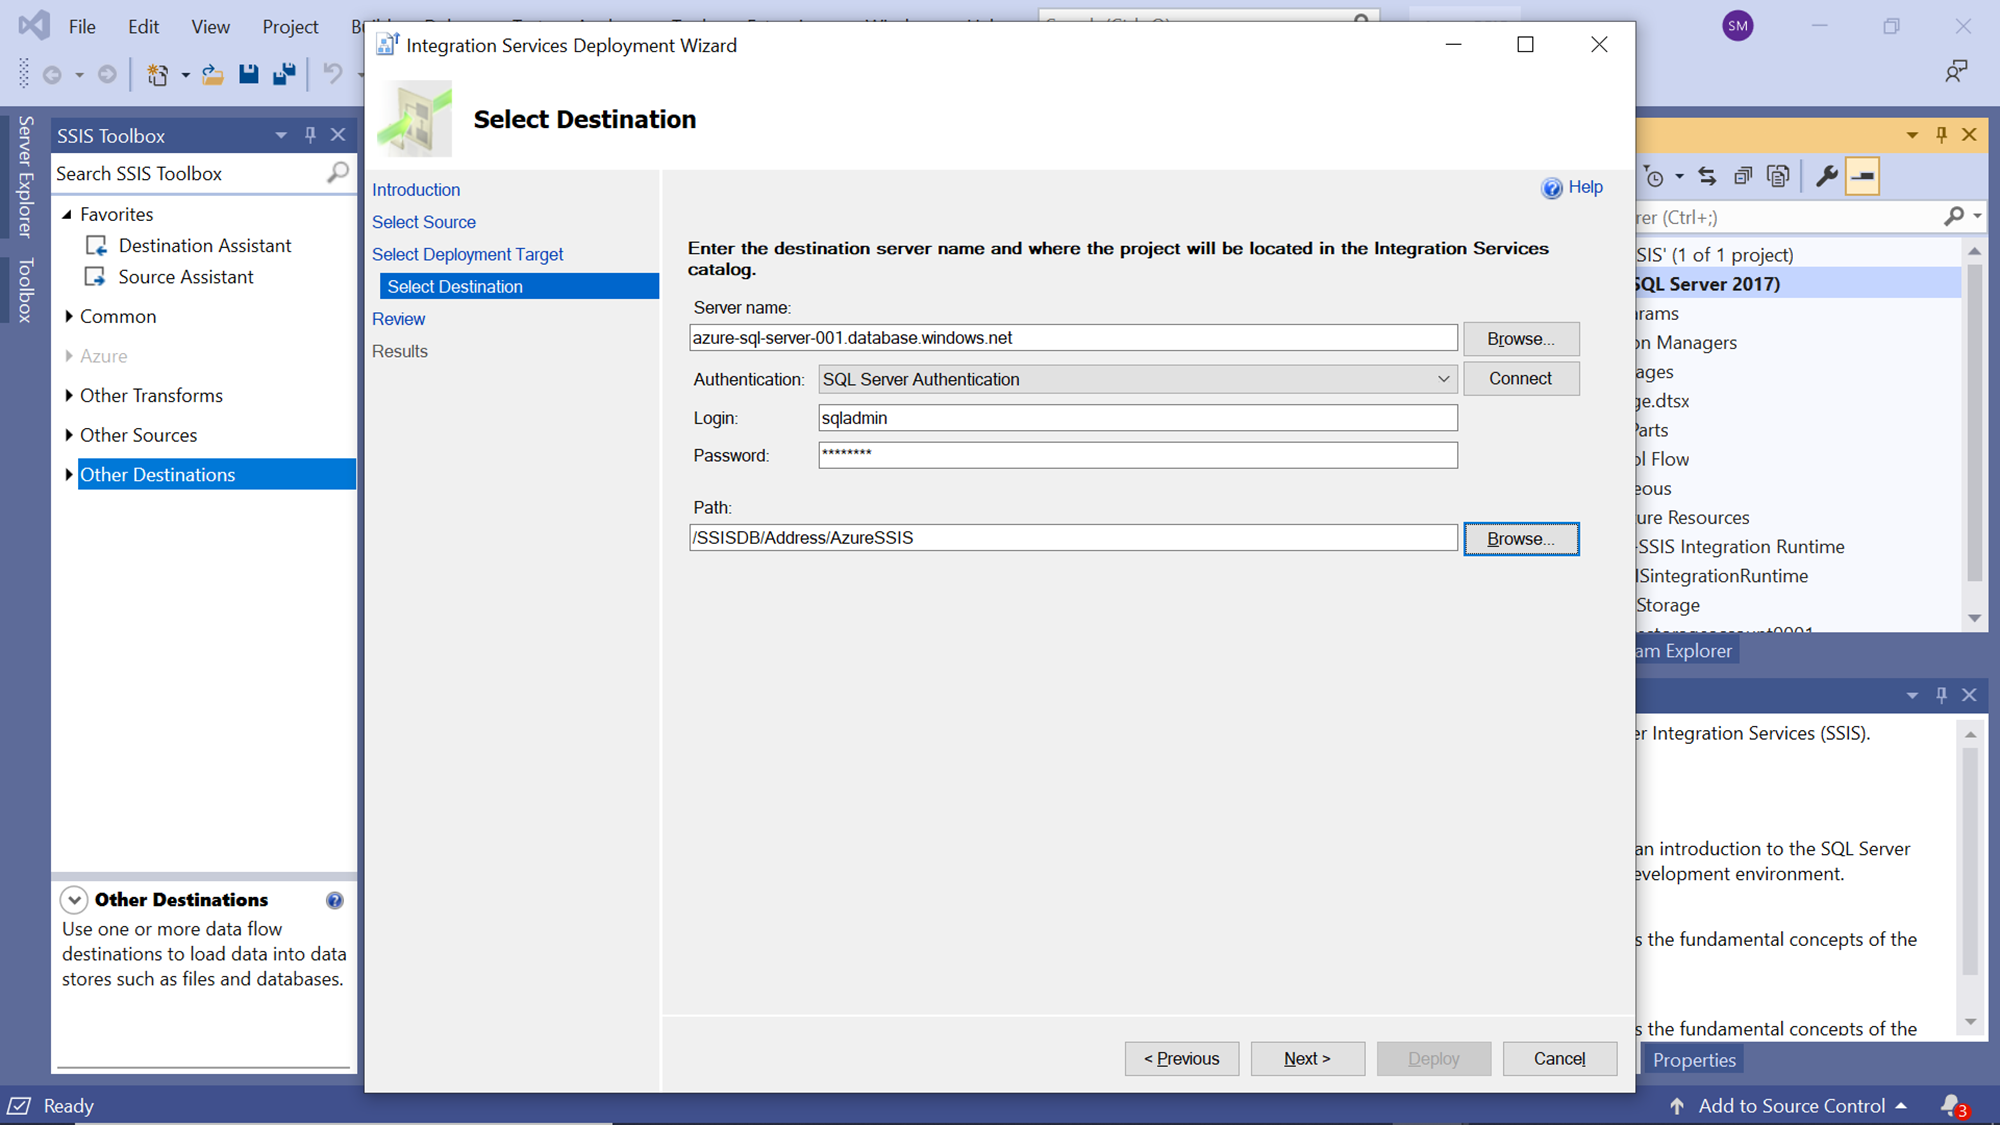
In this step, we need to provide the details of the SQL Azure database on which the integration services catalog would be created. Provide the credentials of the right data repository on which you intend to create the SSIS catalog. One can choose the path where the catalog database would be created. Once selected click on the Next button.
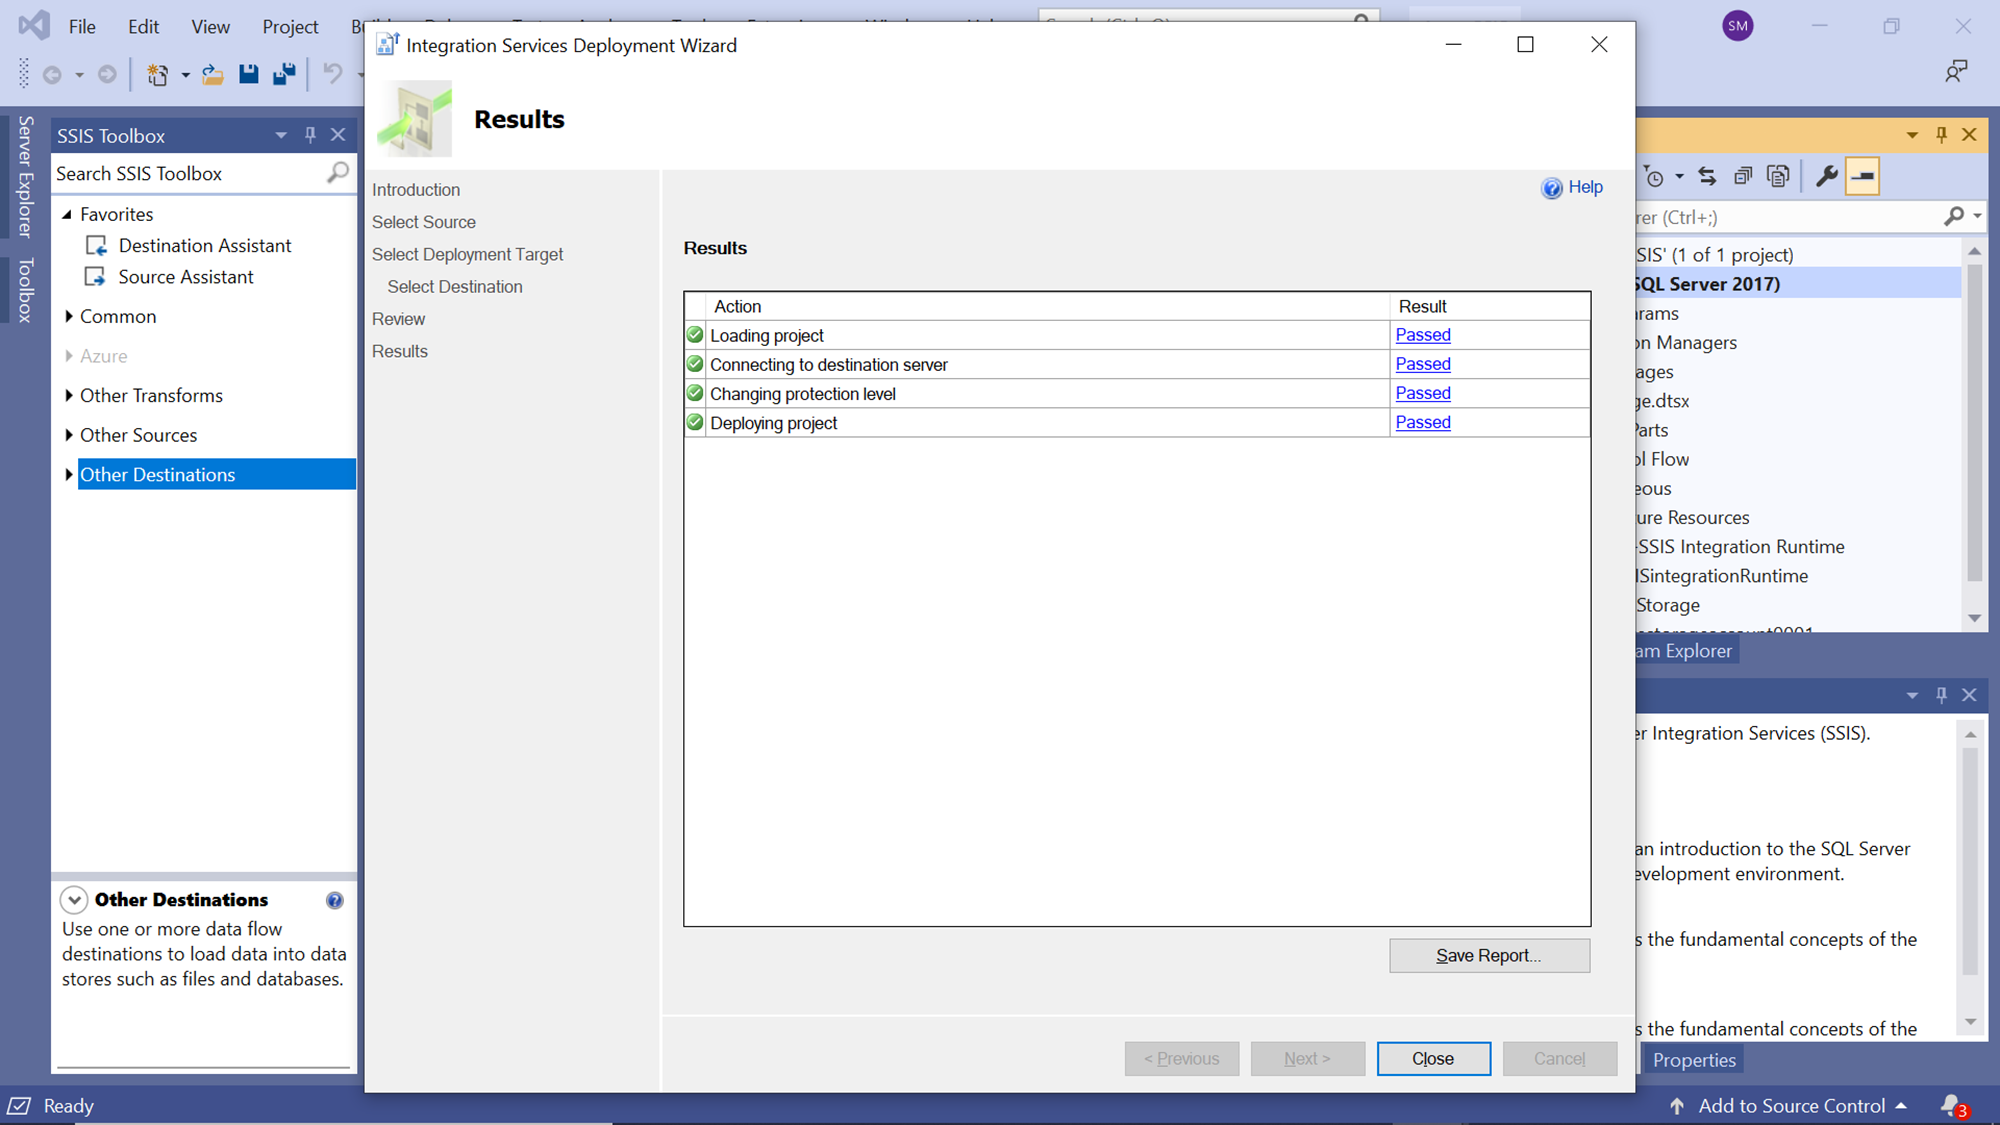
Over here, one would be presented with the summary of the configuration details selected so far. Review the details carefully, and then click on the Next button. This step would immediately start the deployment process as shown below.
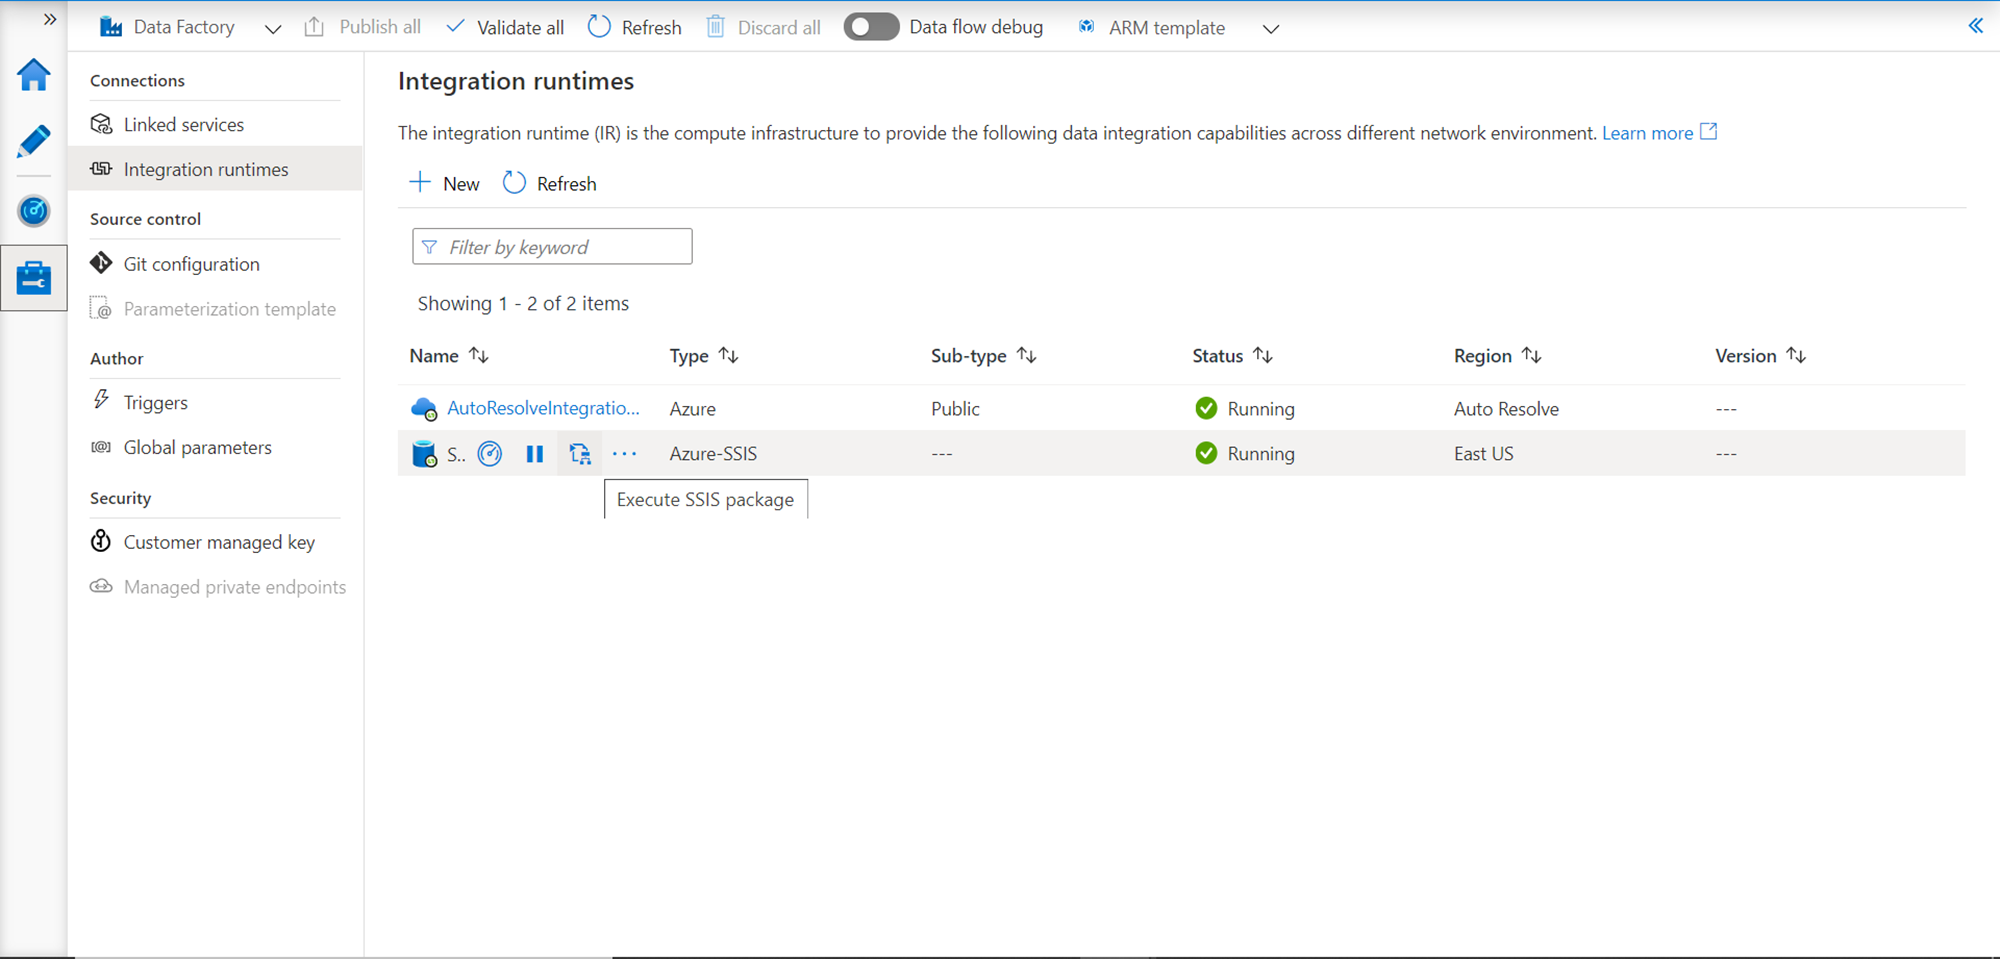
Once the wizard finishes, the package would get deployed on the Azure Data Factory with the Integrated Runtime. After the deployment is complete, one would want to verify and explore the deployed project on the Azure portal. Navigate to the Data Factory account and open the data factory portal. Navigate to the “tools” icon from the left pane, and open the Integrated Runtimes tab. You should be able to see the deployed project listed here. Hover your mouse over the item and you would find options to execute the package, schedule the package, and other such options as shown below.
In this way, using Visual Studio and Data Tools, one can deploy as well as port SSIS packages from local machine to Azure Data Factory.
Conclusion
In this article, we started with a setup of Azure Data Factory account as well as Visual Studio with data tools on the local machine. We learned how to create an Azure enabled SSIS project, connect it with Integrated Runtime on the data factory and deploy the project on the integrated runtime using the deployment wizard in Visual Studio.

He has worked internationally with Fortune 500 clients in various sectors and is a passionate author.
View all posts by Rahul Mehta
- Finding Duplicates in SQL - February 7, 2024
- MySQL substring uses with examples - October 14, 2023
- MySQL group_concat() function overview - March 28, 2023