
Azure SQL Database is a fully managed SQL Server database engine based on the latest stable version of SQL Server enterprise edition. This is Database as a Service offering under the PaaS model in the Azure cloud. It offers in-built high availability capability and reduces the manageability efforts by automating administration activities like backups, patching, etc. Backups are managed automatically by Azure for all PaaS database deployments. This article will explain one of the configuration item retention periods of Azure SQL database backups.
Microsoft Azure internally manages automatic backups for their PaaS database products SQL database and Azure SQL managed instances. It reduces administration complexities and the efforts DBAs spent on managing database backups. Retention policy is one of the important aspects we always do consider whiling designing backup solutions for our critical database systems. Backup retention enables our ability to recover databases till the time we set for the retention period.
Azure SQL databases support two types of backup retention policies:
- Short term retention policy (PITR)
- Long term retention policy
Let’s discuss both types of retention policies and how to modify them as per our retention policy given in the below section.
Short term retention policy
Short term retention policy is used to address point-in-time retention ability for near-term recovery. We can save backup files up to 7-35 days in this retention policy. The default backup retention period under this policy is 7 days but it varies depending upon your pricing tier. If you have chosen the Basic tier under the DTU model, then the maximum you can set is like 7 days whereas standard and premium tiers offer up to 35 days of retention periods.
I will create a PaaS database on Azure SQL and validate its default backup retention period which should be 7 days and, I will show you how to modify this retention as per your desired value. Let’s first create an Azure SQL database with default options.
Create an Azure SQL Database
Log in to the Azure portal. Search SQL database and click on this option. Click on the “Create” option showing on the database dashboard page which will appear post launching it.
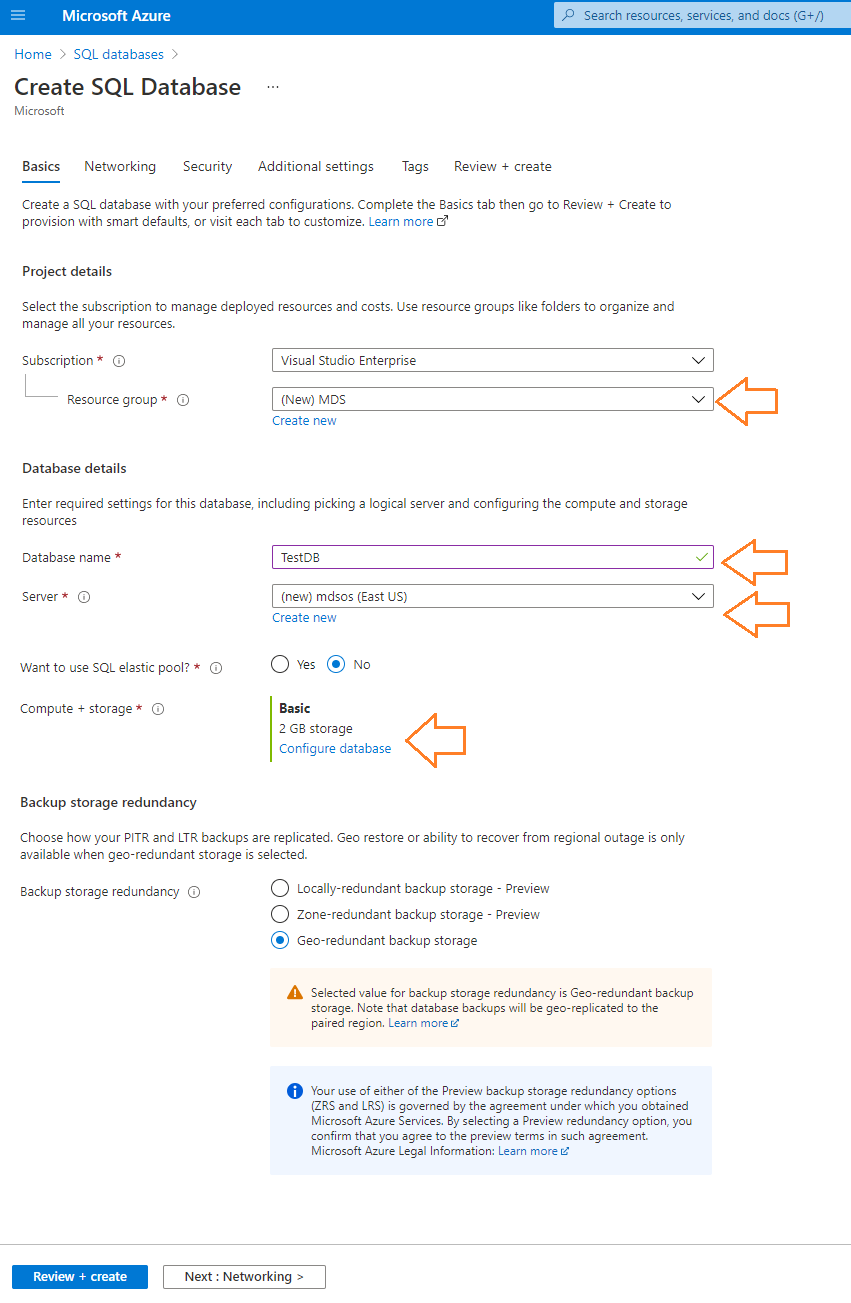
The below screen will appear once you click on Create button. Make sure to fill and review all options showing in the orange color arrow of the below image while creating a new database. I will create this database with keeping all default options. Once you will fill in the details, hit the Review + create button to create your database.
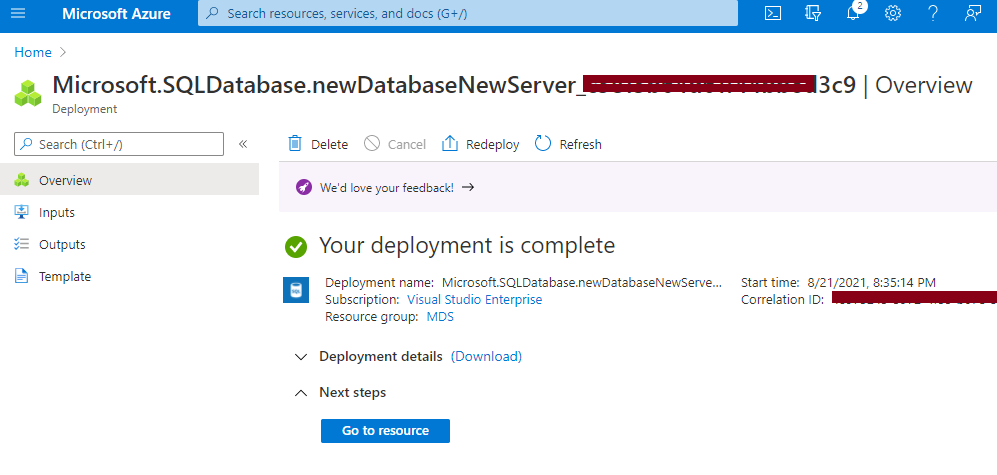
A new database creation process will be started, and you will get the below window once deployment will be successful. You can click on the “Go to Resource” option to jump to the database dashboard page.
Now, let’s see its retention period set for point-in-time recovery by accessing its logical server page. We will then click on the “Backups” option from the left side menu given under Data management. Here is the sequence of steps you need to follow to get the retention policies configuration details.
- Click at logical server name mdsos to launch its overview page
- Click on the “Backups” option from the left side menu given under Data management
- You can see 2 tabs in the right-side pane. Click on Retention policies
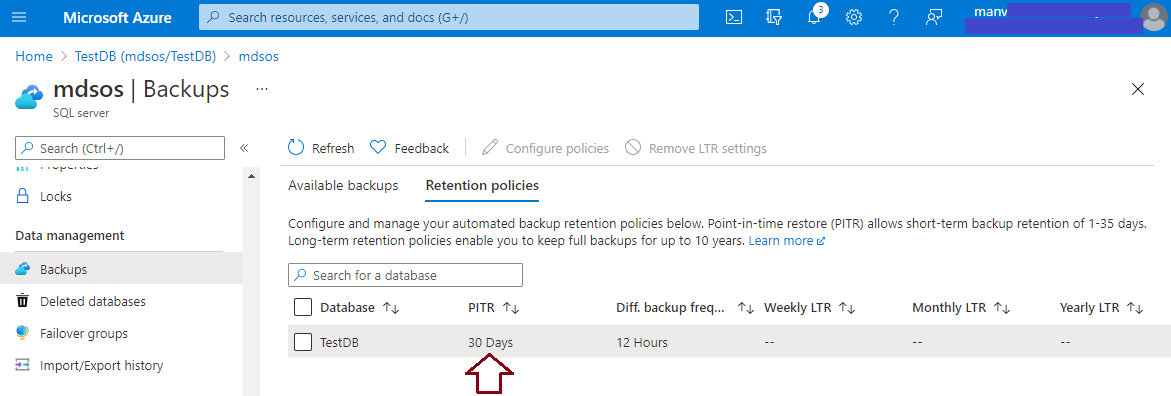
Here, you can see retention policies set for point-in-time recovery and long-term recovery as shown in the below image. As default retention setting for point-in-time recovery is 7 days so you can see it in the below image as well for this database. We can also witness that long-term retention is not set by default for this database which we need to do it manually in the next section of this article.
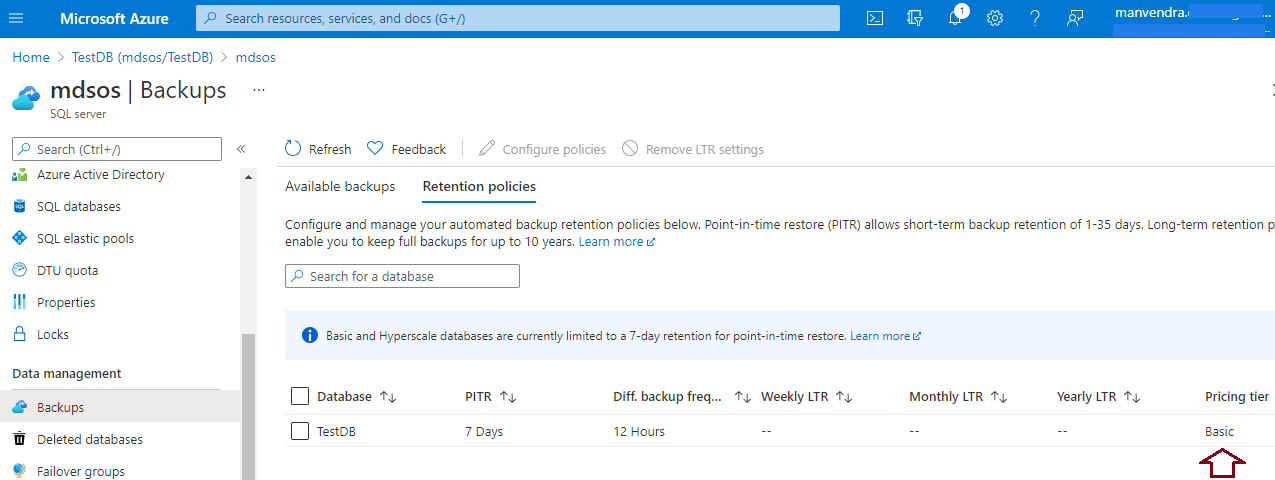
I have deployed this database under the Basic tier of the DTU pricing model so I cannot increase its retention for point-in-time recovery as part of the short-term retention period. If you want to increase the retention period for point-in-time recovery, then you must change its pricing model either to standard or premium tiers of the DTU purchasing model or you should switch to the vCore purchasing model.
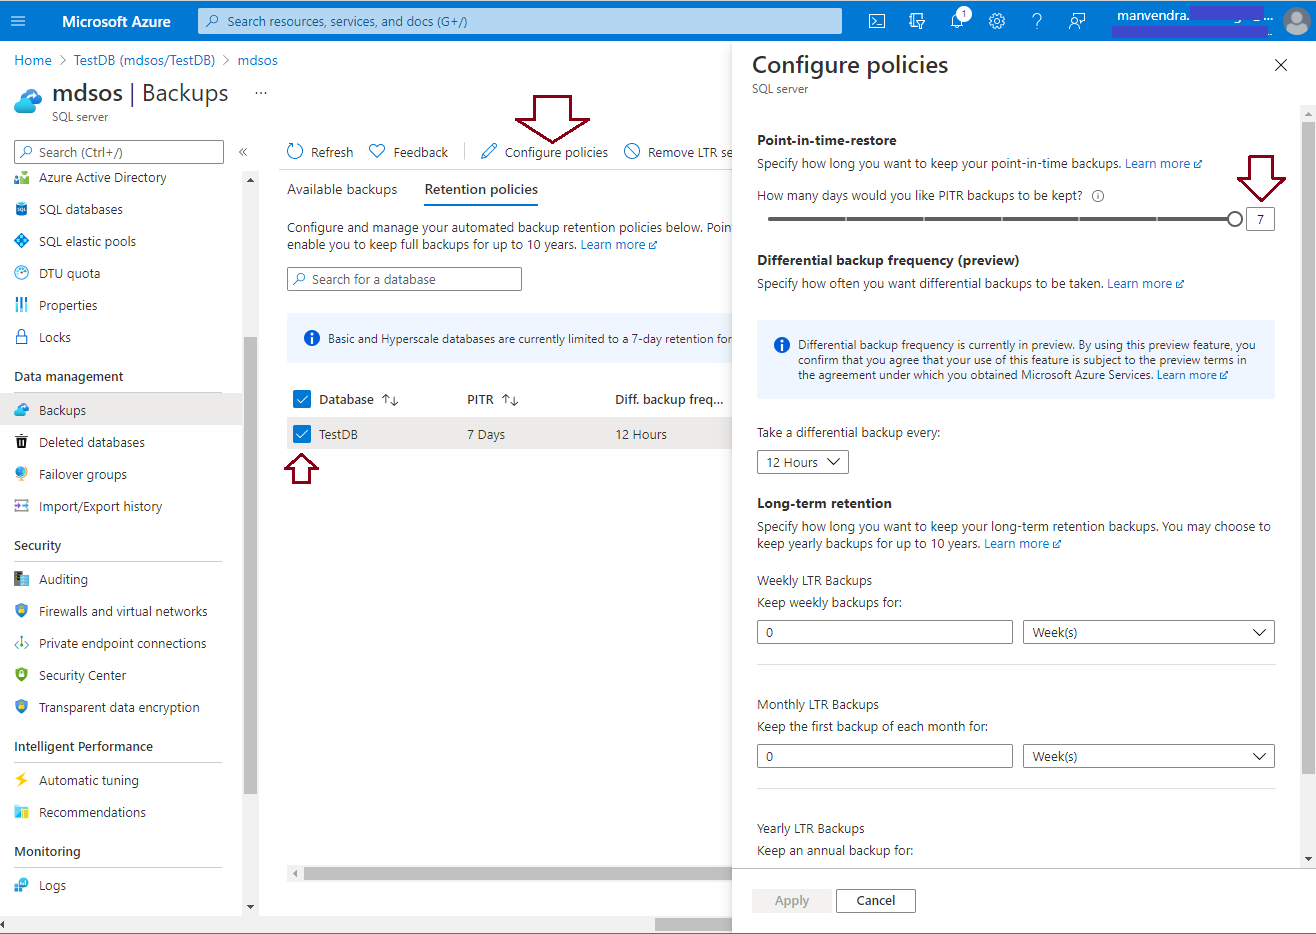
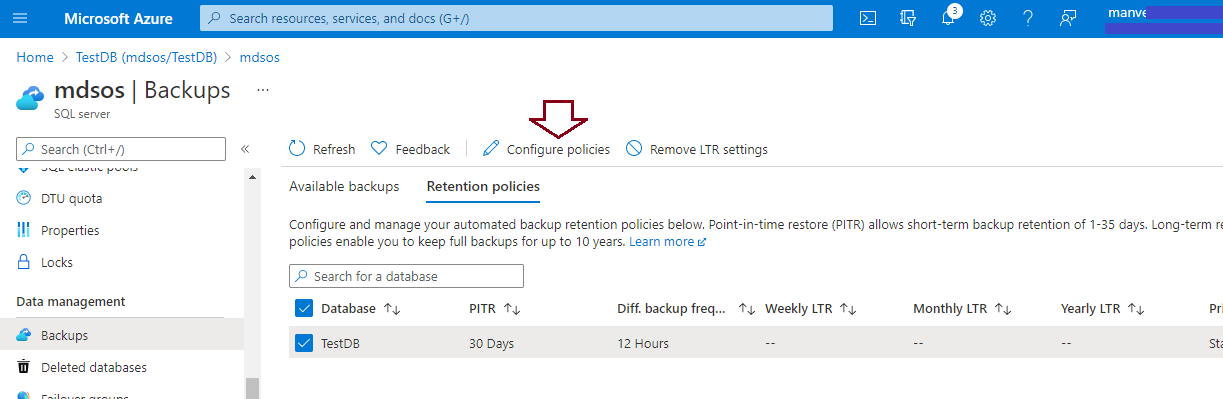
Let me show you while attempting to increase its PITR retention period keeping it in the basic tier of pricing model. Click at the check box showing near SQL database named TestDB. There is a grayed-out tab named “Configure policies” in the above image which will be enabled once you click on the database checkbox. Click on this tab to open the policies window. You can follow the dark red arrow to understand the sequence from the below image.
We can see maximum retention is showing as 7 days and it cannot be increased. There is no scope for increasing its value by dragging the pointer. You can enter the number of retention periods showing near arrow in configure policies window but Apply button will not enable to apply this change on backups.
If you want to increase it, you need to change its pricing tier. You can decide which pricing tier is optimum for you and accordingly scale your SQL database. Make sure to plan it carefully and do not scale it on the fly in the production environment. I assume you will plan it and take all approvals before scaling your SQL database to other pricing tiers. Changing service tiers from Basic to standard or others will cost you more so get all approvals before making this change.
If you already running with standard or premium pricing tiers, then you don’t need to change it. You can skip the below section and directly go to the section where I have shown how to modify its retention period.
Change Pricing Tier
Let me switch to the standard tier of the DTU pricing model and then see its retention period extension possibility.
Login to your Azure portal. Search for SQL database and click on this option. Identify your target database and click on it to launch its dashboard page.

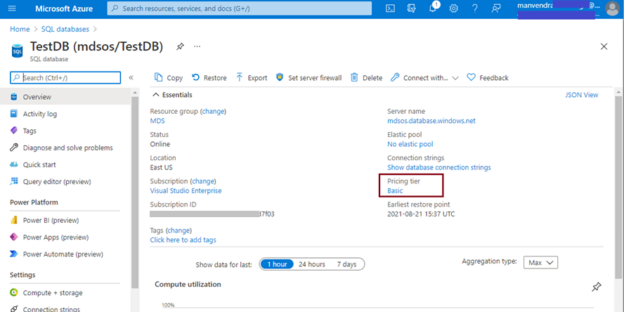
Click at Basic to launch its service and compute tier page or you can click at “Compute + storage” showing in the left side pane under the “Settings” option of image.
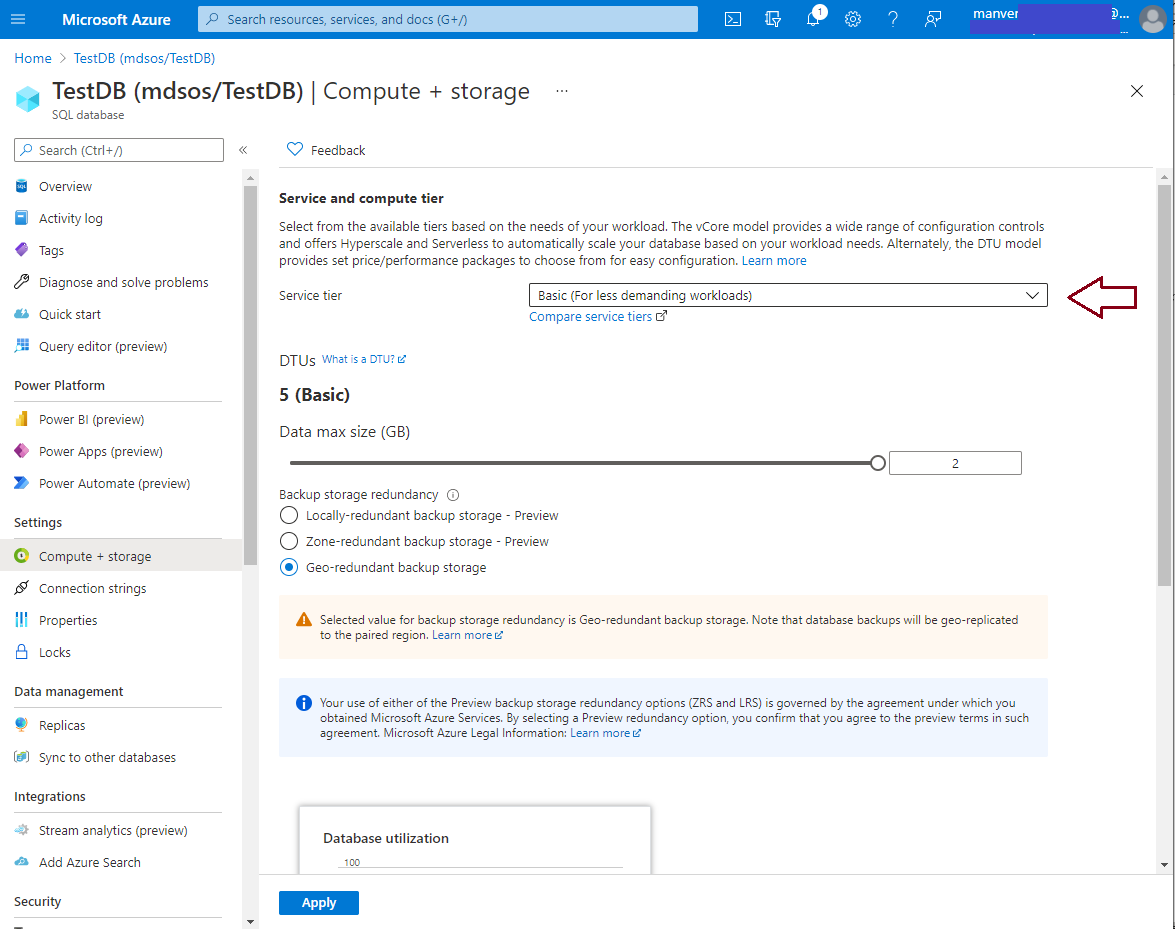
You will follow the above page to change the service tier. You need to click at its drop-down and choose your desired service tier. I have chosen a standard service tier to show you this demonstration. Choose a service tier as per your business requirement.
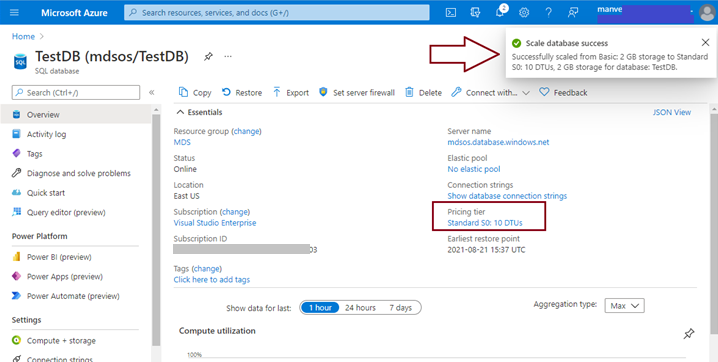
Now you can see the pricing tier has been changed to our desired value as shown in the below image. Next, we will modify point in time recovery retention period from 7 days to 30 days.
Modify Retention period for point in time recovery
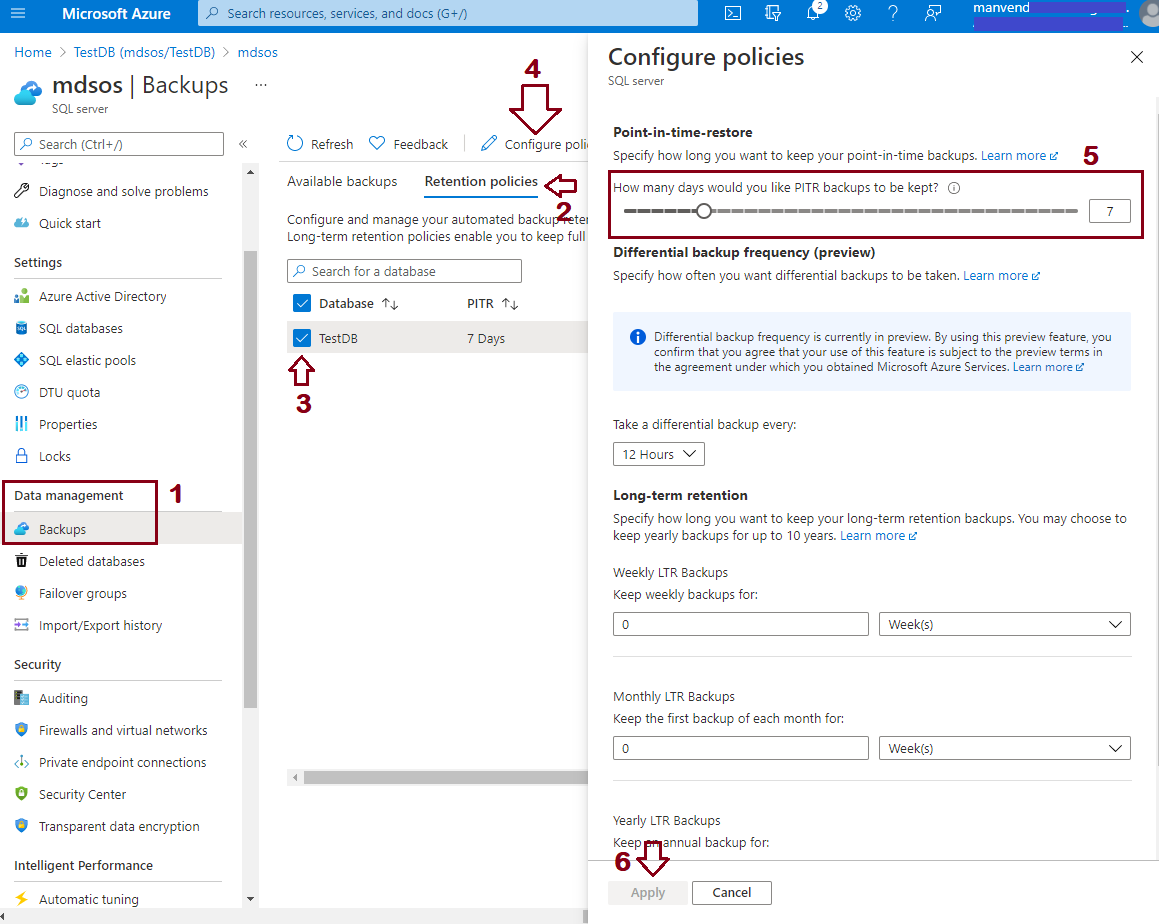
I have shown you how to access the “Configure policies” window of Retention policies for backups in the above sections. Follow the same instructions as I have given above to launch this page. Click at the Backups option given under the Data management of logical server mdsos dashboard page to launch the “Configure policies” window. You can also click on the server’s name value showing in the above image to directly jump at the logical server dashboard page.
Now we have enough scope of increasing retention period from 7 days to 35 days as per our need as shown in the below image. Drag the pointer to your desired retention period or just enter that number of days in a rectangle where the default value of 7 days is showing in the below image. I have made it to 30 days and clicked on the “Apply” button to apply this change. You will get another prompt to click Yes to apply this change. You can also follow the number sequence given in the below image to modify the retention period of point-in-time recovery in a sequence manner.
Once you will make changes, it will not suddenly appear on your screen. Click on the refresh button to get it displayed on the retention policies page. I did the same and you can see we have changed the retention policy for point-in-time recovery for our SQL database from 7 days to 30 days.
Long Term Retention Period
LTR (Long term retention) policy is used to address restores from older backups for various other business needs. You can keep a long-term retention period maximum of 10 years. It means if you have chosen 10 years as a long-term retention period then you would have the capability to restore your 10 years-old data. A weekly backup executes and saves its copies to Azure BLOB storage for up to 10 years under Long term retention policy.
Long-term retention feature copies backups from automatic backups that run automatically for all Azure SQL databases and save them to BLOB storage as per your defined LTR policy.
Let’s modify the long-term retention period for an existing SQL database.
Modify Long Term Retention Period
The first step is to check the existing configuration of the long-term retention period. You should launch the logical server page and then click on the Backup option given under data management in the left side pane as shown in the below image. Click at Retention policies from the right side pane of the backups dashboard. You can see there is no long-term retention defined for our desired database as there is no value configured under weekly, monthly, or yearly LTR (long-term retention). Next, we will go ahead and configure long-term retention for this database.
Log in to the Azure portal. Launch the logical server page on which you have hosted your identified database. Click at the Backups option from the left side pane and then select Retention policies from the right side pane.
Select your desired Azure SQL database for which you want to modify the long-term retention policy and then click on Configure policies option which will be enabled post selecting your desired database as shown in the below image.
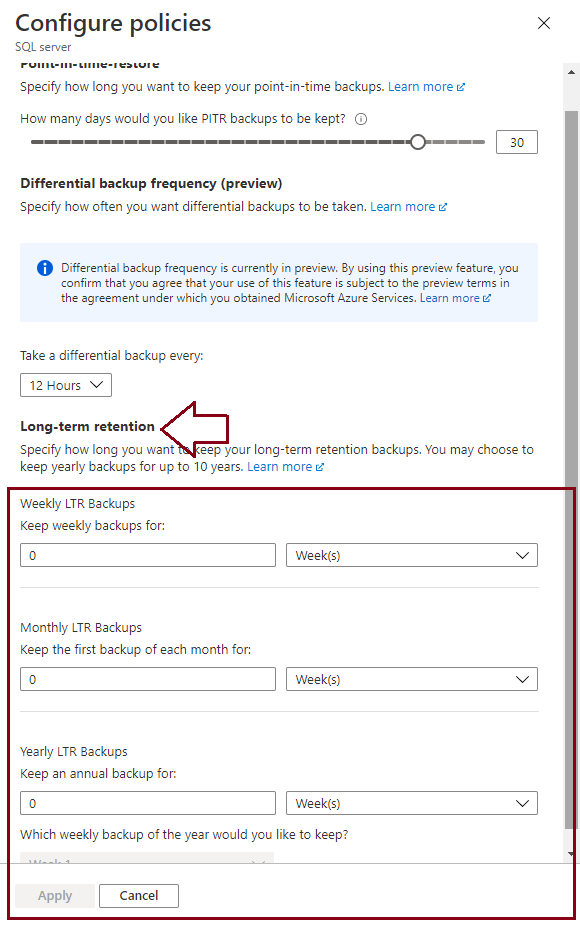
Once you will click on Configure policies, another window will appear like the one given in the below image. Here, you can see a section for long-term retention policies that I have highlighted under the dark red rectangle. It’s the same window through which we have modified the point-in-time retention period in the above section.
Now, we need to define weekly, monthly, and yearly LTR backups which will be saved as part of the long-term retention policy. It is not mandatory to configure weekly, monthly, and yearly LTR backups altogether. You can keep weekly and monthly LTR backups as zero and yearly LTR backup for up to 10 years. If you will not pass any value in weekly and monthly LTR backups, then it will not keep any weekly or monthly data for longer-term rather it will only keep one full backup each year for 10 years or till your desired term is given in yearly LTR backup. If you configure for monthly LTR backup, Azure will keep at least one full backup from each month till your given term in monthly LTR backups. The same applies to weekly LTR backup as well if you want to keep your weekly data for the longer term. You can also choose which weekly backup copy will be saved in BLOB storage for future needs as part of the yearly long-term retention policy.
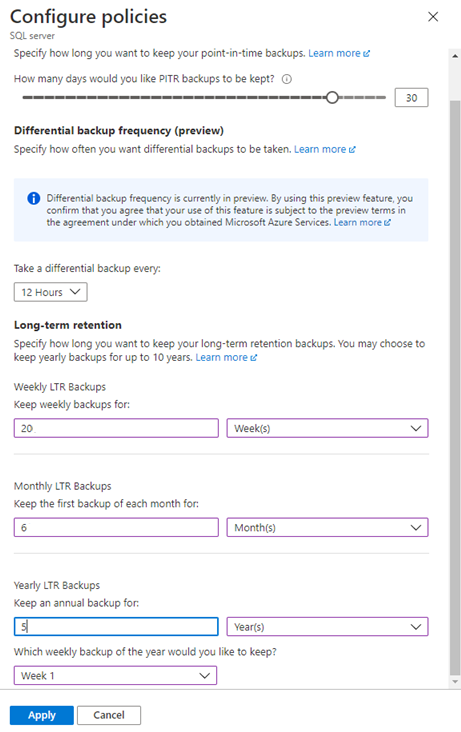
I have given random values to showcase this demonstration and filled the value as shown in the below image. I would strongly recommend you follow your company’s long-term retention policy for backups to define these configuration values and do not configure it as per your choice. This policy will allow you to even choose a specific weekly backup set to be preserved out of all weekly backups for the long term.
Once you defined the values, click on the “Apply” button to apply the changes.
The deployment will take a few seconds once you click on the “Apply” button of the above screen.
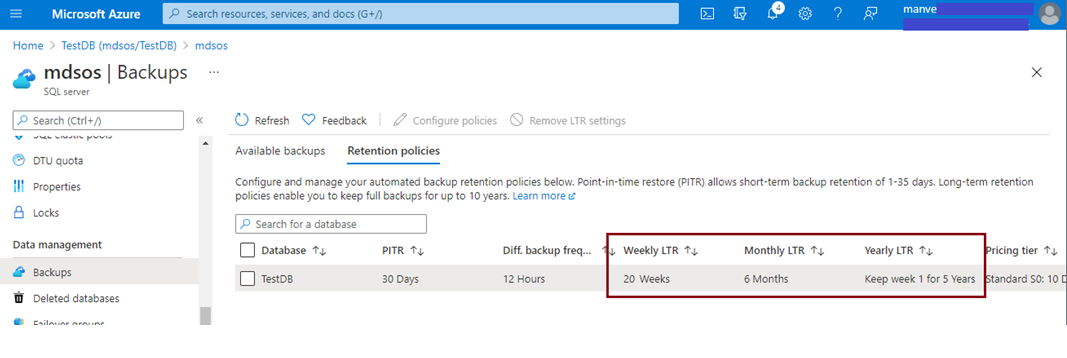
You can see deployment is successful and parallelly, values for weekly, monthly, and yearly LTR have automatically set as our desired value which we have chosen in the above image. The below screen is showing we have configured a long-term retention policy for our Azure SQL database which can be accessed and modified in the future using the below page.
If you will check the Available backups tab to ensure we have backups available under long-term retention or not, then you will see it none because we have made changes just now and we need to wait till backups are not copying and saving as per our long-term retention policy.
Conclusion
A backup retention policy is one of the important aspects to preserve your data for future needs. Azure SQL database offers backup retention policies for point in time as well as long-term retention periods which we need to carefully evaluate and modify. I have explained step by step process to modify both retention policies for a SQL database in this article. You should follow these steps if you want to modify either of the retention policy.

He loves to talk and write about database technologies. He has lead and delivered many projects from designing to deployments on Migrations to the cloud, heterogeneous migrations, Database consolidations, upgrades, heterogeneous replication, HA / DR solutions, automation, and major performance tuning projects.
You can also find him on LinkedIn
View all posts by Manvendra Singh
- Configure backup storage redundancy for Azure Cosmos DB account - May 15, 2024
- Difference between SQL SELECT UNIQUE and SELECT DISTINCT - January 16, 2024
- How to do a group by clause - April 12, 2023