

This article will explain how to perform various activities for Azure cosmos DB using Azure storage explorer. The storage explorer is a very useful desktop utility that helps admins to manage Azure storage without accessing the Azure portal. We can also connect to Azure Cosmos DB accounts using this tool but this feature will be deprecated in the future. As of now, it is supported so I decided to explore it for cosmos DB activities.
Azure Cosmos DB is a fully managed NoSQL database service in the Azure cloud that is globally distributed and suitable for modern-day application development. It is a faster, easily scalable, highly available, and secure database service.
Perform various Cosmos DB activities using Azure storage explorer
I will show you the various cosmos DB activities using storage explorer in this section. Let me start with connecting to an Azure account to see cosmos DB accounts if they are already created on your Azure account.
Connect to Azure Account using Azure storage explorer
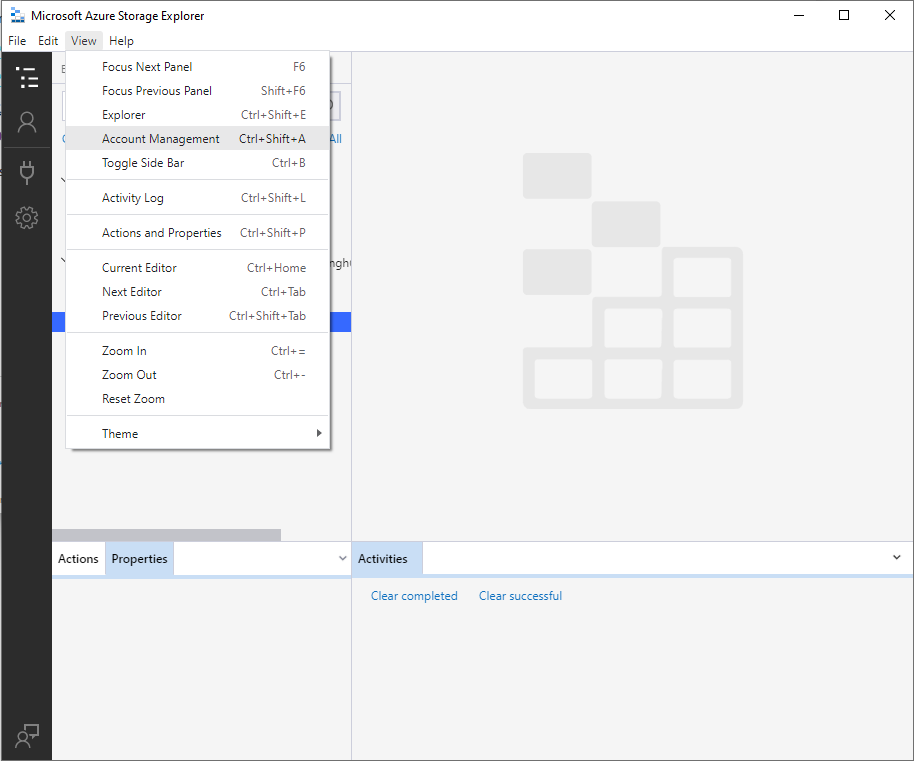
Launch Azure storage explorer on your desktop. Click on the View tab to display the list of options. Choose Account Management to select your Azure account.
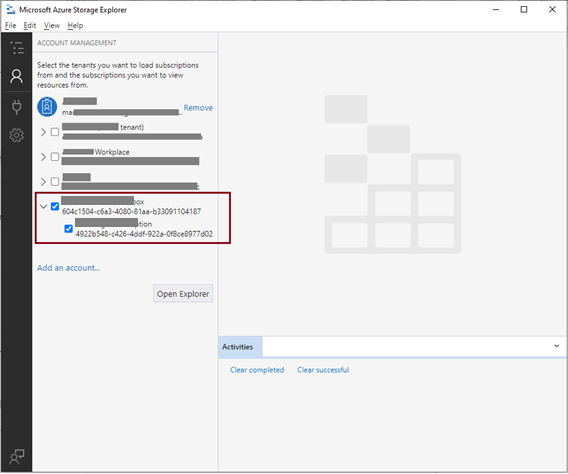
The below screen will appear once you will click on Account Management on the above screen. I have selected my desired subscription from the below image by clicking at their respective checkbox. Now, click on the Open Explorer tab showing below the checkbox of the Azure account.
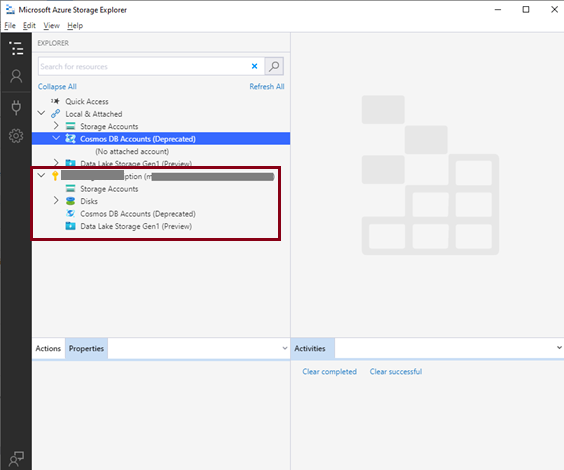
You can see the subscription is displayed in the below explorer. Expand Cosmos DB Accounts option showing under-connected subscription. We don’t have any cosmos DB account under this subscription so it is not displaying any details under this option. The support for cosmos DB accounts using Azure storage explorer will be deprecated in future versions that is why you can see deprecated is showing besides cosmos DB accounts option.
I have shown you how to connect to an Azure account to see connected Cosmos DB accounts in Azure storage explorer in this section. Next, let’s create a cosmos DB account on the Azure portal and connect it to storage explorer to perform various activities.
Create an Azure Cosmos DB Account
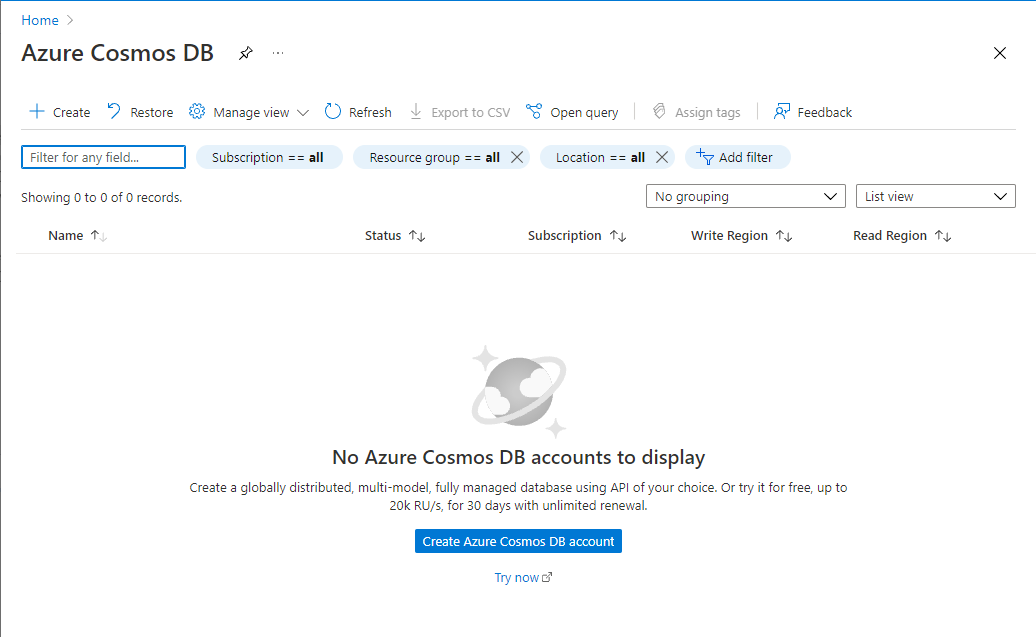
Log in to the Azure portal. Type Azure Cosmos DB in the search bar to display this service. The below page will display once you click on the cosmos DB option. All cosmos DB accounts will display on this page. As we haven’t provisioned cosmos DB yet so it is not showing any details in the below image. Let’s go ahead and create a cosmos DB account first.
Click at + Create option given just below the Azure Cosmos DB heading or click on the Create Azure Cosmos DB account tab given in the center of the below image.
The next screen will come to choose the API as per our workload. I have chosen recommended API Core (SQL) from the below image and hit the Create button given for this option.
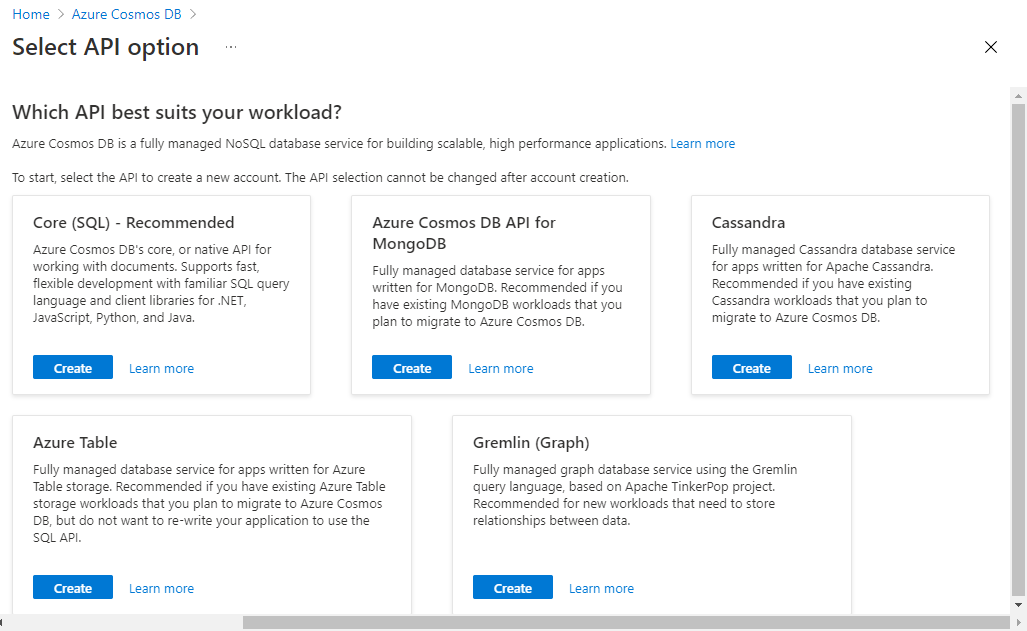
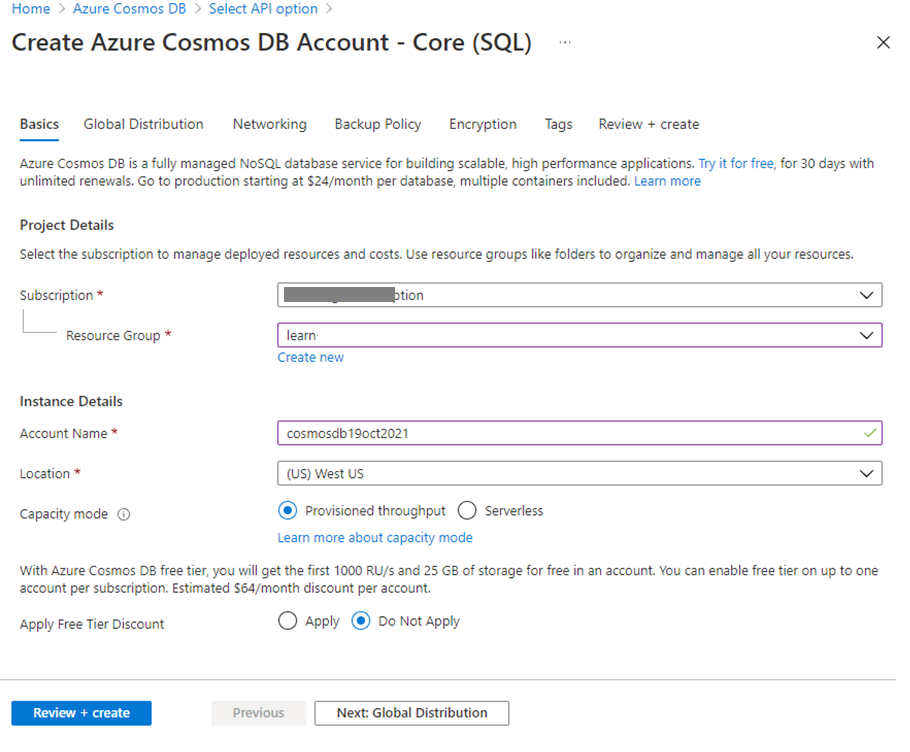
Below screen named Create Azure Cosmos DB Account -Core (SQL) will appear to fill all required details to create a Cosmos DB account. If you will choose a different API than Core SQL then you will get a similar form for that API to create a Cosmos DB account.
As I have to demonstrate it in storage explorer so I kept all default settings as it is.
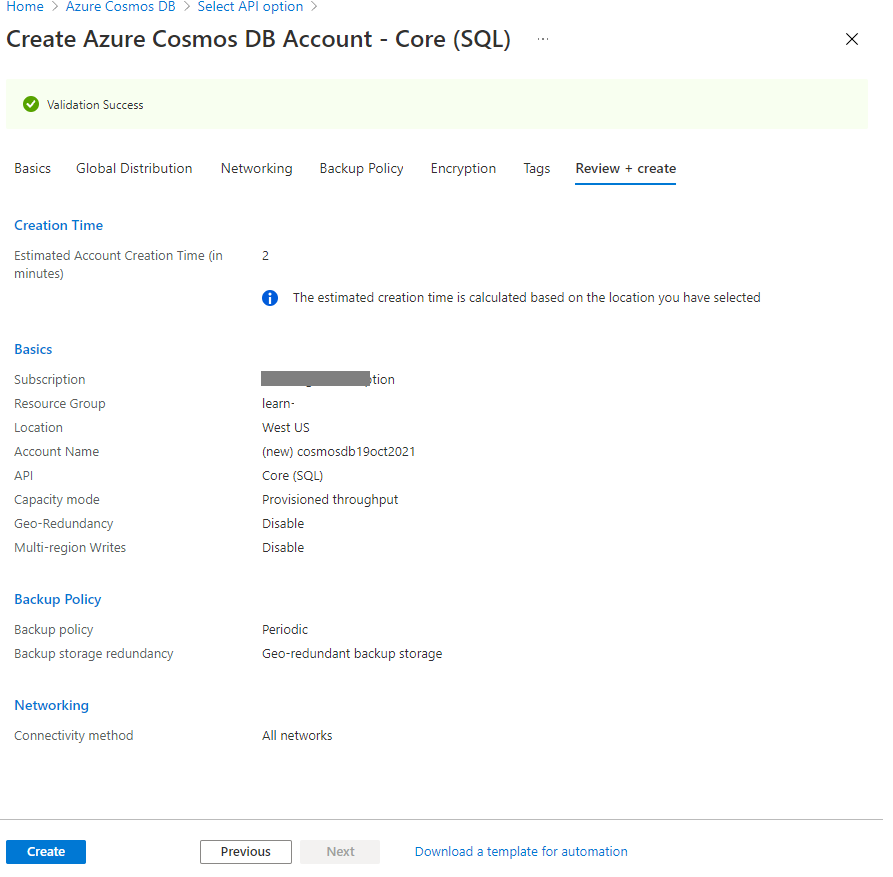
Once you entered all details on all tabs showing in the above image then hit the Review + create button to start the validation process. You can see validation is successful in the below image. Now click on Create button to proceed.
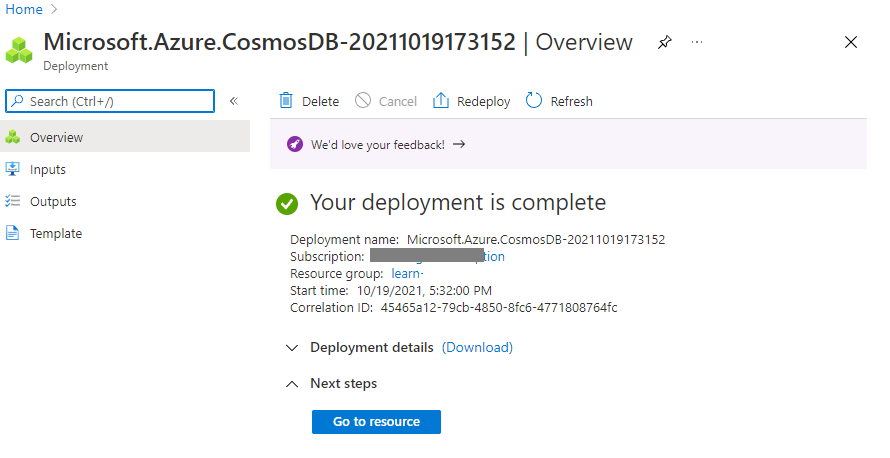
Deployment of Azure cosmos DB account creation will start processing once you will click on create a button of the above image. You will get the below screen once the deployment will be completed. Click at Go to resource tab jump to cosmos DB account.
Let’s go ahead and connect to this cosmos DB account using Azure storage explorer in the next section.
Connect to Azure Cosmos DB account using Azure storage explorer
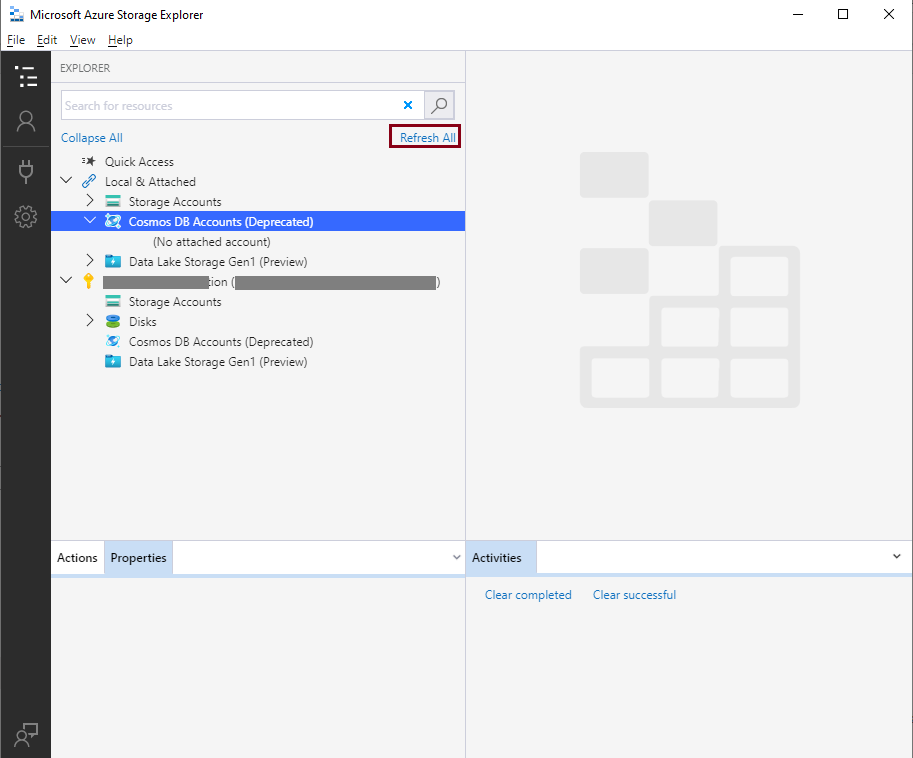
There are 2 ways to connect to an Azure Cosmos DB account using storage explorer. One is using Azure account through which we have connected and expanded Cosmos DB account in the first section, another way is directly connect to cosmos DB account without connecting to Azure account. Let me show you the first option in the below image. Below the screen is the replica of 3rd image showing above where we have connected to the Azure account but there was no cosmos DB account. Now we will click on Refresh All link highlighted in the below image. Once you will refresh it, the newly created cosmos DB account will start appearing under its section of the below image.
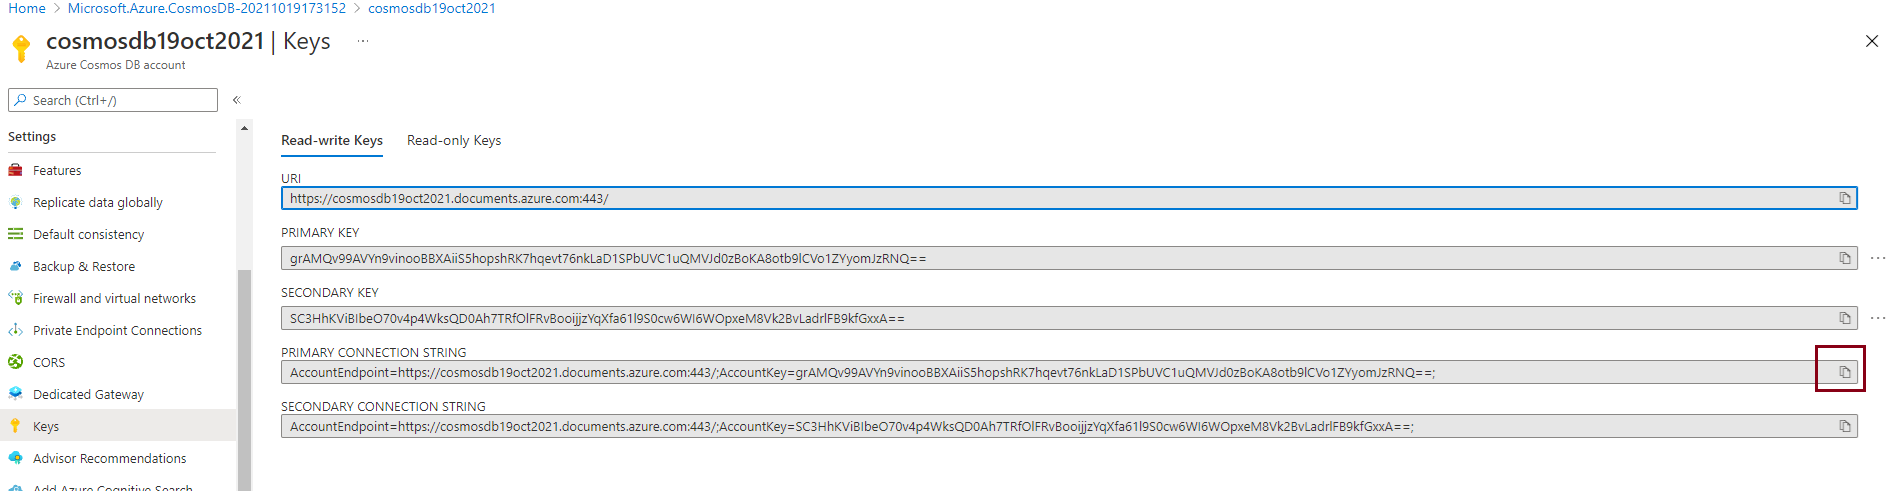
The second option is to directly connect to Azure Cosmos DB account without connecting to the whole Azure account. You need PRIMARY CONNECTION STRING of newly created Azure cosmos DB account or any existing cosmos DB account which you want to connect to storage explorer. You need to access the Keys tab given under Settings of cosmos DB account to get the primary connection string through the Azure portal.
The below image is showing keys tab details to display all the connection strings. Click at the copy icon given in the dark red rectangle in the right-hand side pane.
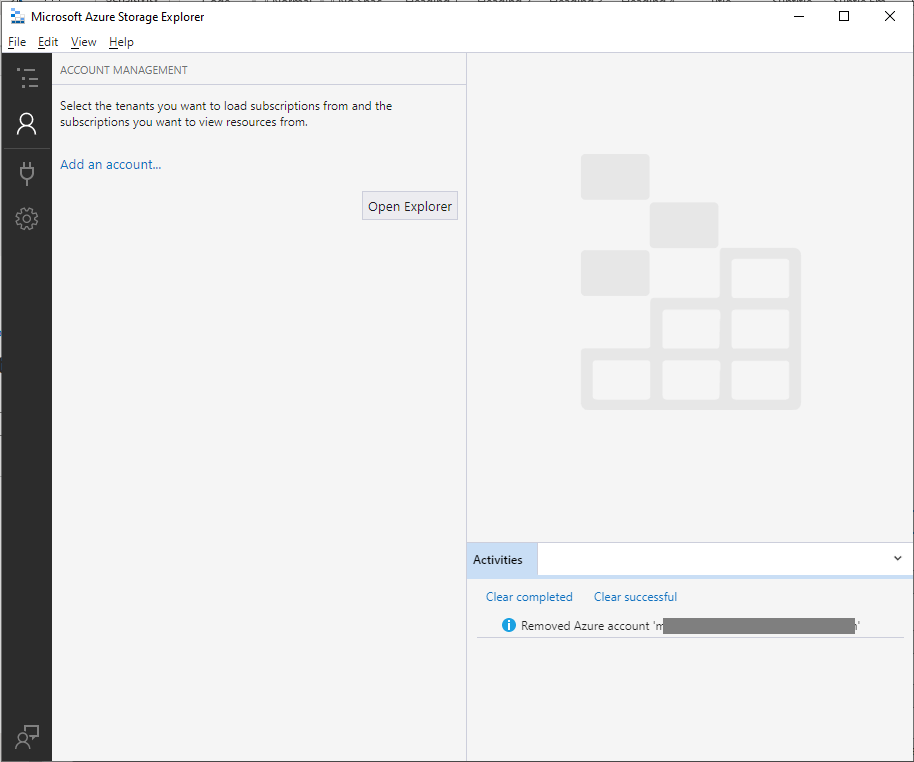
Now, go back to Azure storage explorer and remove all connected Azure accounts as shown in the below image where we can see no Azure account is connected. Now, click on Open Explorer to get the explorer view.
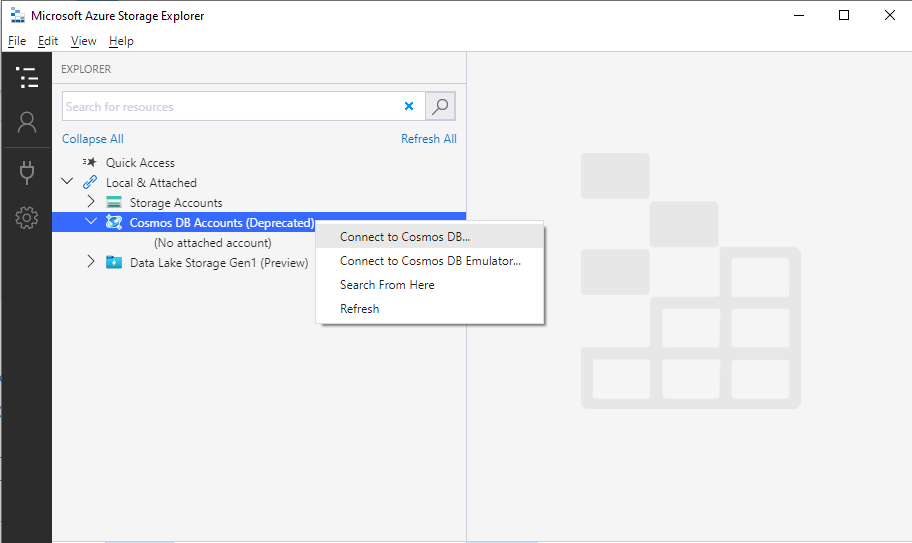
Here, you can see the Cosmos DB Accounts option as shown in the below image. Right-click at this option and click at Connect to Cosmos DB… to get the window where we will be entering the primary connecting string for our newly created cosmos DB account to establish a connection using storage explorer.
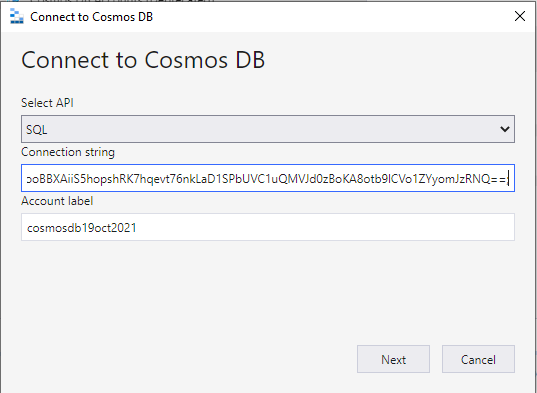
The below screen will appear to enter the connection string. The primary connect string will be entered in the Connection string input box.

Enter the copied connection string from the above step in the connection string box, Account label will automatically be recognized and displayed once you enter the copied connection string. You can see it in the below image, I did not enter the Account label, it is already filled post entering the connection string. Now, click on the Next button of the below image.
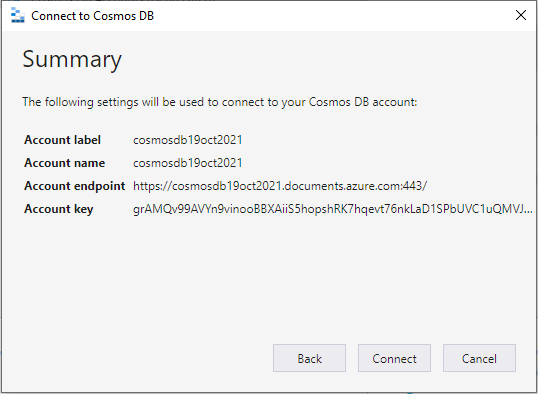
A Summary screen will appear to validate connection details and if all looks fine then hit the Connect button given bottom side of the below image.
Now, we can see our newly created cosmos DB account cosmosdb19oct2021 in Azure storage explorer. If it is not visible to you then click on Refresh All link shown in the below image.
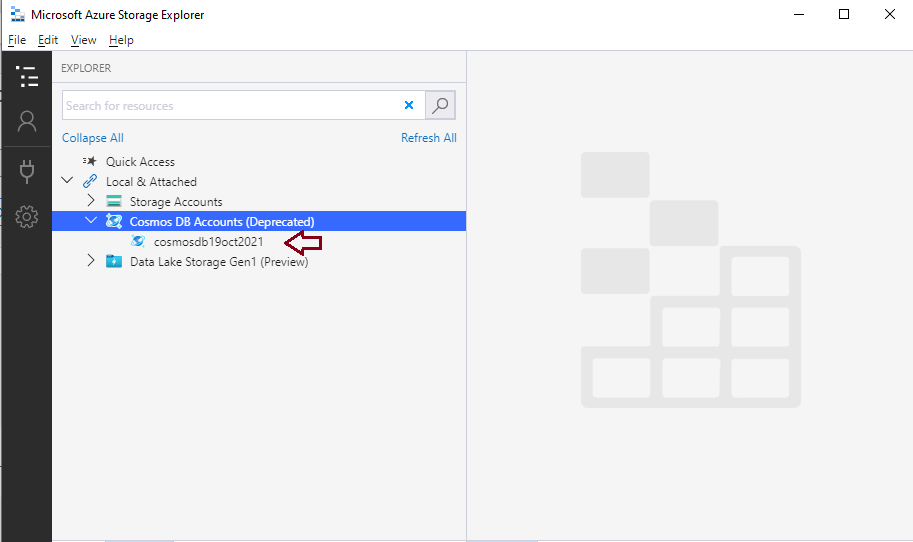
We have successfully connected to an Azure Cosmos DB account using Azure storage explorer in the above image. Now, I will show you various database-level activities which we can perform to cosmos DB account using storage explorer.
Create a Cosmos database using storage explorer
We have created a cosmos DB account and connected it to storage explorer. Now, let’s explore all options which we can perform on this cosmos DB account using Azure storage explorer. Right-click at the connected database account to get the list of activities we can perform at the cosmos DB account level and the list of such activities can be seen in the below image.
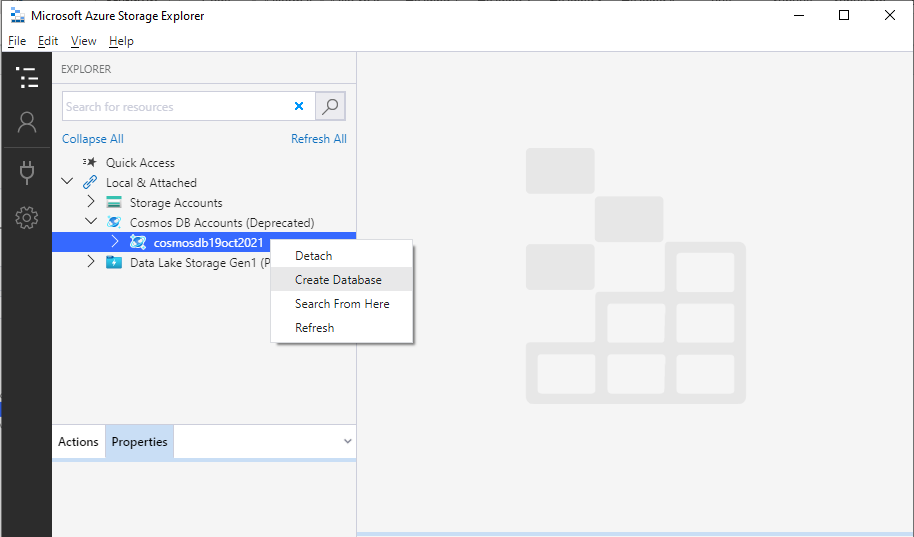
Let me show you how to create a database in this cosmos DB account. Click at Create Database option from the above image, you will get the below text box to enter the name of the database.
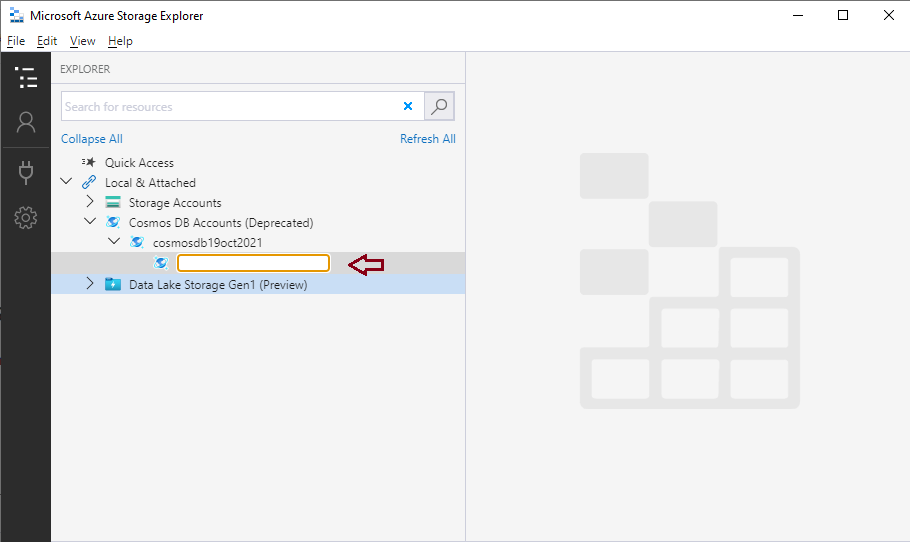
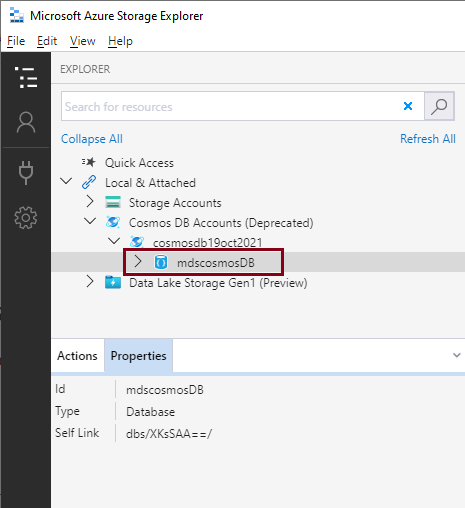
Enter the name of the database and press enter to create it. You can see database mdscosmosDB has been created under the cosmos DB account cosmosdb19oct2021.
We have created a database in the cosmos DB account in this section. Now, we will perform database-level activities in the next section.
Create Collections in Azure Cosmos database using Azure storage explorer
I assume you already have a cosmos DB account and a database. You have connected to cosmos DB account using storage explorer as shown in the below image. Now, we will explore all activities which can be performed for the database created in a cosmos DB account.
Expand connected cosmos DB account name and right-click at the database name showing in the cosmos DB account tree. You can see the list of activities that we can do to this database using storage explorer.

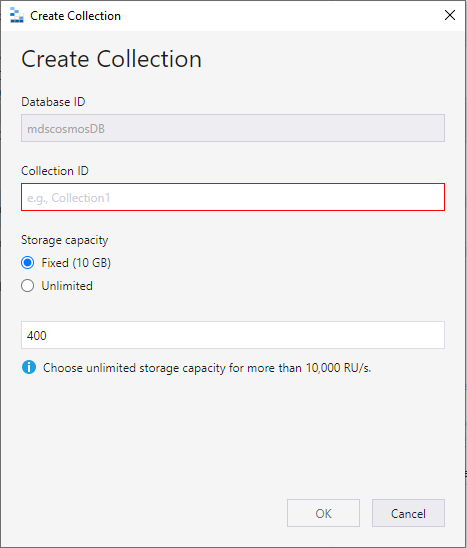
Let me show you how to create a collection in this database. Click on Create Collection… option shown in the above image. You will get below the window to enter the collection ID and define the storage capacity for the collection.
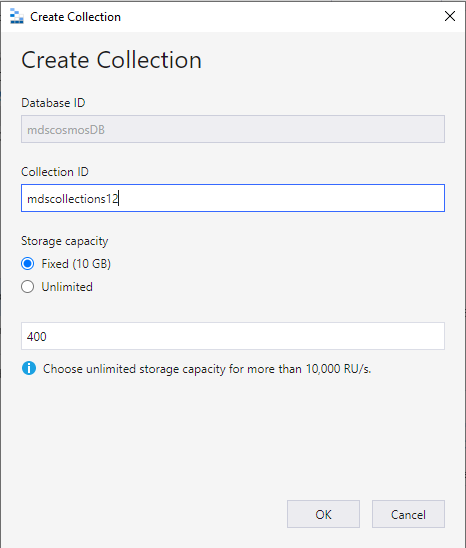
Enter the details required to proceed with collection creation. I have entered them as shown in the below image and clicked on the Ok button.
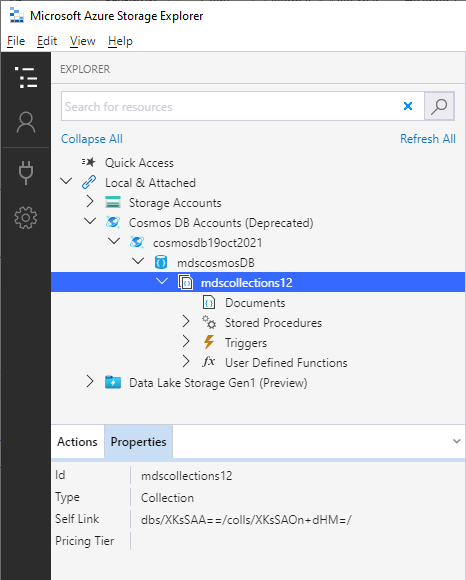
You can see the collection is created in the database in the below image. A list of objects is displayed under the collection tree, like documents, stored procedures, triggers, user-defined functions.
You can go ahead and test other activities which we can do at the database level. If you want to delete this database then you can choose this option from the list that came after right-clicking on the database name. Make sure you have a backup in place in case you need this data in the future.
Add a new document to a cosmos DB collection using Azure storage explorer
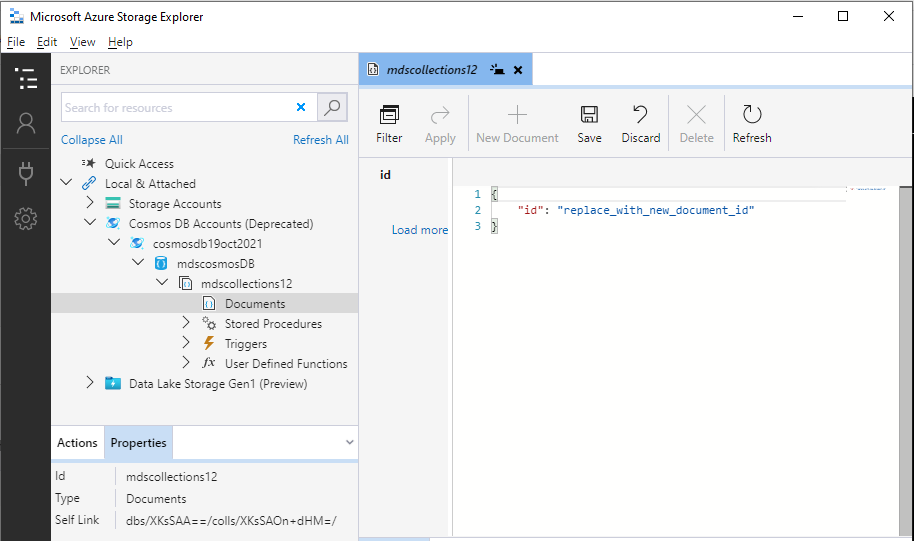
Now, you can go ahead and add a document to the above-created collection. Click at the Documents option showing in the left side pane of the below image under the newly created collection. You will get document details explorer in the right-side pane. Click on the New Document option shown at top of the image.

Below screen with JSON format template will come to create a document. Here you can enter the ID number and other fields and their details which you want to add to this document and hit the Save button to save this document.
I have created a document with below JSON field details and clicked on the save button to store it. If you click on the Save button, there are a few system-generated fields will be added automatically to the below JSON.
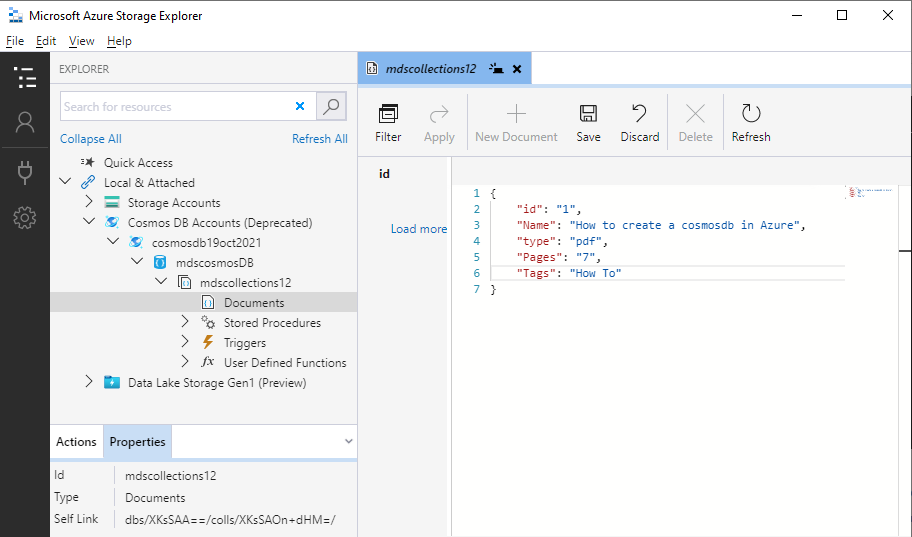
Have a look at the below image, here I have added till Tags field, but the remaining field is added post clicking at the Save button.
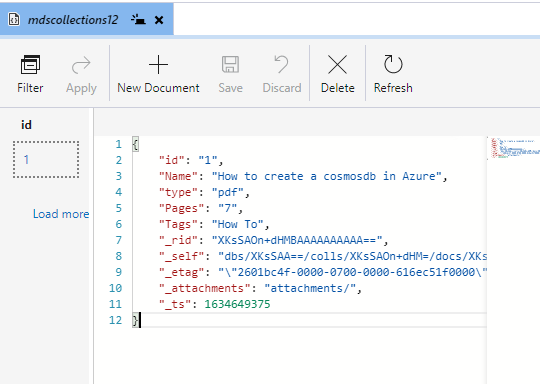
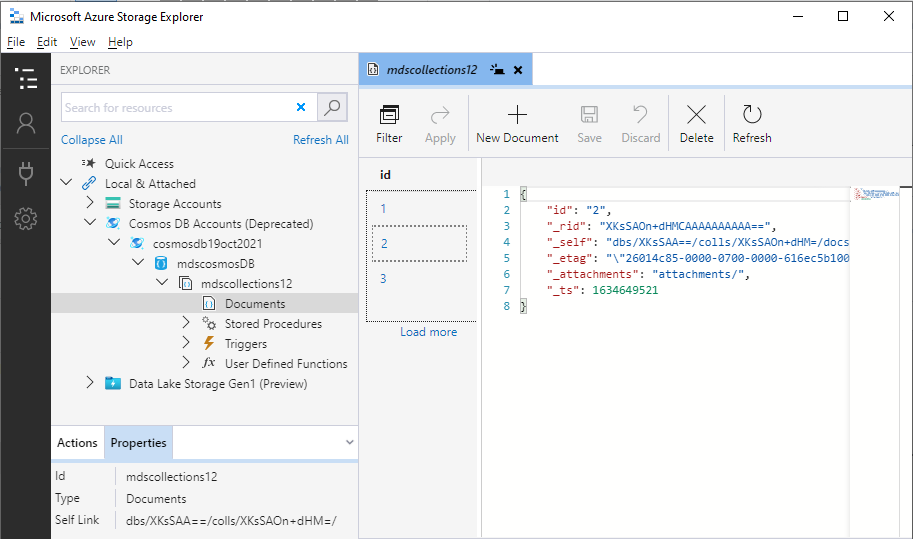
Similarly, you can create multiple documents by clicking on the New Document option and once you will save them it will look like the below image.
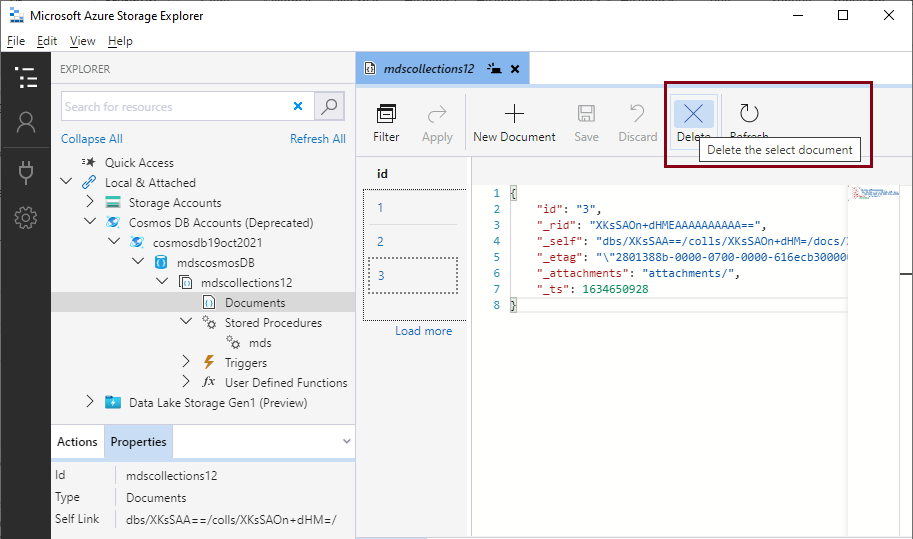
If you want to delete any document then you can select the respective document ID from the ID column and hit the Delete button given in the ribbon bar.
Perform other cosmos DB activities using Azure storage explorer
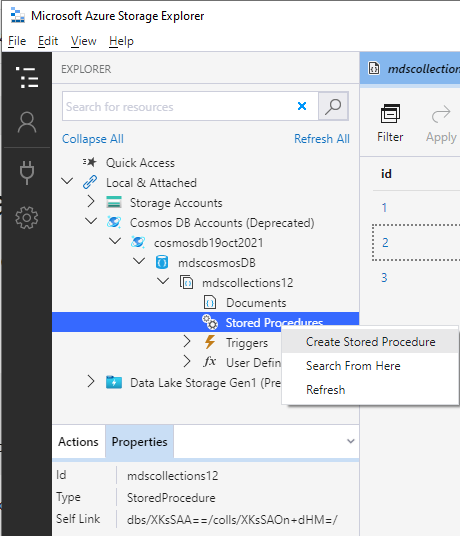
We can also perform other activities like we can create a new stored procedure by doing a right-click at this option and choosing to Create Stored Procedure…
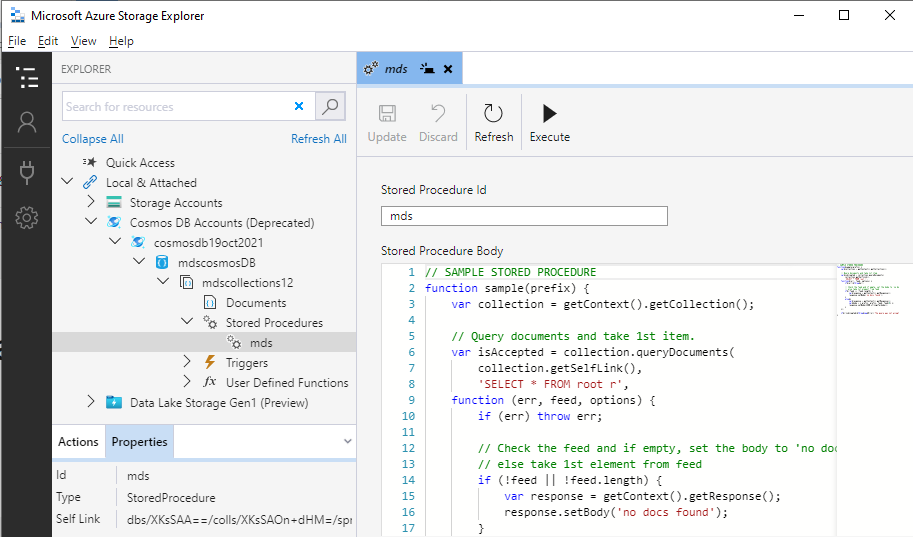
Once you click on the above option, it will ask you to enter its name and once you press enter below screen will come with a sample stored procedure in the right side pane of the stored procedure name.
Conclusion
Azure storage explorer is a very useful desktop application to manage Azure storage and other Azure cloud-related services like cosmos DB and data lake services. Today I have explored how to connect to Azure Cosmos DB account using Azure storage explorer and perform various activities on cosmos DB account and its objects using storage explorer without going to Azure portal. You have also learned how to create a cosmos DB account in this article.

He loves to talk and write about database technologies. He has lead and delivered many projects from designing to deployments on Migrations to the cloud, heterogeneous migrations, Database consolidations, upgrades, heterogeneous replication, HA / DR solutions, automation, and major performance tuning projects.
You can also find him on LinkedIn
View all posts by Manvendra Singh
- Configure backup storage redundancy for Azure Cosmos DB account - May 15, 2024
- Difference between SQL SELECT UNIQUE and SELECT DISTINCT - January 16, 2024
- How to do a group by clause - April 12, 2023