

This article will explore an overview of Azure Cosmos DB, we will also discuss how to create Cosmos DB along with its uses on why we need to choose Cosmos DB.
The need for database storage and its accessibility has changed over time with the evolution of the digital era. Legacy database systems are not enough to address the requirements and challenges faced by new-age advanced applications. These online applications can be accessed from throughout the world so there is a need to host a database near the user’s location to reduce the latency and make it more responsive. Online applications are open to the internet so there can be an enormous amount of traffic will float to these applications which will increase the amount of data size and its velocity. The RDBMS systems are not suitable to address such kind of application’s requirement, so Microsoft has developed another database service Azure Cosmos DB that comes under the NoSQL umbrella of Azure data services.
Azure Cosmos DB
This is a fully managed, highly secure, and globally distributed NoSQL database that is designed for new-age advanced application development. As this is fully managed so you don’t need administrators to manage its maintenance, patching, upgrades, capacity, and space management, auto-scaling in case of workload increase, etc.
It provided faster response time and guaranteed speed at scale. This database service also provides easy multi-region writes and data distribution across regions. It also provides a guaranteed SLA of 99.999% availability to run and make your mission-critical systems highly available. Its auto-scale feature instantly scales system resources and capacity in case of a workload increase or unpredictable workload.
Throughput is a parameter we use to measure cosmos DB workload performance to run read, write, update, and delete operations. The throughput in cosmos DB is measured using the term Request Unit per sec (RU\sec). We can provision throughput in a form of RU\sec for a specific container or a cosmos database. If we provision throughput (RU\s) for a cosmos database, then allocated throughput will be shared among all containers created inside that database.
Before provisioning throughput, you must understand your workload, and accordingly, you should provision it to accommodate your workload. You should understand the item size, the number of properties, indexing, etc. to calculate the adequate request unit.
Cosmos DB is suitable for modern digital applications like online portals based on video streaming, gaming, Internet of things applications, online retail websites, etc. for the below reasons.
- The enormous amount of data generated by such internet-facing applications
- Huge reads write operations
- Quick response time in single-digit milliseconds
- Autoscale to meet data volume and velocity demand in case of the sudden spike in workload
- Expand new location to increase business and workload keeping minor changes at the database layer
Azure Cosmos DB APIs
Azure CosmosDB supports various database APIs to choose from based on your nature of workload and requirement. Below is the list of such APIs.
- Core (SQL) API
- Gremlin API
- Table API
- API for MongoDB
- Cassandra API
Each API is created for the specific requirement to support wide-column, document, key-value, or graph-based data store. You must choose the right API based on your requirements whether you need a document-based data store, key-value data store, or any other data store, you want to leverage open-source developer or client drivers or you want to benefit from the advanced features of cosmos DB like autoscaling, globally distributed data, performance, etc. The recommended API for cosmos DB is Core (SQL) API. If your existing application is based on MongoDB or any other similar API given above, then you must choose its respective API.
Resource Model
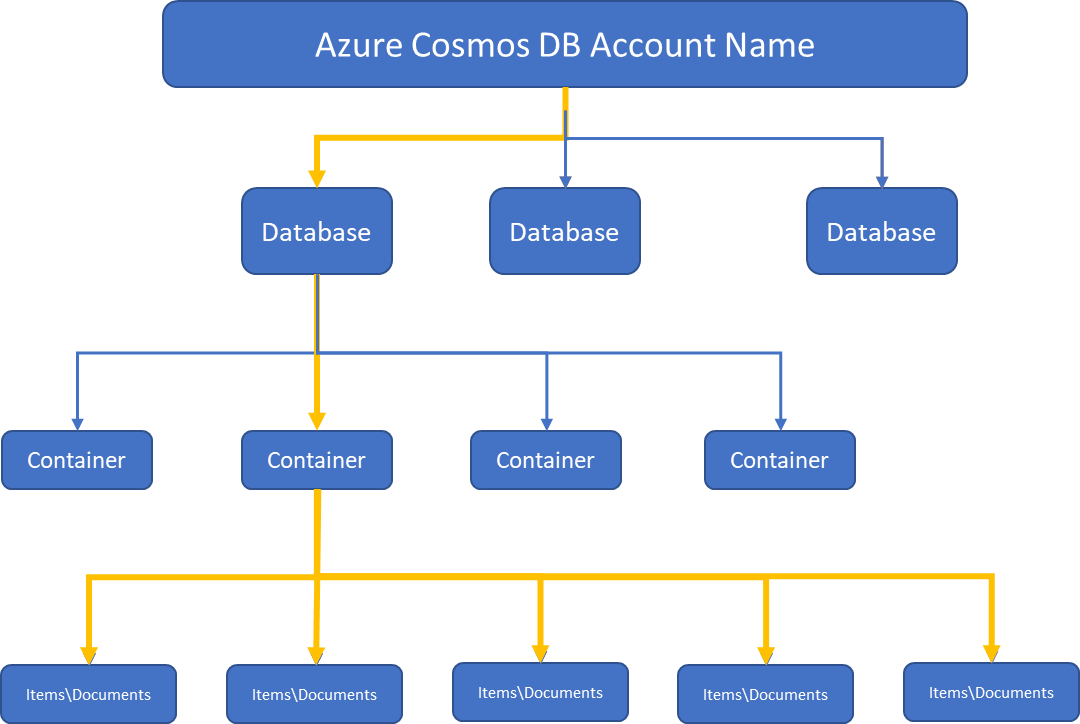
Here we will discuss the Cosmos DB resource model and how it is organized and structured to arrange your data. The very first and top layer is the Azure cosmos DB account which also helps to organize billing details of cosmos databases. It works like a container, all cosmos databases created in a Cosmos DB account. It is also crucial in case you want to use the global distribution of your data because you can add or remove regions at the Cosmos DB account level. We can create multiple Cosmos DB account in a subscription, and you can store an unlimited amount of data in a Cosmos DB account.
The next element under the cosmos DB account is Cosmos Databases. We can create multiple databases in a cosmos DB account. Each database can have multiple containers to store actual data in the form of items like documents, stored procedures, triggers, or key values. You can understand it by looking into the below diagram.
The name of each element in a cosmos DB account varies depending on the type of API you have chosen while creating the cosmos DB account. For example, the database is used for SQL API term whereas its equivalent entity in Cassandra API is known as Keyspace. I have given the list of such element which has a different name in different APIs in the below table:
Azure CosmosDB Element Name | SQL API | Cassandra API | Azure CosmosDB API for MongoDB | Gremlin API | Table API |
Azure Cosmos database | Database | Keyspace | Database | Database | NA |
Azure cosmos container | Container | Table | Collection | Graph | Table |
Azure cosmos Item | Item | Row | Document | Node or Edge | Item |
Azure Cosmos DB Account Creation
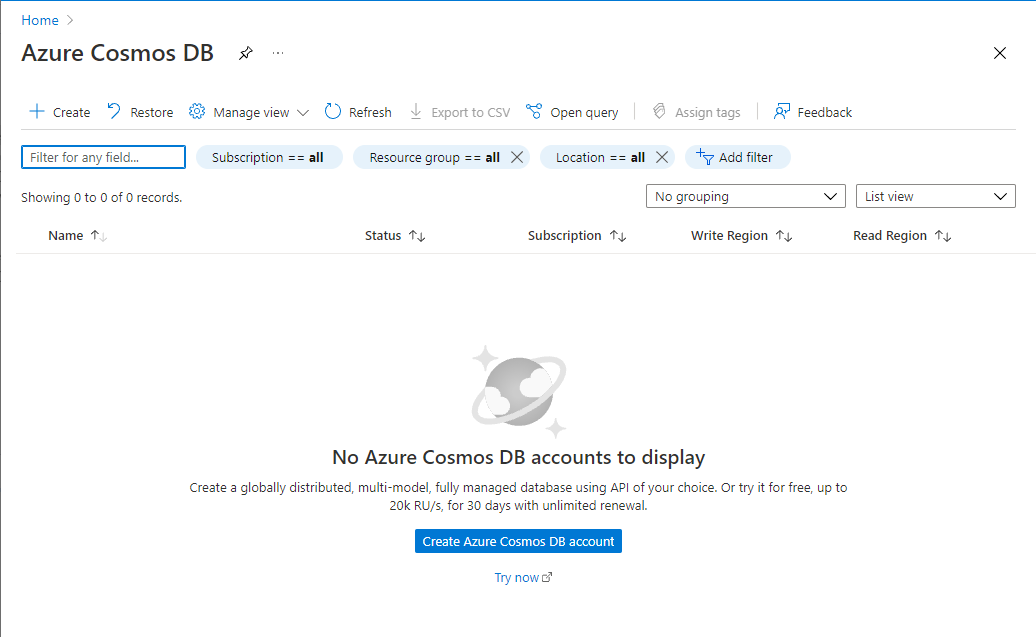
Log in to the Azure portal. Type Azure Cosmos DB in the search bar and click on this option once it will appear in the search drop-down menu. The below page will display once you click on the cosmos DB option. You can manage all cosmos DB accounts from this page also it will be displayed here on this page. As we haven’t provisioned cosmos DB yet, it is not showing any details in the below image. Let’s go ahead and create a cosmos DB account first by following the below steps.
Click on the + Create option given just below the Azure Cosmos DB heading or click on the Create Azure Cosmos DB account tab given in the center of the below image.
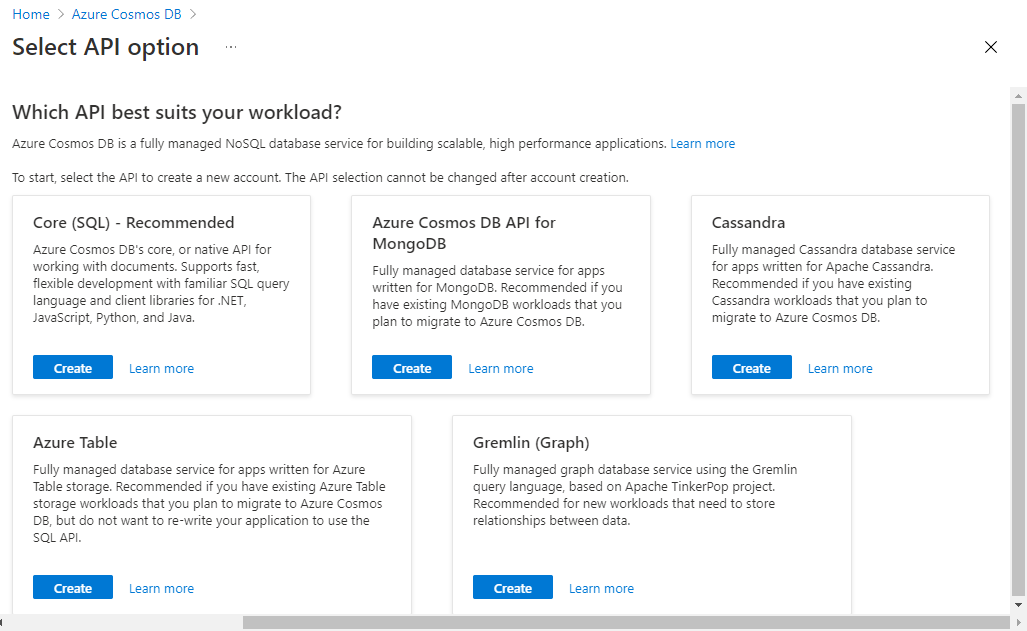
The next screen will come to choose the API as per our workload. I have chosen recommended API Core (SQL) from the below image and hit the Create button given for this option.
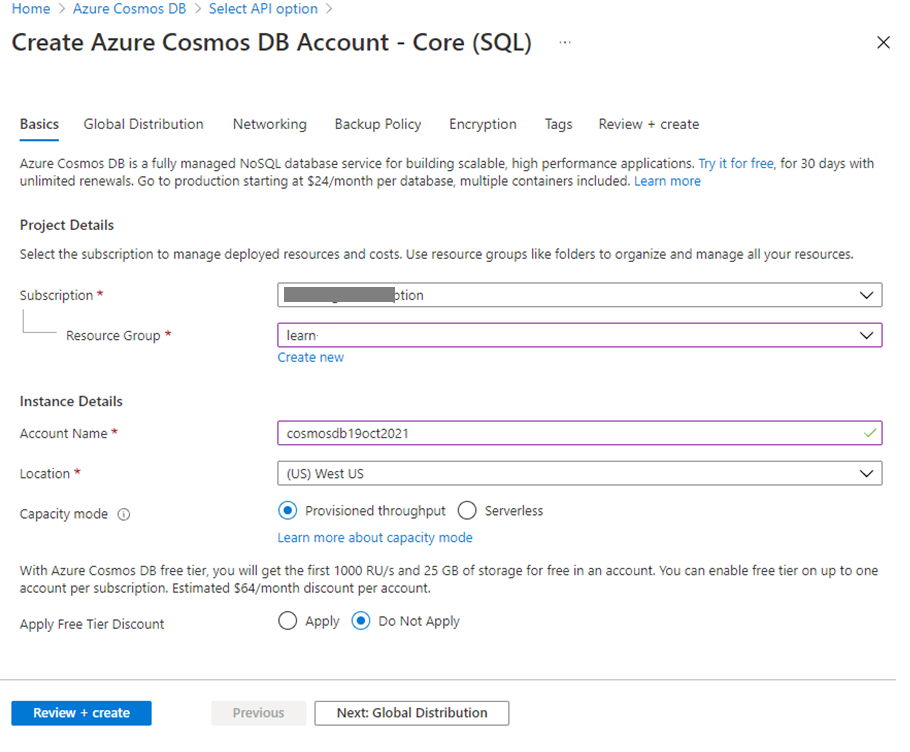
Below screen named Create Azure Cosmos DB Account -Core (SQL) will appear to fill all required details to create a Cosmos DB account. If you will choose a different API than Core SQL, then you will get a similar form for that API to create a Cosmos DB account.
Here, we need to choose the Subscription name under which we want to provision this database, the Resource Group under which we will create this database, the name of this cosmos DB account then we will choose a location where we want to provision this service. We can also choose the Capacity mode through which we will provision the adequate throughputs in a form of request units. You can also provision cosmos DB account as Serverless as you can see this option under the Capacity mode of the below screen. You will also get the first 1000 RU\s and 25 GB of storage free post-creating this account.
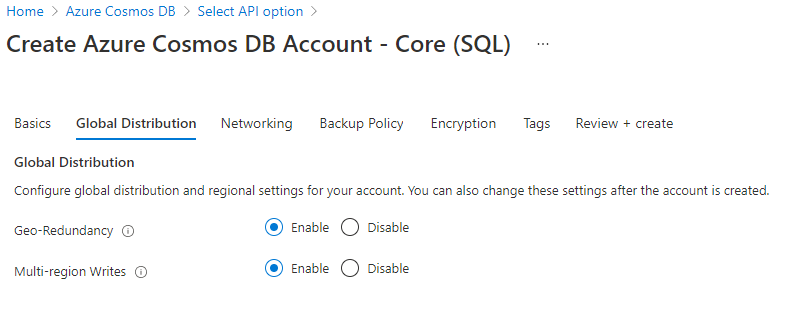
The next tab is Global Distribution which is used to configure the global distribution feature. Here we need to enable geo-redundancy and multi-region writes. The multi-region writes feature allows us to take advantage of provisioned throughput across the globe. We can add or remove additional regions later post-creating this account. If you want to enable it select both radio buttons.
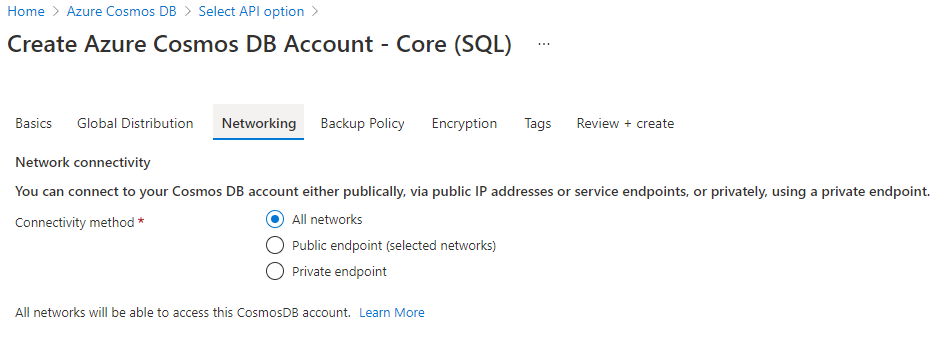
The next tab is Networking under which we will configure connectivity. You can choose your desired setting as per your requirement.
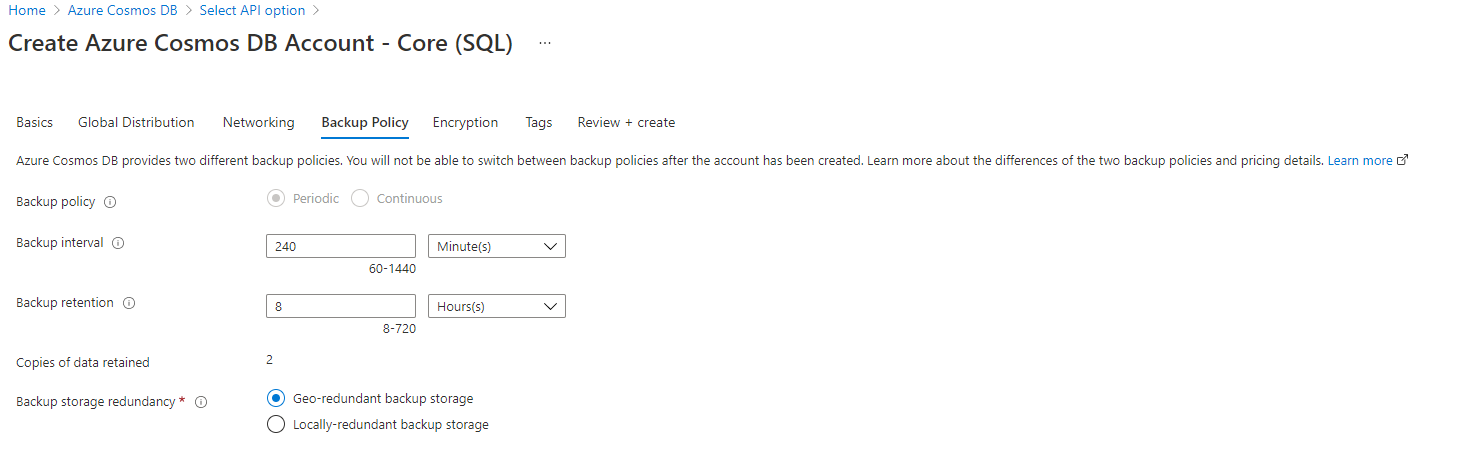
Next, we will configure the backup policy for the Azure Cosmos DB account by accessing the Backup Policy tab as shown in the below image. You can configure how often the backup should run along with the backup retention period. You can also choose desired redundancy option for your backup storage.
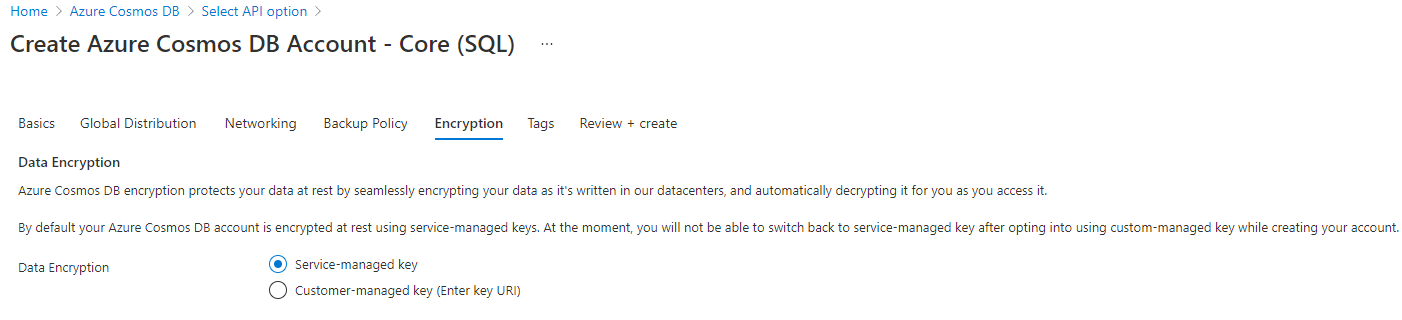
Next, we will configure encryption to ensure our data is protected in the cosmos DB account by accessing the Encryption tab of the below image. Choose how you want to manage encryption keys to protect your data.
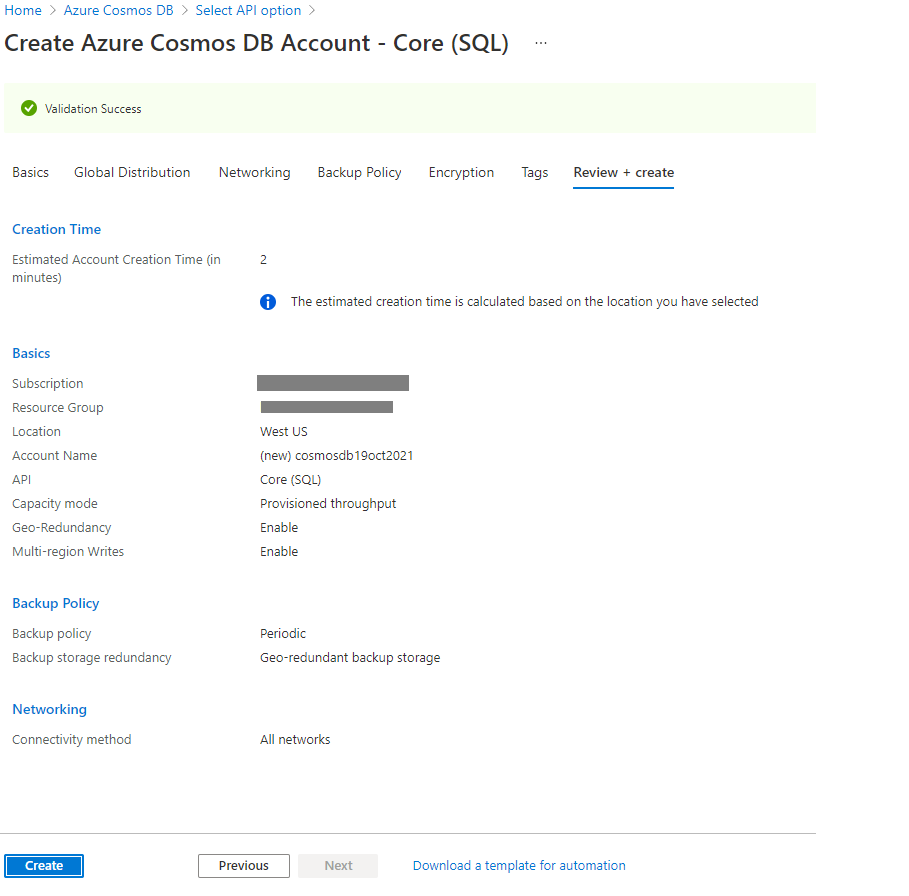
The next tab is to manage the Tags. Apply the tags as per your requirement in this section and once you entered all details on all tabs showing in the above images then hit the Review + create button to start the validation process. You can see validation is successful in the below image. Now click on Create button to proceed.
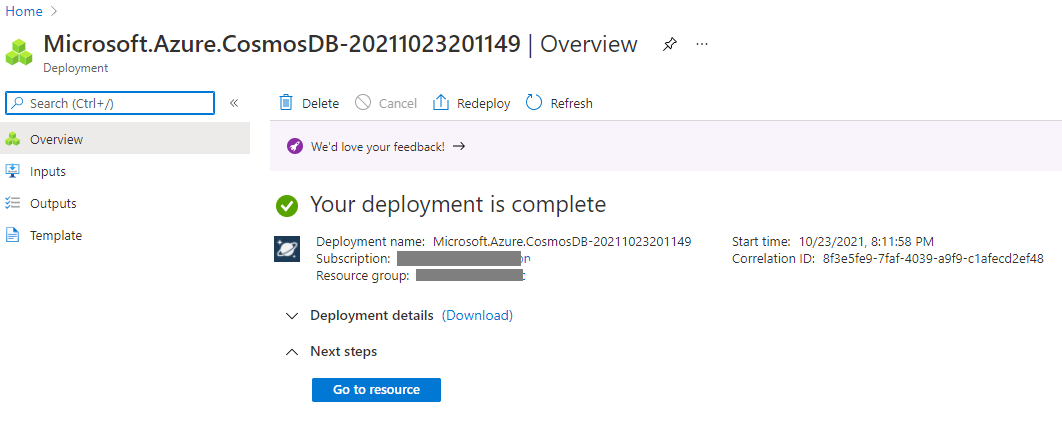
Deployment of Azure cosmos DB account creation will start processing once you will click on create a button of the above image. You will get the below screen once the deployment will be completed. Click on Go to resource tab jump to the cosmos DB account.
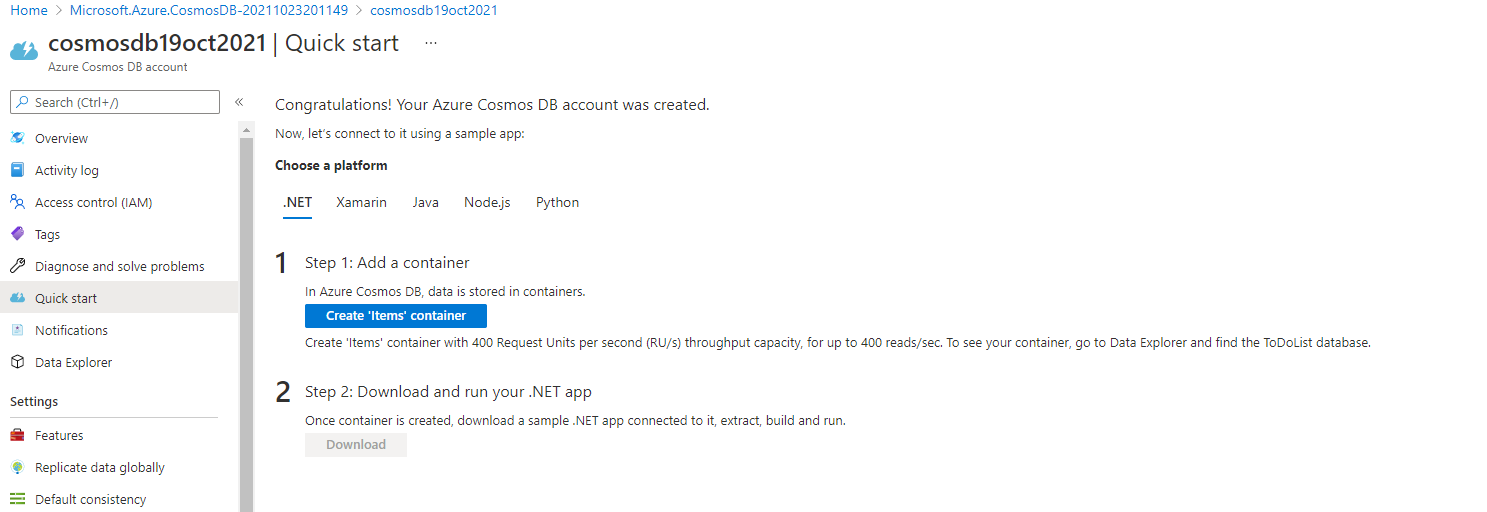
Now, you can click on the Go to resource of the above screen to jump to the Azure Cosmos DB account overview page as shown in the below image.
Conclusion
I have explained a brief overview of Azure Cosmos DB along with the sequential process to create a cosmos DB account in a step-by-step manner. I have also explained its APIs and resource model. Next, you can go ahead and create a Cosmos DB database and then containers to store your data in this database. Stay tuned for my next articles in which I will discuss the step-by-step process to create cosmos DB database and containers using data explorer.

He loves to talk and write about database technologies. He has lead and delivered many projects from designing to deployments on Migrations to the cloud, heterogeneous migrations, Database consolidations, upgrades, heterogeneous replication, HA / DR solutions, automation, and major performance tuning projects.
You can also find him on LinkedIn
View all posts by Manvendra Singh
- Configure backup storage redundancy for Azure Cosmos DB account - May 15, 2024
- Difference between SQL SELECT UNIQUE and SELECT DISTINCT - January 16, 2024
- How to do a group by clause - April 12, 2023