
In this article, we are going to talk about the Azure Queue Storage service using python as a programming language. As it goes by the name, Azure Queue Storage is a simple queue and messaging service in Azure that can be used to build queues and process messages in an asynchronous fashion. Queues help to decouple multiple systems and provide the middle layer in a distributed architecture. The Queue Storage service in Azure allows users to connect to and store messages up to 64 KB in size from anywhere in the world. It is exposed by using HTTP or HTTPS endpoints and can contain millions of messages that need to be processed.
In this article, we are going to use python to programmatically create and delete Azure Queue Storage in a step-by-step manner. We will also have a look at the four important scenarios that include the following.
- Adding a message to the queue
- Peeking a message from the queue
- Getting a message from the queue
- Deleting messages from the queue
Pre-Requisites
In order to proceed with this article, I recommend that you must have the following pre-requisites.
- Python 3 – Since this article is focussed mainly on accessing the Azure Storage Queue elements programmatically, you must have Python 3 installed on your machine
- A valid Azure Account – Also, before proceeding forward, please make sure that you have access to a valid Azure Account where you have sufficient permission to create and delete Queue Storage
Azure Queue Storage components
Let us first start by understanding the important components of the Queue Storage service in Azure.

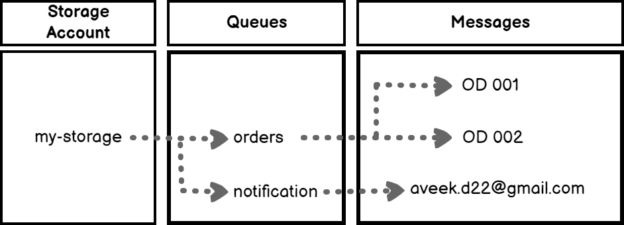
Figure 1 – Azure Queue Storage Service Components
As you can see in the figure above, there are the following components to the Queue Storage account in Azure.
- Storage Account – In order to build any queue in Azure, it is necessary to have a storage account created. In that storage account, we can create multiple queues as per the requirements
- Queue – This is the actual queue that is going to contain the messages. We can connect to this queue and send messages. There can be multiple queues created under a storage account
- Message – Once the queues are in place, we can start sending messages to the queue. This can be done either programmatically or by using the Azure Portal
In the figure above, we have a storage account with the name “my-storage” and two queues under it, namely “orders” and “notification“. These queues are defined to logically handle how messages should be handled and what services do they offer.
Additionally, in order to connect to a queue in Azure, we need to know the URL for that specific queue. It is usually of the following format.
http://<STORAGE_ACCOUNT>.queue.core.windows.net/<QUEUE_NAME>
If we have the “orders” queue in the “my-storage” account, then the URL would be as follows:
Creating a Storage Account in Azure
In order to get started, we should create a storage account in Azure under which we can create our queues. The easiest way to do this is to use the Azure portal. Alternatively, you can also use the Azure CLI or PowerShell to create the Storage Account in Azure. Navigate to the Azure Portal and search for Storage Accounts. Click on Create and then Create a storage account blade will appear on the right.
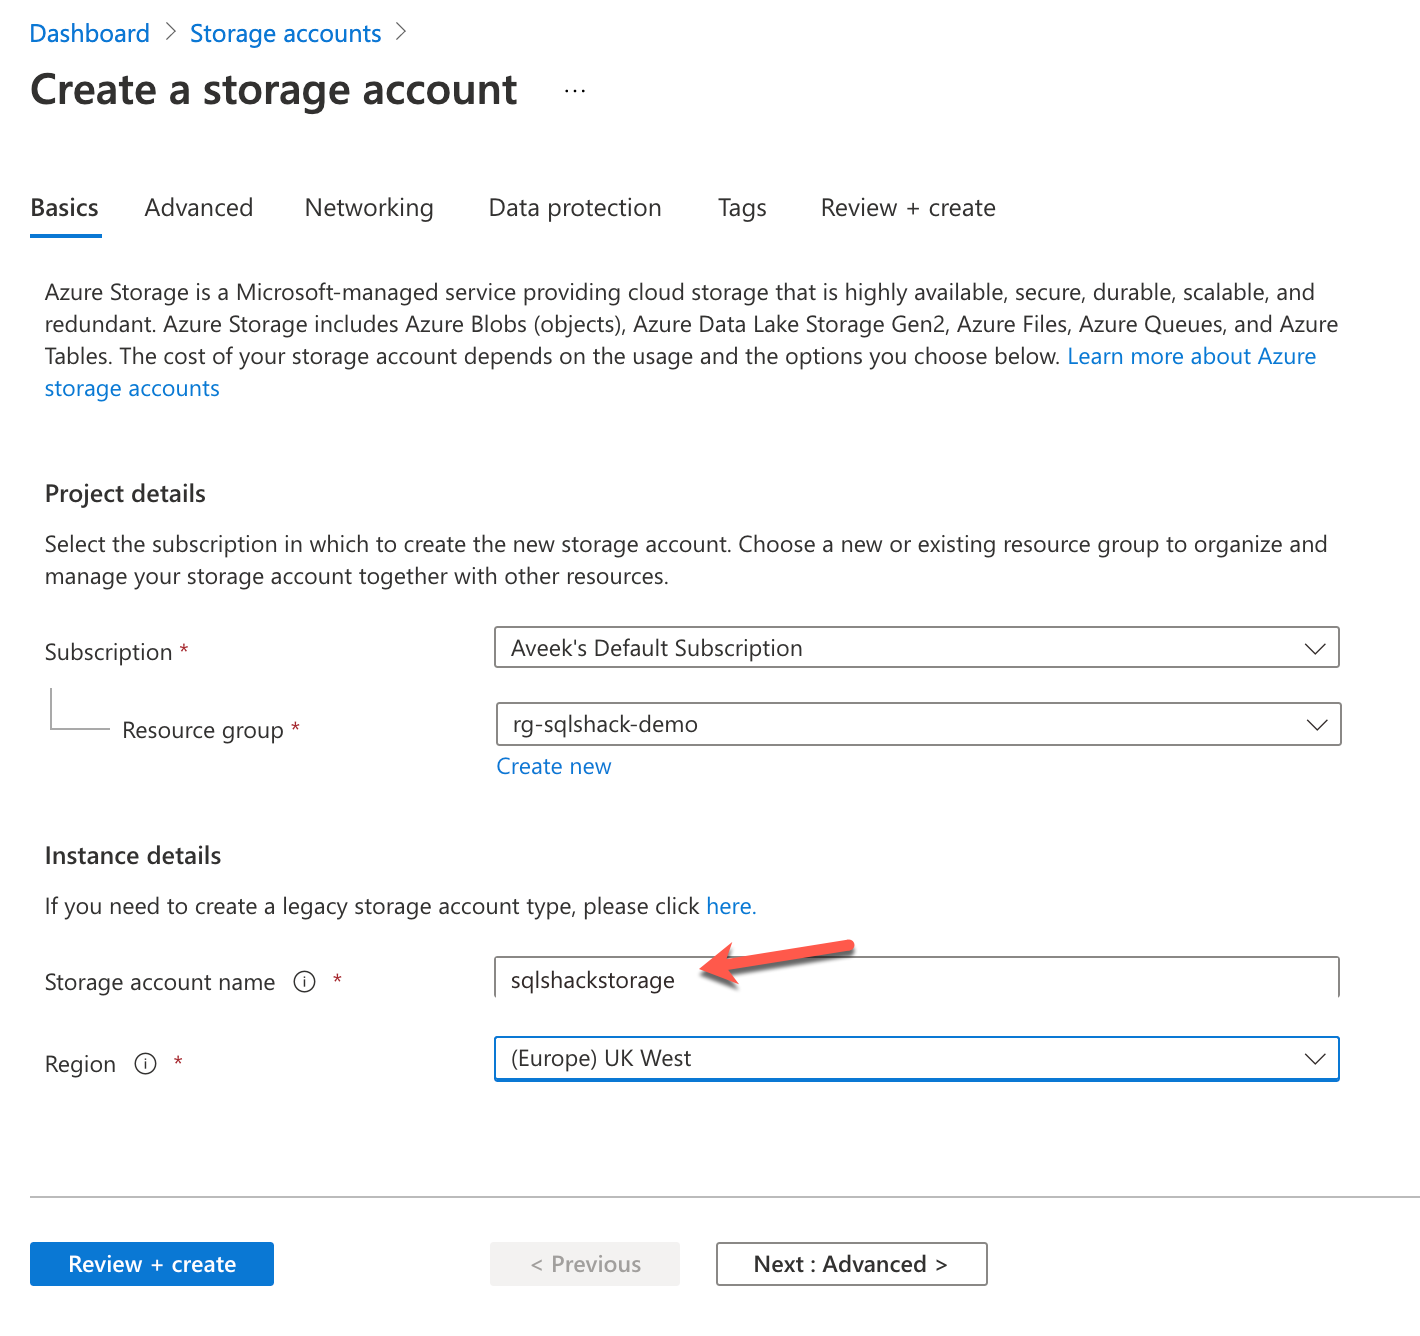
Figure 2 – Creating the Storage Account
Once you have provided the basic details, you can click on Review + Create to create the storage account with the default settings. However, you are free to choose other settings by navigating through the other tabs during the configuration of the Storage Account. The deployment might take some time but once it is done, you can see it on the portal and confirm that there are no queues in the storage account so far.
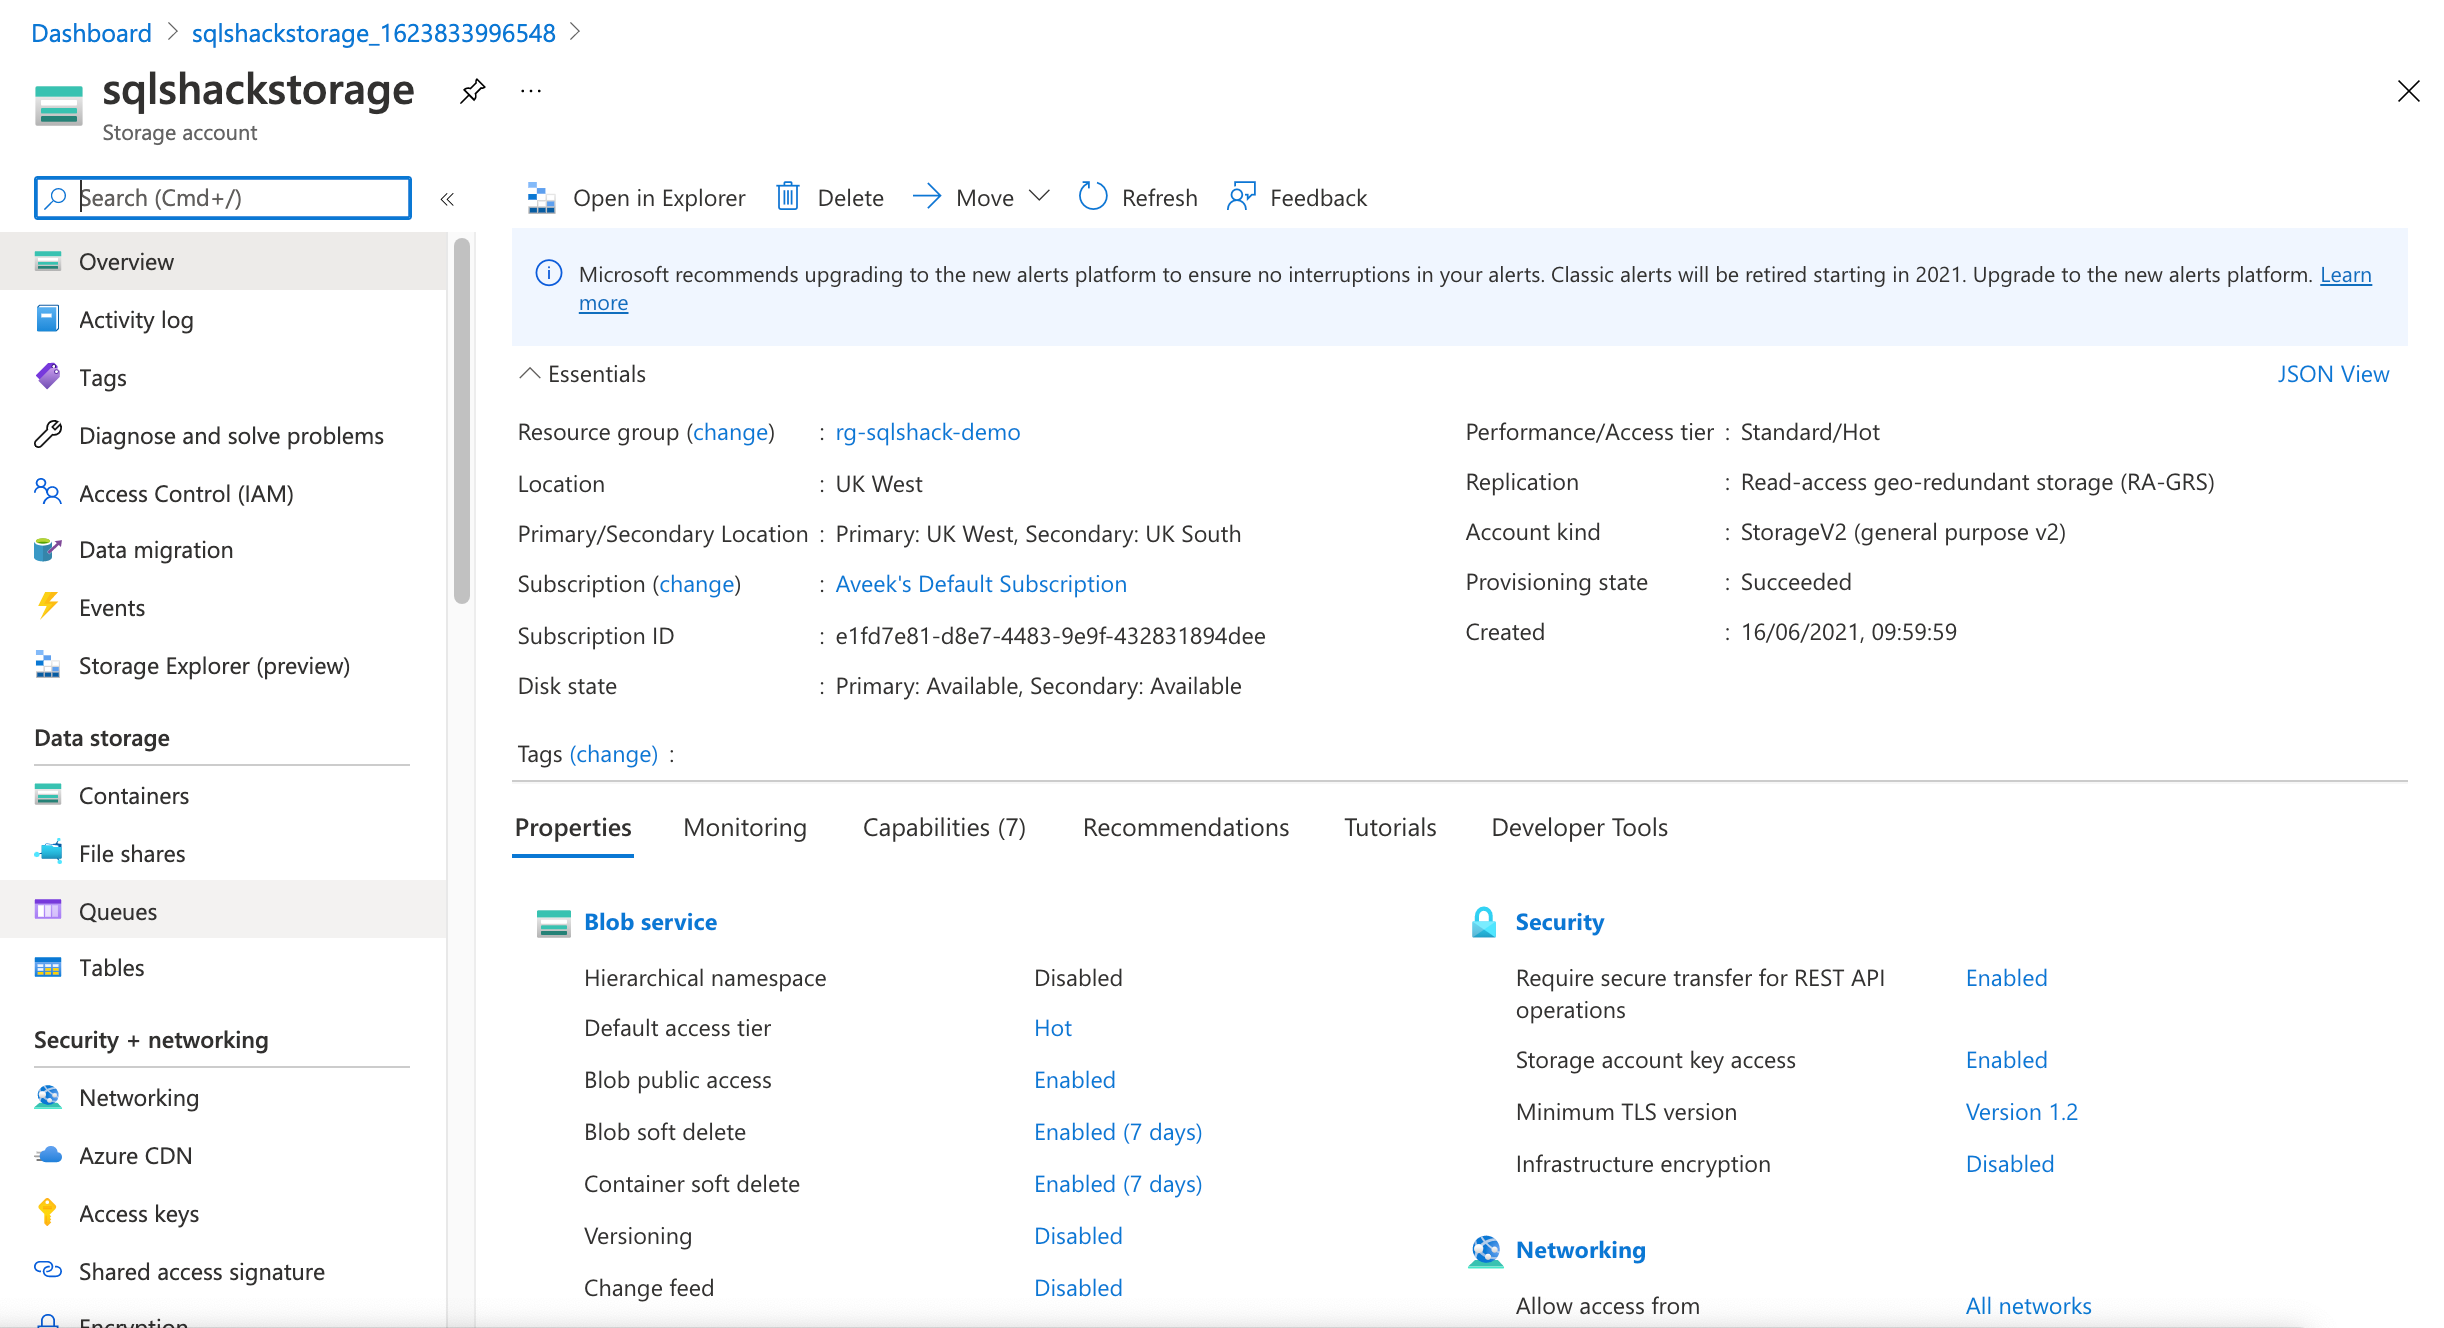
Figure 3 – Storage Account created in Azure
Once the Storage Account is created, we need to obtain the Access Keys in order to connect to the Storage account programmatically using python. Navigate to Access Keys under Security + Networking and click on Show Keys. Copy the Connection string and store it for later use.
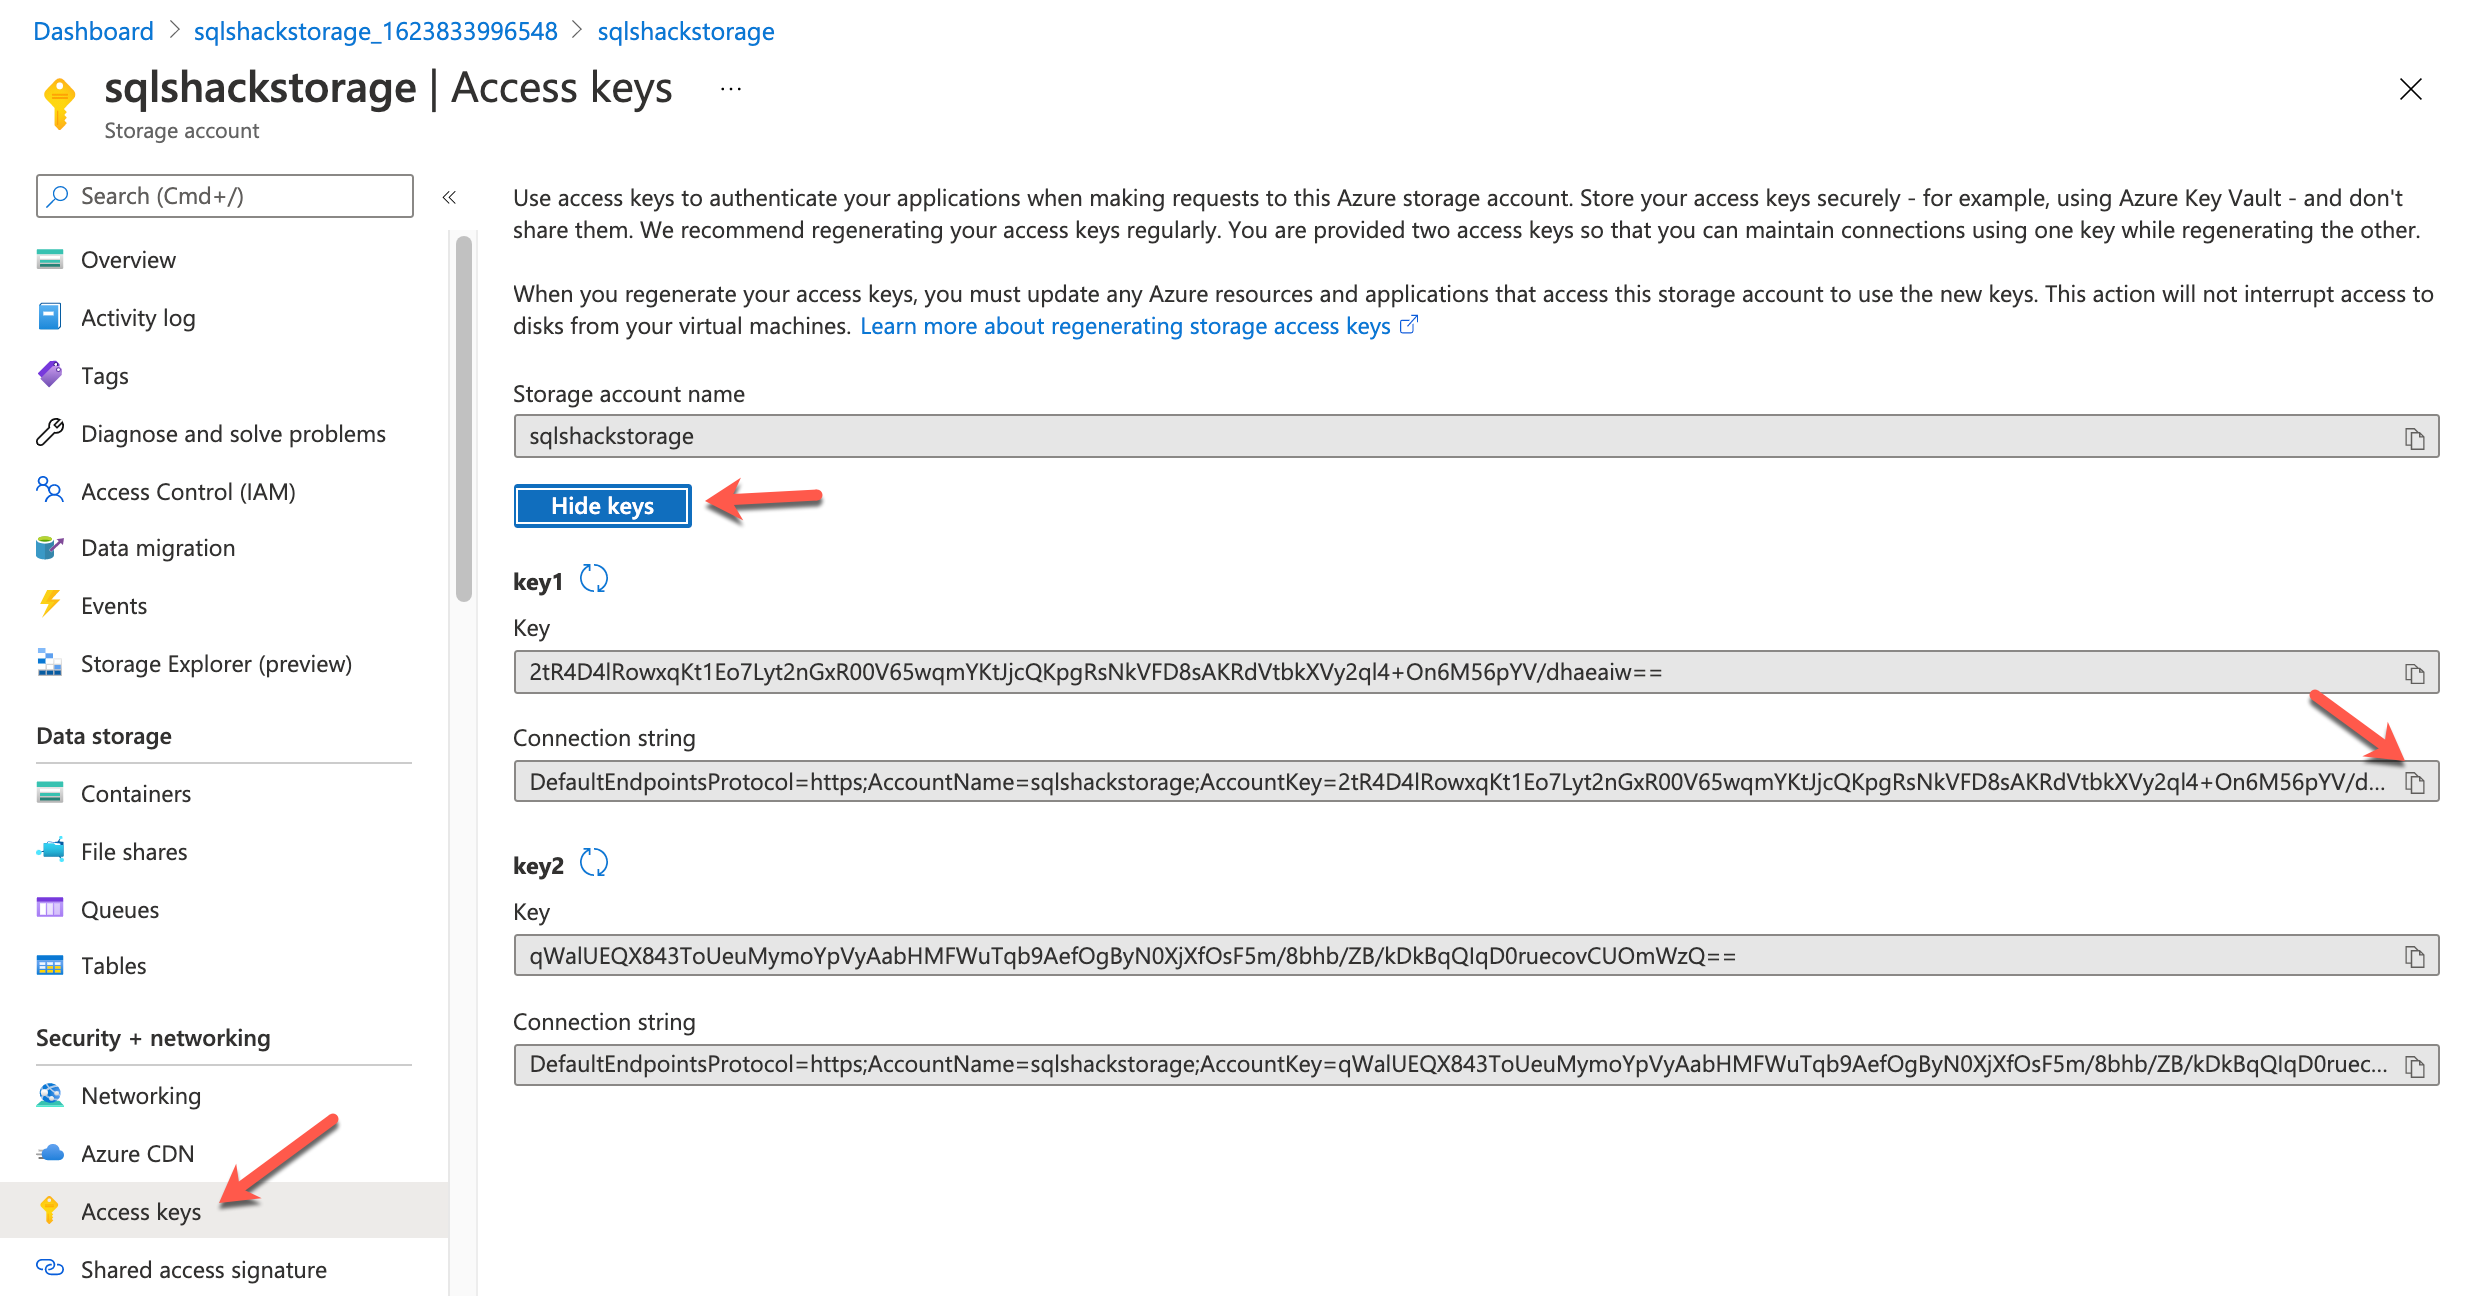
Figure 4 – Fetching the Access Keys for the Storage Account
Installing the Azure Storage SDK for Python
The next step after creating the storage account in Azure is that we would need to install the python SDK for Azure Storage on our machine. This can be done by downloading and installing the package from the regular Python Package Manager. Head over to your terminal and write the following command:
|
1 |
pip install azure-storage-queue |

Figure 5 – Downloading and Installing Azure Queue Storage SDK from the PyPi
Creating the program in python to connect to the Azure Queue Storage
Now that we have all the necessary requirements set up, we are good to create our program in Python. For the purpose of this article, I am going to use a Jupyter Notebook in Visual Studio Code to explain the steps as follows.
Setting up the connecting string
Assign the connection string to a variable to be used later.

Figure 6 – Connection String
Import the necessary libraries to the program
We need to import the Azure Queue Storage SDK to our program in order to leverage it to connect to the queue storage in Azure.

Figure 7 – Importing the SDK to the program
Create the Queue Client and the Queue
Provide a name for the queue and create the queue client using the SDK and the connecting string. Using the queue client, you can now create the queue.
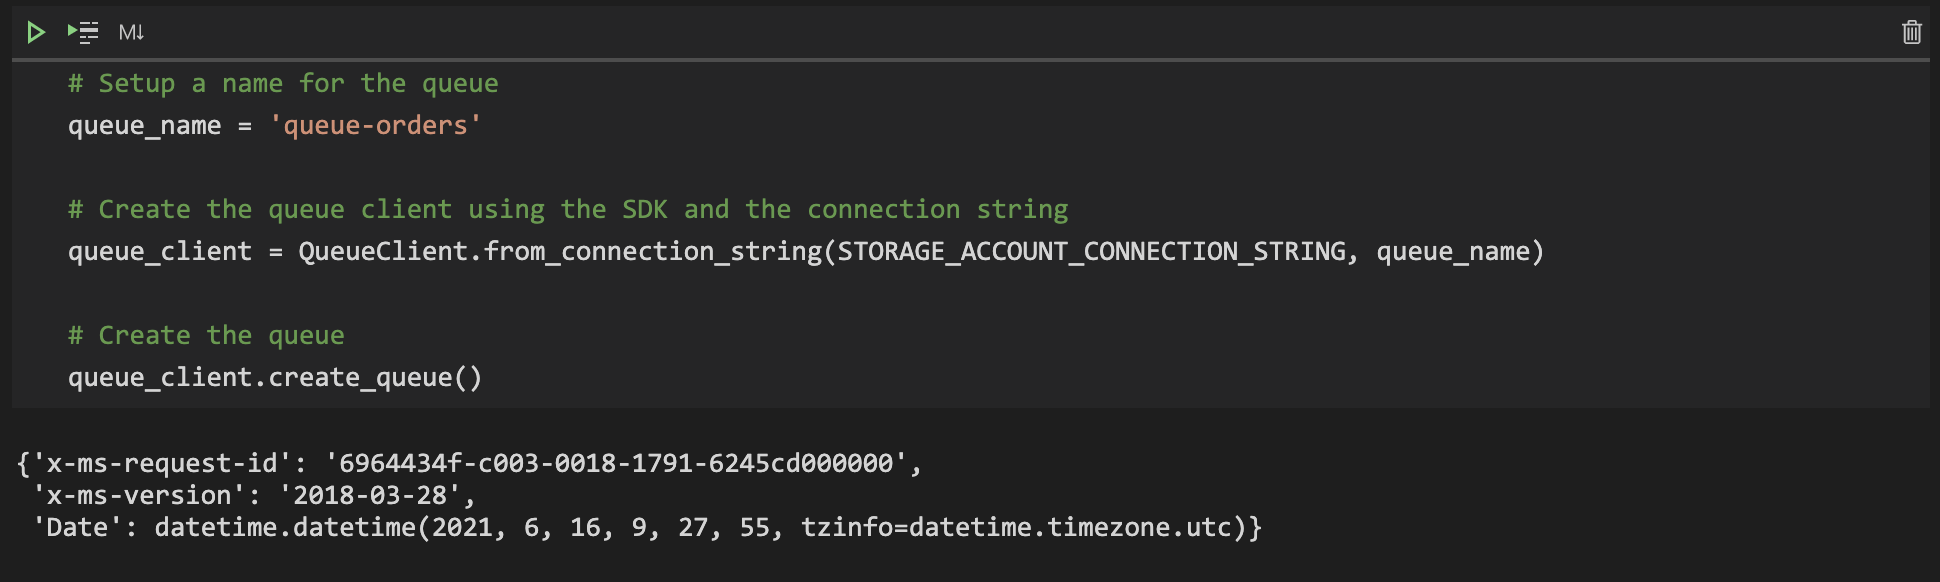
Figure 8 – Creating the queue in Azure Queue Storage
As soon as the queue is created, you will see the response in JSON format. Also, you can verify the queue from the portal as well.
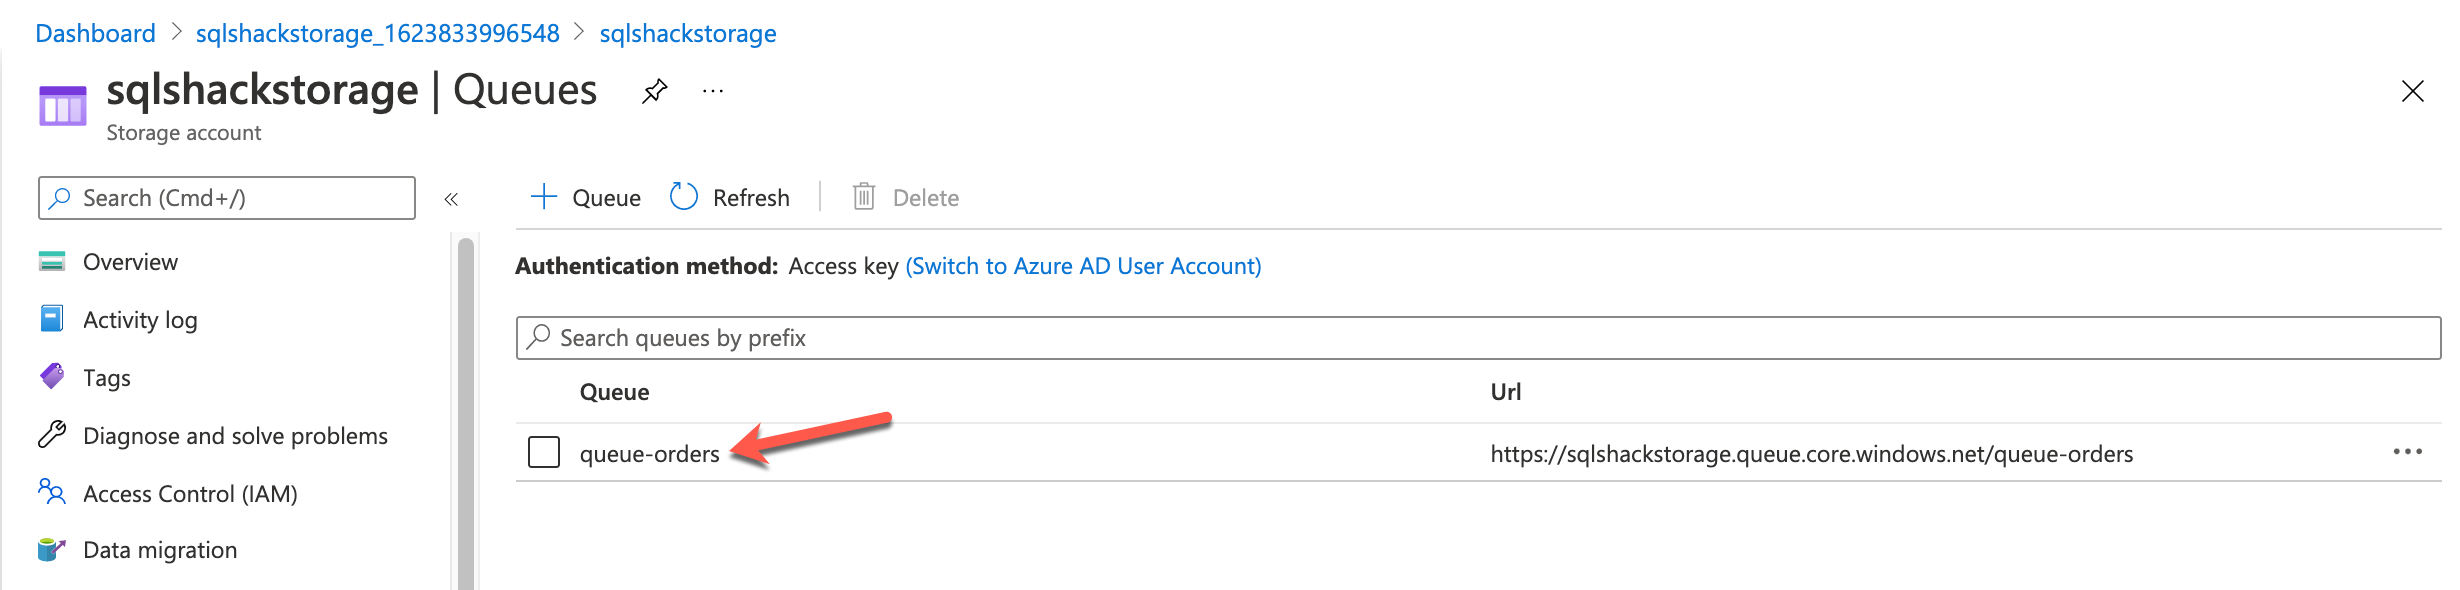
Figure 9 – Queue has been created in the portal
Sending messages to the queue
Once the queue is created, you can start sending messages to the queue. This can be simply done by using the send_message() method of the queue client.
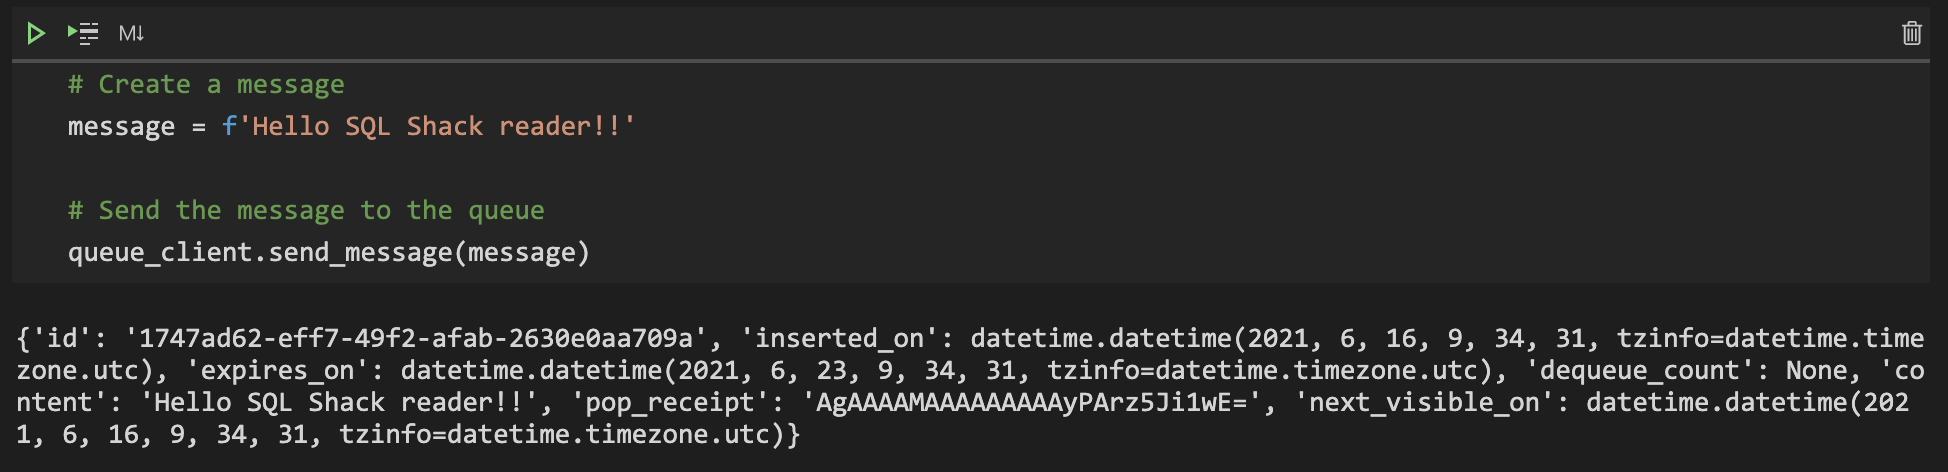
Figure 10 – Sending a message to the queue in Azure Storage
Once the message has been sent, you will receive the JSON response that states the result of the operation.
Peeking messages in the queue
Peeking messages in the queue helps us to view the messages in the queue without removing them. This is helpful when you need to gauge what the messages are before processing them from the queue. It can be done with the help of the peek_messages() function.

Figure 11 – Peeking messages from the Azure Storage Queue
Processing and Removing messages from the queue
Now that we know how to peek at messages from the queue, let us also learn how to read and process messages from the queue. Also, it is important to remove the message from the queue after it has been processed so that it is not processed again.
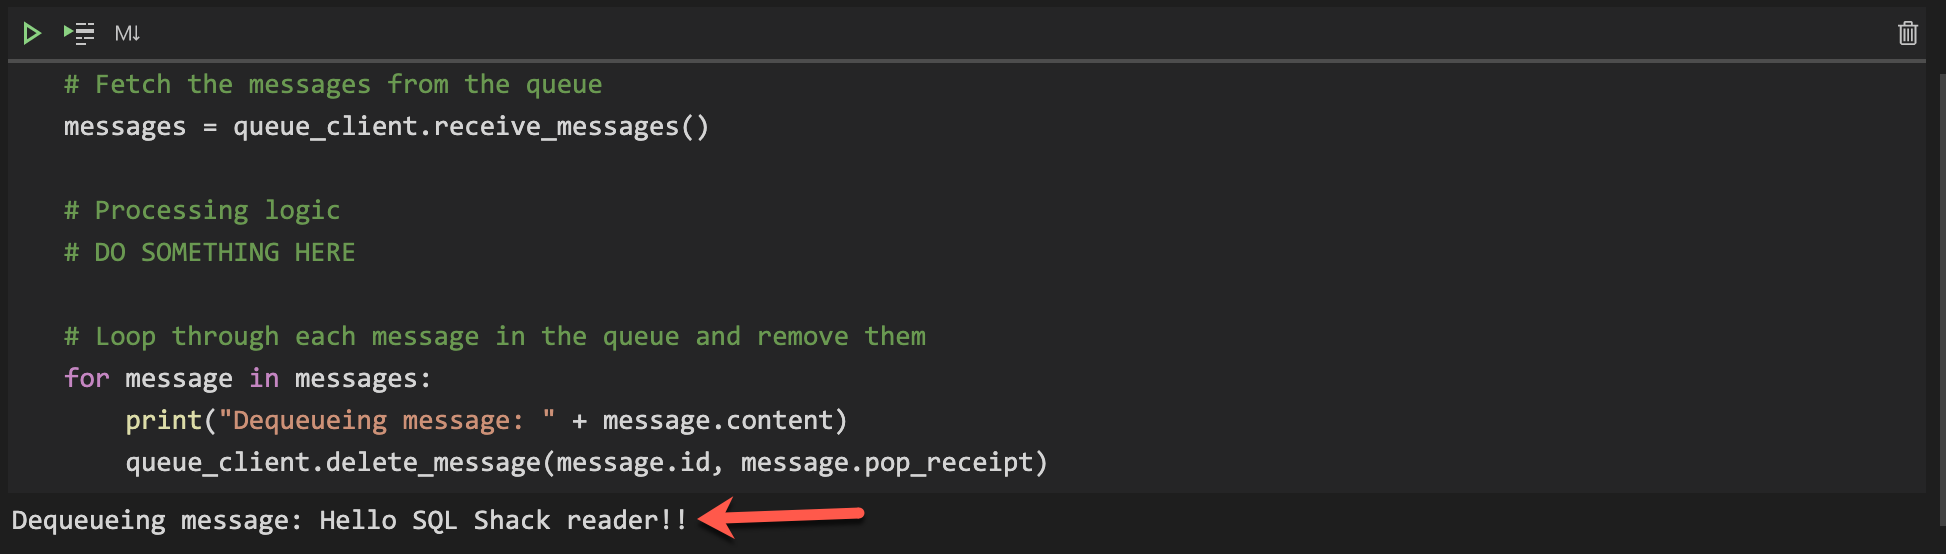
Figure 12 – Processing and removing messages from the queue
By default, when the receive_messages() function is called, the message becomes invisible to other programs reading from the same queue to prevent unnecessary processing. The invisibility time is set to 30 seconds after which it becomes visible again.
Deleting the queue from the Storage Account
You can delete the queue from the Storage Account by using the delete_queue() function.

Figure 13 – Deleting the queue
The entire code for the article can be found here.
Conclusion
In this article, we have understood in detail Azure Queue Storage and how to create and delete queues programmatically using python. We have also learned how to add messages to the queue, peek and get messages and finally deleting messages off the queue. These are the four different services that users can use to interact with the Azure Storage Queue service. Instead of python, you are also free to choose any other runtime of your choice.

He is a prolific author, with over 100 articles published on various technical blogs, including his own blog, and a frequent contributor to different technical forums.
In his leisure time, he enjoys amateur photography mostly street imagery and still life. Some glimpses of his work can be found on Instagram. You can also find him on LinkedIn
View all posts by Aveek Das
- Getting started with PostgreSQL on Docker - August 12, 2022
- Getting started with Spatial Data in PostgreSQL - January 13, 2022
- An overview of Power BI Incremental Refresh - December 6, 2021