

Introduction
In SQL Server Management Studio (SSMS), it is possible to connect to the Azure Storage. The Azure Storage Account is useful because it creates replicas automatically in the cloud. You only need to upload your file to the Azure Storage Account and the replication is automatic. You can have multiple replications in different regions and Datacenters with few clicks.
That is why it is a common practice to Back up your local database to Azure.
In this article, we will show how to connect to Azure using SSMS and then we will store a backup file of a SQL Server database on-premises to the Azure Storage Account.
Finally, we will restore a database using the backup created.
Requirements
The following software is required:
- SSMS 17.2 and SQL Server installed.
- An Azure Account
Getting started
We will first create an Azure Account and containers and then we will back up a local database in the Azure container and finally, we will restore the database.
Create an Azure Account and containers
We will create an Azure Account first and then we will connect to it. To create an Azure Storage Account, go to the Azure Portal.
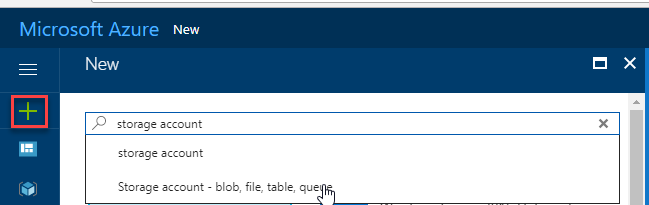
In the Azure Portal, press the + icon and write storage account. Select the Storage Account -blob file -Table -Queue:
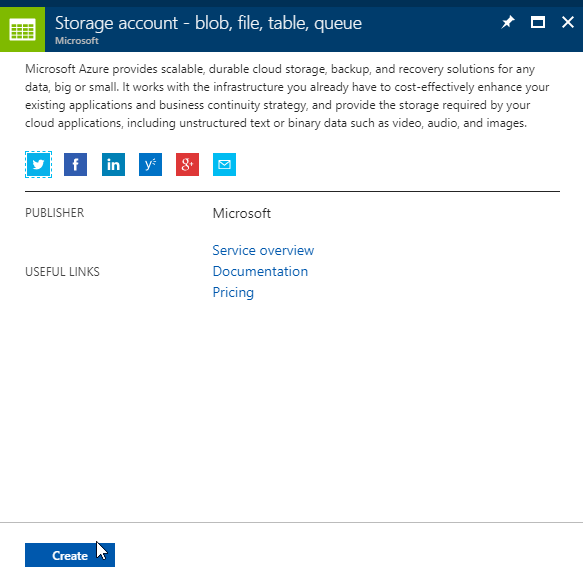
You will receive access to links with an introduction and documentation. Press the create button:
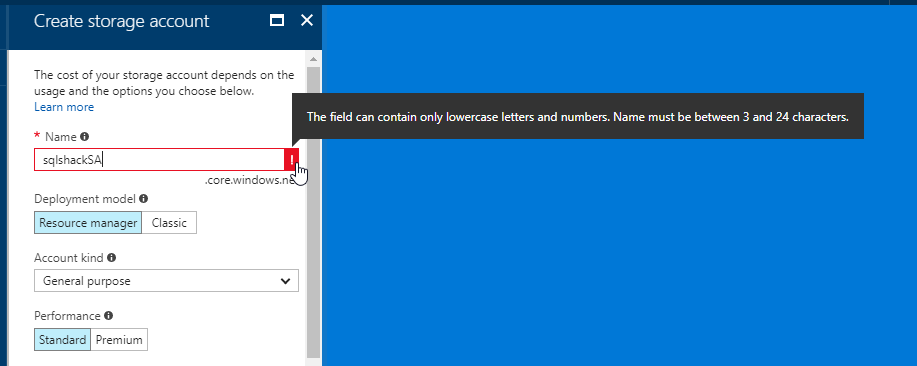
Specify a name. The system has validators. For example, the Storage name does not support numbers or uppercase letters:
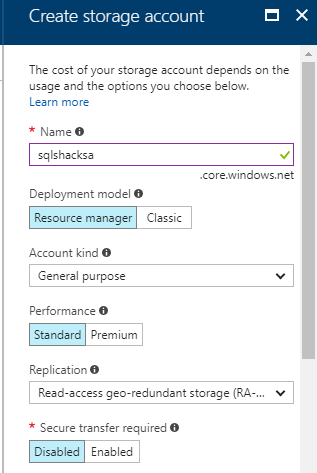
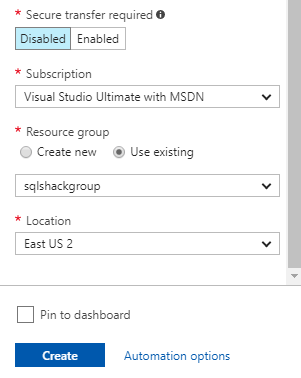
Specify a name for the storage account. In the deployment model, use the default one (Resource manager). “Classic” is the older option. In “Account kind” specify General purpose. For some reason, blob storage is not supported in SSMS. In performance, we will use “Standard” because it is just a demo. In replication, the cheapest option is locally redundant storage. This option is used to replicate the information 3 times in the same region.
The Subscription is important if you have multiple subscriptions. You can use an existing group or create a new one. This is important if you want to administer multiple resources in groups. You can also select your location. Press the create button:
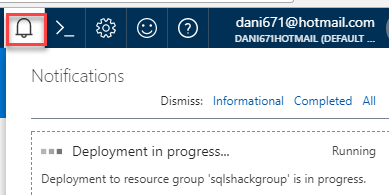
At the right top of the Azure Portal, there is a bell icon. It will inform the user if the storage creation is in progress and/or if it was created successfully. The Notifications can be used for any Azure resource:
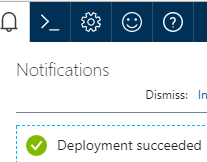
When the creation is completed, a green message is displayed:
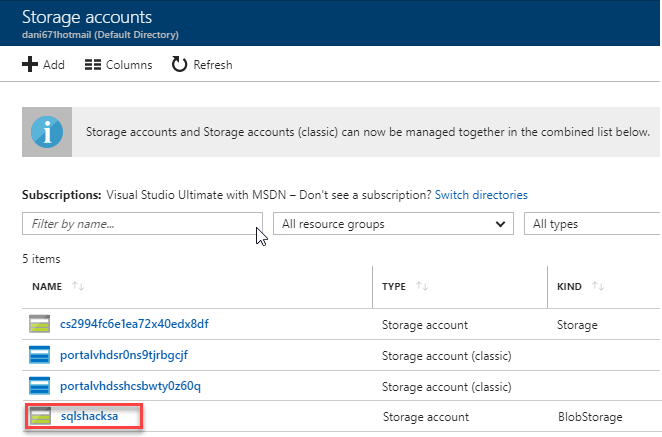
To check your Azure Account, go to more services and write storage to find Storage accounts. Click on Storage accounts:

Click on the storage account just created:
In the Azure Account, go to overview, click on Blobs:

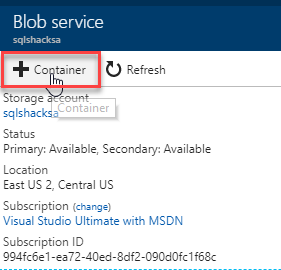
Click on the + Container to create containers:
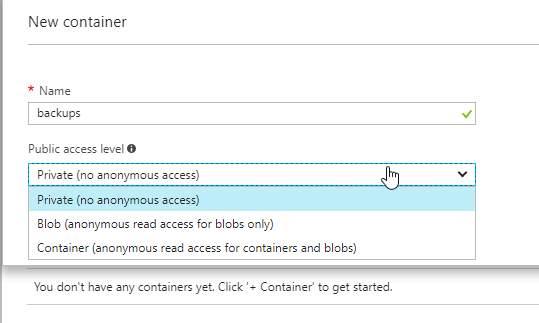
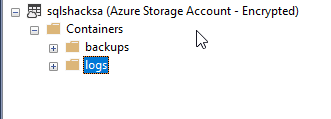
Create a container named backups or any name of your preference. The container is like a folder. We will store the backups here:
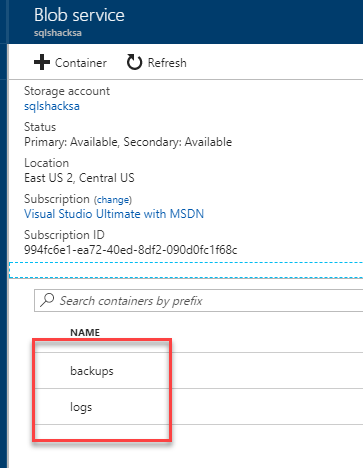
Repeat the steps and create a new container named logs:
In the Azure Account, in Access keys you will have two keys. Key1 and key2. You can use any of the keys to connect to your Azure Storage Account using SSMS:

Connect to Azure Storage Account using SSMS
In previous steps, we created an Azure Storage Account with 2 containers. Now, we will connect to the Storage Account using SSMS.
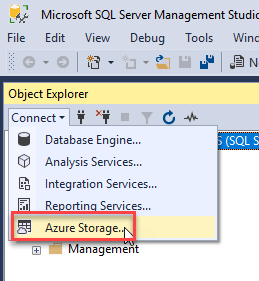
In the SSMS, go to Connect and select Azure Storage:
Specify the Azure Storage Account name created in the Azure Portal and the Account key. The account key can be the key1 or key2 that we saw in the Azure Portal in the Access Keys section:

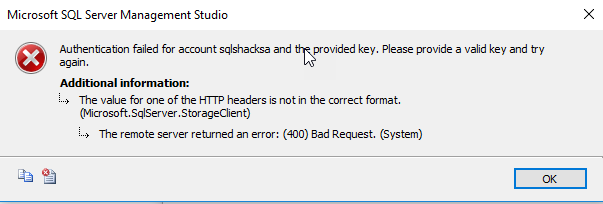
A common error is that the Authentication failed for account xxx and the provider key.
If your problem is not the key, the problem can be the account kind. It must be general purpose. For some reason, it may fail with the Blob Storage option:
If everything is OK, you will be able to connect to your Azure Account:
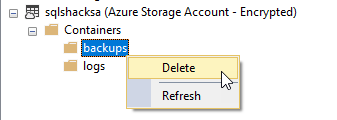
In SSMS 17.2, you cannot create new containers. However, you can delete and refresh your containers. This may change in future versions. You also do not have access to other Storage Account services like Queues, Tables and file storage.
Create a backup in the Azure Account
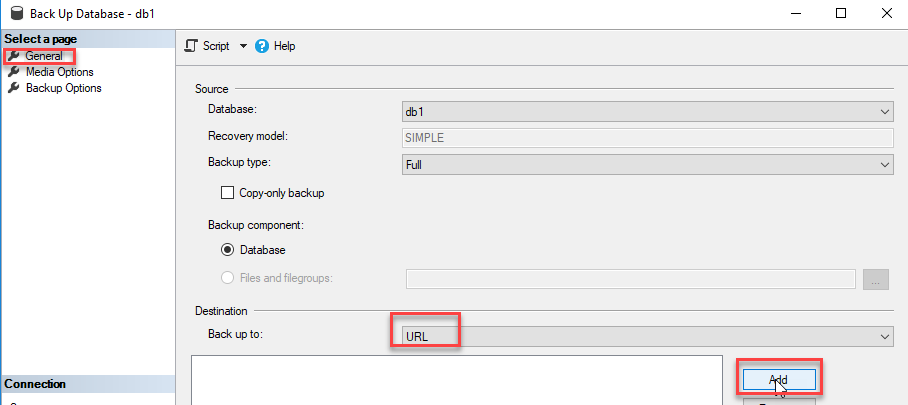
We will create a backup of a database on-premises into the Azure Account. Right click on your database and select Tasks>Back Up
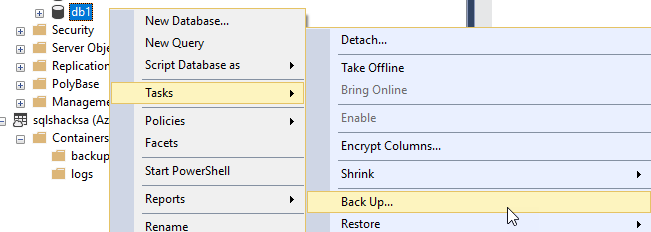
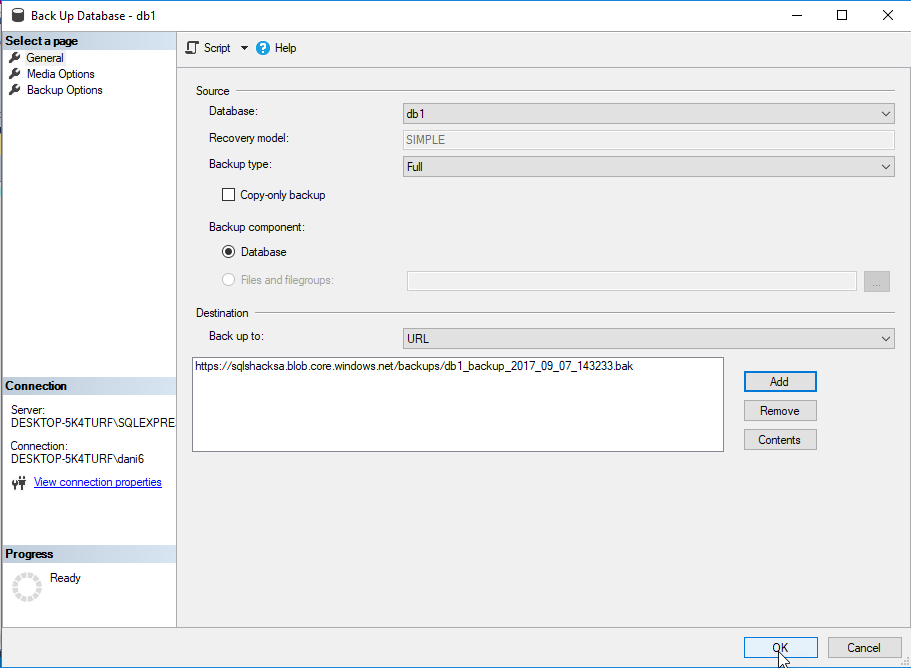
In the General page, select Back Up to URL. This option will let you store your backup in the Azure Storage Account. Press the Add button:
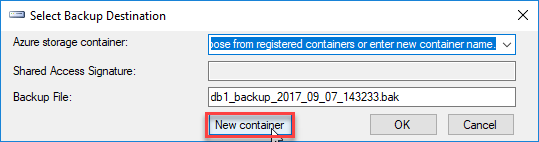
We will create a new container. Press the New container button:
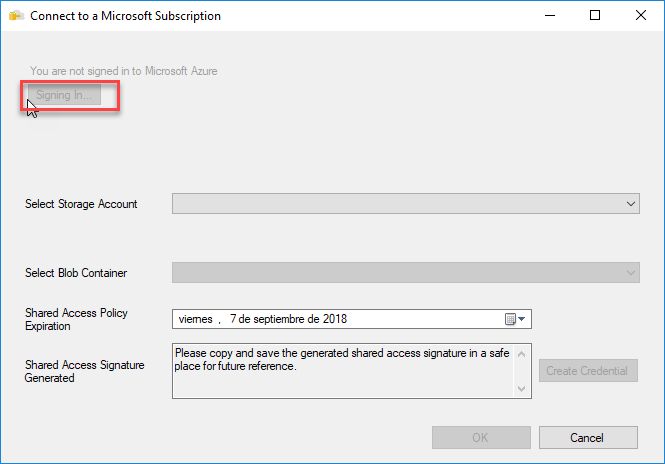
You will need to Sign in to Azure. Press the Signing In button and specify your Azure credentials:
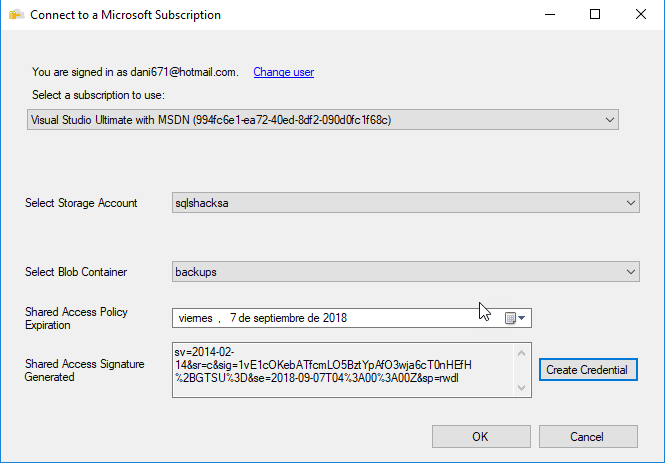
Once connected, you will be able to see your subscription. If you have multiple subscription, select the one used to create the Storage Account. Select the Azure Storage Account created in the portal and the container backups and press OK:
You will be able to see the URL destination. Press OK to start the back up:
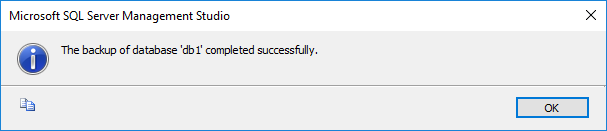
If everything is OK, a successful message will be displayed:
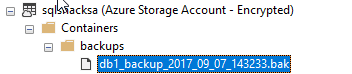
You can verify in the Azure Storage Account that the backup was successfully created in Azure:
Restore a database in SQL Server on-premises using a backup stored in an Azure Storage Account
Restoring a local database from the Azure Storage is a straightforward process in SSMS 17.2.
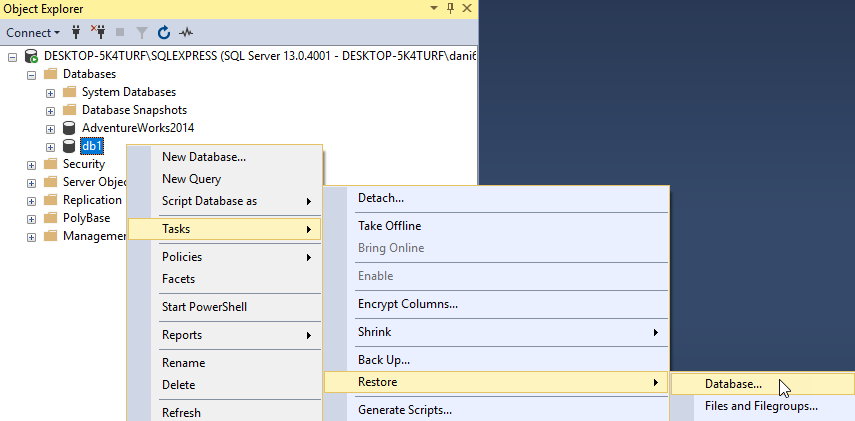
To restore, right click the database that you want to restore and select Tasks>Restore>Database:
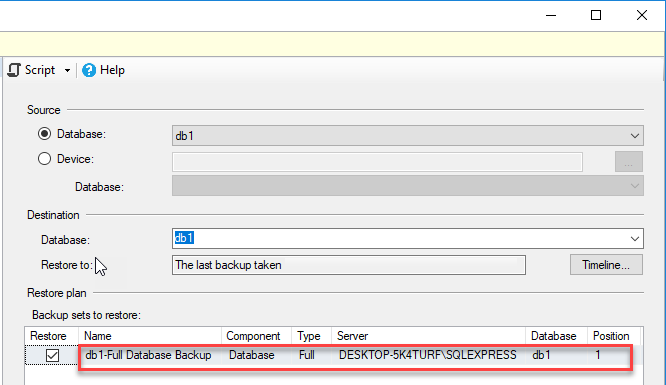
The backups created are already detected. You only need to select the backup that you want to use and press OK. The database will be restored using the Azure Backup:
Conclusion
As you can see, now it is easier to interact with the Azure Storage Account and verify your files. Today, we may have SQL Server on-premises, but we also want to store some information in the Cloud. In this example, we show how to back up our database on-premises to Azure and how to verify the creation using SSMS.

He has worked for the government, oil companies, web sites, magazines and universities around the world. Daniel also regularly speaks at SQL Servers conferences and blogs. He writes SQL Server training materials for certification exams.
He also helps with translating SQLShack articles to Spanish
View all posts by Daniel Calbimonte
- PostgreSQL tutorial to create a user - November 12, 2023
- PostgreSQL Tutorial for beginners - April 6, 2023
- PSQL stored procedures overview and examples - February 14, 2023