
In this article, I am going to discuss SSIS data lineage concepts, which are often used while designing ETL workloads on a data warehouse. Although this article is focused on implementing data lineage using SSIS, it does not only confine to SSIS but to any ETL tools in the market using which data is moved from one source to a destination. In my previous article, Understanding Data Lineage in ETL, I have already discussed the generic importance of data lineage concepts for any ETL tool. I would definitely suggest you have a look at it if you want to understand in general how data lineage helps to track the source of a single record in the warehouse.
Creating the source files
First things first, we need to create two flat files for the sake of this tutorial. Although the concept of SSIS data lineage can be implemented for a wide range of sources like excel, database, etc., I am going to use CSV files to keep things simple. Head over to Microsoft Excel or Notepad and create two simple CSV files with data as follows. Save the two files as “Employee1.csv” and “Employee2.csv”.
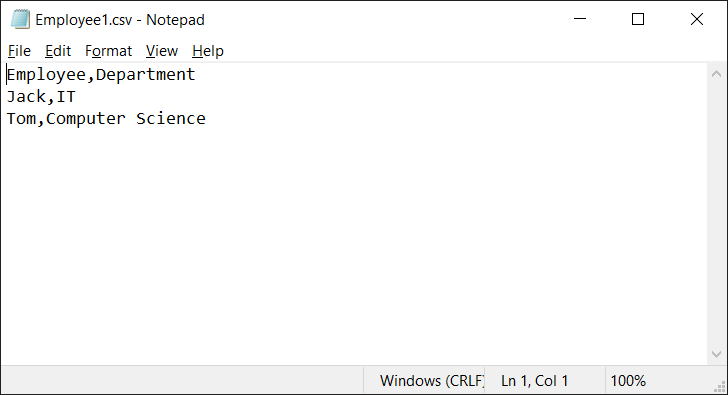
Figure 1 – Employee1.csv
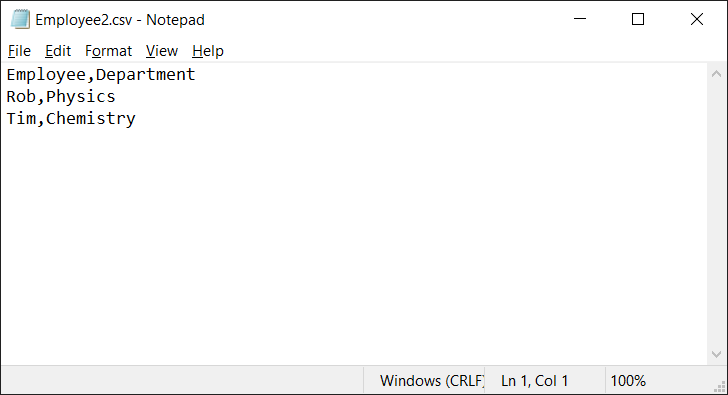
Figure 2 – Employee2.csv
As you can see in the figures above, there are two columns, “Employee” and “Department” in both the files with different data. Once you have created both the CSV files, let us move ahead and design the database to load the data into.
Creating the database design
For the purpose of the demonstration, I am going to read data from two flat files and load those two files into a single table in the SQL Server database. Additionally, I will add a column “SourceSystemID” that will store the information about the source file name from which the data has been populated. Let us now go ahead and create the database table. You can use the following script to create the table.
|
1 2 3 4 5 6 7 8 9 |
USE [Work] GO CREATE TABLE [dbo].[Employees]( [Employee] [nvarchar](100) NULL, [Department] [nvarchar](100) NULL, [SourceSystemID] [nvarchar](100) NULL ) ON [PRIMARY] GO |
Creating Connection Managers in the SSIS Package
Now that both the source and the destinations are ready, we can create the SSIS package to demonstrate the data lineage. First, let us create the connection managers that we are going to use within our package. Right-click on the connection manager pane and select “New Flat File Connection”.
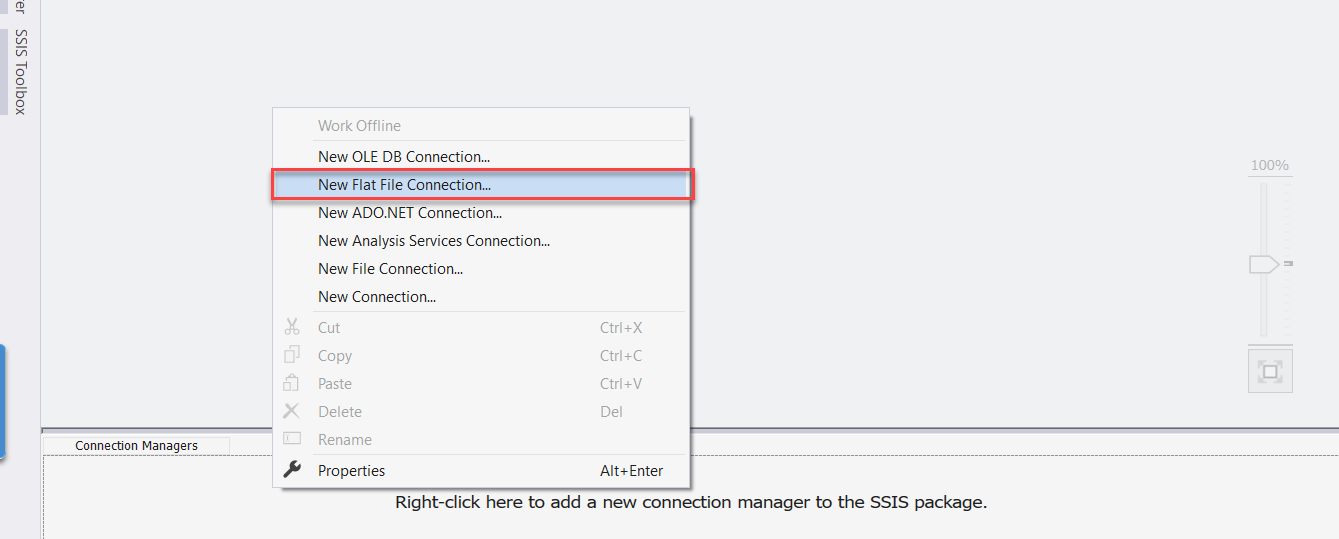
Figure 3 – Creating the New Flat File Connection
The New Flat File Connection Manager opens. Set the connection manager name as “Employee1” and click on Browse to select the files that we have created in our previous step and click Open.
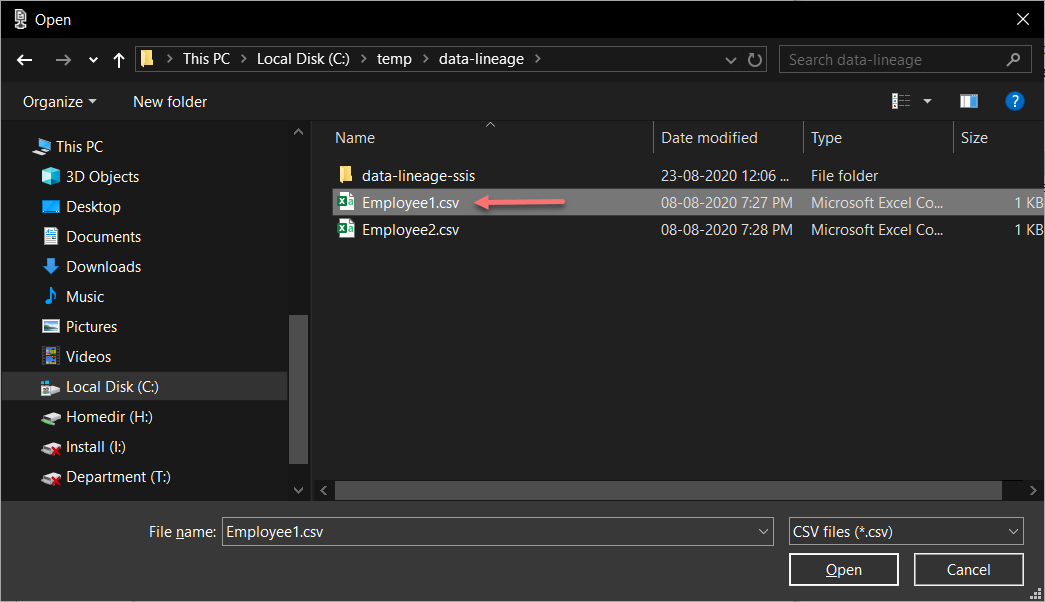
Figure 4 – Selecting the source file
Now, navigate to the Advanced tab and click on the Employee. On the right-hand pane against DataType, select “Unicode string [DT_WSTR]”. Repeat the same for the Department as well. Click OK once done. The connection manager for Employee1 has now been created successfully. Repeat the same steps and create the connection manager for Employee2 as well.
Once both the flat file connection managers are created, the next step is to create the destination connection manager for the SQL Server database table. Right-click on the connection manager pane and select “New OLE DB Connection”.

Figure 5 – Adding New OLE DB Connection
Click on New and then add the server and database details as required. Once done, click on Test Connection to verify if the connection to the database is fine.
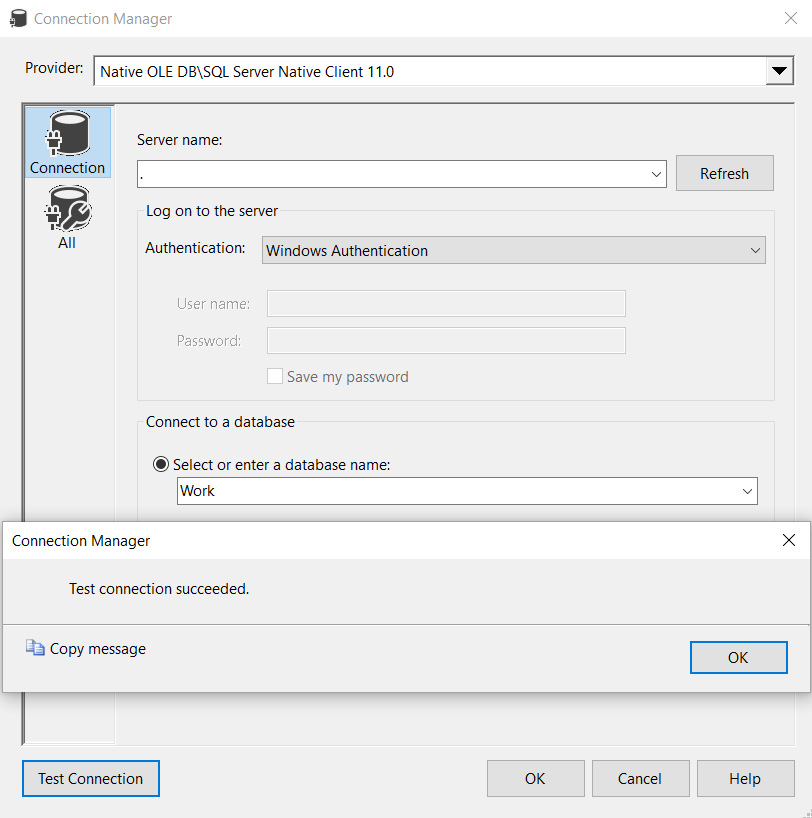
Figure 6 – Connecting to the database
Once all the three connection managers are created, you can see them as below.
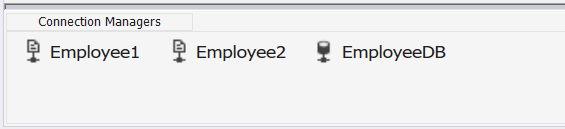
Figure 7 – Connection Managers created
Designing the Data Flow Task
In order to implement the SSIS Data Lineage workflow, we are going to use a Data Flow Task that will use the flat files as a source and then dump the data into the database table that we have created in our previous steps. Additionally, we will also add a Derived Column transformation to add the name of the source file in the database. Let us first drag and drop the Data Flow Task component into the Control Flow pane of the SSIS package. Once the Data Flow Task is in there, double-click on it, and the Data Flow pane appear up.
In the Data Flow pane, add the following components from the SSIS Toolbox:
- Flat File Source
- OLE DB Destination
- Derived Column
For the Flat File Source connection, select Employee1 as the connection manager and click OK.
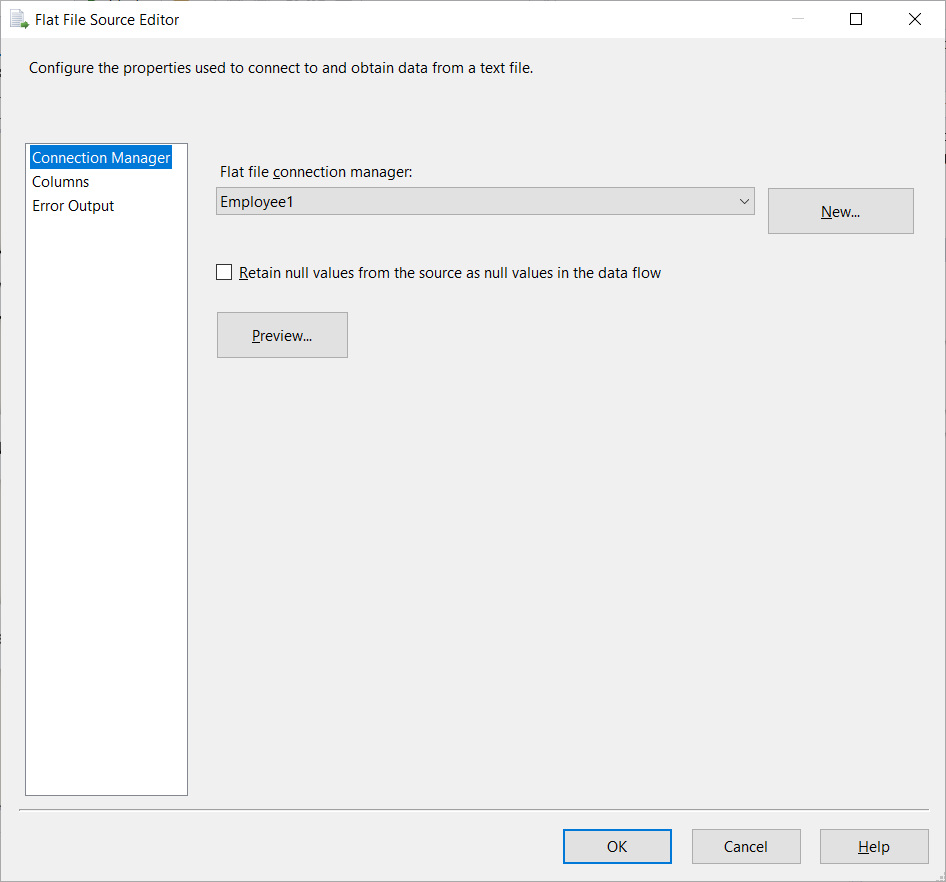
Figure 8 – Selecting a connection manager for Flat File Source
Now, connect the Success Flow of the Flat File Connection Manager to the Derived Column transformation and rename it as “Add Filename”.
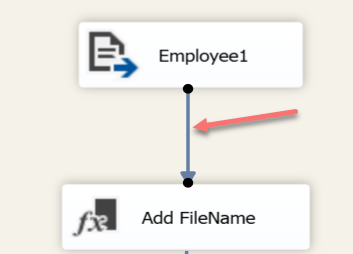
Figure 9 – Configuring Data Flow
Double-click the Derived Column transformation and add the name of the column and the corresponding expression. The name of this new derived column is “SourceFileName”, and to keep things simple, we will just add the name of the file in the expression box. Click OK once done.
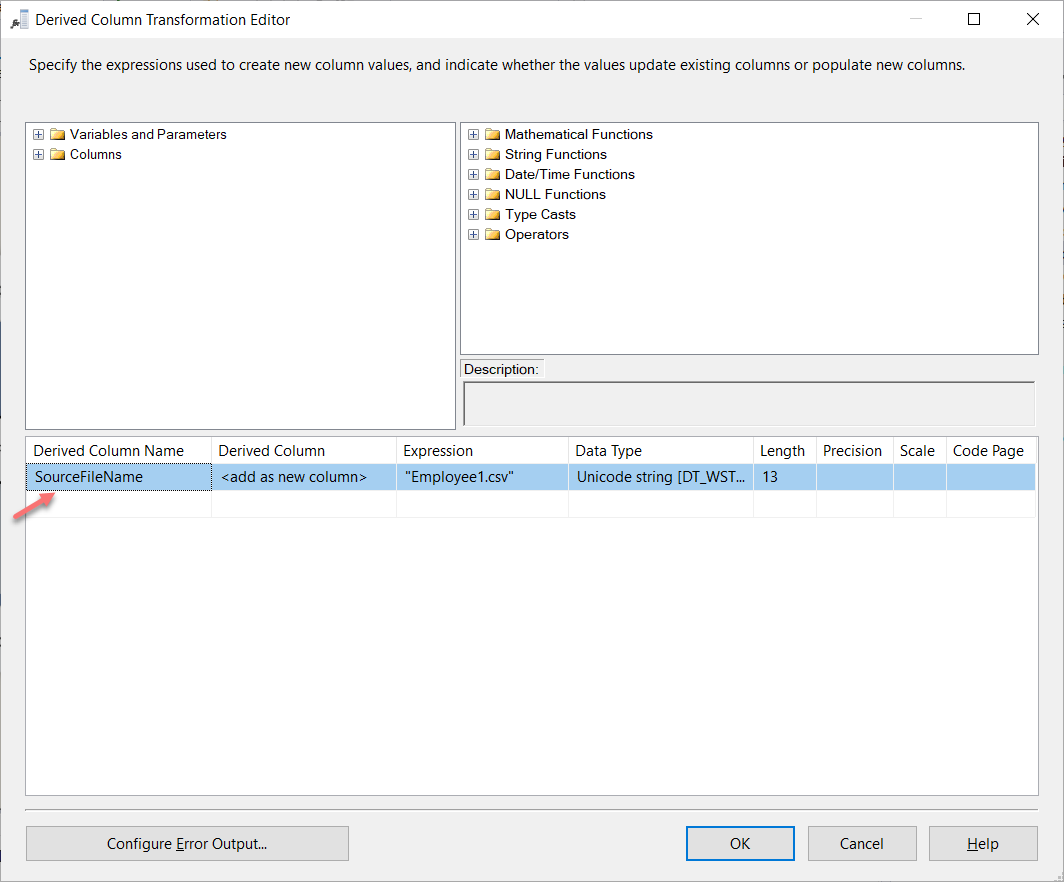
Figure 10 – Configuring the derived column transformation for SSIS Data Lineage
Once the Derived Column transformation has been configured successfully, connect the Success Flow of the Derived Column transformation to the OLE DB Destination and rename it to “Employee1-DB”.
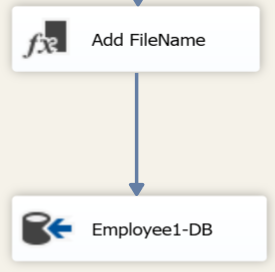
Figure 11 – Connecting to the OLE DB Destination using Success Flow
Double-click the OLE DB Destination and select the name of the table that we have created in our previous step.
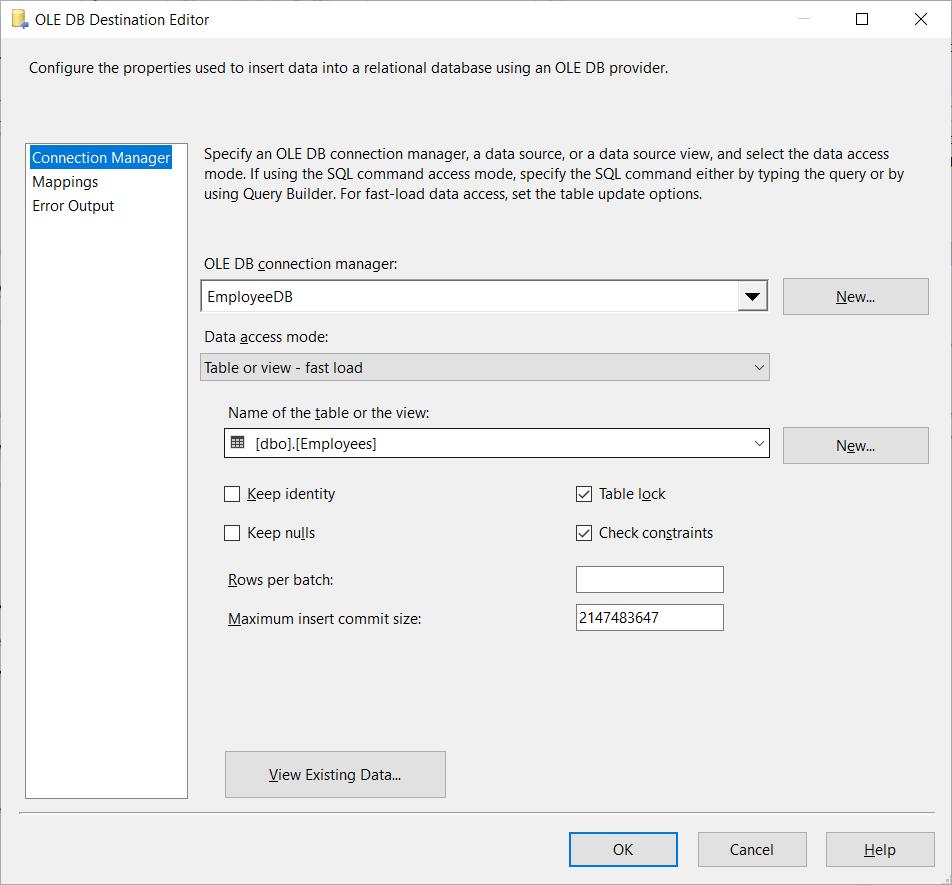
Figure 12 – Setting up the OLE DB Destination Connection Manager
Just to make sure that all the mappings are working fine, click on the Mappings available on the left-hand pane. You can see that all the columns, including the derived column, have been mapped to the destination database. Click OK once done.
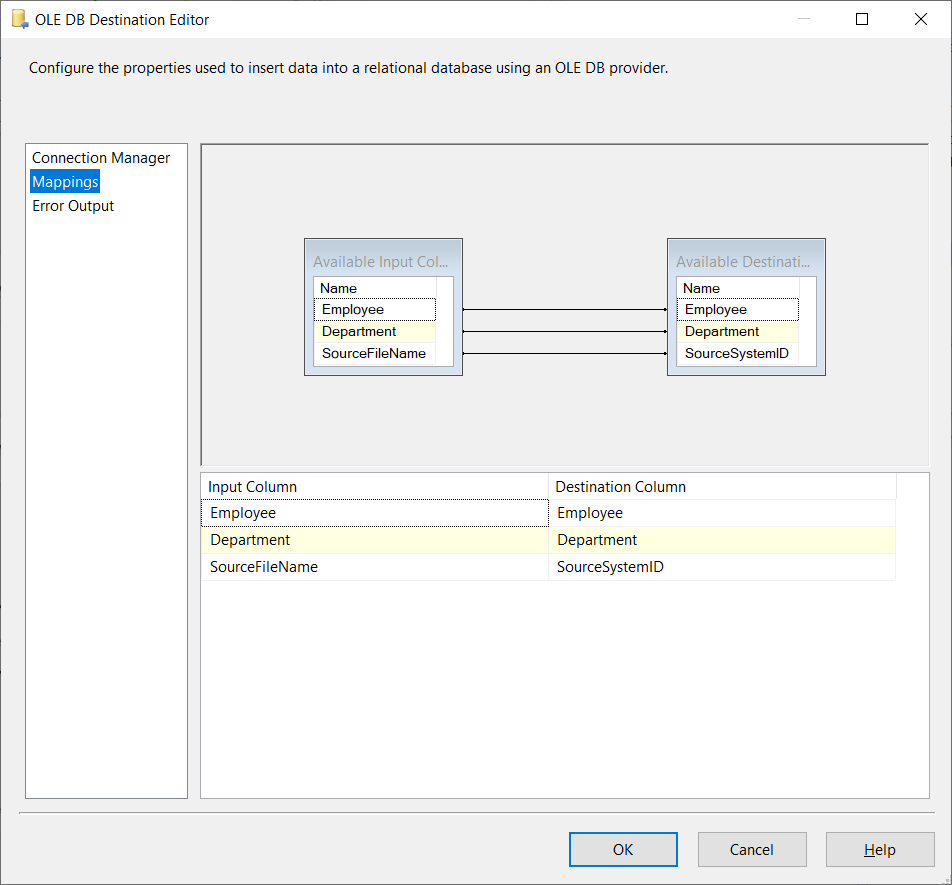
Figure 13 – Mapping Source and Destination Columns
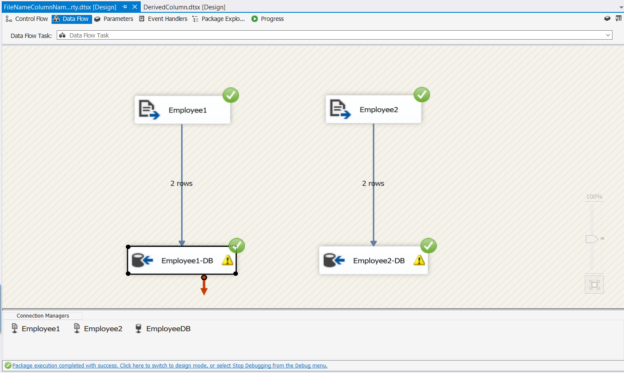
This is the entire data flow process for populating data from the “Employee1.csv” file. In order to do the same for “Employee2.csv”, repeat the above steps of creating the Flat File Source, Derived Column, and OLE DB Destination. In the Derived Column, specify “Employee2.csv” and create the data flow. Once both the flows are in place, you should see something like this.
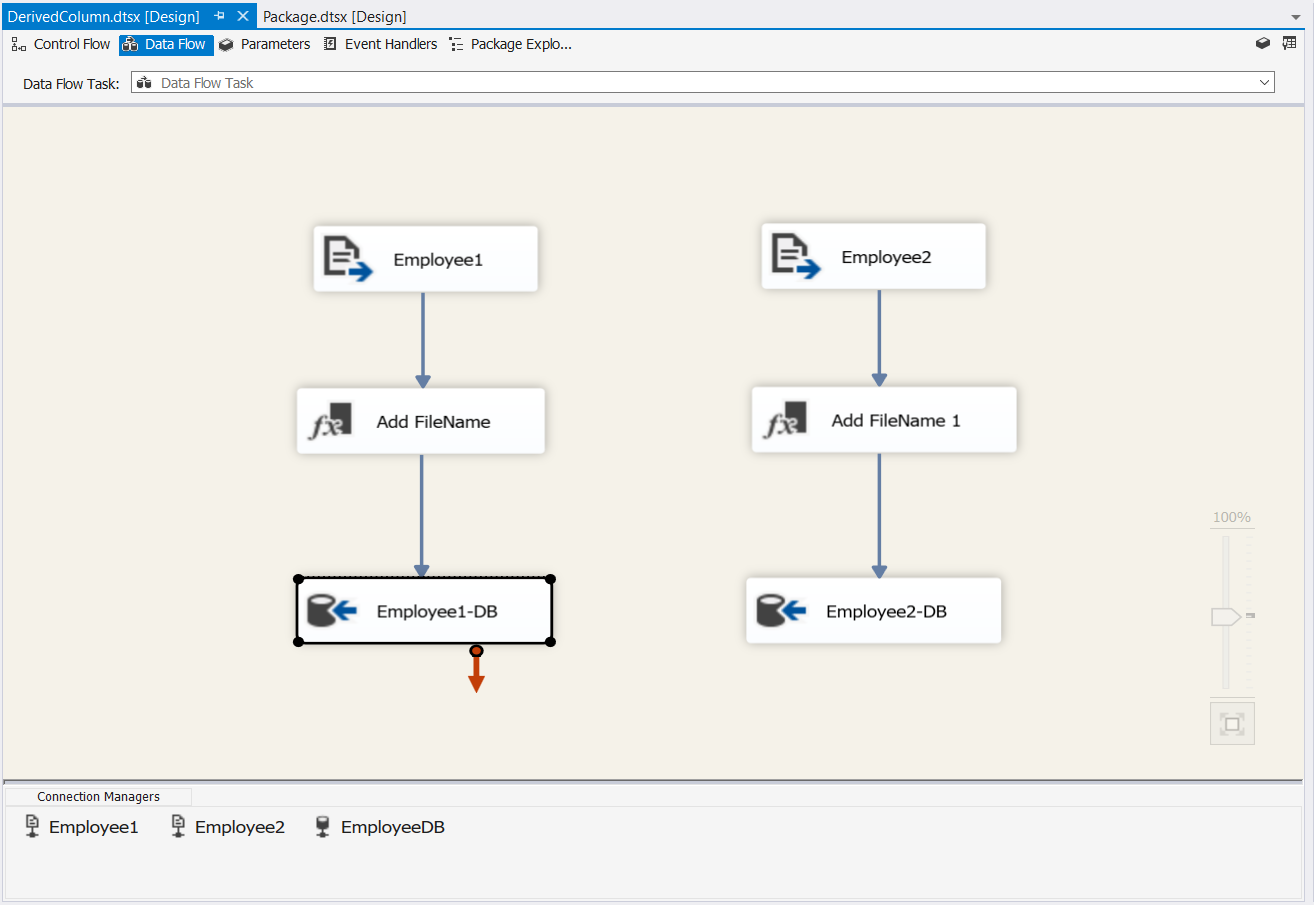
Figure 14 – Data Flow Pipeline created
When you execute the above package, you can see that the SQL Server database table has been populated with the relevant records from both the flat files along with the name of the file as the SourceSystemID.
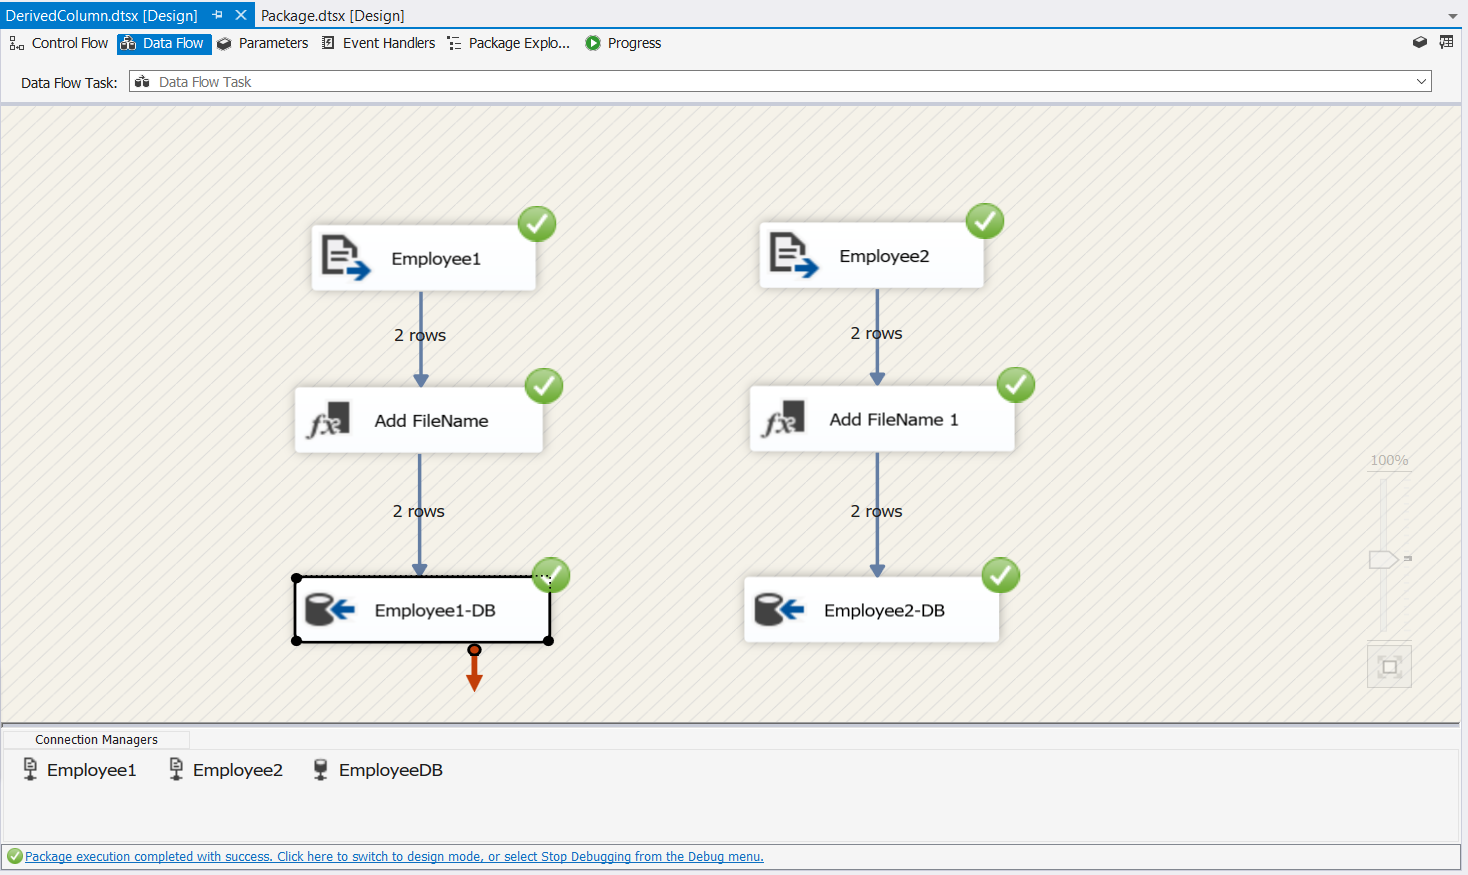
Figure 15 – Executing the SSIS Package
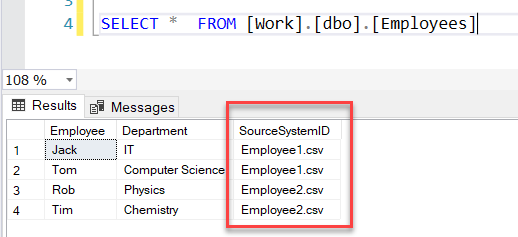
Figure 16 – Source System ID populated with filename – SSIS Data Lineage
Automatically generate the filename for SSIS Data Lineage
So far, in this tutorial, we have learned how to add a Derived Column into the Data Flow Task and add the name of the file by explicitly declaring it in the Expressions. This approach works fine until we have few sources which are under our control, and we can manually add those filenames as expression under a Derived Column transformation.
However, if there are many such sources, it becomes difficult or rather time-consuming to create such Derived Column transformations for each and every source in the pipeline. An easy way to get rid of the Derived Column transformation is by using the FileNameColumnName property of the Flat File Source connection. This property automatically adds the path of the file as a new column, which can then be mapped to the Destination column. Let us now see this in action.
Copy the entire package to a new one so that we do not lose the Derived Column transformation. On the new package, delete the Derived Column transformation. Connect the Success Flow of the Source to the Destination. Your package should look something like this now.
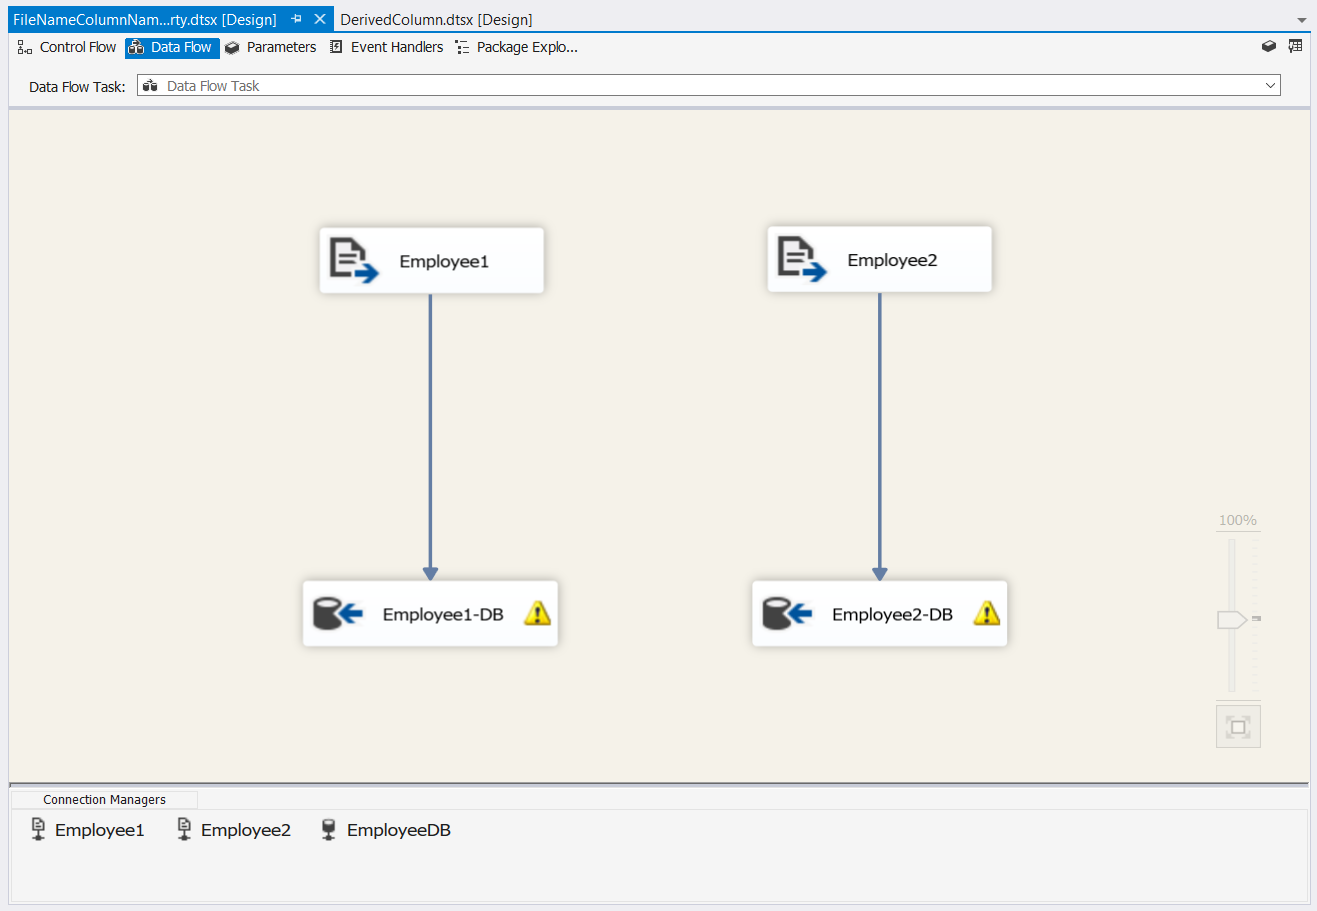
Figure 17 – New package for SSIS Data Lineage
Right-click on the Flat File Source and select Show Advanced Editor. This will open up the Advanced Editor dialog box. Navigate to Component Properties and add value to the FileNameColumnName property. This will add a new column with the name as specified in the property value.
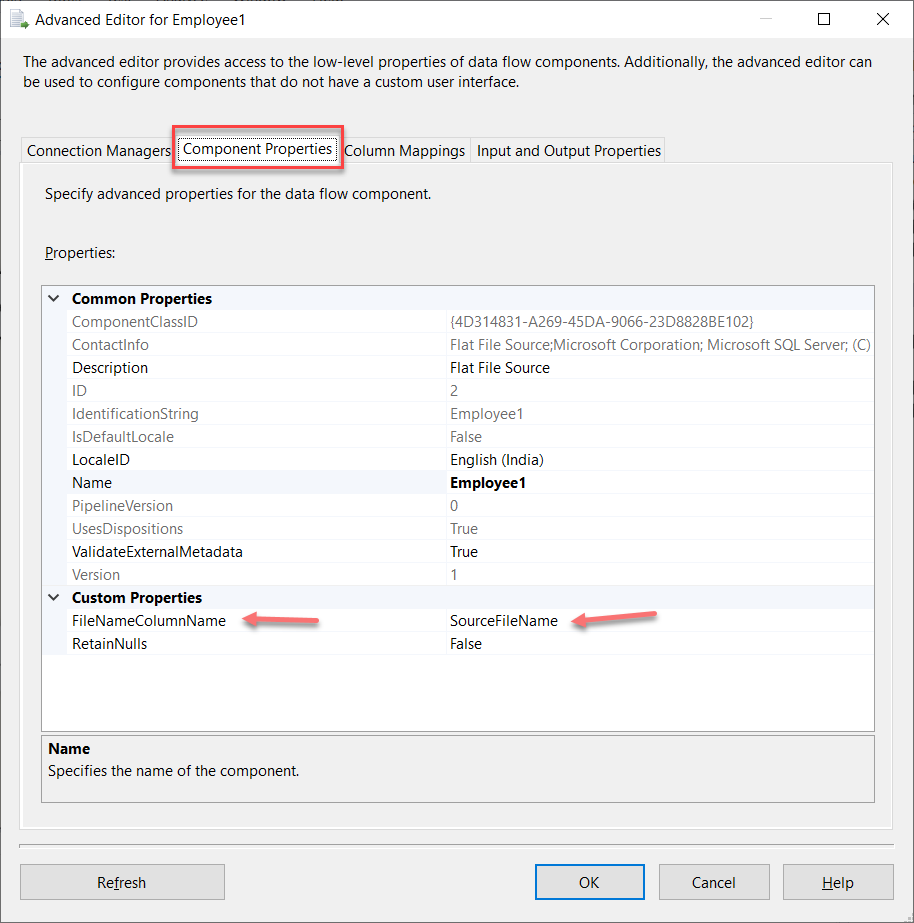
Figure 18 – Adding the FileName ColumnName property
Now, if you open the OLE DB Destination mappings, you can see that the new column has been mapped to the SourceSystemID. Executing the package now will yield the following result in the database table.
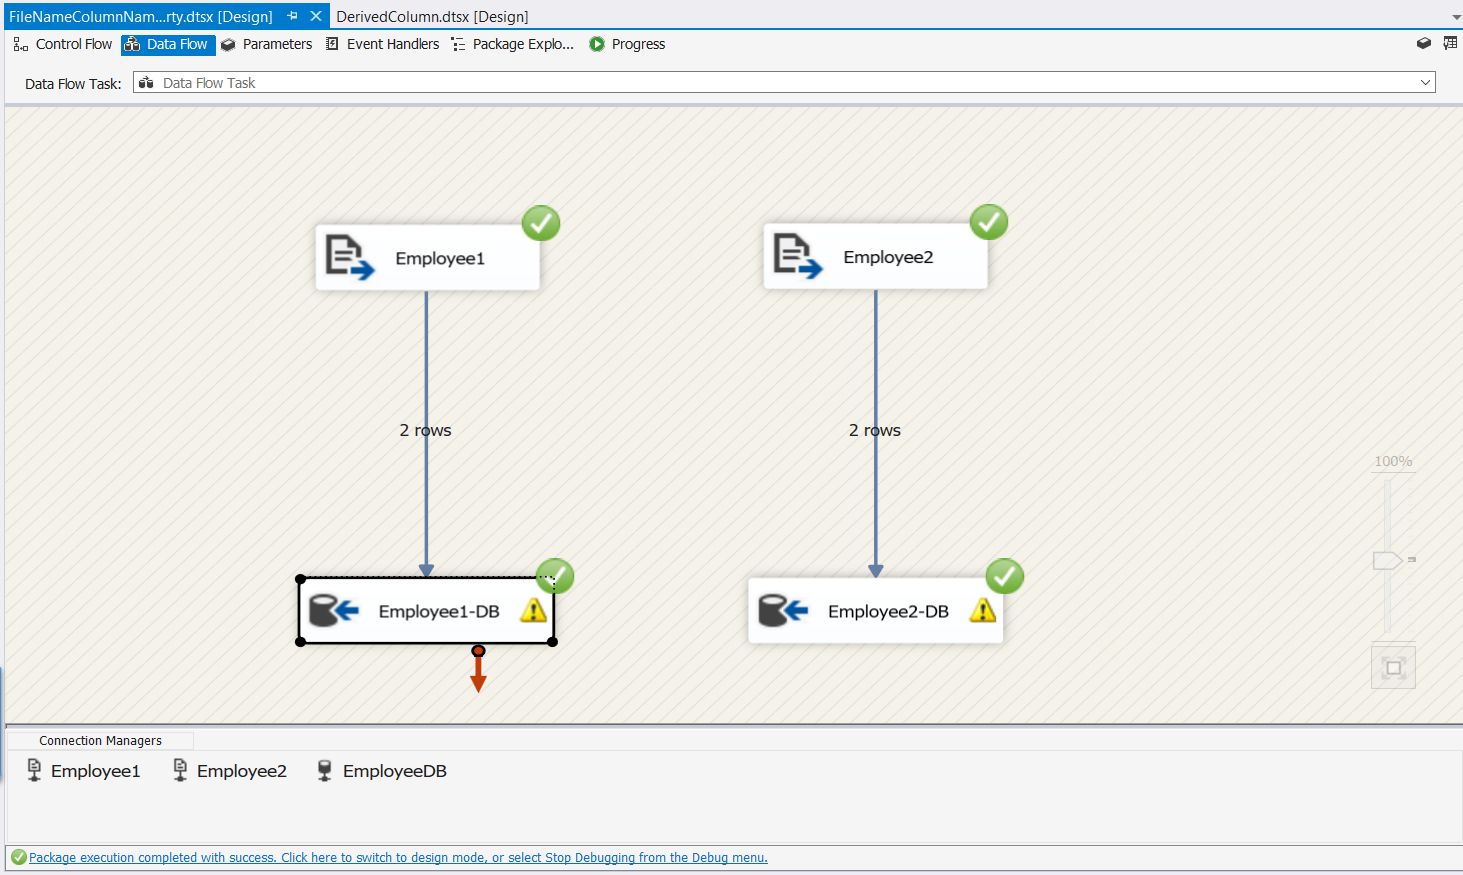
Figure 19 – Executing the SSIS Package

Figure 20 – File Path added as Source System ID
As you can see in the figure above, the path of the source file has been added as the SourceSystemID. If required, the path can be trimmed by using some other transformations, and only the Filename can be stored.
Conclusion
In this article, we have understood SSIS data lineage concepts in detail and explored the various ways in which such an SSIS package can be created. Implementing data lineage is always a key part in designing any ETL solution as it is helpful once the packages are deployed in production, and then we need to track back to the source of a particular record from the data warehouse. This also helps us to identify the source of each and every individual record in case there are some data quality issues and thus helps to keep the system stable and functional.

He is a prolific author, with over 100 articles published on various technical blogs, including his own blog, and a frequent contributor to different technical forums.
In his leisure time, he enjoys amateur photography mostly street imagery and still life. Some glimpses of his work can be found on Instagram. You can also find him on LinkedIn
View all posts by Aveek Das
- Getting started with PostgreSQL on Docker - August 12, 2022
- Getting started with Spatial Data in PostgreSQL - January 13, 2022
- An overview of Power BI Incremental Refresh - December 6, 2021