
This article will explore an overview of Data explorer and how to access and manage Azure Cosmos DB using Data Explorer. Azure Cosmos DB is a fully managed, highly secure, and globally distributed NoSQL database that is designed for new-age modern application development. As this is fully managed so you don’t need administrators to manage its maintenance, patching, upgrades, capacity, and space management, auto-scaling in case of workload increase, etc. It is suitable for modern digital applications like online portals based on video streaming, gaming, Internet of things applications, online retail websites, etc.
You can choose this NoSQL database service if your application will have the below requirements.
- The enormous amount of data generated by such internet-facing applications
- Huge reads write operations
- Quick response time in single-digit milliseconds
- Autoscale to meet data volume and velocity demand in case of the sudden spike in workload
- Expand new location to increase business and workload keeping minor changes at the database layer
Data Explorer
The Data explorer given in the Azure Cosmos DB account is a web-based interface that allows us to view, access, and manage cosmos DB elements like databases, containers, and data stored in Cosmos DB items. We can access this option only with Cosmos DB account creation. We can perform all activities using data explorer. I will show you step by step process about performing various cosmos DB activities using data explorer in this article. Do not confuse Data Explorer given in Cosmos DB account with Azure Data Explorer Clusters. Both are different and designed for different purposes.
Let’s use data explorer to perform various Azure Cosmos DB activities in the below section.
Create database and collection in Cosmos DB account using Data Explorer
Creating databases and collections will require an Azure cosmos DB account first, so first, we will create a cosmos DB account and then will create its database followed by the collections using data explorer.
Create Azure Cosmos DB account
I have explained step by step process in detail to create a Cosmos DB account in my last article. I would recommend you read that article attached here “Understanding and creating Azure Cosmos DB accounts” to create a Cosmos DB account. The high-level steps to create a cosmos DB account are given below.
Log in to the Azure portal. Type Azure Cosmos DB in the search bar and click on this option once it will appear in the search drop-down menu.
Click on the + Create option given on the cosmos DB page. Choose the API as per our workload.
Fill and validate all details given in the below tabs of Create Azure Cosmos DB Account -Core (SQL) form that will appear once you will click at + Create button.
- Basics
- Global Distribution
- Networking
- Backup Policy
- Encryption
- Tags
Once you have entered all details on all tabs then hit the Review + create button to start the validation process. Finally, click on Create button to proceed with creation. Deployment of cosmos DB account creation will start processing after that. You will be notified once the deployment will be completed. We have successfully created a cosmos DB account named cosmosdb19oct20211 in this section. Next, click on Go to resource tab to jump to the cosmos DB account overview page.
Create a Sample Database in Azure Cosmos DB account
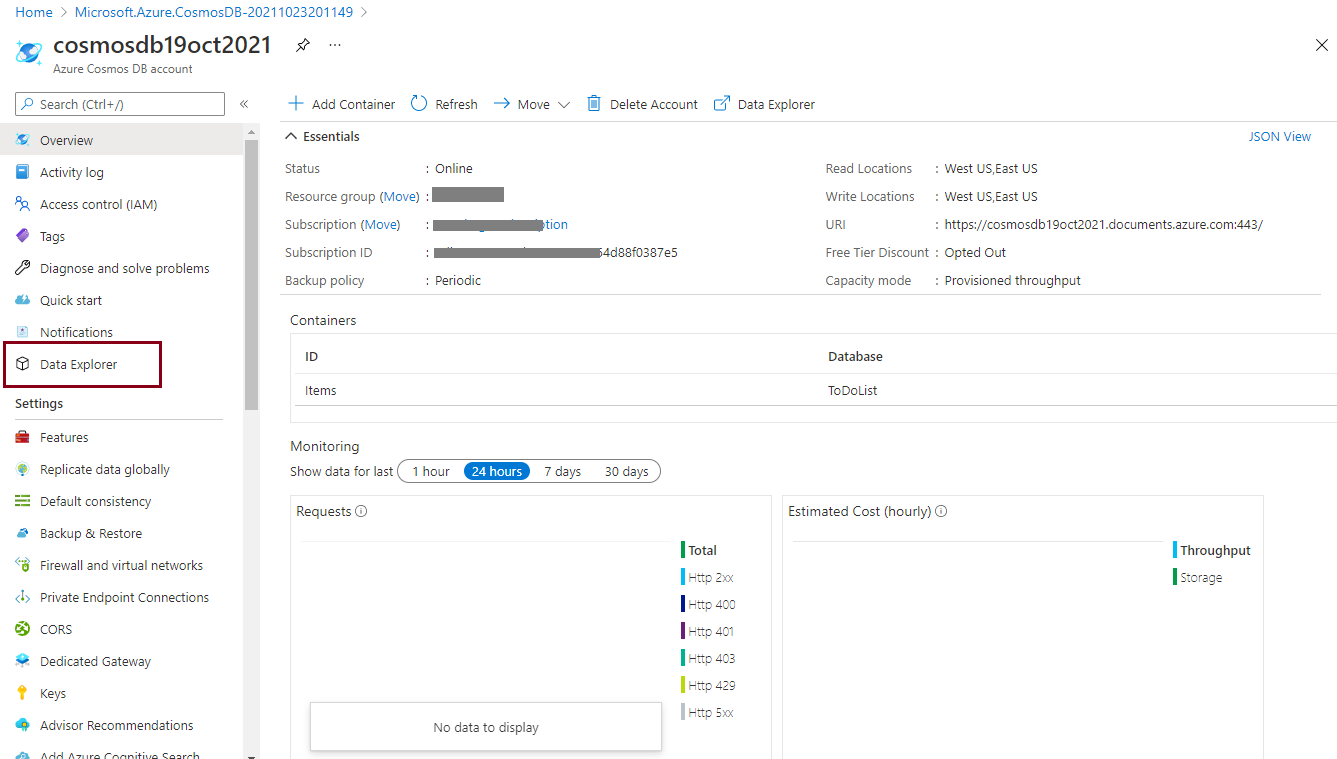
Now, we have a Cosmos DB account named cosmosdb19oct20211. Click on the Overview page of this account. You can see all details of this account from the right-side pane. You can also access data explorer from the left side pane as highlighted in the below image. Click on this option to open the data explorer page.
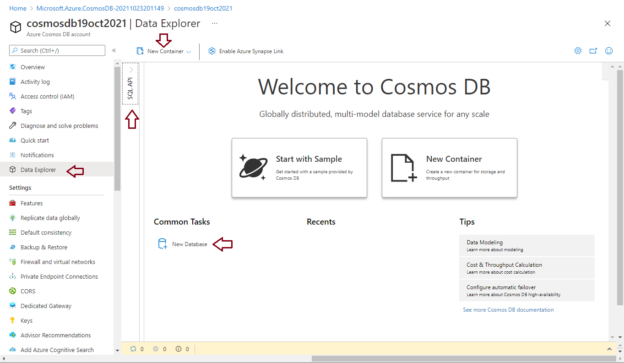
The below screen will appear after accessing the Data Explorer tab from the left side pane. You can focus on dark red arrows to see important links. I have created this Azure Cosmos DB account using Core SQL API so SQL API is showing in the right side pane. You can click on this option to expand it; all databases and containers can be seen as organized under this API. Have a look at the other dark red arrows which are showing links and options using which we can create a new database or containers in this cosmos DB account.
You can see two options are showing in the right-side pane window.
- Start with Sample
- New Container
Let me show you with first option using which we can create a sample database in this Azure Cosmos DB account. Click on this option “Start with Sample”.

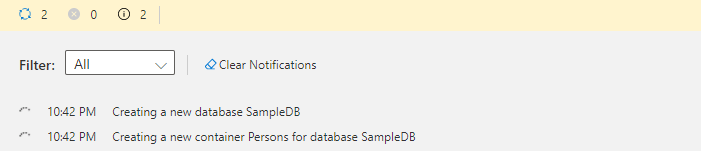
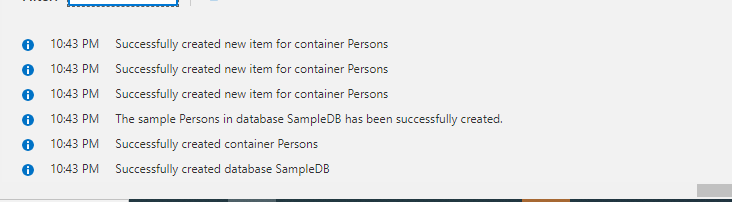
Once you will click on the Start with Sample rectangle from the above image, sample database creation will start processing and can be tracked its progress in the bottom side of the above image which is highlighted in yellow color. I have taken a screenshot of that notification bar which is shown in the below image.
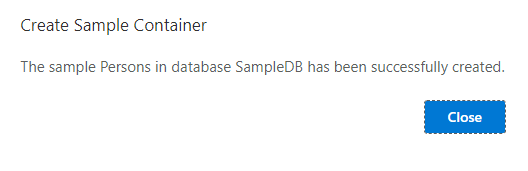
Once the sample database will be created, you will get below popup window stating, “The sample persons in database SampleDB has been successfully created.”
Again, you can see the notification or output bar given on the bottom side of the data explorer image to validate the sample database creation.
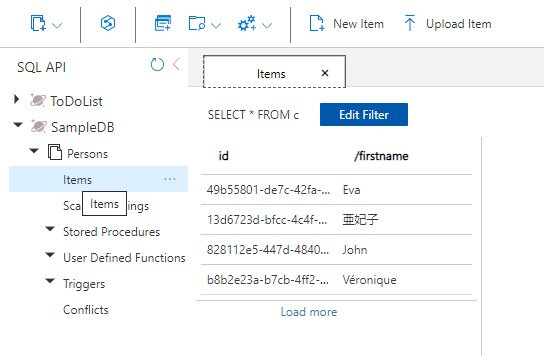
Let’s see and validate the newly created sample database in the data explorer. As I told above SQL API will list all databases and containers in an organized way so click on this option to expand its objects. You will see the below image once you click on the SQL API option. You can see the sample database SampleDB and its container Persons in the below image. You can also access actual data by clicking on the respective options from the left side pane given under the SQL API tree.
You can go ahead and do your testing using this sample database.
Create a New Database in Azure Cosmos DB account
Now, we will create a new database by accessing the New Database link given in the right-side pane of the Data Explorer. You can also click on the drop-down given near New Container to choose a new database creation window. A database in cosmos DB is a logical container for one or more containers.
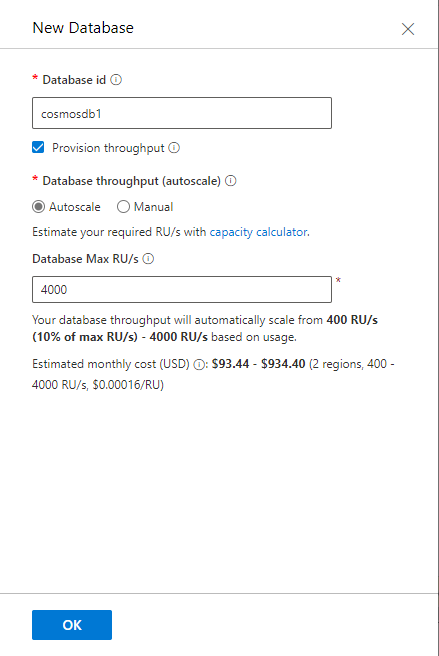
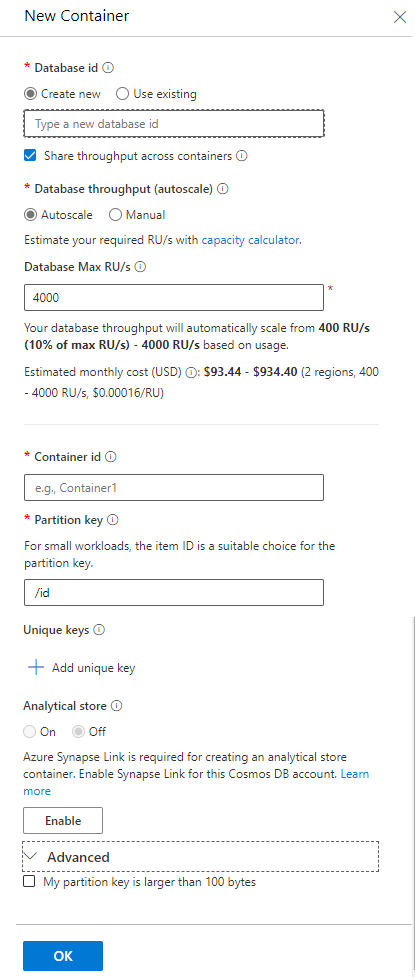
Below New Database screen will appear to enter details for the new database. Enter database if as I have entered as cosmosdb1. Provision throughput checkbox will be enabled as it was selected during creating the cosmos DB account. If you want this database to Autoscale in case of increased workload or throughput then you can choose this option given under Database throughput (autoscale). The provisioned throughput at the database level will be shared among all collections of that database. Next, configure the database max request units per second and then finally click on the OK button given bottom side of the below image.
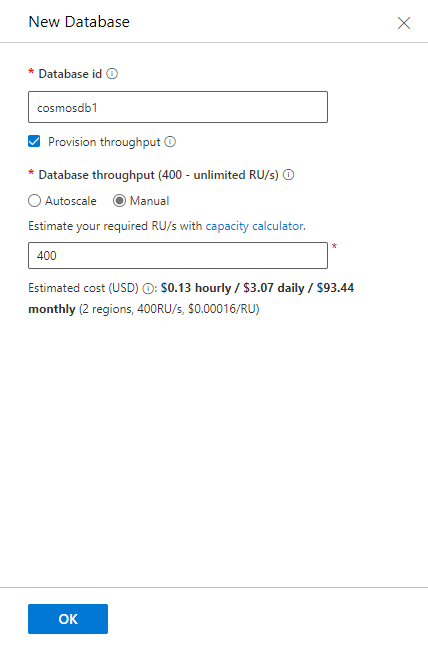
If you want to choose database throughput as Manual, then you need to select this option and you need to carefully enter the required request units per second as capacity throughput for this database. Note, the database will not be auto-scaled in case of increased work as you have chosen Manual mode for database throughput.
I have chosen Autoscale for my new database creation and hit the OK button to proceed.
Your database will be created after a few minutes of executions post clicking the OK button of the New Database window. You can see and validate your newly created database by accessing the SQL API tree in data explorer as shown in the below image near the dark red arrow.
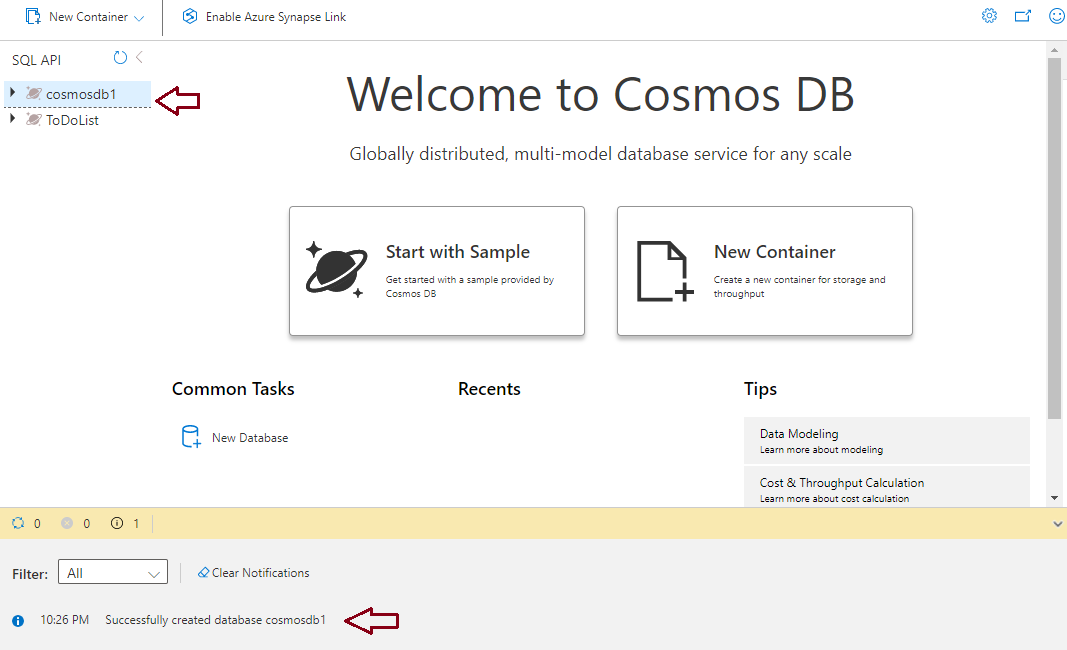
You can also expand the newly created database showing under SQL API to see its elements. Next, we will create a new container in this newly created database in the next section.
Create a New Container in Cosmos Database
Go to Azure Cosmos DB account and click on Data Explorer from the left side pane. You will get a link named New Container in the right-side pane as shown in the above images. Click on this option to open the New Container window as shown in the below image.
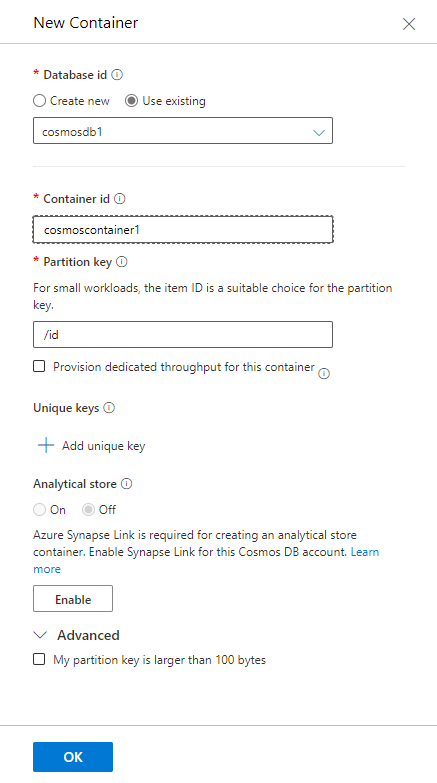
You can see two options for database id, if you don’t have any database created for your container then fill in the details as we did in the above section for new database creation and if you already have created your database then choose the second option “Use existing” and choose your database name from the drop-down.
Once you choose the existing database, other options will be disappeared from the database Id section. Next, you need to fill in details for Container Id. Enter the id for the container, enter the partition key based on which data partitioning will work. You can also add unique keys by accessing this option. Click the OK button once you filled in all details. You can leave options as it is to create this container with default configurations.
Once you will click on the OK button of the above screen, a new container will be created under your selected database. Have a look at the dark red arrows to verify this newly created container cosmoscontainer1.
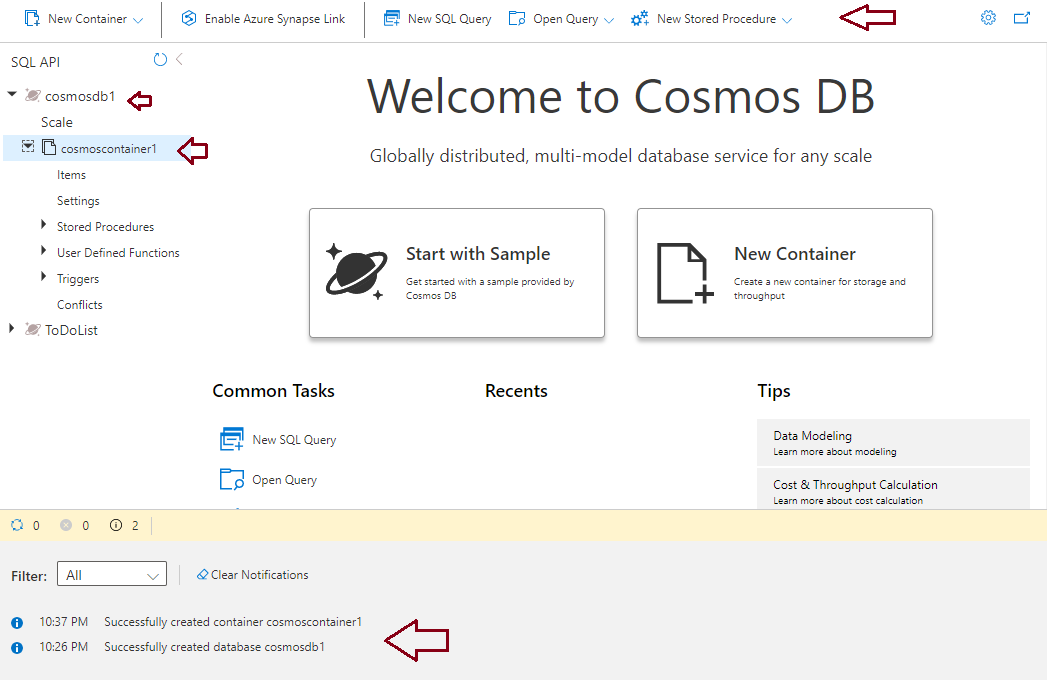
You can further explore this newly created container for more activities. Click at 3 dots given besides the container name to display the list of activities that can be performed as shown in the below image.
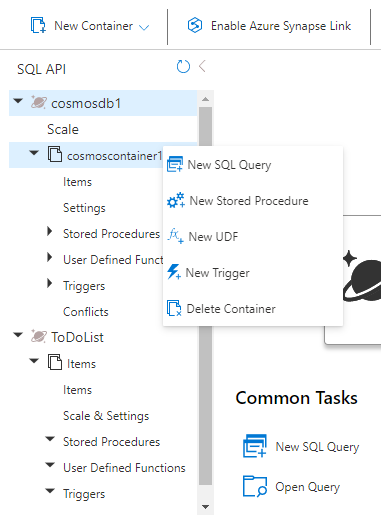
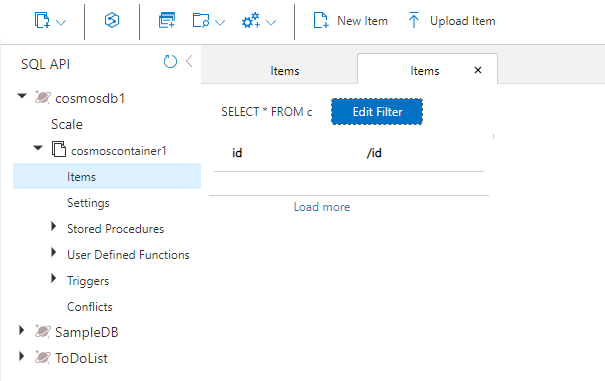
You can click on Items under the container to see its data or add new items to this container. Click on the New Item to add a new item or you can also upload the saved JSON file to upload items to this container by accessing their respective tabs from the below image.
We have created new containers for the new sample database and a new user database in the above steps. We can access these containers using the Azure portal as well. You can click on the Browse tab given under Containers from the left side pane and all containers and their details like associated database, their provisioned throughput, and other details will appear in the right-side pane.

Conclusion
Azure Cosmos DB is a fully managed, highly secure, and globally distributed NoSQL database. We can manage its databases and elements using the data explorer utility given inside the cosmos DB account. I have explored data explorer and steps to create a sample database, new container, and database using data explorer in the Azure Cosmos DB account. You can manage other configuration details of cosmos databases and containers using this tool.

He loves to talk and write about database technologies. He has lead and delivered many projects from designing to deployments on Migrations to the cloud, heterogeneous migrations, Database consolidations, upgrades, heterogeneous replication, HA / DR solutions, automation, and major performance tuning projects.
You can also find him on LinkedIn
View all posts by Manvendra Singh
- Configure backup storage redundancy for Azure Cosmos DB account - May 15, 2024
- Difference between SQL SELECT UNIQUE and SELECT DISTINCT - January 16, 2024
- How to do a group by clause - April 12, 2023