
Tons of new and exciting features have been introduced with the release of the latest SQL Server 2016. It simply is faster, better and more reliable! 🙂 As with the last several releases, there are again a lot of improvements with regards to the integration between on-premises databases and databases sitting into the Cloud. The ultimate goal is to have as convenient and easy as possible migration of the data in both directions. Today’s focus will be one of those features: Stretched Databases. Fasten your seatbelts and discover what is beneath this term!
Note: To learn about performance tuning in cloud databases vs. on-premises, please read Cloud vs. On-Premises Databases: How Does Performance Tuning Differ? article.
The core concept
Nowadays, we live in a very dynamic world where data is a valuable asset. Almost every device is generating new and important numbers pretty much all the time. So data is growing at high pace which is a challenge for database owners and administrators. Usually, the intuitive decision would be to get rid of the old data and keep only the most recent data. Which is the most recent data you need? What should be the retention period? What happens if you are a hospital and need medical records that are one year old? What happens if you must comply with specific audit rules? There are numerous questions you need to take into consideration prior to designing your cleanup strategy. The need of keeping our “cold” data (the one that we do not access on a daily basis) is becoming more and more obvious, which is pushing us into creating such solutions.
Microsoft’s answer to this is SQL Server 2016 and Stretch Databases. This feature allows us to move our “cold” data to the Cloud over secure channels. This approach has a lot of advantages:
Cold data can be kept there for many years
Cold data is online
Can be accessed from the same application which is using the “hot” data
Faster backup/restore as you will have less data on-premises
It is also worth mentioning that Stretch Databases are available in all SQL Server editions and not only in the Premium ones.
As we are now aware what the goal of this feature is, let’s play with it and get our hands dirty!
How to implement it?
The implementation of a Stretch Database is very straightforward and easy. There is an out-of-the-box wizard available to us and embedded into SQL Server Management Studio.
Let’s go through the process:
First, you need to enable Database Stretch on instance level:
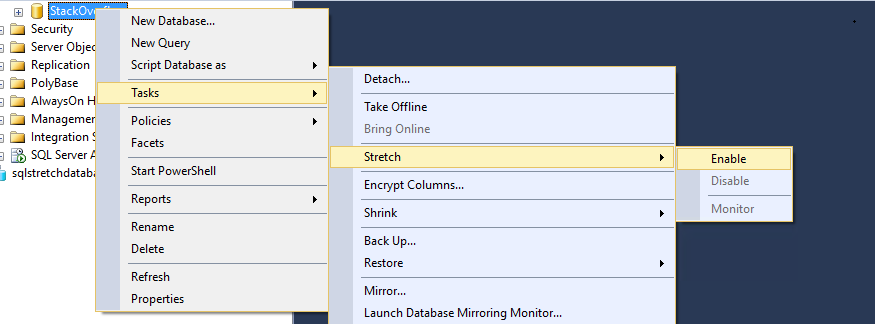
12345EXEC sys.sp_configure N'remote data archive', '1';RECONFIGURE;GOSelect which database you want to enable for Stretching and start the wizard (I will be using the StackOverflow database for the demonstration):

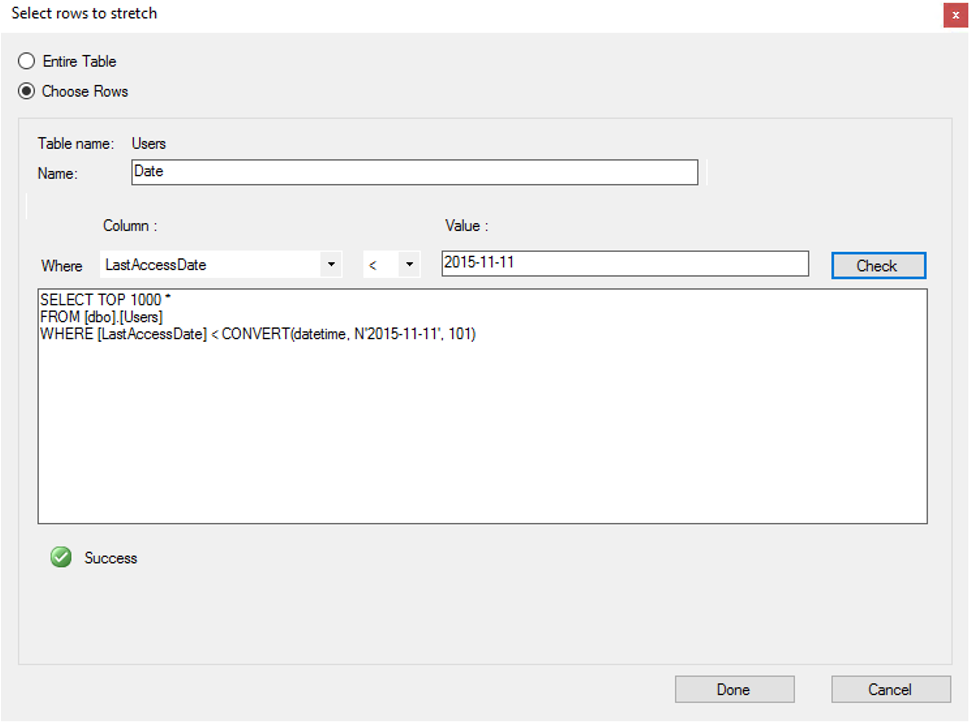
Choose which table/s you want to be enabled for data movement to the Cloud:
You can migrate all of the rows from the selected table/s or specify a filter by clicking on the Entire Table link and move only the specified rows:
In our example, I will choose the migrate all of the rows into the Cloud and not using filtering.
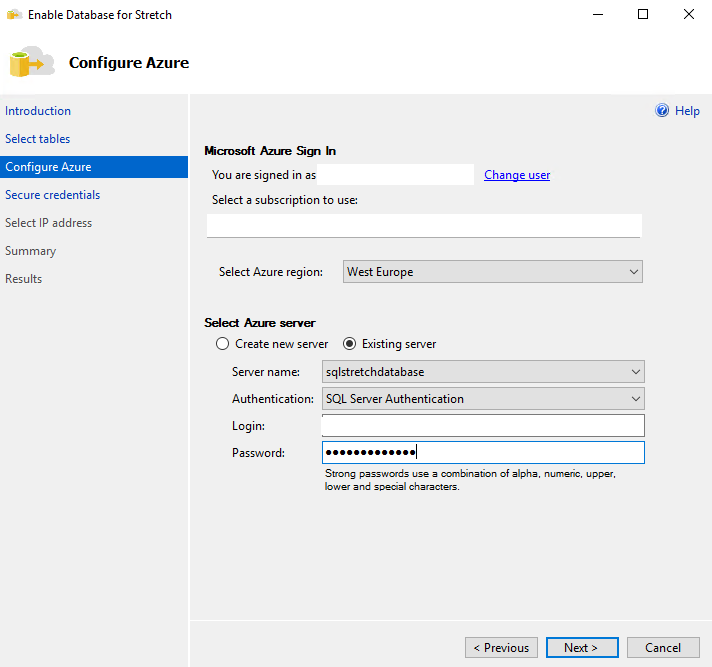
Enter the details for your Azure account. You could have created your Azure SQL in advance and select it or initialize it during the Stretching enabling. We will use an existing server:
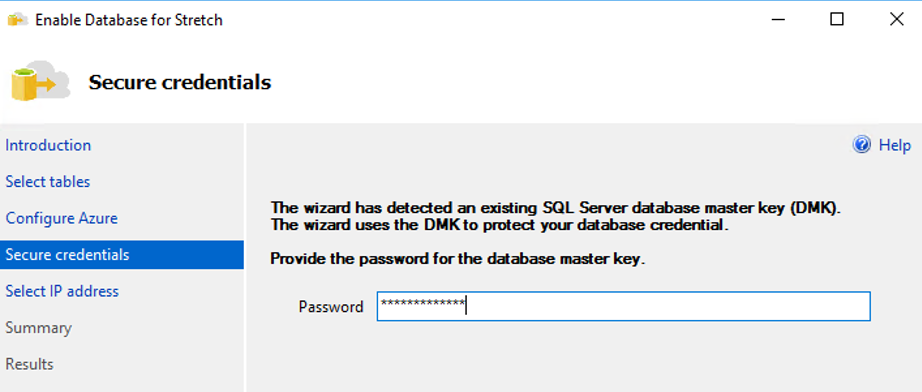
A database Master Key needs to be created in order to facilitate the stretching or if it has already been created, you need to specify the key:
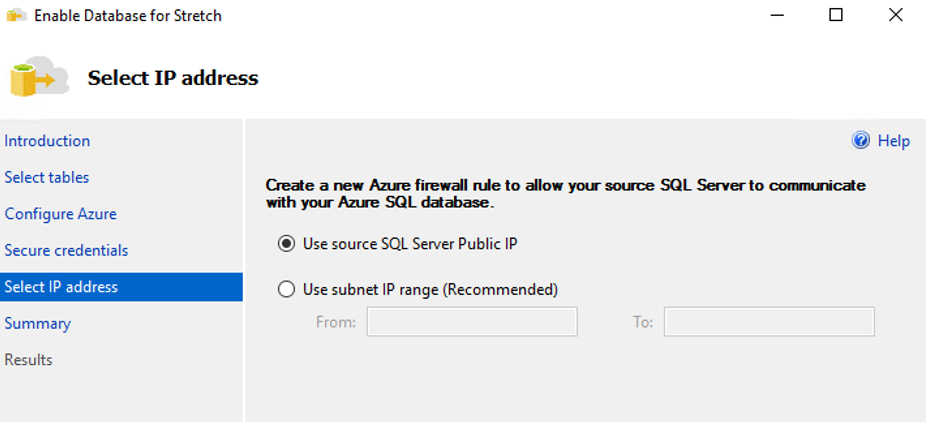
Next, a Firewall rule must be created to ensure the communication between the on premise SQL and Azure SQL is possible:
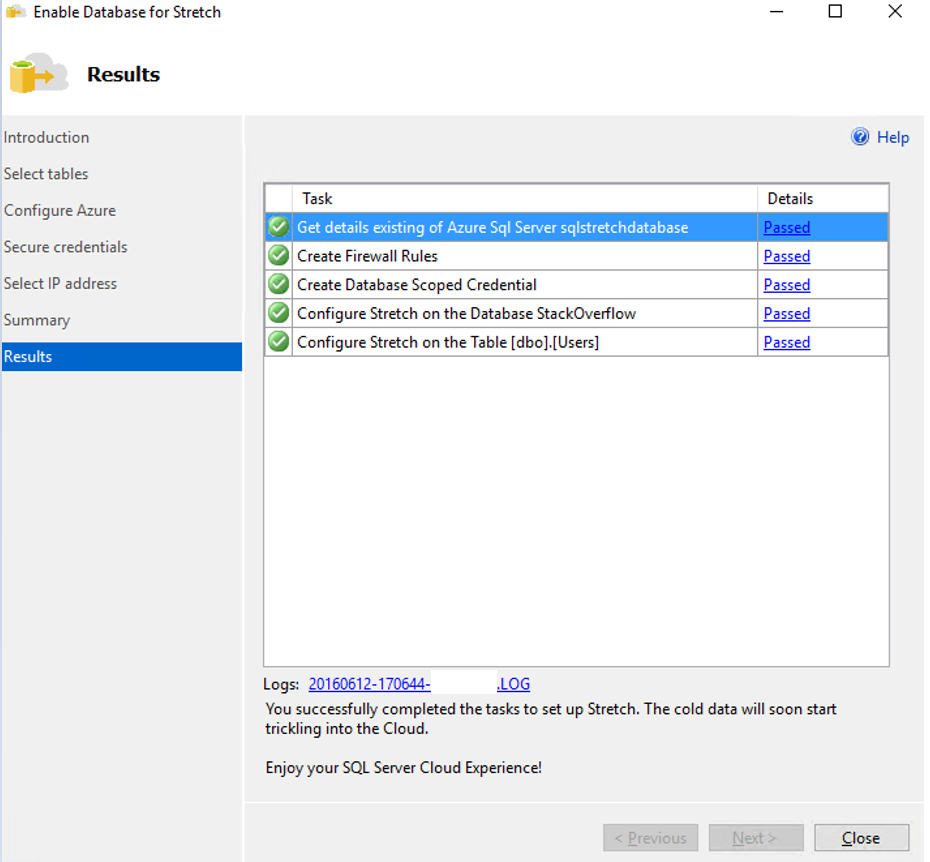
After you review the summary, the operation is good to go and you are waiting for the nice, green result 🙂
Note there is a log that can be reviewed after the operation (missing part is the name of the host).
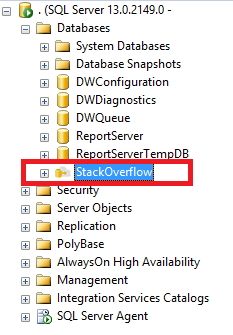
After everything has finished successfully, notice the icon next to the Stretched Database:
Congratulations you are now moving your “cold” data to the Cloud with a few clicks! 🙂

What about monitoring?
The rows that you have specified are now being trickled to Azure under the hood and everything is perfect, but as a Database owner or administrator you need to have a picture of what is really going on, right? We can monitor the data movement in two ways:
Graphically, via Stretch Database Monitoring
T-SQL, using DMVs
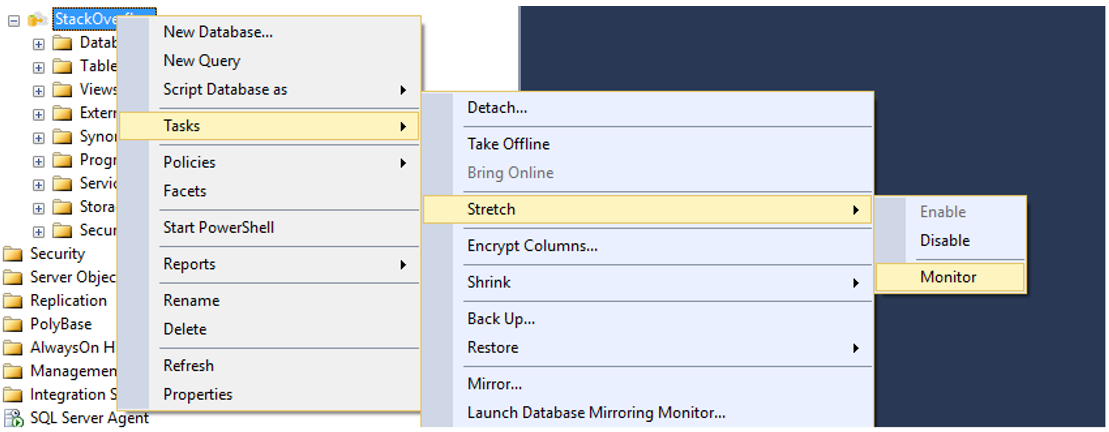
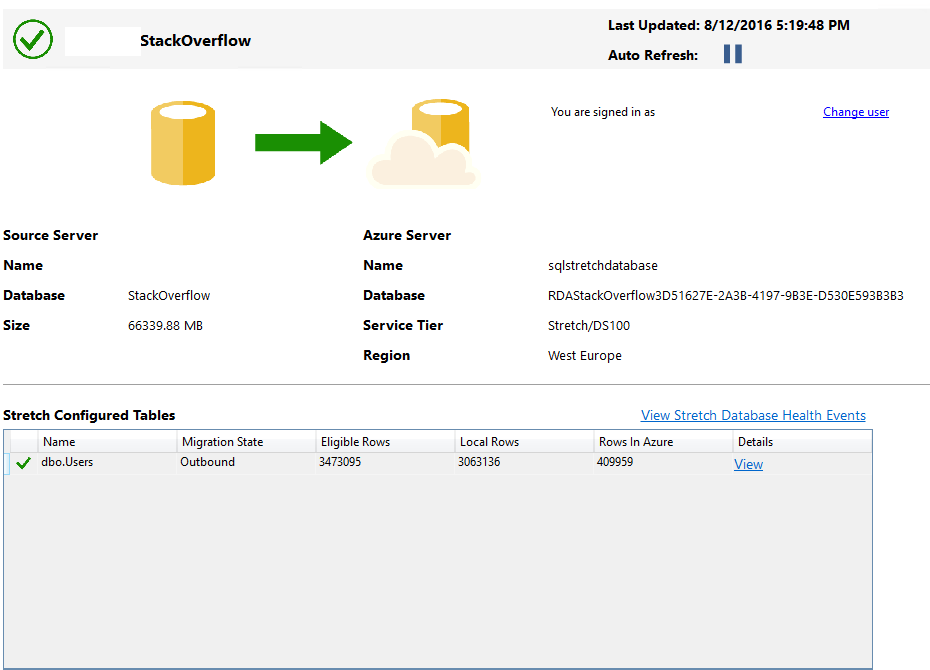
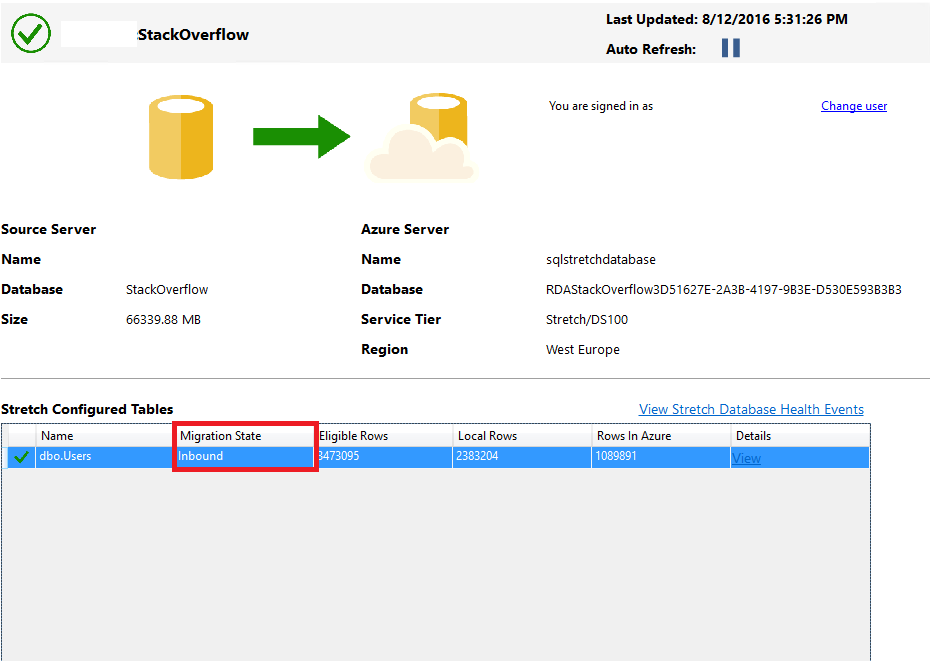
The Monitoring can be started from the database you are currently stretching:
You can see information about the Azure SQL, the tables being stretched, number of rows you have locally and in Azure and the Migration State, which could be Outbound (moving data to Azure), Inbound (transferring data from Azure back) or Paused:
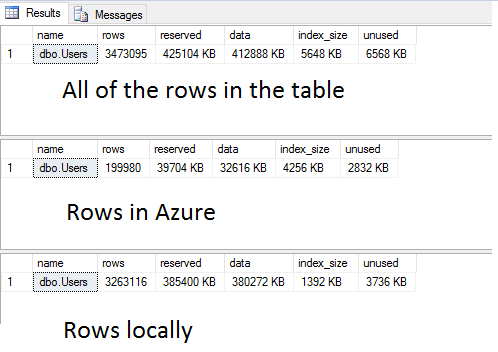
Similar information can be received from T-SQL as well, but you need to combine several pieces of code. Number of rows stored locally and in Azure can be checked by running this script:
|
1 2 3 4 5 6 7 |
USE [StackOverflow] GO EXEC sp_spaceused N'dbo.Users' -- All of the rows in the table EXEC sp_spaceused N'dbo.Users', @mode = 'REMOTE_ONLY' -- Rows in Azure EXEC sp_spaceused N'dbo.Users', @mode = 'LOCAL_ONLY' -- Rows locally |
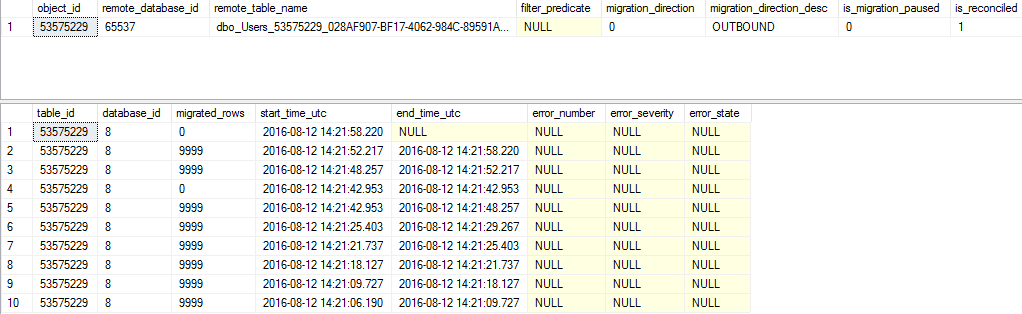
If you need details about which tables are being stretched currently, how is the recent data movement going and the direction of the traffic, you can use similar code:
|
1 2 3 4 5 6 |
USE [StackOverflow] GO SELECT * FROM sys.remote_data_archive_tables SELECT top 10 * FROM sys.dm_db_rda_migration_status ORDER BY start_time_utc DESC |
Getting the data locally and from Azure
In my opinion, the biggest advantage of this feature is that you basically do not care where your rows are currently residing and you can query the local and Azure data from the same application and code. Isn’t this awesome?! There is no difference at all. Let’s get some data from the “dbo.Users” table before it has been configured for Stretching and check the execution plan:
|
1 2 3 |
SELECT TOP 100 * FROM [StackOverflow].[dbo].[Users] |

There is nothing really interesting here as all of the data is still on premise. Stretching has been enabled and some of the rows are already in Azure. Run the same query and check the execution plan:
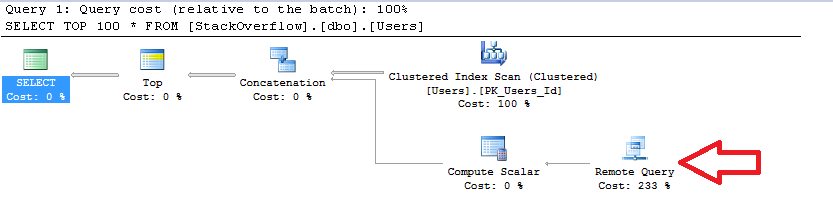
We now have an operator “Remote Query” which is the indication that we have read some data from the Azure prior to receiving the result of our query and that’s it! This is the difference between querying local data and getting rows from Azure. Had not we reviewed the execution plans, we would not have been able to differentiate both cases.
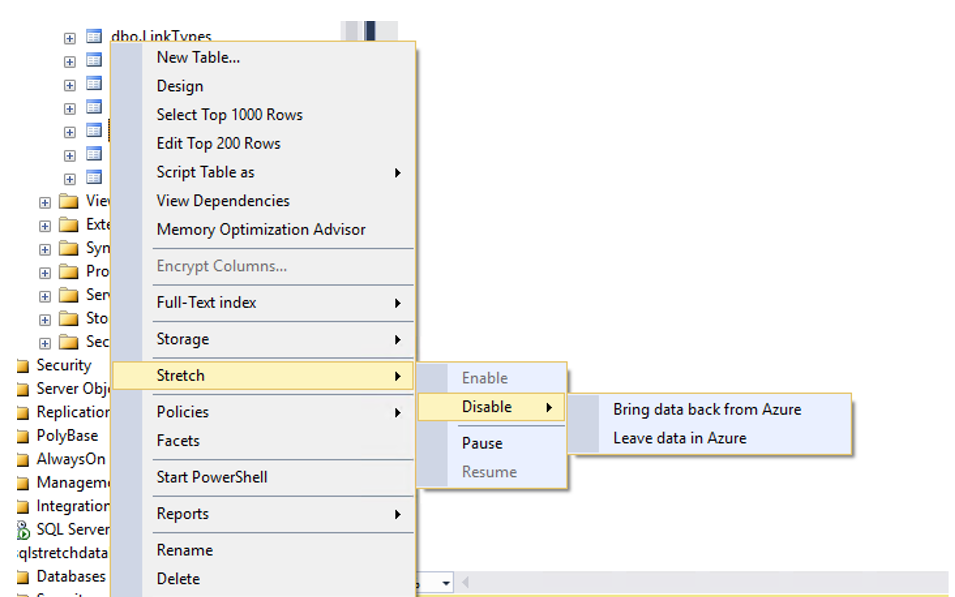
Disable Database Stretching
Disabling Database Stretching is again a fairly easy procedure. You just have to disable the stretching for all tables under the respective database prior to this. When you are doing this, the decision should be made whether the rows would be transferred back to on premise database or you want to keep them in Azure:
In our example, we have chosen to bring the data back from Azure and now the direction of the traffic is Inbound:
As soon as the migration finishes, the T-SQL code used above to monitor the number of rows locally and in Azure no longer succeeds as we do not have data in the Cloud anymore:
|
1 2 3 4 5 6 7 |
USE [StackOverflow] GO EXEC sp_spaceused N'dbo.Users' -- All of the rows in the table EXEC sp_spaceused N'dbo.Users', @mode = 'REMOTE_ONLY' -- Rows in Azure EXEC sp_spaceused N'dbo.Users', @mode = 'LOCAL_ONLY' -- Rows locally |

Stretch Databases are one of the latest, cutting-edge features that have been integrated into the new SQL Server 2016. Straightforward implementation, convenient monitoring and always available “cold” data are characteristics that makes it a preferable solution for institutions that are required to keep old data for a long and even indefinite period of time.
Thanks for reading!

In the last years, he is working on a great variety of customers' environments and involved in complex transitions and transformation projects.
Miroslav is also leading courses at Sofia University and participated as a speaker at various events.
View all posts by Miroslav Dimitrov
- How to perform backup and restore operations on SQL Server stretch databases - September 7, 2016
- SQL Server stretch databases – Moving your “cold” data to the Cloud - August 18, 2016
- Tips and tricks for SQL Server database maintenance optimization - January 11, 2016