In one of my articles about Microsoft Azure, I show how to create credentials and how to connect to an Azure Database using SQL Server Management Studio (SSMS). In this new article, we will talk about the Azure Virtual Machines and we will learn how to connect to them using our local SSMS. You will require unblocking ports, add endpoints and other tasks that I will explain later. We will also learn how to export a local database to an Azure Virtual Machine with SQL Server installed.
Requirements
In this example, we will require an Azure Virtual Machine installed, a local machine with SQL Server and SSMS installed, the Cloud Adapter (we are including the steps to configure it) and a certificate which will also be explained in this section.
- You will require an Azure Virtual Machine with SQL Server installed. To create an Azure Account, review this link. To create a virtual machine, review this link.
A local machine with the SQL Server Engine Installed and a database to export with access to internet.
The Cloud Adapter
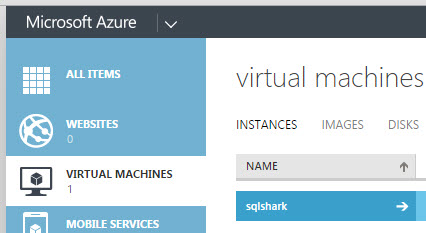
A Cloud Adapter. The cloud adapter is an Azure Service required for SQL Server and generates a SSL certificate In the Azure portal. In order to create it, go to Virtual Machines and click on the virtual machine name.

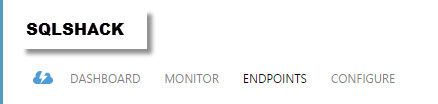
Figure r1. The Azure virtual machines.Click on EndPoints.
Figure r2. The Endpoints- Press the New icon.
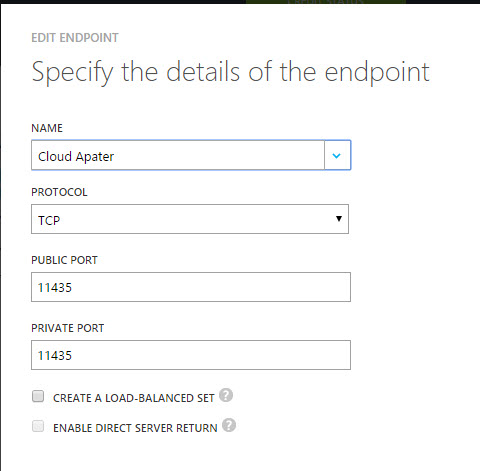
Figure r3. Add new endpoints Add the Endpoint name, protocol and port (by default it is the port 11435).
Figure r4. The cloud Adapter for SQL
A certificate
Another requirement is a certificate to connect to the Cloud. In order to do it do the following steps:
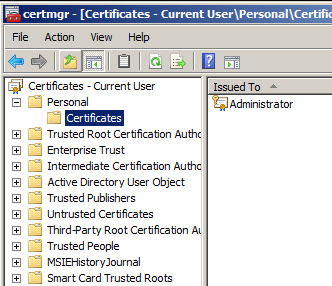
Open the certmgr.msc. You can create your certificate or use an existing one. In this example we will use an existing one.
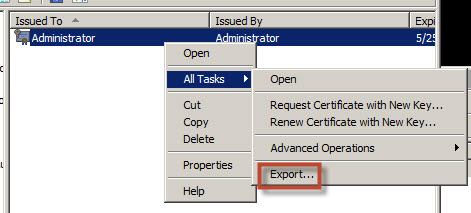
R5. The certificate consoleSelect the certificate right click and select All Tasks>Export
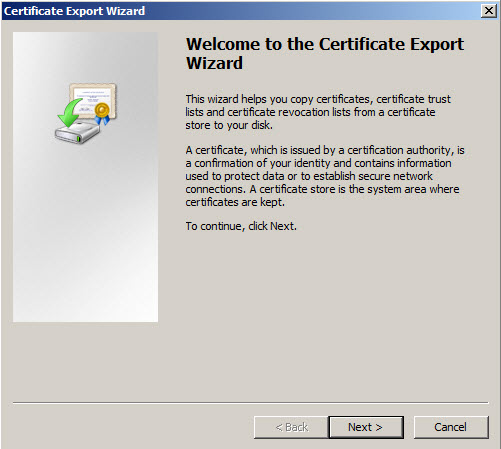
R6. Export a certificateThe wizard to export certificates will be displayed. Click next.
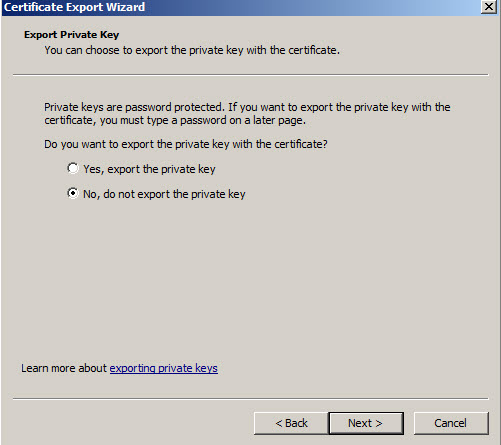
R7. Export Wizard.Select if you want to have a private key.
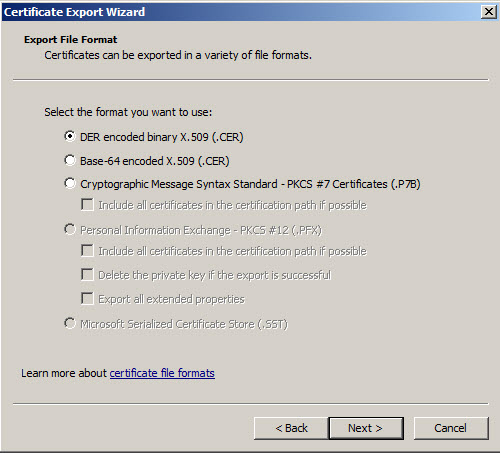
R8. Private key questionSpecify the format of the certificate.
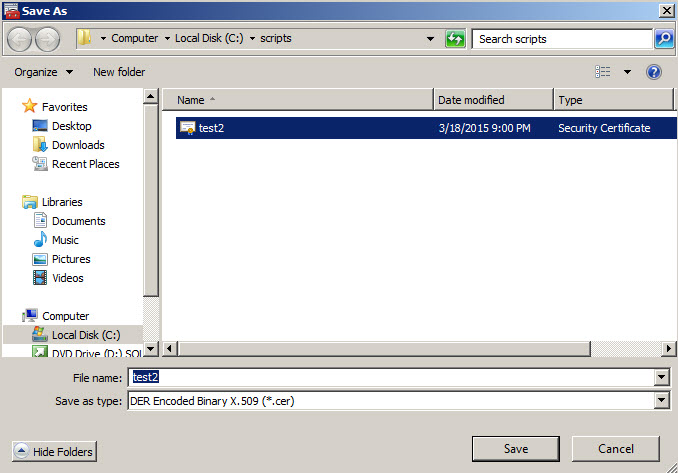
R9. Select the certify formatSpecify a name and a path.
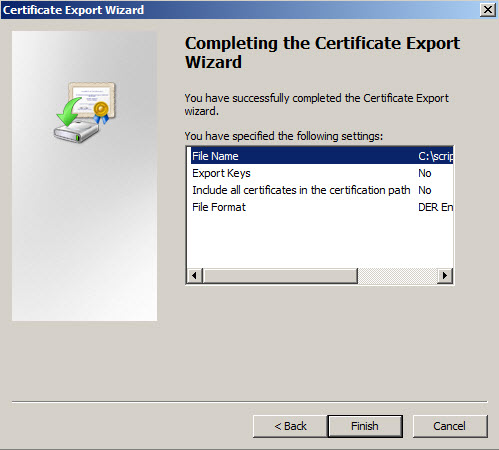
R10. Selecting name and path of the .cer file.Once the Wizard is completed, press finish.
R11. Final step of the export wizard.Go to the Azure portal and click on the Virtual Machine.
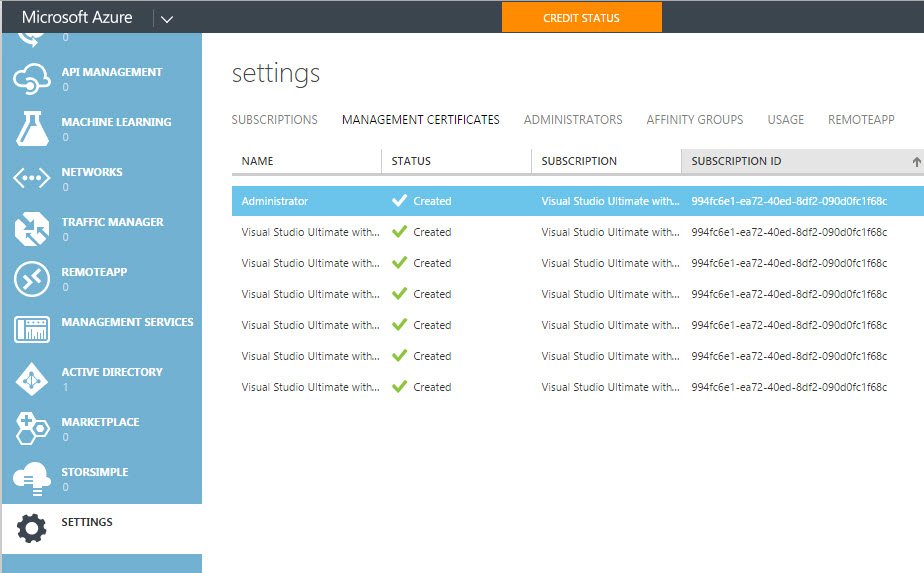
R12. The virtual machine.Click on the Management Certificates link.
R13. The certificates
Click the Upload button and upload the certificate created on step 7.
R14. The option to upload certificates.To connect to a Virtual Machine, you can use the SQL Server Account. In order to enable the SQL Server authentication, in the Azure Virtual Machine (VM), open the SSMS and connect to the database. Right click on your Server and select properties. Change the Server Authentication to SQL Server and Windows Authentication to connect from your local machine.
Figure 1. Server properties
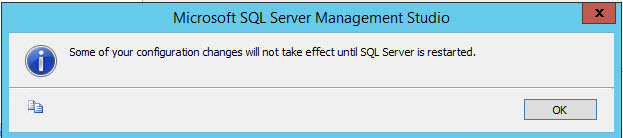
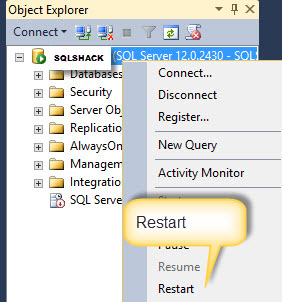
You will be prompted a message about restarting the SQL Server Service.
Figure 2. Information message.Restart the Service in order for the new configuration to take effect.
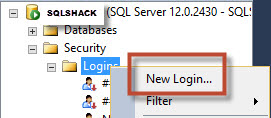
Figure 3. Restarting the MSSQL ServiceNow that the SQL Server authentication is enabled, create a SQL Server Login.
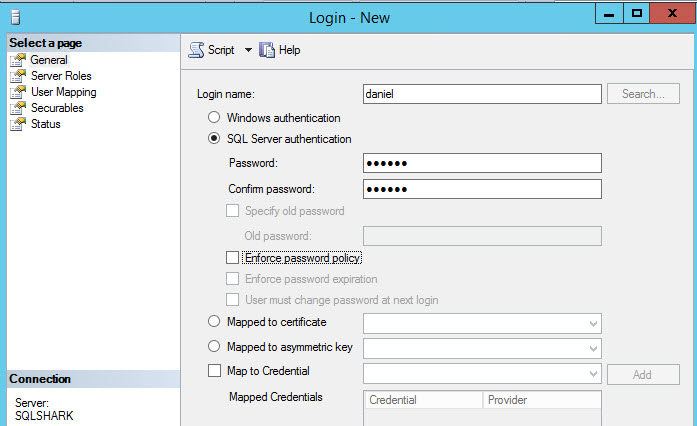
Figure 4. Creating a new login.Specify the login name and passwords. It is recommended to enforce the password policy for security reasons. In this example, we will omit the Enforce password policy to simplify the example.
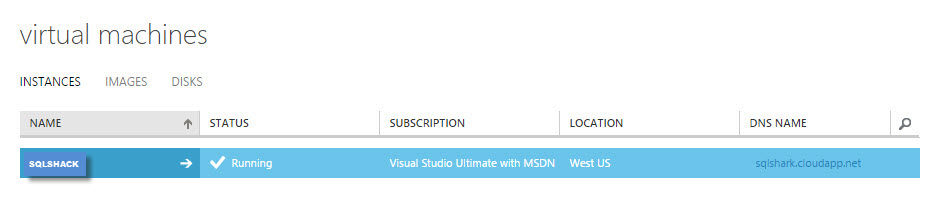
Figure 5. Login settingsGo to the Virtual Machine in the Azure Portal and click on the Virtual Machine name.
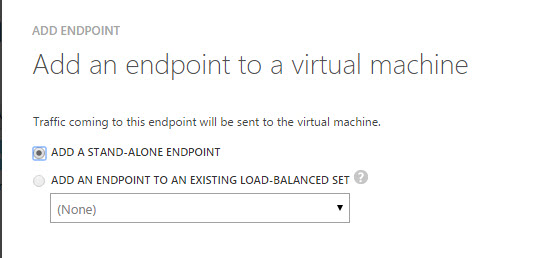
Figure 6. The virtual machine statusClick the ENDPOINTS link and press the Add icon to add a new Endpoint.
Figure 7. Endpoints
Select the add Standalone Endpoint
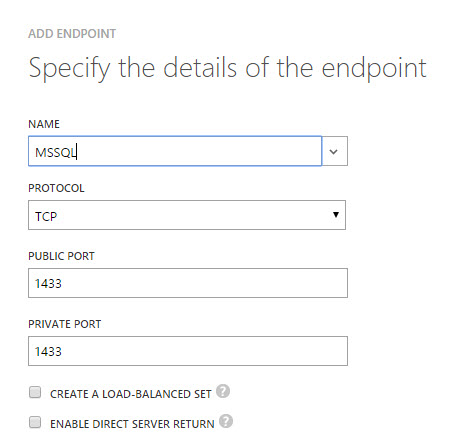
Figure 8. Adding endpointWrite the name of the Endpoint. The protocol should be TCP and the port by default in the default instance is 1433.
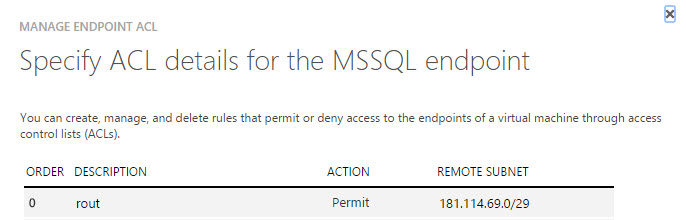
Figure 9. Endpoint settingsThe ACL allows you to specify the range of subnets allowed to access to your Azure virtual Machine. You can provide the name and subnet. If you do not your Internet IP, you can use this link.
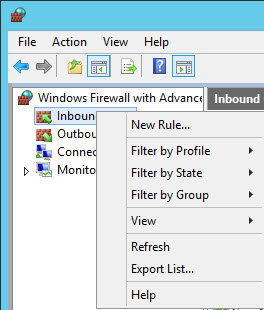
Figure 10. The ACL detailsYou also need to enable the ports used to access remotely. Go to the Windows Firewall and right click on the Inbound Rules and select new rule.
Figure 11. The Inbound rules.Specify the port to which you want to apply a rule. In this case, it is the port 1433.
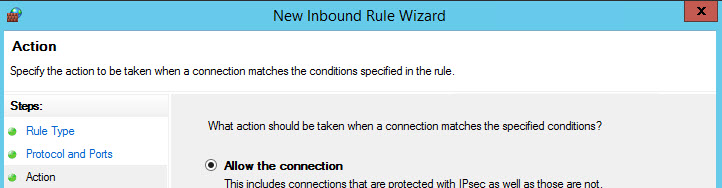
Figure 12. The TCP IP SQL Server portIn the action, select the allow the connection option.
Figure 13. Allow permissionsSelect the rule that you want to apply.
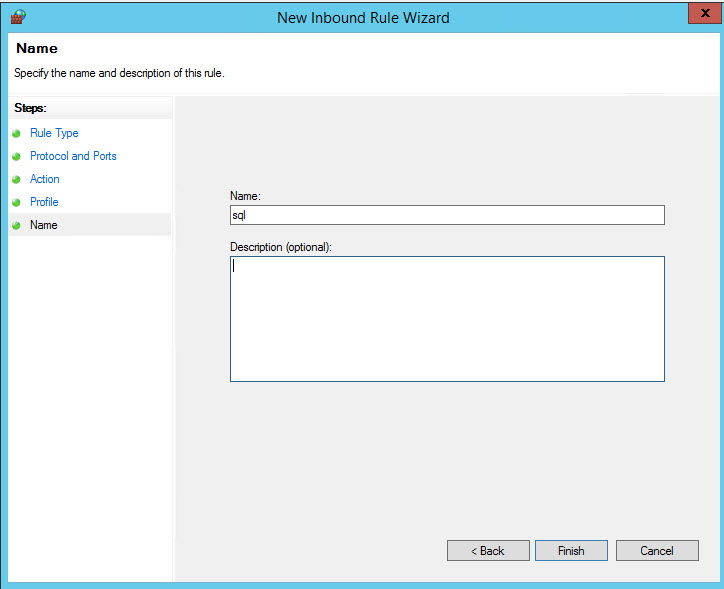
Figure 14. Rules to applyWrite a name for the rule.
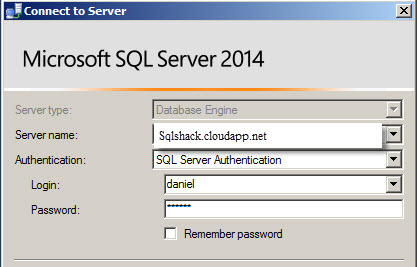
Figure 15. Rule nameNow connect to your Azure VM from the SSMS of the local machine.
Figure 16. Connect to an Azure VM from the local SSMSIf everything is OK you can now connect to the SQL Server machine with Azure from your local machine.
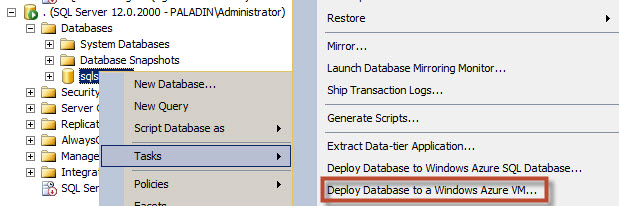
In the local SSMS, Select the database that you want to copy and select Tasks>Deploy Database to Windows Azure.
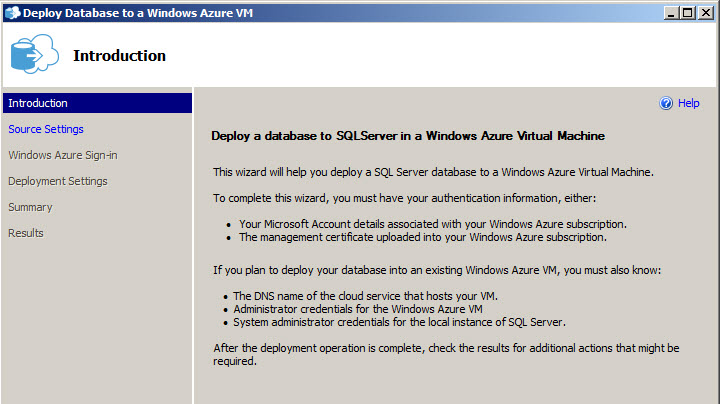
Figure 17. The Deploy Database to Azure VM Wizard.The Introduction Wizard Windows will be displayed.
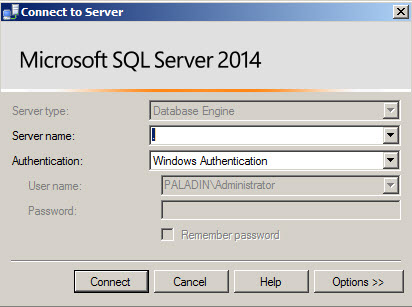
Figure 18. The Introduction Wizard.Press the Connect button to connect to the local SQL Server.
Figure 19. The local machine informationSpecify the Server name and credentials and press Connect.
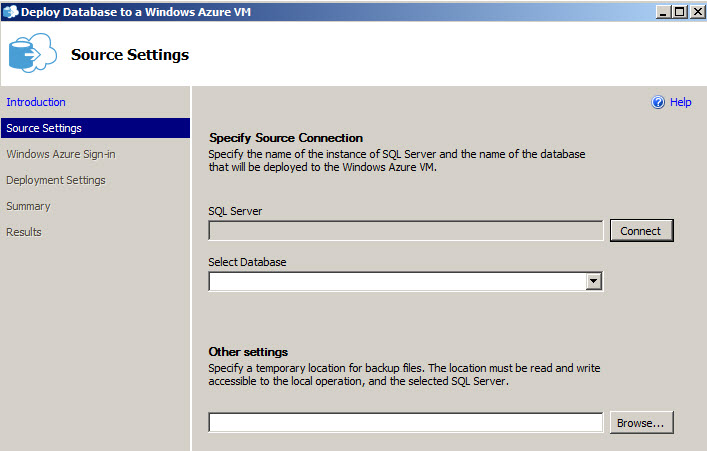
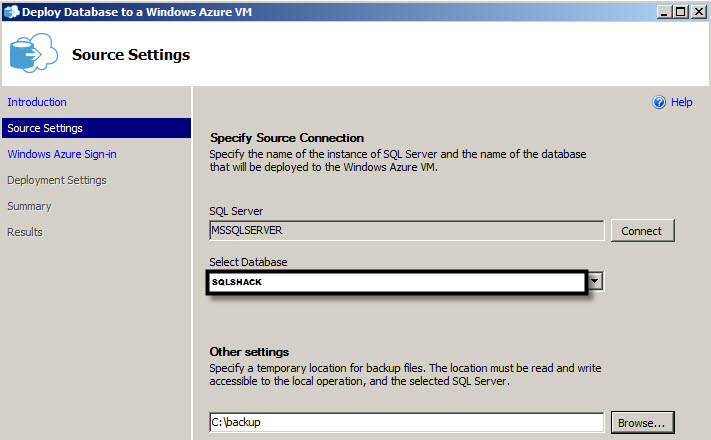
Figure 20. The local machine credentials.Select a database to export and a temporary location for the backup files. Make sure that the SQL Server has permissions on a temporary location.
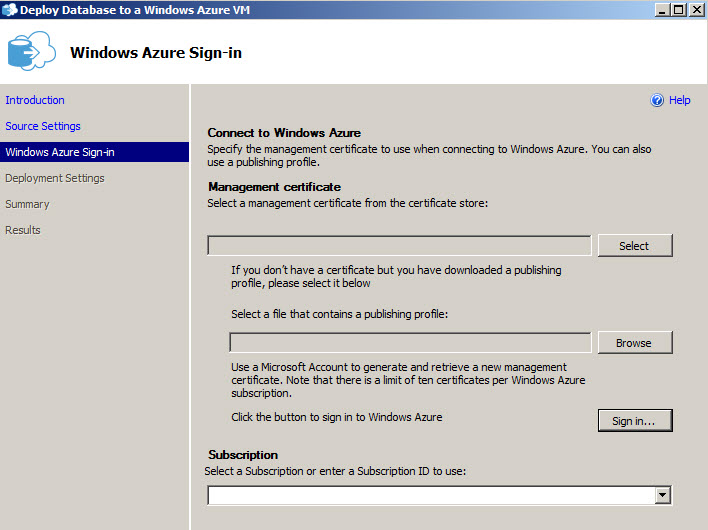
Figure 21. The Database to export and the temporary file.To connect to Azure, you will need a Certificate. You can also work with a publishing profile. For more information about a publishing profile.
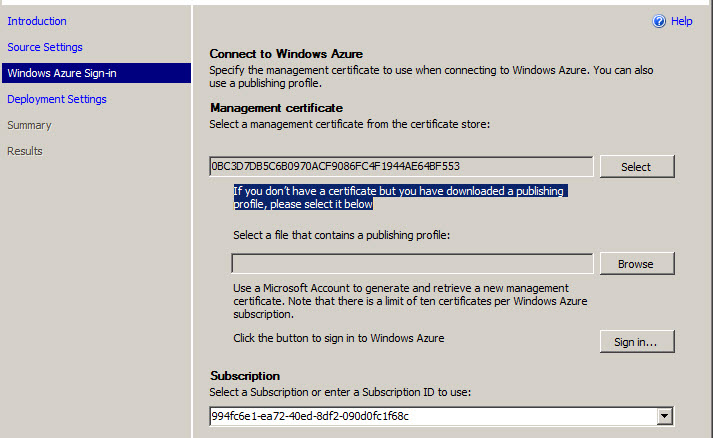
Figure 22. Certificate.Press the Select button and select the certificate created on the requirements section of this article. Copy the subscription ID of step 9 of the requirements in the certificate section.
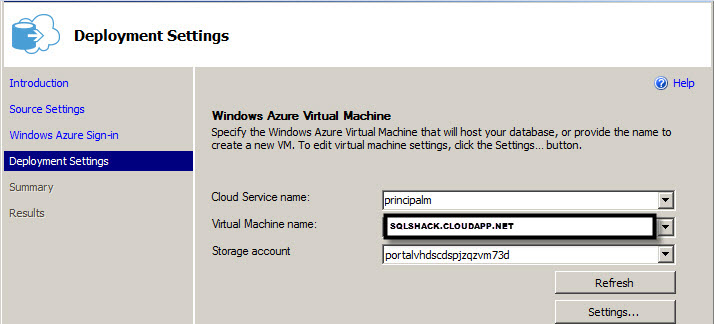
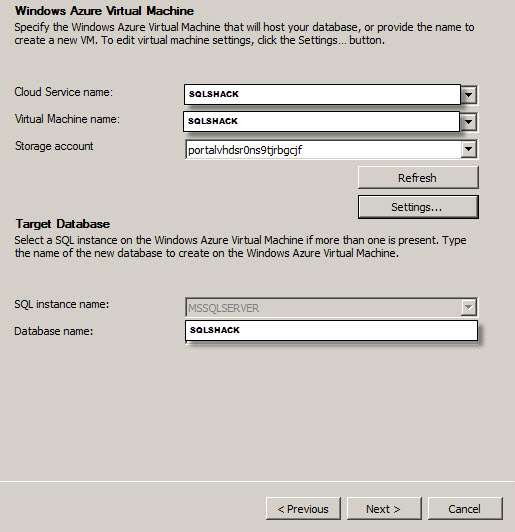
Figure 23. The subscription ID.Specify the Cloud Service name, Virtual Machine name and Storage Account and then press Settings.
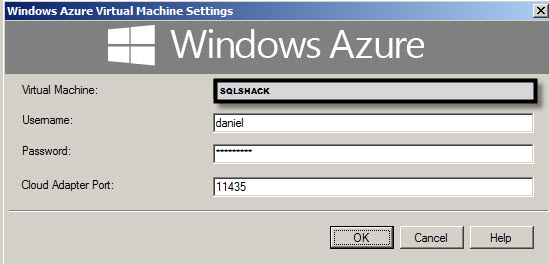
Figure 24. The subscription ID.Specify the Virtual Machine, your credentials and the Cloud Adapter port. Verify in the requirements the port used. By default, it is the port 11435.
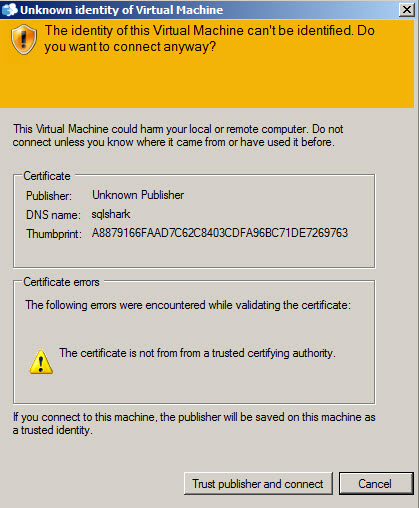
Figure 25. Cloud Adapter information.You will receive a message about the certificate. If you agree, press Trust Publisher and connect.
Figure 26. The Trust message.Finally you will have your information like this:
Figure 27. The Azure VM information and the Local SQL Server informationIf everything is OK, the summary window will be displayed.
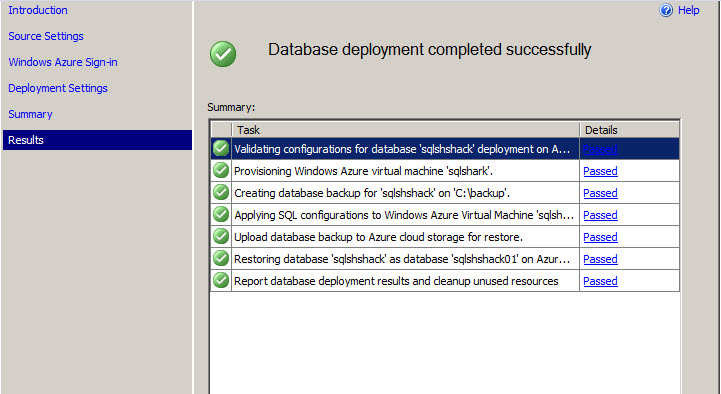
Figure 28. Summary WindowFinally, you will receive the results windows that will be green if everything is OK.
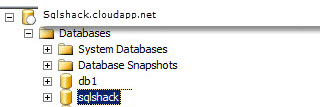
Figure 29. The Results wizard.To verify that the database was copied successfully, go to the virtual machine and verify that the database was copied successfully.
- PostgreSQL tutorial to create a user - November 12, 2023
- PostgreSQL Tutorial for beginners - April 6, 2023
- PSQL stored procedures overview and examples - February 14, 2023
Getting Started
How to deploy your database using the Deploy Database to Windows Azure VM
Now we will export our local database to the Azure Vm.
Conclusion
In this tutorial, we’ve learned how to connect to an Azure virtual machine with SQL Server using our local SQL Server. We also learned how to export a local database to a SQL Server Azure VM.
Daniel Calbimonte is a Microsoft Most Valuable Professional, Microsoft Certified Trainer and Microsoft Certified IT Professional for SQL Server. He is an accomplished SSIS author, teacher at IT Academies and has over 13 years of experience working with different databases.
He has worked for the government, oil companies, web sites, magazines and universities around the world. Daniel also regularly speaks at SQL Servers conferences and blogs. He writes SQL Server training materials for certification exams.
He also helps with translating SQLShack articles to Spanish
View all posts by Daniel CalbimonteLatest posts by Daniel Calbimonte (see all)