
Introduction
The first time that you create your VM in Azure manually using the UI is a very pleasant experience. However, when you have hundred and sometimes thousands of computers it is extremely exhausting and boring to create and configure it.
With PowerShell, it is possible to automate several administrative tasks and create scripts to automatically create VMs, enable ports, download and create remote desktop files, administer services, etc.
In this new chapter, we will show how to create a Virtual Machine in Azure with SQL Server installed using PowerShell.
Requirements
- An Azure subscription.
- A local machine with Windows installed.
- The PowerShell installed (check my first article about PowerShell, step 1 to 5 for more information about the installation).
- Connect to Azure from PowerShell by creating and importing a PublishSettings file (see my article about PowerShell and Azure step 8 to 13 for more information).
Getting started
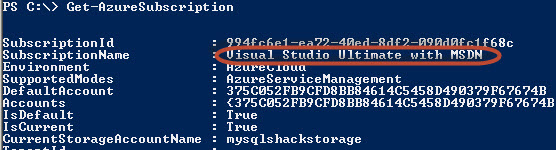
The first thing that you need to know is your subscription information. You can use the following command to get your subscription information:
Get-AzureSubscription
The command will provide all the Subscription information:

Figure 1. Subscription informationThe information that we need is the SubscriptionName. You could also use the following command to get just the required information:
Get-AzureSubscription | select SubscriptionName
- Once you have the SubscriptionName, store the information in a variable:
$SubscriptionName= ‘Visual Studio Ultimate with MSDN’
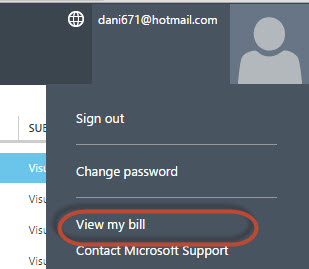
In the Azure Portal you can find the same information just to compare by clicking in the user name> View my bill. This step is just to verify and compare PowerShell with the portal.
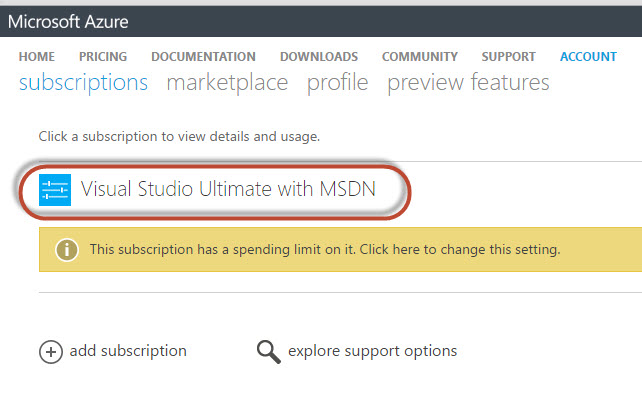
Figure 2. Billing informationIn the subscriptions, you will find the subscription name.
Figure 3. The type of subscriptionWe also need the storageaccount. The storage is used to store information like backups, files and in this case the Virtual Machine information.
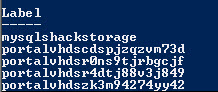
We can get the list of StorageAccounts with the following command:
Get-AzureStorageAccount | select label
The information displayed is the following:
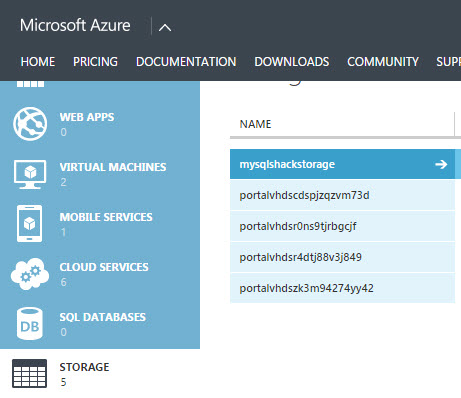
Figure 4. The Azure Storage AccountsYou can store the storageAccount information with this command:
$storageaccount=’mysqlshackstorage’
You can compare this information with the Storage section in the Azure Portal.
Figure 5. The storage list in the Azure PortalYou can also check the currentStorageAccount using the command of the step 1.
Figure 6. The current Storage Account NameSomething important is the Location and Geo-Location. You can find this information using the following commands:
Get-AzureStorageAccount | select
label,location,geoprimarylocationThe location is used to locate your service near you. That may improve the speed of your Services in Azure.
Figure 7. The storage, locaton and primary location.In this example the location will be West US.
If you do not have an storage account you can create one with the following commands:
$dclocation=’West US’
$storageaccount=’sqlshackstorage‘
New-AzureStorageAccount -StorageAccountName $storageaccount -Location $dclocation
The $dclocation variable will store the location. You can check the storage created following the step 10.
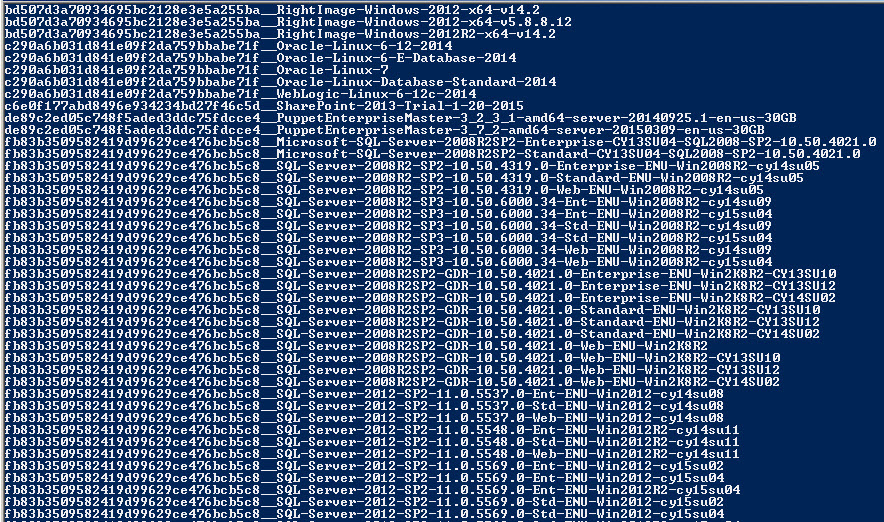
Another step is the image used to create the virtual machine. The following command will provide the images related to SQL Server:
Get-AzureVMImage | select ImageName
The command will show all the Azure images including Servers with Linux, Oracle, SharePoint, SQL Server, etc. The images are used to easily create virtual machines with software installed instead of installing from zero.
Figure 8. The list of virtual Images.In this example, we will use a SQL Server 14 RTM Web Edition:
$image=’fb83b3509582419d99629ce476bcb5c8__SQL-Server-2014-RTM-12.0.2361.0-Web-ENU-Win2012R2-cy14su05′
- Now set the Azure Subscription
Set-AzureSubscription -SubscriptionName $SubscriptionName -CurrentStorageAccount $storageaccount
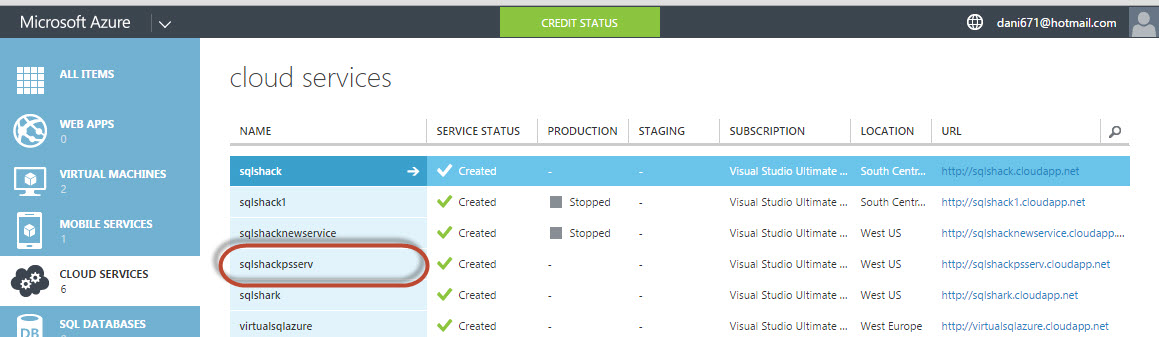
You will also need a CloudService name. First, let’s add a service name in a variable:
$cloudServiceName = ‘sqlshackpsserv‘
- You can create a new Azure service with the following commands:
New-AzureService -ServiceName $cloudServiceName -Label "my service" -Location $dclocation
You can verify the cloud service created in the portal.
Figure 9. The list of cloud servicesWe will also need the Administrator username and password to login the Virtual Azure machine.
$UserName = ‘Daniel‘
$Password = ‘Security12!@‘You will also need a Virtual Machine name:
$virtual_name = ‘VMSqlShack‘
Now, create a Virtual Machine with a User and Password using the cloudServiceName:
New-AzureVMConfig -Name $virtual_name –InstanceSize Large –ImageName $image | Add-AzureProvisioningConfig -Windows -Password $Password –AdminUsername $UserName | New-AzureVM –ServiceName $cloudServiceName
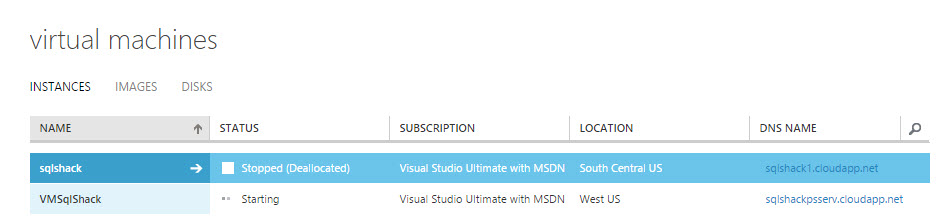
If everything is correct, you will be able to see the the Virtual Machine created in the Azure Portal:
Figure 10. The virtual machine createdIt may take some minutes for the virtual machine to start.
You can get the virtual machine information using the following command:
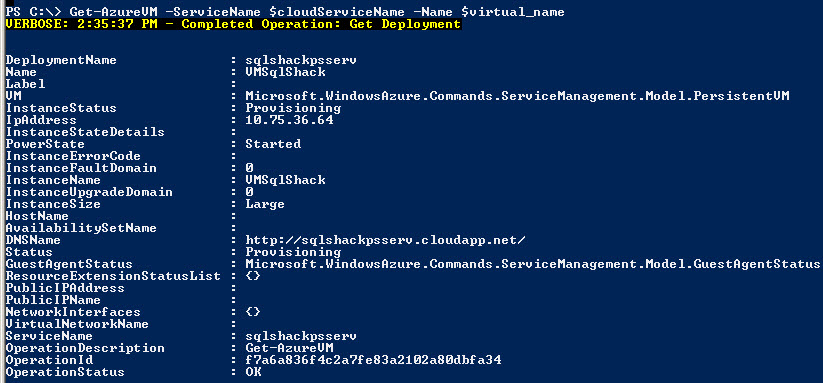
Get–AzureVM –ServiceName $cloudServiceName –Name $virtual_name
The information displayed by the Get-AzureVM will be similar to this picture:
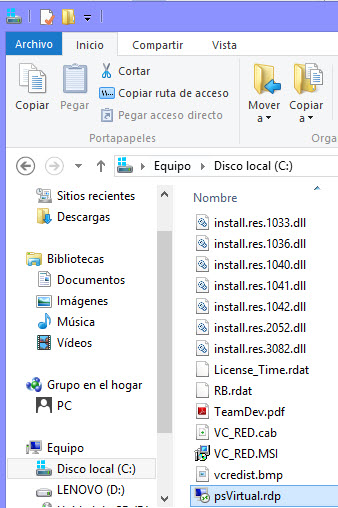
Figure 11. The VM information- You can create a remote desktop file using the following command:
Get-AzureRemoteDesktopFile –ServiceName $cloudServiceName -Name $virtual_name –LocalPath "c:\myvm\psVirtual.rdp"
You can now connect to your machine by double clicking on the rdp file.
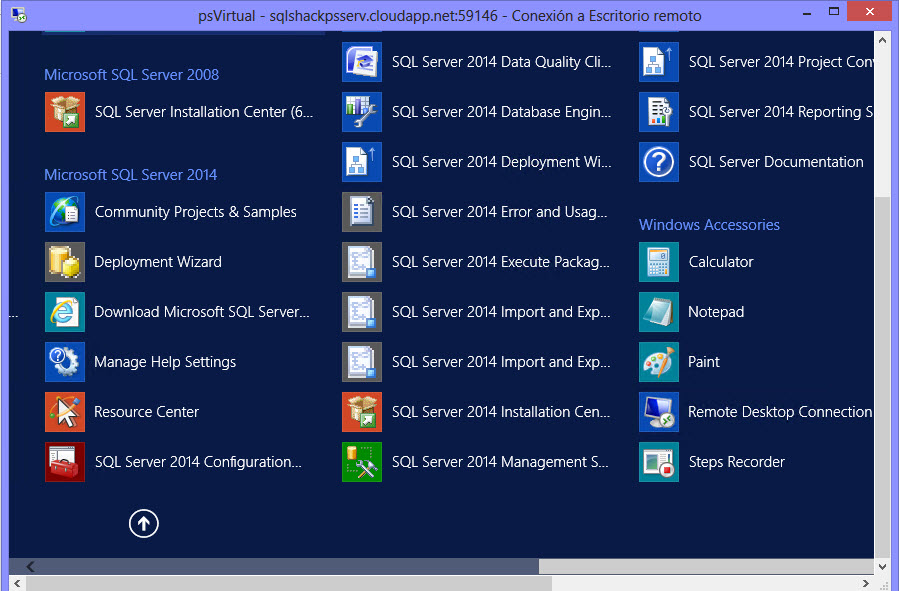
File 12. The rpd fileNow you can connect to your machine with the credentials provided on step 20.
Figure 13. The virtual machine with SQL Server createdFinally, if the machine is for testing purposes, you can stop the Virtual machine using this command (strongly recommended because Azure charges per minute of started machine):
Stop-AzureVM –ServiceName $cloudServiceName –Name $virtual_name


Some typical errors
When you run this command:
New-AzureVMConfig -Name $virtual_name –InstanceSize Large –ImageName $image | Add-AzureProvisioningConfig -Windows -Password $Password –AdminUsername $UserName | New-AzureVM –ServiceName $cloudServiceName
A typical error is this one:
Add-AzureProvisioningConfig : A parameter cannot be found that matches parameter name ‘MediaLocation’.
When I had this error I just changed the virtual images (in step 14) to a different SQL Server image because the one used expired.
When I run this command:
New-AzureService -ServiceName $cloudSvcName -Label "MyLabel" -Location "DC-LOCATION"
I received the following output:
VERBOSE: 9:12:48 AM – Begin Operation: New-AzureService
New-AzureService : ConflictError: The specified DNS name is already taken.
At line:1 char:1
+ New-AzureService -ServiceName $cloudSvcName -Label "MyLabel" -Location $dclocati …
+ CategoryInfo : CloseError: (:) [New-AzureService], CloudException
+ FullyQualifiedErrorId : Microsoft.WindowsAzure.Commands.ServiceManagement.HostedServices.NewAzureServiceCommand
The solution is just to try to assign a diferent service name.
Conclusion
In this chapter, we learned how to create a virtual machine using PowerShell. First, you need to verify the subscription information, use an existing StorageAccount or create a StorageAccount and set Azure Subscriptions.
You have to create an Azure Service.
With that information, you can create a Virtual Machine assigning a user name and password.
The last part is to create an rdp file to connect remotely to the virtual machine.

He has worked for the government, oil companies, web sites, magazines and universities around the world. Daniel also regularly speaks at SQL Servers conferences and blogs. He writes SQL Server training materials for certification exams.
He also helps with translating SQLShack articles to Spanish
View all posts by Daniel Calbimonte
- PostgreSQL tutorial to create a user - November 12, 2023
- PostgreSQL Tutorial for beginners - April 6, 2023
- PSQL stored procedures overview and examples - February 14, 2023