Introduction
In my last chapter, How to migrate your database to an Azure Virtual Machine I showed you the steps to connect to a SQL Server in an Azure VM by using SQL Server Management Studio (SSMS). In this new chapter, we will show you how to work with SQL Server Integration Services (SSIS) to export a local table and its data to an Azure Virtual Machine (VM) with SQL Server installed.
These days, SSIS is a very important tool to automate tasks and create projects to import data from different data sources like Oracle, MySQL, and in this case MS Azure. With SSIS you can create friendly tasks visually, without programming knowledge, and create fast tasks to import and export data in parallel tasks (if necessary) with friendly tools.
This example is a step by step tutorial which does not require previous knowledge in SSIS, but requires previous knowledge from Azure from my Azure articles.
Requirements
You should be able to connect to the SQL Server in the Azure VM using your local SSMS. In order to enable the SSMS, read my article with the title How to connect to Azure from your local machine.
- You need an Azure VM with SQL Server installed and with a database.
- The SQL Server Data Tools (SSDT) for Business Intelligence installed in your local machine.
- A local SQL Server Database with a table to export (in this example a database name is SSIS and the table t1 and some data inside it).
- A database in the Azure VM machine where we will export the table (in this example the VM database name is also SSIS).
Getting Started
First of all, we will create a SSIS project. In the SSDT, go to File>New project.

Figure 1. The File ProjectCreate an Integration Services Project. Go to Business Intelligence and select Integration Services Project.
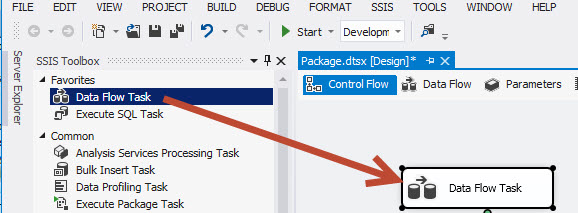
Figure 2. Integration Services Project.Drag and drop the Data Flow Task to the design pane and double click on the Data Flow Task. This task is used to export the data.
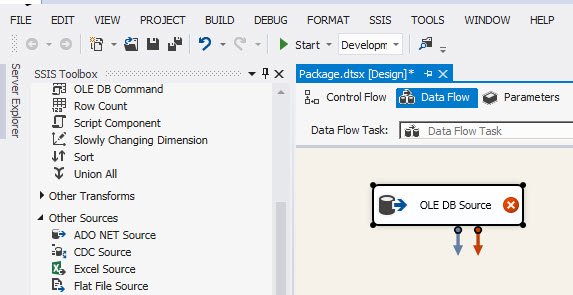
Figure 3. The Data Flow TaskIn the Data Flow Tag, drag and drop the OLE DB Source Task. This task will be used to create a connection to a local SQL Server.
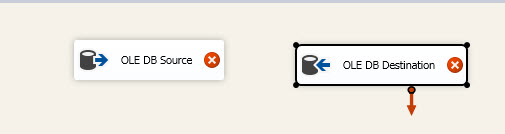
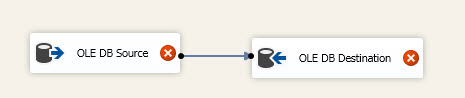
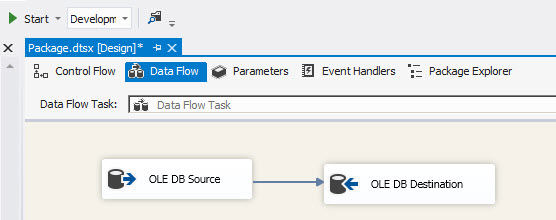
Figure 4. The OLE DB SourceDrag and drop the OLE DB destination task. This task will be used to create a connection to SQL Azure.
Figure 5. The OLE DB Source and OLE DB DestinationNow connect both tasks and double click on the OLE DB Source.
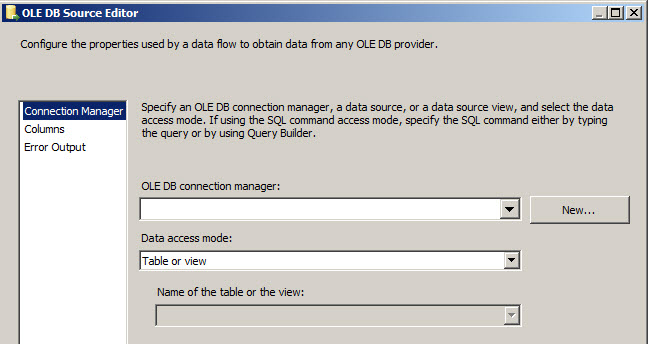
Figure 6. Connecting tasksThe OLE DB Source Editor window will be displayed. Press the New button.
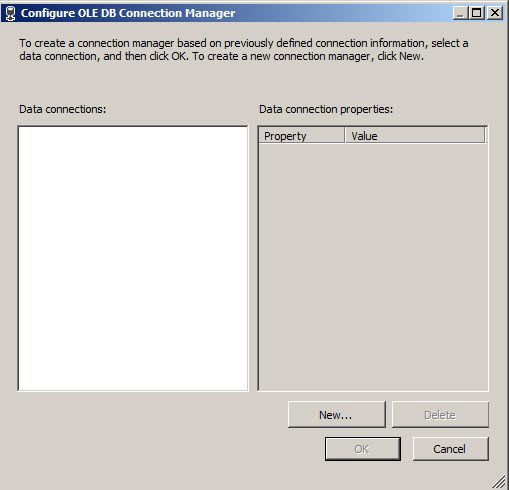
Figure 7. OLE DB Source EditorOn the Configure OLE DB Connection Manager, press the New button to create a new connection.
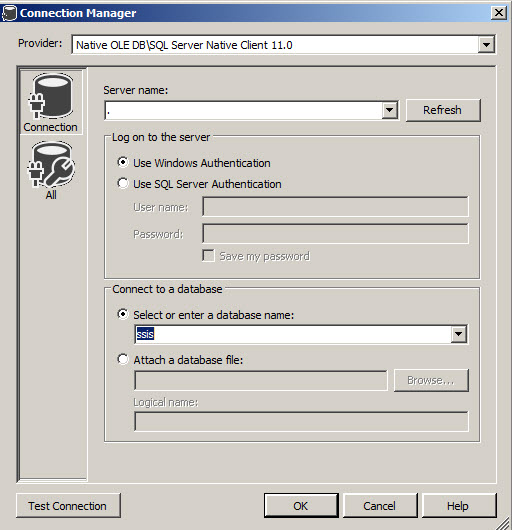
Figure 8. Configure OLE DB ConnectionAdd the Server name of the local machine and the database with the table that you want to export to Azure and press OK. In this example, the database name is ssis
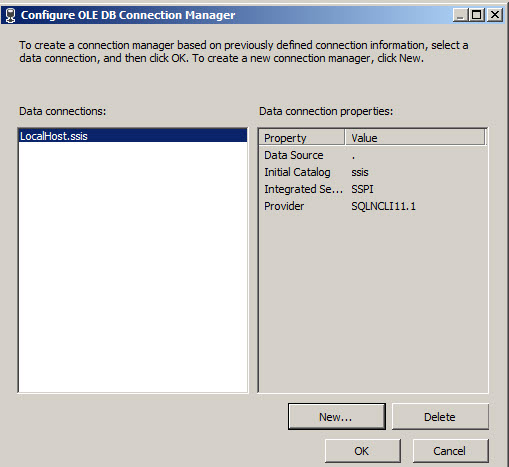
Figure 9. Connection Manager.On the Configure OLE DB connection manager, press OK.
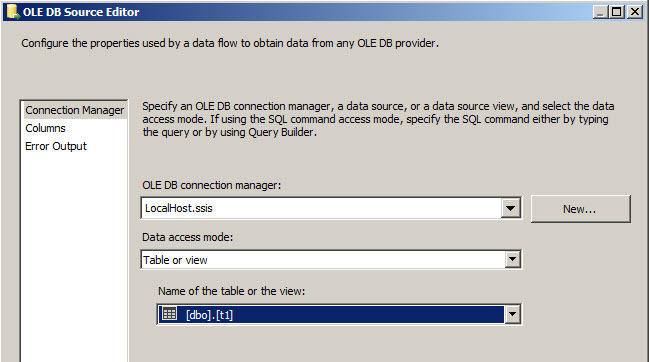
Figure 10. Connection created.On the OLE DB Source Editor Window, in the Data Access mode, select the Table or view option. On the name of the table or the view, select the local table that you want to export (in this case, t1).
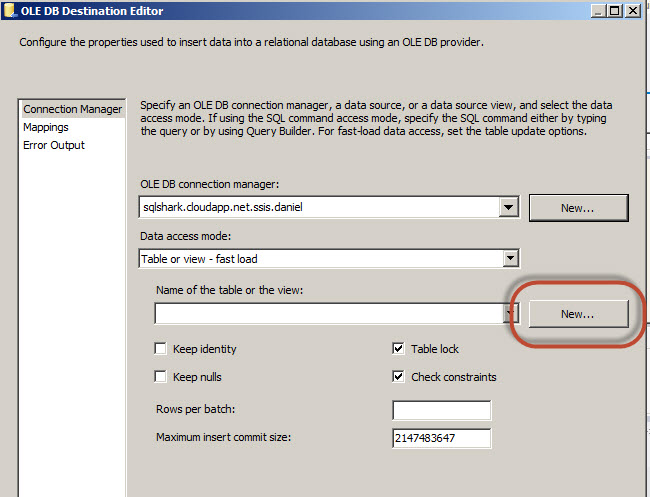
Figure 11. The table t1.Double click on the OLE DB Destination. Press the New button to create a new OLE DB connection. By default, the Data Access mode is Table or view – fast load which is the fastest option to load data.
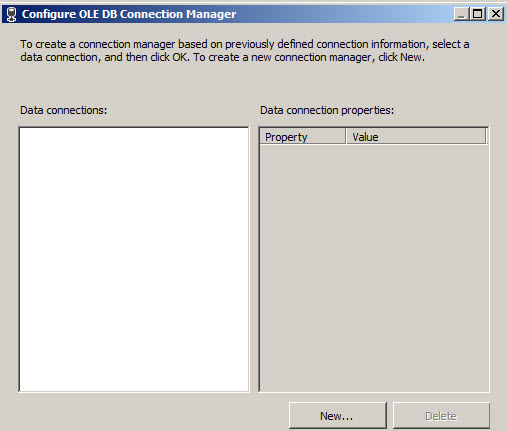
Figure 12. The OLE DB Destination EditorOn the Configure OLE DB Connection Manager, press the New button.
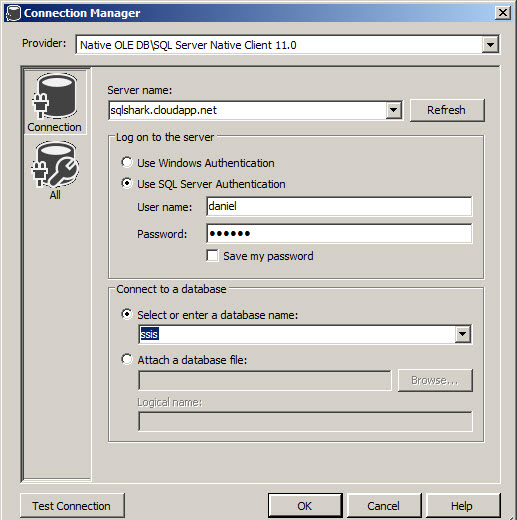
Figure 13. Creating the Azure connectionKeep the Native OLE DB\SQL Server Native Client. In the Server name text box, write the complete Azure VM name. Specify your credentials. In this example, it is the SQL Server credentials created and used in the previous article. Finally, select the Azure destination database.
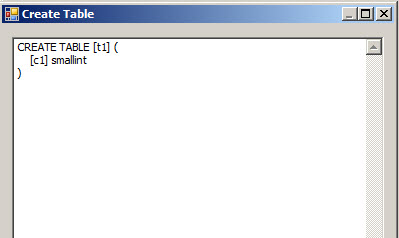
Figure 14. The SQL Azure credentials usedPress the new button to create a new destination table to receive the data exported from the local machine.
Figure 15. Creating a new table in azureModify the table name. In this example, we will create a table named t1 in the azure machine.
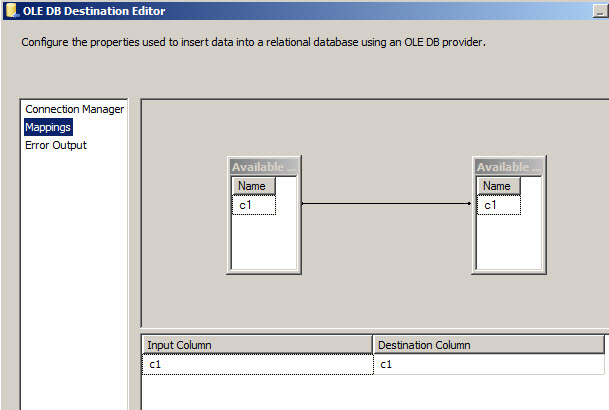
Figure 16. Creating the T-SQL for the Azure tablePress the Mappings page. By default, if the name of the source and destination column are the same, the mapping will be automatically.
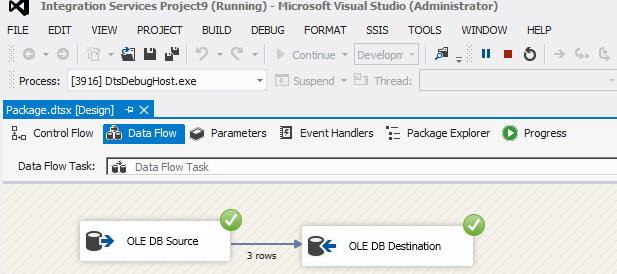
Figure 17. Mapping the columnsPress the Start button to initiate the package and export the data from the local table to Azure.
Figure 18. Starting the packageIf everything is OK, the task will be marked with green icons and the number of rows exported will be displayed.
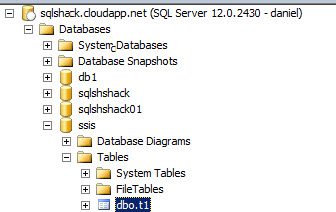
Figure 19. The package executedNow in the SSMS, verify that the table and the data was created. In this example, we created a table t1 in the ssis database in the Azure Server.
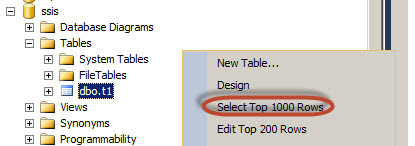
Figure 20. The table exported to Azure.Check the rows imported in the table using a select sentence.
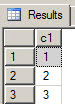
Figure 21. Select rowsNow you can see the data imported from the local source table to the SQL Azure. As you can see, all the data is OK
Figure 22. The data exported.Conclusion
In this article, we show how to export a table and its data to an Azure Virtual Machine with SQL Server. As you can see, once you can connect to the Azure VM, the rest is a straightforward process. There is almost no difference between a SQL Server on a local network than a machine in Microsoft Azure.
Daniel Calbimonte is a Microsoft Most Valuable Professional, Microsoft Certified Trainer and Microsoft Certified IT Professional for SQL Server. He is an accomplished SSIS author, teacher at IT Academies and has over 13 years of experience working with different databases.
He has worked for the government, oil companies, web sites, magazines and universities around the world. Daniel also regularly speaks at SQL Servers conferences and blogs. He writes SQL Server training materials for certification exams.
He also helps with translating SQLShack articles to Spanish
View all posts by Daniel CalbimonteLatest posts by Daniel Calbimonte (see all)- PostgreSQL tutorial to create a user - November 12, 2023
- PostgreSQL Tutorial for beginners - April 6, 2023
- PSQL stored procedures overview and examples - February 14, 2023