

Introduction
Cloud Shell is a new feature just released on May 2017. It is currently in beta.
The idea behind the Cloud Shell is to run Azure commands using the Azure Portal directly. In the past, it was necessary to install the Azure CLI on a local machine. You could install on a Windows, Linux or a Mac machine or you could use Docker. Now, you can use the Azure Portal.
In this article, we are going to create an Azure SQL Server and an Azure SQL Database inside the server using the Cloud Shell. Specifically, we are going to use bash in Azure.
Requirements
Get started
To start, in the Azure Portal, you will be able to see the new icon >_. This icon will be used to enter to the Cloud Shell:

You will receive a message to create a storage to persist your $Home directory:
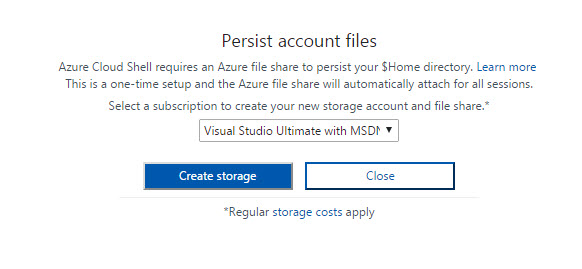
When you select the option, the storage account will be created. Also, a resource group and a File Share are created.
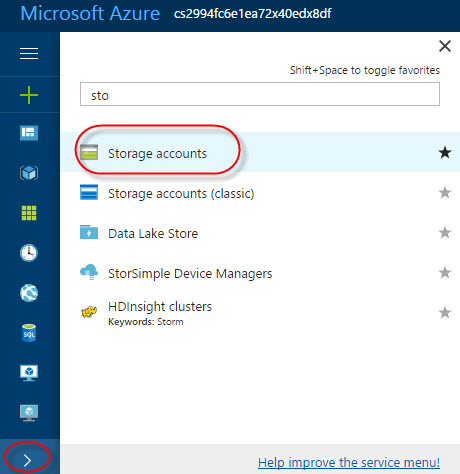
To verify, in the Azure Portal, press the > icon and select Storage accounts:
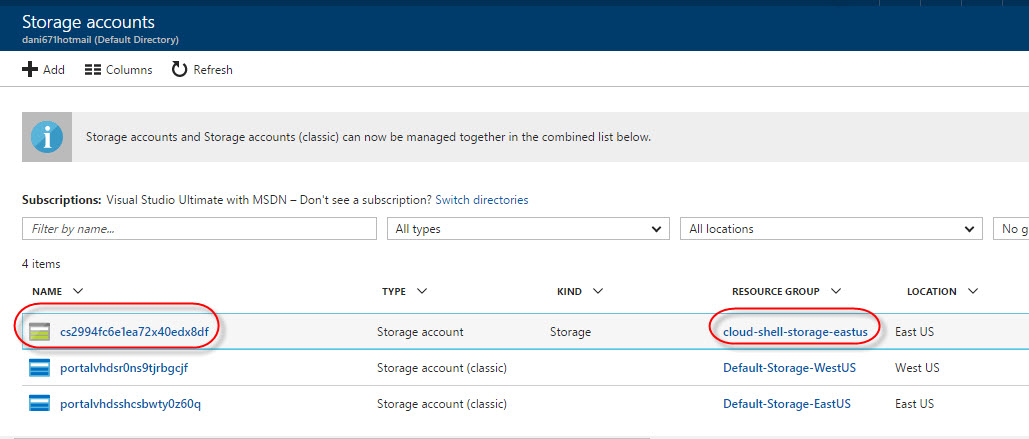
When we created a storage account a resource group named cloud-shell-storage-eastus was created and a storage named cs2994fc6e1ea72x40edx8df:
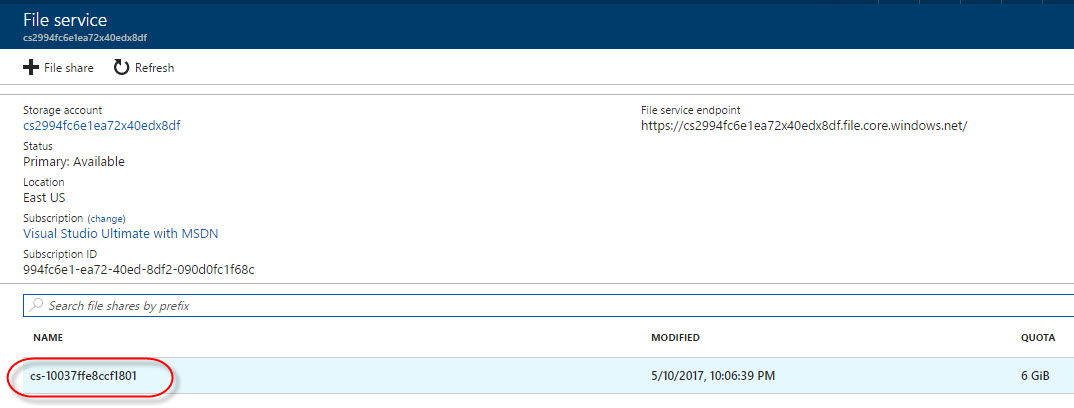
Inside the storage account, we created a File share. To verify it, click on the storage and go to Files:

You will see a File service created. In our example, the File service name is cs-10037ffe8ccf1801 of 6 GiB. Click on it:
If you press Connect you can create a file share to Windows. This is very useful to copy files from your local Windows machine to Azure or vice versa:

In the command line (cmd), copy the command, but assign a drive letter like this:
net use z: \\cs2994fc6e1ea72x40edx8df.file.core.windows.net\cs-10037ffe8ccf1801 /u:AZURE\cs2994fc6e1ea72x40e
On your local machine, you will see that the new drive was created. You can copy and paste files there:

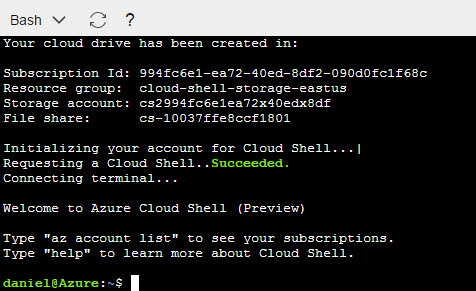
Return to the Cloud Shell that was activated in Figure 1. You will connect to Bash.
Bash is a popular shell in Unix and Linux and now you can use it on Azure. If you are a Windows User, we can say that it is more powerful than the cmd and similar to PowerShell:
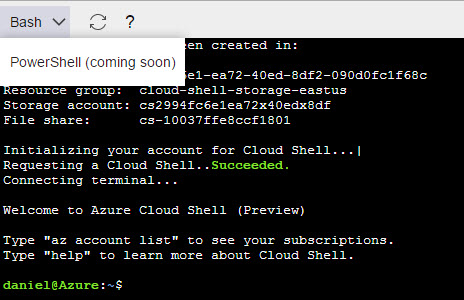
As you can see, PowerShell is not supported yet in the Cloud Shell yet, but it will be supported soon:
The first command that we will try is the help. It will show you soome links to a Microsoft web site with basic information about Cloud Shell:

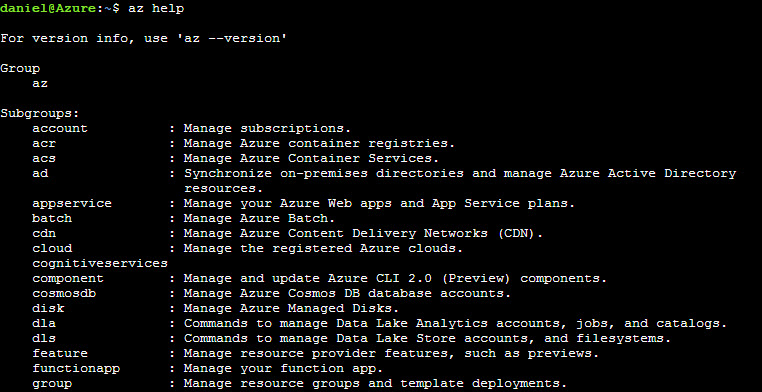
Az help is another command that will list the different commands in bash for Azure:
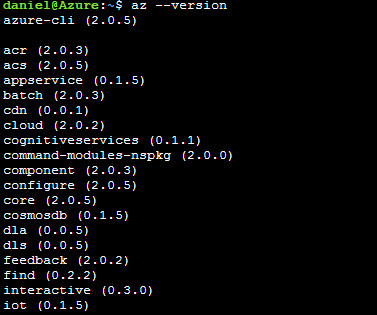
The command az –version, displays the version of the different Azure Cli components:
Creating an Azure SQL Database
To create an Azure SQL Database, it is necessary to create:
- An Azure Group
- An Azure SQL Server
First, we are going to create an Azure group named mysqlshackgroup. The parameter –l is used to specify the location (like eastus, northeurope, eastasia and more) and –n is used to specify the name:
Az group create –l southcentralus –n mysqlshackgroup
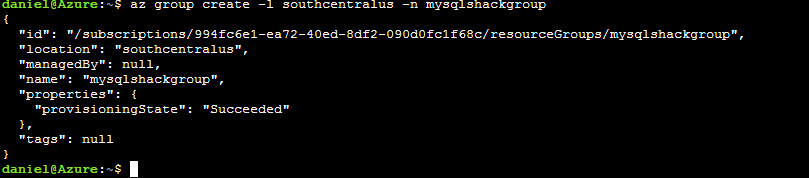
Note that the results are displayed in JSON format.
In the next example, we are going to create a server named shackserver it will be created in the group mysqlshackgroup just created above. The parameter –s is to specify the server name, -u is to specify the user name (in this example the user name is admin) and the password uses the parameter –p.
The location is southcentralus and it uses the –l parameter:

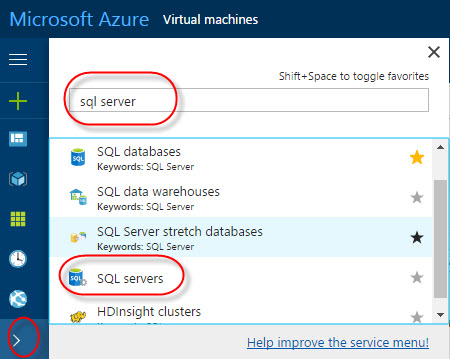
To verify in the Portal, you can click on the > icon and in the search text box write sql server and click on the SQL servers icon:
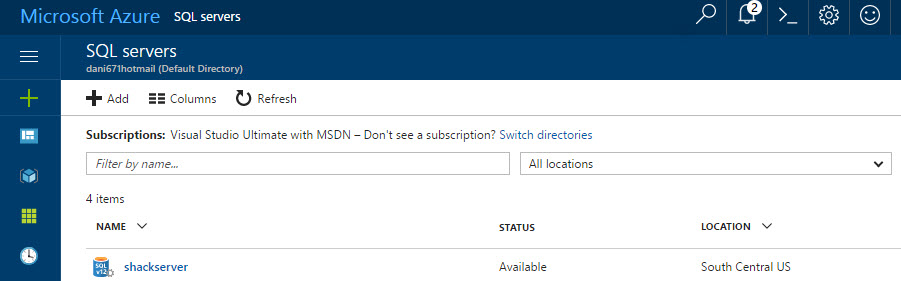
You will be able to see the database created:
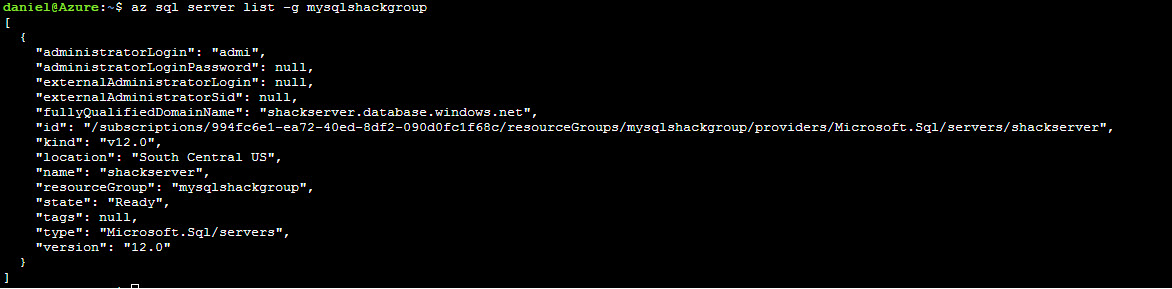
To verify that the Azure SQL Server was create you can use the az sql server list command.
You only need to specify the Azure Resource Group and it will show all the SQL Servers in the group:
az sql server list –g mysqlshackgroup
Note that the session can be idle for 10 minutes after that it is disconnected and you need to reconnect the console by pressing Enter:

To create the database, you need to specify the name of the database (in this example newsqlshackdb), the Azure server name (shackserver) and the Azure Resource group (mysqlshackgroup):
az sql create –n newsqlshackdb –s shackserver –g mysqlshackgroup
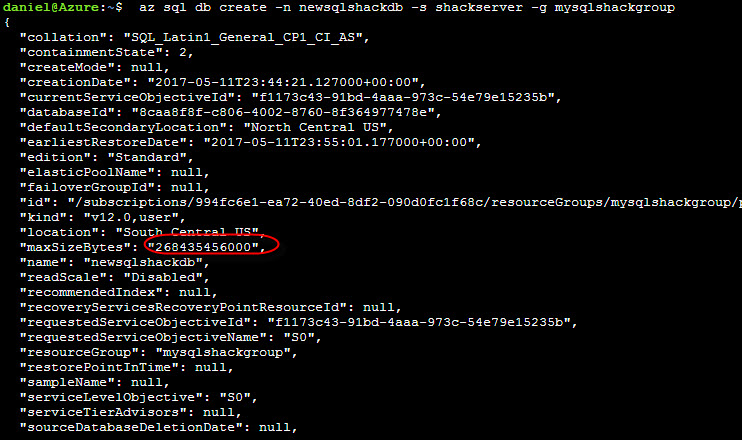
If you check the maxSizeBytes parameter, it has 268435456000 bytes (250 Gb), you can verify that the Database was created in the portal if you click on the SQL icon:

The minimum size allowed is 100 MB. To reduce the size, you can update the Azure SQL Properties. The following commands will change the maximum database size to 100 MB:
az sql db update -n newsqlshackdb -s shackserver -g mysqlshackgroup –max-size 100MB
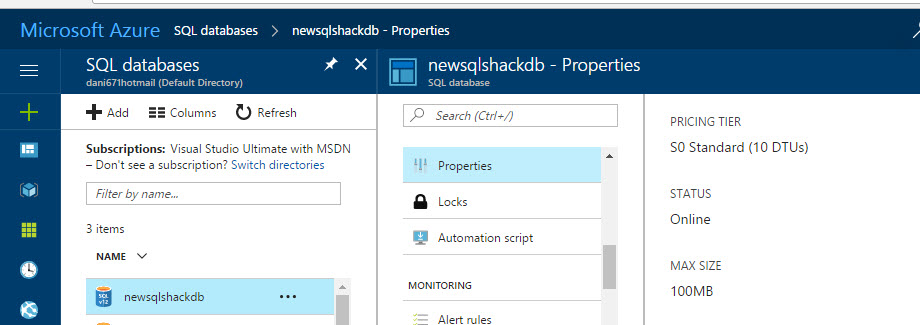
In the Azure Portal, you can go to databases and check the MAX SIZE in the properties section. As you can see, it was successfully changed to 100 MB:
You can verify the database properties of the databases in the group mysqlshackgroup by using the az sql db list:
az sql db list -s shackserver -g mysqlshackgroup
There are two databases, the master database, which is a system database not visible in the Portal UI and the new sqlshackdb.

The property maxSizeBytes shows the maximum size of the database in bytes. The Maximum Size is 100 MB:

Conclusions
Cloud Shell is a new feature that helps to run the command line without installing new software in the local machine. It is very useful and it creates a Storage Account with a file share that allows to copy and paste local files from and to Azure easily. At the moment, Bash is available, but soon we will be able to run PowerShell in the Cloud directly and automate the tasks easily.
Other articles in this series:
- How to migrate MySQL tables to Microsoft Azure SQL database
- How to copy an Azure SQL database using the Azure Portal, Cloud Shell and T-SQL
- Working with Azure Active Directory and Azure SQL Database
- How to automate Azure Active Directory (AAD) tasks using the Cloud Shell

He has worked for the government, oil companies, web sites, magazines and universities around the world. Daniel also regularly speaks at SQL Servers conferences and blogs. He writes SQL Server training materials for certification exams.
He also helps with translating SQLShack articles to Spanish
View all posts by Daniel Calbimonte
- PostgreSQL tutorial to create a user - November 12, 2023
- PostgreSQL Tutorial for beginners - April 6, 2023
- PSQL stored procedures overview and examples - February 14, 2023