
In the previous blog post : Deployment to several databases using SQL Server Data Tools and Team foundation Server I illustrated how it is possible to use TFS and a batch file to deploy a database to several SQL Server instances or to deploy several SQL Server databases to several instances. The main way to achieve that in the previous post was using a batch file. For more information about this technique please have a look at that blog post.
In this post on the other hand I will demonstrate how the same functionality can be achieved using a Windows Workflow Foundation file (xaml) deployment file and Team Foundation Server.
Using a Windows Workflow Foundation file
In Team Foundation build the processes are controlled by Windows Workflow Foundation files. In the same way that we could use a batch file to call SQLPackage.exe in various ways, we can use a Windows Workflow Foundation file to call SQLPackage.exe. This option is the most complex but also the most flexible.
Use this option when :
- You want to deploy a database to several SQL Server instances upon successful build
- You want to deploy several databases to one or several SQL Server instances upon successful build
The first step in this setup is to make a custom template and workflow project for the build definition.
Creating a custom template
Those few steps will let you create a custom template :
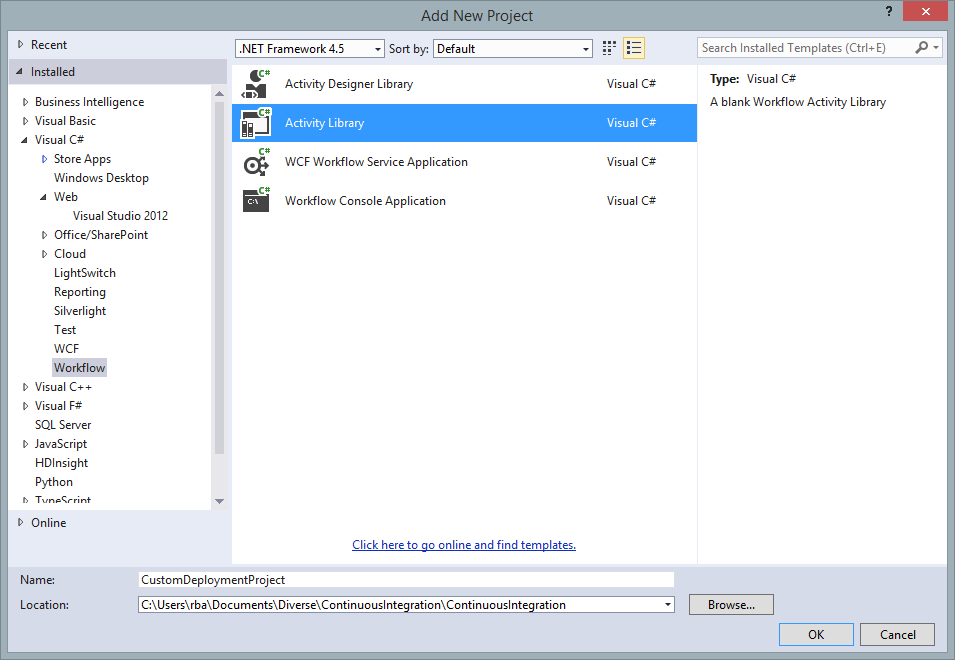
Create a workflow activity library project in your solution (you need to do that in the context of a project otherwise you might encounter problems when editing the template)

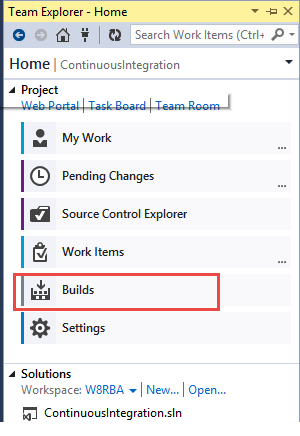
Go back to your Team Explorer pane and choose Build definitions
Create a new build definition or use an existing one.
Setup the build definition to Continuous Integration – Build each check-in
On the Source settings of the definition choose the project(s) that you want to build and deploy
On the build defaults pane pick the right controller and a shared folder to where the build output will be copied
- The next pane, the Process pane is where things are getting really exciting 😀

Modifying the Windows Workflow Foundation template file
In the Process pane under the Build Process Template click on Show Details and download the default.xaml file

This is the file, that we are going to customize, so save it somewhere where it can be found again and under a meaningful name!!
In the previously created Activity Library project delete the default xaml file created and add the new downloaded. This file shouldn’t be copied to the output directory.
Open the file to view the different workflow elements and add your own custom ones.
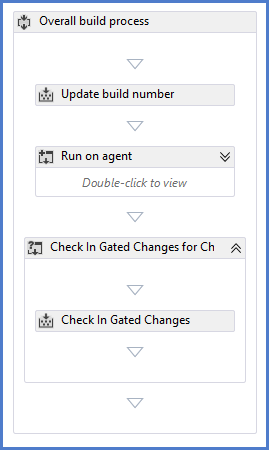
This the overall build template without any changes. It looks small but don’t be fooled once expanded they are many many steps that make the process a very complex workflow indeed.
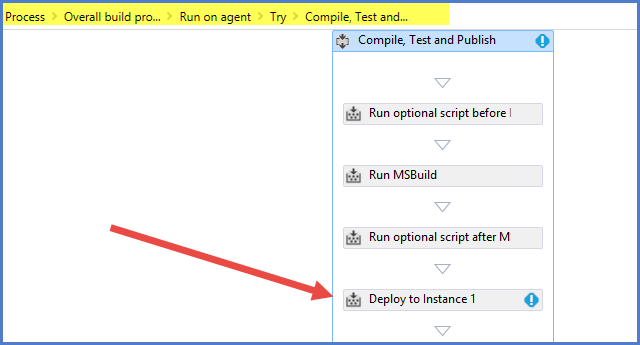
Under Run on agent go and find the Run optional Script after MSBuild block this is where you need to put your own custom functionality. The right path to the place in the template is:
Overall build process ➙ Run on Agent ➙ Try ➙ Compile, Test, and Publish. Right after the activity Run optional Script after MSBuild.
Right there :
Adding custom building blocks to the Workflow template
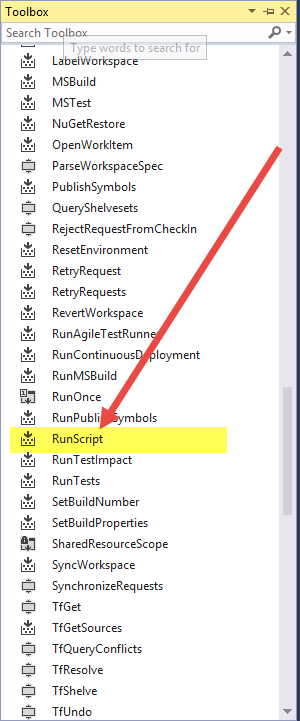
Once you’ve found the right place to hook in, expand the toolbox on your project. It will eventually need to load and you will see a myriad of different components ready to be added to your workflow template.
Find the Run Script activity in the toolbox. It is under Team Foundation Build Activities section of the toolbox
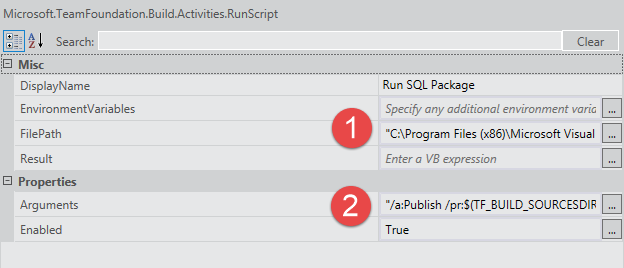
Add this activity right after the Run optional Script after MSBuild activity and give it a meaningful name in the Properties pane. The rest of the steps will take place in the Properties pane and is the same procedure than when using a Batch file (like described in my previous post). The first mandatory step in a RunScript activity is to specify what is the FilePath of the program to run. In this case we need to find SQLPackage.exe which usually resides there :
“C:\Program Files (x86)\Microsoft Visual Studio 12.0\Common7\IDE\Extensions\Microsoft\SQLDB\DAC\120\sqlpackage.exe”
Once you get the FilePath you need the arguments to ensure the deployment.
In my case I use :
“/a:Publish /pr:$(TF_BUILD_SOURCESDIRECTORY)\Projects\ContinuousIntegration\ContinuousIntegration\ContinuousIntegration.publish.xml /sf:$(TF_BUILD_BINARIESDIRECTORY)\ContinuousIntegration.dacpac”
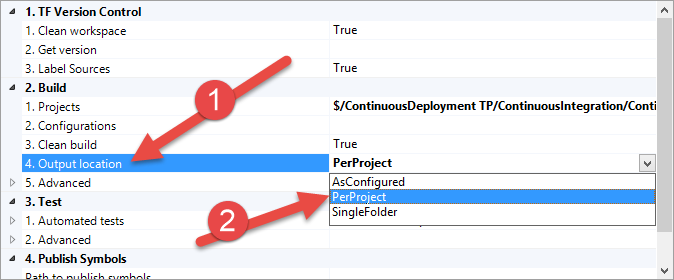
So the tricky part is to build those command lines. For doing that you have to consider several options and how you setup your project or projects Output Location. The options for the Output Location field are either PerProject or SingleProject in your custom build definition. I usually use a SingleProject option to avoid having this kind of problems.
If you have chosen PerProject your command line should look like that (on a single line):
“/a:Publish /pr:%TF_BUILD_BINARIESDIRECTORY%\<Project Name>\<Publish profile file>.publish.xml /sf:%TF_BUILD_BINARIESDIRECTORY%\<Project Name>\<DACPAC file name>.dacpac”
If you are using a SingleProject deployment then the command line will omit the project name:
“/a:Publish /pr:%TF_BUILD_BINARIESDIRECTORY%\<Publish profile file>.publish.xml /sf:%TF_BUILD_BINARIESDIRECTORY%\<DACPAC file name>.dacpac”
Option 2 : Without a Publish profile, you will need to specify the database details in the command line file:
“/a:Publish /tcs:””Data Source=<SQL Server>;Integrated Security=true;Initial Catalog=<Database Name>;Pooling=false”” /sf:%TF_BUILD_BINARIESDIRECTORY% \<DACPAC file name>.dacpac”
And the same command this time with a setting of PerProject :
“/a:Publish /tcs:””Data Source=<SQL Server>;Integrated Security=true;Initial Catalog=<Database Name>;Pooling=false”” /sf:%TF_BUILD_BINARIESDIRECTORY% \<Project Name>\<DACPAC file name>.dacpac”
For each database that you want to publish or each location you want to publish to repeat the steps above, starting at step 1 of “Adding custom building blocks to the Workflow template”
After that remember to check in your Build template and ensure that it is used in the Customized build template.
On the Process Pane of the Build Template click New out for the Build Process File and pick the Windows Workflow Foundation file that you’ve just build.
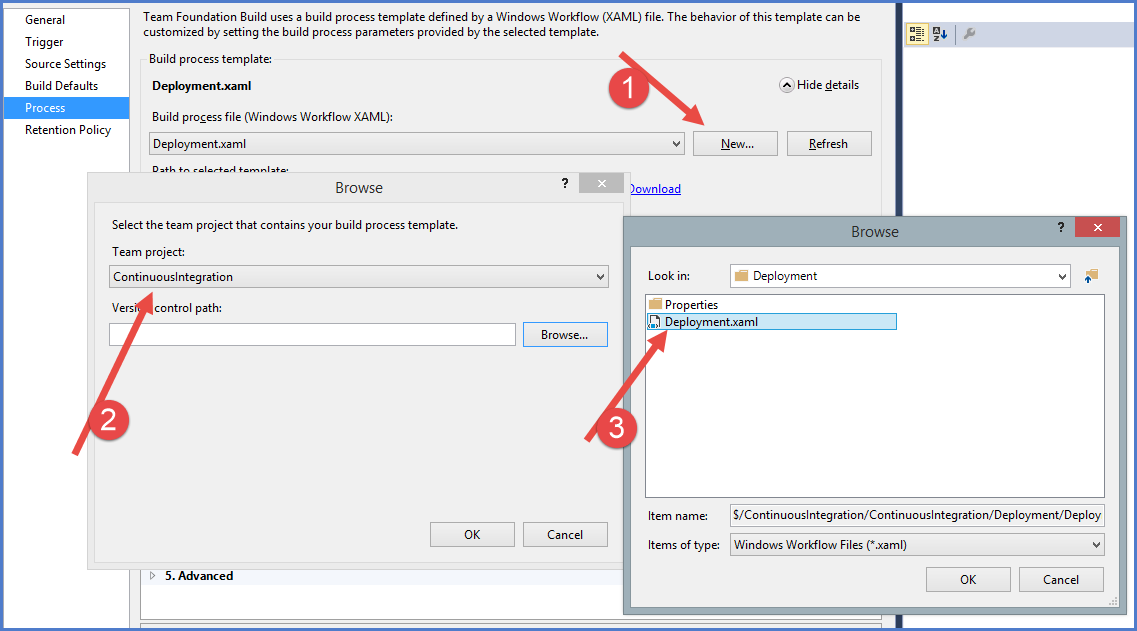
This should do the trick and upon if you use this customized Build Template upon your next checkin you should be able to deploy your database(s) to the specified instance(s).
In an upcoming post I will explain how to achieve this by using Visual Studio Online. They are a few minor differences and some breaking changes. More information about Visual Studio Online
Happy deploying !!

His background and work experience mixes technology and business, providing him a unique edge to contribute to datawarehouse and SharePoint projects, being able to effectively interact with technical and business decision makers.
Régis is a frequent speaker at SQL Server conferences and is a board member of the Danish SQL Server User Group and the founder of the SQL Saturday Denmark community event.
In april 2014 Régis received the MVP award for SQL Server for his involvment in the product and the community.
View all posts by Régis Baccaro
- Continuous Deployment using SQL Server Data Tools and Visual Studio Online - February 2, 2015
- Creating Azure automation to start Azure VMs - February 2, 2015
- Deployment to several databases using SQL Server Data Tools and TFS using a Custom Workflow file - January 16, 2015