
In the previous post : Continuous Integration with SSDT and TFS I have described some techniques to allow continuous integration / deployment using SQL Server Data Tools and Team Foundation Server. The solution described works great for deploying to a single instance of a database.
If you remember, I showed that you can adapt the Build template in Team Foundation Server to deploy automatically after every successful build and check-in.
But sometimes it is not enough. There might be some cases where you might have several databases in your project that you want to deploy at the same time. Or may be you are interested in deploying the same databases to several servers. Or may be a combination of both. In this conditions you need to be able to specify several databases you wish to deploy to.
So when you want this can be achieved in two ways: by using a batch file, or by using a Windows Workflow Foundation file. This blog post is a description of the first one of the way to do it.
Using A Batch File
With SQL Server Data Tools follows a command line utility called SQLPackage.exe. This utility can be called from the PostBuild line argument in the same way than you were able to specify arguments for msbuild in my previous blog post. The problem is that the PostBuild argument gives only the possibility to call sqlpackage.exe once, not twice or multiple times. In these cases you will need a batch file. If it is an option for you, please follow these simple steps:
Verify that SQLPackage is available on your build server. By default the latest version of SQL Server Data Tools installs SQLPackage in this location :
C:\Program Files (x86)\Microsoft Visual Studio 12.0\Common7\IDE\Extensions\Microsoft\SQLDB\DAC\120
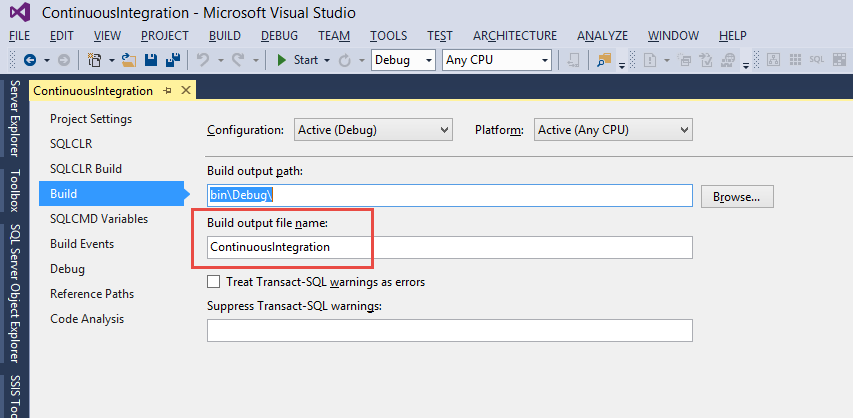
Identify the dacpac files that are produced by the build of your project. Usually they have the same name than your project and are created in the bin folder of the project. To find the file name, right click you project and choose Properties and on the Build tab take a look at the Build Output File Name, this is the file you need
Now you need to create the command line for sqlpackage. The easiest way to do it is to use notepad, but every other editor will do it. There are two options there. Either you have a custom publish.xml file (like described in my previous post) or you don’t and in this case you need to specify the details in the command line call.
Option 1 : With a publish.xml file. There again is 2 options depending on how you have configured the Output Location field to be PerProject or SingleProject in your custom build definition. I usually use a SingleProject option to avoid having this kind of problems.
If you have chosen PerProject your command line should look like that (on a single line):
“C:\Program Files (x86)\Microsoft Visual Studio 12.0\Common7\IDE\Extensions\Microsoft\SQLDB\DAC\120\SqlPackage.exe” /a:Publish /pr:%TF_BUILD_BINARIESDIRECTORY%\<Project Name>\<Publish profile file>.publish.xml /sf:%TF_BUILD_BINARIESDIRECTORY%\<Project Name>\<DACPAC file name>.dacpac
If you are using a SingleProject deployment then the command line will omit the project name:
“C:\Program Files (x86)\Microsoft Visual Studio 12.0\Common7\IDE\Extensions\Microsoft\SQLDB\DAC\120\SqlPackage.exe” /a:Publish /pr:%TF_BUILD_BINARIESDIRECTORY%\<Publish profile file.publish.xml> /sf:%TF_BUILD_BINARIESDIRECTORY%\<DACPAC file name>.dacpac
Option 2 : Without a Publish profile, you will need to specify the database details in the command line file:
“C:\Program Files (x86)\Microsoft Visual Studio 12.0\Common7\IDE\Extensions\Microsoft\SQLDB\DAC\120\SqlPackage.exe” /a:Publish /tcs:”Data Source=<SQL Server<;Integrated Security=true;Initial Catalog=<Database Name>;Pooling=false” /sf:%TF_BUILD_BINARIESDIRECTORY% \<DACPAC file name<.dacpac
And the same command this time with a setting of PerProject:
“C:\Program Files (x86)\Microsoft Visual Studio 12.0\Common7\IDE\Extensions\Microsoft\SQLDB\DAC\120\SqlPackage.exe” /a:Publish /tcs:”Data Source=<SQL Server>;Integrated Security=true;Initial Catalog=<Database Name>;Pooling=false” /sf:%TF_BUILD_BINARIESDIRECTORY% \<Project Name>\<DACPAC file name>.dacpac
Another option that SQLPackage offers is the ability to generate a script instead of executing the deployment, in this case you will be able to run the script later or distribute it to another person in your organization. For generating a script you have to use the keyword /a:Script instead of /a:Publish and add the OutputPath for the script. Example:
“C:\Program Files (x86)\Microsoft Visual Studio 12.0\Common7\IDE\Extensions\Microsoft\SQLDB\DAC\120\SqlPackage.exe” /a:Script /tcs:”Data Source=<SQL Server>;Integrated Security=true;Initial Catalog=<Database Name>;Pooling=false” /sf:%TF_BUILD_BINARIESDIRECTORY% \<Project Name>\<DACPAC file name>.dacpac /OutputPath:%TF_BUILD_DROPLOCATION%\MyDeploymentscript.sql
For each database deployment you need please add a single line to the .cmd file repeating steps 5, 6, 7 or 8 depending on the options you chose.
Note : Each call need to be on a single line
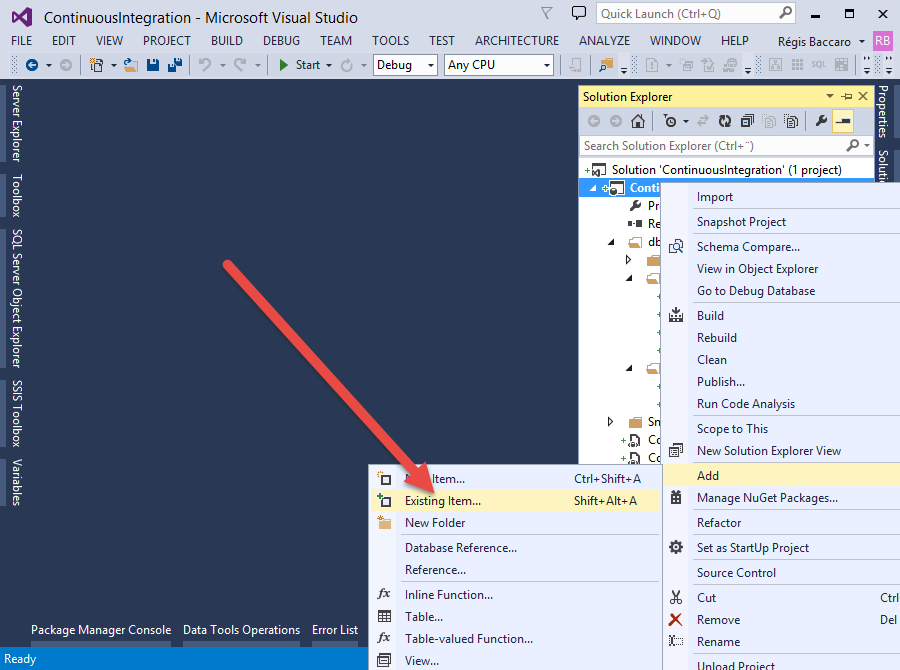
Save the script with the .cmd extension and add to you SQL Server Data Tools Solution by right-clicking the project select add existing item and in the dialog window add the .cmd file you just created.
Of course if you have multiple database projects in one solution it enough to add the batch file just once!
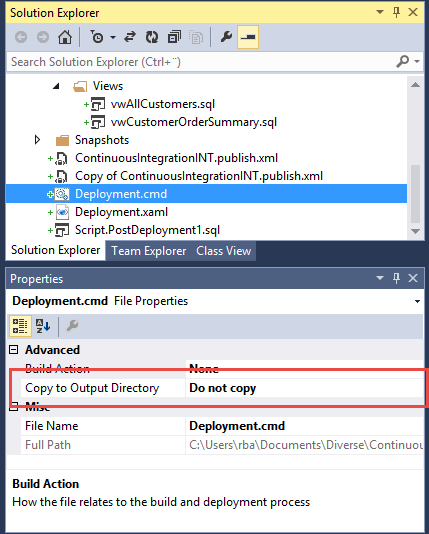
Once the file is added it should appear in the Solution explorer and you will be able to modify its Copy to Output directory property to fit your needs. Either Do Not Copy or Copy always.
- Continuous Deployment using SQL Server Data Tools and Visual Studio Online - February 2, 2015
- Creating Azure automation to start Azure VMs - February 2, 2015
- Deployment to several databases using SQL Server Data Tools and TFS using a Custom Workflow file - January 16, 2015

So now you are ready to reference your file in the build template. Depending on your choice you will have to reference the file in different ways. If you have decided to Copy Always then the reference should be TF_BUILD_BINARIESDIRECTORY in the case of Do Not Copy the reference is TF_BUILD_SOURCEDIRECTORY
Copy Always = TF_BUILD_BINARIESDIRECTORY
Do Not Copy = TF_BUILD_SOURCEDIRECTORY
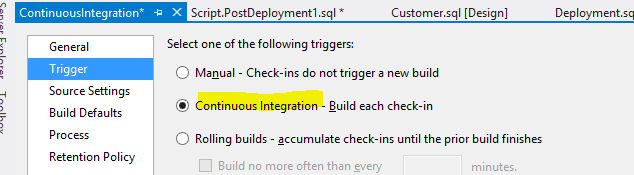
So now it is time to find your build template in the Source Control tab of your project find the Build menu and either add or edit an existing template. Choose the option for Continuous Integration in the Trigger tab
On the Process tab make sure that the right project is selected and on the Advanced section find the Post-build script path to point to your batch file
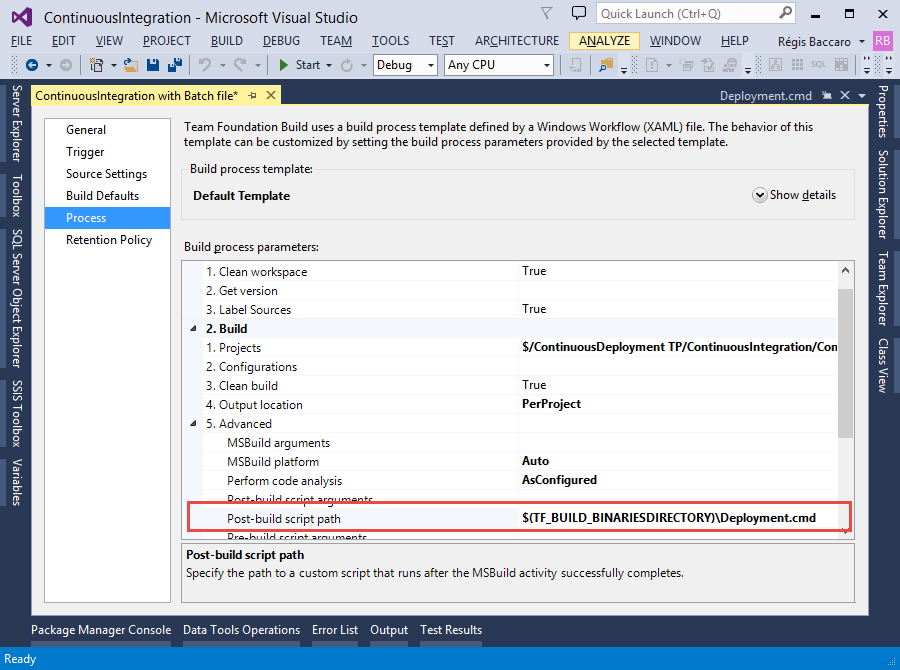
Note: If you have chosen a Per Project output you will need to add the project name to the path: $(TF_BUILD_BINARIESDIRECTORY)\<Project Name>\Deployment.cmd
There are many options to SQLPackage. You can find them there : http://msdn.microsoft.com/en-us/library/hh550080%28v=vs.103%29.aspx
In the next blog post I will describe how to publish several databases using a Windows Workflow Foundation file, so stay tuned for more Team Foundation Server and SQL Server Data Tools tips.
Happy deploying !!
Reference:
http://blogs.msdn.com/b/ssdt/archive/2014/07/24/sql-server-database-projects-and-team-foundation-build.aspx
His background and work experience mixes technology and business, providing him a unique edge to contribute to datawarehouse and SharePoint projects, being able to effectively interact with technical and business decision makers.
Régis is a frequent speaker at SQL Server conferences and is a board member of the Danish SQL Server User Group and the founder of the SQL Saturday Denmark community event.
In april 2014 Régis received the MVP award for SQL Server for his involvment in the product and the community.
View all posts by Régis Baccaro