
This article explores the Merge Join Transformation in SSIS packages.
Introduction
In a relational database, we use different normalizations to split data across multiple tables. Later, if we need to retrieve data together, we used multiple kinds of JOINS operator in SQL Server. These tables combine using a shared key or join key. For example, we can use the [EmpID] column to join tables related to employees.
I would recommend you to go through the following articles to get knowledge of JOINS in SQL Server.
SQL Server setup also provides SQL Server integration services (SSIS) to develop and implement SSIS packages that could do data transformation and data manipulations. On SQLShack, we have covered many useful transformations using SSIS packages. You can check these detailed articles Integration Services (SSIS) to learn more about them.
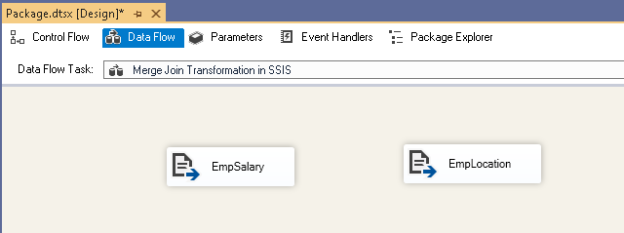
In this article, we will explore the Merge Join Transformation in SSIS package. It is useful to perform SQL Joins using the SSIS package. We can achieve Inner Join, Left Outer Join, Right Outer Join and Full Outer Join using this transformation.
Sample data – Flat file source
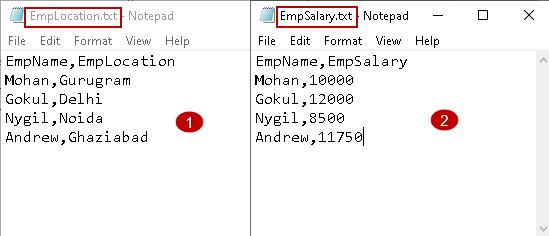
For this article, I prepared two flat files (*.txt), as shown below. These files contain employee information, such as location and salary. We have an employee name field common in both files.
In terms of environment, I am using Visual Studio 2019 version 16.4.0. You can download the latest version of it using this link.
Create an ETL package for Merge Join Transformation in SSIS
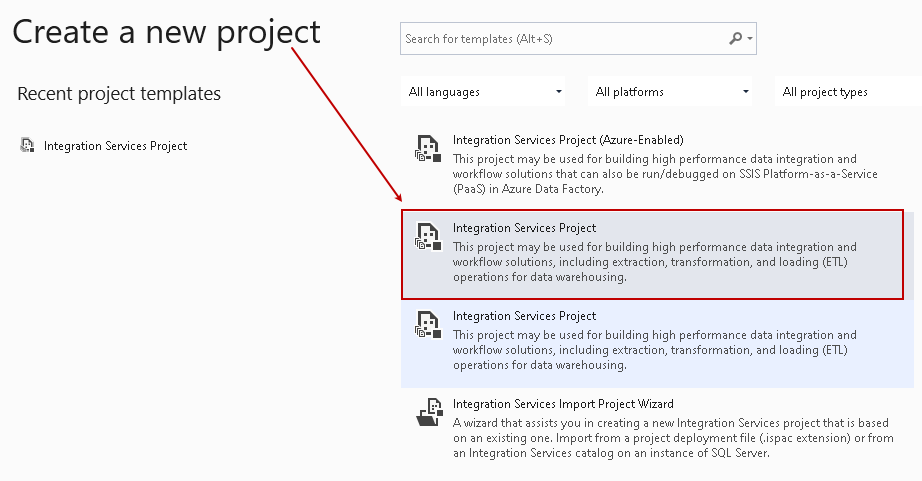
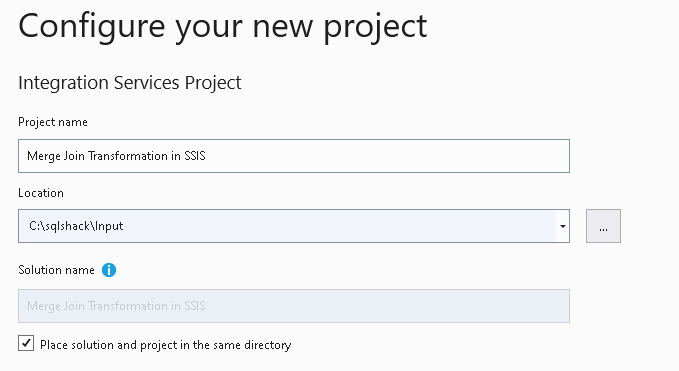
Launch Visual Studio, create a new integration service project.
On the next page, specify a project name and directory to save the package related files.
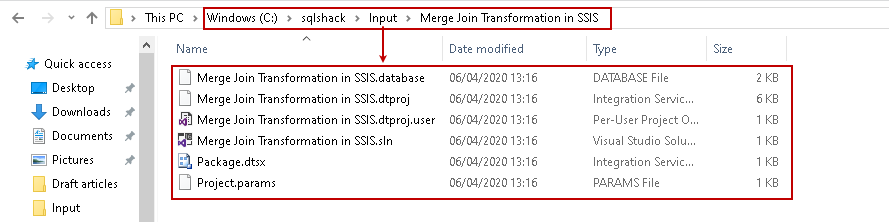
Once it creates the project, you can go back to the directory and view the project-related files in the folder.
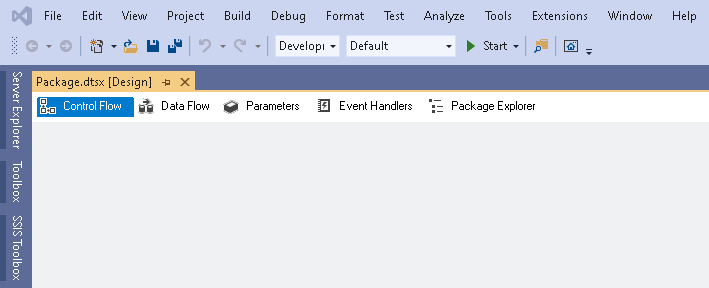
It opens the new project and solution, as shown below.
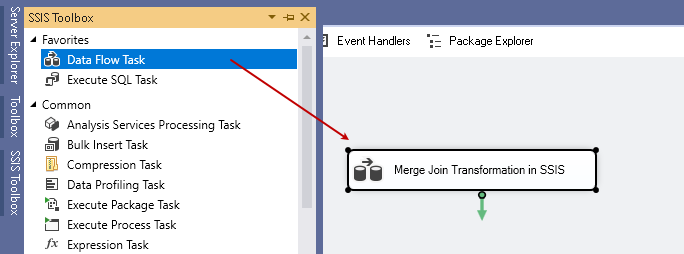
Now, drag a data flow task from the SSIS toolbox and rename it to give an appropriate name. For rename, right-click on it and choose Rename.
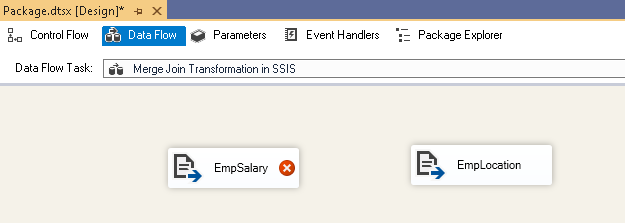
Double-click on this task and add two flat file sources in the data flow area. We use the flat file source for connecting with text or CSV files.
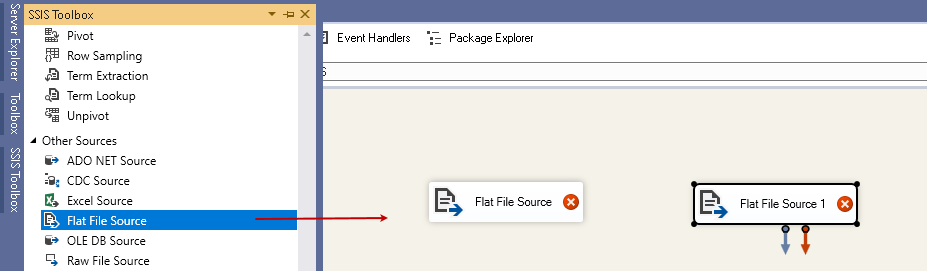
Rename both flat-file sources to reflect the flat file source.
- Flat File Source -> EmpSalary
- Flat File Source 1 -> EmpLocation

We see a red cross on both flat files because we have not created connections to source files. I will show a connection for a flat-file here, and you can follow the similar steps for the second file as well.
Double-click on this flat file source, and it opens the following flat file source editor.
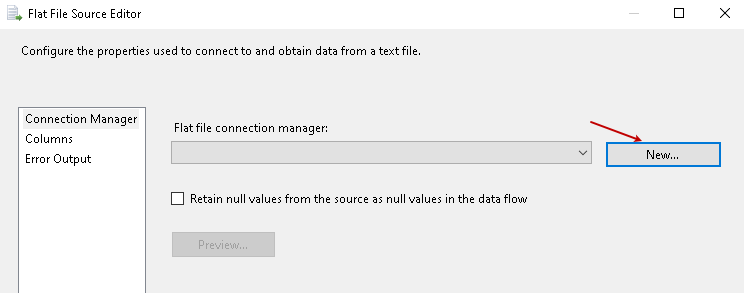
Click on New and fill out the following information’s in the General tab.
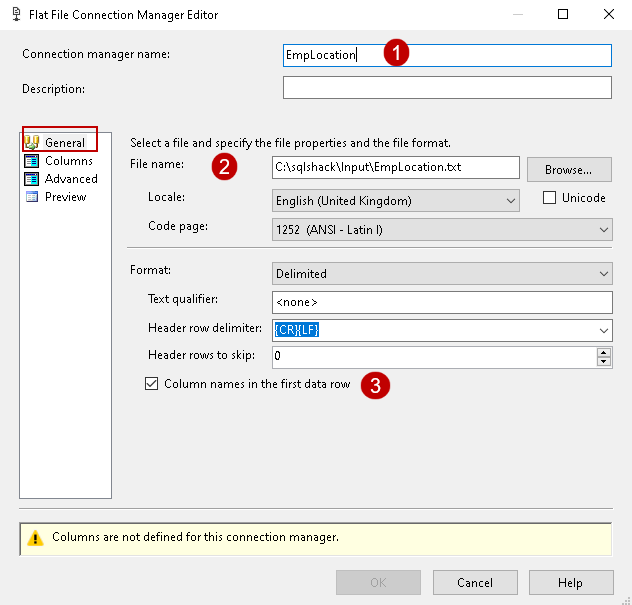
- Connection Manager name: SSIS package automatically takes a name for it, but it is recommended to give a proper name so that you can quickly identify connections in the package
- File Name: Specify the complete path of the source file. You can browse the file here or paste the complete file path
- In my example, the first row contains the table header. If you do not have a column header, uncheck the tick from Column names in the first data row
SSIS package automatically checks the format and text delimiter for the flat file. You can review and make changes if required.
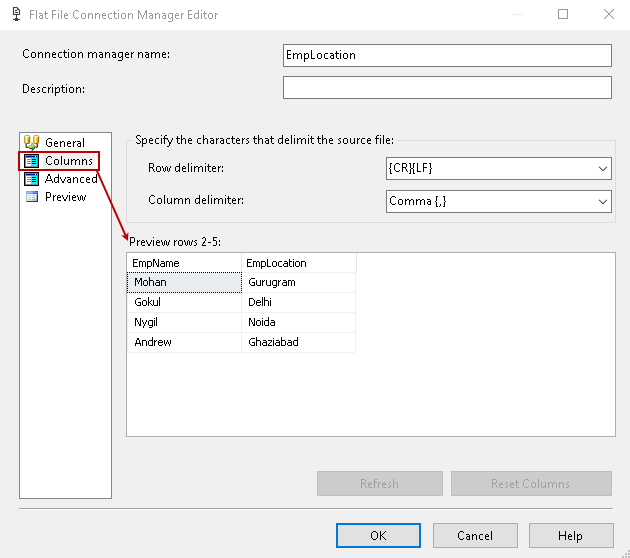
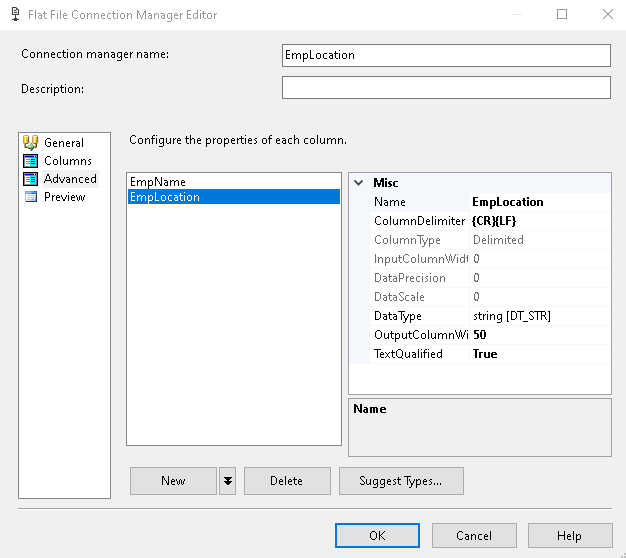
In the bottom, you see a message that Columns are not defined for this connection manager. Navigate to Columns, verify the columns present in the flat file in preview.
Navigate to Advanced and verify the properties of the column. Here, you can make changes in column delimiter, data type, and output column width. We can go with the default values here.
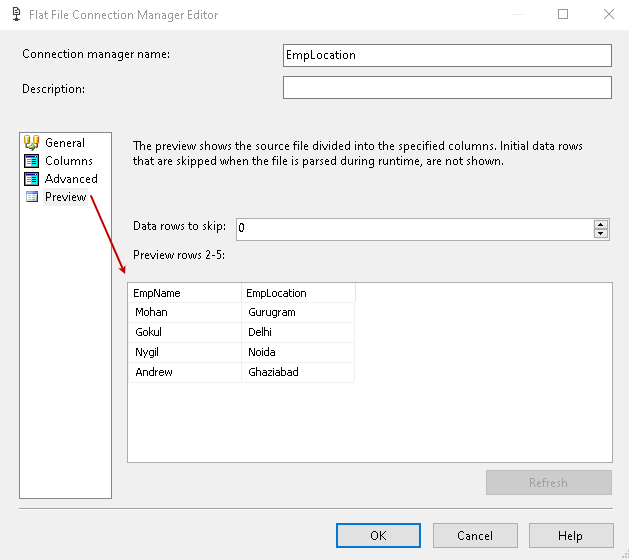
Navigate to Preview and verify records appearing correctly.
Click OK, and we are done with the configuration for the first flat file source.
Similarly, do the configuration for another flat file, as shown below.

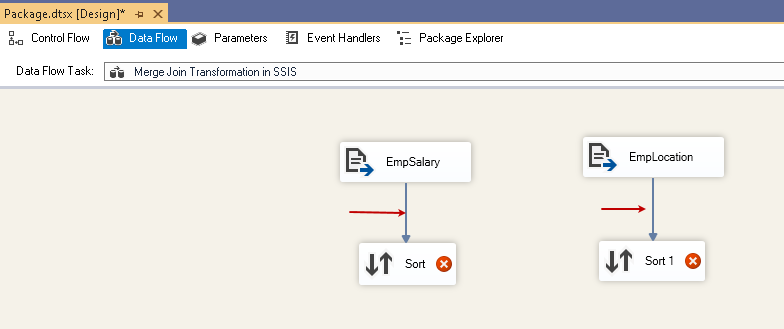
Before we add a Merge Join Transformation in SSIS, we require a sort transformation with both flat file source. Sort transformation is similar to an ORDER BY clause that sorts the results in an ascending or descending order.
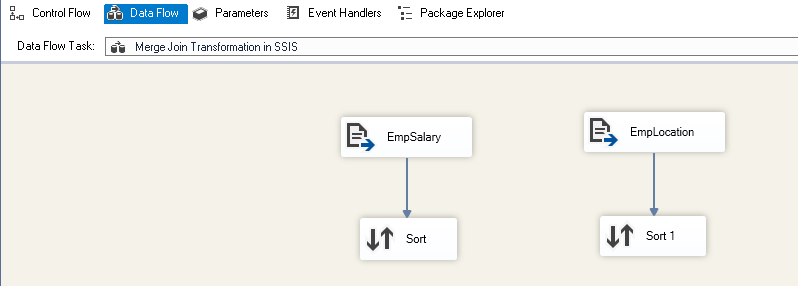
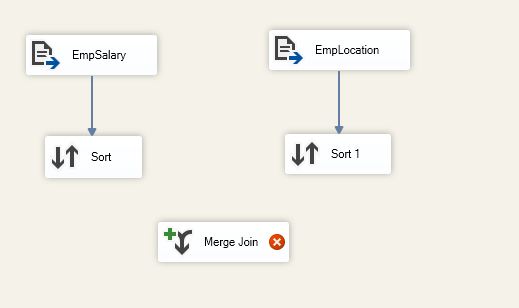
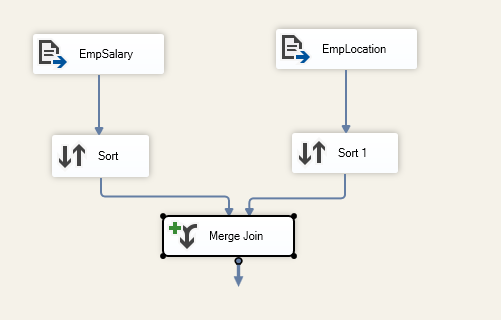
Drag two sort transformations and join them with the flat file source shown below.
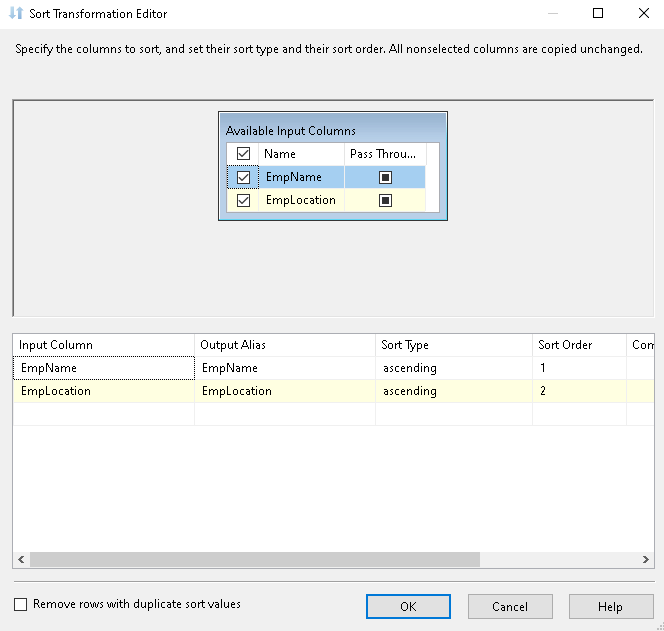
We need to configure the sort transformation as well. Let’s open the sort connected with [EmpSalary] flat file source.
It shows the input columns from the flat file. Select all available columns, and you see below input columns, output column alias( by default same as of Input columns), sort type and sort order. The sort order defines which columns will be sorted first. It depends upon which column we selected first for the sorting.
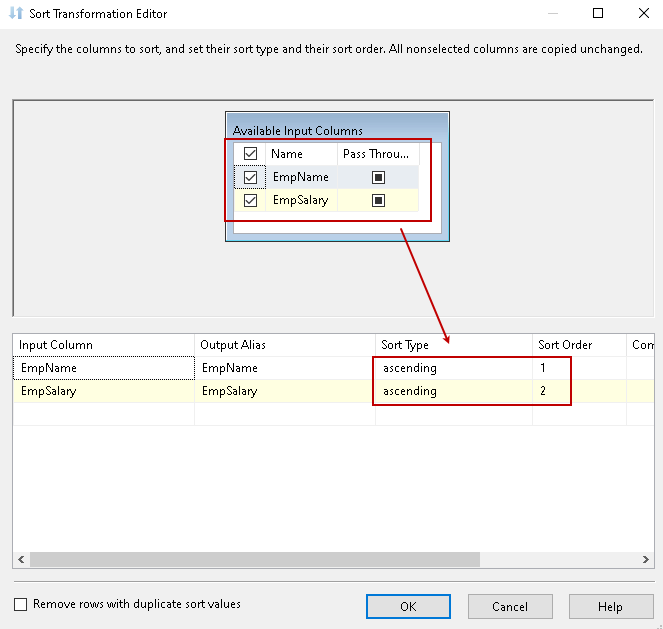
Click Ok, and the configuration is done for the first sort operator.
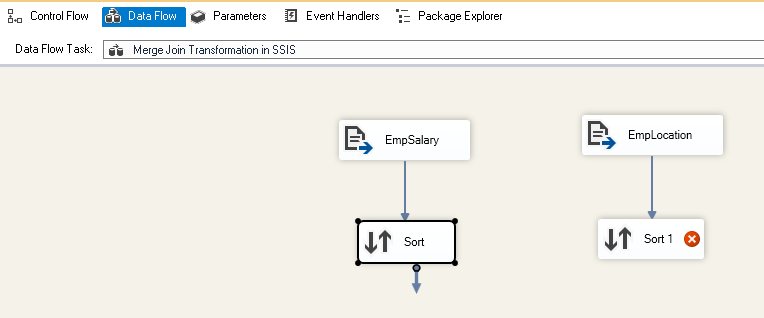
Similarly, do the configuration for another sort operator, and you see it removed the red cross icon.
We have completed both sort transformation configurations.
Now, its time to add Merge Join transformation in SSIS package.
As you know, for a SQL JOIN we require at least two tables to join together. Similarly, here, we need to give input of data coming from both flat files after sort transformation.
Once you drag an output from sort operator to Merge Join, it opens the following pop-up for input-output selection. Here, we select the input either Merge Join Left Input or Merge Join Right Input.
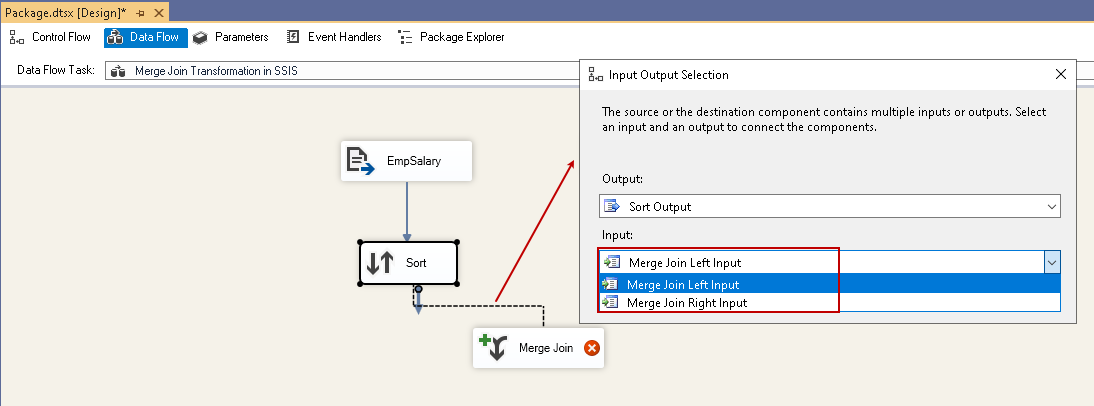
Let’s select the Merge Join Left Input and click Ok. Similarly, drag the output of the second sort to Merge Join transformation. It does not show an input-output selection window this time because we have already given input in the first sort transformation.

Now, we need to configure Merge Join as well. Double-click on it and open Merge Join Transformation Editor. It shows both input files data, and join type as Inner Join in this case.
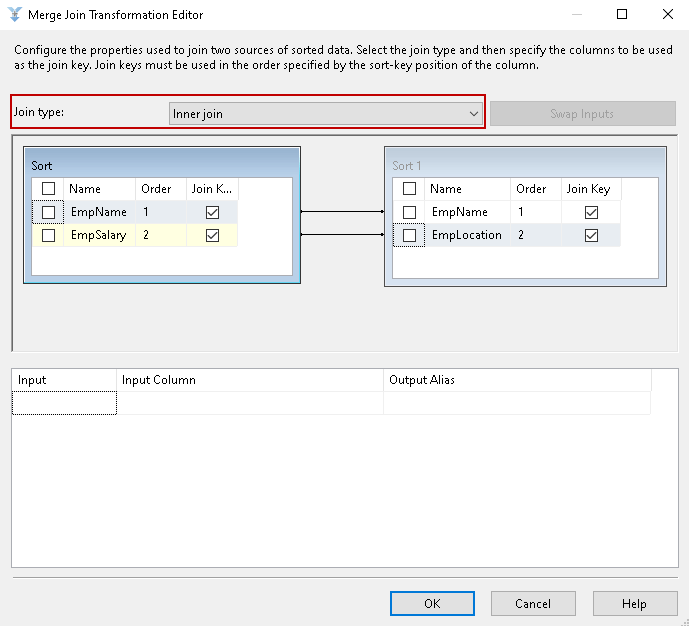
Now, select the columns we require in the output. We have a common field [EmpName] in both data set. We can skip one column to avoid duplicate columns.
We also need to define the Join key accurately. Currently, in the previous screenshot, it has put a check on Join Key for all columns. Remove the check from other columns, and it should have Join key for [EmpName] column as shown below.
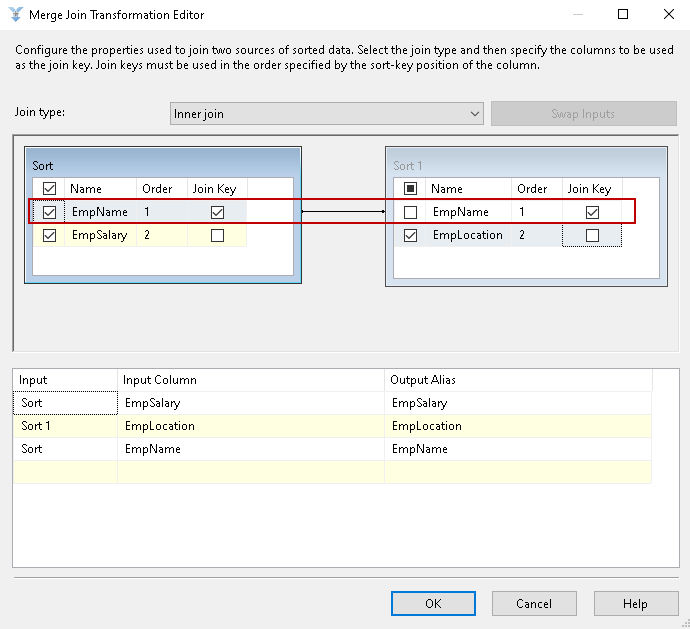
Click Ok, and we can see that configuration is complete for the Merge Join Transformation in SSIS.
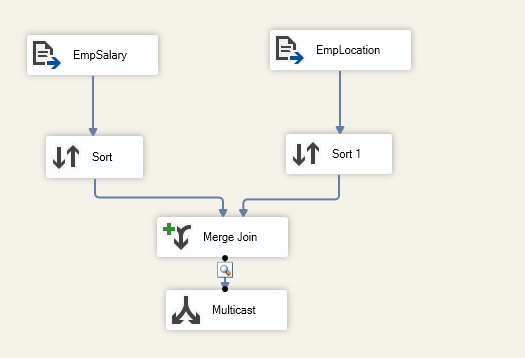
For this demo purpose, we do not need to insert data in a SQL table. Let’s add an SSIS Multicast transformation and join it with Merge Join.
To view data, right-click on the connection line between both Merge Join and SSIS Multicast and click on Enable Data Viewer. You can see a data viewer symbol on the connection line.
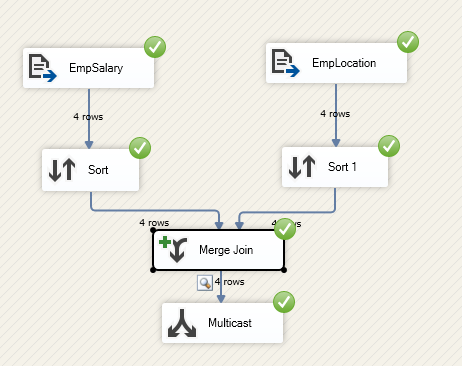
Let’s execute the SSIS package now and view the results. Here, we see the expected result of the INNER JOIN of both flat files. We see in progress icon for Merge Join and Multicast because it is showing the data in a data viewer.
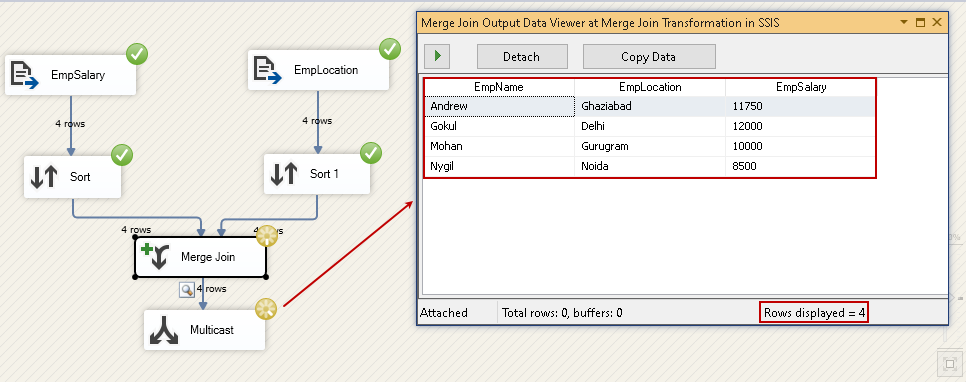
We can copy the data in the clipboard from here or close the data viewer screen. It shows the package completed successfully.
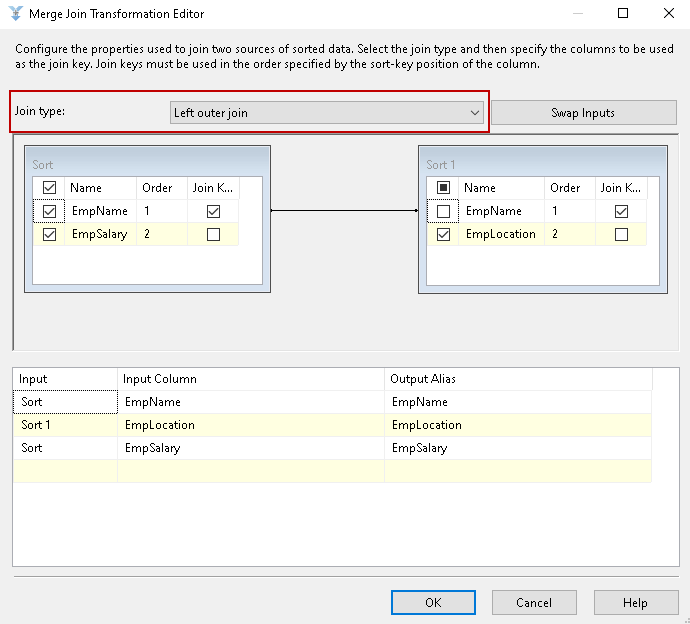
Now, stop the package execution and open the Merge Join transformation editor. Change the Join type from Inner Join to Left Outer Join.
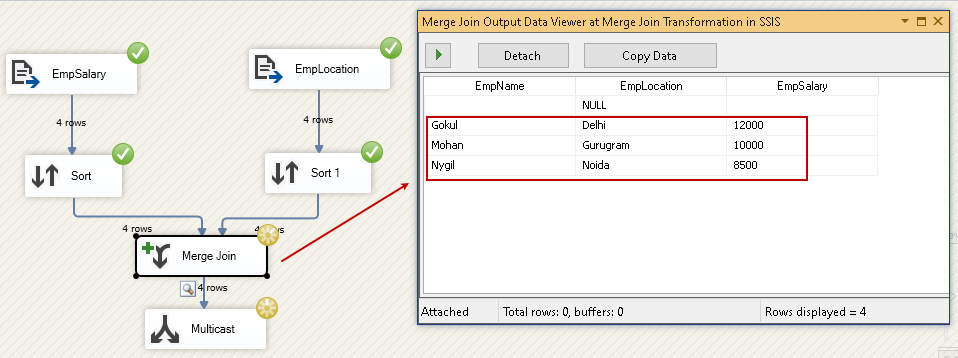
Open the [EmpSalary] text file and remove the data for Andrew.
In the Left outer Join, we get output from the left-hand table along with the matching rows between both tables.

Once we execute the package now, it does not show a row for Andrew because it exits in the right-hand side table [EmpLocation]. Left outer join does not include unmatched rows from the right-hand side table.
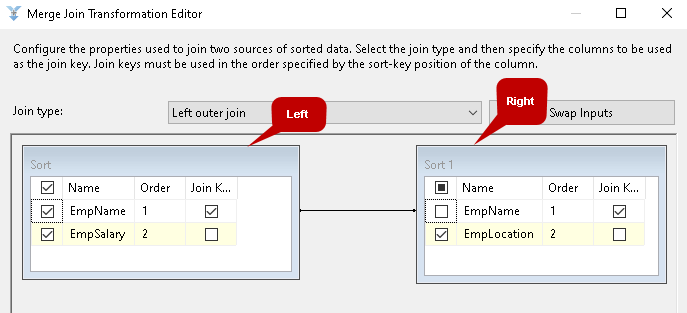
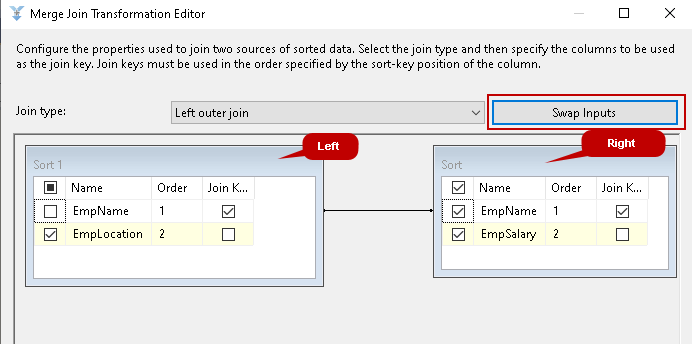
Let’s stop the package, and open Merge join transformation editor again. Click on Swap Inputs, and it changes the position of the tables. We can see [EmpLocation] table is on the left-hand side now.
This [EmpLocation] table still contains data for Andrew. Rerun the package, and in the output, we get a row for Andrew as well because it is in the left-hand side table.
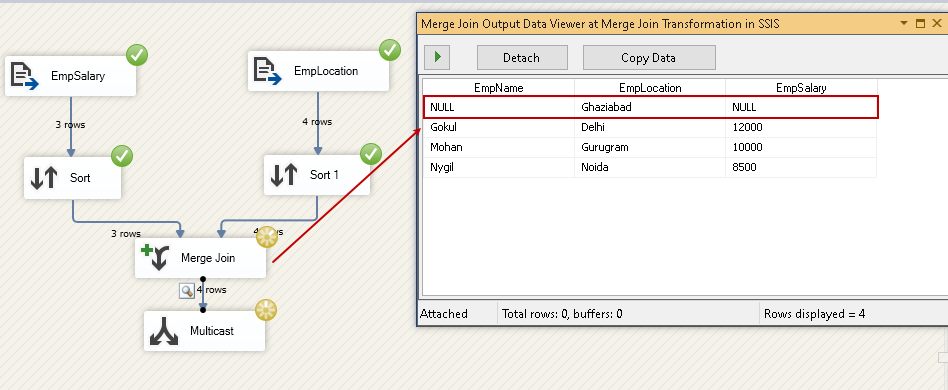
We get NULL values for the column because it does not have a corresponding row in the [EmpSalary] table.
Conclusion
In this article, we explored the usage of Merge Join Transformation in SSIS packages to perform SQL JOINS. It might be useful for beginners to learn the JOINS. You can also use it in ETL’s where you get data from multiple sources, and you need to perform the Join on them. It eliminates the need for importing data first in SQL tables, perform joins using SQL query and then do further data processing.

I am the author of the book "DP-300 Administering Relational Database on Microsoft Azure". I published more than 650 technical articles on MSSQLTips, SQLShack, Quest, CodingSight, and SeveralNines.
I am the creator of one of the biggest free online collections of articles on a single topic, with his 50-part series on SQL Server Always On Availability Groups.
Based on my contribution to the SQL Server community, I have been recognized as the prestigious Best Author of the Year continuously in 2019, 2020, and 2021 (2nd Rank) at SQLShack and the MSSQLTIPS champions award in 2020.
Personal Blog: https://www.dbblogger.com
I am always interested in new challenges so if you need consulting help, reach me at rajendra.gupta16@gmail.com
View all posts by Rajendra Gupta
- Understanding PostgreSQL SUBSTRING function - September 21, 2024
- How to install PostgreSQL on Ubuntu - July 13, 2023
- How to use the CROSSTAB function in PostgreSQL - February 17, 2023