
In this article, I am going to explain how we can split the large backup file into multiple small backup files using SSMS 2016. I will also explain how we can combine multiple backups to restore a database and split the backup of the SQL database using SQL Server Management Studio (SSMS).
When we generate a backup of the large database, it is advisable to generate the backup in multiple files. This process reduces the time to generate the backup. If your business requirement is to download the backup of a large database, then downloading multiple backup files method is way faster than downloading one large backup file.
To demonstrate the process, I have restored the AdventureWorks2017 database on my workstation. We are going to perform this task using SQL Server Management Studio.
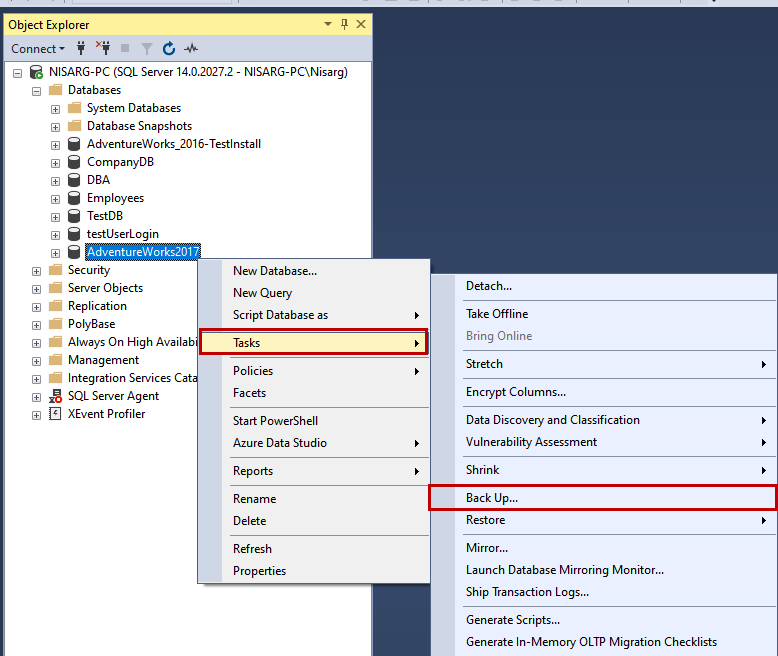
To generate the backup, open SQL Server Management Studio -> Connect to the database engine -> Expand Databases -> Right-click on AdventureWorks2017 database -> Hover on Tasks -> Click on Back Up…
You can refer to the following image:
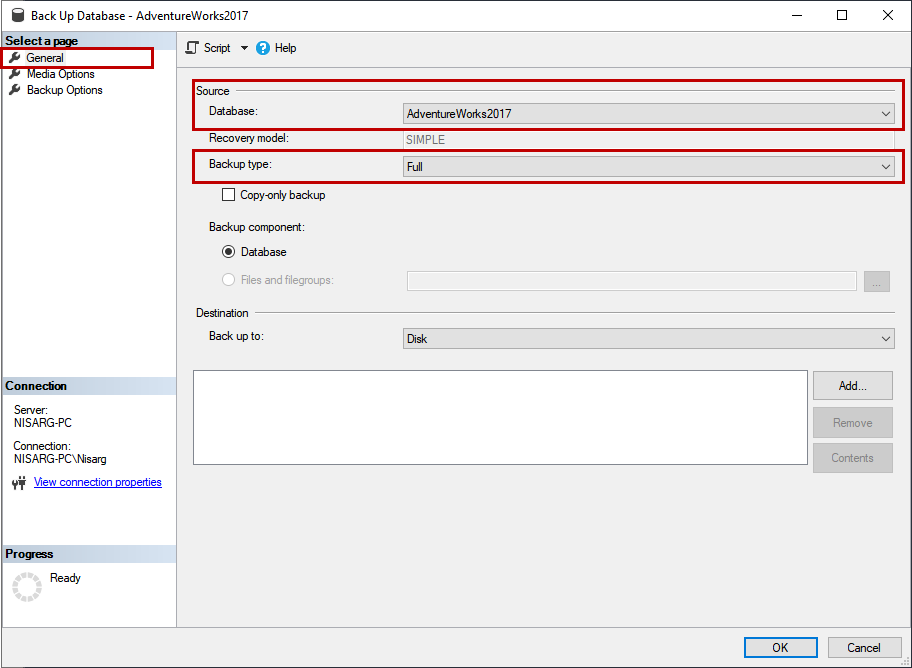
A dialog box Backup database opens. We want to generate a full backup of the AdventureWorks2017 database, hence choose AdventureWorks2017 from the database drop-down box. In the backup type drop-down box, choose FULL. See the following image:
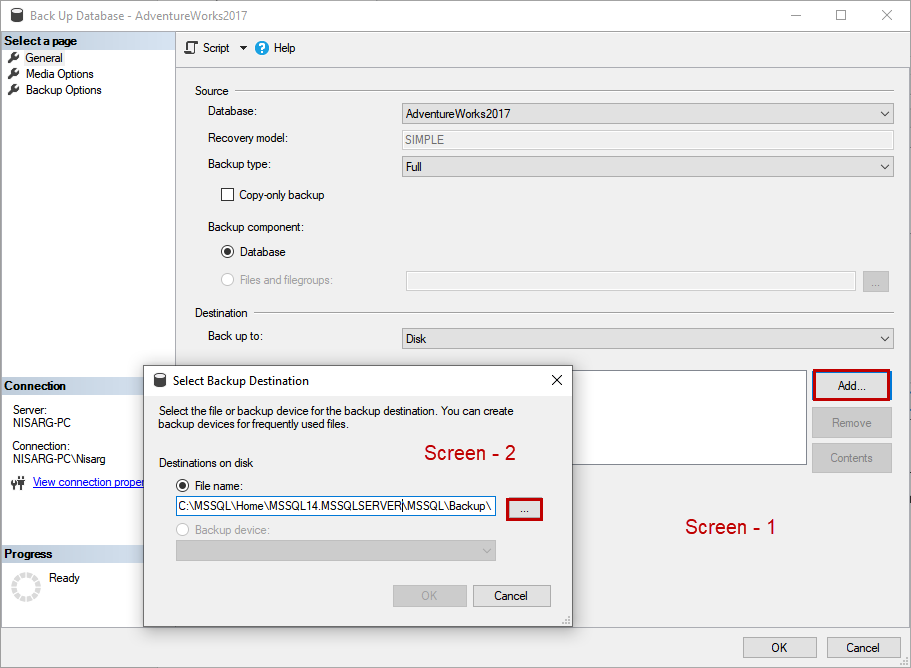
To generate the multiple backup files, click on Add. (Screen-1) A dialog box, Select Backup Location opens (Screen-2). In this dialog box, we can specify the location where you want to put the backup file. In the File Name text box, you can see the backup path, which is the default location of the backup file. We can specify a different location. To choose the desired location, click on the balloon (…) See the following image:
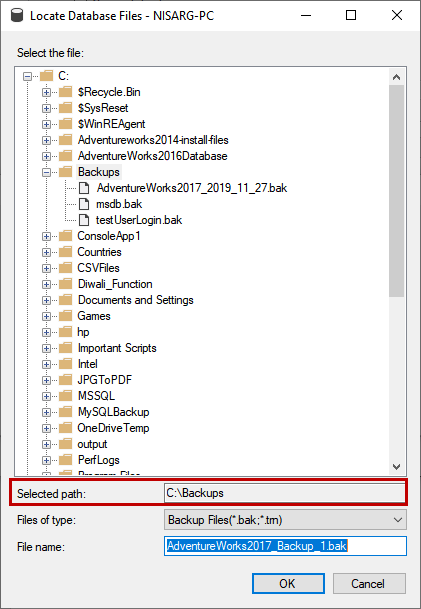
In Locate Database Files dialog box, choose the desired location where you want to put the backup file. Provide the desired name of backup in the File Name text box. Click OK to close the dialog box. See the following image:
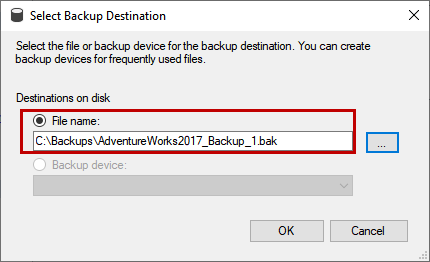
On the Select Backup Destination dialog box, the backup destination has been changed. Click OK to close the Select Backup Destination dialog box. See the following image:
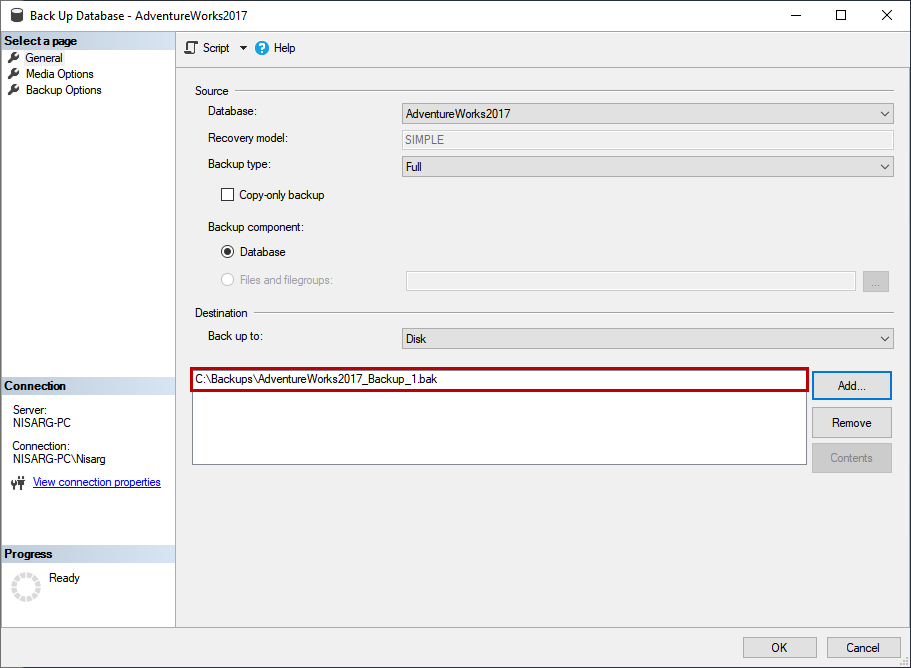
On the Back Up Database screen, you can see the location of the backup in the list box within the destination section. See the following image:
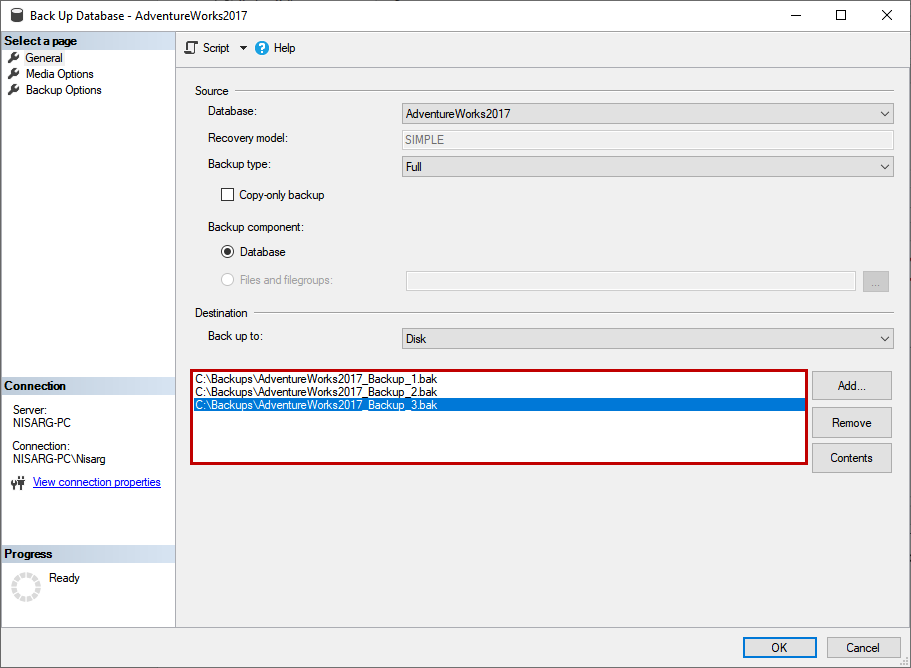
To generate multiple backup files, follow the above process again. Once the destination of the backup files has been configured, the Back Up Database dialog box looks like the following image:
If you want to automate the task, you can generate the script of the entire configuration. To do that, click on the Script button on top of the dialog box. See the following image:

The backup script looks like the following:
|
1 2 3 4 5 6 7 |
BACKUP DATABASE [AdventureWorks2017] TO DISK = N'C:\Backups\AdventureWorks2017_Backup_1.bak', DISK = N'C:\Backups\AdventureWorks2017_Backup_2.bak', DISK = N'C:\Backups\AdventureWorks2017_Backup_3.bak' WITH NOFORMAT, NOINIT, NAME = N'AdventureWorks2017-Full Database Backup', SKIP, NOREWIND, NOUNLOAD, STATS = 10 GO |
Now, click on OK to generate the backup. The backup process has been started and completed successfully.
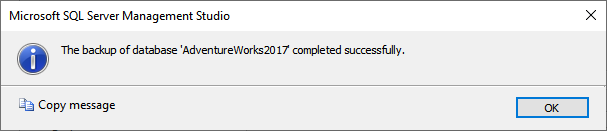
Once the backup completes, open the backup location, you can see three backup files generated by SQL Server Management Studio.

Restore databases using multiple backup files
To restore the same database on the server, we must drop it. To do that, first, change the state of the database from multi_user to single_user. This command rollbacks all non-qualified transactions, and only one user can connect to it. Now drop the database by executing the following command:
|
1 2 3 4 5 6 |
Use [master] Go alter database [AdventureWorks2017] set single_user with rollback immediate Go Drop database [AdventureWorks2017] Go |
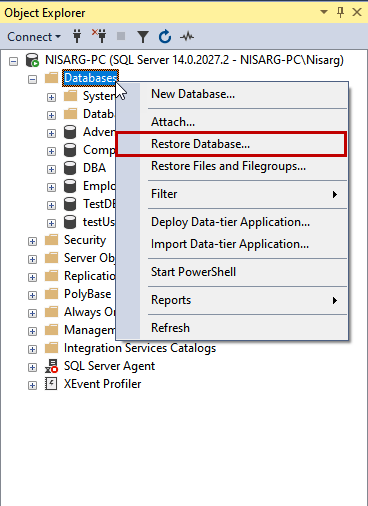
Once the database is dropped, let us restore the database. To do that, right-click on Database -> Click on Restore Database... See the following image:
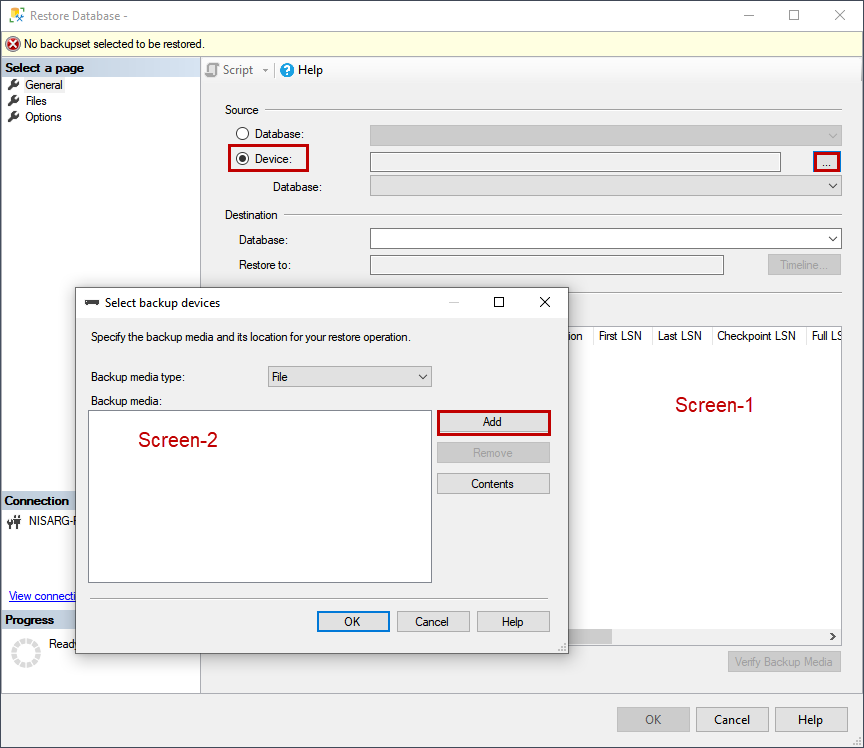
The Restore Database dialog box opens. We are restoring the database from a local hard disk hence choose Device. To locate the backup file, click on the balloon (…), which is next to the device textbox (Screen1). When you click on it, the Select backup devices dialog box (Screen 2) opens. Click on Add. See the following image:
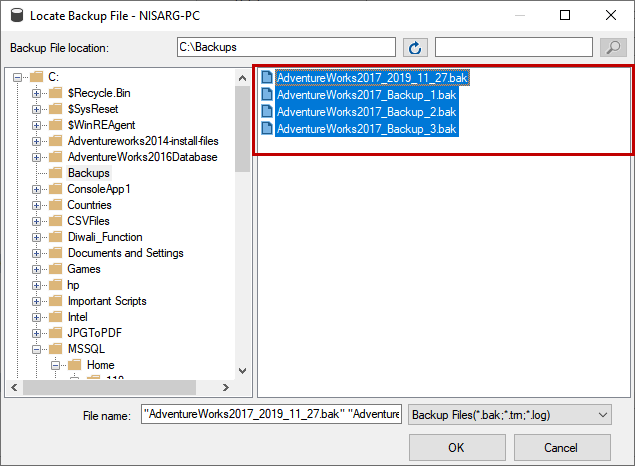
In Locate Backup File dialog box, traverse in the directories of the computer and open the backup location. To restore the backup of the AdventureWorks2017 database, we must choose all the backup files of it. In locate the database file dialog box, we can select multiple files. Select all the backup files and click on OK. See the following image:
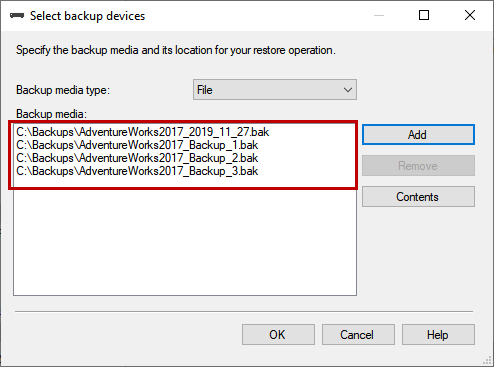
On the Select backup devices dialog box, you can see all the backup files in a list box. Review all the backup files and click OK.

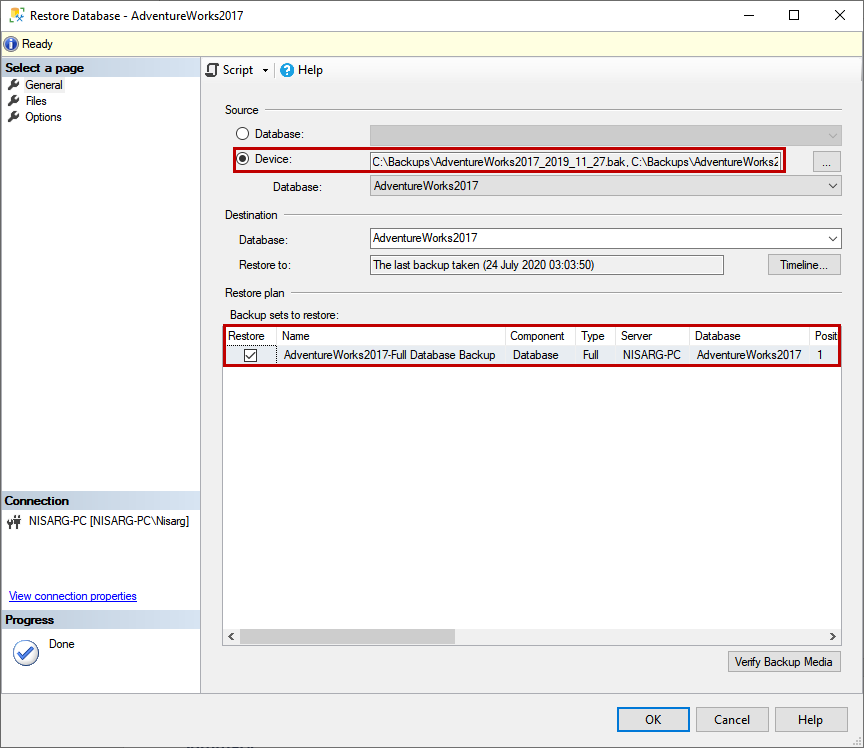
On restore database dialog box, you can see the backup files in the text box next to the Device radio button. You can view the information of the backup in the backup set to restore the list box. See the below image:
You can change the location of database files from the Files tab. We do not want to change the location of the database files; hence I am skipping the step. We are restoring the database with a recovery option so we can skip the step. If you want to generate the database restore script to automate the restore process, click on the Script button on top of the Restore Database dialog box. See the following image:

Following is the restore database script generated by the SQL Server management studio.
|
1 2 3 4 5 6 7 |
USE [master] RESTORE DATABASE [AdventureWorks2017] FROM DISK = N'C:\Backups\AdventureWorks2017_Backup_1.bak', DISK = N'C:\Backups\AdventureWorks2017_Backup_2.bak', DISK = N'C:\Backups\AdventureWorks2017_Backup_3.bak' WITH FILE = 1, NOUNLOAD, STATS = 5 GO |
On restore database dialog box, click on OK to restore the database. The database has been restored successfully.
Summary
In this article, we learned how we can split the large backup file into multiple backup files and how to restore the database using multiple backup files using SSMS 2016.

He has expertise in database design, performance tuning, backup and recovery, HA and DR setup, database migrations and upgrades. He has completed the B.Tech from Ganpat University. He can be reached on nisargupadhyay87@outlook.com
- Different ways to identify and change compatibility levels in SQL Server - July 22, 2024
- Copy SQL Databases between Windows 10 and CentOS using SQL Server data tools - October 19, 2022
- Changing the location of FILESTREAM data files in SQL Database - October 14, 2022