

SQL Server & Containers
There’s a lot of buzz around containers at the moment but not so much in the SQL Server world which I find odd as, to me as a SQL Server DBA, the technology has a lot of benefits that are worth exploring especially when it comes to development environments.
I’ve been working with containers for a while now and one thing that has struck me is that I always seem to install the Docker Engine on a Windows Server 2016 server with the GUI. That seems a bit redundant to me as all interactions with the Docker Engine are through the command line so why waste server resources in displaying a desktop? Surely we should always be working with Windows Server 2016 Core when using containers?
I’ve looked around for a complete guide to configuring and running containers on a Core installation but couldn’t find one so I’ve written this guide to go through the steps.
Initial Server Configuration
The first steps to perform once Windows Server 2016 Core has been installed are to configure the network settings, rename the server and then join a domain (optional).
To set a static IP address you must first identify the ID of the network adapter. To do this run:
netsh interface ipv4 show interfaces
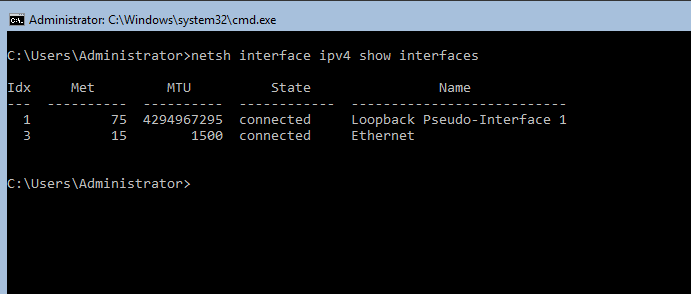
The ID of the Ethernet network adapter shown above is 3. Using that we can then run the following to configure it:
netsh interface ipv4 set address name=”3” source=static
address=xx.xx.xx.xx mask=255.255.255.0 gateway=xx.xx.xx.xx
This will set a static IP address, network mask and default gateway.
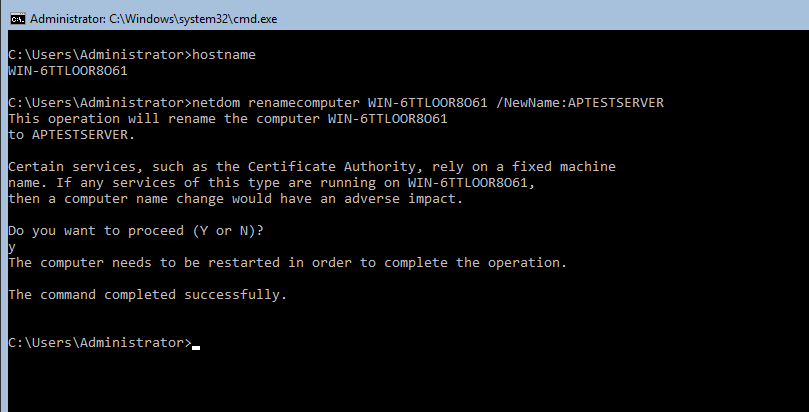
The next steps are optional but I always run through them when working with a new server. First thing is to rename the server so run the following to find out the current assigned server name:
hostname
Once we have the current name we can rename the server by running:
netdom renamecomputer CURRENTNAME /NewName:NEWSERVERNAME
Then restart the server:
shutdown /r /t 0
Once the server has restarted it can then be joined to a domain. To do this run:
Netdom join SERVERNAME /domain:DOMAINNAME /userd:USERNAME /password:*
Enter in the fully qualified domain and a user’s details that has domain admin rights. Once that’s executed the server needs to be restarted once again.
Installing the Docker Engine
Now that the server has been configured we can install the docker engine. I’m no longer going to be running scripts in a console session but you can continue like that if you want to but what I’m going to do is switch to a remote powershell session. If you do not know how to set that up, full details on how to do so can be found here.
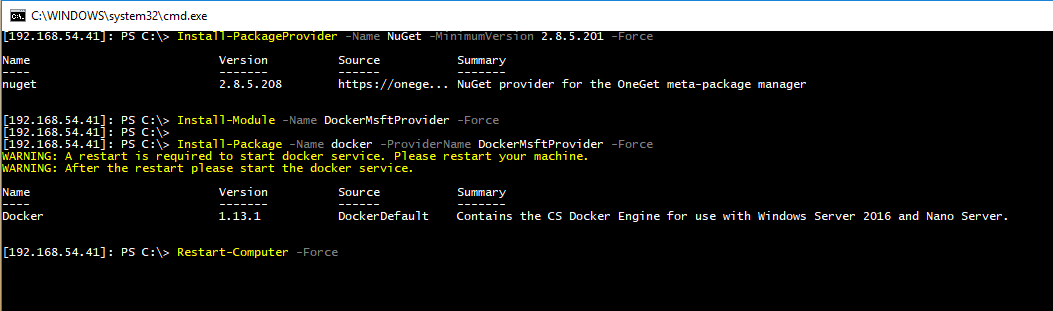
To install the Docker engine the following two powershell scripts must be run. Firstly, we need to install the NuGet package provider:
Install-PackageProvider -Name NuGet -MinimumVersion 2.8.5.201 –Force
Now install the DockerMsftProvider module which is a powershell module for discovering, installing and updating Docker:
Install-Module -Name DockerMsftProvider –Force
Then we can install Docker:
Install-Package -Name docker -ProviderName DockerMsftProvider –Force
And finally restart the server:
Restart-Computer -Force
Once the server has restarted we can verify that the Docker Engine is running by executing:
get-service docker
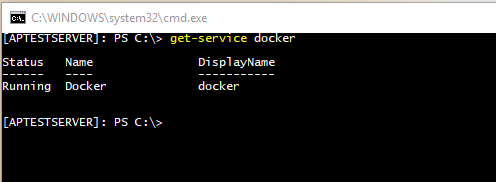
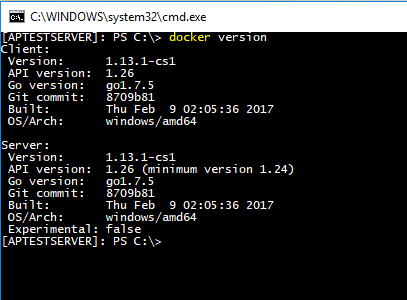
Now that we know the service is running we can also verify that the Engine is responding to requests by running:
docker version
Pulling an initial image
We’ve configured our server and installed the Docker Engine. Now we can pull an image from the Docker Hub to use to build containers. To search for all Microsoft SQL Server images available that we can use run:
docker search microsoft/mssql-server-windows

The image that we want is highlighted above. It is the vNext Enterprise Evaluation edition of SQL Server.
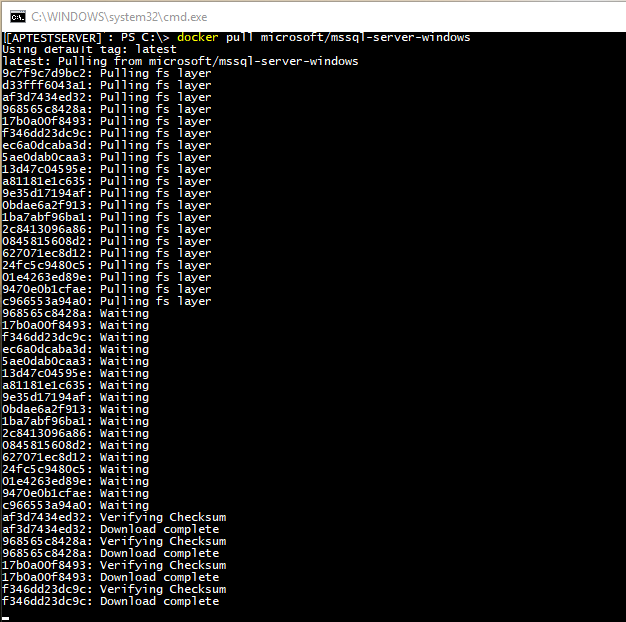
To download the image to our local Docker repository run:
docker pull microsoft/mssql-server-windows
Once that’s complete we can verify that the image is in our local repository ready to be used:
docker images

Running our First Container
We can now run our first container. The command to do this is:
docker run -d -p 15777:1433 –env ACCEPT_EULA=Y sa_password=Testing11@@ –name myfirstcontainer microsoft/mssql-server-windows
The run command tells the Docker Engine to build and start a new container, the -d switch tells the engine to run the container in the background so that we can continue to use this shell window. Then we map the host’s port 15777 to the container’s 1433 port which will allow us to remotely connect to the instance of SQL in the container.
The following switch ACCEPT_EULA=Y accepts SQL Server’s end user licence agreement, if this isn’t specified the container will not run. We then change the sa password, give the container a name and finally tell the Docker Engine which image to build the container from.
Once that’s done we can verify that the container is running:
docker ps

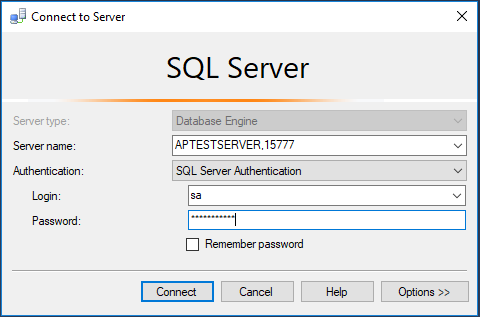
And we can connect remotely to the container in the same way that we would connect to a named instance:
Building a Custom Image
Creating an empty SQL container in a short space of time is very useful but there is more to containers. By using DockerFiles we can run commands when we create containers to add databases into SQL Server. We can then save that container as a custom image so that we can build more, identical, containers from that image all of which will contain the databases that we originally added in.
To do this we need to create a directory to host our dockerfile and the database files:
cd c:\
mkdir docker\mycustomimage
cd docker\mycustomimage
Then we can create our dockerfile:
new-item dockerfile -type file
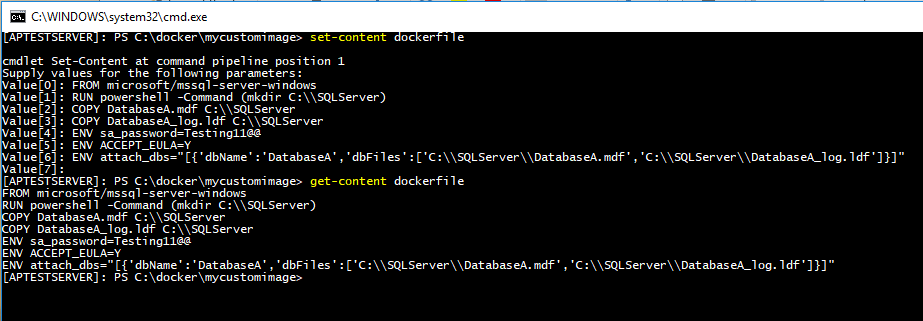
To edit the content within the dockerfile run:
set-content dockerfile
Enter the following on each line:
|
1 2 3 4 5 6 7 8 9 |
FROM microsoft/mssql-server-windows RUN powershell -Command (mkdir C:\\SQLServer) COPY DatabaseA.mdf C:\\SQLServer COPY DatabaseA_log.ldf C:\\SQLServer ENV sa_password=Testing11@@ ENV ACCEPT_EULA=Y ENV attach_dbs="[{'dbName':'DatabaseA','dbFiles':['C:\\SQLServer\\DatabaseA.mdf','C:\\SQLServer\\DatabaseA_log.ldf']}]" |
I’ll go through each line to detail what the command is telling the Docker Engine to do:
|
1 2 3 |
FROM microsoft/mssql-server-windows |
This line tells the Docker Engine which image to build the container from
|
1 2 3 |
RUN powershell -Command (mkdir C:\\SQLServer) |
This will create a C:\SQLServer directory within our container
|
1 2 3 4 |
COPY DatabaseA.mdf C:\\SQLServer COPY DatabaseA_log.ldf C:\\SQLServer |
These lines copy the database files from the host into the directory we created in the container
|
1 2 3 4 |
ENV sa_password=Testing11@@ ENV ACCEPT_EULA=Y |
We need to accept the end user agreement and specify the sa password
|
1 2 3 |
ENV attach_dbs="[{'dbName':'DatabaseA','dbFiles' ['C:\\SQLServer\\DatabaseA.mdf','C:\\SQLServer\\DatabaseA_log.ldf']}]" |
Finally we tell the Engine to attach the database to the SQL instance in the container
Once you’ve entered all the lines above hit enter twice to set the content and then verify by running:
docker get-content dockerfile
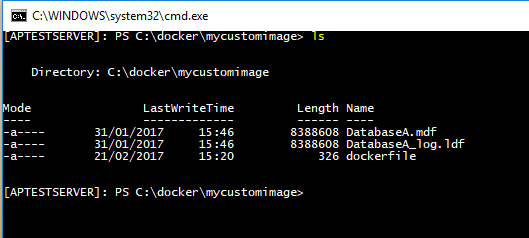
We now need to copy over our database files to the server. To allow us to transfer our database files, run:
netsh advfirewall firewall set rule group=”File and Printer Sharing” new enable=Yes

I created a database on my local instance of SQL Server, stopped that instance and copied the files to the server. Once the files have been transferred your mycustomimage folder should look like this:
Now we can build our custom image:
docker build -t mycustomimage .
The . is important as it tells the Docker Engine to look in the current location for a dockerfile to process its commands.
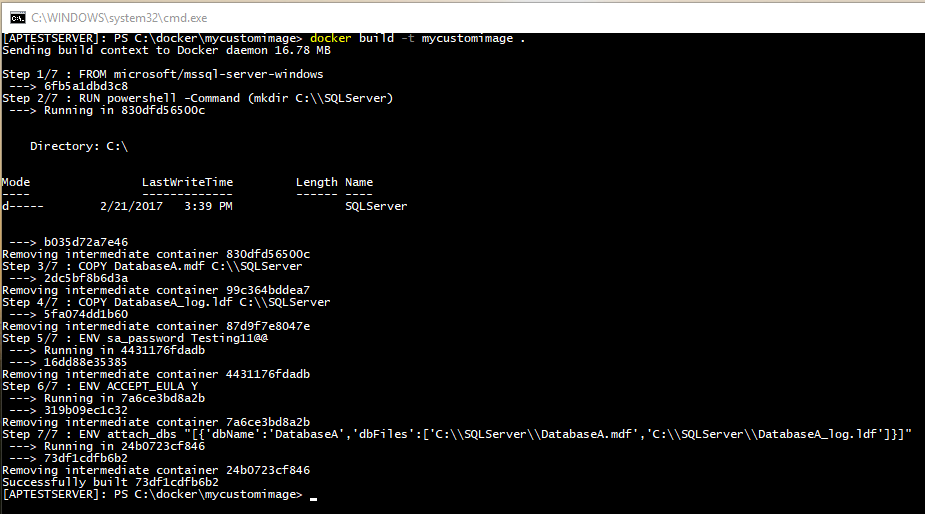
The output of the Docker Engine shows that it is running each command in sequence. It builds intermediate containers at each step and then cleans up after itself. Once complete we can verify our new custom image:

Let’s build a container from our new image. So, run:
docker run -d -p 15789:1433 –name mycustomcontainer mycustomimage
N.B. – Notice that we didn’t have to specify that we accepted the end user agreement or set the sa password. This was already done in the DockerFile so we won’t have to do it again for any containers that we create from our custom image.
Verify that the container has been built:
docker ps

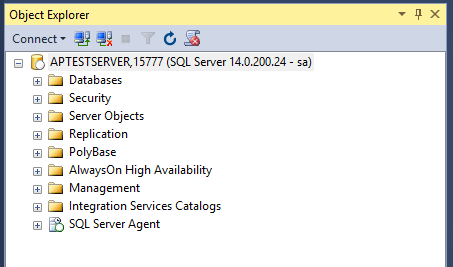
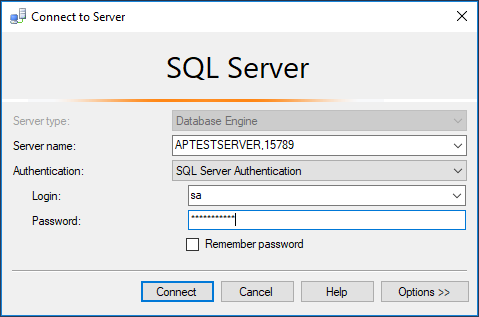
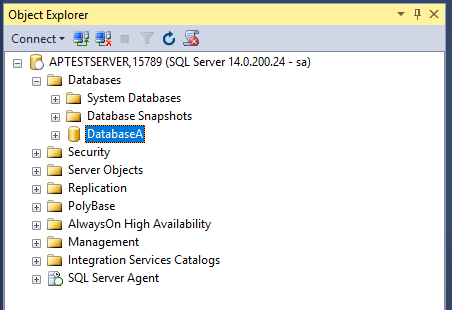
Remotely connect to confirm that our database is available in the SQL instance via SSMS using the server hostname and port number that we specified on container creation:
This is where containers show how powerful they are. We can spin up a container running a SQL instance that is configured exactly how we want it to be in seconds.
I hope that this has been informative and that you can now use this information to assess the technology to determine whether it can be of use in your day to day work.
Resources
- Setting up powershell remote sessions
- Summary of my Container Series
- Windows Containers on Windows Server
- Configuring a Server Core installation: Overview

He has been working with relational databases for over 10 years and has been a SQL Server DBA for 6 of those.
Speaker at SQL Saturdays and blogs at dbafromthecold.wordpress.com
- Refreshing SQL Server Containers automatically with Watchtower - July 25, 2017
- Running SQL Server Containers on Windows Server 2016 Core - April 21, 2017