
This article will explain Azure storage explorer, its installations, and details of how to start working with this application to access Azure storage services. Azure storage provides a flexible solution to store various types of data at a massive scale in the cloud environment. If you have many storage accounts in Azure storage, then it will be difficult to manage them. Microsoft has recognized this problem and developed a desktop application Azure storage explorer to manage Azure storage accounts easily. It can be installed on Windows, Linux, and macOS operating systems.
Azure storage explorer can be used to manage the below types of storage options:
- Azure blob storage
- Azure Files
- Azure Queue
- Azure Tables
- Azure Disks
- Azure CosmosDB
- Azure data lake storage
Storage explorer also supports 2 emulators to support cost optimization.
- Azure storage emulator
- Azurite
A storage emulator is a tool that creates the above types of storage for testing and development work without spending any cost in creating an Azure subscription and storage accounts. This storage emulator uses SQL Server express edition in the background to store objects and emulates all types of Azure storage services. This feature is marked for deprecated so always use Azurite to emulate Azure storage services.
Azurite is an open-source emulator that creates a local environment for testing and development for your application to use Azure blob storage, Azure table, and queue services. You can deploy these storage accounts into the cloud once you will finalize the application development.
Let’s go ahead and install storage explorer in the next section.
Install and Connect to Azure storage account using Azure storage explorer
This section is divided into 3 parts, first is to download its installation files then I will show you its step-by-step installation in the second part and finally, I will explain how to access Azure storage accounts while establishing the connection to Azure cloud.
Download storage explorer installation files
The first task is to download its installation files. Click on this attached Microsoft link to download storage explorer installation files. Make sure to download the correct files based on the operating system flavor on which you want to install them. I want to install storage explorer for a windows machine, so I have chosen the operating system as Windows in the below screen. You can click on this drop-down to select your operating system and then go ahead with the download process.
Once you will click on Download now button on the above screen, the download process will start and the installation file StorageExplorer.exe will be downloaded to your download folder.
Install Azure storage explorer
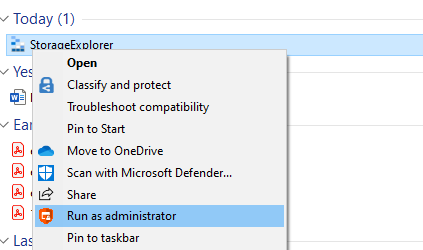
Right-click on the downloaded installer file StorageExplorer.exe and click on the Run as administrator to initiate its installation.
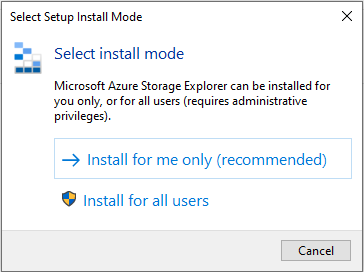
The below screen will come to select whether you want to install this application storage explorer only for yourself or for all users. I have chosen recommended approach to install it for myself only.
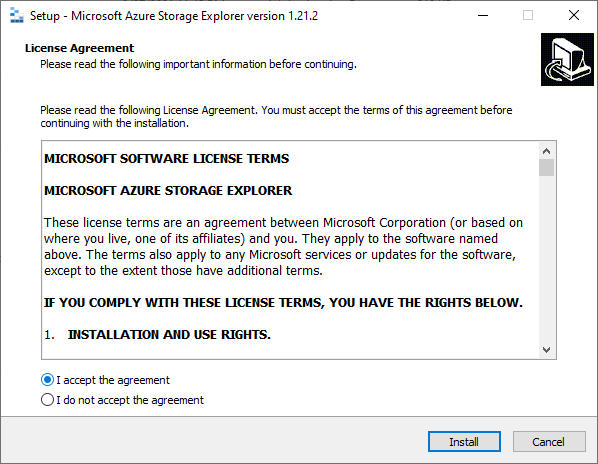
Once you select the appropriate option from the above screen, you will get below the screen to accept license terms for this application. Choose the radio button given against “I accept the agreement” and hit the Install button to process the installation.
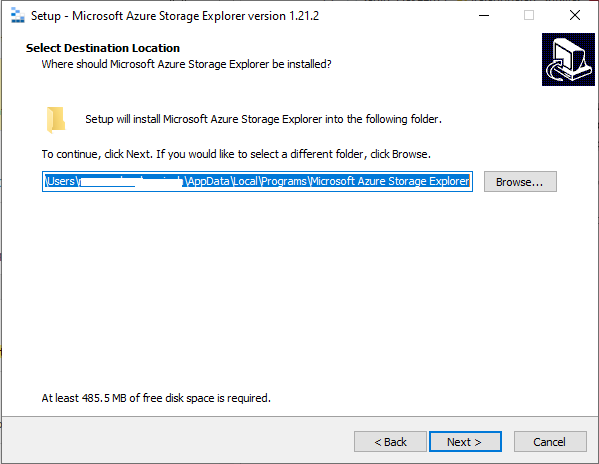
The below screen will appear once you click on the Install button of the above screen. Here, you can choose the location where you want to install Azure storage explorer. Click on the Browse… button to locate your desired location. I have kept the installation path as default showing in the below screen. Make sure your disk subsystem has recommended free space. Click on the Next button once you are done with the below screen.
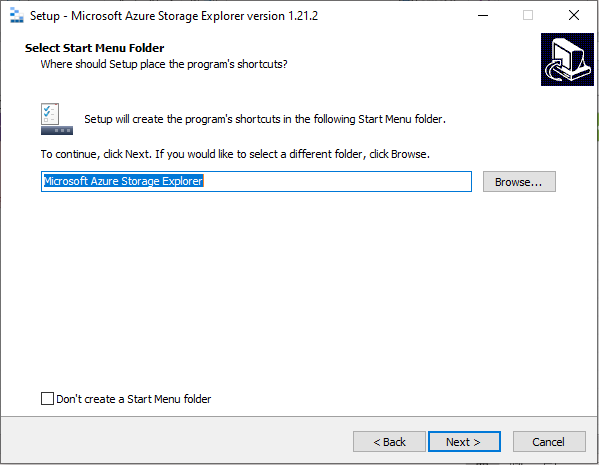
Change your shortcut in the below screen if needed otherwise, you can keep it as default. Click on the Next button to start the installation process.
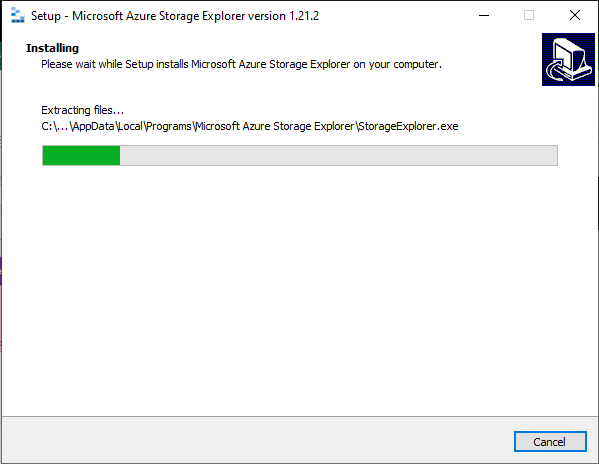
The installation of Azure storage explorer has started post-hitting the Next button of the above image. You can see the processing as shown in the below image.
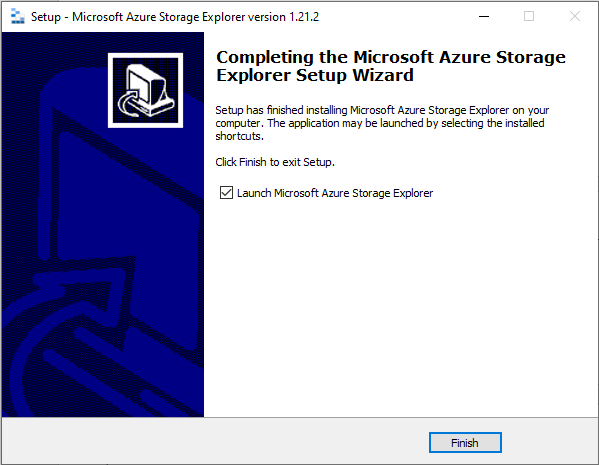
Once the installation will be completed, you will get below the screen to finish the installation. If you want to launch the newly installed application, click at the checkbox, and hit the Finish button or you can uncheck this checkbox and launch Azure storage explorer from the start menu or using this shortcut. I have left the checkbox as selected to launch this application.
Once you will click on the Finish button of the above screen having the checkbox option selected then the Azure storage explorer application will be launched as shown in the below image.
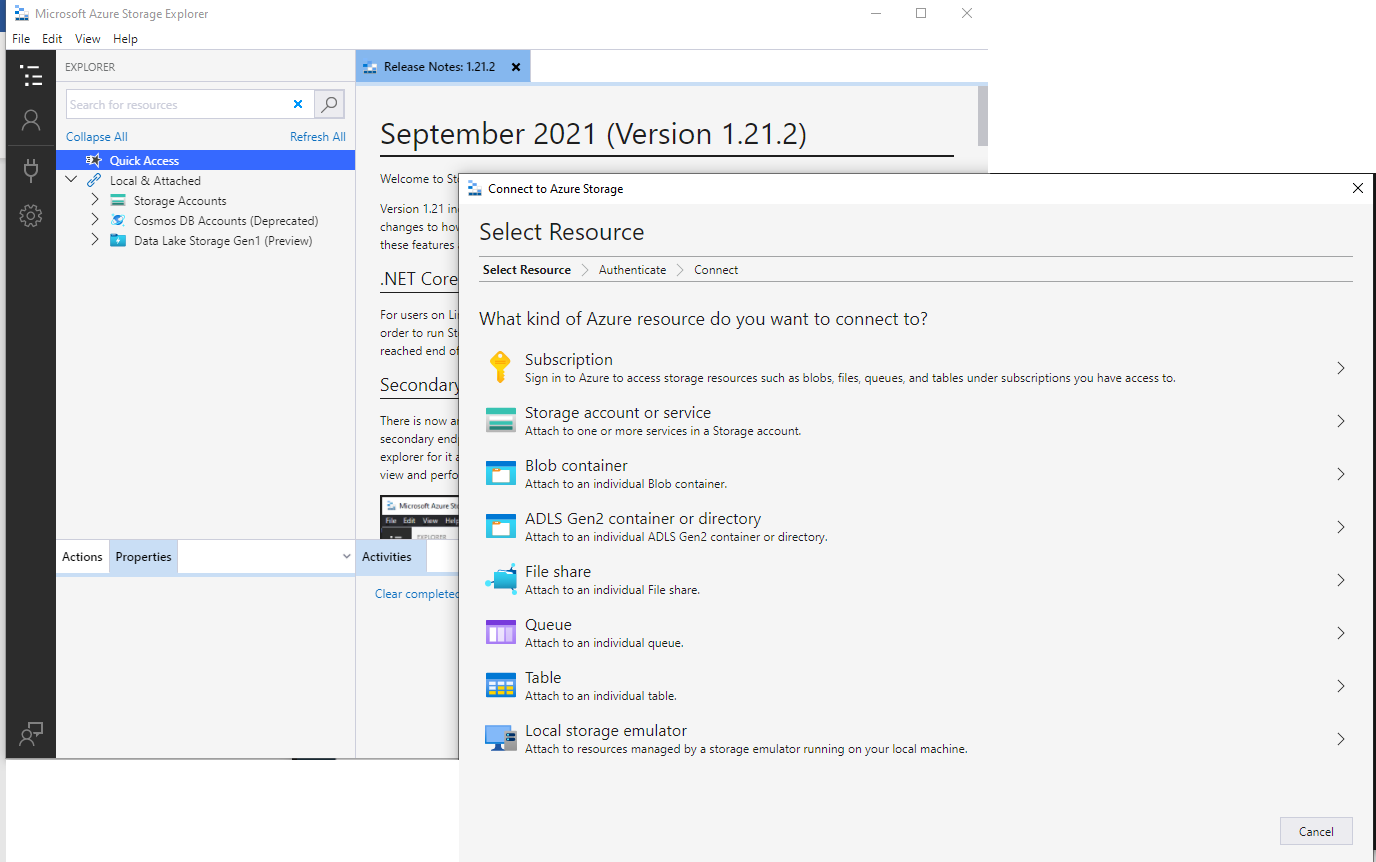
Here is the final image of this application, where you have got the Connect to Azure Storage pop-up window to select the type of Azure storage and connection you want to make. You can choose the desired option and follow the instructions to establish the connection to a storage account or to a subscription to display all storage accounts of that subscription.
Access an Azure storage account using storage explorer
Now, here I will show you how to connect to Azure storage accounts using storage explorer. Click on the Subscription option shown in the above popup window. I assumed you have already launched Azure storage explorer on your local desktop that we have installed in the above section in case you have closed it post its installation.
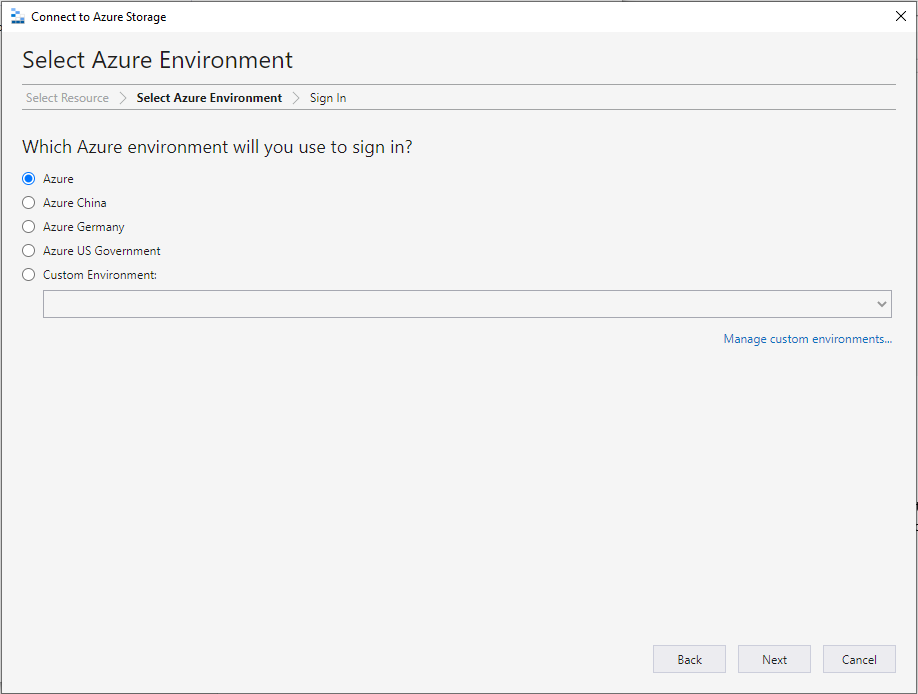
The below screen will appear to choose the Azure environment where you have provisioned your cloud resources. I have selected the first option Azure and clicked on the Next button given below.
Once you will click on the Next button, it will route you to the Azure portal URL to enter your login and password credentials to establish a connection to your Azure account. Once your Azure account will be successfully authenticated, you will get the message in your web browser.
Authenticated. You can return to Storage Explorer. You might need to authenticate again if you close this browser tab.
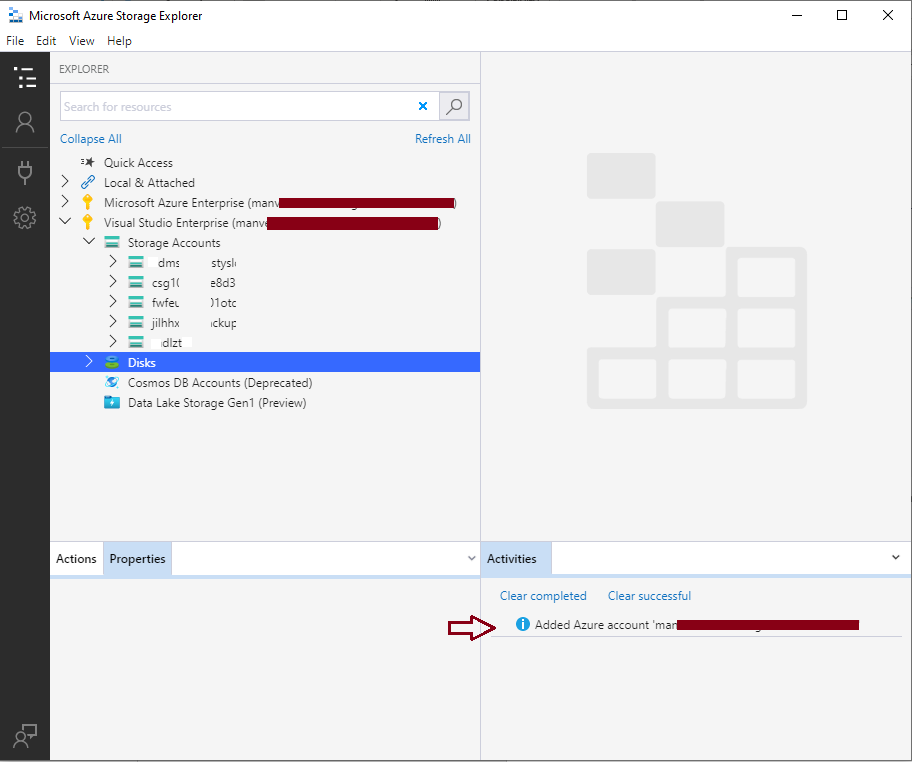
Now, leave this browser as it is and return to Azure storage explorer. Here you will see all subscriptions are reflected in storage explorer as shown in the below image. You can click on each respective checkbox given beside each tenant to load its resources. I have hidden details from a security standpoint. You can also directly access this window by clicking on the View tab of storage explorer and choosing the option Account Management.

Click on Open Explorer to jump to the explorer view to see all their resources provisioned on Azure cloud. You can see both subscriptions which are checked in the above image are displaying their Azure resources. We can see its disks and storage accounts.
If you want to add a Microsoft Learn Sandbox subscription in storage explorer, then you need to click on the checkbox of this subscription in the above image. Post that it will display all its resources to storage explorer.
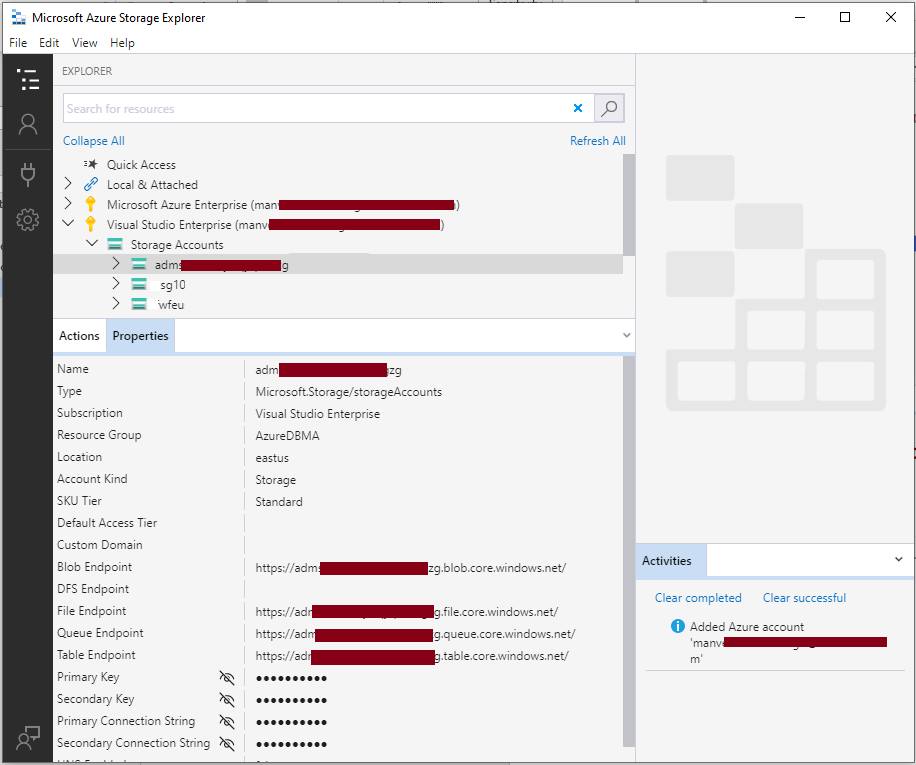
If you click on the specific Azure storage account displayed in the Storage Accounts tree of Visual Studio Enterprise subscription, then it will show all its properties in the bottom side pane under the Properties tab of the above image.
I have clicked on one of the storage accounts given there and you can see its properties are listing all its details in the below image.
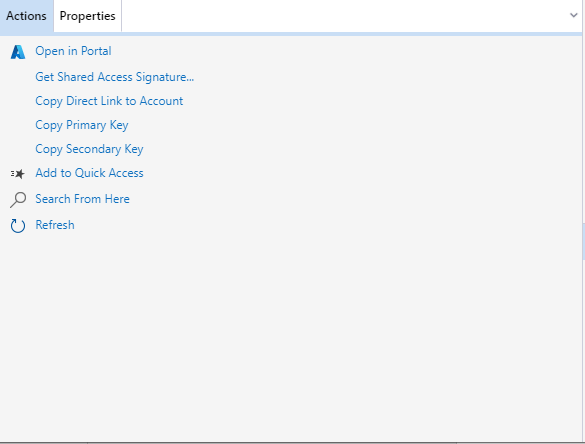
You can further click on another tab Actions given beside Properties to see a few actions we can perform for a specific storage account.
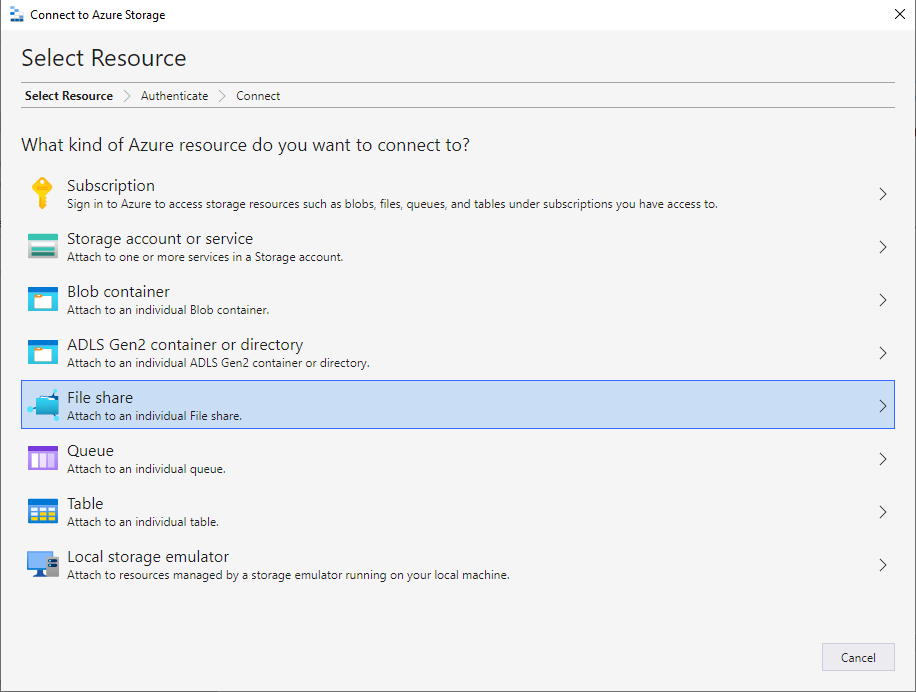
If you want to connect directly to a specific blob container, file share, or other services and not to the Azure account then you can get it done by choosing the right option given in Connect to Azure Storage window of Storage explorer. Choose your desired option from the below list and click on the next button to enter the credentials or keys to connect to that service.
Conclusion
Azure storage explorer is a desktop utility to manage data stored in Azure storage. I have explored the basics of storage explorer, its installations, and how to use it to manage Azure storage account. You can go ahead and explore this tool for various other requirements for Azure storage.

He loves to talk and write about database technologies. He has lead and delivered many projects from designing to deployments on Migrations to the cloud, heterogeneous migrations, Database consolidations, upgrades, heterogeneous replication, HA / DR solutions, automation, and major performance tuning projects.
You can also find him on LinkedIn
View all posts by Manvendra Singh
- Configure backup storage redundancy for Azure Cosmos DB account - May 15, 2024
- Difference between SQL SELECT UNIQUE and SELECT DISTINCT - January 16, 2024
- How to do a group by clause - April 12, 2023