In this article, we implement a copy of the Azure SQL database using both Azure Web Portal and Azure CLI.
Database professionals implement regular database changes in the production environment. Usually, SQL Server DBA either backup the affected objects, schema, or takes full backup or the database snapshots. If you move from on-premise SQL Server to Azure SQL database, you must be aware of how to make a transactionally consistent copy for your database.
Requirements
You require a source Azure SQL Database before you plan to prepare a copy of it. For this purpose, you do the following:
- You can refer to SQL Azure articles on SQLShack and implements a database using the Azure portal OR
- Refer to the article Provisioning Azure SQL database using Azure PowerShell for deploying a database using Azure PowerShell
- You can use the AWS CLI or Azure Cloud Shell for resource deployments. Refer to the article, An overview of Azure Cloud Shell
For this article lab purpose, we have the following database:
- Server name: demoazuresqlrepos.database.windows.net
- Location: Central India
- Pricing tier: General Purpose: Gen5, 2 vCores
- Elastic pool: No
An overview of creating database copy in the Azure SQL database
Azure SQL DB can create a transactionally consistent copy or snapshot of the database from your source database. It provides a point in time consistent copy of the database once a user places a request for it. The data copy is an asynchronous process. The database copy operation uses the Active geo-replication topology for data copy. Once the data copy completes, the new database becomes an independent, fully functional database. It terminates the geo-replication link as well.
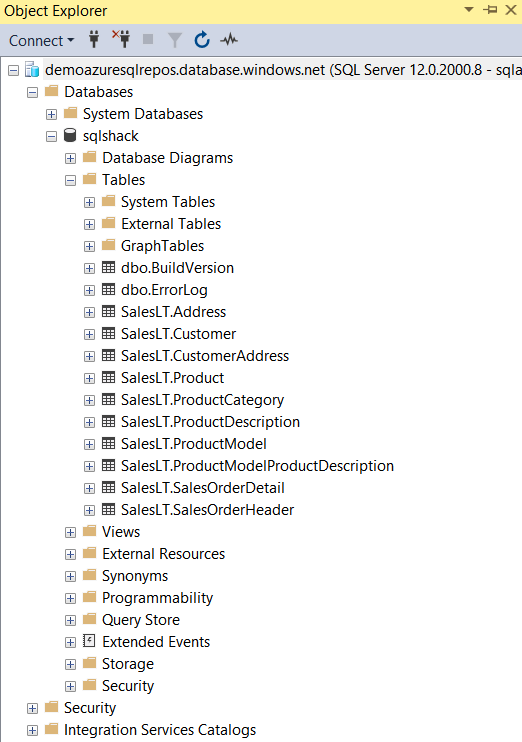
Connect to your Azure database in SQL Server Management Studio (SSMS). Here, I have a sample database [sqlshack] as shown in the below image.
We can create a database copy in multiple ways. Let’s explore the different methods for it.
Use Azure Portal for a database copy for Azure SQL database
In the Azure Portal, navigate to the Overview page of your source database.
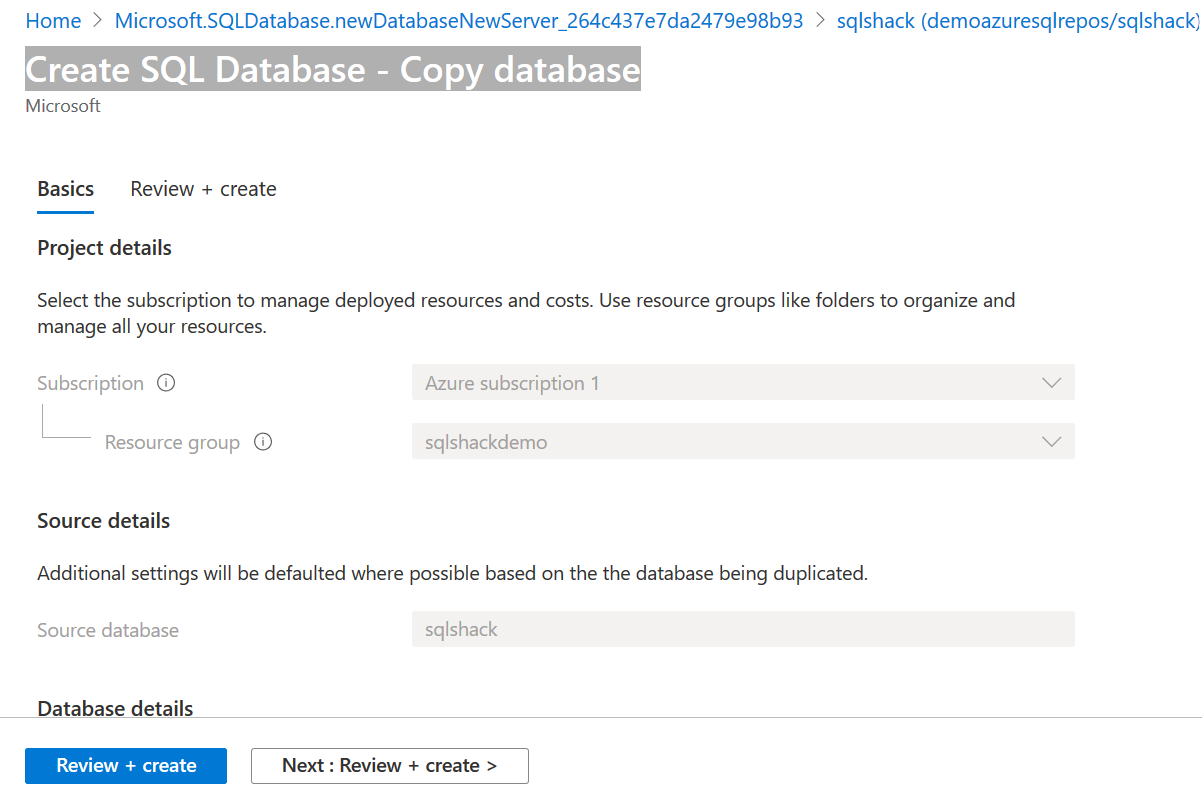
Here, click on the Copy. It opens another web page for Create SQL Database – Copy database. On the first page, it lists out your Azure subscription name, source database, and resource group.
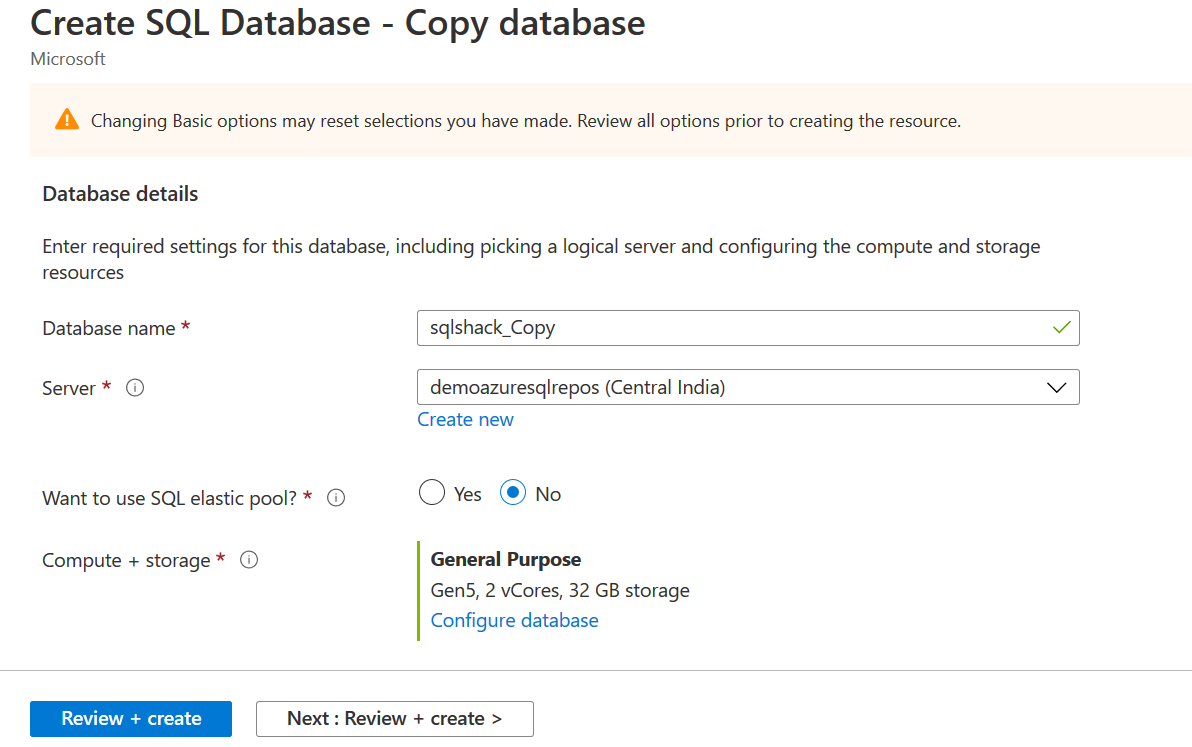
Scroll down, and you get the database details configuration page.
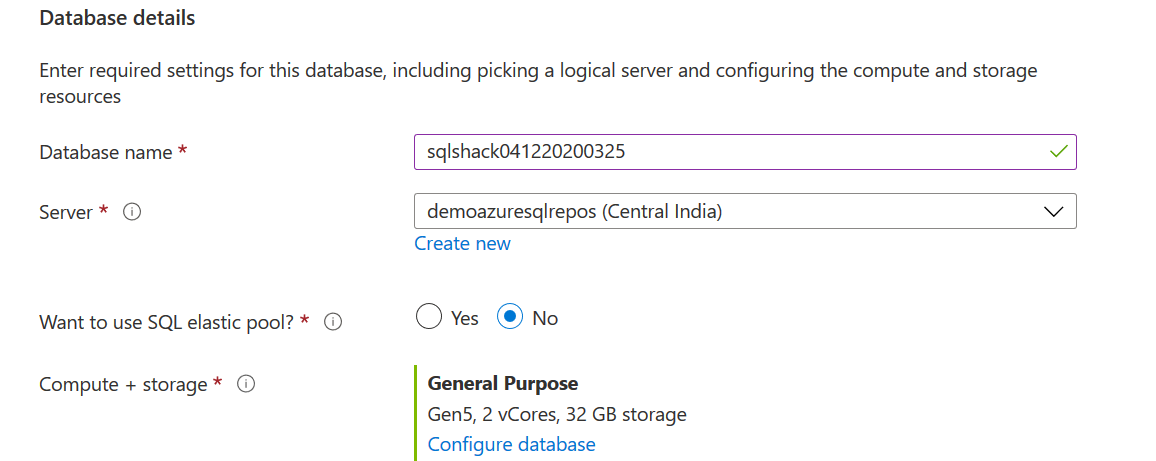
- Database name: By default, it uses the suffix _copy for the new consistent copy of the database. You can change the database name as per your requirement. For example, here, I specify the database name as sqlshack041220200325. It includes the current date (04122020) and timestamp(0325)
- Server: You can copy a database on the same server, different server, elastic pool and different subscriptions. By default, it lists out the source server name assuming that you want to copy the database on the same SQL Server. However, you can click on Create New, and it builds a new server with your specified configurations
- Want to use SQL elastic pools: Select No in this option
- Compute Storage: By default, it uses Gen5 2 vCores and 32 GB storage. However, you can click on Configure database for different specifications
In the below image, you see the modified configurations.
Click on Review + Create. Review your configuration, accept terms by click on Create. You can go back in case any changes are required.
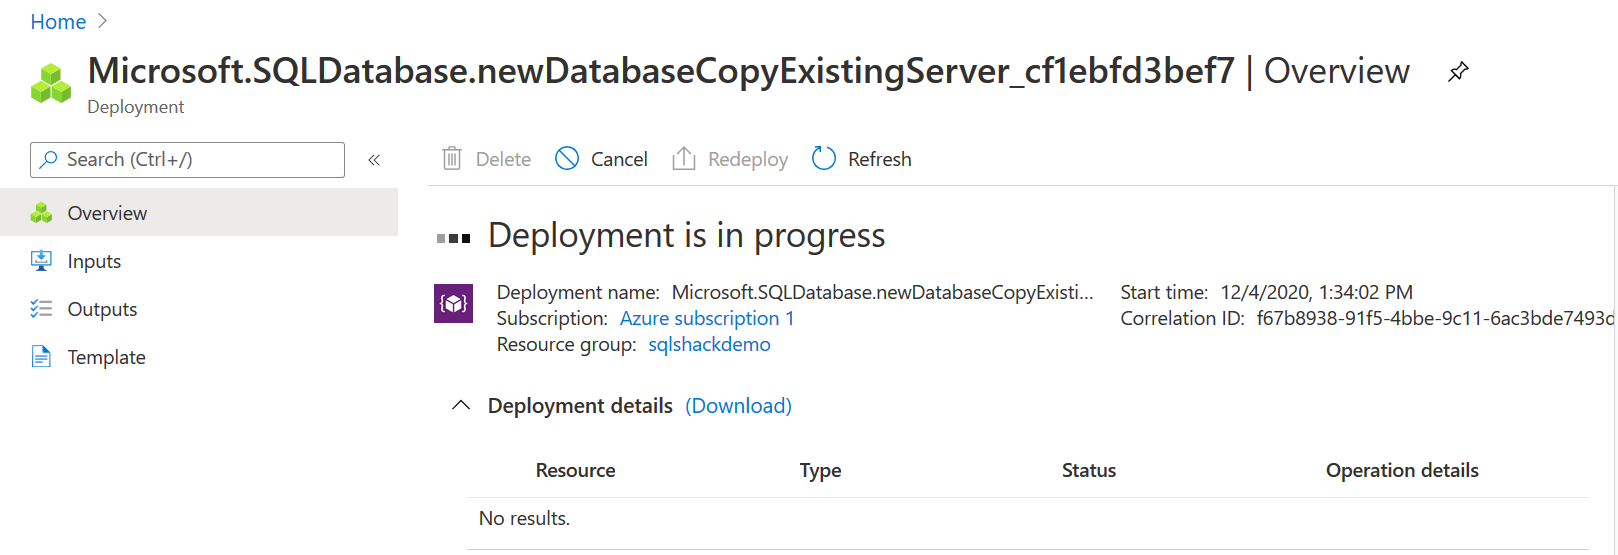
It starts the copy database deployment, as shown below.
Once the deployment completes, refresh your Azure SQL Server. It shows a database copy with our specified naming convention.

Copy a database on the same server using Transact-SQL
Previously, we use the Azure portal to copy an Azure SQL Database. Usually, database administrators prefer to do the task using SQL queries.
Connect to your source SQL database with a server administrator or database owner login. If you use a separate login, it must be a member of the dbmanager role.
We can use the following Transact-SQL in the master database. It creates a database copy named sqlshack_copy from the source sqlshack database.
|
1 2 3 4 |
USE master GO CREATE DATABASE sqlshack_copy AS COPY OF sqlshack; GO |
You can query dynamic management view sys.dm_database_copies and sys.databases for tracking the database copy.
|
1 2 3 |
SELECT database_id, start_date,modify_date,percent_complete,partner_server,partner_database,replication_state_desc FROM sys.dm_database_copies SELECT state_desc, * FROM sys.databases |
The sys.databases return the state_desc as COPYING while data copy is in progress.
Rerun the monitoring DMV’s, and it shows the replication_state_desc as SEEDING. At this point, the copy database is not fully synchronized with the source database. You cannot connect to the copy database because its status is still showing as COPYING.
It shows the replication_state_desc changes to CATCH_UP before the database copy comes online.
Once the copy database comes online, you can connect and query the database like an independent database. At this point, the sys.dm_database_copies does not return any row in the output.
Logins in the Source and database copy
- The source and copy database can use the same logins to access both databases
- The login that initiates a database copy becomes the database owner of the new database
- All database users, their permissions, security identifier(SID’s) are also copied to the new database. It follows the contained database users to ensure you can immediately connect to the copied database
- If you copy the database on a new server, your server logins will not work. The new server might not have server logins or can have a different security identifier. In this case, you can connect to the copied database using the database owner and use the ALTER USER statement to remap the logins
Copy a database on a different server using Transact-SQL
You can copy an Azure SQL Database onto a different server. Suppose you have the following servers.
- Source server: Server1
- Target Server: Server2
Execute the following SQL query on the target server for a database copy from the source server.
|
1 |
CREATE DATABASE [databasename] AS COPY OF server1. [databasename]; |
- On the source server, connect with the database owner user
- On the target server, it must be a member of the dbmanager role
- Note: It might take time for database copy depending upon the database size and server location. You can monitor the track using the DMV’s explained earlier. Similarly, you can copy the database on a different subscription as well
Copy an Azure SQL Database using Azure Cloud Shell
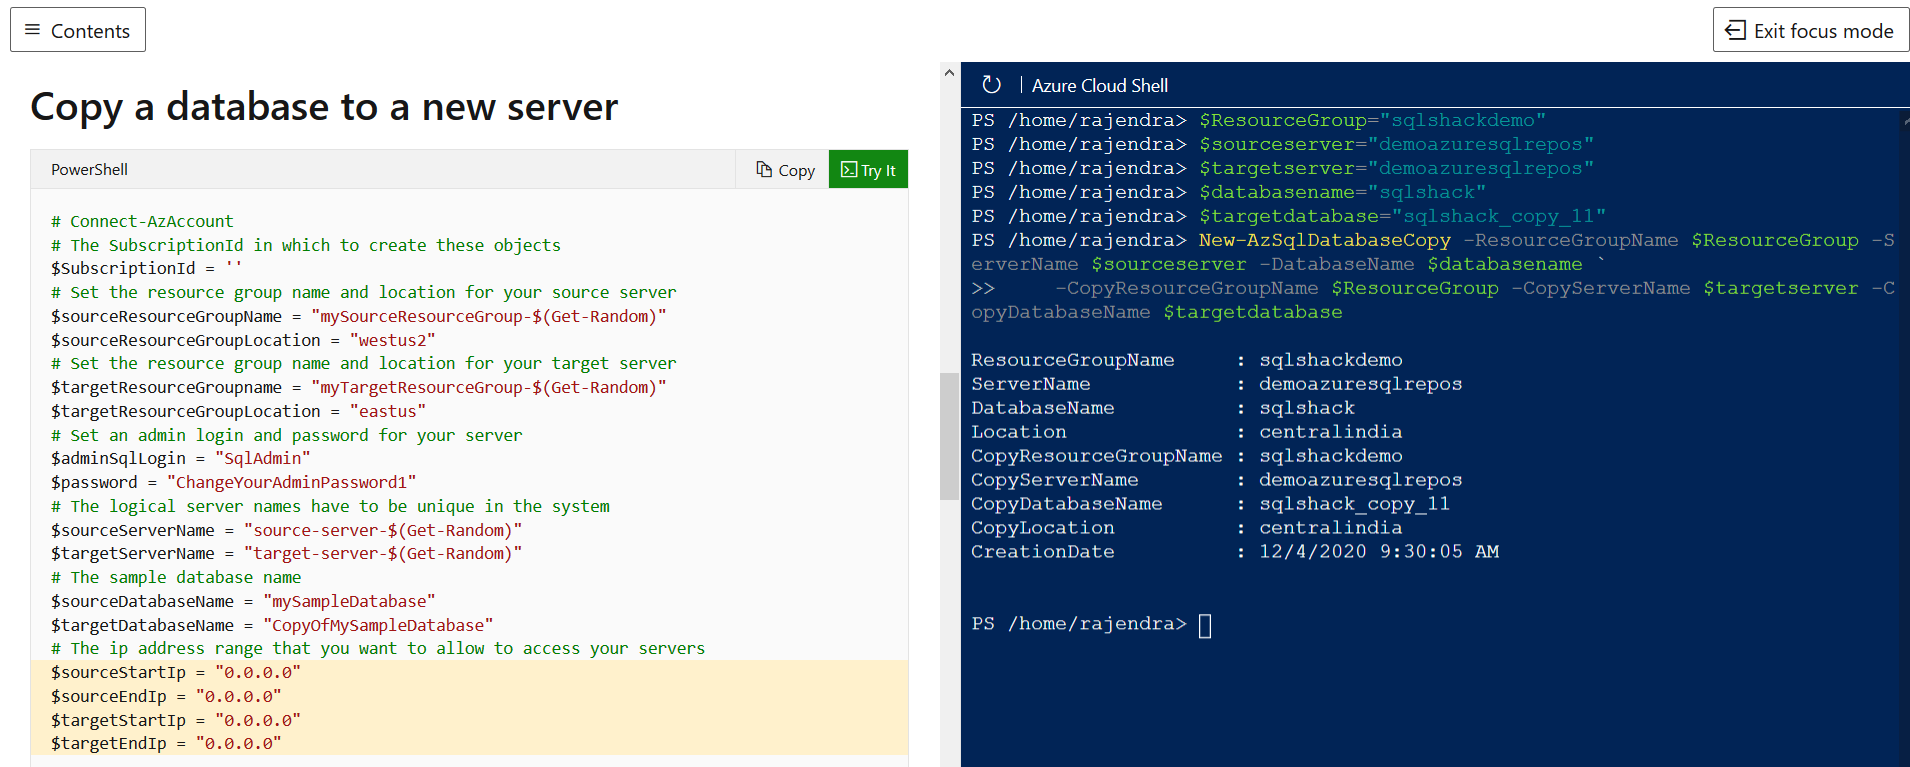
In the previous article, we learned that Azure Cloud Shell is an interactive, browser-based component for both PowerShell and Bash command. You can also integrate it with the Visual Studio Code.
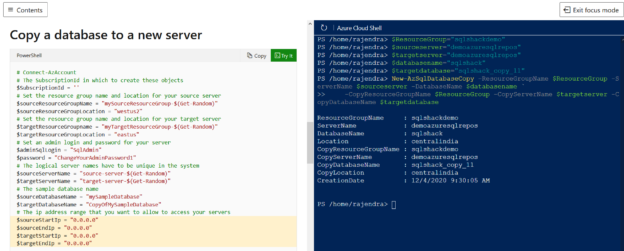
In the Azure PowerShell, we use the cmdlet New-AzSqlDatabaseCopy and specify the following parameters. In this section, we copy the database onto the same server with a different name. It would be best if you modified the script as per your requirements.
- ResourceGroupName: Specify the resource group for Azure resources. In my case, the resource group is sqlshackdemo
- ServerName: Enter the source server name. Here, we need to specify the server name without FQDN. For example, I specify value [demoazuresqlrepos] for this
- CopyServerName: It is the target server name. For the simplicity purpose, I also use another parameter to hold the target server name
- Databasename: It is the source database name
- CopyDatabasename: It is the copied database name on the target server
|
1 2 3 4 5 6 7 |
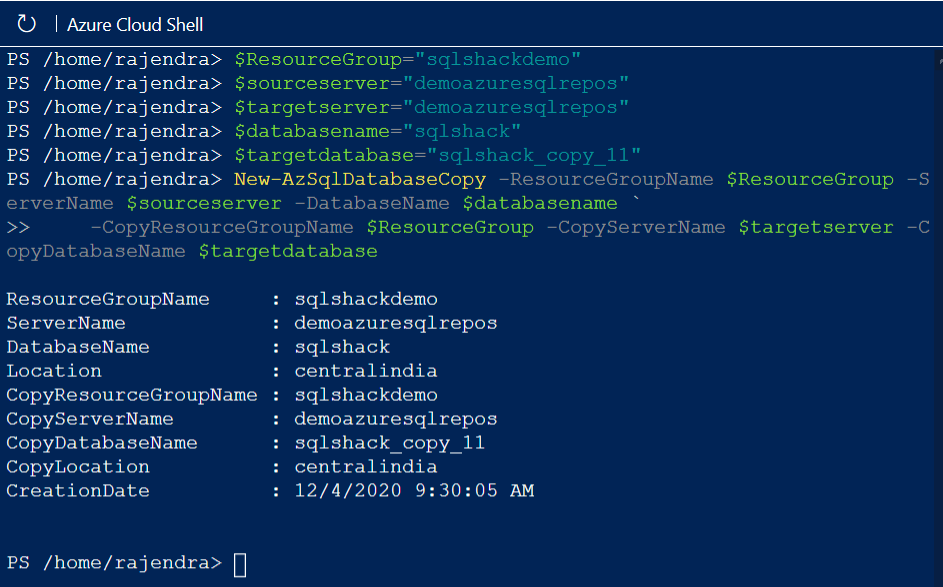
$ResourceGroup="sqlshackdemo" $sourceserver="demoazuresqlrepos" $targetserver="demoazuresqlrepos" $databasename="sqlshack" $targetdatabase="sqlshack_copy_11" New-AzSqlDatabaseCopy -ResourceGroupName $ResourceGroup -ServerName $sourceserver -DatabaseName $databasename ` -CopyResourceGroupName $ResourceGroup -CopyServerName $targetserver -CopyDatabaseName $targetdatabase |
Launch your Azure Cloud Shell for PowerShell and run the above script. It returns the source and target server, database names, as shown below.
For learning purposes, you can follow the Microsoft docs article Use PowerShell to copy a database to a new server, click on Try it to launch Azure Cloud Shell, and run the scripts as per given instructions.
In the end, you must clean up Azure resources to avoid costs. You can run the following script to clean all items in a resource group.
|
1 |
Remove-AzResourceGroup -ResourceGroupName $ResourceGroup |

- Note: If you get any error while copying an Azure database, you can refer to Database copy errors and look for error codes, their Severity and descriptions
Conclusion
In this article, we explored creating a transactionally consistent snapshot copy for the Azure SQL database. You can create a database copy on the same server, different servers, different subscriptions, different configurations. You can also choose your preferred methods such as Azure portal, Azure PowerShell, Azure CLI, Azure Cloud Shell, or Transact-SQL for it. You can also create multiple copies or snapshots of a database, and all these copies remain consistent to the point we created these database copies.
- Understanding PostgreSQL SUBSTRING function - September 21, 2024
- How to install PostgreSQL on Ubuntu - July 13, 2023
- How to use the CROSSTAB function in PostgreSQL - February 17, 2023

