

SQL Server Integration Services (SSIS) has been growing into an enterprise solution over the last three releases. Variables were a step in that direction, but with Project deployments to the SSIS Catalog in SQL Server 2012 Microsoft has stepped it up, even more. Project parameters have become the go to solution for changing variable values in packages at run time. This article is going to dive into an example that parameterizes the Server Name and Initial Catalog (database name) in a connection string for packages in a project.
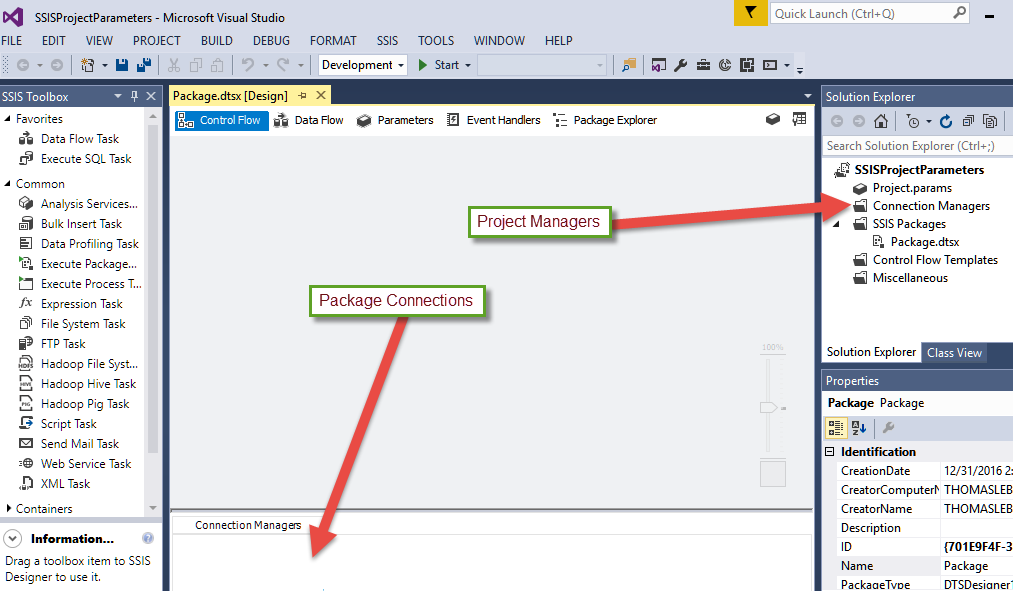
The Connection String for a database can be created for an individual package or for a project in Visual Studio. These Connection Managers are available to either just the package or any package in a project. If the connection to the database needs to be used in multiple packages, use the Project Connection Manager.
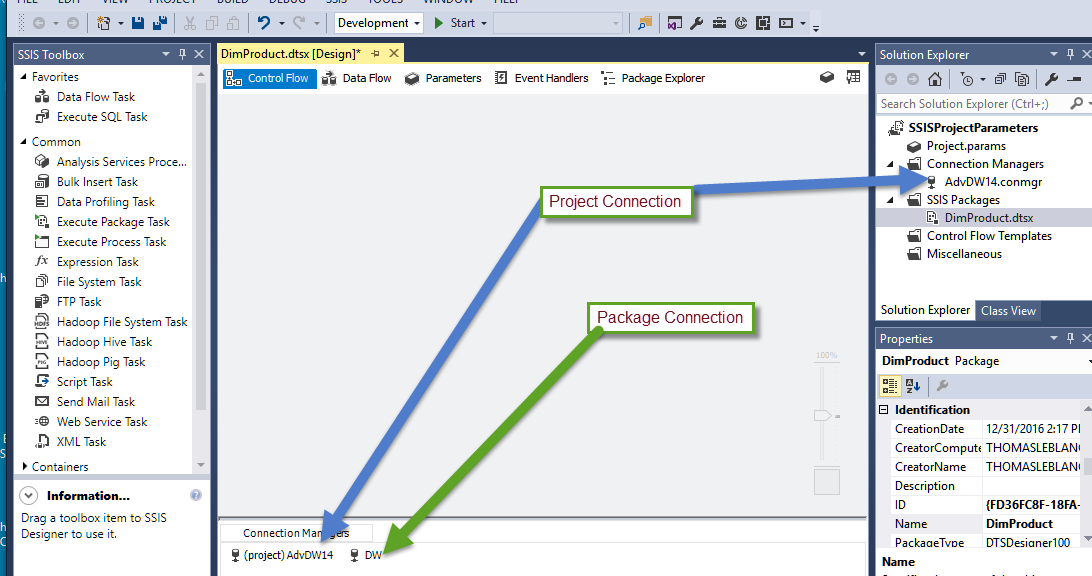
Once a connection is created in the Project Connection Manager, it is available to the packages in the project. The connection properties are changed from the Package Connection Manager which can be confusing. Figure 2 shows the prefix (project) on the connection name in the package DimProduct. A connection (DW) created just in the package will not have this prefix.
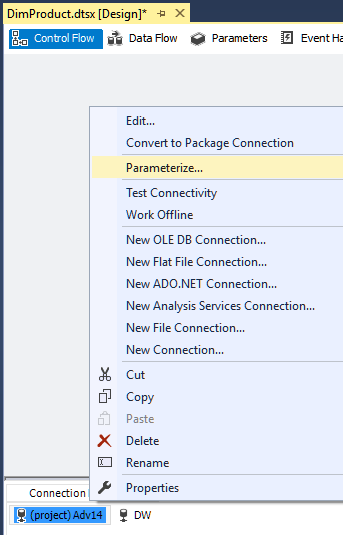
The properties available when selecting the connection in the Package Connection Manager can be changed to parameterize the connection string. The Expression property is going to be used to change the connection string. The entire string can be changed or just parts like Server Name and Initial Catalog (database name). Figure 3 shows right-clicking the (project) ADVDW14 database connection and selecting the Parameterize… submenu, which is a shortcut.
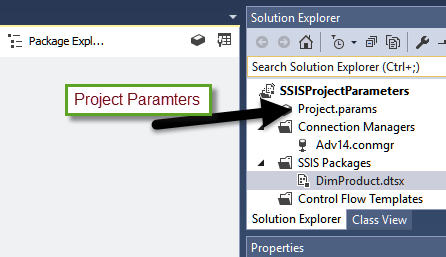
But before we use shortcuts, it is better to learn the areas used by SSIS to complete this parameterization. The first new area is Project Parameters in the Solution Explorer of the project. Project Parameters are global to all Packages in a single SSIS Project. So, if you use the parameter in more than one package in a project, and the value is changed before executing, then all packages will see and use the new value.
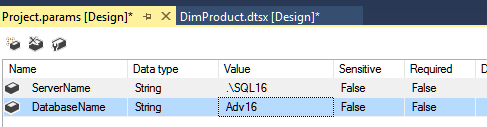
There will be 2 new parameters created: ServerName and DatabaseName. The ServerName and DatabaseName project parameters will enable us to deploy this package to a different SSIS instance (QA or Production) and change the parameters when executing. The values used when developing and testing this package will be different than when deployed to production.
To create Project Parameters, just double-click the Project.param file in the solution explorer. There will be a toolbar button available to create new parameters.
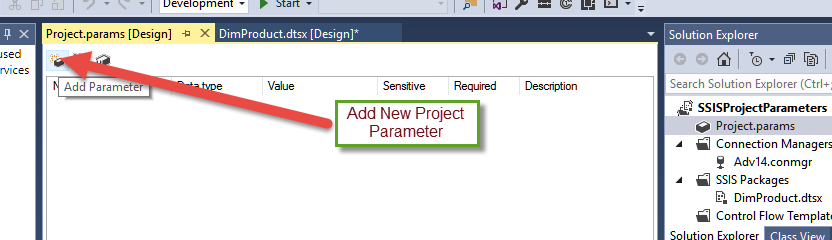
Place the name of the parameter in the name column. The Data Type in this case is string. Value is used for initial value. Column Required is used to force a value in the parameter before executing. An error is returned when the Required parameter has no value.
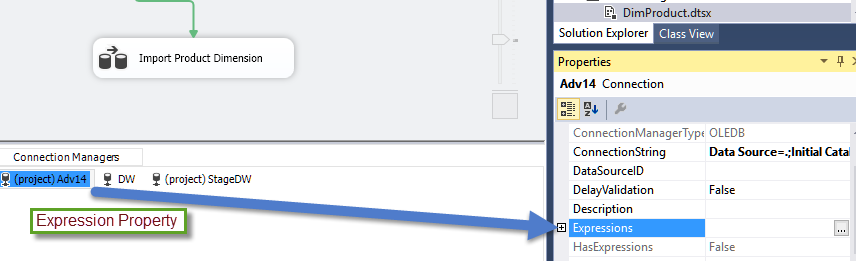
To change the connection string to use the project parameters, select the connection in the package Connection Managers, and go to the properties window. If the properties window is not already visible, right-click the connection and select properties. It is convenient to have the properties docked to the right and under the solution explorer.
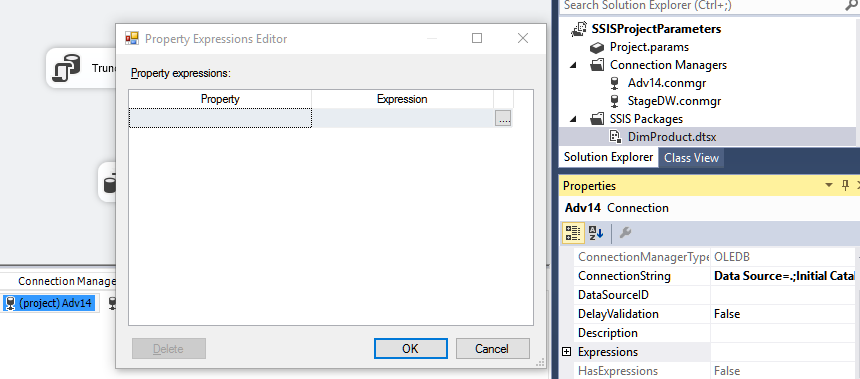
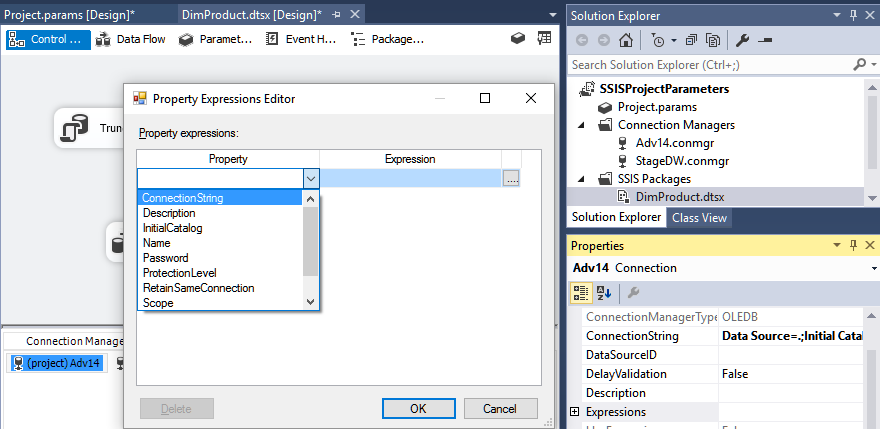
Click the ellipse to the right of the Expressions property and the Property Expression Editor window will pop up.
One of the available properties is ConnectionString, but this makes you edit the whole string rather than just parts of the string. The ServerName property for the new Project Parameter is obvious, but the DatabaseName is not unless you are familiar with SQL Server database connection strings. The property used for changing the database is InitialCatalog. This property can be traced back to the original OBDC driver days, which by the way are making a return.
When InitialCatalog is selected, the next step is to associate the Project Parameter DatabaseName with this Expression property. This is done by clicking the ellipse under the Expression column of the Property.
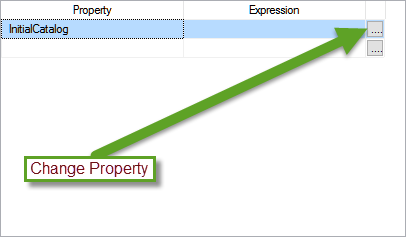
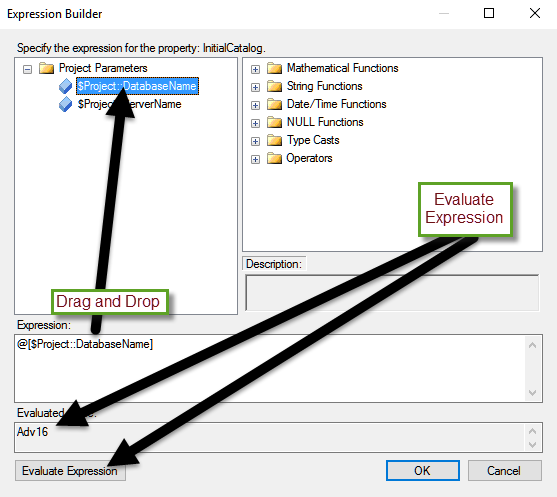
Figure 11 shows the Expression Builder window. This window enables the dragging and dropping of the Project Parameters to the Expression text box. Once dragged and dropped, the Project Parameter will have a @ symbol prefixed on the parameter name. There is an Evaluate Expression button available to show the results of the expression. The expression can contain other variables, expressions or hard-coded text as part of the value. The button is useful to make sure the expression created is correct and valid.
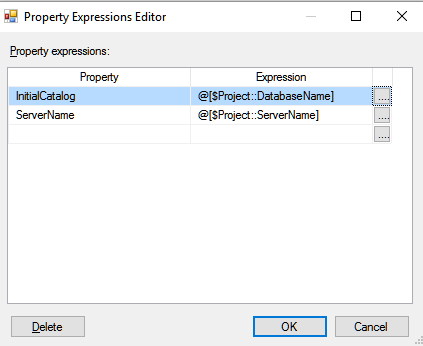
Repeat these steps for the ServerName property. The Project and Packages are ready to be deployed.
The project can be deployed to the SSIS instance by right-clicking the project and selecting deploy from the submenu. The wizard will prompt for an SSIS instance to deploy the project. There will be a different selection area for the folder in the SSIS Catalog.
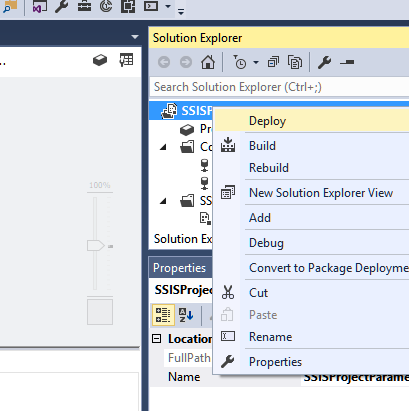
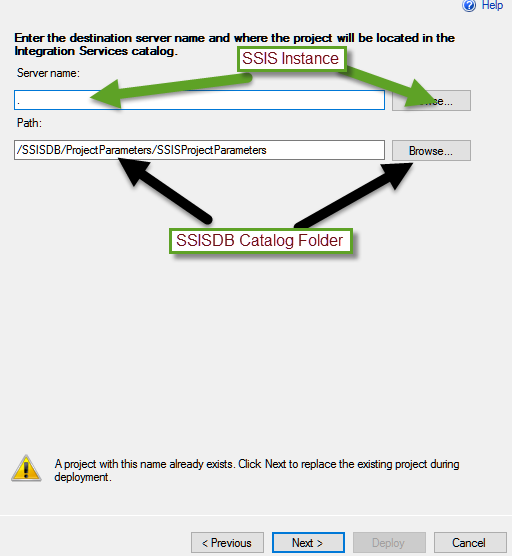
Figure 14 shows the package configured in SQL Server Agent as step in a job. The configuration tab of this Job Step can be used to change the values of a Project Parameter.
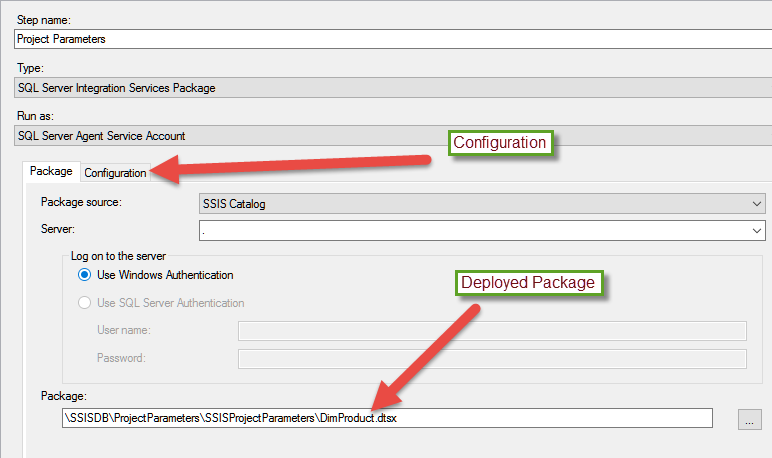
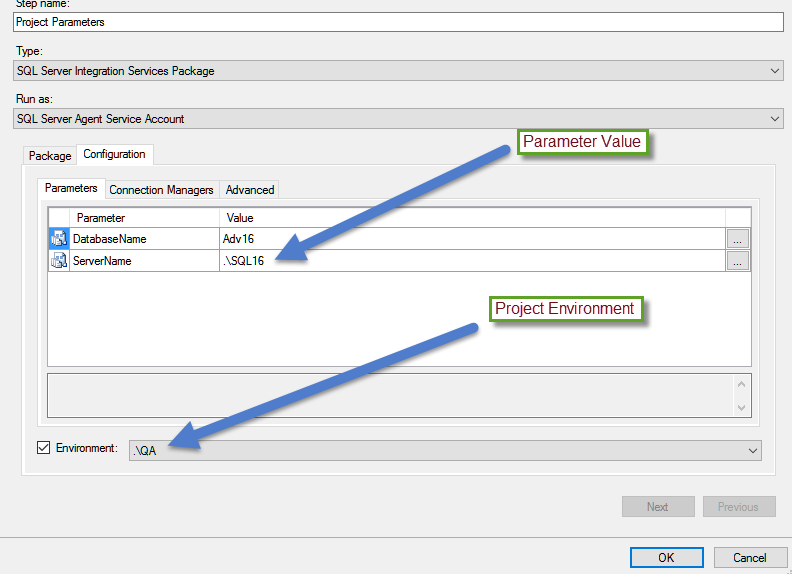
Figure 15 shows the areas to change these values for the Project Parameters. The first is the Parameter itself. The second is an Environment that is associated with the Project. If the value needs to change for multiple packages in the project, use the Environment. Environments help with managing the change for multiple packages in a deployed project.
It may seem that there are a lot of steps to accomplish the desired result. But once this is setup, the configuration can be changed in the Environment of the project once deployed to the SSIS Catalog. More about the SSIS Catalog of Environments will be covered in another article.
Side Bar:
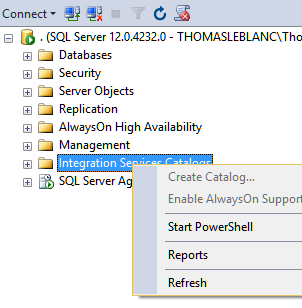
The SSIS Catalog can be created in a new installation of SQL Server 2012, 2014 or 2016. In SQL Server Management Studio (SSMS), the object explorer will show a Folder called Integration Services Catalog. If you Right-Click on this folder, a Create Catalog… submenu will be available to create the SSIS database on this instance. Figure 16 shows the menu choice disabled because the Catalog has already been created.
References

Starting as a developer in COBOL while at LSU, he has been a developer, tester, project manager, team lead as well as a software trainer writing documentation. Involvement in the SQL Server community includes speaking at SQLPASS.org Summits and SQLSaturday since 2011 and has been a speaker at IT/Dev Connections and Live! 360.
Currently, he is the Chair of the PASS Excel Business Intelligence Virtual Chapter and worked on the Nomination Committee for PASS Board of Directors for 2016.
View all posts by Thomas LeBlanc
- Performance tuning – Nested and Merge SQL Loop with Execution Plans - April 2, 2018
- Time Intelligence in Analysis Services (SSAS) Tabular Models - March 20, 2018
- How to create Intermediate Measures in Analysis Services (SSAS) - February 19, 2018